

MOTREX MTXRSE100YPPE User Manual

ENGLISH
FRANÇAIS
Rear Seat Entertainment System
OWNER’S MANUAL
SEDONA
Please read this manual carefully before operating your set and retain it for future reference.
Designs and specifications are subject to change without prior notice.
The screens shown in this manual may differ from the actual screens of the product.
The design and specification of this product may change without prior notification for product
improvement.
When transferring the vehicle to another individual, include this user’s manual so that the next
driver can continue its use.
All feature images are for illustrative purposes only.

Trade Mark
®
Bluetooth
DOLBY
The Bluetooth Wireless Technology terms,
marks and logos are registered trademarks
owned by Bluetooth Wireless Technology SIG,
Inc.
Manufactured under license from Dolby
Laboratories. Dolby and double-D symbol are
trademarks of Dolby Laboratories.
ENGLISH 2

Table of Contents
General
■
Precautions for safety
■
Key Product Features
■
Component Names and
Functions
■
Using the System for the
First Time
AV
■
USB Music
■
USB Movie
■
USB Photo
■
DVD
■
Video CD
■
Audio CD
■
Data CD
■
AUX
■
HDMI
Connectivity
■
YouTube
■
Internet
■
Mirroring
Setup
■
Language
■
Bluetooth
■
Network
■
User Guide
■
Speaker Mode Guide
■
System Information
■
Beep Sound
■
Power Setting
■
Factory Reset
Appendix
■
Specification
■
Trouble shooting
■
Limited Warranty
ENGLISH 3

Precautions for safety
WARNING:
•
•
Do not disassemble,
assemble, or modify the
RSE system. Such acts could
result in accidents, fire, or
electric shock.
•
•
Heed caution not to spill
water or introduce foreign
objects into the device.
Such acts could lead to
smoke, fire, or product
malfunction.
•
•
Please refrain from use if the
screen is blank or no sound
can be heard as these
signs may indicate product
malfunction. Continued use
in such conditions could
lead to accidents (fires,
electric shock) or product
malfunctions.
•
•
Do not disassemble or
modify the headphones.
Such acts could result in
accidents, fire, or electric
•
•
Store the headphones in a
door pocket when they are
not being used in order to
reduce the chance of injury
in case of an accident or
sudden stop.
shock.
ENGLISH 4

Precautions for safety
CAUTION:
•
•
Turn on the car ignition
before using this device. Do
not operate the RSE System
for long periods of time
with the ignition turned
off as such operations may
lead to battery discharge.
•
•
Adjust the volume to levels
that allow the driver to hear
sounds from outside of the
vehicle. Driving in a state where
external sounds cannot be
heard may lead to accidents.
•
•
Pay attention to the volume
setting when turning
the device on. A sudden
output of extreme volume
upon turning the device
on could lead to hearing
impairment. (Adjust the
volume to a suitable level
before turning off the
device.)
•
•
Do not subject the device to
severe shock or impact. Direct
pressure onto the front side of
the monitor may cause damage
to the LCD or touch screen.
•
•
When cleaning the device,
make sure to turn off the
device and use a dry and
smooth cloth. Never use
tough materials, chemical
cloths, or solvents(alcohol,
benzene, thinners, etc.) as
such materials may damage
the device panel or cause
color/quality deterioration.
ENGLISH 5

Precautions for safety
•
•
When experiencing product
malfunctions, inquire with
your place of purchase or
service maintenance center.
•
•
Do not expose the
headphones to direct
sunlight, strong heat
and/or a highly humid
environment. The
headphones could become
deformed and the batteries
in them could leak or
even explode under these
•
•
Avoid dropping the
headphones and hitting
them against hard objects.
•
•
Do not sit on the headphones
or place anything heavy on
them.
conditions.
ENGLISH 6

Key Product Features
Display
Multimedia
Player
Etc
Wide TFT-LCD Display
Provides high-quality video through a Wide TFT-LCD Display using an LED Back Light.
Support for various Media Formats
Supports various media formats, including Audio/MP3/Video CD, DVD, AUX and USB modes.
Bluetooth® Wireless Technology
Convenient use of Bluetooth® Handsfree by using buttons within the steering wheel
remote controller.
Digital Screen Control Features
Easy control of features through touch screen options.
Wi-Fi
Connects to Internet Explorer or YouTube through Wi-Fi connection.
Mirroring
Screen mirroring program using Wi-Fi connection between the RSE system and Android phone.
The smart phone screen can be displayed in RSE system and controlled from the RSE system
screen. For details, visit the Mirroring website.
ENGLISH 7
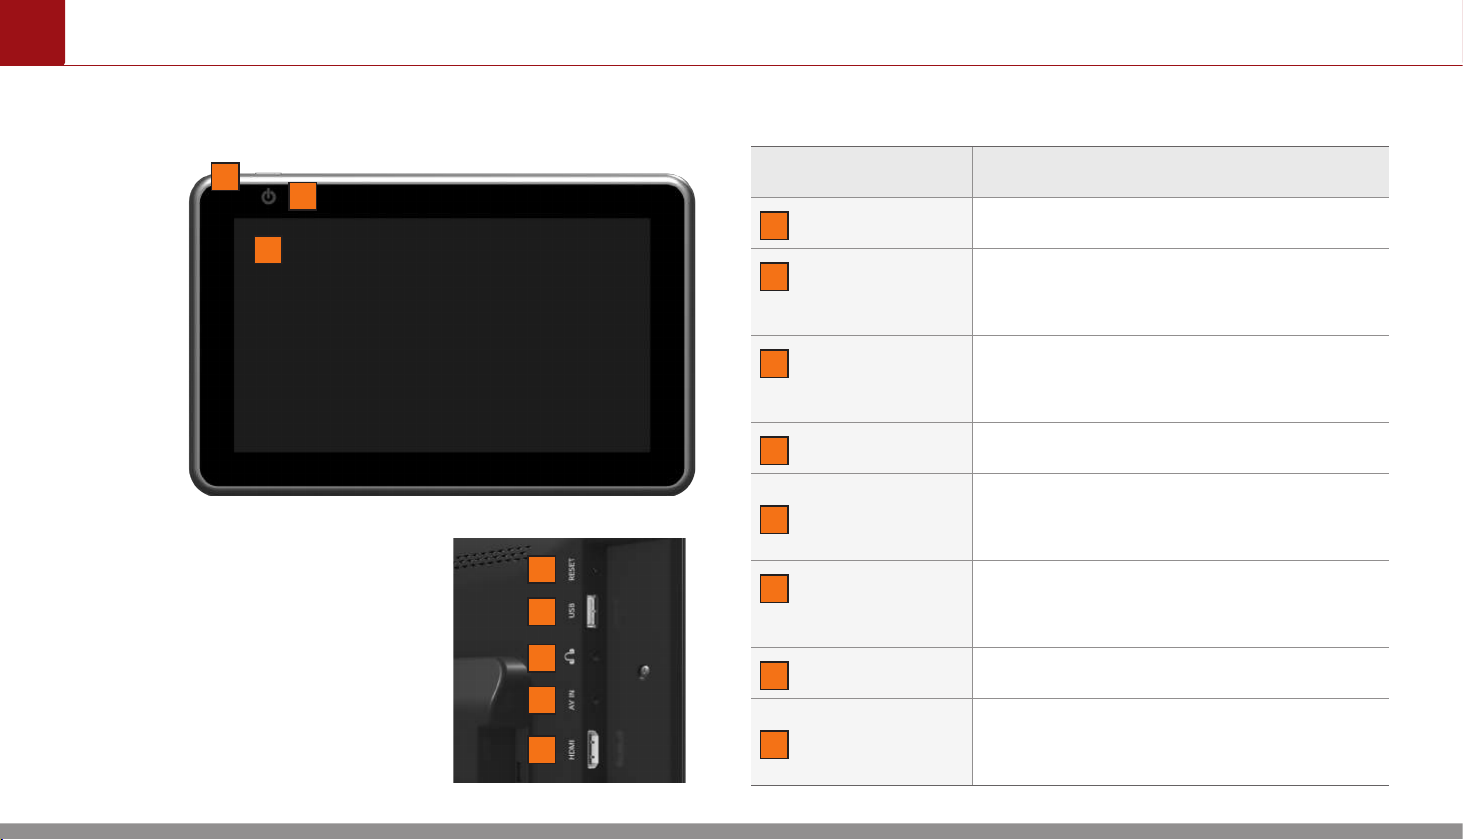
Component Names and Functions
Display Monitors
Front
1
2
3
Display Monitors
Rear
Name Description
1
Power Key Press to turn the unit on/off.
2
Power
Displays the power on/off state.
Indicator LED
3
LCD Touch
Screen
4
RESET Resets the system.
Easy control of features through
touch screen options.
Insert a USB device to play
5
USB Port
music, video and image.
4
5
6
7
6
Headphone
Jack
7
AV IN AUX Input Jack using AV cable.
Allows plug-in of wired
headphones.
AUX Input port using HDMI
8
8
HDMI
cable.
ENGLISH 8
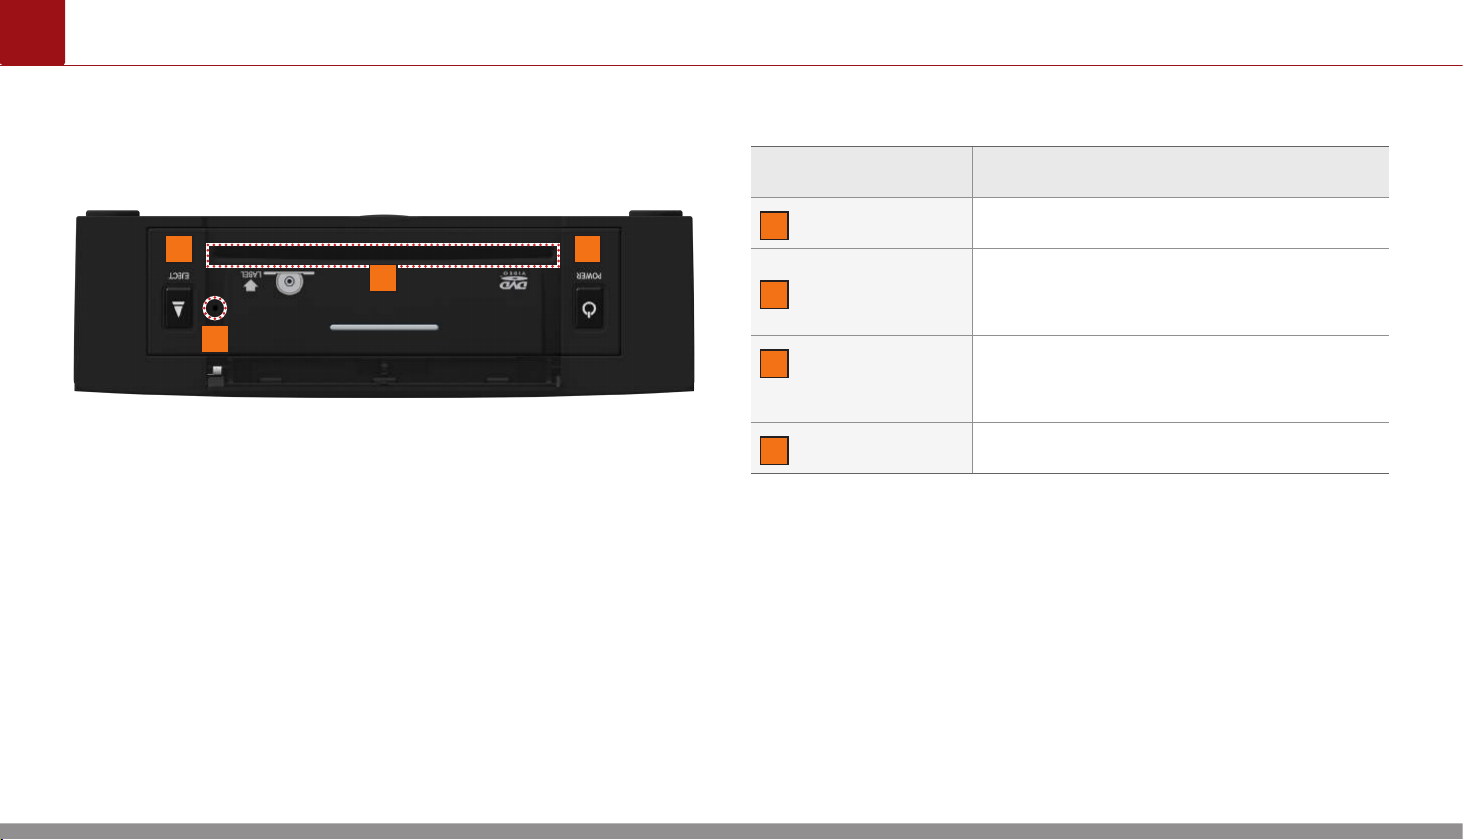
Component Names and Functions
DVD Deck
Name Description
1
Eject Key
1 4
3
2
2
Ejecting Hole
3
DISC
Insert Slot
4
Power key Press to turn the unit on/off.
Press to eject disc.
Use a pin to press when ejecting
a disc by force.
DISC insert/eject slot.
ENGLISH 9

Component Names and Functions
Wireless Headphones
2
1
Left
3
Right
Name Description
•
Press and hold (over 3 seconds)
•
to turn on the headphones.
1
Power Button
•
To turn off the headphones,
•
press and hold until indicator
LED is off.
2
Indicator LED Displays the various state.
3
Charging
Port
Connect Mini-USB plug to
charging port
ENGLISH 10
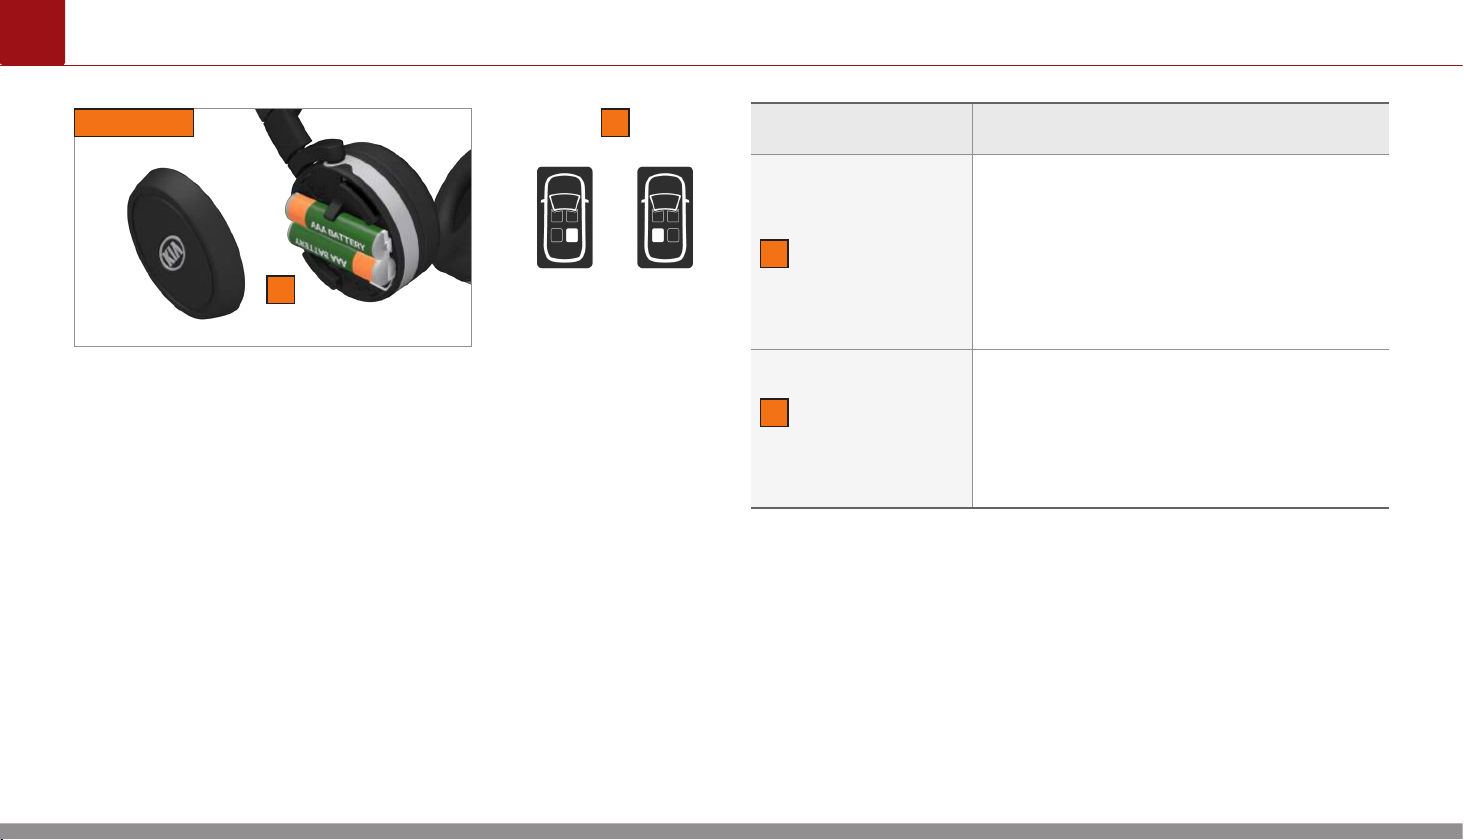
Component Names and Functions
Left
5
Name Description
•
Two rechargeable (Ni-MH) AAA
•
batteries are equipped.
4
Battery Cover
4
•
Slide the cover on the left head-
•
phone from right to left to open
the battery compartment.
The assignment of the
5
Left/Right
Sticker
headphones to the left / right
RSE display can be marked with
a sticker.
ENGLISH 11
Using the System for the First Time
Turning the System On/Off
Turning the System ON
Press the engine start button then press the
power button at the upper left side.
NOTE
• If the system is set to "Turn power on automatically,"
the system will start automatically.
For more information, refer to "Power Setting".
Turning the System Off
Press the engine start button again or press
and hold the power key on the head unit to
turn off the system.
Display ON/OFF
Press the Display button on the screen.
Even when the display is off, sound will be
played.
Touch anywhere on the touch screen to turn
the display back on.
ENGLISH 12

Using the System for the First Time
Adjusting the Display Mode
Press the Brightness button on the screen.
Press the Display Mode button to select
the desired mode. Each press of the button
will change the mode.
Icon Mode
Daylight
Night
ENGLISH 13
Using the System for the First Time
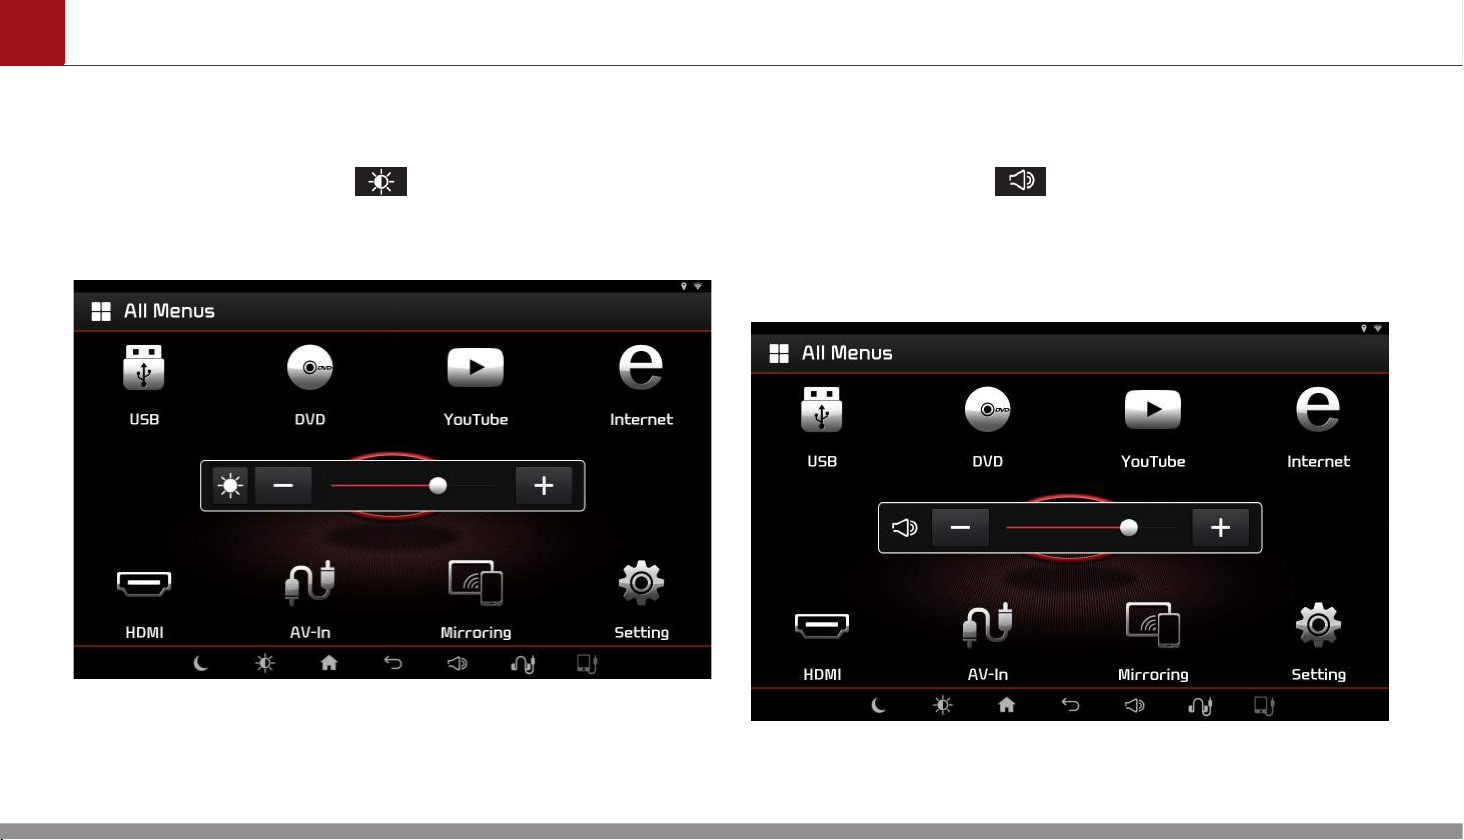
Adjusting the Brightness
Press the Brightness button on the screen.
Adjust the brightness to the desired level.
Adjusting the Volume
Press the Volume button on the screen.
Adjust the volume to the desired level.
Press and hold to mute the volume.
ENGLISH 14
Using the System for the First Time
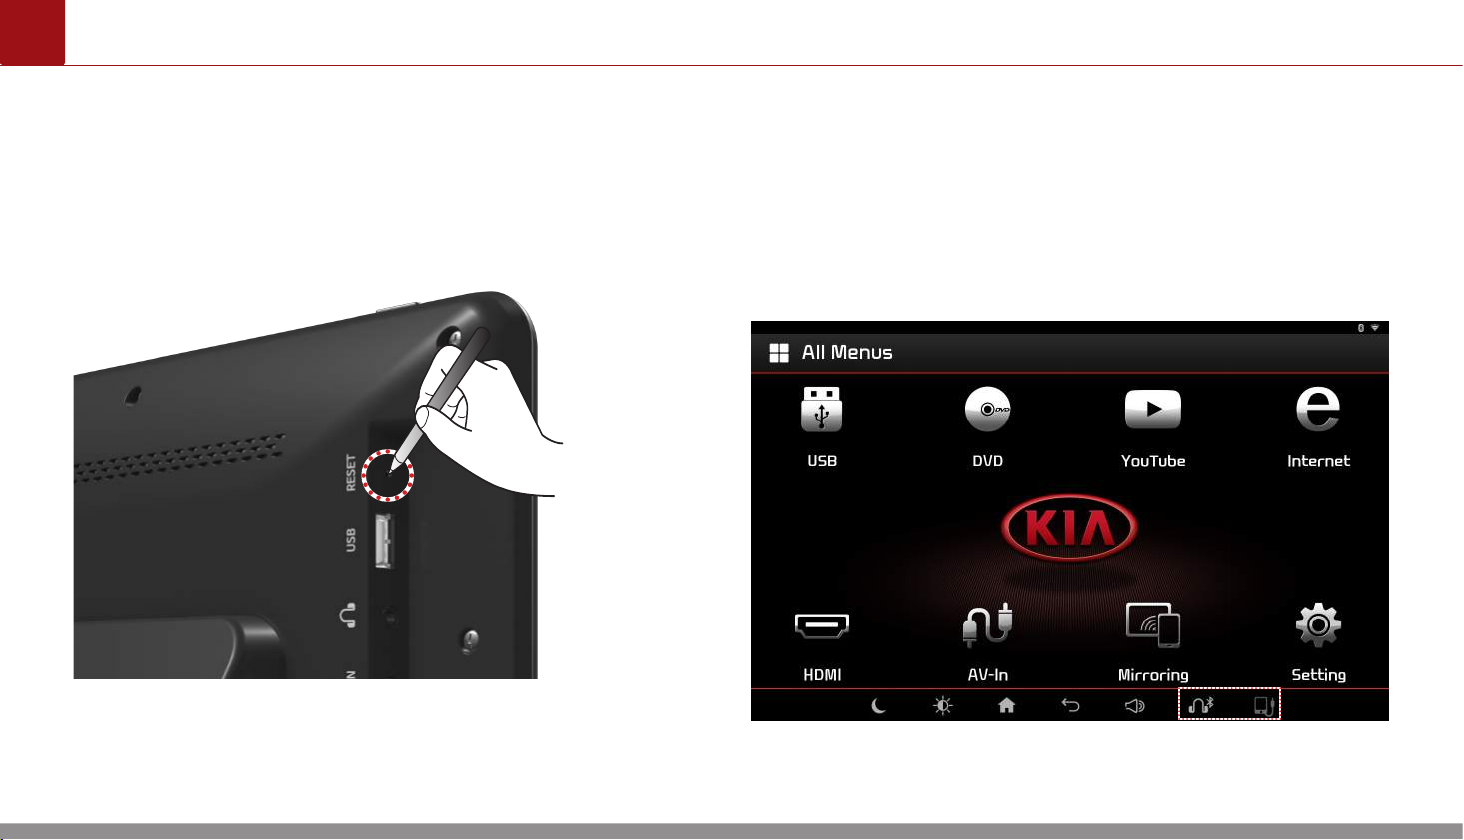
Resetting the System
This feature is used to reset the system in the
occurrence of an unforeseen error or problem.
Setting the Speaker Mode
Press the speaker icon. Each time the button
is pressed, the mode will change between the
headphones and vehicle speaker.
To reset the system, use a clip or a pin to press
the [RESET] hole.
ENGLISH 15

Using the System for the First Time
Icon Mode
Headphones
Bluetooth headphones
Vehicle speaker
Mediabox
Vehicle speaker is unavailable in this
mode.
Note
• The vehicle speakers can be selected for use from
one monitor. When in use, the vehicle speakers
cannot be connected to the other monitor.
• For more information on connecting Bluetooth
headphones, refer to “Bluetooth”.
ENGLISH 16

Using the System for the First Time
Connecting the Wireless
Headphones
1. Remove the protective film on the battery
cover and turn off the wireless headphone.
2. Press the power button for over 5 seconds
until the LED starts flashing quickly. The
wireless headphones will be ready to start
the connection process.
3. Press Settings ▶ Bluetooth on the Display
Monitor you wish to connect.
4. Select the device name from the list.
5. Once the wireless headphones are properly
6. Repeat the process for the second wireless
headphones.
7. Attach the Left / Right stickers on the inside
of the left / right wireless headphones.
Note
• Once you have completed the wireless
headphone setup, then Bluetooth will connect
automatically when the power is turned on.
• When using Bluetooth headphones and the
vehicle speakers together, a time laps may occur
in the headphones.
recognized, a message appears on the RSE
display and the LED will flash slowly.
ENGLISH 17

Using the System for the First Time
Charging/replacing the
Batteries
When the LED turns red, the battery charge is
weak and the batteries need to be charged/
replaced.
Charging the Batteries
Connect the USB charger cable to the
charging port on the bottom-side of the left
headphone.
Replacing the Batteries
1. Slide the cover on the left headphone from
left to right to open the battery compartment.
2. Replace the batteries.
3. Reattach the cover and turn it from right to
left until it engages.
Left
Left
ENGLISH 18
Using the System for the First Time
Note
• When replacing with a non-chargeable battery,
never connect the charging cable.
• Battery charging through the Charging Port is
possible with select rechargeable batteries. Not
all battery may be recharged.
On-Screen Touch Controls
Learn how to touch the screen to operate the
system.
Select
Tap lightly on a menu or item to select it.
Drag & Drop
Select a menu or item and drag and drop it to
the desired place.
Drag or touch the slider along the play bar in
the music screens to jump to the point that
you want to play from.
ENGLISH 19
Using the System for the First Time
Flick (Quick Scrolling)
Quickly moves up and down in the list.
Home Screen
Press the button.
1
5
2
6
3
7
14109
1511 12 13
4
8
ENGLISH 20
Using the System for the First Time
Note
• If the USB port is not in use USB mode will be disabled.
• If the disc is not inserted, DVD mode will be disabled.
• If the Wi-Fi connection is not connected, YouTube and
Internet modes will be disabled.
• The Mirroring feature is only supported within Android
phones.
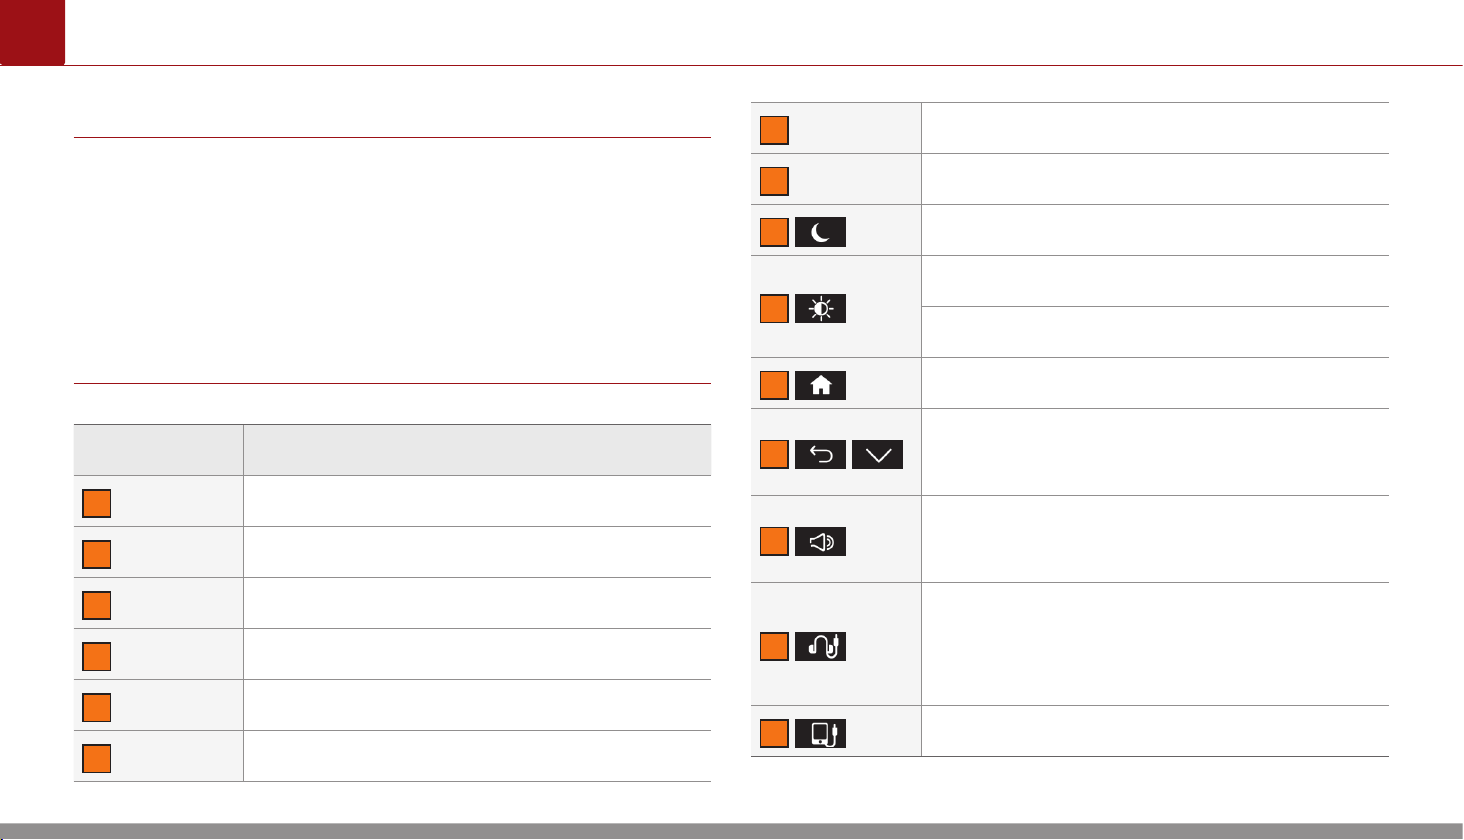
Button Description
1
USB Operates USB mode.
2
DVD Operates DISC mode.
3
YouTube Operates YouTube mode.
4
Internet Operates Internet mode.
5
HDMI Operates HDMI mode.
6
AV-In Operates AV mode.
7
Mirroring Operates Mirroring mode.
8
Settings Displays the Settings screen.
9
Turns display off.
Adjusts brightness.
10
Adjusts the display mode.
11
Displays the Home screen.
•
Moves to the previous screen.
12
•
•
Hides keyboard.
•
Adjusts volume.
13
Press and hold to mute the volume.
Sets the speaker mode. The speaker
14
icon may differ according to speaker
mode.
15
Shows vehicle speaker mode.
ENGLISH 21

USB
About USB
•
•
When connecting an external USB device, the
•
•
Connect the USB device after turning on
the engine. The USB device may become
damaged if it is already connected when the
ignition is turned on.
•
•
Files that are not standard format files will not
be played.
•
•
For MP3/WMA files, only music files with
compression rates between 8 Kbps ~ 320
Kbps can be played.
•
•
Heed caution to static electricity when
connecting/disconnecting external USB
devices.
•
•
Encoded MP3 Players will not be recognized
when connected as an external device.
device may not properly recognize the USB is
in some states.
•
•
Only USB devices formatted as FAT 32 and
NTFS are supported.
•
•
Some USB devices may not be supported due
to compatibility issues.
•
•
Avoid contact between the USB connector
with bodily parts/foreign objects.
•
•
Repeated connecting/disconnecting of USB
devices within short periods of time may
result in product malfunction.
•
•
Insert USB device after starting the car. If the
car is started while USB device is inserted, it
may damage USB device.
•
•
The amount of time required to recognize the
ENGLISH 22
USB
external USB device may differ depending
•
•
Charging through the USB may not work for
on the type, size, or file formats stored on the
USB. Such differences in required time are not
indications of malfunction.
•
•
The device may not recognize the USB
device if separately purchased USB hubs and
extension cables are being used. Connect the
USB directly with the multimedia terminal of
the vehicle.
•
•
When application programs are installed to
specific USBs, files may not properly play.
•
•
The device may not operate normally if MP3
Players, cellular phones, digital cameras,
or other electronic devices (USB devices
not recognized as portable disk drives) are
some mobile devices.
•
•
The device may not support normal operation
when using a USB memory type besides
Metal Cover Type USB Memory.
•
•
The device may not support normal operation
when using formats such as HDD Type, CF, or
SD Memory.
•
•
The device will not support files locked by
DRM (Digital Rights Management).
•
•
USB memory sticks used by connecting an
Adaptor (SD Type or CF Type) may not be
properly recognized.
connected with the device.
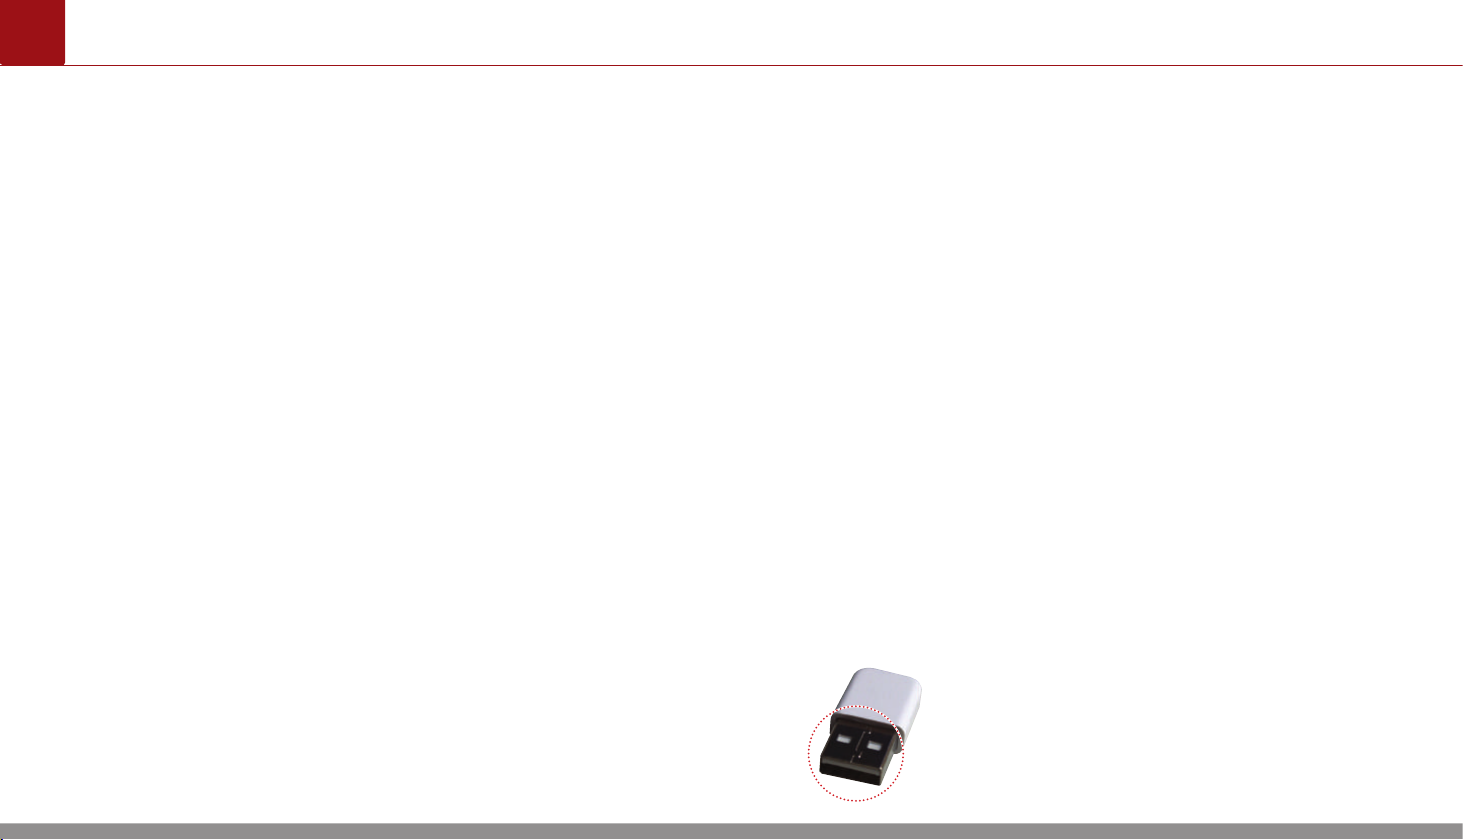
Plug Type Connector
ENGLISH 23
USB
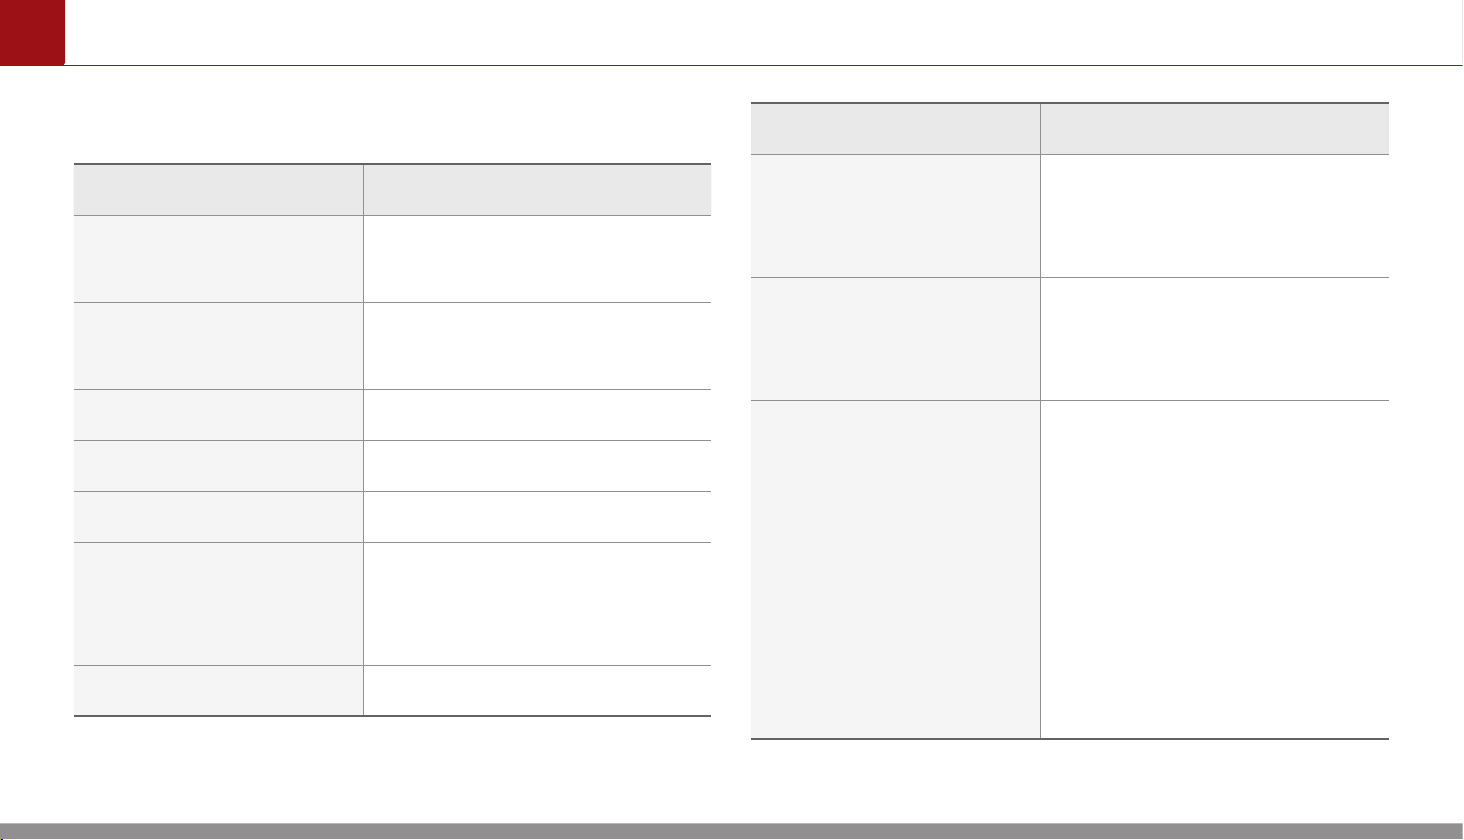
Supported File Specification
Button Description
Video Format
Audio Format
Image Format JPEG, BMP, GIF PNG
Image Resolution Max 4096 x 4096
Image zoom in/out Max 300%
Video Codec
Video Resolution 1280 x 720
AVI, 3GP/MP4, MOV, MPG,
VOB, MKV, FLV, TS/TP, WMV
MP3, MP2, AAC, OGG,
FLAC, APE, WMA, AC3
MPEG1, MPEG2, MPEG4,
H.263, H.264. WMV7/8,
VC-1, VP8, VP9, MJPEG
Button Description
Audio Codec
Subtitles
Detailed
Specification
MP1, MP2, MP3, AAC, AC-3,
WMA, FLAC, AMR, LPCM,
ADPCM
SMISMI, SRT, SUB support
only SUB 2.0 Text MKV/TS
Internal
Max Directory Layers: 15 layers
Max length of folder names
and file names: 250 Bytes
Characters supported for
folder/file names: English,
Korean, French, Spanish and
numbers
Max number of files recognized
from one USB device: 5000
ENGLISH 24
USB
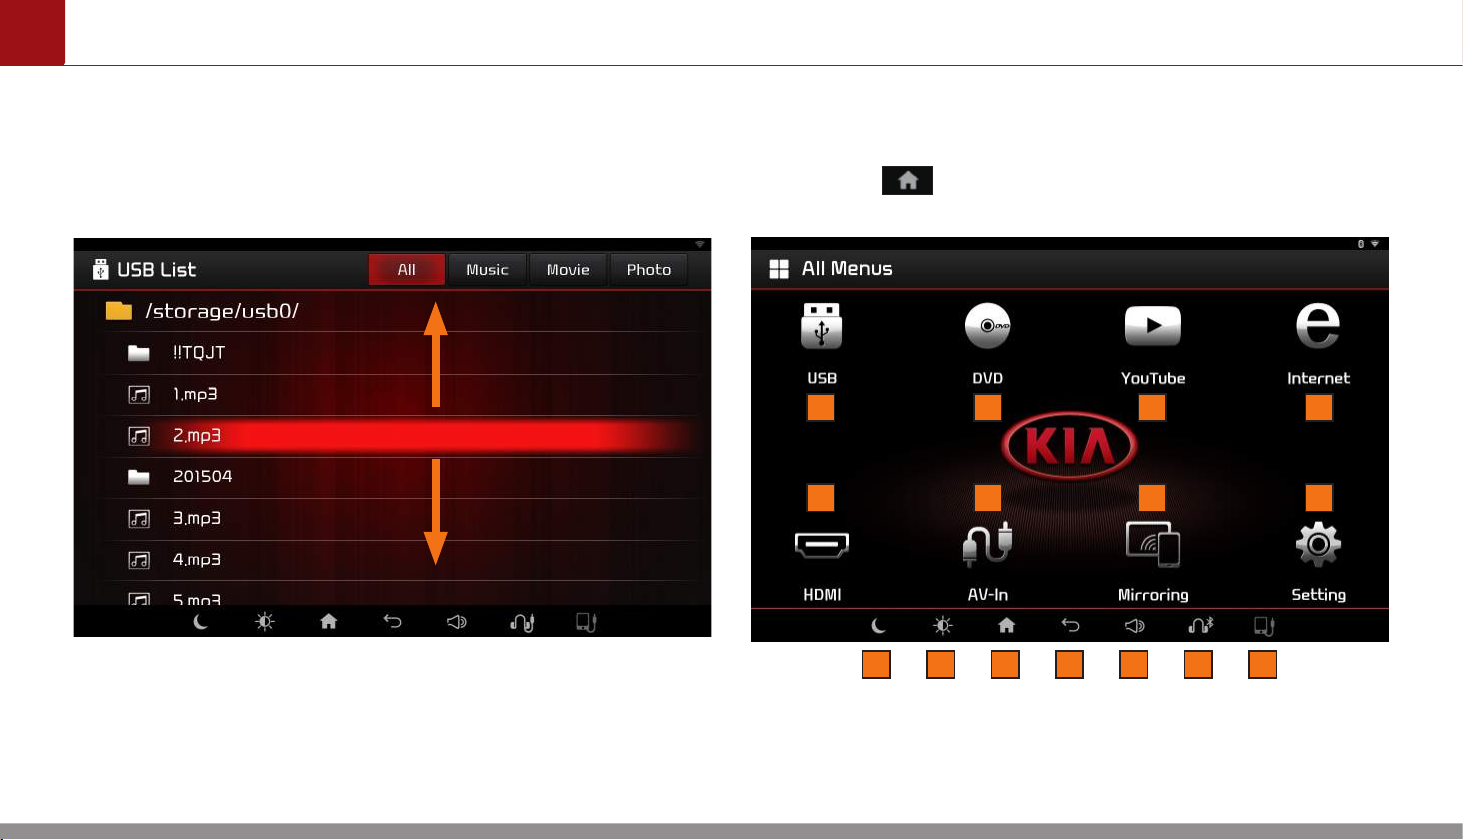
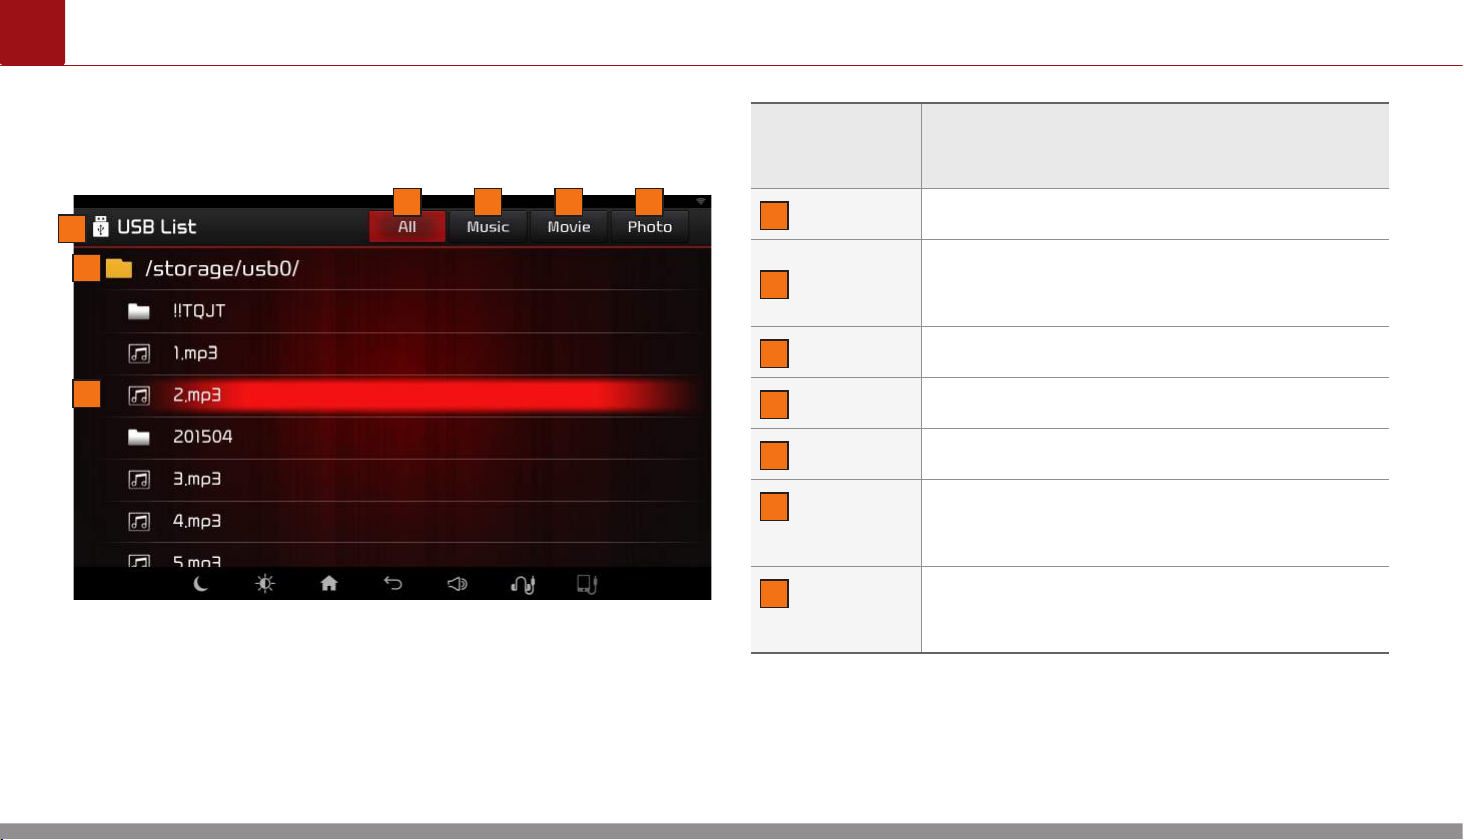
USB List Screen
1
6
7
Name and
Details
Icon
3
4
52
1
Mode Displays currently operating mode.
Displays the folders and music/
2
All
movie/photo files.
3
Music Displays the folders and music files.
4
Movie Displays the folders and movie files.
5
Photo Displays the folders and image files.
6
Directory
Name
7
Current
Directory of current list.
Touch to move to the higher directory.
Current playing file name.
Song
ENGLISH 25
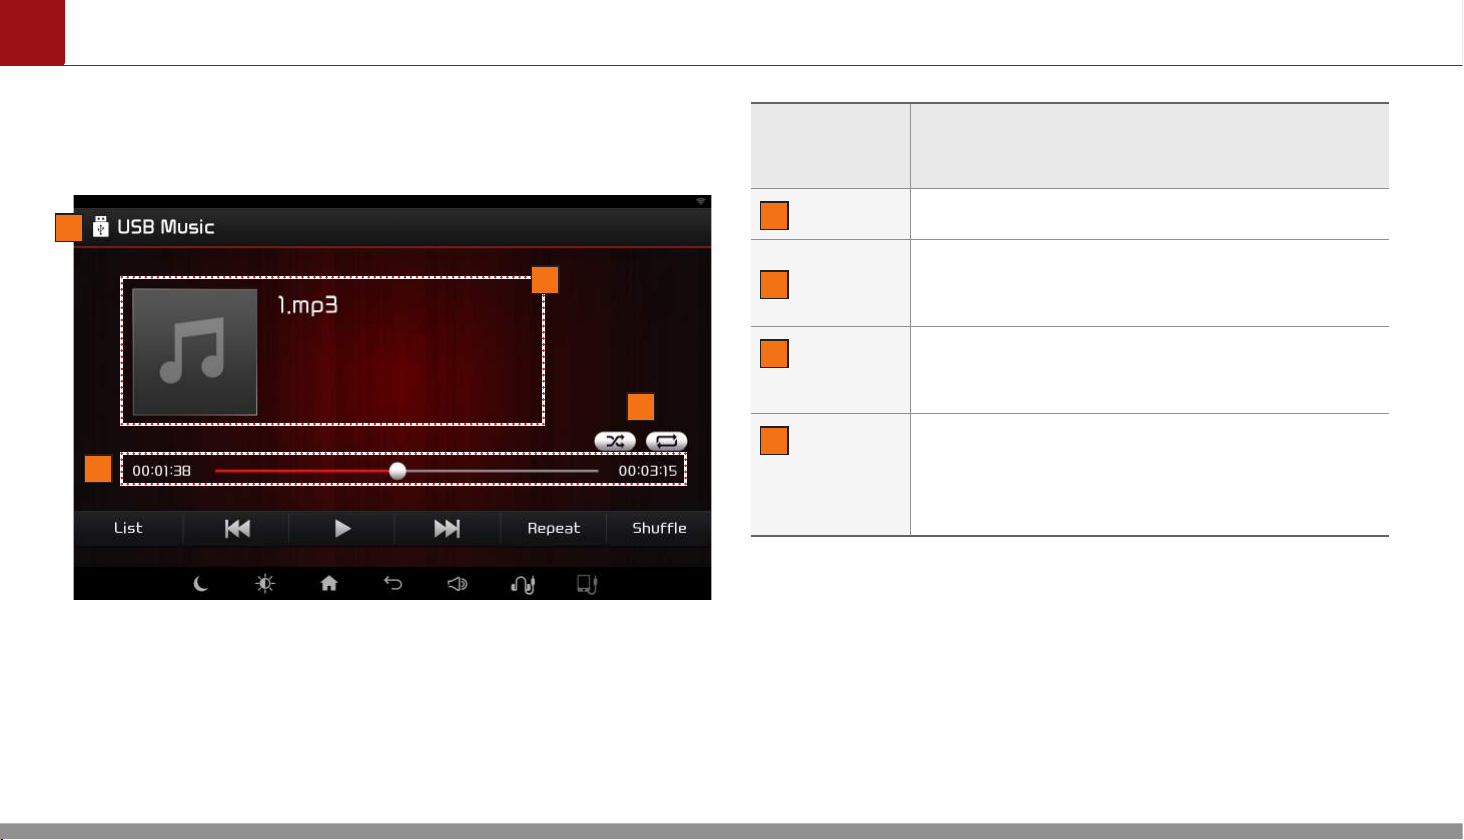
USB Music
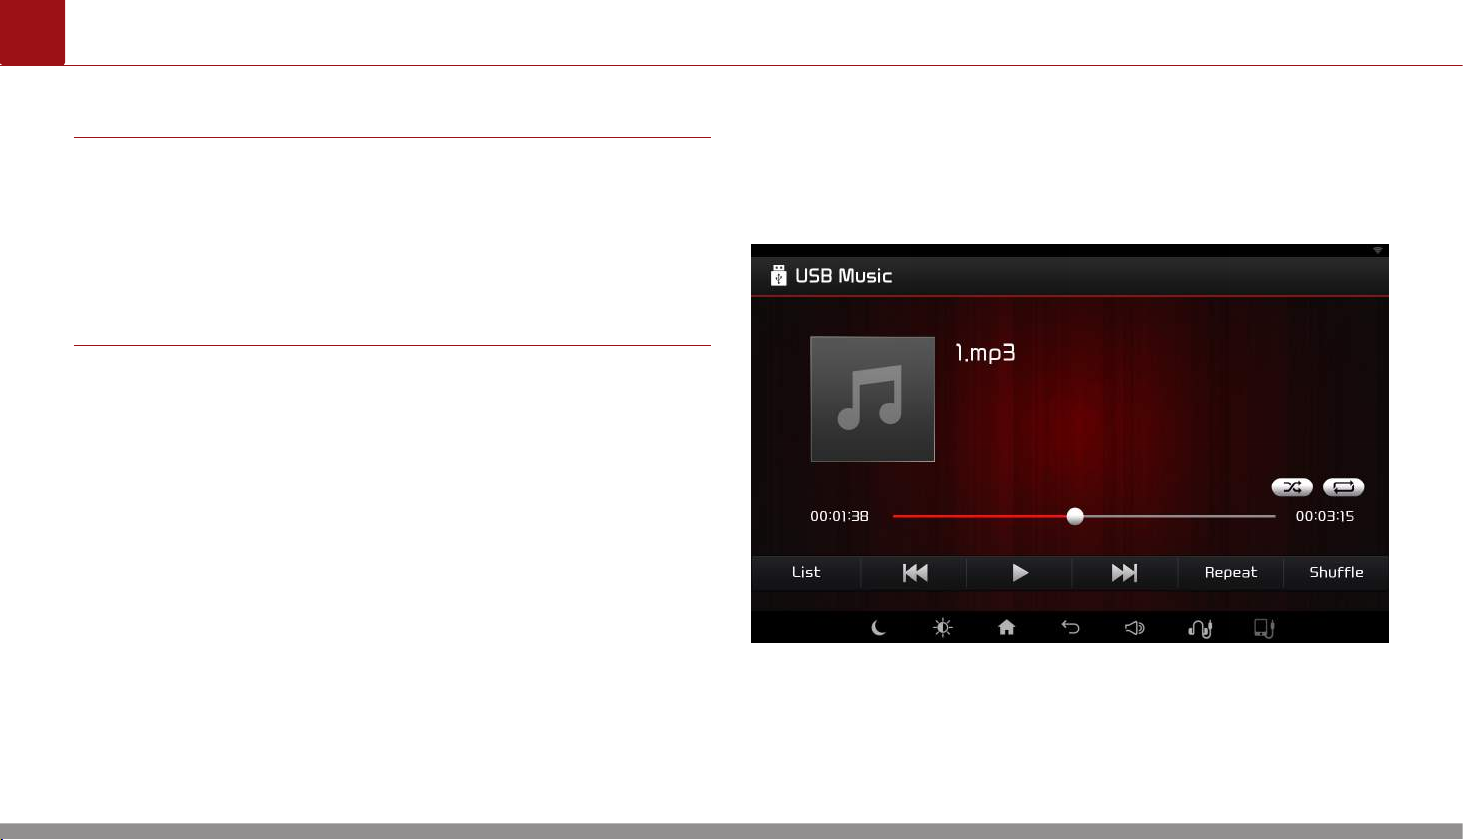
Basic Screen
1
4
Name and
Details
Icon
1
Mode Displays currently operating mode.
2
2
File Info
Displays file name/artist/title/album
info of the current file.
3
Play
Mode
3
4
Play
Time/
Play Bar
Displays the currently operating
function.
•
Displays the current play time.
•
•
Fast-fowards and rewinds the cur-
•
rent file.
ENGLISH 26
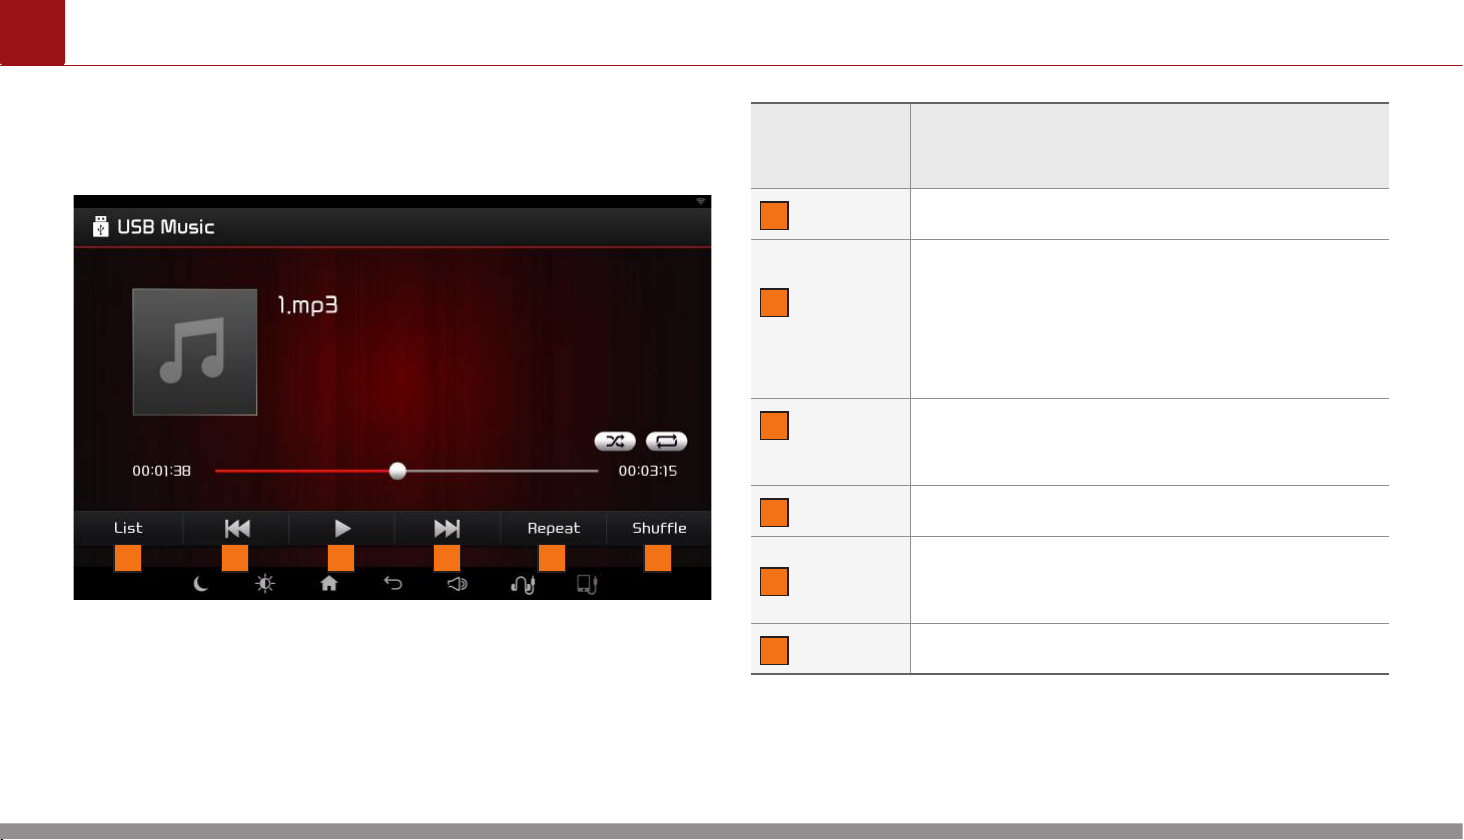
USB Music
Basic Screen
5 76 8 9 10
Name and
Details
Icon
5
List Moves to the list screen.
•
When the play time is under 2 seconds :
•
6
Previous
File
Moves to the previous file.
•
When the play time is over 2 seconds :
•
Plays the current file from the beginning.
7
Play/
Plays/pauses the current file.
Pause
8
Next File Moves to the next file.
Repeats the current file or all files in
9
Repeat
the folder.
10
Shuffle Plays files in random order.
ENGLISH 27
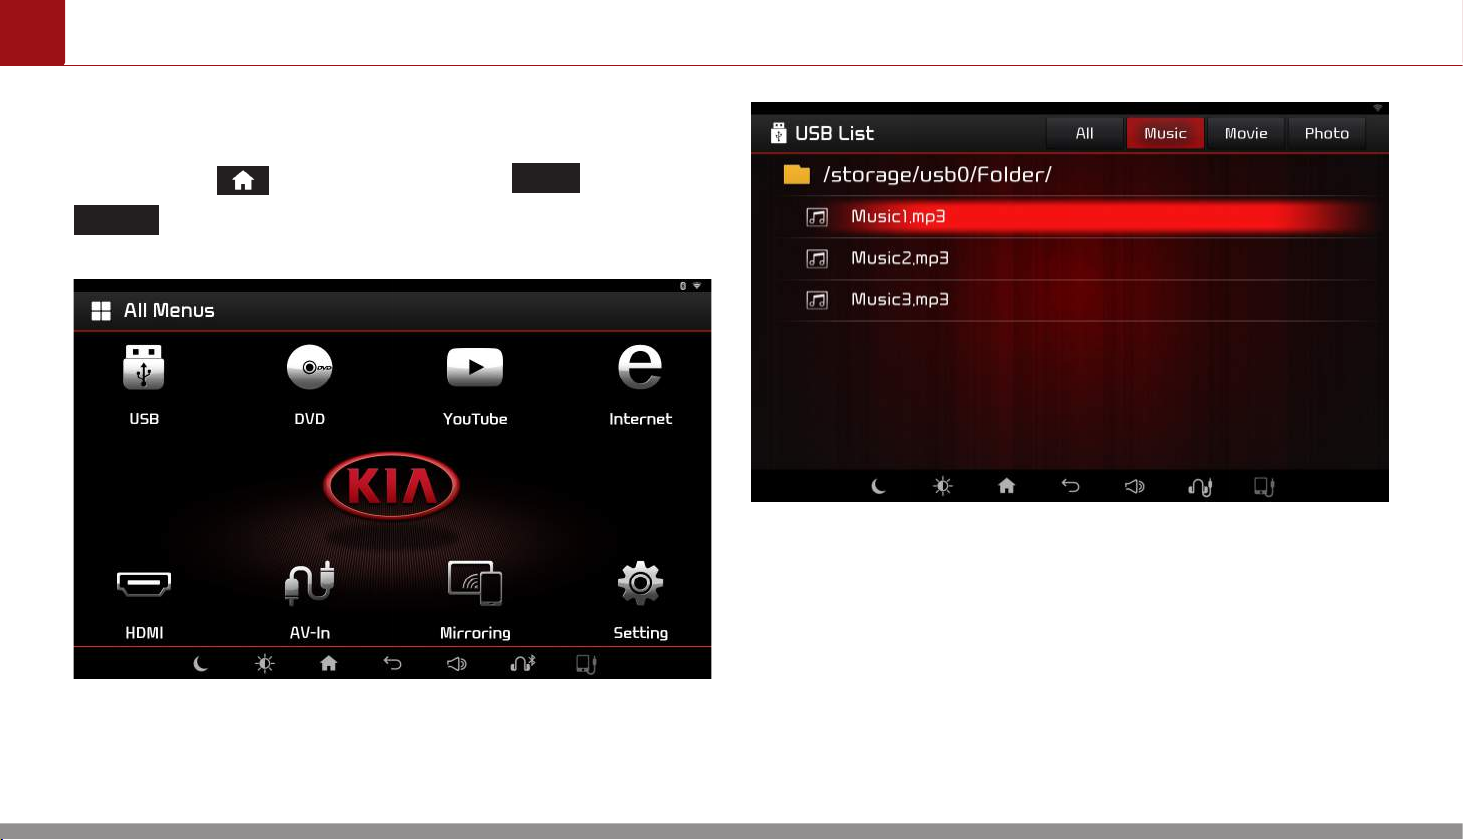
USB Music
Playing USB Music
Press the button▶ Press
Music
▶ Press the desired file.
USB
▶ Press
ENGLISH 28
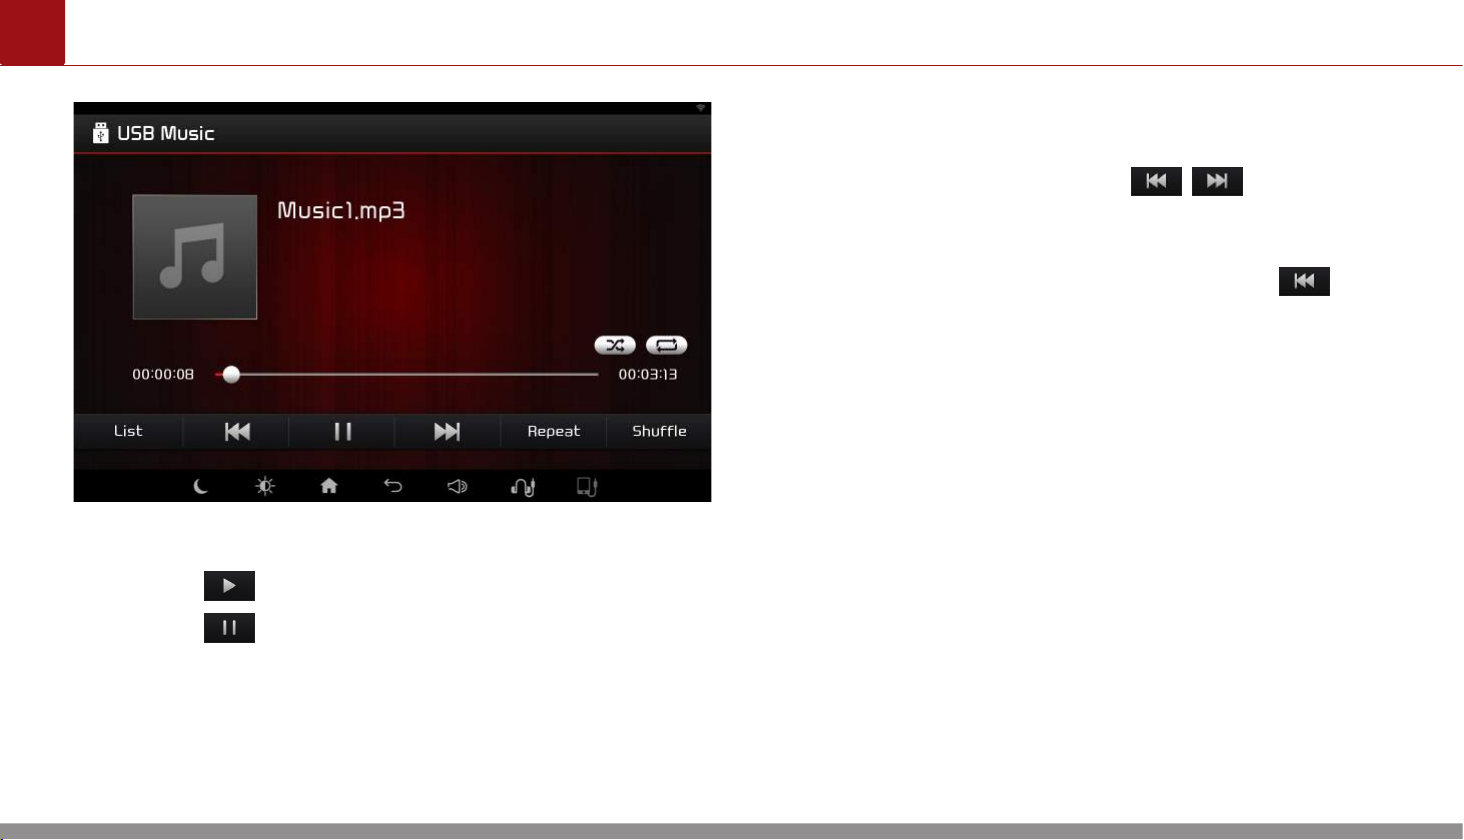
USB Music
Press the button to play.
Playing the Previous/Next File
While playing ▶ Press the button to
play the previous/next file.
After 3 seconds of playing, pressing will
play the current file from the beginning.
Fast-forwarding/Rewinding
Drag or touch the slider along the play bar to
jump to the point that you want to play from.
Press the button to pause.
ENGLISH 29
USB Music
Shuffle
Press the
Each time the button is pressed, the option is
changed from Shuffle On ( ) ▶ Off.
Shuffle
button.
Repeat
Press the
Each time the button is pressed, the option is
changed from Repeat All ( ) ▶ Repeat One
( ) ▶Off.
Repeat
button.
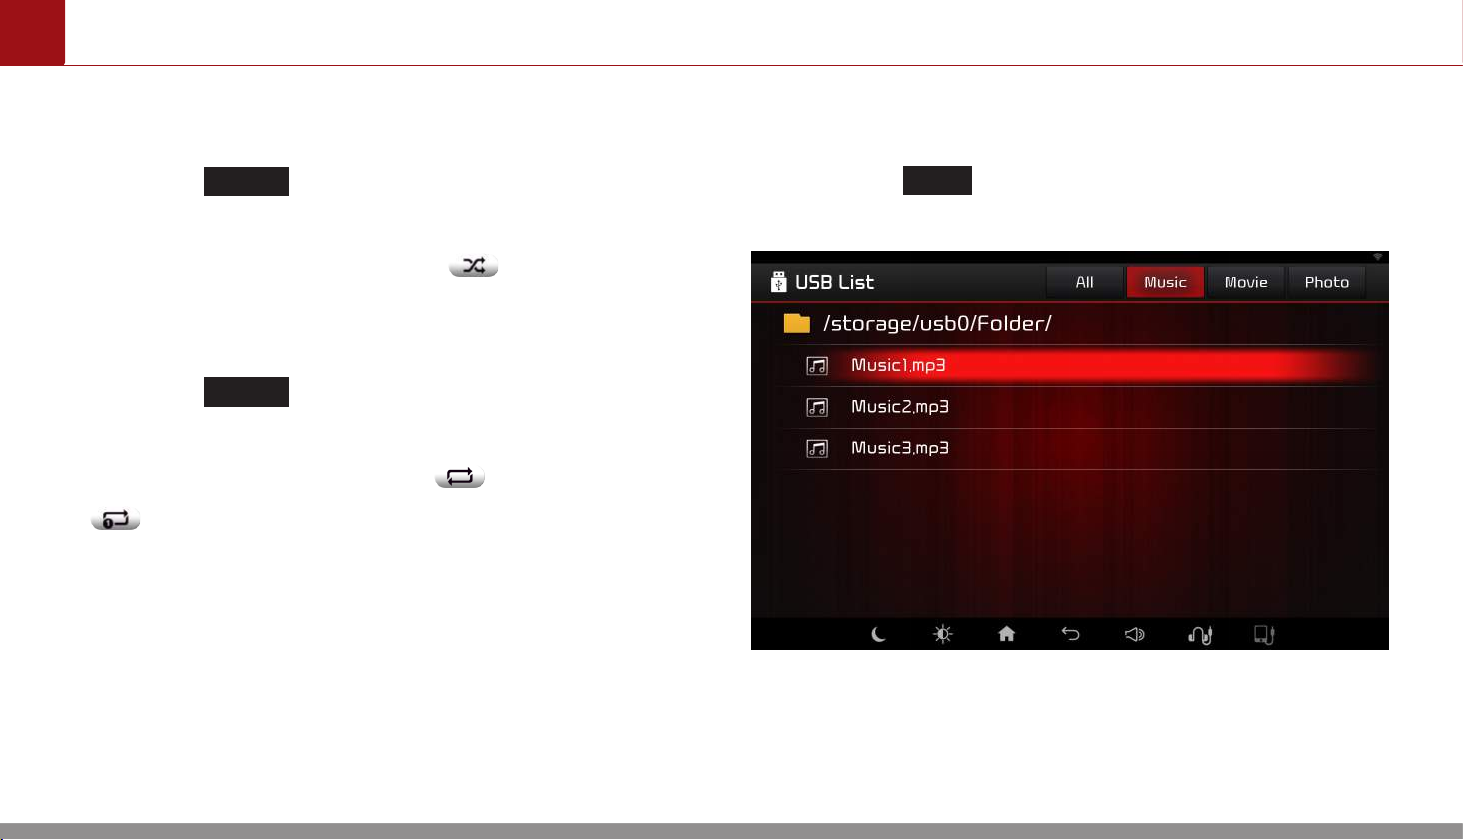
List
Press the
Music list screen.
It is possible to search music file.
List
button to display the USB
Press the directory name to move to the
higher directory.
ENGLISH 30
 Loading...