

Motorola Talkabout T6250 User Manual


Introduction
Congratulations on your purchase of a Motorola Product!
Product registration is an important step toward enjoying your new Motorola
Product. Registering helps us facilitate warranty service, and permits us to
contact you should your Motorola Product require an update or other service.
Registration is not required for warranty coverage. To register your product online, visit www.motorola.com/warranty/radios.

Motorola, the Stylized M Logo, and all other trademarks indicated as such herein
are trademarks of Motorola, Inc.
Reg. U.S. Pat. & Tm. Off.
© 2002 Motorola, Inc. All rights reserved. Printed in the U.S.A.

Contents
Safety and General Information .4
FCC Licensing Information . . . .14
Getting Started . . . . . . . . . . . . . .15
Control Buttons and Basic
Operation . . . . . . . . . . . . . . .15
Installing the Batteries . . . . . . .16
Battery Meter . . . . . . . . . . . . . . 17
Alerts . . . . . . . . . . . . . . . . . . . . . 32
Call Tone and Call Display . . . 32
Ring Only . . . . . . . . . . . . . . . . 33
Ring and/or VibraCall
®
Alert . . 33
Talk Confirmation Tone . . . . . 35
Button Beeps . . . . . . . . . . . . . 35
Eavesdrop Reducer . . . . . . . . 36
Weather . . . . . . . . . . . . . . . . . . . 39
Setting the Weather Channel . 40

Safety and General Information
Important Information on Safe and Efficient Operation
Read This Information Before Using Your Radio
The information provided in this document supersedes the general safety
information contained in user guides published prior to July 2000.
Transmit and Receive Procedure
Your two-way radio contains a transmitter and a receiver. To transmit (talk), you

• Ministry of Health (Canada) Safety Code 6. Limits of Human Exposure to
Radio Frequency Electromagnetic Fields in the Frequency Range from 3 kHz
to 300 GHz, 1999
• Australian Communications Authority Radiocommunications
(Electromagnetic Radiation - Human Exposure) Standard 2001 (applicable to
wireless phones only)
To assure optimal radio performance and make sure human exposure to radio
frequency electromagnetic energy is within the guidelines set forth in the above

To control your exposure and ensure compliance with the general population/
uncontrolled environment exposure limits, always adhere to the following
procedure:
• Transmit no more than 50% of the time.
• To transmit (talk), push the Push-to-Talk (PTT) button.
• To receive calls, release the PTT button.
Transmitting 50% of the time, or less, is important because the radio generates
measurable RF energy exposure only when transmitting (in terms of measuring

Approved Accessories
For a list of approved Motorola accessories visit our website at www.mot.com.
Electromagnetic Interference/Compatibility
Note: Nearly every electronic device is susceptible to electromagnetic
interference (EMI) if inadequately shielded, designed or otherwise
configured for electromagnetic compatibility.
Facilities

Persons with pacemakers should:
• ALWAYS keep the radio more than six inches (15 centimeters) from their
pacemaker when the radio is turned ON.
• not carry the radio in the breast pocket.
• use the ear opposite the pacemaker to minimize the potential for interference.
• turn the radio OFF immediately if you have any reason to suspect that
interference is taking place.
Hearing Aids

Operational Warnings
For Vehicles with an Air Bag
Do not place a portable radio in the area over an air bag or in the air bag
deployment area. Air bags inflate with great force. If a portable radio is placed in
the air bag deployment area and the air bag inflates, the radio may be propelled
with great force and cause serious injury to occupants of the vehicle.
Potentially Explosive Atmospheres

Blasting Caps and Areas
To avoid possible interference with blasting operations, turn off your radio when
you are near electrical blasting caps, in a blasting area, or in areas posted: “Turn
off two-way radio.” Obey all signs and instructions.
Operational Cautions
Antennas
Do not use any portable radio that has a damaged antenna. If a damaged
antenna comes into contact with your skin, a minor burn can result.

Charger Safety Instructions
Before using the battery charger, read all instructions and cautionary markings on
the:
1. battery
2. battery charger, and
3. radio using the battery.
Caution: To reduce the risk of injury, charge only the rechargeable batteries

Save these Instructions
1. Do not expose the charger to rain or snow.
2. Do not operate the charger if it has received a sharp blow, or has been
dropped or damaged in any way.
3. Do not disassemble the charger if it has received a sharp blow, or has been
dropped or damaged in any way.
4. Never alter the AC cord or plug provided with the unit. If plug will not fit the
outlet, have proper outlet installed by a qualified electrician. An improper

9. An extension cord should not be used unless absolutely necessary. Use of
an improper extension cord could result in a risk of fire and/or electric shock.
If an extension cord must be used, make sure:
• That the pins on the plug of the extension cord are the same number, size
and shape as those on the plug of the charger.
• That the extension cord is properly wired and in good electrical condition,
and
• That the cord size is18 AWG for lengths up to 100 feet, and 16 AWG for

FCC Licensing Information
Your Motorola radio operates on General Mobile Radio Service (GMRS)
frequencies and is subject to the Rules and Regulations of the Federal
Communications Commission (FCC). The FCC requires that all operators using
General Mobile Radio Service (GMRS) frequencies obtain a radio license before
operating their equipment. To obtain the FCC licensing forms, please request
Forms 605
and 159. If you want to have the document faxed, mailed, or have
questions, please use the following contact information.

Getting Started
Control Buttons and Basic Operation
Use P (Power) to:
Use
\ to:
Indicator Light
- Turn power on/off
Use Q to:
- Turn on backlight
(short press).
- Press and hold to
switch between
weather mode and

Installing the Batteries
Your radio uses 3 AA Alkaline batteries or a rechargeable Nickel-Metal Hydride
(NiMH) battery (sold separately). A NiMH battery upgrade kit (56319) is also
available. Call 1-800-353-2729 in the USA for a dealer nearest you.
1. If the radio is on, turn it off by pressing and holding P.
2. Push latch up until it clicks.
3. Lift back cover off
4. Remove and replace batteries so the + marking matches the one in the com-

Battery Meter
The battery meter on the top-left corner of the display shows how much battery
power you have. It shows d (full), b (two-thirds full), c (one-third full),
or a (empty). When the battery is low (c), the radio beeps every 10 minutes
indicating it’s time to change or charge them.
Setting the Battery Type
This feature is used to set the battery meter to recognize and properly display the
power usage for either alkaline or rechargeable batteries.
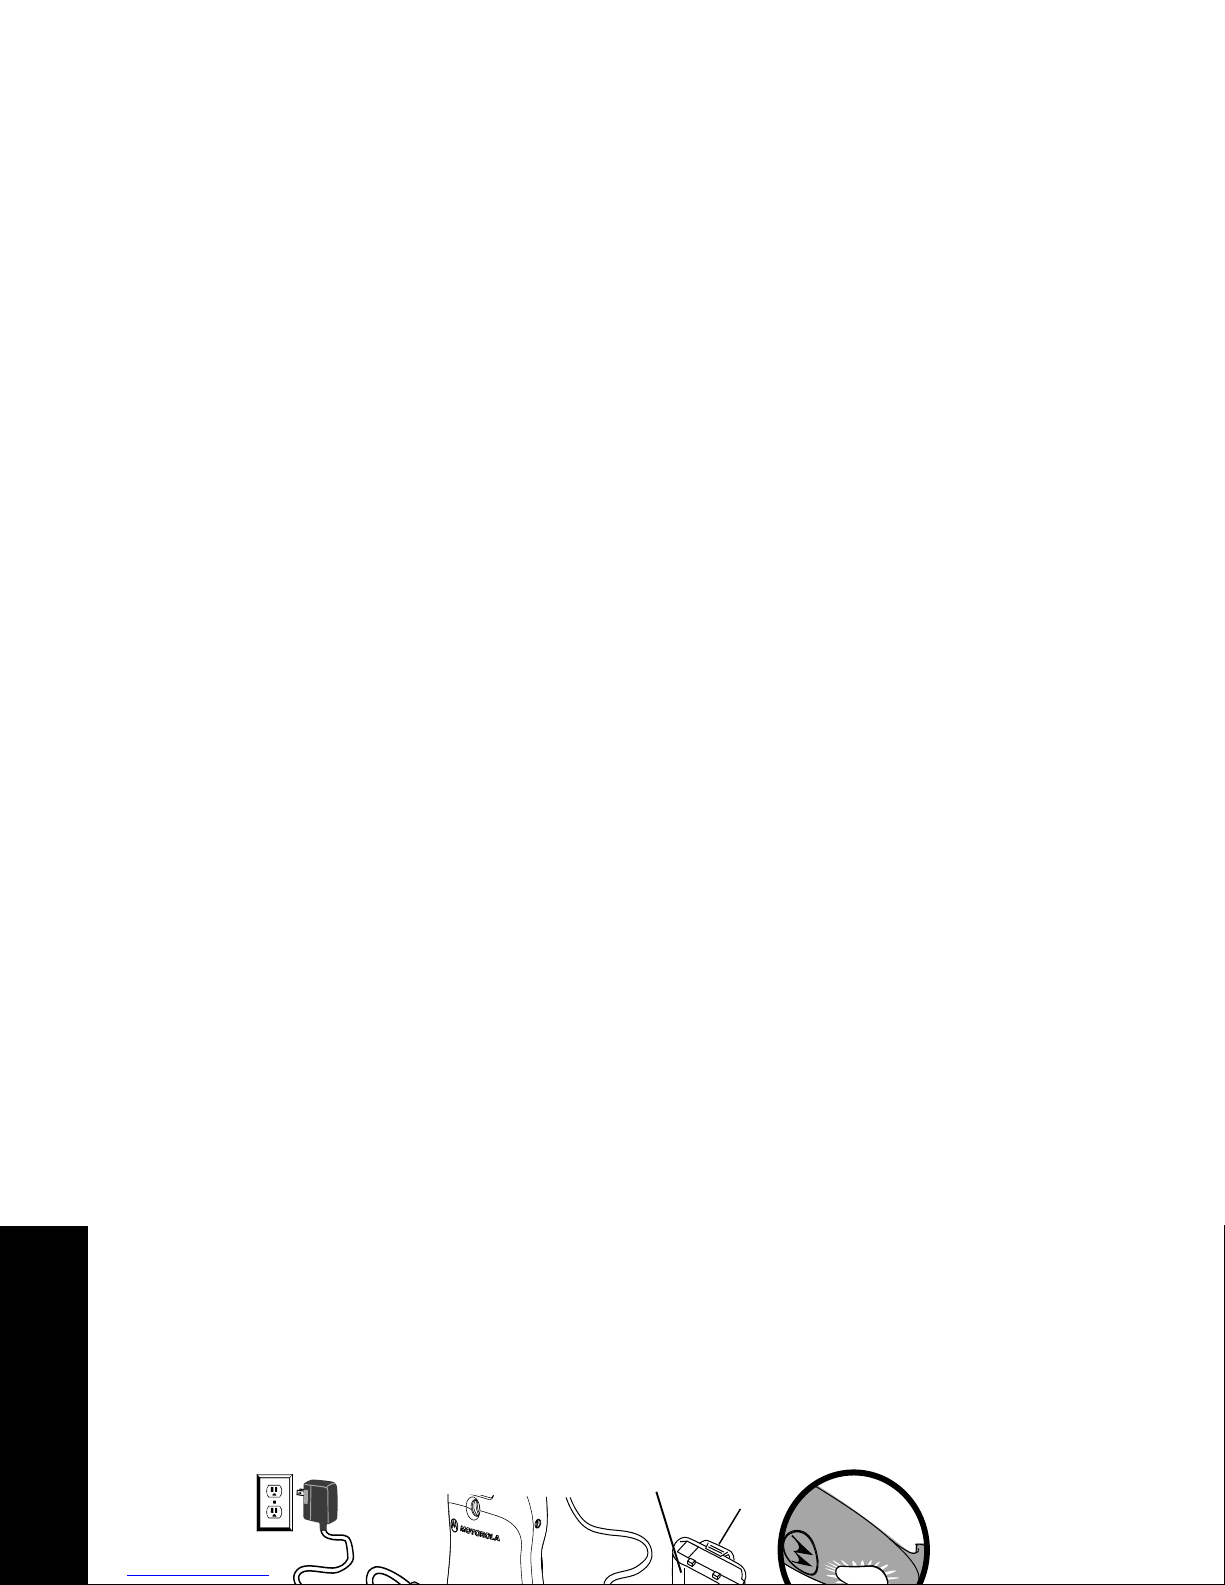
Charging the NiMH Battery (Optional Accessory)
Charge the NiMH battery overnight (16 hours) before using it for the first time. It
will only need up to four hours of charging thereafter.
Battery
Charger
Adapter
Cover

Charging Status
The light indicator shows the charging status when the charger is connected to
the radio, the NiMH battery, or the charging dock.
Light Indicator
Color
Charging Status and Description
Charging Level
Complete
Solid Red Rapid charging Up to 90%
Flashing Green Top-off charging 90% to 100%
 Loading...