

Motorola TALKABOUT T5200, TALKABOUT T5100 User Manual
Visit the Motorola Website at:
http://www.motorola.com
Visitez notre site Web à :
http://www.motorola.com
Visite nuestro sitio de Motorola en la red:
http://www.motorola.com
Visite nosso endereço na internet:
http://www.motorola.com.br
T5100 Series Canada and US

Table Of Contents
Your New Radio
Radio Diagram...................................................................3
Batteries
To Install ............................................................................4
Radio Etiquette..................................................................4
Belt Clip
To Attach............................................................................4
To Remove.........................................................................4
To Communicate
Removeable front Cover....................................................5
Turn The Radio On............................................................5
Monitor Button...................................................................5
Adjust The Volume.............................................................5
Time-out Timer...................................................................5
Set The Channel................................................................6
Set The Code.....................................................................6
Call Tone............................................................................6
Set The Call Tone..............................................................6
“Roger” Beep.....................................................................7
Sending Messages............................................................7
Battery Meter.....................................................................7
Low Battery Alert ...............................................................7
To Use Audio Accessories.................................................7
Talk Range.........................................................................9
Care of Your radio..............................................................9
Safety Information
Cautions and Warnings......................................................10-13
Troubleshooting
Troubleshooting ................................................................14
Warranty
One Year Limited Warranty................................................15
Accessories.......................................................................16
Channel Frequency Chart..................................................16
Interference Eliminator Code Chart...................................17
Specifications.....................................................................18
ENGLISH
1
T5100 Series Canada and US
Your New Radio
Motorola Talkabout T5100 and T5200 radios operate on Family Radio Service
(FRS) designated frequencies.This license-free, short range, two-way radio
service was established specifically for family and group recreational use.
Use of this radio outside the country where it was intended to be distributed is
subject to government regulations and may be prohibited.
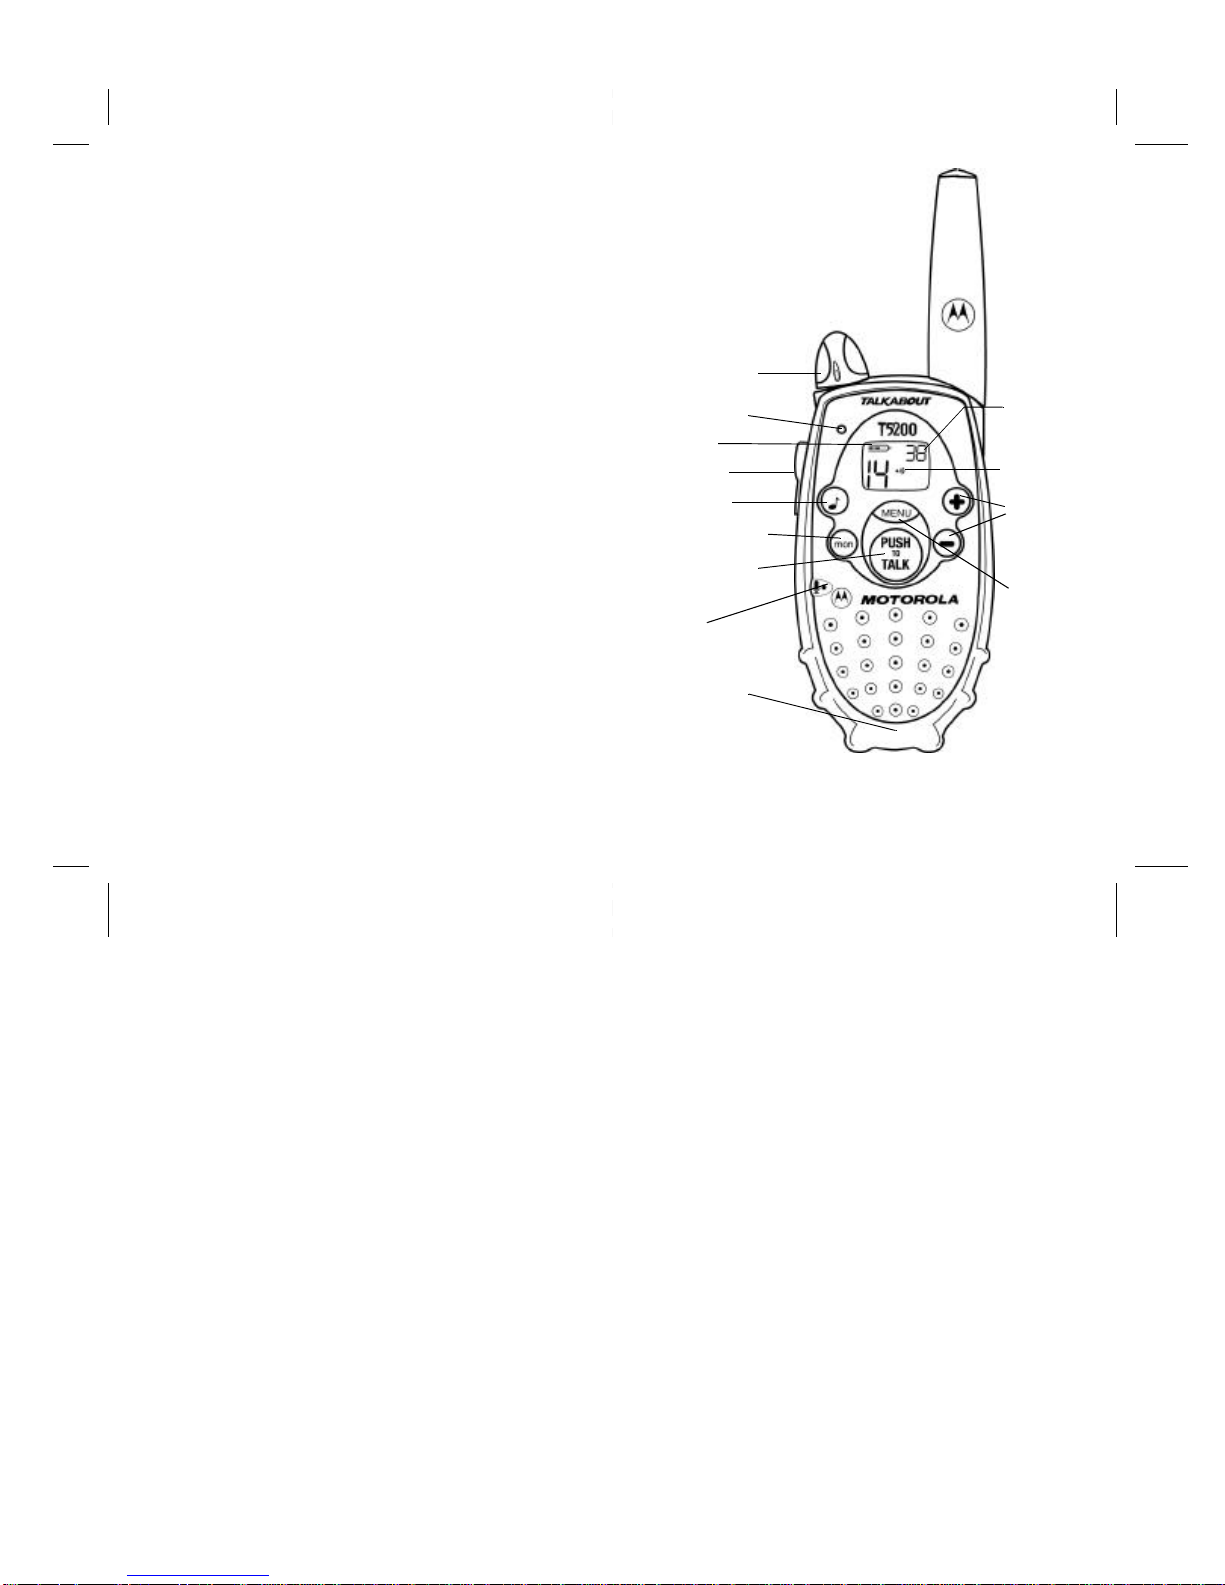
Power/Volume Knob
LED Indicator Light
Battery Meter
Accessory Jack
Call Tone Button
Monitor (mon) Button
Push-To-Talk Button
(PTT)
Microphone
Battery Cover Latch
(radio back)
*T5200 Only
2
Interference
Eliminator Code*
“Roger”
Beep Icon
Scroll
Buttons
Menu/Lock
Button
3
T5100 Series Canada and US
Batteries
T5100 and T5200 radios operate with 3 AA alkaline
batteries providing approximately 30 hours of use. That is
almost 3 hours of talk and over 27 hours
of standby time.
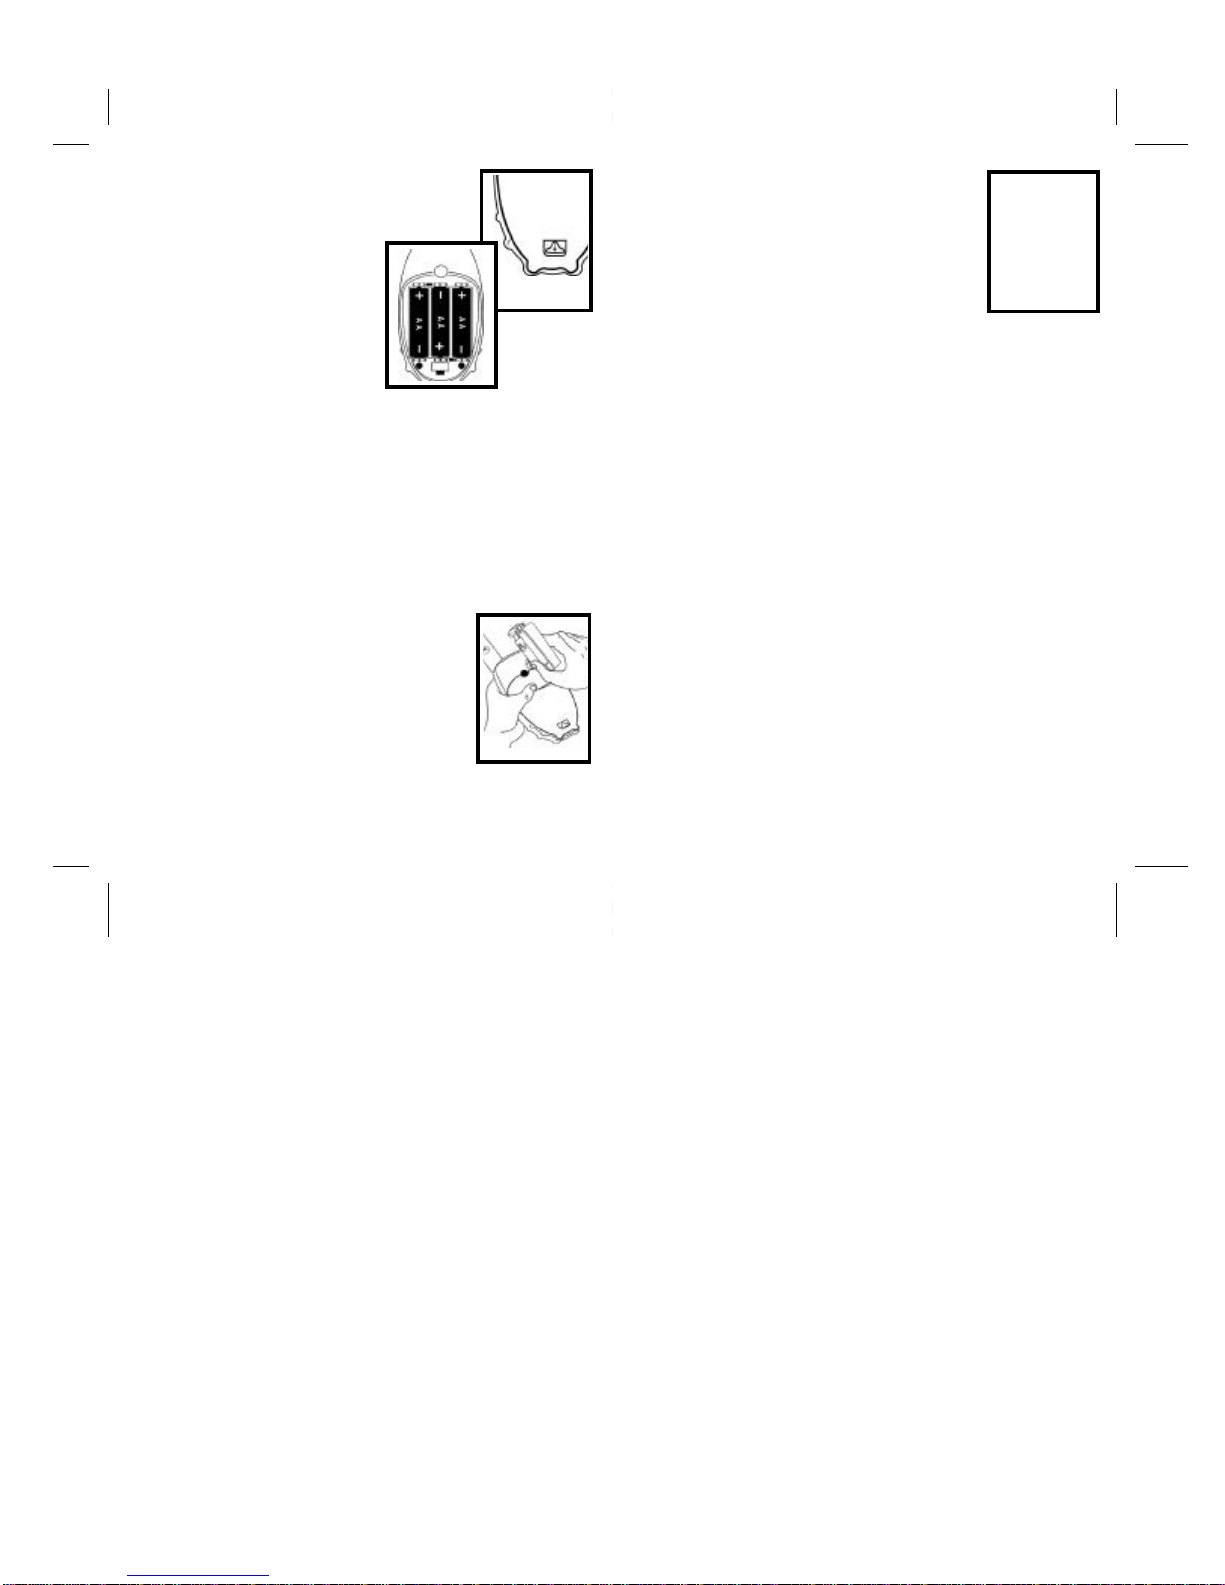
To Install:
1. With back of radio facing you, flip Battery
Cover Latch up to release. Lift cover off.
Fig. 1.
2. Insert 3 AA batteries as shown. Fig. 2.
3. Replace battery cover. Reposition
Battery Cover, flip Battery Cover Latch
down to secure.
Battery Cover Latch
Figure 1
Figure 2
Radio Etiquette:
Your radio has multiple channels shared on a “take turns” basis. This means
other groups may be talking on the channels. For uninterrupted
communications, do not talk over someone who is already using the channel –
your message may not be completely heard. Try changing the channel to
avoid channel congestion or use the Monitor button to check for channel
activity. If you hear static while holding down the Monitor button the channel is
clear for use.
Note: Since the channels are shared, your conversations will not be private
and you may hear others talking.
Belt Clip
Motorola T5100 and T5200 radios come with a swivel
belt clip.
To Attach:
1. Align belt clip post with hole in the radio back.
2. Gently push until it clicks into place. Fig. 3.
To Remove:
1. Push release tab on top of belt clip down to release
catch.
2. Pull belt clip from the radio back.
4
Figure 3
Removable Front Cover:
The T5100 and T5200 radios have a removable front
cover.To Remove, press down on the tab at the bottom of
the radio with your fingernail or a small coin. Figure 4. Pull
the bottom of the removable cover away from the radio. To
Install, reinsert housing tab and press down to snap cover
into place
To Communicate
Read this manual carefully and make sure you know how to
properly operate radio before use.
Motorola Talkabout two-way radios have 14 channels*. To communicate with
others, all radios in your group must be set to the same channel. Other FRS
radios, such as the T5200, may have Interference Eliminator Codes, which must
be turned off or set to zero for proper communication with T5100 radios.
Figure 4
Turn The Radio On:
1. Rotate Power/Volume knob clockwise until you hear a click. Radio will beep and
LED Indicator Light will flash to confirm. The display will show current channel
and code (T5200 only). LED will flash every three seconds.
2. To turn radio off, rotate Power/Volume knob counter clockwise until you hear
a click and display disappears.
Note: All icons on the display will light up briefly, some of which may not be
supported by your radio.
Monitor Button:
The Monitor (mon) button lets you hear the radio’s volume level when you are
not receiving so you can adjust the volume. It is also used to check activity on
current channel before transmitting. The radio also has a Channel Busy Indicator
where the LED will also flash twice per second to indicate the channel frequency
is in use.
Adjust The Volume:
Rotate Power/Volume knob while holding down the Monitor button until you
reach a comfortable listening level. Rotate knob clockwise to increase and
counter clockwise to decrease volume.
Time-out Timer:
The Time-out Timer feature helps extend battery life by preventing accidental
transmission. The radio will emit a continuous warning tone after the Push-To-
Talk button is pressed for 60 continuous seconds and will stop transmitting.
* Chile and Argentina radios have 7 frequencies (channels) only.
5
T5100 Series Canada and US
 Loading...