

Mail
Mail Functions of FOMA Handset ...........................................................................168
What is i-mode Mail?................................................................................................168
Displaying Mail Menu<Mail Menu>..........................................................................172
Creating i-mode Mail/Deco-Mail
Creating and Sending i-mode Mail<Creating/sending i-mode mail> ...........172
Creating and Sending Deco-mail<Deco-mail>...............................................174
Creating Deco-mail Using Template<Template>............................................175
Attaching a File<File attachment> ..................................................................175
Receiving/Operating i-mode Mail
When i-mode Mail is Received<Automatic reception of mail>.....................176
Selecting and Receiving i-mode Mail<Receive option>................................176
Checking for i-mode Mails<Check new message>........................................177
Replying to i-mode Mail<Replying i-mode Mail> ...........................................177
Forwarding i-mode Mail to Another Destination
<Forwarding i-mode Mail> ...............................................................................177
Registering Mail Address to Phonebook........................................................178
Replaying/Saving Melody from i-mode Mail<Save Melody>.........................178
Displaying/Saving Image of Image Mail<Receiving Image Mail> .................178
Replaying/Saving i-motion from i-motion Mail...............................................178
Operating Mail Box
Displaying Mails in Outbox/Inbox/Unsentbox
<Outbox/Inbox/Unsentbox>.............................................................................178
Configuring Mail Settings
Setting FOMA Handset Mail Functions<Mail setting>...................................184
166
Using Chat Mail
Chat Mail............................................................................................................186
Creating and Sending Chat Mail<Creating/sending chatmail>.....................186
Using SMS (Short Message)
Creating and Sending SMS (Short Message) <Creating/Sending SMS>.....187
Automatically Receiving SMS (Short Message)<Receiving SMS>...............188
Checking for SMS (Short Message)<Check New SMS>................................189
Configuring SMS (Short Message) Settings<SMS Settings> .......................189
167

Mail Functions of FOMA
Handset
FOMA handset provides 2 mail functions:
i-mode mail and SMS.
• Using i-mode mail requires i-mode subscription.
• Using SMS requires no i-mode subscription.
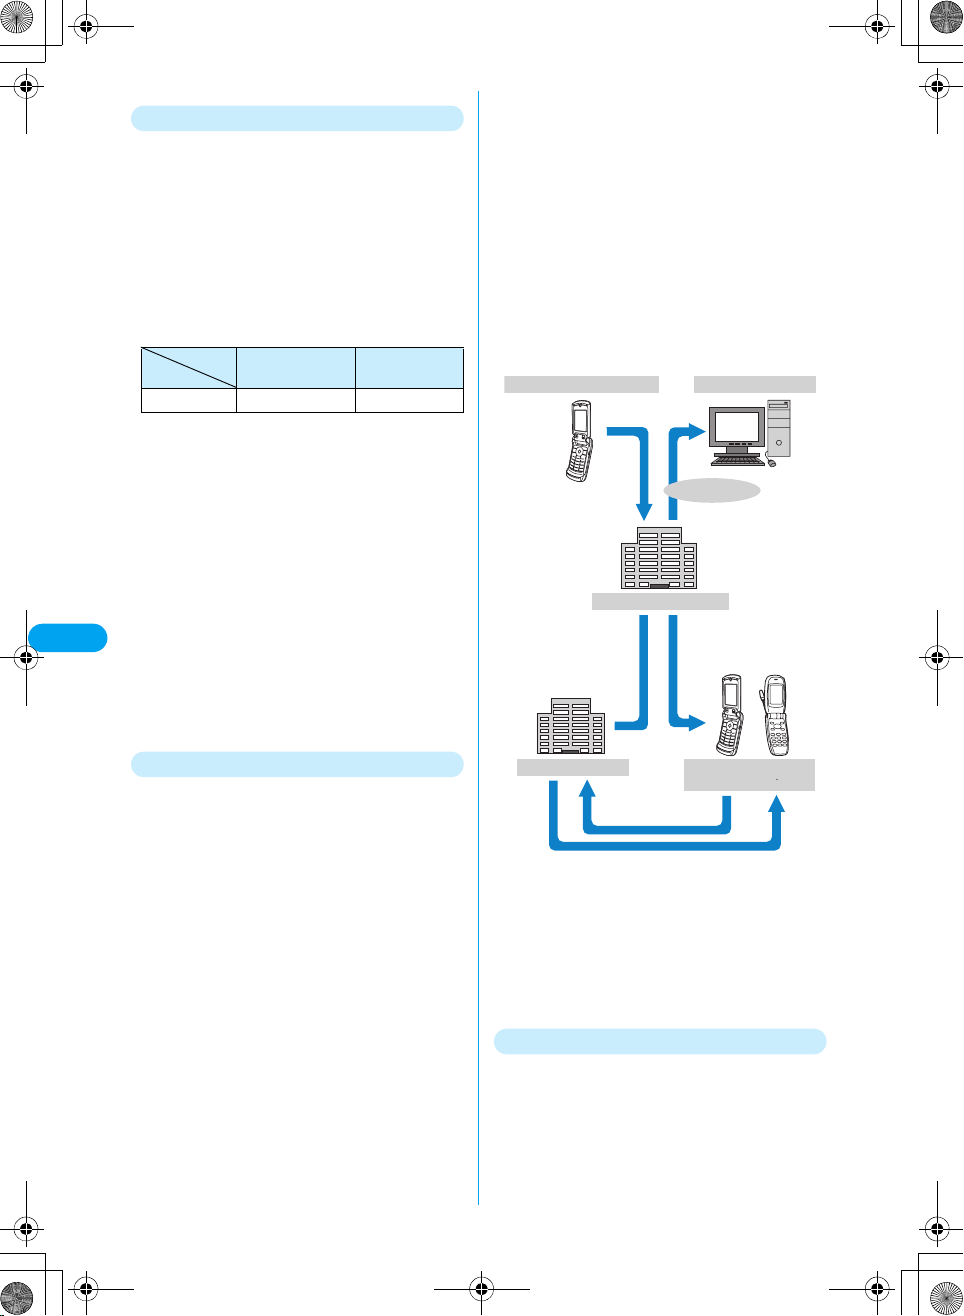
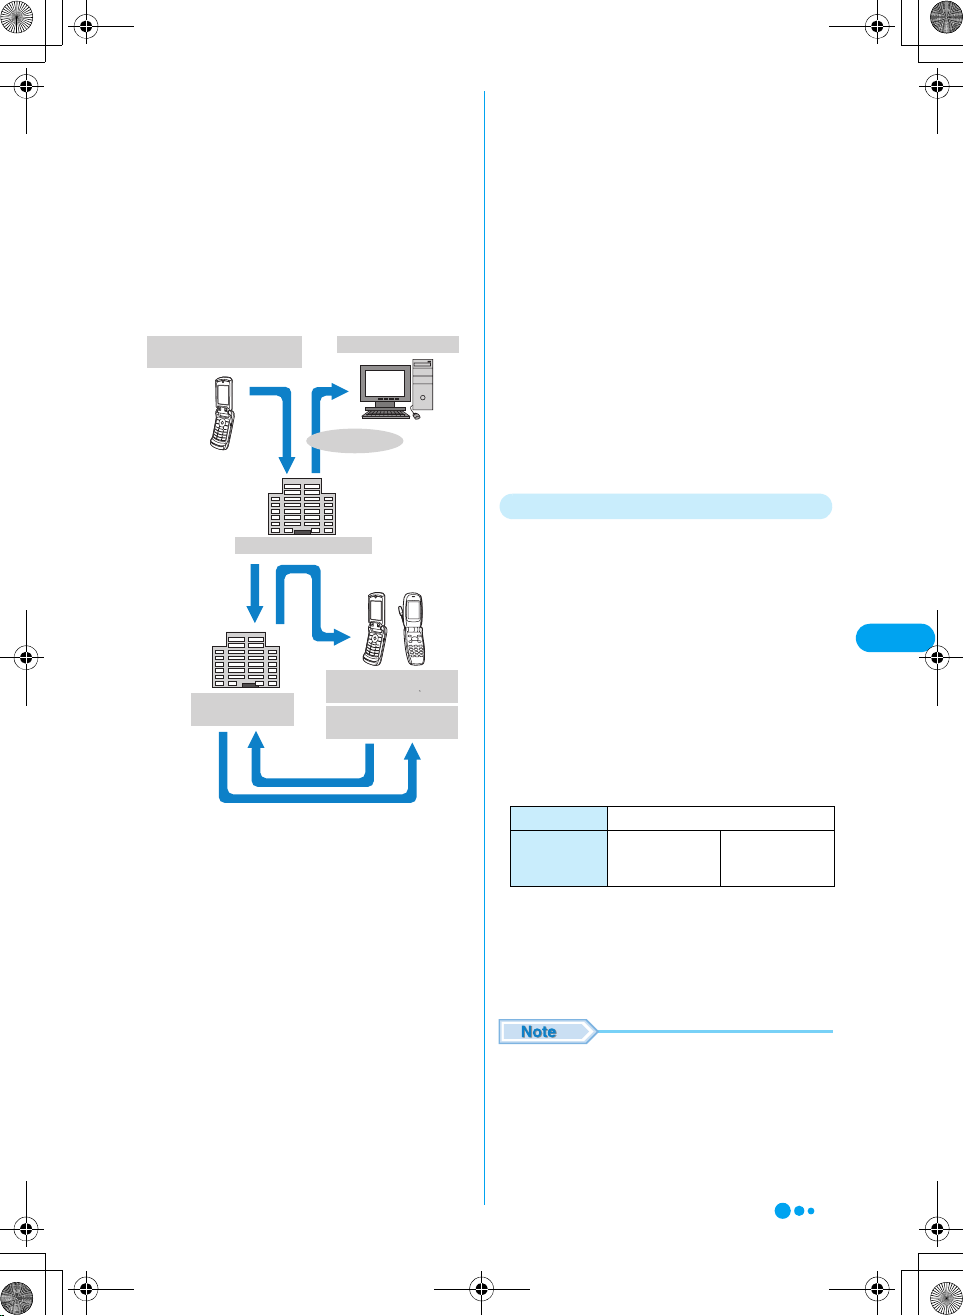
Sending and Receiving Mail
FOMA handset → FOMA handset
SMS
Up to 70 characters
i-mode Mail
Up to 5000 full-pitch characters
FOMA
handset
Mail
FOMA Handset → i-mode Service
SMS sent from FOMA handset is received by
mova service i-mode handset as i-mode mail.
XXXXX
SMS
i-mode Mail
i-mode Mail
SMS
FOMA
handset
What is i-mode Mail?
Upon subscription to i-mode, you can send and
receive messages via internet as well as
between i-mode handsets (including mova
handsets). The default mail address specified at
i-mode subscription is as given below.
■ When you have newly subscribed to i-mode
A combination of random alphanumeric
characters is succeeded by @. After subscription
to i-mode, check your mail address.
Example: abc1234 ... 789xyz@docomo.ne.jp
Checking your mail address
iMenu" → "ENGLISH" → "Function" → "Mail
Settings" → "Confirm Mail Address"
• Between i-mode handsets (including mova handsets),
mails can be sent and received using only the address
preceding @.
• When sending mails from PC, etc. to FOMA handset,
use the whole address containing @docomo.ne.jp.
Mail address
A
docomo.taro
△△
@docomo.ne.jp
Mail address
docomo.
△△
@docomo.ne.jp
Address between i-mode handsets
:
A B→
:
B A→
docomo.
△△
docomo.taro
_ab1234yz
△△
_ab1234yz
B
i-mode Mail
Up to 2000 full-pitch characters*
FOMA
handset
*: If "Report request" is set to "ON", SMS cannot be sent
to mova.
i-mode Mail
mova service i-mode handset → FOMA handset
Short mail* sent from mova service i-mode
handset can be received by FOMA handset as
SMS.
Up to 50 full-pitch characters
Short mail
Dial Special
number 1655
i-mode Mail
mova service
i-mode handset
*: Short mail is a service that allows to send and receive text
Up to 250 full-pitch characters
messages between DoCoMo mobile phones.
×
i-mode Mail
i-mode Mail
168
mova service
i-mode
handset
SMS
FOMA
handset
i-mode Center
Address between i-mode handset and PC
docomotaro@
:
A C→
docomo.taro
:
C A→
Personal computer
Mail address
C
docomotaro@
.co.jp
△△.□□□
.co.jp
△△.□□□
@docomo.ne.jp
△△
■ Receive option
You can check subjects of i-mode mails stored in
i-mode Center and select ones to be received or
deleted without reception from the i-mode Center.
→P176
Mail Setting
You can make various settings as described
below.
■ Setting procedure
i → "iMenu" → "Function" → "Mail Settings"
→ 【Each Setting】
• For details, refer to "i-mode User's Manual".
■ Changing your mail address【Mail Address
(Change Mail Address)】
You can change characters preceding mark @ in
a mail address, e.g.,
"docomo.△△_ab1234yz@docomo.ne.jp".
■ Confirm Mail Address 【Mail Address
(Confirm Mail Address)】
You can confirm the current mail address.
■ Registering secret code 【Mail Address
(Other Settings) → Register a Secret Code】
When using a mail address of format "mobile
phone number@docomo.ne.jp", you can register
4-digit secret code in addition to the mail address.
Because mails with no secret code attached are
not received, you can avoid receiving
unnecessary i-mode messages.
■ Resetting mail address 【Mail Address (Other
Settings) → Reset Mail Address】
You can set your mail address to "mobile phone
number@docomo.ne.jp".
■ Spam Mail Prevention
You can restrict reception of messages by setting
mail reception/rejection in one of the procedures
given below.
a Reject/Receive Mail Settings 【Receiving Mail (Spam
Mail Prevention) → Reject/Receive Mail Settings】
• You can receive mails from one of carriers selected
from au, Vodafone, DoCoMo, TU-KA and
WILLCOM.
• You can receive mails from the specified domain
address of those sent from the carriers other than
the above.
(You can reject mail pretending to use a mobile
phone or PHS domain from the Internet.)
b SMS Rejection Settings 【Receiving Mail (Spam Mail
Prevention) → SMS Rejection Settings】
• You can restrict incoming SMS by selecting one
from "Reject All SMS", "Reject Anonymous SMS",
"Reject International SMS", and "Reject Anonymous
and International SMS". You can also view the
current settings.
c Restricting reception of mails from mass i-mode mail
senders 【Receiving Mail (Other Settings)→ Reject
Mass i-mode Mail Senders】
• You reject 201st and subsequent i-mode mails sent
from one i-mode handset (including mova handset)
a day. "Reject" is set by default, so you do not have
to change the settings to reject messages sent from
mass mail senders.
d Reject Unsolicited Ad Mail 【Receiving Mail (Other
Settings)→ Reject Unsolicited Ad Mail】
• You reject reception of mails with "Reject
Unsolicited Ad Mail" description added to a mail
subject which are sent unilaterally for advertisement
and/or promotion without agreement of the receiver.
"Reject" is set by default, so you do not have to
change the settings to reject such messages.
(Senders are obligated by law to give description
Unsolicited Ad Mail (6 full-pitch characters) to the
beginning of the mail subject field.
■ Limiting mail size [Receiving Mail (Limit Mail
Size)]
You can limit i-mode mails to be received with the
predetermined size.
■ Confirm Settings [Receiving Mail (Confirm
Settings)]
You can check the current settings of mail
reception/rejection and others.
■ Suspending mail function 【Suspend Mail】
You can suspend the mail function in the i-mode
Center when it is not necessary.
■ Number of characters that can be sent/
received
The number of characters that can be sent/
received in i-mode mail is as listed below.
Full-pitch characters
Items
Subject 15 characters 30 characters
Destination
Text 5000 characters 10000 characters
*: The number of characters that can be sent/received will be
reduced when a file such as melody, image, i-motion is
attached or the text is decorated.
• Up to 5000 full-pitch characters (10000 bytes) can be
sent/received in i-mode mail text, but the number of
characters that can be sent/received is reduced
depending on the data size of an attached file.
• When i-mode mail text exceeds the number of
characters that can be received, "/" or "//" is inserted in
the end of the text and the excessive part is
automatically deleted.
• When sending i-mode mail to a mova handset, the text
can contain up to 2000 full-pitch characters. In addition,
i-shot or i-motion mail is sent as a mail containing URL
and other attachment files are deleted.
• When the number of characters in a subject exceeds the
allowable limit for reception, excessive characters are
deleted.
• Do not use half-pitch katakana or pictographs except in
mails sent or received between
i-mode handsets (including mova handsets). Such
characters, if any, used for other terminals may not be
displayed correctly on the receiver side.
(kanji characters,
hiragana characters,
pictographs, etc.)
−
Hal-pitch characters
(alphabetic
characters,
numerals, katakana
characters, etc.)
50 characters
Mail
XXXXX
169
When i-mode Mail Cannot Be Received
i-mode mail delivered to i-mode Center will be
immediately sent to your i-mode handset. Note
that, however, when your i-mode handset is
turned off or out of the service area, the i-mode
mail is stored in i-mode Center. i-mode mail
stored in i-mode Center is resent up to 3 times
with a predetermined interval. In addition,
Receive Option can also be used to select and
receive i-mode mail stored in i-mode Center.
• The maximum number of i-mode mails and storage period
in i-mode Center are as listed below.
Maximum number
of mails stored
i-mode mails 207 to 1000 mails 720 hours
• Expired i-mode mails are automatically deleted.
• The maximum number of stored mail varies depending on
the i-mode mail data sizes. When the maximum number of
stored mails is exceeded, $★$ appears on the i-mode
handset. At this time, i-mode Center does not receive an
i-mode mail and returns it to the sender with an error
message. Note that with Receive Option "ON", $★$ does
not appear even when the maximum number of stored
mails is exceeded.
• You can receive i-mode mails stored in i-mode Center by
Mail
XXXXX
"Check new message" or "Receive Option" settings. In
addition, when a new i-mode mail is delivered, you can
receive it together with other i-mode mails and Message R/
F stored.
• When i-mode mail stored in i-mode Center is received, it is
deleted from i-mode Center.
• i-mode message with an excessive size may not be
accepted by i-mode Center.
Maximum
storage period
■ i-shot
You can send/receive a still image shot with a
terminal with Camera function to/from i-mode
handsets (including mova handsets), PCs or
mobile phones of other carriers. It is sent to the
receiver as a mail of attachment file format or that
containing URL (or icon) for image viewing with
an image storage period described. When URL is
sent, the image can be acquired by selecting the
URL.
A mail text sent to an i-mode handset of mova
service can contain up to 184 full-pitch characters
(369 bytes). When 2 or more files are attached,
they are deleted and only the mail text is sent.
Sending →P175 Receiving →P176
i-mode handset (FOMA)
Send a still
image using
i-shot
i-mode Center
PC, etc.
Internet
Send an image as an
attachment
Attached image, or mail
a
with the URL of the
attached image, or mail
with the icon (URL) of the
attached image
Other Convenient Functions
■ File attached mail
Melody attached mail
You can send/receive a melody file downloaded
from a site or Web site through mail attachment.
Note that, however, a melody file whose mail
attachment or output from FOMA handset is
prohibited cannot be sent.
Sending →P175 Receiving →P176
Image attached mail
You can send/receive a still image file
downloaded from a site or Web site through
i-mode mail attachment. Note that, however, a
still image file whose mail attachment or output
from FOMA handset is prohibited cannot be sent.
Sending →P175 Receiving →P176
170
i-shot Center
Select the URL in mail
b
(Web To function)*
*: When a mail containing URL of an attached image is
received
• The image is stored in i-shot Center a maximum 10
days and automatically deleted after expiration.
• i-mode handset can send a still image of up to 500K
bytes. When a message attached with an image
exceeding 20K bytes is sent to an i-mode handset, it
acquires an image with its size automatically reduced.
i-mode handset (FOMA)
i-mode handset (mova)
Image data*
c
i-motion Mail
You can send/receive videos shot with an
i-motion mail compatible handset or those
acquired from sites to/from i-motion mail
compatible handsets, PCs or mobile phones of
other carriers. Note that, however, a video file
cannot be sent if its mail attachment or output
from FOMA handset is prohibited cannot be
sent.
Sending →P172 Receiving →P178
■ Service scheme
• A video file attached to i-motion mail is sent to and
stored in i-motion mail Center.
If it is for a PC, etc., it is directly sent as an attachment
file. When it is received by an i-motion mail compatible
handset, a video can be acquired by selecting URL
indicated in the message text.
• When a video file attached to i-motion mail is sent to a
handset incompatible with i-motion mail, it is received
as a mail containing URL with i-motion converted to
continuous still images. The receiver can acquire the
continuous images by selecting the indicated URL.
i-motion mail FOMA
handset
Send as i-mode
mail
i-mode Center
i-motion Mail
Center
Select the URL
b
in mail (Web To
function)
Attached image or sequential still image data
• Video is stored in i-motion mail Center for up to 10 days
• An i-motion compatible handset can receive video of a
c
and automatically deleted after expiration.
maximum 500K bytes. The size of the received video is
automatically converted so that it matches the screen
of the i-motion mail compatible handset.
PC, etc.
Internet
Send an image as an
attachment
Mail with the URL of the
a
attached video i-shot
Center
i-motion mail FOMA
handset
Non- i-motion mail
handset
■ Deco-mail
You can create and send or receive enjoyable
i-mode mail edited in a decorative manner such
as changing the font size and/or background
color or pasting an image in the text. Note that, a
decorated mail received from a PC may not
appear exactly in the same way as on the PC,
because some decorations are not available on
i-mode handsets. When a Deco-mail is sent to an
incompatible handset, it is received as a mail
containing URL. The receiver can view the Decomail by selecting the indicated URL.
Editing/Sending →P174
• Applicable models: Available on Deco-mail compatible
handsets. For details, refer to "i-mode User's Manual".
■ Simultaneous mail sending
Same i-mode mail can be sent to multiple (up to
5) addresses at a time. →P173
• The communication fee is the same as that for sending
one i-mode mail. Note that the communication fee will
increase for the information size of added destinations.
■ CC or BCC sending/receiving
Similarly to PC, TO, CC and/or BCC can be
selected as destinations. Note that mail with no
TO destinations cannot be sent. →P173
■ Chat mail
Mail can be exchanged in a similar manners as
chatting with multiple parties. →P186
• The communication fee for exchanging chat mail with
multiple parties is the same as that for simultaneous
mail sending.
■ i-appli attached mail
You can activate i-appli from URL (link) pasted to
received i-mode mail. →P157
SMS (Short Message)
You can send/receive text messages using only
the mobile phone numbers without subscription
to i-mode.
Sending →P187 Receiving →P188 Checking
→P189
■ SMS (Short Message) destination
SMS destination is "subscribed mobile phone
number".
• For destinations used for sending/receiving SMS to/
from overseas carriers other then DoCoMo, see
DoCoMo's web site.
■ Number of characters that can be sent/
received
The number of characters that can be sent/
received in SMS is as listed below.
Destination 21 characters (including "+")
SMS text entry
settings
Full-pitch character
entry
(70 characters)
■ When SMS (Short Message) cannot be
received
SMS delivered to SMS Center will be immediately
sent to your FOMA handset. Note that, however,
when your FOMA handset is OFF or out of the
service area, the SMS is stored in SMS Center.
• The maximum storage period of SMS in SMS Center is
72 hours. The sender can specify the storage period.
→P184
• SMS expired is automatically deleted.
• SMS stored in SMS Center can be received by SMS
inquiry. →P189
Half-pitch
alphanumeric entry
(160 characters)
Mail
XXXXX
Continued on the next page
171
• When SMS stored in SMS Center is received, it is
deleted from SMS Center.
Mail Menu
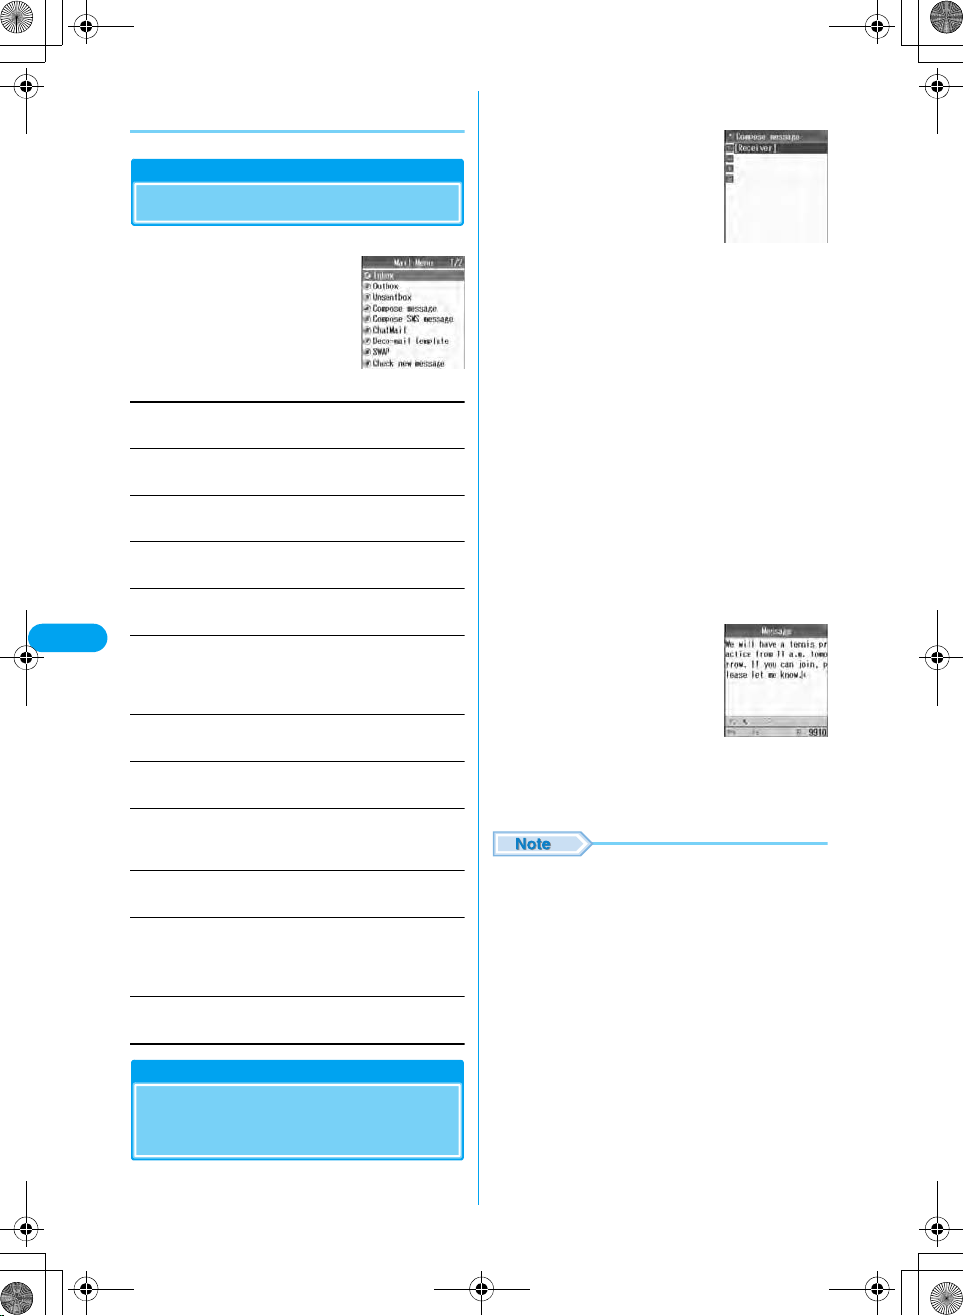
Displaying Mail Menu
Mail Menu screen (P172) y "Compose
a
message"
my Perform the following operations
a
Mail Menu screen
Inbox
Display an Inbox list screen. →P178
Outbox
Display an Outbox list screen. →P179
Unsentbox
Display an Unsentbox list screen. →P179
Compose message
Create a new i -mode mail. →P172
Mail
Compose SMS message
Create new SMS (Short Message). →P187
ChatMail
XXXXX
Display chat mail screen. →P186
• When you use chat mail for the first time, the member setup
screen appears. →P186
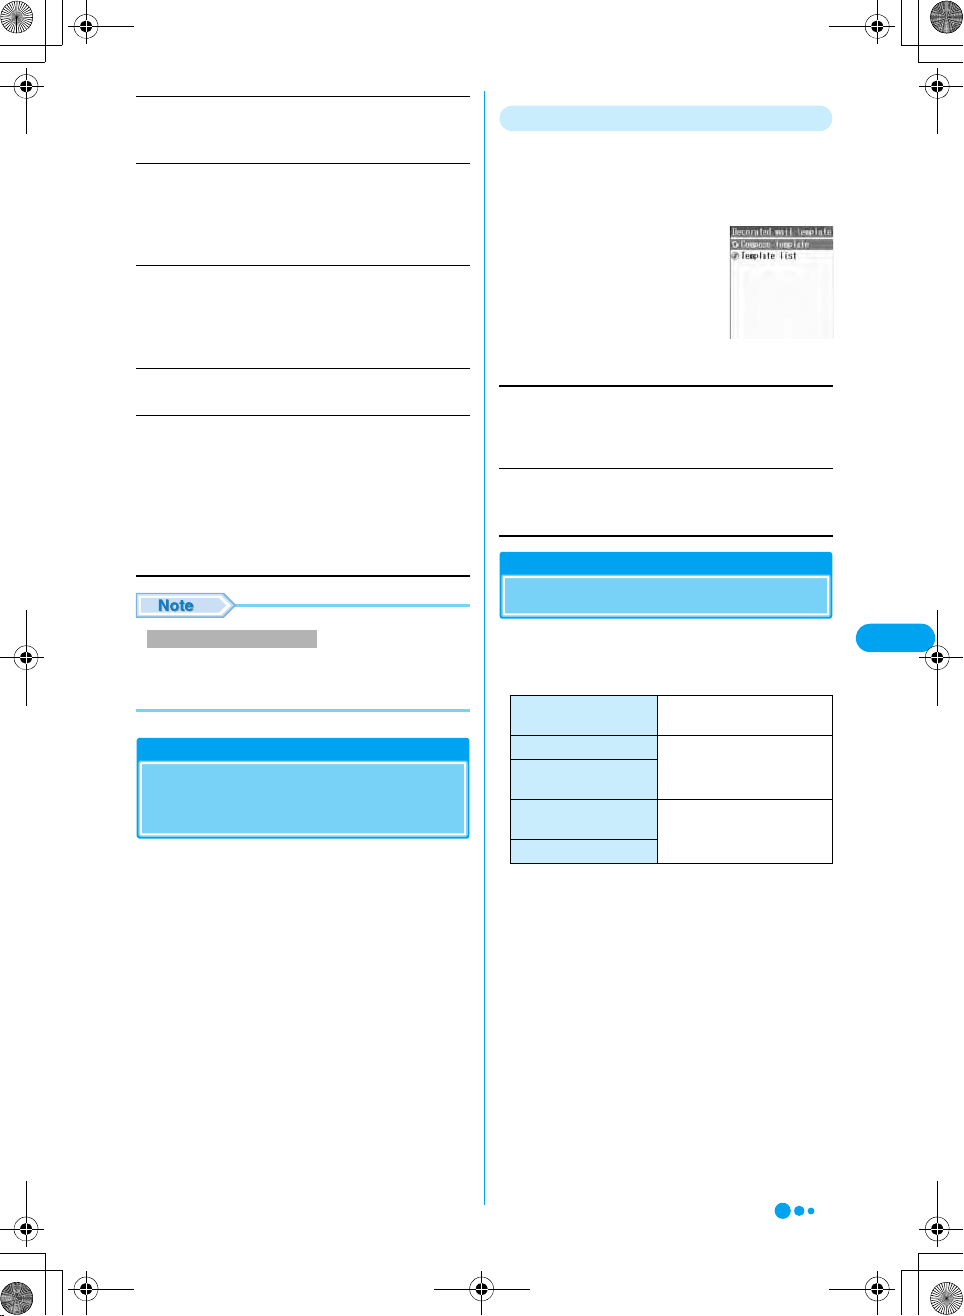
Deco-mail template
Display Decorated mail template screen. →P175
Swap
Call up another function from mail menu. →P226
Check new message
Receive i-mode mail stored in i-mode Center by i-mode check.
→P177
Check SMS
Receive SMS stored in SMS Center by SMS check. →P189
Receive option
You can check subjects of i-mode mails stored in i-mode Center
and select ones to be received or del eted without reception from
the i-mode Center. →P176
Message setting
Set the mail function. →P184
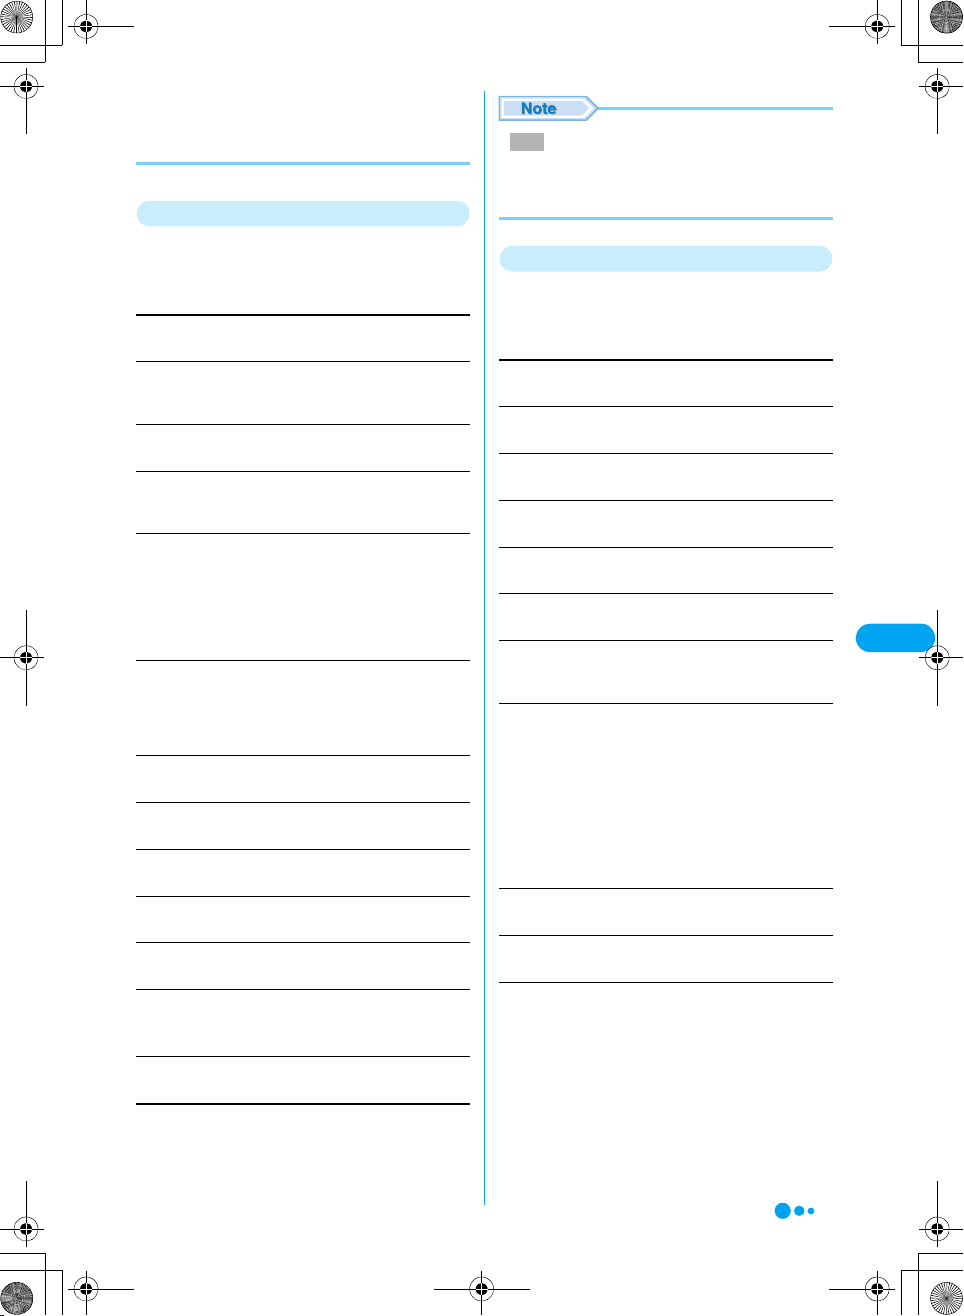
Creating/sending i-mode mail
Creating and Sending
i-mode Mail
Compose
message screen
Select the $★$ (Receiver) field y c y
b
Enter the receiver
• Enter up to 50 half-pitch characters.
• After the address is entered, a new $★$ (Receiver) field
is added automatically allowing you to send more than
1 recipient.
Up to 5 addresses can be entered.
• You can select and enter an address from the
Phonebook or call logs. Press h [Function]. →P173
Select the $★$ (Subject) field ycy
c
Enter subject yc
• Up to 15 full-pitch or 30 half-pitch characters can be
entered.
Select the $★$ (Message) field ycy
d
Enter text yc
• Up to 5000 full-pitch or 10000
half-pitch characters can be
entered.
• To decorate mail →P174
Message entry
screen
i [Send]
e
• Characters may not be sent correctly to the receiver
depending on the signal wave conditions.
• Do not use half-pitch katakana and pictographs except
for mail exchanged between i-mode handsets. These
characters may not be displayed correctly.
• The secret code is added automatically when the mail
whose address is set with the secret code is sent.
However, the address of the sent mail does not display
the secret code.
• If there is not enough free space, or if the maximum
number of mail to be saved is exceeded, i-mode mail
cannot be created. Delete unnecessary i-mode mail or
SMS from folders in the Outbox. →P180
• Even if i-mode mail is sent successfully, an error
message indicating the mail could not be sent may
appear depending on signal conditions.
• To send with attached file → "Attaching a File" (P175)
172
• If the number of sent mail saved on the FOMA handset
exceeds the maximum allowed, the oldest sent mail will
be overwritten first. (Checking the specifications).
However, protected mail will not be overwritten.
Function Menu on Compose message Screen
Compose message screen (P172) yh
a
[Function] y Perform the following
operations
Send
Send mail.
Save
Save mail being created or edited in Unsentbox. Press $★$
[Yes].
Select Template
Read a template to create Deco-mail. Press h [Yes].
Change to To
The addresses of recipients. The mail addresses entered in the
To fields will be shown to other recipients.
Change Cc
The addresses of carbon copy recipients. You can specify
additional addresses to send a copy of the same mail to other
recipients in addition to the direct recipients. The mail addresses
entered in the Cc field will be shown to other recipients.
• The mail address may not be displayed depending on the
recipient's handset, device or mail software.
Change to Bcc
The addresses of blind carbon copy recipients. You can specify
addresses of people to receive copies but whose identity will not
be shown to other recipients. The mail addresses entered in the
Bcc field will not be shown to other recipients.
Delete Receiver
Delete a selected destination. Press $★$ [Yes].
Quote Phonebook
Select a destination from a phone book.
Quote Received Address
Select a destination from received mail history.
Quote Sent Address
Select a destination from sent mail history.
Quote Sending Group
Select a destination from a sent group.
Quote Profile
Display a profile screen. A destination from the profile.
y Enter the Security Code
Direct Input
Directly enter a destination.
Save
• Mail which $★$ (Receiver), $★$ (Subject) or $★$
(Message) is not entered or with no attachment cannot
be saved.
Function Menu on Message Entry Screen
Message entry screen (P172) y Select
a
"Message" ycyh [Function] y
Perform the following operations
Decorate mail
Display a palette. →P174
Reset decoration
Cancel all of decoration.
Template
Use a template to create Deco-mail.
Copy
Select and copy characters in text. →P265
Cut
Select and cut characters in text. →P265
Paste
Paste copied or cut characters to text. →P265
Undo
Restore character entry, deletion, paste, decoration, etc. to the
previous state.
Import
Quote characters from signature, phone book or local phone
information (profile) and enter them to text.
Signature
Phonebook
Owner Information
: Select and enter a signature.
: Select mail address and/or phone
number from phone book and enter them
to text.
: Select mail address and/or phone
number from local phone information
(profile) and enter them to text.
Common phrases
Select and enter a fixed phrase to text.
Entry Mode
Switch the entry mode. →P260
Entry Setup
Set conversion prediction function and character entry.
Japanese Prediction
English setting
Cursor timeout
Pitch mode
Default
: Set "J Matching" and "J Next Word".
→P263
: Set the English entry mode ,"E
Matching" and "E Next Word". →P263
: Set the automatic cursor function.
→P263
: Switch between full-/half-pitch mode.
→P263
: Change default character entry mode.
→P263
Continued on the next page
Mail
XXXXX
173
English functions
Set English character entry function. "Turn on"/"Turn off"
(Checking the specifications)
Preview
Display preview screen of text being edited.
• h [OK]: Display text edit screen.
• i [Save]: Save as Deco-mail template.
Deco-mail
Creating and Sending Deco-mail
You can create your own designer mail by
adding decorations such as changing font size,
font color or background color, or inserting
images when you edit i-mode mail messages.
Perform Steps 1 to 3 in "Creating and
a
Sending i-mode Mail" (P172)
Select the $★$ (Message) field y c y
b
h [Function] y "Decorate mail"
• Decorating operations →P174
Mail
XXXXX
i [Close]
c
■ To view set Deco-mail
h [Function] y Select "Preview"
■ Cancel the set Decoration
h [Function] y Select "Reset decorate"
cyi [Send]
d
• When Deco-mail is sent to or received from a handset
other than Deco-mail compatible i-mode handsets,
decorations may not be displayed correctly.
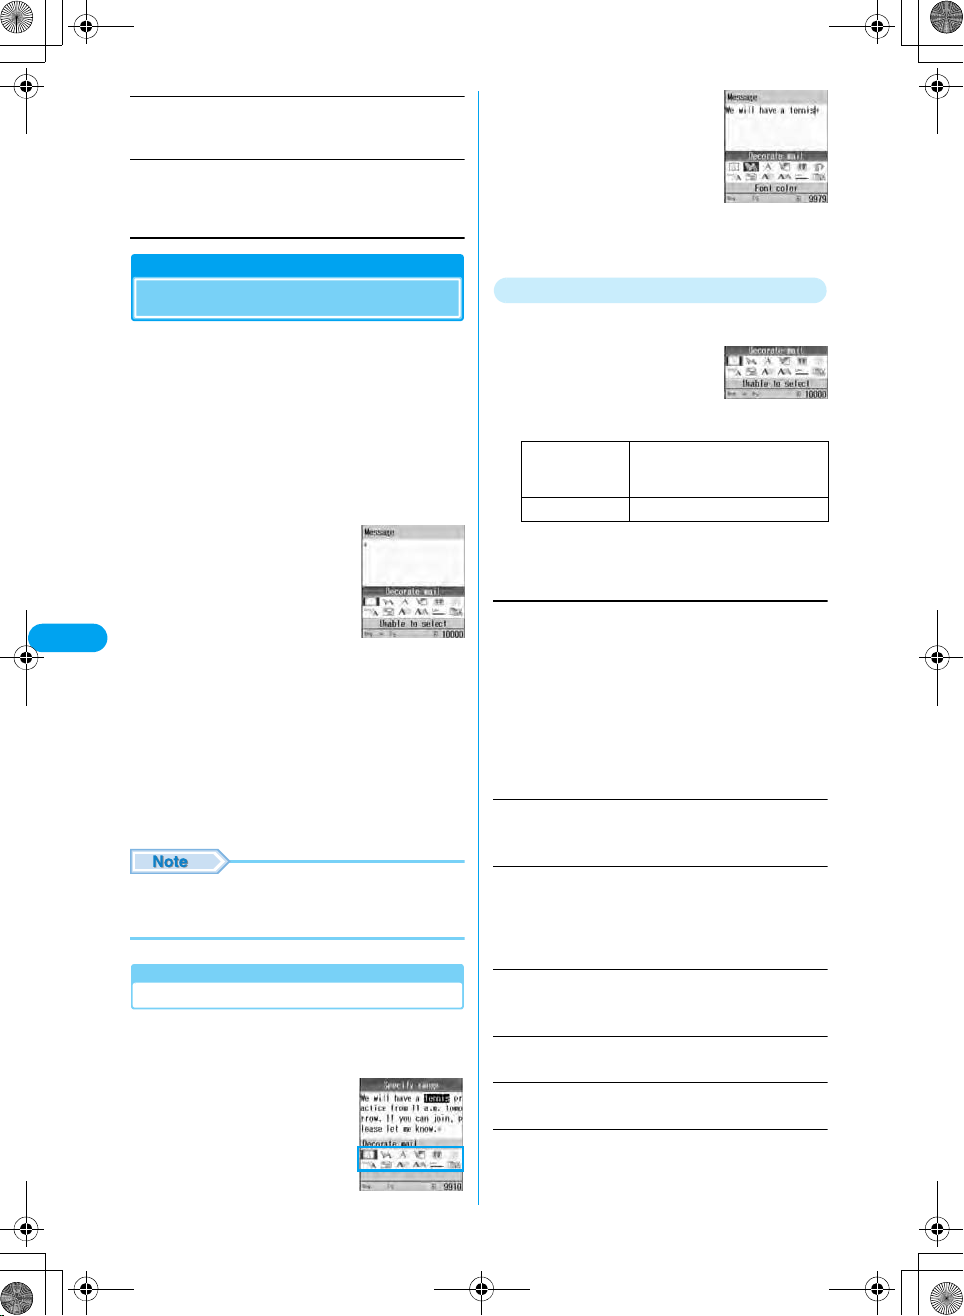
Decorating Operations
Decorate characters using the palette.
You can decorate entered characters or select
decoration before entering characters.
■ Enter characters then
decorate them
Select "tennis" from the
message and decorate the
word.
Palette display
screen
■ Select decoration then
enter characters
Select decoration from the
palette and apply it to
characters to be entered after
the cursor.
In the screen on the right, the
characters to be entered after
"a tennis" will be decorated.
Palette
The following table describes operations for
decorating mail using the palette:
Palette display
screen
h [Message]/
[Decorate]
i [Close] Close the palette.
*: Unable to select" is displayed next to any decoration
that cannot be set.
Select decoration y c
a
$★$ (Edit decoration)
Specify the range of text to decorate.
yMove the cursor to the front of the character to be
selectedyh【Start】
• i [Select All]: You can select all sentences.
yMove the cursor to the back of the character to be
selectedyh [End]
• i [Return]: Returns to the previous operation. (Checking
the specifications)
• C: You can cancel the selection. (Checking the
specifications)
$★$ (Font color)
Set a color of characters.
y Select color y c y Enter characters
$★$ (Blink)
Make characters flashing.
y Move the cursor to the starting point of flashing y c
[Begin blink]
y Enter characters y c [End blink]
$★$ (Background color)
Set a background color of mail text.
y Select color y c
$★$ (Insert image)
Insert an image saved in "My Pictures" to mail text.
$★$ (Undo)
Restores a set decoration to previous setting.
$★$ (Font size)
Set a font size.
y Select from "Large"/"Standard"/"Small" y c
Each press of the key toggles
between message entry and mail
decoration.
174
$★$ (Word alignment)
Set a position to enter characters or insert an image.
y Select from "Left"/"Center"/"Right" y c
$★$ (Ticker)
Set a ticker to the text.
y Move the cursor to the starting point of the ticker y c
[Begin ticker]
y Enter characters y c [End ticker]
$★$ (Swing)
Set swing to text.
y Move the cursor to the starting point of the swing y c
[Begin swing]
y Enter characters y c [End swing]
$★$ (Insert line)
Insert a line in mail text.
$★$ (Copy/Cut/Paste)(Checking the
specifications)
Select characters, images or lines and copy, cut or paste them.
■ Select characters to be copied or cut
See "$★$ (Edit decoration)".
■Pasting characters
y Select copied/cut characters y $★$
y Select inserting position y $★$
Creating/Editing a Template
Create original templates or edit saved
templates.
The Mail Menu screen (P172) y "Deco-
a
mail template"
Decorated mail
template screen
Compose template
Create a new template.
y h [Function] y "Decorate"
• Basic decorating operations →P174
Template list
Edit templates saved in the "Databox".
y Select decoration y c y (Checking the specifications)
File attachment
Attaching a File
Mail
Edit Decoration/Copy/Cut
• When characters with "Ticker" or "Swing" set are
selected and "Copy" or "Cut" is carried out, the settings
for "Ticker" or "Swing" are not affected.
Template
Creating Deco-mail Using
Template
Templates are form data for Deco-mail with
decorations such as the font size and image
insertion already set. In addition to templates
preinstalled, you can use those downloaded
from sites.
• Templates preinstalled →P288
Message entry screen (P172) yh
a
[Function] y "Select template"
Select a template yc
b
The selected template is inserted in the message
text.
You can send i-mode mail attached with images
or melodies.
■ File that can be attached
File type
Melody
Image of 10000 bytes or
smaller (JPEG or GIF)
Image over 10000 bytes
(JPEG)
Video/i-motion Movie
*1: The total data size including melodies, images and
text of these 10 files should not exceed 5000 full-pitch
characters (10000 bytes). The number of files that can
be attached differ depending on their data sizes.
*2: One of image or video/i-motion of up to ●● Kbytes
can be attached. It is counted as one, besides
melodies and images of 10000 bytes or less.
• A file prohibited to be attached to mail or to be output
from FOMA handset cannot be attached.
• When a JPEG format image or i-motion exceeding
10000 bytes is attached, the number of characters that
can be entered to text is reduced by 100 full-pitch
characters (200 half-pitch characters).
When decoration is made, it is reduced by 200 full-pitch
characters (400 half-pitch characters).
• Up to 11 files can be attached to mail. It is reduced
depending on the file sizes.
Maximum number of attached
files
Total of 10*
One of either*
1
2
Continued on the next page
XXXXX
175
Compose message screen (P172) y
a
$★$ (Attach) ycy Perform the
following operations
Attach image
Select a file from those saved in "My Pictures".
Attach i-motion
Select a file from those saved in "i-motion".
Attach melody
Select a file from those saved in "Melody".
Snap photo
Shoot and attach a still image.
y Shoot a still image y h [Insert]
i [Discard]: Re-shoot a still image.
Shoot movie
Shoot and attach a video.
y Shoot a video y h [Insert]
i [Discard]: Re-shoot a video.
microSD
Select a file from those saved in microSD memory card.
Deleting/Changing an Attached File
Mail
You can delete, change, replay or confirm
information of an attached file.
Select an attached file yc
a
XXXXX
Play/Display : Replay/display a selected file.
Change : Change a selected file.
File properties
: Display information about a selected file.
Delete : Delete a selected file. Press h [Yes].
Receiving
message screen
"Mail"
b
Display an Inbox list screen.
• When new i-mode mail is delivered, other i-mode mail
and/or Message R/F stored in i-mode Center are
received at the same time.
• i-mode mail allows to receive melodies and/or still
images as attached files. Incompatible attached files are
automatically deleted in i-mode Center.
• When Receive Option for i-mode mail has been set, sent
i-mode mail is stored in i-mode Center. You can confirm
a subject, etc. of i-mode mail stored in Ce nter and select
and receive it. →P176
• When received mails exceed the limit, they are
overwritten from the oldest ones. Note that unread or
protected mails are not overwritten.
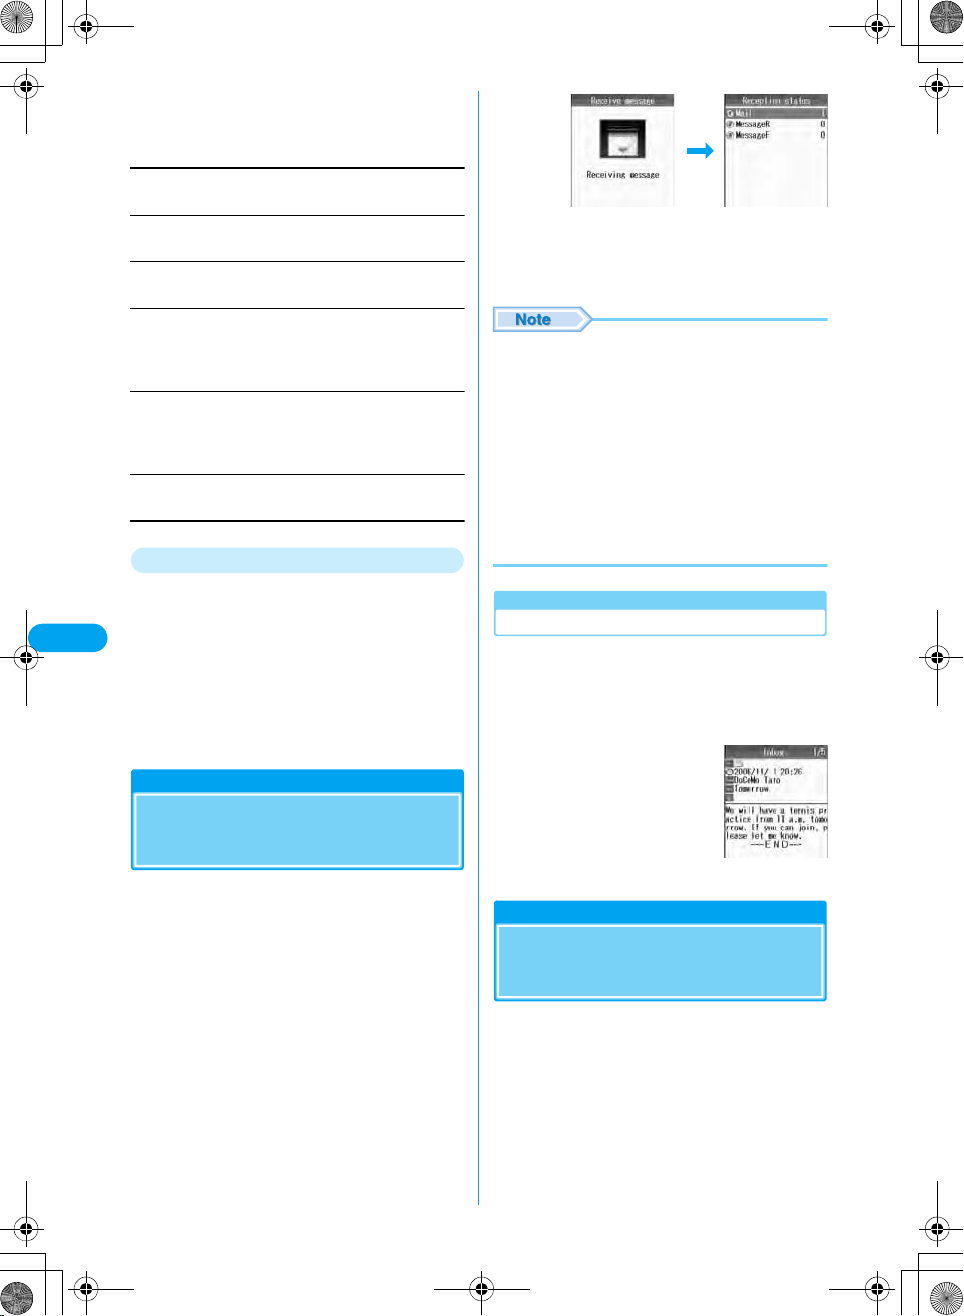
Message Reception
status screen
Displaying New i-mode Mail Received
Message Reception status screen (P176)
a
y "Mail" y Select a folder y c
Select mail to be displayed yh
b
[Select]
Automatic reception of mail
When i-mode Mail is
Received
When FOMA handset is in a service area, i-mode
mail is automatically sent from i-mode Center.
When i-mode mail is received, $★$ goes
a
flashing and "Receiving messages・・・"
appears.
When reception has completed, the reception
result appears on the screen.
• Returns to the Standby screen if no operation is
performed for 30 seconds.
* You need to obtain a microSD memory card separately to use the functions related to the microSD memory card. →P221
176
Receive option
Selecting and Receiving
i-mode Mail
You can confirm a subject, etc. of i-mode mail
stored in i-mode Center and select mail to be
received or delete it in i-mode Center before
reception.
• To use Receive Option, set "Receive Option" to "On" in
advance. Note that when it is "On", i-mode mail cannot be
automatically received. →P184
Inbox detail screen
Mail Menu screen (P172) y "Receive
a
option"
Subsequently, perform the operations in "i-mode
User's Manual".
• Receive option can also be carried out from "iMenu".
Select "iMenu"→"English"→"Menu List"→"Receive
option".
• Even with Receive option set to "On", all mails are
received when "Check new message" is used. When
you do not want to receive mails, delete "Mail" from the
inquiry items. →P184
■ Not quoting received mail text
Select "Reply".
• You can reply to mail also by pressing i [Reply]
on Inbox detail screen.
• When the mail has been sent to multiple receivers
simultaneously, you can select "Sender" or "All".
Entering subject and text yc
b
• "Re:" is added to a subject.
• When replying by quoting, ">" is added to the beginning
of quoted text.
• Editing subject and text → "Creating and sending
i-mode mail" (P172).
i [Send]
c
Check new message
Checking for i-mode Mails
i-mode mails, if any, that could not be received
because FOMA handset was out of the service
area or for other reasons are stored in i-mode
Center. You can receive stored i-mode mails by
checking to i-mode Center.
• You cannot inquire from out of the service area.
Mail Menu screen (P172) y"Check new
a
message"
When check has completed, the mail reception
result appears on the screen.
• When new i-mode mail is delivered, other i-mode mail
and/or Message R/F stored in i-mode Center are
received at the same time.
• When received mails exceed the limit, they are
overwritten from the oldest ones. Note that unread or
protected mails are not overwritten.
Replying i-mode Mail
Replying to i-mode Mail
You can reply to i-mode mail sender. Replying
can be made by entering new text or quoting the
text of received i-mode mail.
Received mail list screen (P179)/Inbox
a
detail screen (P179) yh [Function]
■ Replying by quoting received mail text
Select "Reply with quotation".
• When the mail has been sent to multiple receivers
simultaneously, you can select "Sender" or "All".
• When the storage capacity of Outbox has been
exceeded, replying cannot be made. Delete mails saved
in Outbox before replying.
• You cannot send i-mode mail in self mode.
• The reply to received Deco-mail with quotation has
original decoration and images entered in the message
text. However, restricted images and highlighted URLs
will not be quoted.
Forwarding i-mode Mail
Forwarding i-mode Mail to
Another Destination
You can forward received i-mode mail to another
party.
Received mail list screen (P179)/Inbox
a
detail screen (P179) yh [Function] y
"Forward"
Enter destination yc
b
• "Fw:" is added to a subject.
• Editing destination and text → "Creating and sending
i-mode mail (P172)
i [Send]
c
• When a file whose mail attachment or output from FOMA
handset is prohibited has been attached or pasted to
i-mode mail forwarded, such file and information are
deleted.
• When the storage capacity of Outbox has been
exceeded, forwarding cannot be made. Delete mails
saved in Outbox before forwarding.
• The forwarded Deco-mail has original decoration and
images entered in the message text. However, restricted
images and highlighted URLs will not be forwarded.
Mail
XXXXX
177
Receiving Image Mail
Registering Mail Address
to Phonebook
You can register sender's mail address, phone
number and URL contained in text of received
mail to phonebook.
Inbox detail screen (P179) y Select mail
a
address, phone number and/or URL to
be registered in phonebook yh
[Function] y "Save in Phonebook"
Register to phonebook
b
Go to Step 2 in "Saving Contacts to the
Phonebook from Received Calls or Dialed Calls"
(P94).
Save Melody
Replaying/Saving Melody
from i-mode Mail
Mail
Playing Melody
XXXXX
Inbox detail screen (P179) y Select
a
attached or pasted melody yc
Saving Melody
Inbox detail screen (P179) yh
a
[Function] y "Check attachment"
List files attached to received
mail.
Select a melody file to be saved yi
b
[Save]
Screen to be
inserted
Attached file list
screen
Displaying/Saving Image of
Image Mail
Displaying an Image
Inbox detail screen (P179) y Select an
a
attached image yc
• An image larger than the display size is reduced for
display. Note that, however, an image that is too large
may not be displayed. (Checking the specifications)
Saving an Image
Inbox detail screen (P179) yh
a
[Function] y "Check attachment"
List files attached to received mail.
Select an image file to be saved yi
b
[Save]
Replaying/Saving i-motion
from i-motion Mail
Select URL contained in i-motion mail received,
acquire i-motion stored in i-motion mail Center
and save it.
Inbox Detail Screen (P179) y Select URL
a
ycy $★$ [Yes]
Acquisition of i-motion starts.
• When "i-motion auto playing setting" has been set to
"Auto replay", i-motion is automatically replayed after
acquisition.
"Save" y$★$ [Yes] (Checking the
b
specifications)
Outbox/Inbox/Unsentbox
178
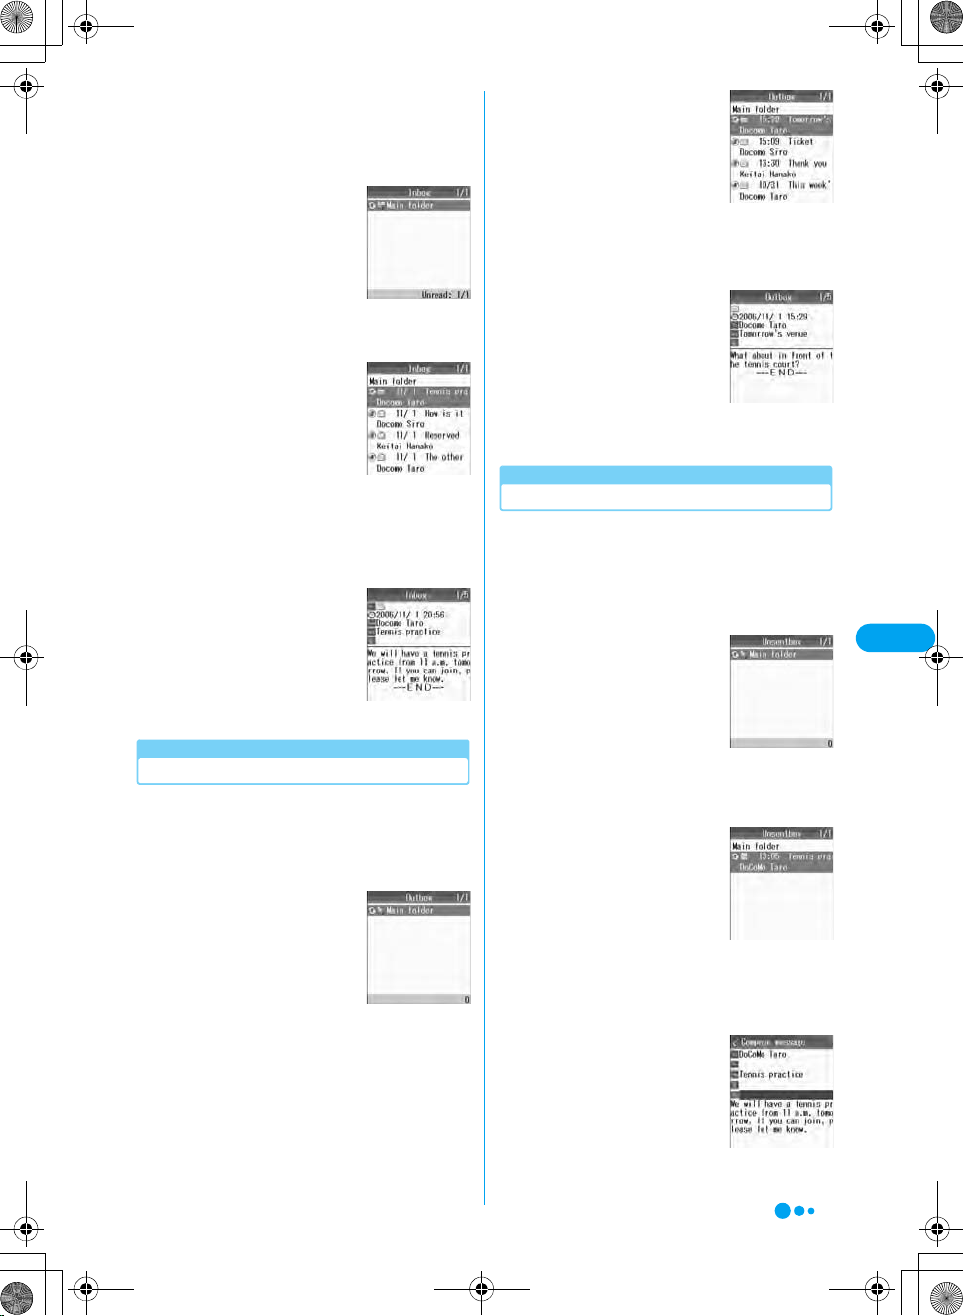
Displaying Mails in Outbox/
Inbox/Unsentbox
Displaying Mails in Inbox
Up to ●●● mail items including i-mode mails
and SMS can be saved.
• The number of items that can be saved varies depending
on their data sizes.
Mail Menu screen (P179) y "Inbox"
a
Inbox list screen
Select a folder yc
b
• s: Display the previous or next
page when there are 2 or more
pages.
• i [Sort]: Sort mail by
selecting keys such as received
date and time, subject or sender.
→P180
Select a mail yc
c
• j: Scroll the screen.
• s: Display the previous or next
mail.
• i [Reply]: Reply to the
sender and/or receivers of
simultaneous mail sending.
→P172, P187
Received mail list
screen
Inbox detail screen
• s: Display the previous or next
page when there are 2 or more
pages.
• i [Sort by]: Sort mail by
selecting keys such as sent date
and time, subject or sender.
→P180
Select mail yc
c
• j: Scroll the screen.
• s: Display the previous or next
mail.
• i [Edit]: Display Compose
message or SMS creation
screen. →P172, P187
Sent mail list screen
Sent mail detail
screen
Displaying Mails in Unsentbox
Mails created but not sent are saved. Up to ●●
mail items including i-mode mails and SMS can
be saved.
• The number of items that can be saved varies depending
on their data sizes.
Mail Menu screen (P172) y"Unsentbox"
a
Mail
XXXXX
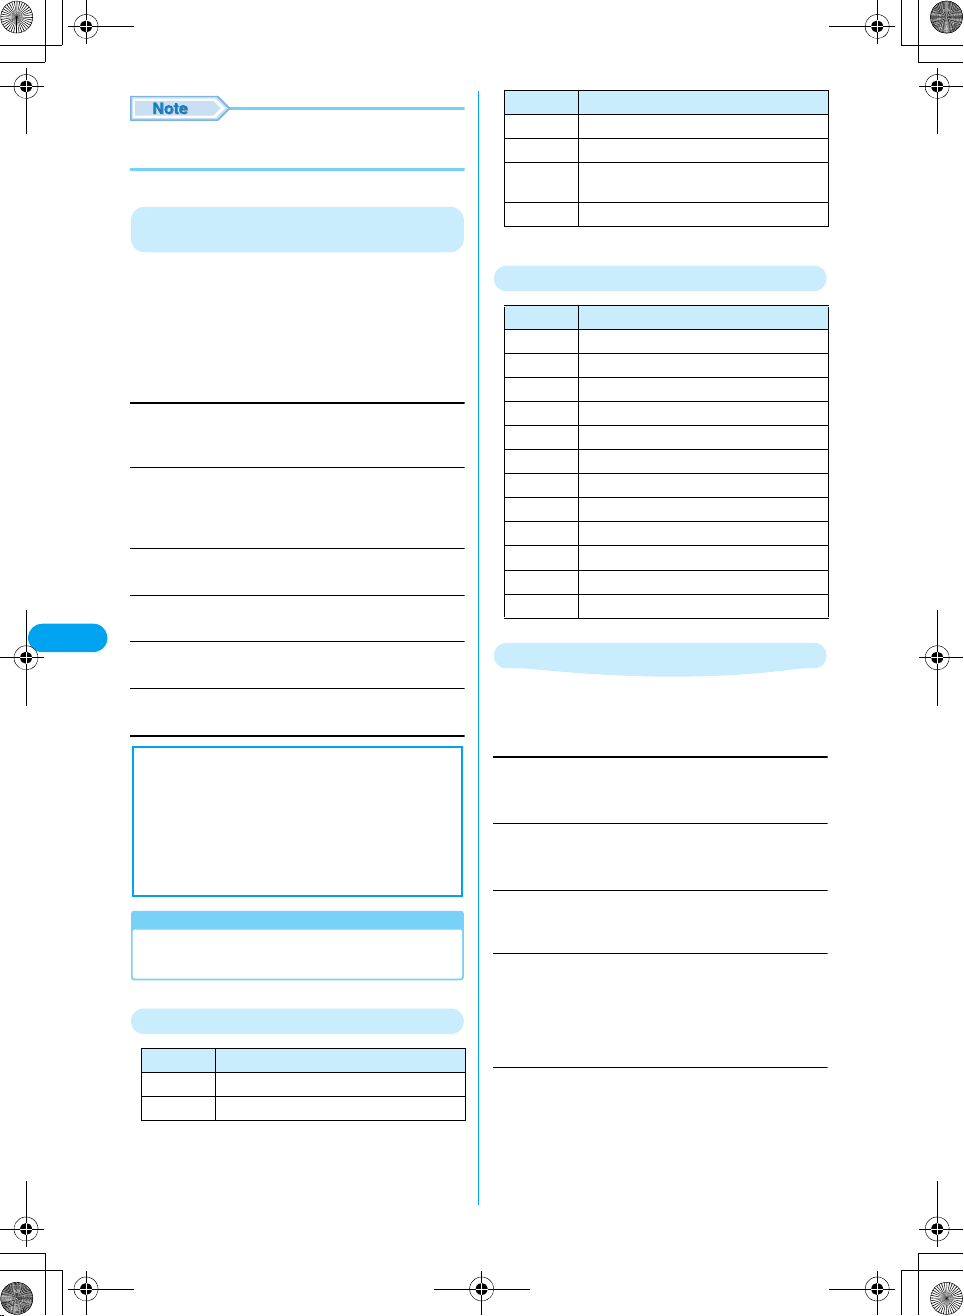
Displaying Outbox Mails
Up to ●●● mail items including i-mode mails
and SMS can be saved.
• The number of items that can be saved varies depending
on their data sizes.
Mail Menu screen (P172) y "Outbox"
a
Outbox list
screen
Select folder yc
b
Select folder yc
b
• s: Display the previous or next
page when there are 2 or more
pages.
• i [Sort]: Sort mail by
selecting keys such as saved
date and time, subject or sender.
→P180
Select mail yc
c
• j: Scroll the screen.
• s: Display the previous or next
mail.
• i [Edit]: Display Compose
message or SMS creation
screen. →P172, P187
Unsent mail list
Unsent mail detail
Continued on the next page
Unsentbox list
screen
screen
screen
179
• To display contents of a folder with mail security set,
enter the Security code.
Sorting Mail in Inbox/Outbox/Unsentbox List
Screen
Sort mail by specifying keys such as
chronological or reverse chronological order.
(Checking the specifications)
Inbox list screen (P179)/Outbox list
a
screen (P179)/Unsentbox list screen
(P179) y i [Sort]
Received date (new>old)/Sent date (new>old)/
Saved date (new>old)
Sort mail in chronological order of received, sent or saved date.
Received date (old>new)/Sent date (old>new)/
Saved date (old>new)
Sort mail in reverse chronological order of received, sent or
saved date.
Subject (ascending order)
Sort mail in ascending order of subject.
Mail
Subject (descending order)
Sort mail in descending order of subject.
XXXXX
Sender (ascending order)
Sort mail in ascending order of sender.
Sender (descending order)
Sort mail in descending order of sender.
■ Notice
Saved contents may be lost by failure, repair or
other handling of FOMA handset. DoCoMo is not
liable to such loss and recommends you to store
contents saved in FOMA handset to microSD
memory card. They can be stored in a PC, if
available, using data link software and FOMA
USB connection cable (optional).
Reading Box List/Mail List/Mail Detail
Screen
Icons on Inbox/Outbox/Unsentbox List Screen
Icons Description
$★$ Folder containing unread mails/SMS
$★$ Folder containing no unread mails/SMS
Icons Description
$★$ Folder with security set
$★$ Created folder containing unread mails/SMS
$★$ Created folder containing no unread mails/
$★$ Mail-linked i-appli folder
SMS
Icons on Received/Sent/Unsent Mail List Screen
Icons Description
$★$ Unread mail
$★$ Read mail
$★$ Unread SMS
$★$ Read SMS
$★$ Protected mail
$★$ Replied mail
$★$ Forwarded mail
$★$ Mail with acquired image attached
$★$
$★$ Mail with not acquired image attached
$★$ Mail with not acquired melody attached
$★$ SMS saved in UIM
Mail with acquired melody attached
Function Menu on Inbox/Outbox List Screen
Received mail list screen (P179)/Outbox
a
list screen (P179) yh [Function] y
Perform the following operations
Create folder
Create a folder.
y Enter folder name
Edit folder name
Edit a selected folder name.
y Enter folder name
Auto sort
Set conditions for automatically saving mails in specified
folders. →P185
Sort folders
Sort folders.
y Select a folder to be sorted yh [Select] y Select
location to move the folder yh [Define] yi
[Complete]
• i [Return]: Go back to the previous operation.
Set security/Release security
Set or release security to the selected folder. Setting security
requires the security code entry to view the contents of the
folder.
y Enter the Security Code
* You need to obtain a microSD memory card separately to use the functions related to the microSD memory card. →P221
180
Delete folder
Delete a selected folder.
Mail list
Display contents of a selected folder.
Delete All Messages
Delete all mail in Inbox/Outbox.
y Enter the Security Code
Send all entries
Send all received mails by Bluetooth. (Checking the
specifications)
Sort folders/Delete folder
• Folders registered by default cannot be sorted or
deleted.
Delete folder
• A folder containing protected mails cannot be deleted.
• When there is mail-linked i-appli, the folder for i-appli
cannot be deleted.
Delete All Messages
• Protected mails or SMS saved in UIM are not deleted.
For a folder with security set, a confirmation message
appears asking whether to delete it. Press h [Yes] to
delete the folder.
Function Menu on Received Mail List Screen
Received mail list screen (P179) y Select
a
mail yh [Function] y Perform the
following operations
Reply
Reply to mail. →P177
Reply w/quotation
Reply to received mail quoting its contents.
Forward
Forward mail. →P177
Search
Search for received mail under set conditions.
Search unread
Search read
Search protected
Search attached
Re-search*
Release search*
Protect/Release
Protect or release the selected mail.
Release
Release all
: Search for only unread mails.
: Search for only read mails.
: Search for only protected mails.
: Search for only mails with file attached.
: Search again.
: Cancel searching state.
: Release the selected mail.
: Release all mail.
Move to folder
Move a selected folder.
y Select a move destination yh [Select]yh [Yes]
Switch display
Select information to be displayed on received mail list screen.
y"Date/Subject/Sender"/"Date/Sender"/"Subject/Sender"
Check address
Display addresses of the sender and simultaneous receivers of
a selected mail.
• h [Detail]: Display detail screen of a selected address.
Create message
Save in Phonebook
Auto sort
Register sending group
Copy E-mail
Send
Send a selected mail via Infrared communication.
: Reply to a selected address/phone
number. →P177, P187
: Register a selected address/phone
number for phonebook.
→P178
: Set to automatically save a selected
address/phone number to a
specified folder under specified
conditions. →P185
: Register a selected address to a
send group. →P185
: Copy a selected address/phone
number.
UIM
Copy or move a selected SMS to UIM/FOMA phone.
Move to UIM
Copy to UIM
Move to Phone
Copy to Phone
: Move SMS to UIM. Press h [Yes].
: Copy SMS to UIM. Press h [Yes].
: Move SMS to the phone. Press h [Yes].
: Copy SMS to the phone. Press h [Yes].
Delete
Delete
Delete multiple
Delete all
Delete
• Protected mails cannot be deleted.
Protect
•Up to ●● mails can be protected.
: Delete a selected mail. Press h [Yes].
: Select and delete 2 or more mails. Select
mails to be deleted ycyi [Execute]y
Press $★$ [Yes].
: Delete all messages in the folder, or delete
all messages found using "Search". Enter
the Security Code y Press $★$ [Yes].
Function Menu on Inbox Detail Screen
Inbox Detail screen (P179) yh
a
[Function] y Perform the following
operations
Reply
Reply to mail. →P177
Continued on the next page
Mail
XXXXX
181
Reply w/quotation
Reply to received mail quoting its contents.
Forward
Forward a mail →P177
Protect/Release
Protect or release the displayed mail.
Scroll
Set a number of lines to be scrolled. →P184
Font size
Set a font size. →P184
Save to template
Save Deco-mail as a template. (Checking the specifications)
Move to folder
Move the displayed mail to another folder.
ySelect a move destination yh [Select] yh [Yes]
Check address
Display addresses of the sender and simultaneous receivers of
a displayed mail.
• h [Detail]: Display detail screen of a selected address.
Compose message
Save in Phonebook
Mail
Auto sort
XXXXX
Check image
Save images contained in the displayed mail. Select an image
then go to Step 2 in "Saving Images from a Site or Message"
(P155).
Check Attachment
List files attached to a displayed mail.
• i [Save]: Save the selected file.
Attached file list screen yh [Function]
Set up
File Properties
Delete
Send
Send a displayed mail via Infrared communication.
UIM
Copy or move a selected SMS to UIM/FOMA phone.
Move to UIM
Copy to UIM
Move to Phone
Copy to Phone
: Reply to a selected address/phone
number. →P177, P187
: Register a selected address/phone
number to phonebook. →P178
: Set to automatically save a selected
address/phone number to a specified
folder under specified conditions.
→P185
: Display a setup screen after saving a file.
(Checking the specifications)
: Display information of a selected file.
: Delete a selected file.
: Move SMS to UIM. Press h [Yes].
: Copy SMS to UIM. Press h [Yes].
: Move SMS to the phone. Press h [Yes].
: Copy SMS to the phone. Press h [Yes].
Delete
Delete a displayed mail.
Save in Phonebook
Register a selected mail address/phone number to phonebook.
→P178
View URL
Display URL of pasted to mail text. (Checking the specifications)
• h [Copy]: Copy URL.
Save to template
• A large-size still image file or melody file attached to
Deco-mail is deleted when saving the mail.
Delete
• Protected mails cannot be deleted.
Protect
•Up to ●● mails can be protected. (Checking the
specifications)
Function Menu on Sent Mail Detail Screen
Sent mail Detail screen (P179) y Select a
a
mail yh [Function] y Perform the
following operations
Edit
Edit and send a sent mail. →P172, P186
Search
Search sent mail under set conditions.
Search protected
Search attached
Re-search
Release search
Protect/Release
Protect or release the selected mail.
Release
Release all
Move to folder
Move a folder.
Move
Move multiple
Move all
Switch display
Select information to be displayed on sent mail list screen.
y"Date/Subj./Sender"/"Date/Sender"/"Subject/Sender"
: Search only protected mails.
: Search only mails with file attached.
: Search again.
: Cancel searching state.
: Release the selected mail.
: Release all mail.
: Move a selected folder. Select a move
destination yh [Select] y Press h
[Yes].
: Select and move 2 or more mails. Select mails
to be moved ycyi [Execute] y Select
$★$ [Yes].
: Delete all messages in the folder, or delete all
messages found using "Search". Enter the
Security Code y Press $★$ [Yes].
182
Check address
Display addresses of the sender and simultaneous receivers of
a selected mail.
• h [Detail]: Display detail screen of a selected address.
Compose message (Compose SMS)
: Reply to a selected address/phone
number. →P177, P187
Save in Phonebook
Auto sort
Register sending group
Copy E-mail・Copy phone No.
Send
Send a selected mail via Infrared communication.
UIM
Copy or move a selected SMS to UIM/FOMA phone.
Move to UIM
Copy to UIM
Move to Phone
Copy to Phone
: Register a selected address/phone
number to phonebook. →P178
: Set to automatically save a selected
address/phone number to a specified
folder under specified conditions.
→P185
: Register a selected address to a send
group. →P185
: Copy a selected address/phone
number.
: Move SMS to UIM. Press h [Yes].
: Copy SMS to UIM. Press h [Yes].
: Move SMS to the phone. Press h [Yes].
: Copy SMS to the phone. Press h [Yes].
Delete
Delete a sent mail.
Delete
Delete multiple
Delete all
Delete
• Protected mails cannot be deleted.
Protect
•Up to ●● mails can be protected. (Checking the
specifications)
: Delete a selected mail. Press h [Yes].
: Select and delete 2 or more mails. Select
mails to be deleted ycyi [Execute] y
Select $★$ [Yes].
: Delete all messages in the folder, or delete
all messages found using "Search". Enter
the Security Code y Press $★$ [Yes].
Function Menu on Sent Mail List Screen
Sent mail display screen (P179) yh
a
[Function] y Perform the following
operations
Copy
Copy contents of a displayed sent mail.
Address
: Copy a destination. When there are simultaneous
receiver addresses, copy destinations from sent
mail address confirmation screen.
Subject
: Copy a subject.
Message
: Select and copy contents of text. →P264
Protect/Release
Protect or release the displayed mail.
Scroll
Set a number of lines to be scrolled. →P184
Font size
Set a font size. →P184
Save to template
Save Deco-mail as a template. (Checking the specifications)
Move to folder
Move the displayed mail to another folder.
ySelect a move destination yh [Select] yh [Yes]
Check address
Display addresses of the sender and simultaneous receivers of
a displayed mail.
• h [Details]: Display detail screen of a selected address.
Compose message (Compose SMS)
: Send mail or SMS to a selected
address/phone number. →P177,
P187
Save in Phonebook
Auto sort
Register sending group
Copy E-mail・Copy phone No.
Check image
Save images contained in the displayed mail. Select an image
then go to Step 2 in "Saving Images from a Site or Message"
(P155).
Check Attachment
List files attached to a displayed mail.
• i [Save]: Save a selected file.
Attached file list screen yh [Function]
Set
File Properties
Delete
Send
Send a displayed mail via Infrared communication.
: Register a selected address/phone
number to phonebook. →P178
: Set to automatically save a
selected address/phone nu mber to
a specified folder under specified
conditions. →P185
: Register a selected address to a
send group. →P185
: Copy a selected address/phone
number.
: Display a setup screen after saving a file.
(Checking the specifications)
: Display information of a selected file.
: Delete a selected file.
Mail
XXXXX
Continued on the next page
183

UIM
Copy or move a selected SMS to UIM/FOMA phone.
Move to UIM
Copy to UIM
Move to Phone
Copy to Phone
Save in Phonebook
Register a selected mail address/phone number to phonebook.
→P178
: Move SMS to UIM. Press h [Yes].
: Copy SMS to UIM. Press h [Yes].
: Move SMS to the phone. Press h [Yes].
: Copy SMS to the phone. Press h [Yes].
Delete
Delete a displayed mail.
• Items displayed on the function menu vary depending
on the displayed mail.
Protect
•Up to ●● mails can be protected.(Checking the
specifications)
Save to template
• A large-size still image file or melody file attached to
Deco-mail is deleted when saving the mail.
Delete
• Protected mails cannot be deleted.
Mail
Mail setting
XXXXX
Setting FOMA Handset Mail
Functions
Check new message: Checked All
(Checking the specifications)
Receive attachment: Image and Melody
Default
Receive option: OFF
Melody auto play: Auto Play
Receive preference: Prefer receive notice
Font size: Standard
Scroll: 1-line
Set the mail and SMS functions.
Mail Menu screen (P172) y "Mail setting"
a
Mail setting screen
h [Select] y Perform the following
b
operations
Check new message
Set items to be checked for "Check new message".
ySelect the items to be checked yh [Select]
184
Receive attachment
Set attachment files to be acquired when receiving mail,
Message R/F, etc.
Image and Melody
Image
Melody
Not receive
Receive option
Set whether to set Receive Option.
ON
: Do not automatically receive mails.
OFF
: Automatically receive mails.
Melody auto play
Set whether to automatically replay a melody attached or pasted
to a mail received and displayed.
y"Auto Play"/"Not auto play"
Receive preference
Set whether to display a receiving or reception result screen of
a mail or Message R/F received during FOMA handset
operation.
Prefer receive notice
Prefer user operation
Signature
Set a signature to be inserted to mail text. →P185
Edit quotation mark
Set a symbol indicating quotation from a received mail used for
replying by quoting.
yEnter quotation mark
Font size
Set a font size for text on mail display screen.
y"Large"/"Standard"/"Small"
Scroll
Set a number of lines to be scrolled when j is pressed on a
mail detail or mail creation screen.
1-line
3-line
5-line
1/2-page
1-page
Register sending group
Register a mail address of a group. You can send a mail
simultaneously to multiple members registered in the group.
→P185
SMS report request
Set whether to request for SMS delivery notification for SMS
sent. →P189
SMS message validity
Set duration SMS is preserved in SMS Center. →P189
SMS Center
Set SMS Center access point. →P189
: Acquire images and melodies.
: Acquire only images.
: Acquire only melodies.
: Acquires no attachment files.
: Displays the Receiving screen and
Received result screen.
: Gives priority to the operation of the
FOMA handset without displaying the
Receiving screen and Received result
screen.
: Scroll 1 line.
: Scroll 3 lines.
: Scroll 5 lines.
1
/2 page.
: Scroll
: Scroll 1 page.

Mail status request
Confirm the mail settings. After confirming, press h [OK].
Reset mail
Reset the mail settings to the Default.
yEnter the Security Code yh [Yes]
■ Changing sort conditions
When a set sort condition is selected from automatic
sort setup screen (P185) and c is pressed, a screen
for confirming condition change appears.
Select h [Yes] to change a sort condition.
Receive attachment
• Even when "Image and Melody" or "Image" has been
set, a large-size still image file cannot be acquired.
Auto sort
Sorting Sent/Received Mails
Automatically to Folders
Set conditions for automatically saving mails in
specified folders.
Inbox list screen (P179)/Outbox list
a
screen (P179) yh [Function] y "Auto
sort"
• h [Delete]: Delete the set sort
condition by "delete this"/"delete
all".
Auto sort setting
screen
"Add rule" y Perform the following
b
operations
Sender address・Receiver address
Set mail address as a sort keys.
ySelect the following item y$★$yAfter setting yi
[Complete]
Quote phonebook
Quote rcvd adrs
Quote sent adrs
Quote sending grp
Quote profile
Direct input
Subject
Set a mail subject as a condition.
y Enter a subject yi [Complete]
All inbox messages・All outbox messages
Sort all received/sent mails to a selected folder. Press i
[Complete].
: Select and set from a phonebook.
: Select and set from received mail
history.
: Select and set from sent mail history.
: Select and set a group from send
groups.
: Select and set from a profile.
: Directly enter and set a mail address.
• When the same condition has been set for another
folder, a message for confirming the change appears.
When h [Yes] is selected, the condition set for
another folder is cancelled and set for a selected folder.
Signature
Add a Signature to Mail
Default Off
Edit and set a signature to be inserted to mail
text.
Mail setting screen (P184) y"Signature"
a
■ Changing signature title
Select "Signature 1"/
"Signature 2"/"Signature 3"
yh [Title] y Enter a title
■ Registering and editing
signature text
Select "Signature 1"/
"Signature 2"/"Signature 3"
ycy Enter signature text
• Entering characters →P260
$★$
b
Register Sending Group
Signature setting
screen
Registering a Destination to a Mail Group
Register a mail address of a group. Up to 5 mail
address can be registered for a group. You can
send a mail simultaneously to multiple members
registered in the group.
Mail setting screen (P184) y"Register
a
sending group"
Sending group
list screen
Mail
XXXXX
Continued on the next page
185

Select a group yc
b
Register sending
group screen
"[Unregistered]" y Perform the
c
following operations
Quote phonebook
Select and register a mail address from a phonebook.
Quote received group
Select and register a mail address from a received mail history.
Quote sending group
Select and register a mail address from a sent mail history.
Quote profile
Select and register a mail address from a profile.
Direct input
Directly enter a mail address.
Mail
XXXXX
i [Complete]
d
Function Menu on Send Group List Screen
Send group list screen (P185) y Select a
a
group yh [Function] y Perform the
following operations
Edit group name
Edit/changes a group name.
yEnter a group name
Delete
Delete all addresses saved for a selected group. Select h
[Yes].
Chat Mail
Chat mail allows you to exchange mail among
multiple parties on a single screen.
Chat Mail Screen (Checking the
specifications)
Chat mail
history
Creating/sending chatmail
Screen to be
inserted
Chatmail screen
Latest chat
mail
Creating and Sending Chat
Mail
To use chat mail, you have to register other
parties' mail addresses as chat members in
advance. →P187
• When "Receive option" is "ON", you cannot use chat mail.
Set "Receive option" to "OFF".
• Select $★$ (Subject) "ChatMail" on the Received mail list
screen (P179) to launch Chat mail and reply to mail
arriving from a member.
Mail Menu screen (P172) y "ChatMail"
a
Deleting an address saved in a category
Send category registration screen
a
(P186) y h [Delete]
Delete
Delete the selected address. Press h [Yes].
Delete all
Delete all addresses registered in a category.
yEnter the Security Code y h [OK]
186
Chatmail screen
cy Enter characters yc(Checking
b
the specifications)
Entered characters are
highlighted.
• Up to 250 full-pitch or 500 halfpitch characters can be entered.
Chatmail text
entry screen

i [Send]
c
A sent chat mail appears in the
top of the display.
Screen to be
inserted
Chat mail screen (P186) y h
a
[Function] y "Member setting"
Screen after
sending chatmail
Receive chatmail
d
h [Function] y "End Chatmail" y
e
$★$ [Yes]
Chat mail ends.
• Communication fee for exchanging chatmail with
multiple parties is the same as that for sending one mail.
Note that the communication fee will increase for the
information size of added destinations.
Function Menu on Chat Mail Screen
Chat mail screen (P186) yh
a
[Function] y Perform the following
operations
Send
Send chat mail.
Renewal
Receive chat mail.
Check recent rcver
Confirm destination of the latest mail.
• h [Set]: Set a member again. Put $★$ on an address to be
set as a chat member and press h [Complete].
Member setting
Set a chat member.
Delete chatmail
Delete a chat mail. Press $★$ [Yes].
Quit chatmail
End chat mail.
Change font size
Change a font size used for chat mail to "Standard character"/
"Small character".
Member setting
screen
h [Function] y Perform the following
b
operations
Register new entry
Specify the name and mail address for a new chat member.
Search a phonebook
Direct entry
History of sent mails
History of received mails
Group reference : Select from sent groups.
Edit
Specify a nickname and font color.
Nickname
Address
Font Color
Delete
Delete One
Delete All
i [Complete]
c
Creating/Sending SMS
: Select from a Contact.
: Directly enter the mail address and
name.
: Select from sent addresses.
: Select from received addresses.
: Enter a nickname.
: Edit the address of a member.
: Select a font color for a member from 30 colors.
: Delete the selected member. Press $★$ [Yes].
: Delete all registered members. Press $★$ [Yes].
Creating and Sending SMS
(Short Message)
Create and send SMS.
• You can send and receive SMS to/from parties of overseas
carriers other than DoCoMo. See DoCoMo's web site for
countries and overseas carriers available.
Mail Menu screen (P172) y "Compose
a
SMS message"
Mail
XXXXX
Setting chat members
Setting Chat Members
To perform Chat Mail, you need to register mail
addresses to chat members in advance.
• Up to 5 chat members can be saved.
• When performing Chat Mail, from the Mail Menu screen
(P172) → select "ChatMail".
Compose SMS
message screen
Continued on the next page
187

Select $★$ (Receiver) yc y Enter a
b
phone number
Enter a phone number.
• Select and enter from a phonebook, received mail
address history, sent mail address history or profile.
→P186
Select $★$ (text) yc y Enter text
c
i [Send]
d
• For a destination of an overseas carrier other than
DoCoMo, enter in the order of "+", "Country Code" and
"receiver's mobile phone numb er". For the mobile phone
number, omit leading "0", if exist. Numbers may be
entered in the order of "010", "Country Code" and
"receiver's mobile phone number" (to reply to overseas
SMS received, enter "010").
• Characters may not be sent correctly to the receiver
depending on the signal wave conditions.
• When sent mails saved in FOMA handset exceed the
limit, they are overwritten from the oldest ones. Note that
protected mails are not overwritten.
• You cannot reply to SMS sent with Private ID or
Unknown ID or from a public phone.
Mail
Direct input
Directly enter a destination.
Receiving SMS
Automatically Receiving
SMS (Short Message)
When FOMA handset is in a service area, SMS is
automatically received.
Up to ●●● items including i-mode mails and
SMS can be saved.
When SMS is received, $★$ goes
a
flashing and "Retrieving Message・・・"
appears
When reception has
completed, the reception
result appears on the screen.
• Returns to the Stand-by screen if
no operation is performed for 30
seconds.
Message Reception
status screen
Function Menu on SMS Creation Screen
XXXXX
SMS creation screen (P187) yh
a
[Function] y Perform the following
operations
Send
Send SMS.
Save
Save SMS being created or edited in Unsentbox.
SMS report request
Set whether to request for SMS delivery notification for SMS
sent. →P189
Message validity
Set a period a sent SMS is stored in SMS Center.
• When "0 day" is selected, sent SMS is not stored in SMS
Center. →P189
Quote phonebook
Select a destination from phonebook.
Quote rcvd adrs
Select a destination from received mail history.
Quote sent adrs
Select a destination from sent mail history.
Quote sending grp
Select a destination from a sent group.
Quote profile
Select a destination from the profile.
yEnter the Security Code
188
• When new SMS is delivered, other i-mode mail and/or
Message R/F stored in i-mode Center are received at
the same time.
• When received mails exceed the limit, they are
overwritten from the oldest ones. Note that unread or
protected mails are not overwritten.
Displaying New SMS Received
Message Reception status screen (P188)
a
y "Mail" y Select a folder
Select SMS to be displayed yh
b
[Select]
Inbox detail screen

Check New SMS
Checking for SMS (Short
Message)
SMS, if any, that could not be received because
FOMA handset was out of the service area or for
other reasons are stored in SMS Center. You can
receive stored SMS by checking to SMS Center.
• You cannot check from out of the service area.
Mail menu screen (P172) y "Check SMS"
a
When check has completed, the mail reception
result appears on the screen.
• When new SMS is delivered, other i-mode mail and/or
Message R/F stored in i-mode Center are received at
the same time.
• When received mails exceed the limit, they are
overwritten from the oldest ones. Note that unread or
protected mails are not overwritten.
SMS Settings
Configuring SMS (Short
Message) Settings
SMS Report Request
SMS message validity
Default For 3 days
Set the duration that a sent SMS can be kept
undelivered at the SMS center.
When "For 0 day" is set, SMS will not be kept
undelivered at the SMS center.
Mail setting screen (P184) y "Message
a
validity" y "For 0 day"/"For 1 day"/"For
2 days"/"For 3 days"
SMS Center
Default DoCoMo
Set the SMS center address.
You usually do not need to change this
setting.
Mail setting screen (P184) y "SMS
a
• To set "Type of Number" to "International", enter "+" at
"
Center
DoCoMo : Set DoCoMo as SMS Center address.
Others : Enter the address.
the beginning of the address. If the address contains "*"
or "#", "International" cannot be set.
Mail
XXXXX
Default OFF
Set whether to request an SMS delivery report
after sending SMS. If this option is set to "ON", a
message indicating that the SMS has been
delivered to the recipient will be sent to you.
Mail setting screen (P184) y "SMS report
a
request" y "ON"/"OFF"
189


i-appli
What is i-appli? .........................................................................................................192
Downloading i-appli from Site .................................................................................193
Activating i-appli.......................................................................................................194
Automatically Starting i-appli<Auto-Start> ............................................................195
Setting the i-appli Standby Screen<Stand-by> ......................................................196
Managing i-appli<i-appli Settings>..........................................................................197
Using Various Functions of i-appli..........................................................................197
191

What is i-appli?
By downloading i-appli from site, i-mode
compatible FOMA handset (hereinafter, referred
to as i-mode handset) can be made more
convenient. For example, you can enjoy various
games downloaded to i-mode handset and
automatically check price by downloading
i-appli for stock price information. In addition,
map i-appli downloads only necessary data,
allowing smooth scrolling. Some i-appli allows
to directly register data to phonebook or
schedule or link with Databox for saving and
acquiring images.
IP (Information Provider)
Games, stock price
information, etc.
i-appli
XXXXX
• Downloading i-appli →P193
• Activating i-appli →P194
• Automatically activating i-appli →P195
Download
i-mode Centeri-mode handset
i-appli
What is i-appliDX?
With i-appliDX, you can use i-appli more
conveniently in such manners as to create mail
with your favorite character screen or let you
notified of the sender of received mail with a
character's comment by linking with i-mode
handset information (such as mail text, sent/
received mail history, redial, phonebook data) or
to update necessary information such as stock
price or promote real-time progression of games
by linking with mail.
■ Using registered data
Some i-appliDX software may be able to refer to,
register or operate registration data such as
mails, sent mail history, received mail history, ring
alert, in addition to registration data available to
ordinary i-appli (phonebook, bookmark, schedule
and images).
Following operations are enabled using
registration data:
• Phonebook registration
• Phonebook referencing
• Icon information
• Bookmark registration
• Schedule registration
• Using mail menu
• Using Compose message screen
• Referencing latest sent mail history
• Referencing latest received mail history
• Referencing latest unread mail
• Saving ring alert
• Changing ring alert (phone, mail, message)
• Image acquisition from Databox
• Image saving to Databox
• Changing screen settings (the stand-by display,
incoming/outgoing calls, mail send/reception, Message
R/F reception)
• Some i-appli may use a serial No. of i-mode handset
phone/UIM.
• Some i-appli may perform communications during
execution. You can set to disable communications.
→
P196
■ Using registered data
Some i-appli software may be able to refer to,
register or operate your i-mode handset
registration data (phonebook, bookmark,
schedule, images). Following operations are
enabled using registration data:
• Phonebook registration
• Bookmark registration
• Schedule registration
• Image acquisition from Databox
• Image saving to Databox
• Melody saving to Databox
192
• i-appliDX may perform communications regardless of
software communication settings to confirm software
validity. The communications count and timings differ
from software.
What is Mail-linked i-appli?
Mail-linked i-appli, a kind of i-appliDX, allows
you to use i-appli more conveniently in such
manners to update in real-time the information
such as stock price and progression of games
by exchanging information with i-mode mail.
• Mails used with mail-linked i-appli may not be displayed
correctly.
Other Convenient Functions
■ i-appli Standby screen
You can receive mails and make calls using
i-appli as the stand-by display. You can make the

stand-by display more convenient by setting
latest news or whether information on the
wallpaper screen or letting your favorite character
inform you of mail reception and alarms. →P196
• This function is available with i-appli compatible with
the i-appli Standby screen.
■ Automatically starting i-appli
You can automatically start software at a
specified time, date or day of week. Some
software can be automatically started at a time
interval predefined in the software. →P195
■ Using camera
You can use i-mode handset Camera from i-appli.
• This function is available with i-appli compatible with
Camera function.
■ Infrared communication
You can communicate with a device installed with
Infrared communication function using the
software. →P223
• This function is available with i-appli compatible with
Infrared communication function.
• Depending on the other party's device,
communications of some data may be disabled even
with Infrared communication function installed.
■ Infrared remote control
You can operate various device from i-appli such
as household electrical appliances compatible
with infrared remote control. →P195
For example, "Gガイド番組表リモコン (G-Guide
Program List Remote Controller)" registered by
default can be used as a remote TV controller
linked with TV program. →P195
• This function is available with i-appli compatible with
infrared remote control function. The other party's
device must have related software.
Downloading i-appli from Site
You can download software from a site and save
it to FOMA handset.
• You can register ●● to up to ●●● software items
downloaded (the number of items that can be saved may
be reduced depending on the software date size).
Display a site containing i-appli y Select
a
software yc
• h [Cancel]: Cancel downloading.
After downloading has completed yi
b
[OK]
■ When software setup screen appears
Set "Set stand-by", "Network set" and "Standby net".
Each setting can also be performed from
"Permissions". →P195, P196
• h [Change]: Change the settings.
• i [Complete] : Complete the settings.
h[Yes]
c
The downloaded software starts.
■ Downloading mail-linked i-appli
The folder for i-appli mail is automatically created in the
inbox/outbox list if you download mail-linked i-appli. The
folder name will be the title for the downloaded maillinked i-appli, which cannot be changed.
• If there are ● folders for i-appli mail in the inbox/
outbox list, mail-linked i-appli cannot be downloaded.
• If mail security is activated, you need to enter the
Security Code for download. (Checking the
specifications)
■ Re-downloading mail-linked i-appli
If you attempt to re-download mail-linked i-appli with
only the folder for i-appli mail left, you can use the
existing folder for i-appli. If you do not want to use the
existing folder for i-appli mail, delete the folder and
create a new one for i-appli mail. You cannot download
mail-linked i-appli without creating a new folder.
(Checking the specifications)
• At downloading, the conformation screen might appear
asking whether to send the "ser ial number of your mobile
phone/UIM". Select "Yes" to start downloading. In this
case, the "serial number of your mobile phone/UIM" is
sent to the ISP (Internet Service Provider) over the
Internet, so could be deciphered by third parties.
However, your phone number, address, age, and
gender are not notified to the ISP (Internet Service
Provider) or others by this operation.
• At downloading, the confirmation screen might appear
asking whether to use the phone-information data
(stored data and serial number of your mobile phone/
UIM). Select "Download" to start downloading. Select
"Details" to check the details of the phone-information
data you want to use.
• If you attempt to re-download the software that was
downloaded with a different UIM, the confirmation
message appears asking whether to overwrite it. Select
"Yes" to display the screen to check the version and size
of the software. Select "Download" to download.
• If download of i-appli fails due to the conditions of the
radio waves, etc., the i-appli is not saved in you FOMA
handset.
• You cannot download if the maximum number of
software is saved or there is not enough memory space
available. Download after deleting the saved software.
• Some software automatically carries out transmission
after downloaded. You can change the settings in
"Network set" of "Permissions" not to automatically carry
out transmission. →P195
i-appli
XXXXX
193

Activating i-appli
cy $★$ (i-appli)
a
Select software yc
b
• p: Terminate the software. Select "Resume" or
"End".
■ Icons on software list screen
Icons Description
$★$ i-appli
$★$ i-appliDX
$★$ Mail-linked i-appli
i-appli
XXXXX
$★$ i-appli that can be set on the wallpaper
$★$ i-appliDX that can be set on the wallpaper
$★$ Mail-linked i-appli that can be set on the
$★$ i-appli set on the wallpaper screen
$★$ i-appliDX set on the wallpaper screen
$★$ Mail-linked i-appli set on the wallpaper
$★$ i-appli/i-appliDX/mail-linked i-appli with
$★$
• At i-appli launch, the confirmation screen might appear
asking whether to upgrade th e software to the latest one.
Select "Yes" or "No".
• You cannot start up software downloaded using a
different UIM.
• Some i-appli DX software automatically does
communication to confirm the validity even if "Network
set" is set to "Not". Communication frequencies and
timing vary depending on the software.
• If communication frequencies are extremely many within
a certain period of time during i-appli launch, the
confirmation screen appears asking whether to continue
communication. Press h [Continue] to continue
communication. Press i [End] to end the i-appli.
screen
screen
wallpaper screen
screen
automatic start set
i-appli/i-appliDX/mail-linked i-appli
downloaded from SSL site
Screen to be
inserted
Software list
screen
Function Menu on Software List Screen
Software list screen(P194)y Select
a
software yh [Function] yPerform the
following operations
Upgrade
Upgrade the software. Press h [Yes].
Delete
Delete software. →P196
Auto-start
Set the auto start method and auto start date and time for the
selected software. →P195
Stand-by
Set selected software on the i-appli Standby screen. →P196
Software Info
Display selected software information such as name, version,
size.
Permissions
Set communications and/or i-appli To function for selected
software. →P196
Upgrade
• At version upgrade, the conformation screen might
appear asking whether to send the "serial number of your
mobile phone/UIM". Select "Yes" to start downloading. In
this case, the "serial number of your mobile phone/UIM"
is sent to the ISP (Internet Service Provider) over the
Internet, so could be deciphered by third parties.
However, your phone number, address, age, and gender
are not notified to the ISP (Internet Service Provider) or
others by this operation.
Software Preinstalled
(Checking the specifications)
i Pictograph Mail
(Checking the specifications)
Ope it out
(Checking the specifications)
Hungry Fish
(Checking the specifications)
194
Guide Program List Remote Controller

This is a convenient application which combines
a TV program list and a TV remote controller,
and is free of monthly usage charges.
You can obtain TV program information for any
time slot, from anywhere and at anytime. You
can acquire information on a program title,
program description, start and end times and the
G-code for your local TV station.
When you find a program of interest, you can
send mail, using the "Recommendation Mail"
function, with the program title and broadcast
schedule to your friends. You can also control
your TV remotely (some models cannot be
controlled).
• When using this application for the first time, you need to
configure the settings and agree to the license agreement.
• Separate packet communication charges apply.
• For details, refer to the "i-mode Operation Guide".
■ Infrared Remote Controller
You can use the FOMA handset as a remote controller
of infrared remote controlled devices. An i-appli sends
remote control signals using the infrared port.
• In order to use a remote controlled device, you need
to download software that is designed for the device.
Key operations for remote control vary depending on
the software.
• Some devices may not be controlled.
• Depending on the controlled device or ambient
brightness, communications may not be possible.
• When Self-mode is set, the infrared remote controller
cannot be used.
• Point the infrared port of the FO MA handset directly in
front of the device’s infrared sensor to operate.
Infrared reception part
Infrared port
15°
90°
15°
Approx.
4 meters
On software list (P194)y Select software
a
y "Permissions"y Select the following
itemsyh [Change]
Network set
Set whether to make communications while software is active.
y"Yes"/"No"/"Once"
Stand-by net
Set whether to make communications while the i-appli Standby
screen is active.
y"Yes"/"No"
Start from browser
Set whether to start software from site.
y"Yes"/"No"
Start from mailer
Set whether to start software from a mail.
y"Yes"/"No"
Start from IR
Set whether to start software via infrared communications.
y"Yes"/"No"
Start from Barcode
Set whether to start software from barcode reader.
y"Yes"/"No"
Change ring/image
Set whether to allow, when software is started, to automatically
change an image and/or melody set for ring alert or on the
wallpaper screen.
YesNo: Automatically change ring alert and/or the stand-by
display settings. To let display a confirmation screen for
each change, successively select h [Yes].
: Do not automatically change the settings.
Phbook/Dials acc.
Set whether to allow to reference the phonebook and reception
history when software is started.
y "Yes" y "No"
Auto-Start
Automatically Starting i-appli
i-appli
XXXXX
Software Settings
Setting i-appli Operating Conditions
Network set: Yes
Stand-by net: Yes
Start from browser: Yes
Default
Set operating conditions for each software. You
can set to make communications automatically
while software is active or whether to start
i-appli via infrared communications.
Start from mailer: Yes
Start from IR: Yes
Start from Barcode: Yes
Change ring/image: Yes
Phbook/Dials acc.: Yes (Checking all the
specifications)
There are 2 types in automatic start:
• Automatic start by software function
• Automatic start by FOMA handset settings
Setting whether to Automatically Start
Set whether to allow automatic start of software
cy$★$ (Settings)y"i-appli
a
Settings"y"Auto-start"yh [Change]
On : Permit Auto-start.
Off : Do not permit Auto-start.
195

Setting Start Date/Time
Validating Automatic Start Date/Time Set in
Software
Default Off (Checking the specifications)
When automatic start previously set for software
is allowed, the software automatically starts at
the date/time set in the software.
Software list screen (P194)y Select
a
software yh [Function]y"Auto-start"
"Permissions"yh [Edit]y"On"/
b
"Off"yi [Complete]
• Software is not started at a automatic start time if other
software is active at that time. An i-appli start failure icon
appears in the top of the display. To delete the icon,
press cy$★$ (i-appli)yh [Detail]. Note that the
start failure history is not deleted. →P197
Stand-by
Setting the i-appli Standby
Screen
Software list screen (P194)y Select
a
software yh [Function]y"Stand-by"
y"ON/OFF"
Setting Software Start Date/Time on FOMA Handset
Default Off (Checking the specifications)
Set to automatically start software at the set
date/time.
i-appli
XXXXX
Software list screen (P194)y Select
a
software yh [Function]y"Auto-start"
"User"yh [Edit]
b
Off : Do not set Auto-start.
Once : Set to start only once.
Daily : Set to start every day.
Weekly : Set to start every week.
Monthly : Set to start every month.
Yearly : Set to start every year.
Perform the following operations
c
User
Select a repeating pattern of Auto-start using s.
Day
Set the date. Press h [Change].
y Use s to select "Year", "Month" or "Day" field y Select
a number using j y h [OK]
Day
Set a day of the week using s.
Time
Set the time. Press h [Change].
Software
y Use s to select "Hour", "Minute" or "am/pm" field y
Select a number using j y h [OK]
• Only one software item can be set on the i-appli Standby
screen.
• Some software may not be set on the i-appli Standby
screen.
• Site connection from the i-appli Standby screen is
disabled.
• When software for communication is set on the i-appli
Standby screen, it may not function correctly for some
signal conditions.
• When "Stand-by net" is set to "Not", timely information
may not be provided.
Starting the i-appli Standby Screen
Activate software set on the i-appli Standby
screen.
On the opened i-appli Standby screen
a
yC yh [Yes]
■ Exiting active i-appli
Press p.
• Resume: Return to software running
screen.(Checking the specifications)
• End: Return to the i-appli Standby screen.(Checking
the specifications)
• Remove from stand-by: Cancel the i-appli Standby
screen.(Checking the specifications)
• Some software may allow to return to the i-appli Standby
screen state by key operations while the i-appli Standby
screen is ON. Note that the i-appli Standby screen
cannot be restored while other menu function is active.
i [Complete]
d
• 1 0 minutes before or after an automatic start time set for
other software cannot be set.
196
Deleting i-appli
Software list screen (P194)ySelect
a
software yh [Function] y"Delete"
yPerform the following operations

Delete One
You can delete the selected software. Press h [Yes].
Delete Several
You can select and delete multiple software programs. Select
software to delete y Press c y i [OK] y $★$ [Yes]
Delete All
You can delete all the software saved.
yEnter the Security Code y h [Yes]
i-appli Settings
Managing i-appli
Sort by: Name Auto-start: On
Default
You can set up/manage the software saved in
the FOMA handset.
cy$★$ (Settings)y"i-appli Settings"y
a
Select the following items yh
[Change]
Softw. info display: Off
Light: Phone Settings
Vibrate: Phone Settings (Checking all
the specifications)
Security error history
Display a log of errors of software terminated due to a security
error.
• h [Function]: You can copy or delete the entries of Security
error history. y Select "Clear All"/"Copy All Text".
Trace output
Display the trace information of the software.
• h [Function]: You can copy or delete the contents of the
trace information. y Select "Clear All"/"Copy All Text".
Trace output
• Trace information does not appear if it does not exist.
Using Various Functions of
i-appli
You can connect to a site and use FOMA
function while i-appli is active.
• For some i-appli, operations may be different or disabled.
i-appli
Sort by
Sort software items displayed on software list screen.
Name
Size
Downloaded Time
Access Time
Auto-start
Set whether to automatically start software. →P195
Softw. info display
Set whether to display software information when downloading
the software.
y"On"/"Off"
Lights
Set lighting used while software is active.
y"Light Phone Settings"/"Software Settings"
Vibrate
Set vibrator operation type used while software is active.
y"Phone Settings"/"Software Settings"
Start failure history
Display a log of software failures to auto-start.
• h [Function]: You can copy or delete the entries of Start
failure history. y Select "Clear All"/"Copy All Text".
Abnormal exit history
Display a log of abnormal termination of the i-appli Standby
screen.
• h [Function]: You can copy or delete entries of the
Abnormal exit history. y Select "Clear All"/"Copy All Text".
: Sort software items by name.(Checking
the specifications)
: Sort software items in an descending
order of size.(Checking the specifications)
: Sort software items by download date.
: Sort software items by date of use.
Starting up Other Software from i-appli
You can start up software saved in the FOMA
handset during i-appli launch.
Select a running i-appli y c yh
a
[Yes]
The software list screen is displayed.
Select that the software yh [Yes]
b
Displaying Site i-appli from Site
• You have to download related i-appli in advance.
Select URL during i-appli launchy$★$
a
yh [OK]
Software exits and site appears.
Using Barcode Reader from i-appli
• You have to download related i-appli in advance.
Start barcode reader from i-appli
a
(Checking the specifications)
A screen appears indicating that the read data will
be used and saved by i-appli.
Read code
b
XXXXX
197


i-Channel
What is i-Channel?....................................................................................................200
Using i-Channel.........................................................................................................201
Setting i-Channel<i-Channel Setting>.....................................................................201
199

What is i-Channel?
bcd
This is a service provided by DoCoMo or IP
(Information Service Provider) to deliver news
and/or weather information as graphical
information to handsets compatible with
i-Channel.
Information is periodically received and latest
information is displayed as ticker on the
wallpaper screen; in addition, it can also be
displayed in a channel list by pressing h.
Moreover, rich detail information can be
acquired by selecting favorite channels from a
channel list.
• For precautions and details of using i-Channel, see
"i-mode User's Manual".
Before subscribing to the service
i-Channel. Packet communication fee charged
for automatic update of information delivered for
"Basic Channel" is contained in i-Channel
service fee.
"Favorite Channel" is provided by IP
(Information Service Provider) other than
DoCoMo and available when you register a
favorite one. Packet communication fee charged
for automatic update of information delivered for
"Favorite Channel" is not contained in i-Channel
service fee.
Information that can be displayed as ticker on
the wallpaper screen is only that of "Basic
Channel".
IP (Information Provider)
Favorite Channel Information
Basic Channel Information
i-Channel XXXXX
a
After the service subscription procedures have been completed
Access
* Screens shown are images. They differ from actual ones.
a When you have not subscribed to i-Channel
b After you have subscribed to i-Channel, ticker appears
on the wallpaper screen at a timing information is
received or channel list is displayed.
c A channel list is displayed by pressing h. You can
view in list format information, etc. given in ticker of
each channel.
d You can view detail information screen of each
channel by selecting it.
Channel
There are 2 types of channels: "Basic Channel"
and "Favorite Channel".
"Basic Channel" is channel provided by
DoCoMo. Because it is registered by default, it is
immediately available upon subscription to
200
i-mode handset
• i-Channel is a chargeable service requiring subscription
(i-mode contract is necessary for subscription).
• Operations →P201
• Applicable models: 701i, 902i, 702i Series, P851i
• Some "Favorite Channel" may require information fee
for using.
• Some "Favorite Channel" may require separate
subscription to IP (Information Service Provider) that
provides information for use.
• Both "Basic Channel" and "Favorite Channel" require
packet communication fee for viewing detail information
from a channel list besides i-Channel service fee.
i-mode Center
Trial Service
When you use an i-Channel compatible handset
and have subscribed to i-mode, but not to
i-Channel for the subscriber line using the
i-Channel compatible handset, you can use
"Basic Channel" for a predetermined period of
time without service fee. Note that you will be
charged packet communication fee for viewing
detail information from a channel list.
Trial service will be started automatically in
principle when a predetermined period of time
has elapsed after inserting UIM and starting to

use i-Channel compatible handset. When it is
not started automatically, press h to start it.
Trial service can be used only once for one
subscriber line. Trial service will be terminated
automatically when a predetermined period of
time has elapsed after the start. For the
procedure to terminate it halfway, see "i-mode
User's Manual".
• For precautions and details of using the trial service, see
"i-mode User's Manual".
Using i-Channel
•
If you change the connection destination in "Host setting"
of "i-mode setting", the connection destination of
i-Channel is also changed. (Normally, you do not need
to change the settings).
• A message to the effect of failure of channel information
acquisition may appear in the following cases:
- When i-Channel connection destination has been
changed
- When the handset has been initialized
- When UIM has been replaced
i-Channel Setting
Setting i-Channel
When you have subscribed to i-Channel,
information automatically appears as ticker on
the wallpaper screen upon reception of
information.
• To automatically display ticker, set "Ticker display set" to
"ON". →P201
• When "Phone Lock" or "UIM PIN" is On, no ticker appears
on the wallpaper screen even with "Ticker display set" set
to "ON". Enter Handset Security Code to display ticker.
(Checking the specifications)
• The ticker cannot be displayed when an i-appli Standby
screen is set.
h
a
h
Ticker
Select a channel item y c
b
The site is connected and detail information
Channel list
screen
appears.
• l: The channel list screen returns.
• Even when information is received, no ring alert or
vibrator operates. In addition, reception lamp does not
go ON or flashing.(Checking the specifications)
• Information may not be received when the FOMA
handset is turned off, or when the signal reception is
weak such as while out of the service area. In this case,
select a channel for non-subscribers that appears by
pressing h to receive information. The ticker on the
Standby screen will show the information automatically.
Also, information may not be received using the default
settings. In this case, press h to receive information.
The ticker on the Standby screen will show the
information automatically.
• Depending on the operating conditions, information may
be received at the timing a channel list is displayed.
Ticker display set: ON
Default
Ticker speed set: Usually
Ticker display: Font Color (Green)/
Background Color (Black)
You can set whether to display ticker on the
wallpaper screen or set the ticker display style.
Channel list screen (P201) y h
a
[Function] y Perform the following
operations
Ticker display set
Set whether to display channel information in the ticker style on
the wallpaper screen.
y "ON"/"OFF"
Ticker speed set
Set the ticker moving rate.
y "Low speed"/"Usually"/"High speed"
Ticker display
Set font color and/or background color of ticker.
Font Color
Background Color
Swap
Call up another function such as phonebook or mail. →P226
Telop display
• When "Default" is selected, the default color is used.
: Select a font color or "Default"y h
[Select].
: Select a background color or "Default"y
h [Select].
i-Channel XXXXX
201

Data Display, Edit, Management/Music Playback
Databox......................................................................................................................204
Still Images
Displaying Images<Picture Viewer> ...............................................................204
Editing Still Images<Edit Still Images>...........................................................207
Video Clips/i-motion
Playing Videos/i-motion Movies<Video/i-motion Player>.............................208
Editing Videos/i-motion Movies<Edit Videos/i-motion Movies> ..................210
Using Albums<Picture Albums/i-motion Movie Album>...............................211
Chara-den
What is Chara-den?<Chara-den>....................................................................213
Melody
Playing Melodies<Melody Player> ..................................................................214
Creating a Playlist<Playlist>............................................................................216
Voice Notes
Using Voice Notes<Voice Notes> ....................................................................218
microSD Memory Card
microSD Memory Cards...................................................................................221
Inserting/Removing a Memory Card...............................................................221
Structure of Folders on the Memory Card......................................................222
Using a Memory Card.......................................................................................222
Reading and Writing to a Memory Card .........................................................222
202

Exchanging Data via Infrared Communication/Cable
Connection
Infrared Communication<Infrared Communication>.....................................223
Exchanging Data One Piece at a Time<Ir data/IrDA link> .............................223
Exchanging All Data<Send All/Receive All> ..................................................224
203

Databox
The Databox contains the items and folders
shown in the following table. Data obtained from
sites or i-mode mail are saved in folders
according to their respective types.
My Pictures
Pictures (All) All still images saved in My
Camera Still images captured by the
i-mode/Other Still images obtained from sites,
Data Display, Edit, Management/Music Playback XXXXX
Pre-installed Still images provided by default
Picture Albums Most Viewed
i-motion
i-motion (All) All videos/i-motion movies
Camera Videos captured by the Video
i-mode/Other Videos obtained from sites, via
Pre-installed Videos provided by default
i-motion Albums Most Viewed
Melody
Melody (All) All melodies saved in Melody
i-mode/Other Melodies obtained from sites,
Pre-installed Melodies provided by default
Playlists Most Played
Artists Lists per artists
Albums Lists per albums
Genres Lists per genre
Composers Lists per composers
Chara-den
Chara-den (All) All Chara-den saved in Chara-
i-mode/Other Chara-den obtained from sites,
Pre-installed Chara-den provided by default
Animations
Animations (All) All Flash movies saved in
Pictures
Camera
via Email or data
communications
User-created picture albums
saved in the i-motion folder
Camera
Email or data communications
User-created i-motion albums
via Email or data
communications
User-created playlists
den
via Email or data
communications
Animation
i-mode/Other Flash movies obtained from
Pre-installed Flash movies provided by
Voice Notes
Voice Notes (All) All Voice Notes saved in Voice
My Notes User-created categories
sites, via Email or data
communications
default
Notes
■ Notice
Stored content may be lost due to the handset
failure, repair or mishandling. DoCoMo is not
responsible for lost data. It is recommended that
you keep saved content from the FOMA handset
on a microSD memory card. You can connect
the handset to a PC using data link software and
a FOMA USB cable (optional) and save the data
to the PC.
Function Menu on the Databox
cy $★$ (Databox) yh [Function] y
a
Perform the following operations
Now Playing/Hide
Show or hide the Playback screen for the melody played in
background. →P214
Rename microSD
Specify a name to the initialized microSD memory card.
Format microSD
Format the microSD memory card.
Free Space
Display the free space on the handset or the microSD memory
card.
Picture Viewer
Displaying Images
You can display still images you have captured,
or obtained from sites or i-mode mail.
■ Available file formats
File Format* JPEG, GIF, Flash
Pixels 1024 x 1280 dots or fewer
File Size XXX Kbytes
File Extension jpg, gif
*: Even if a file is in a compatible file format, it may not
display, depending on the file.
* You need to obtain a microSD memory card separately to use the functions related to the microSD memory card. →P221
204

cy$★$ (Databox) y "My Pictures/
a
Animations"
My Pictures
screen
Select a folder yc
b
Screen to be
inserted
Image file list
Select a file yc
c
Screen to be
inserted
Still image display
screen
■ Operations on the Image display screen
Button/Key Description
s Display the previous/next file
*/# Display the full screen (press s to restore
J Display a slide show of files in the folder
o Create i-mode mail with the file attached
■ Operations on the Flash movie playback
Screen
Button/Key Description
s Display the previous/next file
N/M Increase/decrease the volume
■ Icons Displayed on the image file list
Icon Description
$★$ Files saved on the handset
$★$ Files saved on the memory card
the previous screen)
Go to Step 2 in "Creating and Sending
i-mode Mail" (P172).
Flash playback
screen
Now Playing/Hide
Show or hide the Playback screen for the melody played in
background. →P216
Create New
Start the Camera.
y "Picture"
Pictures Setup
Specify how to display files in the folder. →P206
Function Menu on the My Picture Screen
My Picture screen (P205) y Select a file
a
yh [Function] y Perform the
following operations
Now Playing/Hide
Show or hide the Playback screen for the melody played in
background. →P216
View
Display the selected file.
Play
Play a Flash movie.
Add To Album
Add the selected file to an Album.
Edit
Edit the selected file. →P207
Create New
Start the Camera.
y "Pictures"
Filter by
Change the saving destination of the selected file. (Checking
the specifications)
y "Storage Location"
All
Phone Memory
microSD
Send
in Email
to IrDA
to Bluetooth
: Save the file to both the handset and
memory card.
: Save the file to the handset.
: Save the file to the memory card.
: Create i-mode mail with the file attached.
Go to Step 2 in "Creating and Sending i-mode
Mail" (P172).
: Send one file using Infrared communication.
: Send via Bluetooth. Go to Step 2 in
"Registering and Connecting Bluetooth Device"
(P239).
Data Display, Edit, Management/Music Playback XXXXX
Function Menu on the My Pictures Screen
My Pictures screen (P205) yh
a
[Function] y Perform the following
operations
Continued on the next page
205

Apply As
Set the selected file as Wallpaper or Screen Saver.
Wallpaper
Screen Saver
Phonebook Entry
Camera Off Image
: Set as Wallpaper.
: Set as the Screen Saver.
: Set to a Contact. Go to Step 2 in "Saving
Contacts to the Phonebook from
Received Calls or Dialed Calls" (P95).
: Set the file as the alternate image for
video calls.
Manage
Rename, delete, move or copy the selected file.
: Change the name of the file.
Rename
: Delete the selected file.
Delete
: Move the selected file to the handset or the memory
Move
Data Display, Edit, Management/Music Playback XXXXX
Copy
card.
: Copy the selected file to the handset or the memory
card.
Select Multiple to
Add To Album
Delete
Move
Copy
: Select more than one file and add to an
Album. Select a file to delete y Press
cyi [Complete] y $★$ [Yes].
: Select multiple files and move to the other
folders, etc.
: Select and move more than one file to another
folder. Go to Step 3 in "Selecting and Moving/
Copying Multiple Files".
: Select and copy more than one file to another
folder. Select a file to copy ycy i
[Execute] y Select a copying destination
folder y Press h [Select].
Details
Display the file size, resolution and file format, etc. of the
selected file.
yScroll with dyh [Function]
Restrict File
Copy All Text
: Restrict the file.
: Copy the file information.
Pictures Setup
Set the display method of the selected file. →P206
Function Menu on the Image Display Screen
Image display screen (P205) yh
a
[Function] y Perform the following
operations
Send
In Email
to IrDA
to Bluetooth
: Create i-mode mail with the file attached. Go to
Step 2 in "Creating and Sending i-mode Mail"
(P172).
: Send one file using Infrared communication.
: Send via Bluetooth. Go to Step 2 in
"Registering and Connecting a Bluetooth
Device" (P239).
Apply As
Set the displayed file as Wallpaper or Screen Saver.
Wallpaper
Screen Saver
Phonebook Entry
Camera Off Image
: Set as Wallpaper.
: Set as the Screen Saver.
: Set to a Contact. Go to Step 2 in "Saving
Contacts to the Phonebook from
Received Calls or Dialed Calls" (P95).
: Set the file as the alternate image for
video calls.
Manage
Rename, delete, move or copy the displayed file.
Rename
: Change the name of the file.
Delete
: Delete the displayed file.
Move
: Move the displayed file to the handset or the memory
card.
Copy
: Copy the displayed file to the handset or the memory
card.
Zoom
Fit-to-screen
50%
75%
Original Size
: Display an image to the whole screen.
: Enlarge and display the file by 50%.
: Enlarge and display the file by 75%.
: Restore the original size of the enlarged
image.
Properties
Display the file size, resolution and file format, etc. of the
selected file.
yScroll with dyh [Function]
Restrict File
Copy All Text
: Restrict the file.
: Copy the file information.
Video Quality
Set the quality of the displayed Flash.
y"Good"/"Better"/"Best"
Replay
Play a Flash movie.
View Full Screen
Display an image to the whole screen.
• C: Cancels the full-screen display.
Add to Album
Select a file and add to an Album.
Create New
Start the Camera.
y "Picture"
206
Setting the Image Display
Default
Set the display method for an image.
Auto Repeat: OFF
Slide Interval: 4 seconds
Full-Screen: Left (90 CCW)

Image file list (P205) y Select a file
a
yh [Function] y "Pictures Setup"
Pictures Setup
screen
Select from the following items yh
b
[Change]
Auto Repeat
(Checking the specifications)
y "On"/"Off"
Slide Interval
Set the interval for a slide show between 1 - 999 seconds.
y Enter a number of seconds
• h [Function]: Edit the entered characters (number of
seconds).
Full Screen
Set the angle of the image to be displayed to full screen.
y "Left (90 CCW)"/"Right (90 CW)"
Edit Still Images
Editing Still Images
You can edit still images. Edited images are
saved in "(Checking the specifications)".
• Only JPEG files can be edited. However, you may not be
able to edit some files.
Image file list (P205)/Image file list in an
a
Album (P211) y Select a file yh
[Function] y "Edit" y "Edit Picture"
The Edit Brightness screen opens.
Use s to select the value for Brightness
b
yi
[Apply]
• The Brightness value can be
selected from -3 - 0 - +3.
Screen to be
inserted
Edit image screen
Use j to select from the following
c
editing items
Contrast
Set contrast of the image.
yUse s to select the value yi [Apply]
• Select the contrast from -3 - 0 - +3.
Blur/Sharpen
Set the sharpness of the image.
yUse s to select the value yi [Apply]
• Select Blur/Sharp from -3 - 0 - +3.
Mirror
Set the direction for mirroring the image. Set an option and
press i [Apply].
None Selected
Horizontal
Vertical
Rotation
Set an angle to rotate an image.
y "0 Degrees"/"90 Degrees"/"180 Degrees"/"270 Degrees"
yi [Apply]
Borders
Add a frame to an image.
y "border1_filename"/"border2_filename"/"None
Selected" yi [Apply]
Image Style
Set special effects for an image. Set an option and press i
[Apply].
None Selected
Black&White
Negative
Sepia
Solarize
Reddish
Bluish
Greenish
d
: Mirroring is not set. (Checking the
specifications)
: Invert the image horizontally.
: Invert the image vertically.
: No image effect is set. (Checking the
specifications)
: Change the image into black and white.
: Change the image into negative.
: Change the image into sepia tone.
: Invert the image horizontally.
: Emphasize red.
: Emphasize blue.
: Emphasize green.
i [Save] (Checking the
specifications)
Function Menu on the Edit Image Screen
Image edit screen (P207) yh
a
[Function] y Perform the following
operations
Exit
End editing. (Checking the specifications)
Save As
Save the edited image as a new file.
y Set the following items yh [Complete]
File Name
Storage Location
Save
Save an edited image.
Undo
Restore the original image.
: Enter a file name.
: Select a location from "Phone"/"Memory
Card".
Data Display, Edit, Management/Music Playback XXXXX
Continued on the next page
207

Crop
Trim away a fixed part of an image to a
determined size.
• j: Moves up or down. (Checking the
specifications)
• h [Function]: Select a cropping size
or edit text to be added to an image.
(Checking the specifications)
y "3.5x5"/"4x6"/"5x7"/"8x10"/
"8 1/4x11 3/4" (A4)"/"Manual" yi
[Apply]
Resize
Change the size of the image.
• i [Cancel]: Cancel resizing the image.
y Select a size ycyh [Yes] (Checking the
Data Display, Edit, Management/Music Playback XXXXX
specifications)
Add Graphic
Add a graphic to an image.
y Select a graphic yh [Select]
Add Text
Add text to an image.
ySet the following items yh
[Complete]
Text
Font Size
Text Color
: Enter text to add to the
image.
: Select a font size from
"Large"/"Standard"/"Small".
: Select a text color from 9
colors.
Screen to be
inserted
Cropping screen
Screen to be
inserted
Adding text
screen
File Extension mp4 and 3gp
*: Even if a file is in a compatible file format, it may not play,
depending on the file.
cy $★$ (Databox) y "i-motion"
a
i-motion screen
Select a folder yc
b
i-motion file list
Select a file yc
c
Screen to be
inserted
i-motion playback
screen
Screen to be
inserted
i-motion with ticker
screen
Borders/Crop/Add Graphic/Add Text
• "Borders", "Crop", "Add Graphic" and "Add Text" cannot
be set for an image of 120 x 160 dots or smaller.
Resize
• You cannot "Resize" an image to a larger size than the
original image.
Add Text
• "Add Text" cannot be set for an image of 640 x 480 dots
or larger.
■ When the ticker has highlighted text
Select the highlighted area to use the Web To or Mail
To function. Select the highlighted area y Press
cyh [Yes].
■ Operations on the i-motion playback screen
Button/Key Description
c Pause/Play
s Fast Forward/Rewind
■ Operations on the i-motion with ticker screen
Video/i-motion Player
Playing Videos/i-motion Movies
You can play video clips you have captured, or
i-motion movies obtained from sites or i-mode
Button/Key Description
c Pause/Play
c
(while a ticker
is selected)
Perform Phone To, AV Phone To, Web To
or Mail To function
mail.
■ Available file formats
File Format* MP4 (Mobile MP4)
Encoding Method MP4 file
* You need to obtain a microSD memory card separately to use the functions related to the microSD memory card. →P221
208
Graphics: (Checking the
specifications)
Audio: (Checking the
specifications)
Function Menu on the i-motion Screen
i-motion screen (P208)
a
y
Perform the following operations
Now Playing/Hide
Show or hide the Playback screen for the melody played in
background. →P216
yh
[Function]

Create New
Start the Video Camera.
y "i-motion"
i-motion Setup
Set the playback method of the selected file. →P210
Function Menu on the i-motion File List
i-motion file list (P208) y Select a file
a
yh
[Function] y Perform the
following operations
Now Playing/Hide
Show or hide the Playback screen for the melody played in
background. →P216
Play
Play the selected file.
Add to Album
Add the selected file to an Album.
Edit
Edit the selected file. →P210
Create New
Start the Video Camera.
y "i-motion"
Filter by
Change the saving destination of the selected file. (Checking
the specifications)
y "Storage Location" y Select from the following items
All
Phone Memory
microSD
Send
In Email
to IrDA
to Bluetooth
Apply As
Set the selected file as a Screen Saver or ringtone.
Screen Saver
Incoming Call Alert
Alarm
Manage
Rename, delete, move or copy the selected file.
Rename
Delete
Move
Copy
: Save the file to both the handset and memory
card.
: Save the file to the handset.
: Save the file to the memory card.
: Create i-mode mail with the file attached. Go to
Step 2 in "Creating and Sending i-mode Mail"
(P172).
: Send one file using Infrared communication.
: Send via Bluetooth. Go to Step 2 in
"Registering and Connecti ng a Bluetooth
Device" (P239).
: Set as the Screen Saver.
: Set as a ringtone.
: Set as an alarm tone.
: Change the name of the file.
: Delete the selected file.
: Move the selected file to the handset or the memory card.
: Copy the selected file to the handset or the memory card.
Select Multiple to
Add to Album
Delete
Move
Copy
: Select more than one file and add to an Album.
: Select and delete more than one file. Select a
file to delete y Press
$★$ [Yes].
: Select and move more than one file to another
folder. Select a file to move
[Complete] y Select a destination folder y
Press h [Select].
: Select and copy more than one file to another
folder. Select a file to copy
[Execute] y Select a copying destination folder
y
Press h [Select].
cyi
ycyi
ycyi
[Complete] y
Details
Display the file name, size and author, etc. of the selected file.
yScroll with dyh [Function]
Restrict File
Copy All Text
: Restrict the file.
: Copy the file information.
i-motion Setup
Set the playback method of the selected file. →P210
Function Menu on the i-motion Playback Screen
i-motion playback screen (P208) yh
a
[Function] y Perform the following
operations
Edit
Edit the i-motion that is in playback. →P210
Add to Album
Select a file and add to an Album.
Create New
Start the Video Camera.
y "Video"
Send
In Email
to IrDA
to Bluetooth
Apply As
Set the file in playback as a Screen Saver or ringtone.
Screen Saver
Incoming Call Alert
Alarm
Video Call Alert
Video Call Message
Email Message Alert
R/F Message Alert
Calendar Alarm
: Create i-mode mail with the file attached. Go to
Step 2 in "Creating and Sending i-mode Mail"
(P172).
: Send one file using Infrared communication.
: Send via Bluetooth. Go to Step 2 in
"Registering and Connecting a Bluetooth
Device" (P239).
: Set as the Screen Saver.
: Set as a ringtone.
: Set as an alarm tone.
: Set as the video call ringtone.
: (Checking the specifications)
: Set as an Email ringtone.
: Set as a ringtone for Messages R/F.
: Set as an alarm tone for a Datebook
event.
Data Display, Edit, Management/Music Playback XXXXX
Continued on the next page
209

Manage
Delete, move or copy the file in playback.
Delete
: Delete the file in playback.
Move
: Move the file in playback to the handset or the memory
card.
Copy
: Copy the file in playback to the handset or the memory
card.
Details
Display the file name, size and author, etc. of the file in
playback.
y Scroll with dyh [Function]
Restrict File
Copy All Text
Movies Setup
Data Display, Edit, Management/Music Playback XXXXX
Set the playback method of the file in playback. →P210
: Restrict the file.
: Copy the file information.
Setting Videos/i-motion Movies
Playback Method
Default
Set the playback method for i-motion movies.
i-motion file list (P208) / i-motion
a
playback screen (P208) yh
[Function] y "i-motion Setup"/"Movies
Setup"
Auto Repeat: Off
Fit-to-screen: Left (90 CCW)
Opening the Videos/i-motion Movies Edit Screen
i-motion file list (P208) / i-motion
a
playback screen (P208) yh
[Function] y "Edit"
Screen to be
inserted
Video/i-motion
movie edit screen
Cropping a Video
You can crop a part of a video image while
playing back a video/i-motion movie.
Video/i-motion movie edit screen (P210)
a
y "Extract clip"
• c: Play a video/i-motion movie
Specify a starting point for cropping
b
yh [Select]
Screen to be
inserted
Select from the following items yh
b
[Change]
Auto Repeat
(Checking the specifications)
y "On"/"Off"
Full Screen
Set the angle of the image to be displayed to full screen.
y "Left (90 CCW)"/"Right (90 CW)"
Edit Videos/i-motion Movies
Editing Videos/i-motion Movies
You can edit videos/i-motion movies. Edited
videos/i-motion movies are saved in "(Checking
the specifications)".
• Some files may not be edited.
210
i-motion setup
screen
Cropping screen
Specify a cropping actionyh [Select]
c
Screen to be
inserted
Specify an ending point yh [Yes]
d
Cropping a Part of a Video as a Still Image
You can crop a still image from a video/i-motion
movie.
Video/i-motion movie edit screen (P210)
a
y "Extract still"
Select an image to crop yc
b
h[Save]
c

Compressing Video Files
Video/i-motion movie edit screen (P210)
a
y "Compress"
"i-mode Mail (Small)"/"i-mode Mail
b
(Large)"
Deleting Sounds or Graphics from Videos
Video/i-motion movie edit screen (P210)
a
y "Delete track"
"Video track"/"Audio track"/"Ticker"
b
Recording Sounds to Videos (Checking
the specifications)
Video/i-motion movie edit screen (P210)
a
y "Record audio"
"Record new track"/"Use existing audio
b
file"
■ To record new audio
The original audio of the video/i-motion movie
will be deleted. Press h [Yes] to select
"Record new track".
h [Save]
c
Picture Albums/i-motion Movie Album
Using Albums
Function Menu on the Album List
Picture Album list (P211)/i-motion Album
a
list (P211) yh [Function] y Perform
the following operations
Now Playing/Hide
Show or hide the Playback screen for the melody played in
background. →P216
View
Display the images in the selected Album.
Play
Play the i-motion movies in the selected Album.
Create New
Start the Camera/Video Camera and create a new Album.
Picture
i-motion File
Album
Manage
Delete, move or copy the file in playback.
Rename
Remove
Pictures Setup
Specify how to display files in an Album. →P206
i-motion Setup
Specify how to play files in an Album. →P208
: Start Camera.
: Start the Video Camera.
: Creates a new Album. →P211
: Change the name of the Album.
: Deletes the selected Album.
Saving Images to an Album
Picture Album list (P211)/i-motion Album
a
list (P211) y "[Create New Album]"
Data Display, Edit, Management/Music Playback XXXXX
You can save captured still images/videos or
files in My Pictures/i-motion in an Album and
manage them.
a
b
c
Picture Album list
aMost Viewed
The Album with files that are most viewed (20
files).
bUser-defined Albums
The created Album name is displayed.
cCreate New Album
Create a new Album.
i-motion Album
list
a
b
c
Select a folder yh [Open]
b
Select a file to save in an Album
c
Continued on the next page
Folder selection
screen
(Example: Picture
Album)
Screen to be
inserted
Example: Add picture
screen
211

•Select h [Function] y "Select All" to select all files in
the folder at once.
i [Complete] y Enter an album name
d
Displaying Images in an Album
Picture Album list (P211)/i-motion Album
a
list (P211) y Select an Album
Screen to be
inserted
Data Display, Edit, Management/Music Playback XXXXX
File list in a
Picture Album
Select a file yc
b
■ Icons displayed on the file list in an album
Icon Description
$★$ Files saved on the handset
$★$ Files saved on the memory card
$★$ Select a file to save in an Album.
Function Menu on the File List of an Album
File list in an i-motion Album (
a
list in an i-motion Album (
y
[Function]
Perform the following
operations
Now Playing/Hide
Show or hide the Playback screen for the melody played in
background. →P216
View
Display the selected image.
Replay
Plays the selected i-motion movie.
Edit Picture
Edit the selected image. →P207
Edit
Edit the selected i-motion movie. →P210
Create New
Start the Camera/Video Camera.
y "Pictures"/"Video Camera"
P211) yh
File list in an
i-motion Album
P211
)/File
Sort by
Change the saving destination of the selected file. (Checking
the specifications)
All
Phone Memory
Memory Card
: Save the file to both the handset and
memory card.
: Save the file to the handset.
: Save the file to the memory card.
Send
In Email
to IrDA
to Bluetooth
: Create i-mode mail with the file attached. Go to
Step 2 in "Creating and Sending i-mode Mail"
(P172).
: Send one file using Infrared communication.
: Send via Bluetooth. Go to Step 2 in
"Registering and Connecting a Bluetooth
Device" (P239).
Apply As
Set the selected file as Wallpaper or Screen Saver.
Wallpaper
Screen Saver
Incoming Call Alert
Phonebook Entry
Camera Off Image
Alarms
: Set as Wallpaper.
: Set as the Screen Saver.
: Set as a ringtone.
: Set to a Contact. Go to Step 2 in
"Saving Contacts to the Phonebook
from Received Calls or Dialed Calls"
(P94).
: Set the file as the alternate image for
video calls.
: Set as an alarm tone.
Manage
Delete or sort the selected file.
Remove
: Delete files.
Reorder
: Rearrange files. Select a file yh [Move] y Select
a destination y Press h [Insert].
Select Multiple to
Add More Pictures
Add i-motion
Remove
: Select a file to save in an Album.
: Select a file to save in an Album.
: Select and delete more than one file.
Select a file to delete y Press cyi
[Complete] y $★$ [Yes].
Details
Display the file size and file format, etc. of the selected file.
y Scroll with dyh [Function]
Restrict File
Copy All Text
: Restrict the file.
: Copy the file information.
Pictures Setup
Set the display method of the selected file. →P206
i-motion Setup
Set the playback method of the selected file. →P210
• Items displayed on the function menu vary depending on
the selected files and settings on the handset.
212

Chara-den
What is Chara-den?
Chara-den is an animation character
representing you (an avatar) that can be sent to
the other party as an alternate image instead of
your own image during a video call.
■ Chara-den registered by default
DJ
■ Pre-installed Chara-den
Key DJ Dimo
1 Happy (Laugh) Sadness
2 Angry Anger
3 Cry (Sad) Surprise
4 Shock (Surprise) In love
5 Thank you Let's eat
6 I'm sorry Sorry
7 Bye bye Sleep
8 Yes (OK) Lonely
9 No (No way) Hot spring
Displaying/Controlling Chara-den
cy $★$ (Databox) y "Chara-den"
a
Select a folder yc
b
ブンブン (Dimo)
©BVIG
Chara-den screen
Chara-den list
• s: Display the previous/next
file
• j: Enlarge the image/Restore
the original size
Screen to be
inserted
Chara-den
playback screen
Function Menu on the Chara-den List
Chara-den list (P213) y Select a Chara-
a
den yh [Function] y Perform the
following operations
Now Playing/Hide
Show or hide the Playback screen for the melody played in
background. →P216
Play
Play the selected Chara-den.
Apply As
Set the selected Chara-den as the alternate image for the
videocall or to a Contact.
Camera Off Image
Phonebook Entry
Manage
Rename or delete the selected Chara-den.
Edit title
Remove
Select Multiple to
Select and delete more than one Chara-den. Select Chara-den
to delete y Press cyi [Complete] y $★$
Details
Display the file size and file format, etc. of the selected Charaden.
y Scroll with dyh [Function]
Restrict File
Copy All Text
: Set as the alternate image for the
videocall.
: Set to a Contact. Go to Step 2 in "Saving
Contacts to the Phonebook from
Received Calls or Dialed Calls" (P94).
: Change the name of the Chara-den.
: Delete the selected Chara-den.
: Apply the restriction to files.
: Copy the file information.
Function Menu on the Chara-den Playback Screen
Chara-den playback screen (P213)
a
yh [Function] y Perform the
following operations
Data Display, Edit, Management/Music Playback XXXXX
Select Chara-den yc
c
Continued on the next page
213

Enter V-Phone No.
Make a video call using the Chara-den in playback as the
alternate image.
Enter Number
Phonebook
Received Calls
Dialed Calls
: Make a call by entering a phone number
directly. →P80
: Make a call by searching the phonebook.
→P97
: Make a call by searching through Received
Calls. →P67
: Make a call by searching through Dialed
Calls. →P56
Set Chara-den
Set the selected Chara-den as the alternate image for video
calls.
Data Display, Edit, Management/Music Playback XXXXX
Detail Info
Display the file size and file format, etc. of the Chara-den in
playback.
• h [Function]: Copy the content of the detailed information
screen. Select "Copy All Text".
Delete
Delete the Chara-den in playback.
Change Size
Change the display size of the Chara-den in playback.
(Checking the specifications)
• j: Enlarge the image/Restore the original size
Chara-den Function
y "Change Action"
Switches the character action mode.
Partial Action Mode
Full Action Mode
y"Action List"
Lists all actions assigned to operation keys.
• Select an action y Press h [Select] to make the character
show the selected action.
: The character uses a part of the body to
express actions.
: The character uses the whole body to
express actions.
Select a folder yc
b
Melody file list
Select a file yc
c
Screen to be
inserted
Melody playback
screen
■ Operations on the Melody playback screen
Button/Key Description
c Pause/Play
s Play the previous/next file
N/M Adjust the volume
■ Playing a melody with the FOMA handset
folded(Checking the specifications)
If you fold the FOMA handset during melody playback,
the artist name and song title are displayed on the Subdisplay.
■ Sub-display
J
Screen to be
inserted
Screen to be
inserted
Melody Player
Playing Melodies
■ Key operation on the Melody playback
You can play pre-installed melodies or melodies
downloaded from sites.
■ Available File Formats
File Format* SMF, MFi
File Extension mid, mld, midi
*: Even a file in a compatible file format may not play
depending on the file.
cy $★$ (Databox) y "Melody"
a
Melody screen
* You need to obtain a microSD memory card separately to use the functions related to the microSD memory card. →P221
214
J Open the Song title list
J(press for X second or longer) Stop melody playback
N/M Adjust the volume
■ Key operation on the Song title list
J Pause/Play
J(press for X second or longer) Stop melody playback
N/M Adjust the volume
N/M Display the previous/
screen
screen
Key Description
• The Song title list returns to the Melody playback
screen after five seconds.
Key Description
Song title listMelody playback
next song title in the list

Function Menu on the Melody Screen
Melody screen (P214) yh [Function]
a
y Perform the following operations
Now Playing/Hide
Show or hide the Playback screen for the melody played in
background. →P216
Melody Setup
Set the playback method and sound quality of the melodies in
the selected folder. →P216
Function Menu on the Melody File List
Melody file list (P214) y Select a file
a
yh [Function] y Perform the
following operations
Now Playing/Hide
Show or hide the Playback screen for the melody played in
background. →P216
Play
Play the selected melody.
Add To Playlist
Add the selected file to a Playlist.
Filter by
Change the saving destination of the selected melody.
(Checking the specifications)
All
Phone Memory
microSD
Send
In Email
to IrDA
to Bluetooth
Apply As
Set the selected melody as a ring tone or to a Contact.
Incoming Call Alert
Phonebook Entry
Alarm
: Save the file to both the handset and memory
card.
: Save the file to the handset.
: Save the file to the memory card.
: Create i-mode mail with the file attached. Go to
Step 3 in "Creating and Sending i-mode Mail"
(P172).
: Send 1 file using Infrared communication.
: Send via Bluetooth. Go to Step 2 in
"Registering and Connecting a Bluetooth
Device" (P239).
: Set as a ringtone.
: Set to a Contact. Go to Step 2 in
"Saving Contacts to the Phonebook
from Received Calls or Dialed Calls"
(P94).
: Set as an alarm tone.
Manage
Rename, delete, move or copy the selected melody.
Edit title
: Change the title of the selected melody.
Remove
: Delete the selected melody.
Move
: Move the selected melody to the handset or the
memory card.
Copy
: Copy the selected melody to the handset or the
memory card.
Select Multiple to
Add to Playlist
Delete
Move
Copy
: Select more than 1 melody and add to a
Playlist.
: Select and delete more than 1 melody. Select
melodies to delete y Press cyi
[Complete] y $★$ [Yes].
: Select and move more than 1 melody to
another folder. Select melodies to move y
cyi [Complete] y Select a destination
folder y Press h [Select].
: Select and copy more than 1 melody to
another folder. Select melodies to copy
ycyi [Execute] y Select a copying
destination folder y Press h [Select].
Details
Display the name and size, etc. of the selected melody.
y Scroll with dyh [Function]
Restrict File
Copy All Text
: Apply the restriction to files.
: Copy the file information.
Melody Setup
Set the playback method and sound quality of the selected
melody. →P216
Function Menu on the Melody Playback Screen
Melody playback screen (P214) yh
a
[Function] y Perform the following
operations
Add To Playlist
Add the melody in playback to a Playlist.
Send
In Email
to IrDA
to Bluetooth
Apply As
Set the melody in playback as the alternate image or to a
Contact.
Incoming Call Alert
Phonebook Entry
: Create i-mode mail with the file attached. Go to
Step 3 in "Creating and Sending i-mode Mail"
(P172).
: Send 1 file using Infrared communication.
: Send via Bluetooth. Go to Step 2 in
"Registering and Connecting a Bluetooth
Device" (P239).
: Set as a ringtone.
: Set to a Contact. Go to Step 2 in "Saving
Contacts to the Phonebook from
Received Calls or Dialed Calls" (P94).
Data Display, Edit, Management/Music Playback XXXXX
Continued on the next page
215

Manage
Reorder, delete, move or copy the melody in playback.
Reorder
: Rearrange melodies. Select a melody yh [Move]
y Select a destination y Press h [Insert] yi
[Complete].
Delete
: Delete the melody in playback.
Move
: Move the melody in playback to the handset or the
Copy
Remove
File Details
Display the name and size, etc. of the melody in playback.
y Scroll with dyh [Function]
Data Display, Edit, Management/Music Playback XXXXX
Restrict File
Copy All Text
Melody Setup
Set the playback method and sound quality of the melody in
playback. →P216
Hide
Return to the stand-by display. (Checking the specifications)
memory card.
: Copy the melody in playback to the handset or the
memory card.
: (Checking the specifications)
: Apply the restriction to files.
: Copy the file information.
Using Another Function while Playing a
Melody
You can call up and use another option while
playing a melody.
■ Functions available during the background
playback (Checking the specifications)
Function
Setting the Playback Method and Sound
Quality of Melodies
Auto Repeat: Off Equalizer: On
Default
Set the playback method and sound quality of
the melody.
Melody screen (P214)/Melody file list
a
(P214)/Melody playback screen (P214)
yh [Function] y "Melody Setup"
Select from the following items yh
b
[Change]
Auto Repeat
(Checking the specifications)
y "On"/"Off" yh [Select]
Equalizer
y "On"/"Off" yh [Select]
Spatial Audio
y "On"/"Off" yh [Select]
Bass Boost
y "On"/"Off" yh [Select]
Spatial Audio: (Checking the
specifications)
Bass Boost: (Checking the
specifications)
Melody Setup
screen
Melody playback screen (P214) yh
a
[Function] y "Hide"
Close the Melody playback screen and display the
stand-by display. The melody in playback is
played in background.
■ To return to the melody playback screen
You can display the Melody playback screen
from the function menu of each screen.
• h [Function] y Select "Now Playing"
* You need to obtain a microSD memory card separately to use the functions related to the microSD memory card. →P221
216
Playlist
Creating a Playlist
You can create a Playlist for your favorite
melodies.
Melody screen (P214) y "Playlists"
a
aMost Played
Files played many times (●●files) are
automatically saved in the Playlist.
Screen to be
inserted
Playlist screen

bUser-defined Playlists
The created Playlist name is displayed.
cCreate New Playlist
Create a new Playlist.
"[Create New Playlist]" yc
b
Select a folder yh [Open]
c
Select a melody to save in the Playlist
d
•Select h [Function] y "Select
All" to select all melodies in the
folder at once.
Add melody
i [Complete] y Enter a Playlist name
e
screen
Adding Melodies
Playlist screen (
a
yc
"Add More Melodies" yc
b
Select a melody yc
c
•Select h [Function] y "Select All" to select all
melodies in the folder at once.
i [Complete]
d
P216
) y Select a Playlist
Playlist list
Data Display, Edit, Management/Music Playback XXXXX
Function Menu on the Playlist Screen
Playlist (P216)
a
Perform the following operations
Now Playing/Hide
Show or hide the Playback screen for the melody played in
background. →P216
Play
Play a melody.
Create New
Creates a new Playlist.
Manage
Delete or rename Playlists.
Rename
: Change the title of the selected Playlist.
Delete
: Deletes the selected Playlist.
Melody Setup
Set the playback method and sound quality of the melody in
playback. →P216
yh
[Function] y
Editing Playlists
You can change the content of the created
Playlists by deleting or adding melodies.
Deleting Melodies
Playlist list (P216) y Select a Playlist
a
yc
Select a melody yh [Function] y
b
"Manage" y "Delete"
■ To select and delete more than one melody
Press h [Function] and go to Step 3 in
"Selecting and Deleting Multiple Files".
Function Menu on the Playlist List
Playlist list (P217) y Select a Playlist
a
ycy Perform the following operations
Now Playing/Hide
Show or hide the Playback screen for the melody played in
background. →P216
Play
Play a melody.
Filter by
Change the saving destination of the selected melody.
(Checking the specifications)
y "Storage Location"
All
Phone Memory
microSD
: Save the file to both the handset and
memory card.
: Save the file to the handset.
: Save the file to the memory card.
Continued on the next page
217

Send
In Email
to IrDA
to Bluetooth
Apply As
Set the selected melody as the ringtone or alarm tone.
Incoming Call Alert
Phonebook Entry
Data Display, Edit, Management/Music Playback XXXXX
Alarm
Manage
Reorder or delete melodies in a Playlist.
Reorder
Remove
Select Multiple to
Add More Melodies
Remove
Details
Display the file name, size and author, etc. of the selected file.
y Scroll with dyh [Function]
File Restrictions
Copy All Text
Melody Setup
Set the playback method and sound quality of the selected
melody. →P216
Voice Notes
: Create i-mode mail with the file attached. Go to
Step 3 in "Creating and Sending i-mode Mail"
(P172).
: Send 1 file using Infrared communication.
: Send via Bluetooth. Go to Step 2 in
"Registering and Connecti ng a Bluetooth
Device" (P239).
: Set as a ringtone.
: Set to a Contact. Go to Step 2 in
"Saving Contacts to the Phonebook
from Received Calls or Dialed Calls"
(P94).
: Set as an alarm tone.
: Reorder the selected melody. Select a file yh
[Move] y Select a destination y Press h [Insert].
: Delete the selected melody.
: Select more than 1 melody and ad d to a
Playlist.
: Select and delete more than 1 melody.
Select melodies to delete y Press
hyi [Complete] y $★$ [Yes].
: Apply the restriction to files.
: Copy the file information.
h [Function] y "Create New" y
b
"Voice Note"
Screen to be
inserted
Voice Note Ready
screen
c
c
Recording starts. The recording time is 30
seconds.
• c: Pause/resume the recording.
• h [Stop]: Cancel the recording.
After recording yi [Store]
d
• When "Auto Save" is set to "On",
the recording is saved
automatically. →P219
■ Recording Voice Notes with the FOMA
handset closed
Hold down H to keep recording a Voice Note. Release
to end recording.
H
• The recorded Voice Memo is saved with the recorded
time and date as a file name as "XX-XX-XX.amr".
(Checking the specifications)
Screen to be
inserted
Voice Note
recording
completion screen
Using Voice Notes
You can save and manage Voice Notes on the
handset.
Recording Voice Notes
cy $★$ (Databox) y "Voice Notes"
a
Voice Notes
screen
* You need to obtain a microSD memory card separately to use the functions related to the microSD memory card. →P221
218
Function Menu on the Voice Note Screen
Voice Note screen (P218) yh [Select]
a
y Perform the following operations
Now Playing/Hide
Show or hide the Playback screen for the melody played in
background. →P216
Create New
Start recording. →P216
Function Menu on the Voice Note Ready Screen
Voice Note ready screen (P218) yh
a
[Function] y Perform the following
operations

Go To Voice Notes
Open the Voice Note list.
Switch Storage Device
Set the saving destination for Voice Notes.
y "microSD"/"Phone Memory"
Voice Recorder Setup
Set the recording quality or time, etc.
Record Quality
Record Length
Auto Save
Free Space
Display the storage space status of the Voice Notes folder.
: Sets the recording quality. Select from
"Good"/"Better"/"Best".
: Set the recording time. Select from "MMS"/
"Maximum" (30 seconds).
: Set whether to save the recorded Voice
Notes automatically. Select from "On"/"Off".
■ When selecting Voice
Notes (All)
Select the voice note to
play and press c.
■ When selecting My Data
Select "Category" yPress
c y Select the voice note
yPress c.
Voice Notes (All)
list screen
Category list screen
Data Display, Edit, Management/Music Playback XXXXX
Function Menu on the Voice Note
Recording Completion Screen
Voice Note recording completion screen
a
(P218) yh [Function] y Perform the
following operations
Discard
Delete recorded Voice Notes.
Preview
Play recorded Voice Notes.
Re-Record
Record again.
Apply as Ringtone
Set the recorded Voice Note for use as a Ring Tone.
Playing Recorded Voice Notes
The Voice Note screen has the following
components:
a
b
Voice Notes
aVoice Notes (All)
All recorded Voice Notes are listed.
bMy Notes
Recorded Voice Notes are displayed per
category.
Voice Note screen (P219) y Select
a
"Voice Notes (All)"/"My Notes"
screen
Function Menu on the Voice Notes (All) List
Voice Notes (All) list (P219) y Select a
a
file yh [Function] y Perform the
following operations
Now Playing/Hide
Show or hide the Playback screen for the melody played in
background. →P216
Play
Play the selected Voice Note.
Add to Category
Add the selected Voice Note to a category.
Create New
Record a Voice Note.
Filter by
Change the saving destination of the selected file. (Checking
the specifications)
y "Storage Location"
All
Phone Memory
microSD
Send
In Email
to IrDA
to Bluetooth
: Save the file to both the handset and
memory card.
: Save the file to the handset.
: Save the file to the memory card.
: Create i-mode mail with the Voice Note
attached. Go to Step 3 in "Creating and
Sending i-mode Mail" (P172).
: Send one file using Infrared communication.
: Send via Bluetooth. Go to Step 2 in
"Registering and Connecting a Bluetooth
Device" (P239).
219

Apply As
Set the selected Voice Note as the alternate image or to a
Contact.
Incoming Call Alert
Phonebook Entry
Alarm
: Set as a ringtone.
: Set to a Contact. Go to Step 2 in
"Saving Contacts to the Phonebook
from Received Calls or Dialed Calls"
(P94).
: Set as an alarm tone.
Manage
Rename, delete, move or copy the selected Voice Note.
Rename
: Change the title of the selected Voice Note.
Delete
: Delete the selected Voice Note.
Move
Data Display, Edit, Management/Music Playback XXXXX
: Move the selected Voice Note to the handset or the
memory card.
Copy
: Copy the selected Voice Note to the handset or the
memory card.
Select Multiple to
Add to Category
Delete
Move
Copy
: Select and add more than one Voice Note to
a category.
: Select and delete more than one Voice
Note. Select a Voice Note to delete y Press
cyi [Complete] y $★$ [Yes].
: Select and move more than one Voice Note
to another folder. Select a Voice Memo to
move ycyi [Complete] y Select a
destination folder y Press h [Select].
: Select and copy more than one Voice Note
to another folder. Select a Voice Memo to
copy ycyi [Complete] y Select a
destination folder y Press h [Select].
Details
Display the name and size, etc. of the selected Voice Note.
y Scroll with dyh [Function]
Restrict File
Copy All Text
: Apply the restriction to files.
: Copy the file information.
Function Menu on the Category List
Category list (P219) y Select a file yh
a
[Function] y Perform the following
operations
Now Playing/Hide
Show or hide the Playback screen for the melody played in
background. →P216
Play
Play the selected Voice Note.
Create New
Record a Voice Note. →P218
Filter by
Change the saving destination of the selected file. (Checking
the specifications)
y "Storage Location"
All
Phone Memory
microSD
: Save the file to both the handset and
memory card.
: Save the file to the handset.
: Save the file to the memory card.
Send
In Email
to IrDA
to Bluetooth
: Create i-mode mail with the Voice Note
attached. Go to Step 3 in "Creating and
Sending i-mode Mail" (P172).
: Send one file using Infrared communication.
: Send via Bluetooth. Go to Step 2 in
"Registering and Connecti ng a Bluetooth
Device" (P239).
Apply As
Set the selected Voice Note as the alternate image or to a
Contact.
Ring Tone
Phonebook Entry
Alarm
: Set as a ringtone.
: Set to a Contact. Go to Step 2 in "Saving
Contacts to the Phonebook from
Received Calls or Dialed Calls" (P94).
: Set as an alarm tone.
Manage
Delete the selected Voice Note.
y "Delete"
Select Multiple to
Add More Voice Notes
Delete
: Select and add more than one Voice
Note to a category.
: Select and delete more than one
Voice Note. Select a Voice Note to
delete y Press
y $★
$ [Yes].
cyi
[Complete]
Details
Display the name and size, etc. of the selected Voice Note.
y Scroll with dyh [Function]
Restrict File
Copy All Text
: Apply the restriction to files.
: Copy the file information.
Saving Voice Notes to My Data
You can manage recorded Voice Notes by
saving them per category.
Voice Note screen (P219) y "My Notes"
a
Select "Create New Category" y a folder
b
* You need to obtain a microSD memory card separately to use the functions related to the microSD memory card. →P221
220
My Notes screen

Select a Voice Note yc
c
•Select h [Function] y "Select All" to select all Voice
Notes in the folder at once.
i [Complete] y Enter a Category
d
name
Function Menu on the My Data Screen
My Data screen (P220) yh [Function]
a
y Perform the following operations
Now Playing/Hide
Show or hide the Playback screen for the melody played in
background. →P216
Create New
Voice Note
Category
Manage
Rename or delete the selected Category.
Edit title
Delete
: Start recording. →P218
: Create a new Category. →P220
: Edit the title name. Enter a title y Press c.
: Delete a Category.
microSD Memory Cards
You can insert a microSD memory card into the
handset and use it as external storage. A
microSD memory card is a small size and
lightweight, removable external storage media
with a large capacity.
• You can purchase microSD memory cards and microSD
memory card adapters from electric appliance mass sales
stores, etc. The M702iG handset supports microSD
memory cards up to ●●● Mbytes. (As of ●●, 2006)
- In an environment with high humidity or corrosive
substances
- In a place where it can be affected by static electricity or
electrical noise
Inserting/Removing a
Memory Card
Remove the battery rear cover and the battery
pack first. →P44
Inserting
Illustration to be inserted
Data Display, Edit, Management/Music Playback XXXXX
Cautions on Using MicroSD Memory Cards
• microSD memory cards formatted by another device such
as a PC may not be usable on the handset. Use memory
cards formatted by the M702iG handset. →P222
• Memory cards may lose data or deform due to an accident
or failure of the handset. It is recommended that you make
a copy of important data and keep it in a separate place.
DoCoMo is not responsible for loss or alteration of data.
• Do not turn the handset power off while data is being read
or written.
• Do not apply labels or stick ers on memory cards. Even the
thickness of labels may cause loose contacts and data
corruption.
• Do not touch the contacts with your hand or metal object.
• Do not apply strong force, do not bend or drop, and do not
let the card become wet.
• Do not use or store the card in the following places:
- In e xtremely high temperatures such as insid e a very hot
car or under scorching heat
- In direct sunlight
Illustration to be inserted
221

Removing
Illustration to be inserted
Data Display, Edit, Management/Music Playback XXXXX
Structure of Folders on the
Memory Card
(Checking the specifications)
Using a Memory Card
To use a memory card, you need an optional
memory card.
cy $★$ (Connection) y $★$ (USB
a
Mode Setting) y "Default Connection"
yh [Change] y "microSD mode"
USB Mode Setup
screen
Connect the handset and a PC using a
b
USB cable (optional)
Setting the USB Mode
Set the USB mode when the FOMA handset and
a PC are connected using a USB cable
(optional). The USB mode is set to either "Data
Connection" or "microSD mode".
■ Data/Fax Connection
Use the external connector terminal to transfer
data via the cable connection.
(Checking the specifications)
Formatting a Memory Card
(Checking the specifications)
Format (initialize) a memory card so that it can
be used for the FOMA handset.
Databox screen (P204) yh [Function]
a
y "Format Memory Card"
Illustration to be inserted
Moving/Copying Files between a Memory
Card and the Handset
(Checking the specifications)
Reading and Writing to a
Memory Card
Connect the FOMA handset with a memory card
inserted to a PC and read data from/write data to
the memory card.
* You need to obtain a microSD memory card separately to use the functions related to the microSD memory card. →P221
222

■ Memory Card Mode
Use the external connector terminal as a means
of reading from/writing to the memory card.
Illustration to be inserted
USB Mode Setup screen (P222) y
a
"Default Connection" yh [Change]
"microSD mode"/"Data Connection"
b
■ Notice
Verify that the handset is correctly connected to
a PC. If it is not connected correctly, data may
not only fail to be exchanged but also may be
lost.
Infrared Communication
■ Notice
Stored content may be lost due to the handset
failure, repair or mishandling. DoCoMo is not
responsible for lost data. It is recommended that
you keep saved content from the FOMA handset
on a microSD memory card. You can connect
the handset to a PC using data link software and
a FOMA USB cable (optional) and save the data
to the PC.
Infrared Communication
To perform infrared communication
• When performing infrared communication, open the
FOMA handset 90 degrees as shown below.
• Use the devices within 20 cm. However, if you place
devices on a table, use the devices within 14 cm.
• Do not move the FOMA handset until data exchange
completes.
• If you hold the FOMA handset in your hand, secure the
terminal so that it is not shaky.
Infrared port
Within
20cm
90
°
Within ±15
from the center
°
Data Display, Edit, Management/Music Playback XXXXX
Infrared Communication
You can exchange Contacts, Datebook events or
Bookmarks with a device equipped with infrared
communication capabilities.
Available Data for Data Transfer
(Checking the specifications)
One All
Contact Up to ●●
Still Image File Up to ●●
ToDo Up to ●●
Datebook Event Up to ●●
Memo (Checking
the specifications)
Bookmark Up to ●●
Up to ●●
Cautions on Data Transfer
• Data may not be transferred depending on the other
party's FOMA handset conditions. Depending on the other
party's model, the filter setting of received mail or
Bookmarks may not be reflected or the content of Decomail may not be saved correctly.
• Communication may take a while depending on the
amount of data to be transferred. Also, it is possible that
data may not be received correctly.
Ir data/IrDA link
Exchanging Data One
Piece at a Time
Sending Data One Piece at a Time
Data list y h [Function] y "Send" y
a
"to IrDA"/"Infrared"
223

Receiving Data One Piece at a Time
cy$★$ (Connection) y $★$ (Infrared
a
Link) yh [Yes]
Display preview of received data.
Save data
b
■ When a Contact is received
Press h [Store].
■ When a Calendar event is received
Press h [Function] yh [Store].
■ When an image is
Data Display, Edit, Management/Music Playback XXXXX
received
Press h [Function]
yh [Store Only].
Screen to be
inserted
Received image
preview screen
Email. Check whether important data has been saved
elsewhere before sending or receiving all data.
Sending All Data
From a screen showing data to be sent
a
yh [Function] y "Send All"
Enter the security code y "Infrared"y
b
Enter the authentication password
Receiving All Data
cy$★$ (Connection) y $★$ (Infrared
a
Link)
Enter the security code y Enter the
b
authentication password yh [Yes]
h [Yes]
c
Function menu on the received image
preview screen
Received image preview screen (P224)
a
yh [Function] y Perform the
following operations
Send in Message
Create i-mode mail with the image attached. →P172
Store Only
Save the image.
Apply as Wallpaper
Set as Wallpaper.
Apply as the Screen Saver
Set as the Screen Saver.
Apply as "Camera Off" Image
Set the file as the alternate image for video calls.
Print and Store
(Checking the specifications)
Send All/Receive All
Exchanging All Data
You can transfer all data at once with a PC or
another FOMA handset.
• To exchange all data, a password is used to identify the
sender and receiver correctly. The password is any 6-digit
number and should be entered both in the sending and
receiving devices before sending/receiving data.
• Receiving all data overwrites the data on the FOMA
handset and deletes all saved data including protected
Screen to be
inserted
Overwrite data
confirmation
screen
224
 Loading...