How it Works
Log In / Sign Up
Buy Points
How it Works
FAQ
Contact Us
Questions and Suggestions
Users
Motorola
Loading...
T
T6500
3
T6530
T6550
2
T6AC1
T6AF1
T6AF2
T6AK1
T6AW1
T6BA1
T6BC1
T6BD1
T6BE1
T6BK1
T6CC1
T6CH1
T6CR1
T6CS1
T6CT1
2
T6DF1
T6DQ1
T6DT1
3
T6DV1
T6DZ1
T6EA1
T6EB1
T6EC1
T6ED1
T6EE1
2
T6EG1
T6EH1
T6EJ1
T6EK1
T6EK2
T6EL1
T6EM1
T6EN1
T6EP1
T6EQ1
T6ES1
2
T6EW1
T6EY1
5
T6FA1
T6FB1
2
T6FD1
T6FE1
T6FF1
T6FF2
2
T6FH1
2
T6FJ1
T6FK1
5
T6FL1
2
T6FM1
6
T6FN1
T6FS1
2
T6FW1
T6GD1
T6GD2
T6GE1
2
T6GF1
3
T6GG1
2
T6GH1
T6GJ1
T6GM1
2
T6GM2
T6GN1
T6GP1
T6HA1
T6HD1
T6HE1
T6HF1
T6HM1
T6HQ1
T6JC1
4
T6JG1
4
T6JK1
2
T6JL1
2
T6JN1
T6JS1
T6KH1
T6KU1
T6KW1
T6KX1
T6KZ1
T6LK1
T6LL1
T6LM1
T6MM1
T6MQ1
3
T6MU1
T6MV1
T6MY1
T6MZ1
T6NA2
T6NB1
T6NB2
T6NC1
T6ND2
T6ND3
T6NE1
3
T6NF1
2
Loading...
Loading...
Nothing found
T6FL1
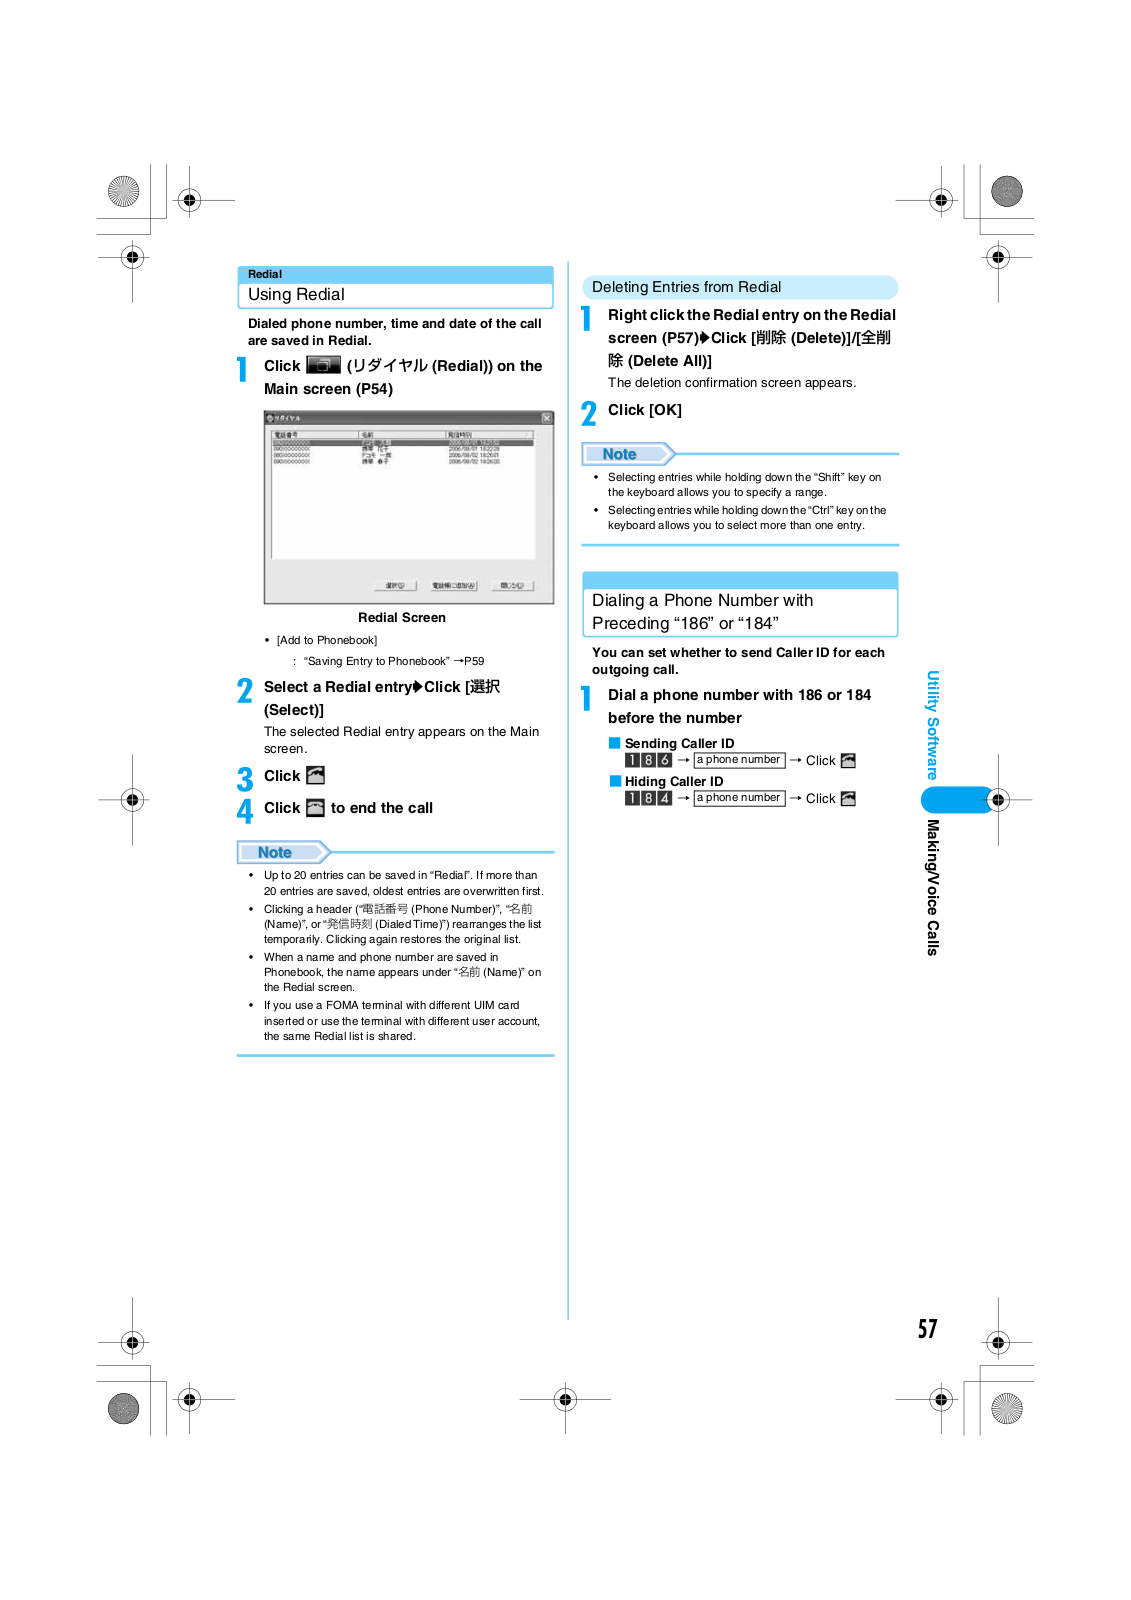
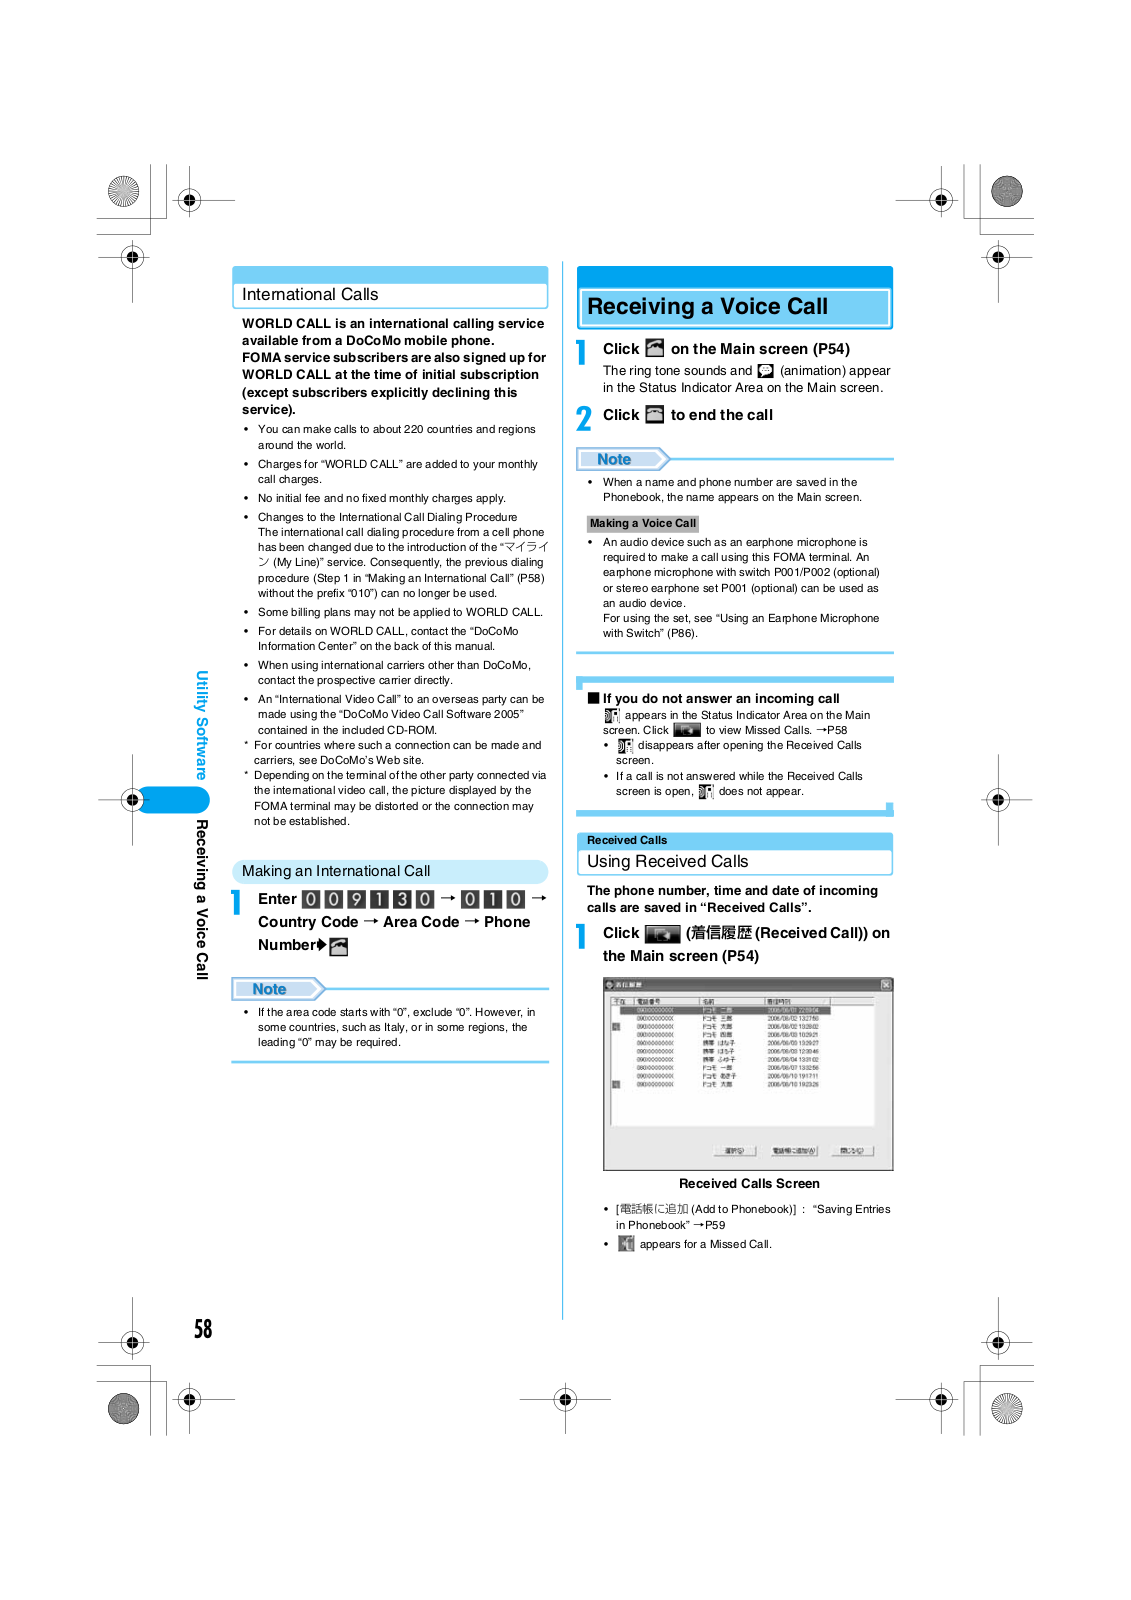
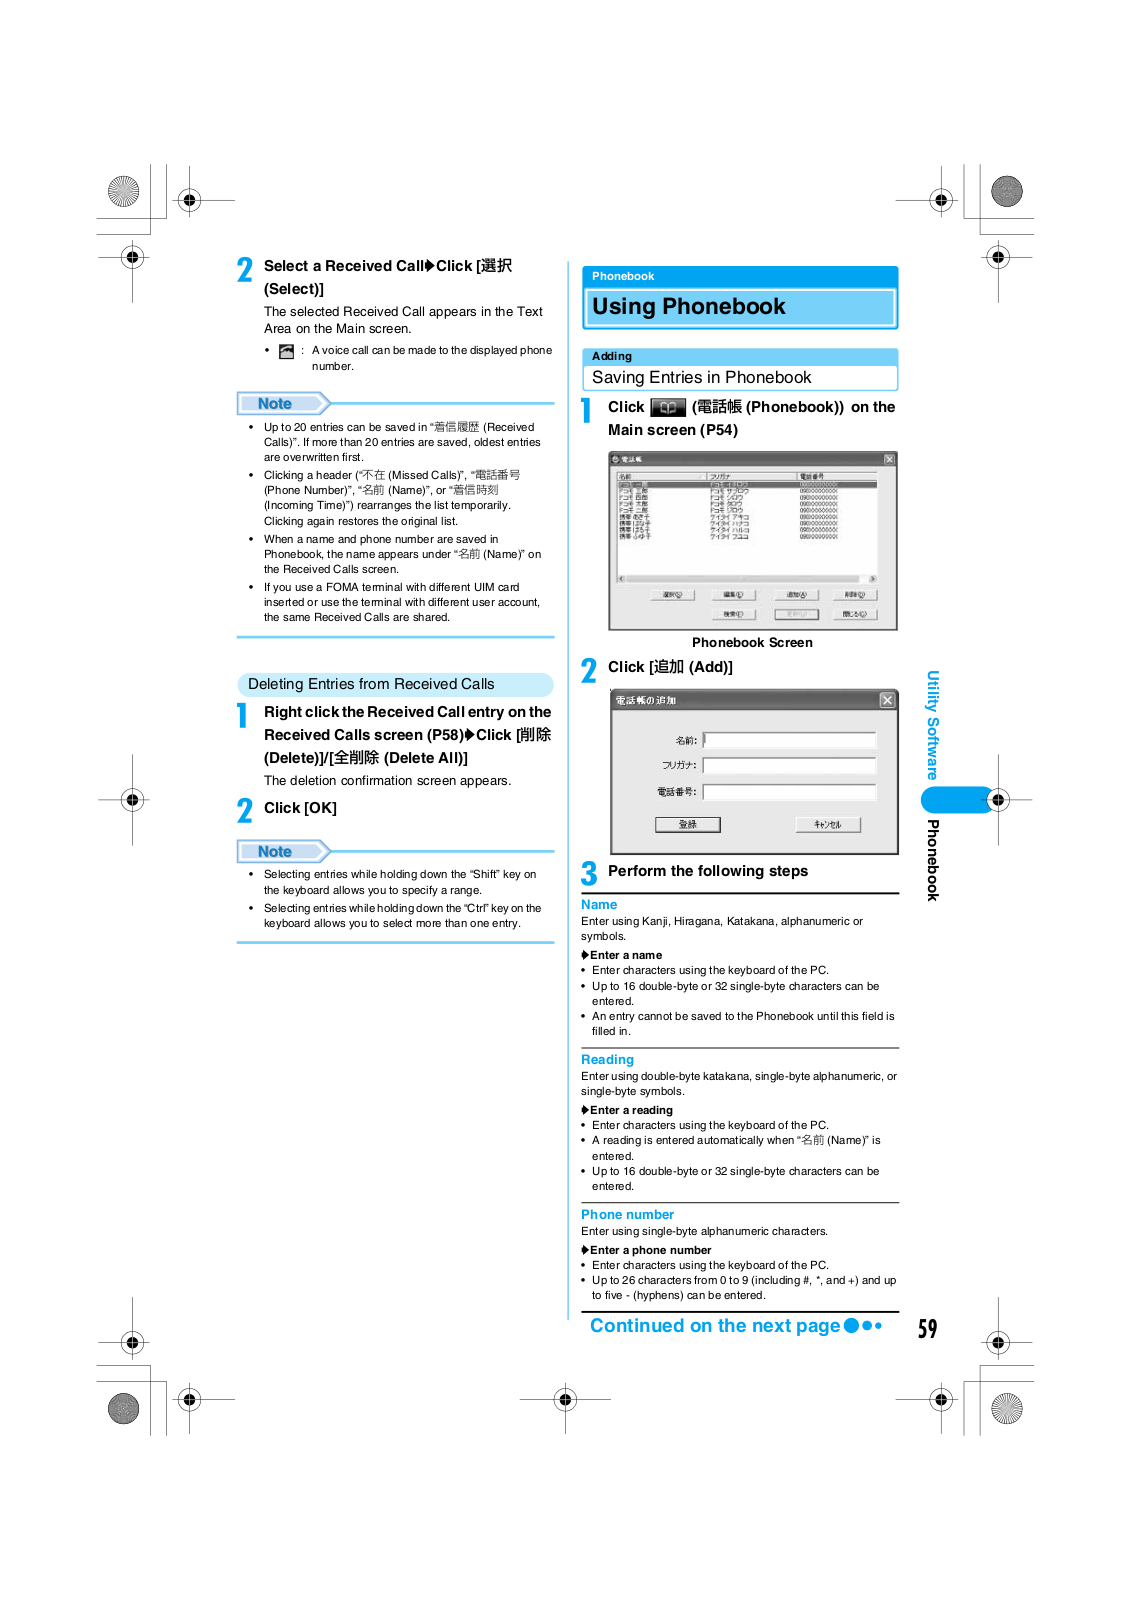
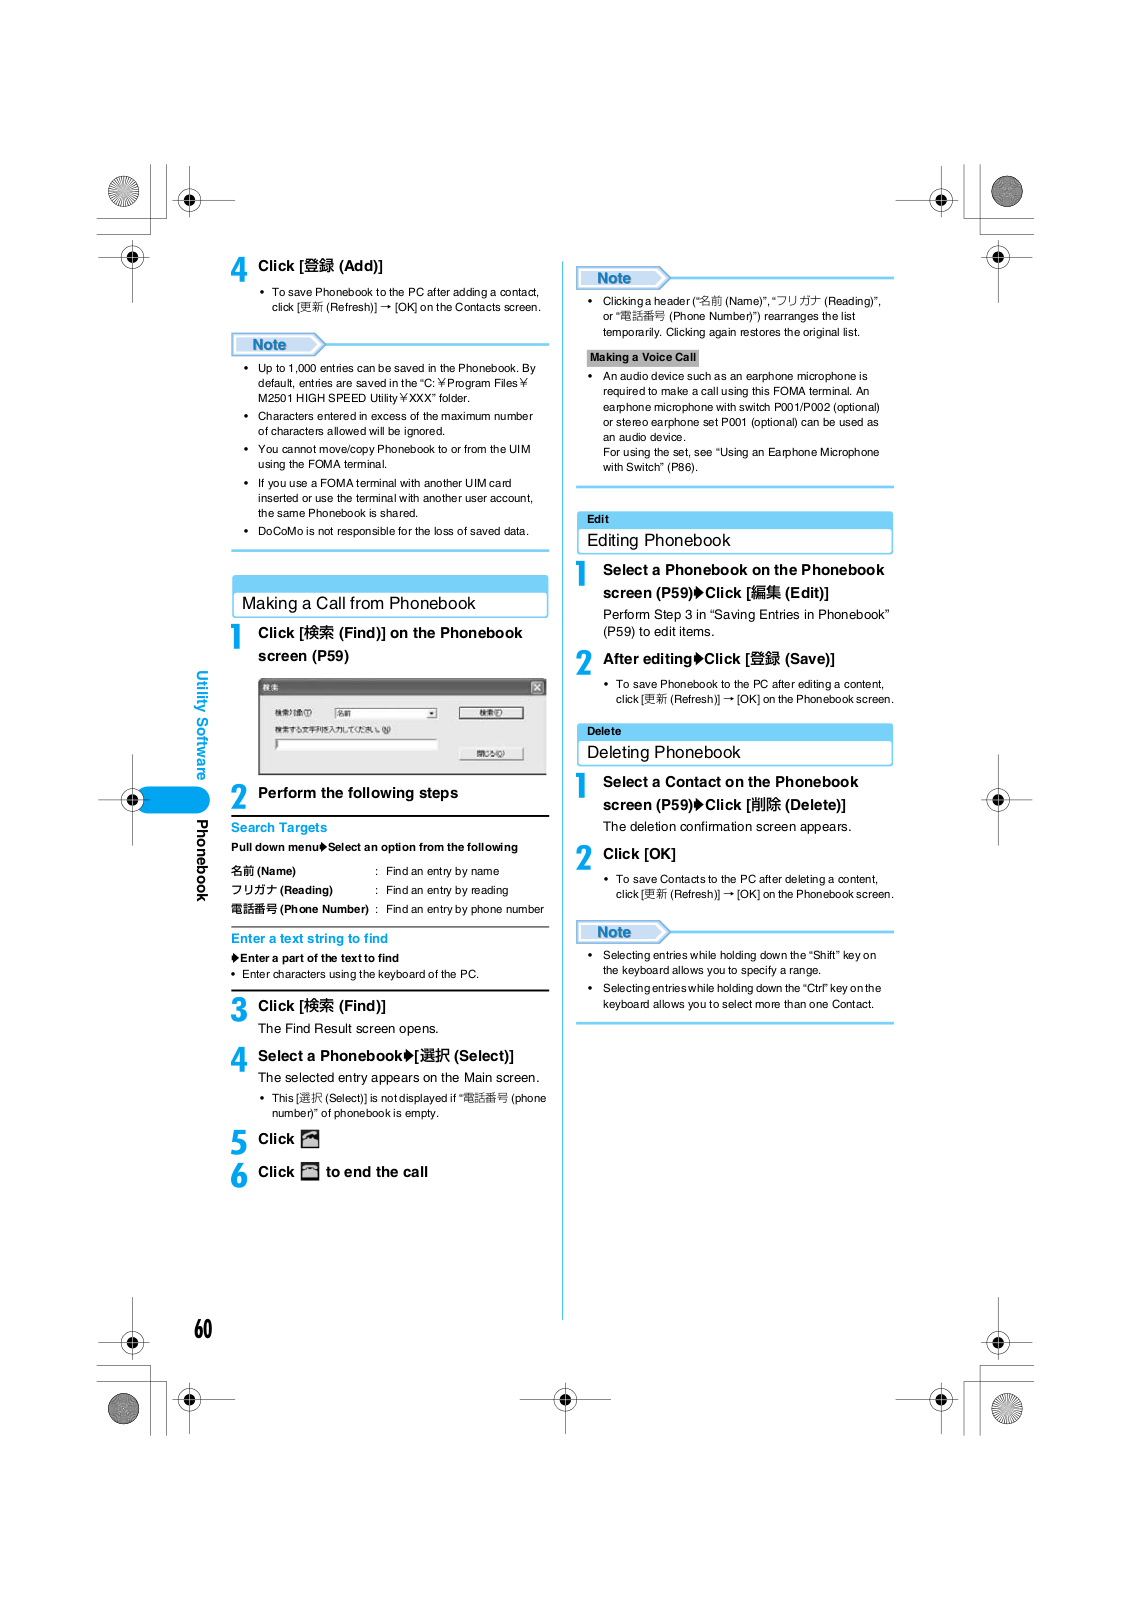
Users manual
50 pgs
2.11 Mb
0
Users manual
49 pgs
2.24 Mb
0
Table of contents
Loading...
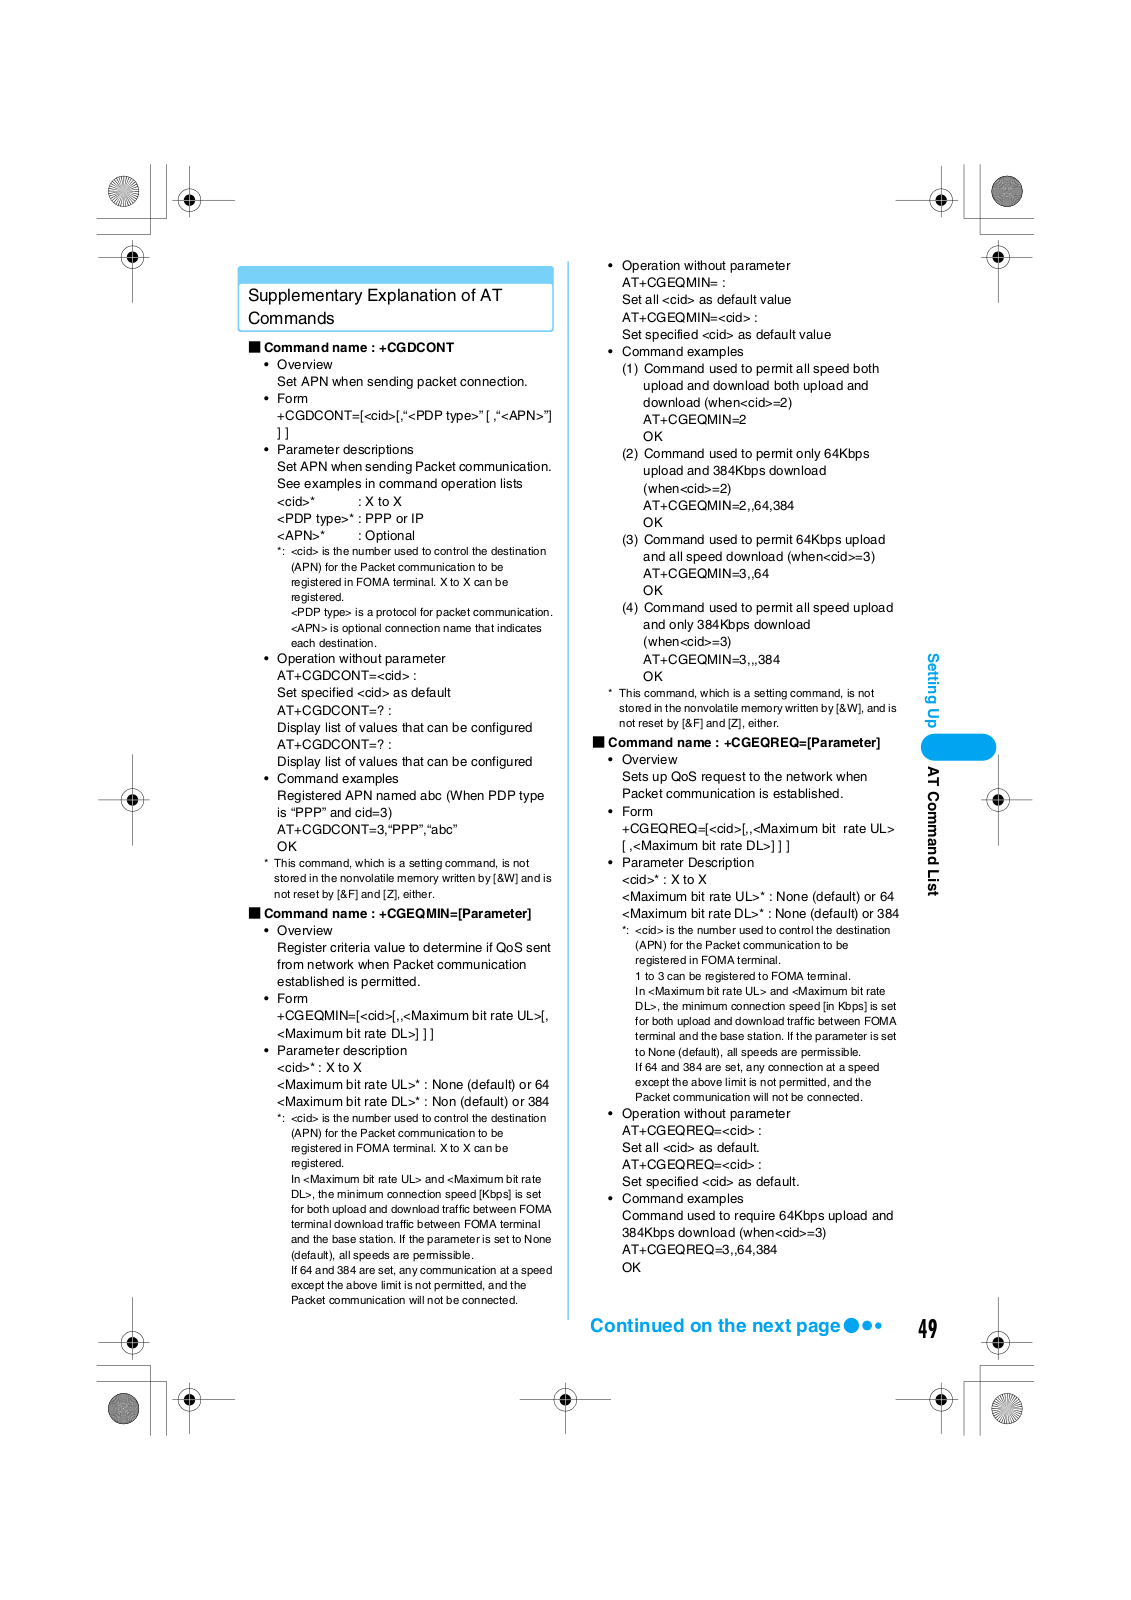
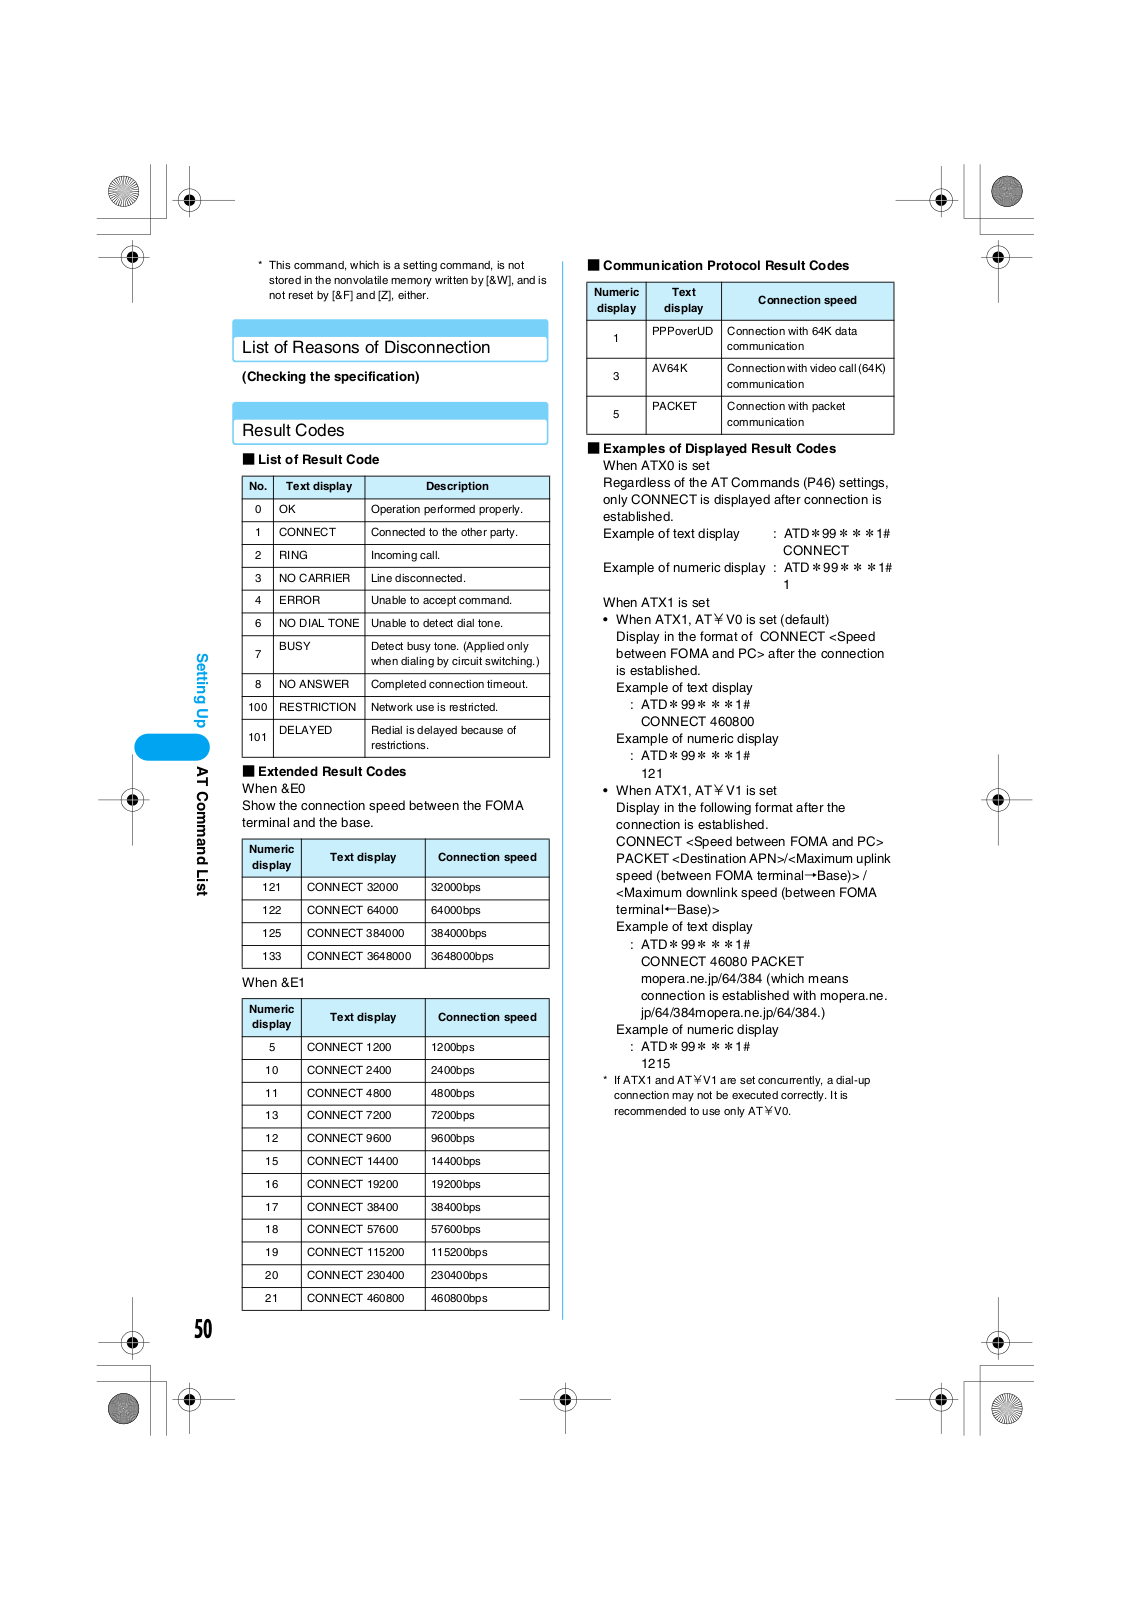
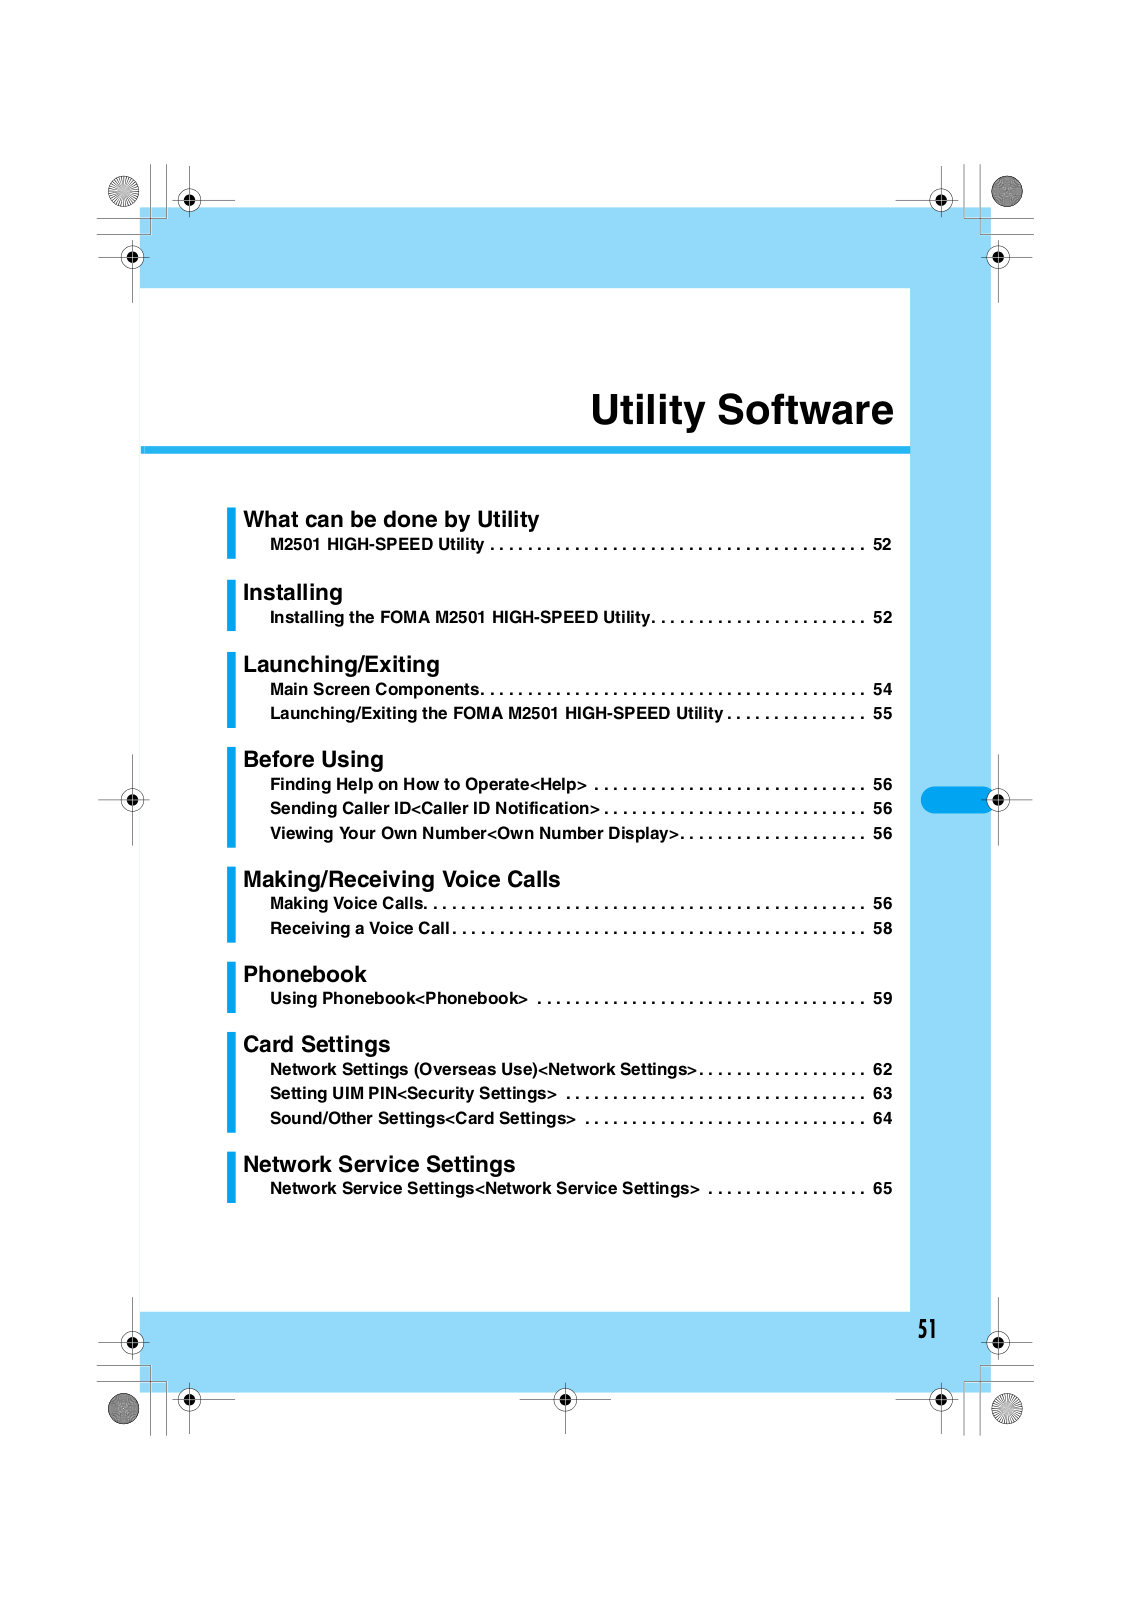
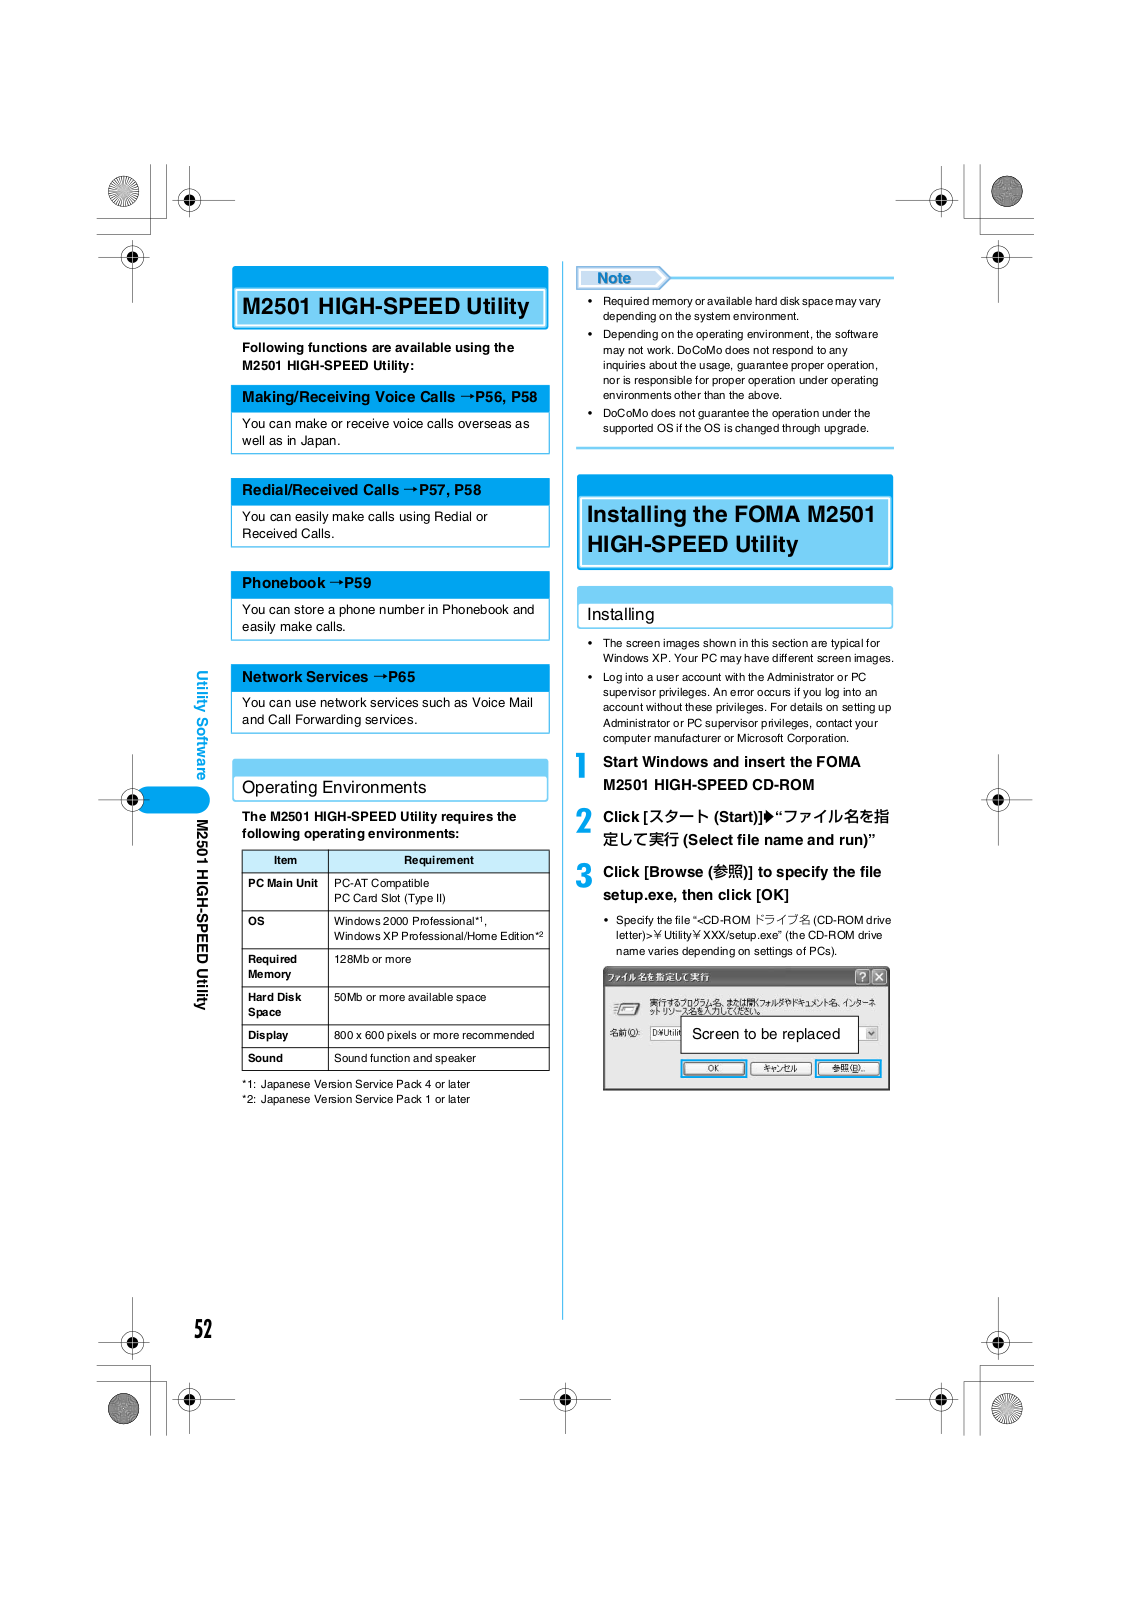
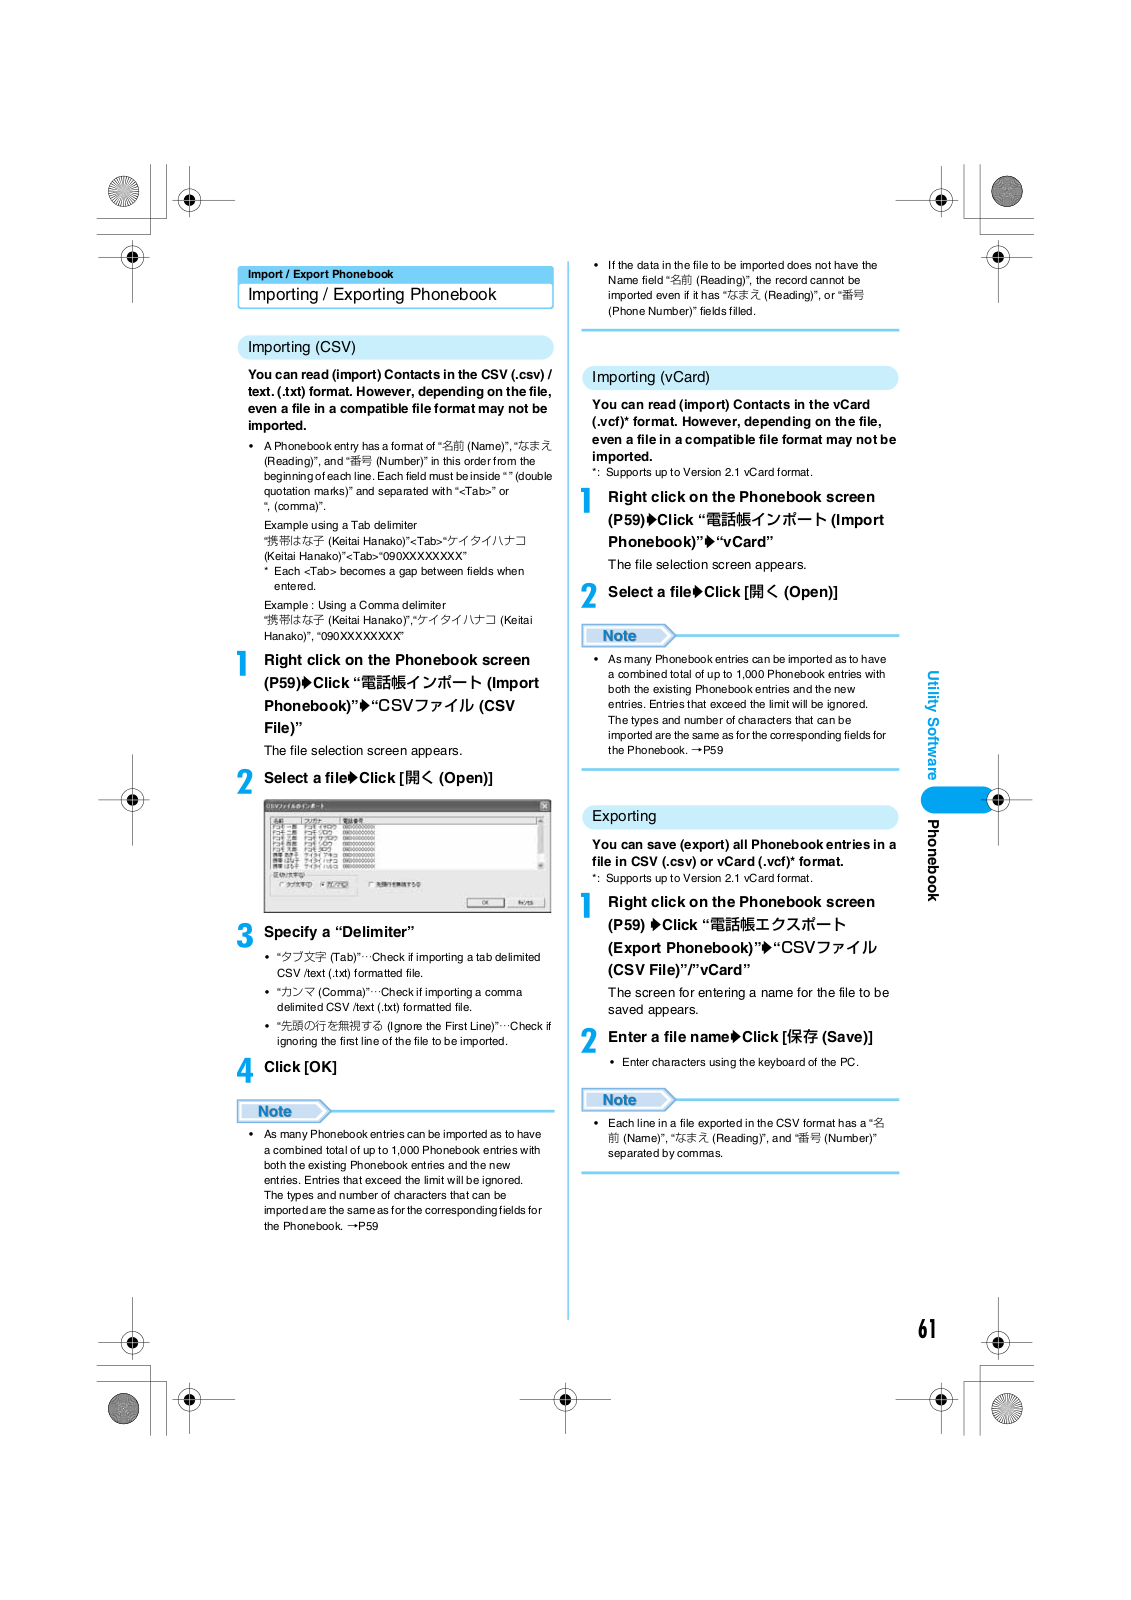
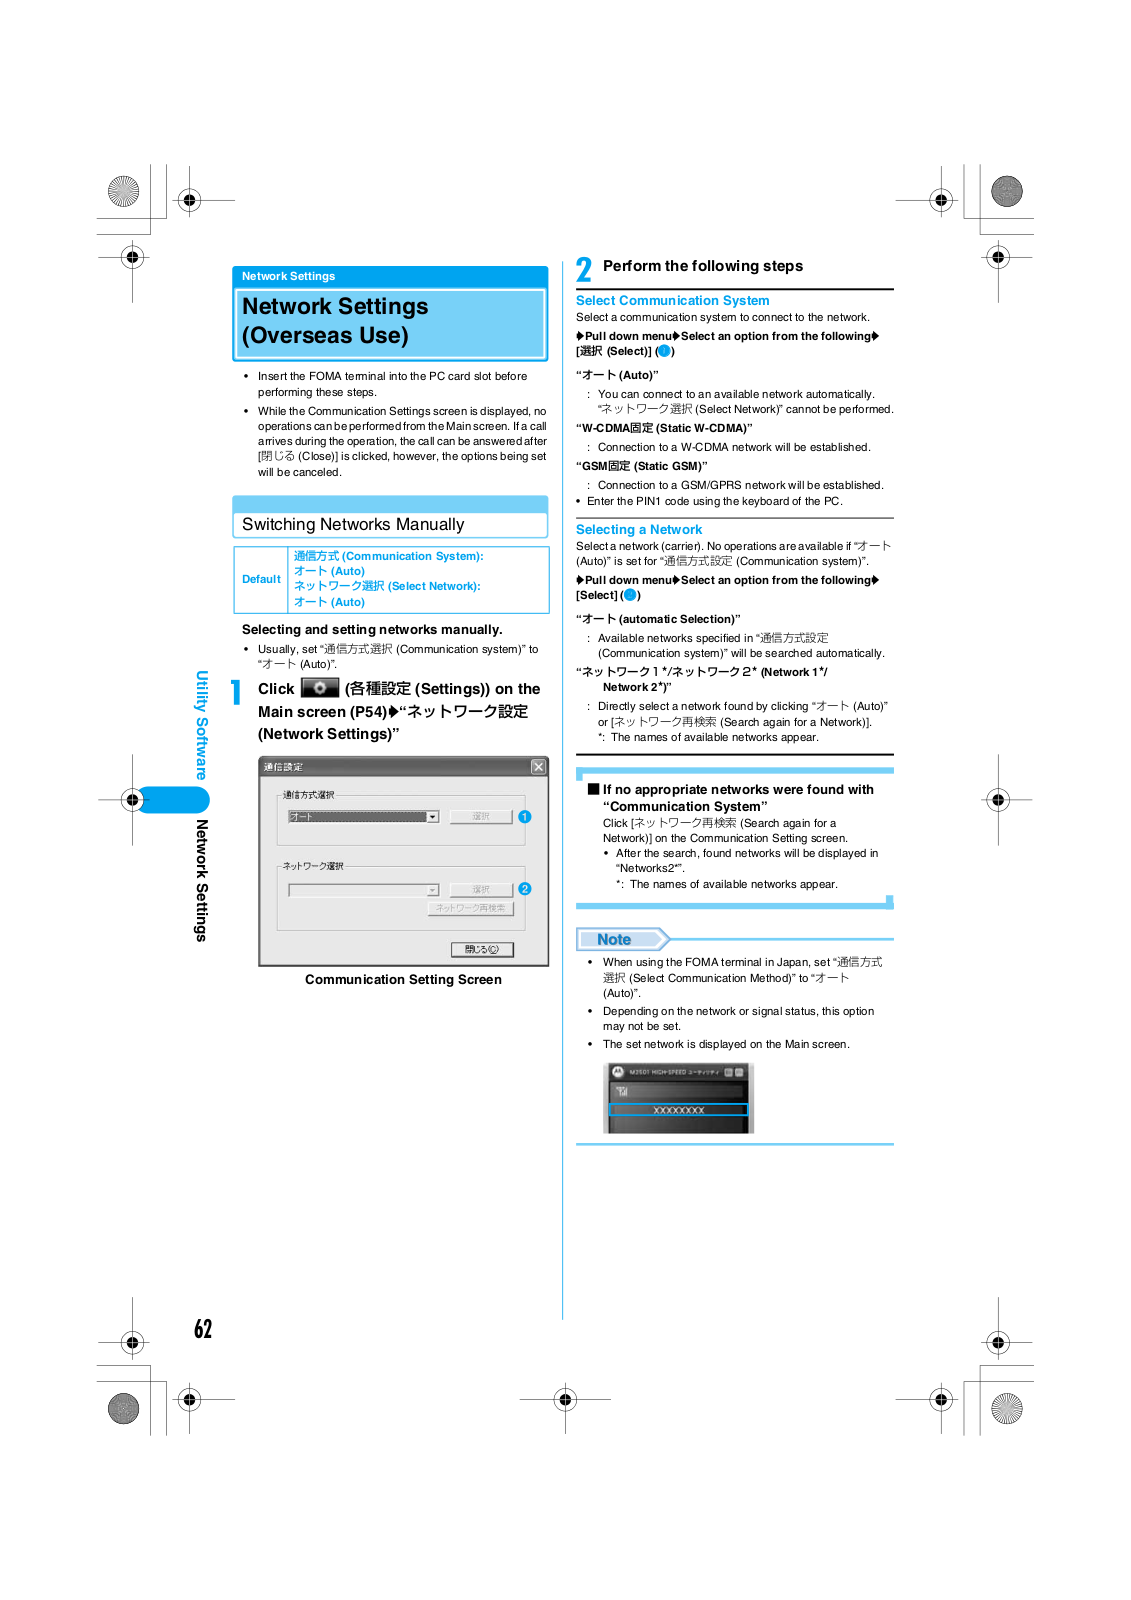
Motorola T6FL1 Users manual
...
Motorola Users manual
Download
Specifications and Main Features
Frequently Asked Questions
User Manual
Download
Loading...
+
hidden pages
Unhide
You need points to download manuals.
1 point = 1 manual.
You can buy points or you can get point for every manual you upload.
Buy points
Upload your manuals
 Loading...