


APPLICANT: MOTOROLA, INC. FCC ID: IHDT6EB1
INSTRUCTION MANUAL
A preliminary draft copy of the Users Manual follows:
EXHIBIT 8
Welcome
Welcome to the world of Mot orol a di gital wireless
communications! We are pleas ed that you hav e chosen the
Motorola V878 wireless phone.
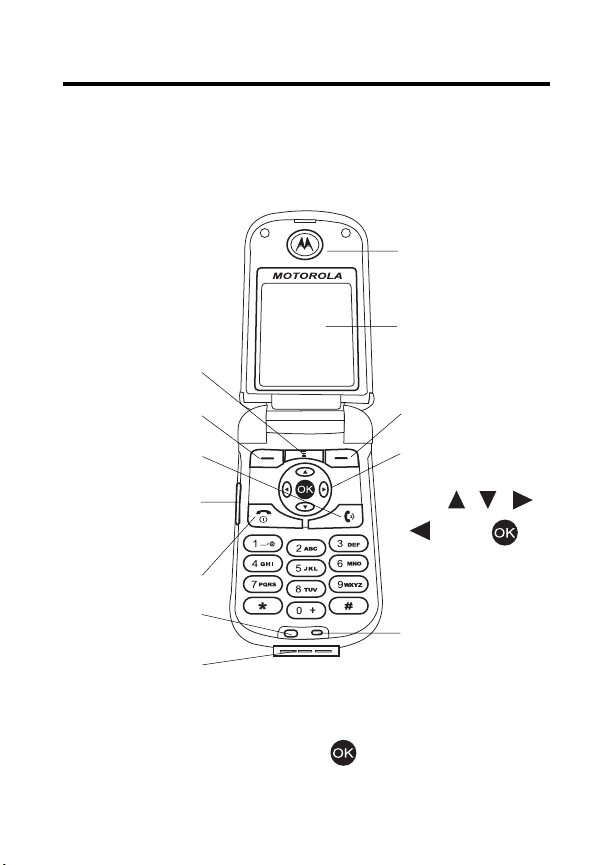
Earpiece
Internal/Main
Display
Menu Key
Left Soft Key
Call/Answer Key
In-Call Volume/
Voice Activation/
Camera Key
Power/End Key
Ambient Light
Sensor
Charger/
Accessory Port
Tip:
5-way navigation key (except ) also serves as
shortcuts to menu features by setting home keys (see
page 94).
Right Soft Key
5-Way Navigation
Key:
Scroll , , ,
. Press to
perform right soft
key function.
Microphone
1

Personal Communications Se ctor
600 North U.S. Highway 4 5
Libertyville, Illinois 60048
1-800-331-6456 (United States)
1-888-390-6456 (TTY/TDD United States)
1-800-461-4575 (Can ada)
www.motorola.com
www.motorola.ca
MOTOROLA and the Stylized M Log o are registered i n the US Patent &
T rademark Office. Java and all other Java-based marks are trademarks or
registered trademarks of Su n M icrosystems, Inc . in the U.S. and other
countries. All other product or ser vice names are the property of their
respective owners.
© Motorola, Inc. 2003.
Software Copyright Notice
The Mot orola products described in this manual may include copyrighted
Motorola and third-party software stored in semiconductor memories or
other media. Laws in the United States and other countries preserve for
Motorola an d t h i rd - pa rty softwa re pro vi d er s ce rtai n e x cl u si ve righ ts for
copyri ghted s oftware, such as the exclusive ri ghts to distribute or
reproduce the copyrig hted software. Accordingly, any copyri ghted
software contained i n the Motorola products may not be modified,
reverse-engineered, distributed, or r eproduced in any manner to the
extent allowed by law. Furthermore, the purchase of the Moto rola
products shall not be deemed to grant either directly or by implication,
estoppel, or otherwi se, any license under the copyrights, patents, or
patent applications of Motorola or any third-party software provider,
except for the normal, non-exclusive, royalty-free license to use that
arises by operation of law i n the sale of a produc t.
Manual number: SJJN5736A
(United States)
(Canada)
2

Menu Map
Yo u can displ a y yo ur pho ne’ s ma in menu as i cons or as a te xt
list. Each has its ow n organization and is different from the
other. By default, your phone displays the main menu as
icons.
To change the menu display mode:
Find the Feature
Note:
The follo w i ng is the standard phone menu layout. Menu
organization and f eatur e names ma y vary on yo ur phone . Not
all features may be available for all users.
>
Settings
>
Menu style
3

Main Menu Display
Msg. cent er *
• Text messages
• Multimedia msgs.
• Voice mailbox
• Cell broadcast
• Setti ngs
• Sending his tory
• Service command
Games
• Five ball
• Flying
• Popo car
• Sound effect
Alarm clock
•On
•Off
Chatroom *
Ouick access
•Browser
• Media center
• Las t call tim e
• W allpaper
• Add entry to phoneb ook
•Calculator
• Games
• Meeting mode
• Ringing tone
•Edit
Media center
• New picture
• Photo album
•Picture
• Anima tion
• Melody
• V oice not es
•Video
• Download media
• Vie w free space
Tools
• Calendar
•Calculator
•Stopwatch
• To ne editor
• Voice commands
• Video player
• My picture
Java
• BombHunt
• SpaceFighter
Settings
• Language
• Bac klight
• Adjust contrast
•Clock
• Auto power off
• Display
• Externa l display
•Key lock
• Input m ode
• Home key s
• Restore factory
•Security
• Call f eatures
•Network
• Connection indication
• Minute remind er
• Menu style
• Java settings
• Light sensor
* Optional network, SIM card, or subscription-dependent feature.
4
Main Menu Display
Profile
•Normal
• Meeting
• Ou tdo or s
•Car
•Customized
•Office
• Handsfree
• Headset
•Silence
Recent calls
• Missed calls
• Received calls
• Dialed calls
•Erase all
• Call time
• Call cost
• GPRS data counter
• GPRS connection time
• In-call count
• Session information
Phonebook
• Sear c h
•Add
•Erase
•Copy
•Option
• Speed dial
• Caller group
• Personal number
• Fixed dial number
•Voice tags
•My Own Card
Ringing style
• Ringing volume
• Ringing tone
• Incom ing call alert
•Vibrating
• Mes sa ge alert tone
• Key tone volume
• Key tone type
• Warning tones
• Startup music
Camera
V. recorder
Browser *
•Home
•Bookmark
•Profiles
• Appearance settings
• Download settings
• Go to address
• Clear the cache
• Service Inbox
• Certificates
Bookmark
Voice notes
STK *
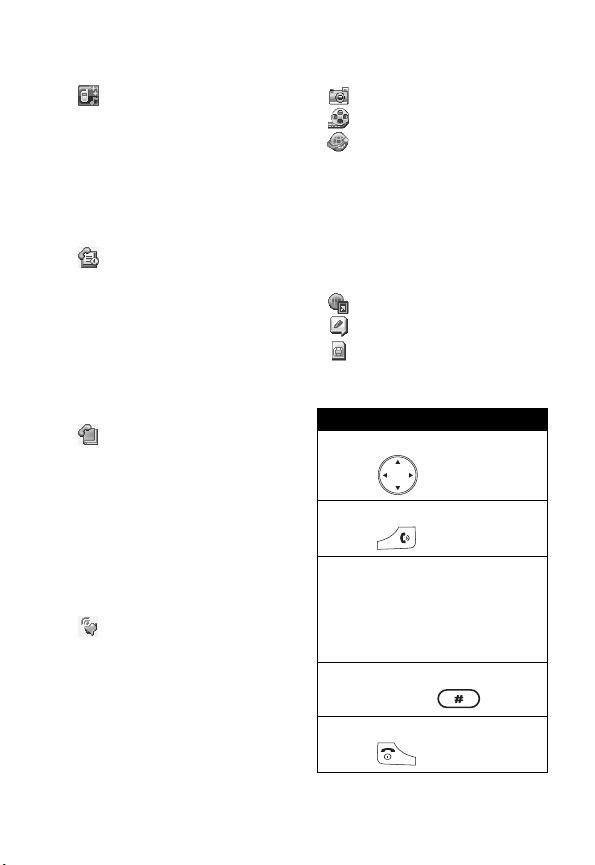
Shortcuts
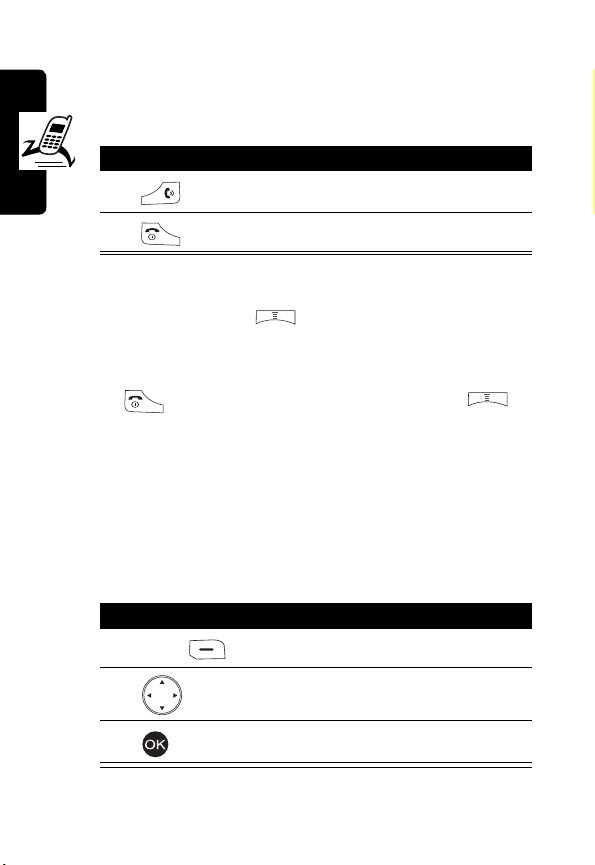
Open menu optio ns :
Pres s (in idle).
Go to dialed calls list:
Press (in idle).
T urn on voice-activated
commands:
Press and hold the v o ice
activation key (in idle) and then
say a command into the
microphone.
Turn off the ri n ger:
Press and hold (in idle).
Exit men u system:
Press .
* Optional network, SIM card, or subscription-dependent feature .
5

Contents
Menu Map . . . . . . . . . . . . . . . . . . . . . . . . . . . . . . . . . . . . . . 3
Safety and General Information . . . . . . . . . . . . . . . . . . . 12
Getting Started . . . . . . . . . . . . . . . . . . . . . . . . . . . . . . . . . 19
What’s in the Box? . . . . . . . . . . . . . . . . . . . . . . . . . . . . . 19
About This Guide . . . . . . . . . . . . . . . . . . . . . . . . . . . . . . 19
Installing the SIM Card . . . . . . . . . . . . . . . . . . . . . . . . . . 20
Installing the Battery. . . . . . . . . . . . . . . . . . . . . . . . . . . . 20
Charging the Battery. . . . . . . . . . . . . . . . . . . . . . . . . . . . 21
Battery Use. . . . . . . . . . . . . . . . . . . . . . . . . . . . . . . . . . . 22
Turning On Your Phone. . . . . . . . . . . . . . . . . . . . . . . . . . 23
Adjusting the In-Call Volume. . . . . . . . . . . . . . . . . . . . . . 24
Displaying Your Phone Number . . . . . . . . . . . . . . . . . . . 25
Making a Call . . . . . . . . . . . . . . . . . . . . . . . . . . . . . . . . . 25
Answering a Call. . . . . . . . . . . . . . . . . . . . . . . . . . . . . . . 26
Muting/Unmuting a Call. . . . . . . . . . . . . . . . . . . . . . . . . . 26
Learning to Use Y our Phone . . . . . . . . . . . . . . . . . . . . . . 27
Using the Internal Display. . . . . . . . . . . . . . . . . . . . . . . . 27
Using Menus. . . . . . . . . . . . . . . . . . . . . . . . . . . . . . . . . . 30
Entering Text. . . . . . . . . . . . . . . . . . . . . . . . . . . . . . . . . . 31
Using the External Display . . . . . . . . . . . . . . . . . . . . . . . 38
Locking and Unlocking Your Phone . . . . . . . . . . . . . . . . 39
Setting and Changing Codes . . . . . . . . . . . . . . . . . . . . . 40
If You Forget Codes . . . . . . . . . . . . . . . . . . . . . . . . . . . . 41
If You Enter the Wrong PIN or PIN2 Code
3 Times in a Row . . . . . . . . . . . . . . . . . . . . . . . . . . . . . . 41
Setting Up Your Phone. . . . . . . . . . . . . . . . . . . . . . . . . . . 42
Adjusting the Backlight . . . . . . . . . . . . . . . . . . . . . . . . . . 42
Adjusting Display Contrast . . . . . . . . . . . . . . . . . . . . . . . 42
6

Setting Time and Date. . . . . . . . . . . . . . . . . . . . . . . . . . 42
Setting Local Time. . . . . . . . . . . . . . . . . . . . . . . . . . . . . 43
Settin g Power-Of f Ti me . . . . . . . . . . . . . . . . . . . . . . . . . 43
Setting Display Color. . . . . . . . . . . . . . . . . . . . . . . . . . . 43
Setting a Wallpaper Image . . . . . . . . . . . . . . . . . . . . . . 44
Settin g a Scr e en Saver Im a ge . . . . . . . . . . . . . . . . . . . 44
Using Anykey Answer . . . . . . . . . . . . . . . . . . . . . . . . . . 45
Using Flip Answer . . . . . . . . . . . . . . . . . . . . . . . . . . . . . 45
Setting an Ambient Light Sensor. . . . . . . . . . . . . . . . . . 45
Calling Features . . . . . . . . . . . . . . . . . . . . . . . . . . . . . . . 46
Putting a Call on Hold . . . . . . . . . . . . . . . . . . . . . . . . . . 46
Answeri ng a New Call . . . . . . . . . . . . . . . . . . . . . . . . . . 46
Making a New Call . . . . . . . . . . . . . . . . . . . . . . . . . . . . 47
Making an Emergency Call . . . . . . . . . . . . . . . . . . . . . . 47
Selecting a Phone Number to Use . . . . . . . . . . . . . . . . 48
Redial i n g Auto ma tically. . . . . . . . . . . . . . . . . . . . . . . . . 48
Checking Recent Calls . . . . . . . . . . . . . . . . . . . . . . . . . 48
Erasing Recent Calls. . . . . . . . . . . . . . . . . . . . . . . . . . . 48
Redial i n g Re ce n t C a lls . . . . . . . . . . . . . . . . . . . . . . . . . 49
Saving Recent Calls in Your Phonebook. . . . . . . . . . . . 50
Messages and Chat . . . . . . . . . . . . . . . . . . . . . . . . . . . . 51
Writing an SMS M essage . . . . . . . . . . . . . . . . . . . . . . . 5 1
Sending an SMS Message . . . . . . . . . . . . . . . . . . . . . . 52
Saving an SM S Mes s age as a Dra ft . . . . . . . . . . . . . . . 53
Writing an MMS M e ssa g e . . . . . . . . . . . . . . . . . . . . . . . 54
Sending an MMS Message. . . . . . . . . . . . . . . . . . . . . . 58
Saving an MM S M essage as a Dra ft. . . . . . . . . . . . . . . 60
Checking a Received SMS/MMS Message. . . . . . . . . . 61
Checking a Sent or Unsent SMS/MM S Message . . . . . 61
Checkin g a Draf t S M S/M MS M e s sag e . . . . . . . . . . . . . 62
Managing an SMS/MMS Message . . . . . . . . . . . . . . . . 62
Editing an MMS Template . . . . . . . . . . . . . . . . . . . . . . . 64
7

Setting a Voice Mail Service Number . . . . . . . . . . . . . . . 64
Setting Message Topics . . . . . . . . . . . . . . . . . . . . . . . . . 65
Setting Service Commands . . . . . . . . . . . . . . . . . . . . . . 65
Opening a Chatroom. . . . . . . . . . . . . . . . . . . . . . . . . . . . 65
Setting SMS . . . . . . . . . . . . . . . . . . . . . . . . . . . . . . . . . . 69
Setting MMS . . . . . . . . . . . . . . . . . . . . . . . . . . . . . . . . . . 69
Settin g Me m o r y for S avin g S MS Mes s a ge s . . . . . . . . . . 69
Checking SIM Card/Phone Memory for
Saving SMS Messages. . . . . . . . . . . . . . . . . . . . . . . . . . 69
Checking Phone M emory f or Sa ving MMS Messages . . 69
Setting Up Your Phonebook . . . . . . . . . . . . . . . . . . . . . . 70
Setting Memory for Saving Your Phonebook . . . . . . . . . 70
Checking SIM Card/Phone Memory for
Saving Your Phonebook . . . . . . . . . . . . . . . . . . . . . . . . . 70
Creating a Phonebook Entry. . . . . . . . . . . . . . . . . . . . . . 71
Phonebook Entry Options . . . . . . . . . . . . . . . . . . . . . . . . 71
Sorting Phonebook Entries. . . . . . . . . . . . . . . . . . . . . . . 73
Looking Up Your Phonebook to Make a Call. . . . . . . . . . 73
Setting 1-Touch Dialing Numbers . . . . . . . . . . . . . . . . . . 73
Renaming a Caller Group . . . . . . . . . . . . . . . . . . . . . . . . 76
Setting a Caller Group Ring To ne. . . . . . . . . . . . . . . . . . 77
Setting a Default Image as a Caller Group Icon . . . . . . . 77
Setting a Multimedi a Cente r Object as a
Caller Group Icon . . . . . . . . . . . . . . . . . . . . . . . . . . . . . . 79
Creating Your Per sonal Phonebook Entries . . . . . . . . . . 80
Settin g Fi xed Dia lin g N um be r s . . . . . . . . . . . . . . . . . . . . 83
Setting Voice Dialing Numbers . . . . . . . . . . . . . . . . . . . . 87
Sending a Phonebook Entry. . . . . . . . . . . . . . . . . . . . . . 89
Sending a Phonebook Entry as an SMS Message. . . . . 91
Creating Your Name Card. . . . . . . . . . . . . . . . . . . . . . . . 92
Checking Your Name Card . . . . . . . . . . . . . . . . . . . . . . . 92
Sending Your Name Card . . . . . . . . . . . . . . . . . . . . . . . . 93
8

Erasing Your Nam e Ca rd. . . . . . . . . . . . . . . . . . . . . . . . 93
Personalizing Your Phone . . . . . . . . . . . . . . . . . . . . . . . 94
Setting a Language. . . . . . . . . . . . . . . . . . . . . . . . . . . . 94
Replacing the Service Provider Name . . . . . . . . . . . . . 94
Setting Home Keys . . . . . . . . . . . . . . . . . . . . . . . . . . . . 94
Restoring Factory Settings . . . . . . . . . . . . . . . . . . . . . . 95
Creating an Option Shortcut . . . . . . . . . . . . . . . . . . . . . 95
Using an Option Shortcut . . . . . . . . . . . . . . . . . . . . . . . 95
Setting a Phone Profile . . . . . . . . . . . . . . . . . . . . . . . . . 96
Getting More Out of Y our Phone . . . . . . . . . . . . . . . . . . 99
Sending DTMF Tones . . . . . . . . . . . . . . . . . . . . . . . . . . 99
Making a Conference Call. . . . . . . . . . . . . . . . . . . . . . . 99
Ending a Conference Call . . . . . . . . . . . . . . . . . . . . . . 100
Diverting Calls. . . . . . . . . . . . . . . . . . . . . . . . . . . . . . . 100
Blocking Calls . . . . . . . . . . . . . . . . . . . . . . . . . . . . . . . 101
Setting Fax, Data, and Voice Calls . . . . . . . . . . . . . . . 101
Setting a Service Network. . . . . . . . . . . . . . . . . . . . . . 101
Setting a Voice Call Connected Remi nder . . . . . . . . . 102
Setting a Call Time Reminder. . . . . . . . . . . . . . . . . . . 102
Checking Call Time . . . . . . . . . . . . . . . . . . . . . . . . . . . 102
Clearing Call Time. . . . . . . . . . . . . . . . . . . . . . . . . . . . 102
Setting a Call Cost Counter. . . . . . . . . . . . . . . . . . . . . 103
Clearing Call Cost . . . . . . . . . . . . . . . . . . . . . . . . . . . . 103
Checking Call Cost . . . . . . . . . . . . . . . . . . . . . . . . . . . 103
Checking Call Credit . . . . . . . . . . . . . . . . . . . . . . . . . . 103
Displaying In-Call Time/Cost. . . . . . . . . . . . . . . . . . . . 104
Displaying Call Time/Cost after a Call. . . . . . . . . . . . . 104
Using STK Services . . . . . . . . . . . . . . . . . . . . . . . . . . 104
Personal Organize r Fe at u res . . . . . . . . . . . . . . . . . . . . 105
Turning On the Alarm Clock . . . . . . . . . . . . . . . . . . . . 105
Turning Off the Alarm Clock . . . . . . . . . . . . . . . . . . . . 106
Creating a Calendar Note . . . . . . . . . . . . . . . . . . . . . . 106
9

Moving/Copying a Calendar Note to Anothe r Date. . . . 108
Sending a Calendar Note as an SMS Message . . . . . . 109
Making a Call from a Calendar Note. . . . . . . . . . . . . . . 110
Checking a Calendar Note . . . . . . . . . . . . . . . . . . . . . . 110
Erasing a Calendar Note. . . . . . . . . . . . . . . . . . . . . . . . 110
Creating an Account Book . . . . . . . . . . . . . . . . . . . . . . 111
Checking Your Income . . . . . . . . . . . . . . . . . . . . . . . . . 112
Checking Your Expense . . . . . . . . . . . . . . . . . . . . . . . . 112
Checking Your Balance. . . . . . . . . . . . . . . . . . . . . . . . . 112
Erasing Account Books. . . . . . . . . . . . . . . . . . . . . . . . . 112
Using the Calculator . . . . . . . . . . . . . . . . . . . . . . . . . . . 112
Using the Stopwatch. . . . . . . . . . . . . . . . . . . . . . . . . . . 114
Setting Voice-Activated Options . . . . . . . . . . . . . . . . . . 116
Displaying World Time . . . . . . . . . . . . . . . . . . . . . . . . . 119
Turning On Your Phone’s Voice Recorder. . . . . . . . . . . 120
Renaming a Voice Note . . . . . . . . . . . . . . . . . . . . . . . . 121
Deleting a Voice Note . . . . . . . . . . . . . . . . . . . . . . . . . . 122
Deleting All Vo ice Notes . . . . . . . . . . . . . . . . . . . . . . . . 122
Sending a Voice Note . . . . . . . . . . . . . . . . . . . . . . . . . . 123
Checking a Voice Note . . . . . . . . . . . . . . . . . . . . . . . . . 125
Sorting Voice Notes . . . . . . . . . . . . . . . . . . . . . . . . . . . 126
Security . . . . . . . . . . . . . . . . . . . . . . . . . . . . . . . . . . . . . . 127
Locking and Unlocking the Keypads. . . . . . . . . . . . . . . 127
Setting a Closed User Group . . . . . . . . . . . . . . . . . . . . 128
News and Entertainment . . . . . . . . . . . . . . . . . . . . . . . . 129
Playing a Game . . . . . . . . . . . . . . . . . . . . . . . . . . . . . . 129
Managing a Photo F ol der . . . . . . . . . . . . . . . . . . . . . . . 129
Drawing a Picture . . . . . . . . . . . . . . . . . . . . . . . . . . . . . 129
Composing a Melody . . . . . . . . . . . . . . . . . . . . . . . . . . 136
Displaying a Multimedia Object. . . . . . . . . . . . . . . . . . . 141
Deleting a Multimedia Object . . . . . . . . . . . . . . . . . . . . 142
Sending a Multimedia Object . . . . . . . . . . . . . . . . . . . . 142
10

Renaming a Multimedia Obj ect. . . . . . . . . . . . . . . . . . 145
Moving a Photo/Pictur e to Anot her Photo Folder . . . . 146
Checking a Multimedia Object. . . . . . . . . . . . . . . . . . . 147
Sorting Multimedia Objects . . . . . . . . . . . . . . . . . . . . . 147
Playing a Java Game . . . . . . . . . . . . . . . . . . . . . . . . . 148
Setting Java. . . . . . . . . . . . . . . . . . . . . . . . . . . . . . . . . 148
Turning On Your Phone Camera . . . . . . . . . . . . . . . . . 148
Customizing Your Phone Camera . . . . . . . . . . . . . . . . 154
Tur ning On Your Phone’s Video Recorder. . . . . . . . . . 160
Renaming a Video. . . . . . . . . . . . . . . . . . . . . . . . . . . . 162
Deleting a Video . . . . . . . . . . . . . . . . . . . . . . . . . . . . . 163
Sending a Video . . . . . . . . . . . . . . . . . . . . . . . . . . . . . 163
Checking a Video . . . . . . . . . . . . . . . . . . . . . . . . . . . . 166
Sorting Videos. . . . . . . . . . . . . . . . . . . . . . . . . . . . . . . 166
Setting Network Connection . . . . . . . . . . . . . . . . . . . . 167
Connecting to the Internet. . . . . . . . . . . . . . . . . . . . . . 167
Setting a Bookmark. . . . . . . . . . . . . . . . . . . . . . . . . . . 170
Downloading Multimedia Objects . . . . . . . . . . . . . . . . 170
Setting Web Page Display Style . . . . . . . . . . . . . . . . . 170
Allowing/Rejecting Cookies. . . . . . . . . . . . . . . . . . . . . 170
Clearing Cache Memory . . . . . . . . . . . . . . . . . . . . . . . 170
Reading Your Networking Provider’s Mess ages . . . . . 171
Reading Certificates . . . . . . . . . . . . . . . . . . . . . . . . . . 171
T roubleshootin g . . . . . . . . . . . . . . . . . . . . . . . . . . . . . . 172
Specifi c Abs o rp tion Rate Data . . . . . . . . . . . . . . . . . . 178
Index. . . . . . . . . . . . . . . . . . . . . . . . . . . . . . . . . . . . . . . . 180
11

Safety and General Information
IMPORTANT INFORMATION ON SAFE AND EFFICIENT OPERATION.
READ THIS INFORMATION BEFORE USING YOUR PHONE.
The information provided in this document supersedes the general safety
information in user guides published prior to December 1, 2002.
Exposure To Radio Frequency (RF) Energy
Your phone contains a transmitter and a receiver. When it is ON, it
receives and transmits RF energy . When you communicate with your
phone, the system handling your cal l controls the power level at which
your phone transm its.
Your Motorola phone is desi gned to comply with local regulatory
requirements in your country concerning exposure of human beings to RF
energy.
Operational Precautions
T o assure optimal phone performance and make sure human exposure to
RF energy i s within the guidelines set forth in the rel evant standards,
always adhere to th e following procedures.
External Antenna Care
Use only the supplied or M otorola-approved replacement ant enna.
Unauthorized anten nas, modificati ons, or at tachment s could damage the
phone.
Do NOT hold the external antenna when the phone is IN USE. Holding
the external antenna affects call quality and may caus e the phone to
operate at a higher power level than needed. In addition, use of
unauthorized antennas may result in non-compliance with the local
regulatory requirements in your country.
12

Phone Operation
When pla cing or receiving a phone call, hold your phone as you would a
wireline telephone.
Body-Worn Operation
T o maintain compliance with RF energy exposure guidelines, if you wear a
phone on your body when transmi tting, always place the phone in a
Motorola-supplied or approved clip, holder, holster, case, or body harness
for this phone, if available. Use of accessories not approved by Motorola
may exceed RF energy exposure gui delines. If you do not use one of the
body-worn accessories approved or suppli ed by Motorola, and are not
using the phone held in the normal use position, ensure the phone and its
antenna are at least 1 inch (2.5 centimeters) from your body when
transmitting.
Data Operation
When using any data feature of the phone, with or without an accessory
cable, position the phone and its antenna at least 1 inch (2.5 centimeters)
from your body.
Approved Accessories
Use of accessories not approved by Moto rola, inc luding but not limi ted to
batteries and anten na, may cause your phone to exceed RF energy
exposure guidelines. For a list of approved Motorola accessories, visit our
website at
www.Motorola.com
.
RF Energy Interference/Compatibility
Note:
Nearly every electro nic device is suscept ible to RF energy
interference from external sour ces if in adequately shielded, designed, or
otherwise configured for RF energy compatibility. In some circumstances
your phone may cause int erference.
Facilities
Turn off your phone in any facility where posted notices instruct you to do
so. These facilities may include hospitals or health ca re facilities that may
be usin g equipment that i s sensitive to external RF en ergy.
13

Aircraft
When i nstructed to do so, turn of f your phone when on board an aircraft.
Any use of a phone must be in accordance with applicable regulations per
airline crew instructions.
Medical Devic es
Pacemakers
Pa ce m aker ma n ufacture rs recommend th at a m i nimum s e pa r ation of
6 inches (15 centimeters) be mai ntain ed betwee n a handhel d wireless
phone and a pacemaker.
Persons wit h pacemaker s sho u ld:
•
ALWAYS keep the ph one more than 6 inches (15 centimeters) from
your pacemaker when the phone is turned ON.
•
NOT carry the phone in the breast pocket.
•
Use th e ear opposite the pacemaker to minimiz e the poten tial for
interference.
•
T urn OFF the phone immediately if you have any reason to suspect
that interference is taking place.
Hearing Aids
Some digital wireless phones may interfere with some hearing aids. In the
event of such interference, you may want t o consult your hearing aid
manufacturer to discuss a lternatives.
Other M edical Device s
If you use any other personal medical device, consult the manufacturer of
your device to determine if it is adequately shielded from RF energy. Your
physician may be able to assist you in obtaining this information.
Use While Driving
Check the laws and regulations on the use of phones in the area where
you drive. Always obey them.
14

When using your phone while driving, please:
•
Give full attent ion to dr iving and to the road.
•
Use hands -free operation, if available.
•
Pull off the road and park before making or answering a call if driving
conditions so require.
Respons ible driving bes t pract ices may be found i n the “Wireless Phone
Safety Tips” at the end of this manual and at the Mot orola website:
www.Motorola.com/callsmart
.
Operational Warnings
For Vehicles With an Air Bag
Do not place a phone in the area over an air bag or in the air bag
deployment area. Air bags inflate with great force. If a phone is placed in
the air bag deployment area and the air bag inflates, the phone may be
propelled with great force and cause serious injury to occupants of the
vehicle.
Potentially Explosive Atmospheres
Turn of f your phone prior to entering any a rea with a potentially explosive
atmosphere, unless it is a phone type especially qualified for use in such
areas and certified as “Intrinsically Safe.” Do not remove, install, or charge
batteries in such areas. Sparks in a potentially explosive atmosphere can
cause an explosion or fire resulting in bodi ly inju ry or even deat h.
Note:
The areas with potentially explosive atmospheres referred to above
include fueling area s such as below decks on bo ats, fuel or chemical
transfer or storage facilities, areas where the air contains chemicals or
particles, such as grain, dust, or meta l powders. Ar eas with potentially
explosive at m ospheres are often but not always posted.
Blasting Caps and Areas
To avoid possible interference with blasti ng operati ons, turn OFF your
phone when you are near electrical blasting caps, in a blasting area, or in
areas posted “T urn off electronic devices.” Obey all signs and instructions.
15
Batteries
Batteries can cause property damage and/or bodily injury such as burns if
a conductive material such as jewelry, keys, or beaded cha ins touch
exposed t erminals. The conductive material may complete an electrical
circuit (short circuit) and become quite hot. Exercise care in handling any
charged battery, particularly when pl acing it inside a pocket, purse, or
othe r co ntainer wi th m e t al object s .
and chargers.
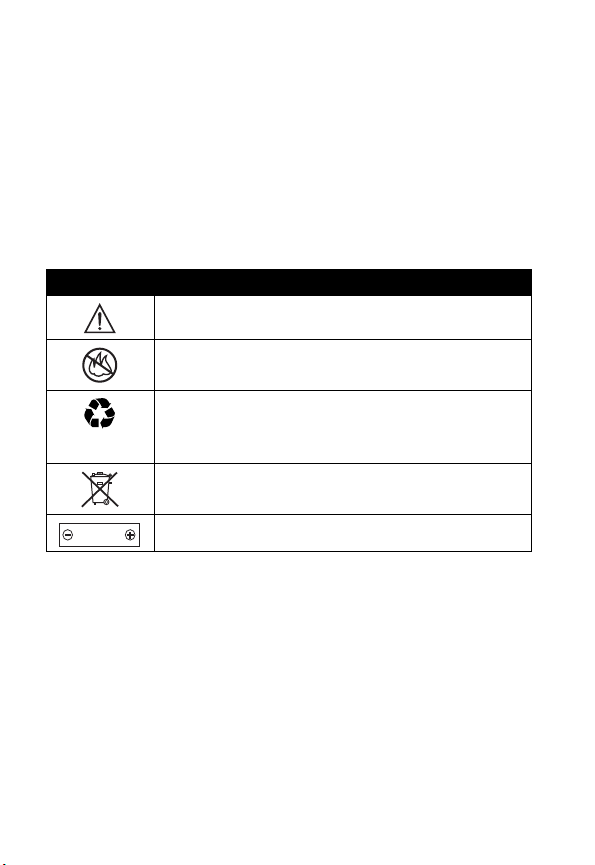
Your battery or phone may con tain symbols, defi ned as follows:
Symbol Definition
Important safety information will follow.
Your battery or phone should not be dispos ed of in a
fire.
Your batte ry or phone may require recycl ing in
accordance wi th local laws. Contact your local
regulatory authorities for more information.
Your battery or phone should not be thrown in the
trash.
LiIon BATT
Your phone contains an internal lithium ion battery.
Use only Motorola original batteries
Seizures/Blackouts
Some people may be suscepti ble to epil eptic sei zures or blackouts when
exposed to blinking light s, such as wh en watching television or playi ng
vide o games. These seizures or blackouts may occur even if a person
never ha d a previous seizure or b l ac kou t.
If you have experienced seizures or blackouts, or if you have a family
hist ory of such occurrences, please consult with your doctor before
playing video gam es on your ph one or enabling a blinking-lights feature
on your phone. (The bl inking-light feature is not available on all products.)
16

Parents should monitor their children's use of video game or other
features that incorporate blinking lights on the phones. All persons should
discontinue use and cons ult a doctor if any of the following symptoms
occur: convulsion, eye or muscle twitching, loss of awareness, involuntary
movements, or disorienta tion.
To limit the like lihood of su ch symptoms, please take th e fo llowi ng safety
precautions:
•
Do not play or use a blink ing-lights featu re if you are ti red or need
sleep.
•
Take a min i m u m of a 15 - m i n ute brea k ho urly.
•
Play in a room i n which all lights are on.
•
Play at the farthest dist ance possible from the screen.
Repetitive Motion Injuries
When you play games on your ph one, you may experience occasional
discom fort in your hands, arms, shoulders, neck, or other parts of your
body. Follow these instructions to avoid problems such as te ndonitis,
carpal tunnel syndrome, or other musculoskeletal disorders:
•
Take a minimum 15-minute break every hour of game playing.
•
If your hands, wrists, or arms become tired or sore while playing,
stop and rest for several hours before playing again.
•
If you con ti nue to have sor e hands, wrists, or arms during or after
play , stop playing and see a doctor.
17

European Union Directives Conformance Statement
Hereby, Motorola declares that this product is in compliance
with
•
The essential requirements and other relevant provisions of
Directive 1999/5/EC
•
All other relevant EU Directives
IMEI: 350 034/40/394721/9
0168
Type: MC2-41H14
The ab ove gives an example o f a typical Product Approval Nu m ber.
You can view your pr oduct 's Declar ation of Conformity (DoC) to Direc tive
1999/5/EC (the R&TT E Directi ve) at www.motor ola.com /rtte - to find your
DoC, enter the product Approval Number from your product's label in the
"Search" bar on the Web site.
18
Product
Approv al
Number

Getting Started
What’s in the Box?
Your digital wireless phone comes wit h a battery and
charger . You can purchase ot her acce ssories t o customi ze
your phone for maximum performance and portability.
To purchase Motorola Original™ acces sori es, contact the
Motorola Customer Call Center at 1-800-331-6456 in the
United States or 1-800-461-4575 in Canada.
About This Guide
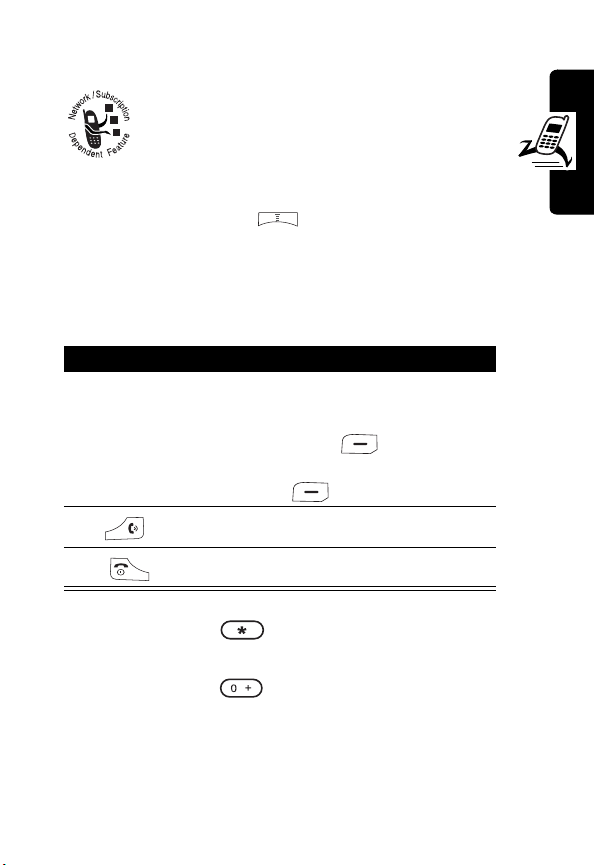
Optional Features
This label identifies an optional network, SIM
card, or subscription-dependent feature that
may not be of fered b y all servi ce pr oviders in all
geograph ic al ar eas. Contact your service
provider for more informati on.
Optional Accessories
This label identifies a feature that requires an
optional Motor ol a Origi nal ™ accessory.
Getting Started
19
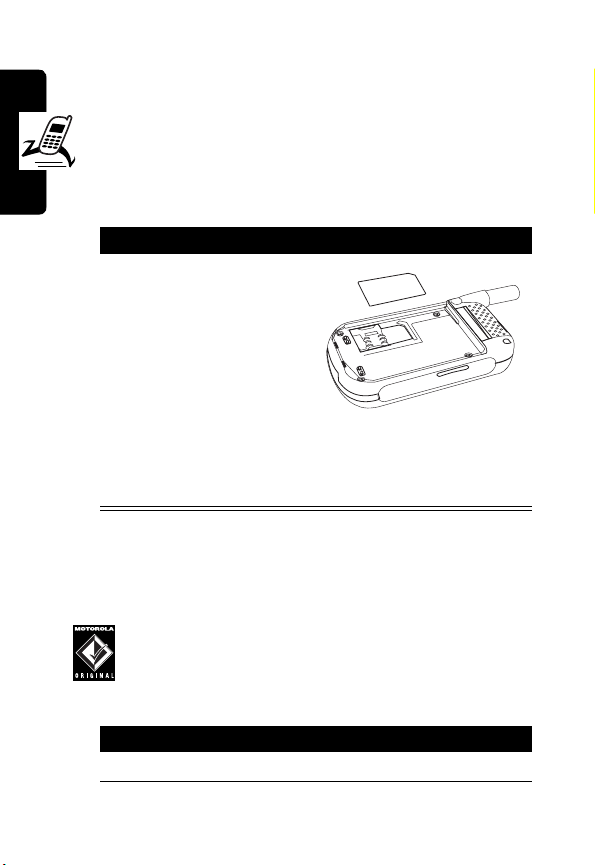
Installing the SIM Card
Your Subscriber Identity Modul e (SIM) card contains
your phon e num ber, service details, and phonebook/
message information.
Caution:
expos ing your SIM card to static electricity, water, or dirt.
Getting Started
Do not bend or scratch your SIM card. Avoid
Action
With your phone
facing down, fit the
SIM card into the sl ot,
with the metal
contacts facing down
and the beveled
corner pointed at the
notch of the slot (as shown).
Note:
Turn off your phone every time when you
remove/ i nsert the SIM card.
Installing the Battery
You must install and charge the battery to use your phone.
Your phone is designed to use only Moto rol a
Original batteries and accessories. We
recommend that y ou store batteries in their
protectiv e cases when not in use.
Action
1
Remove the battery from the plastic case .
20
Action
2
Insert the battery with
the 2 tabs wedged
into the battery slots.
Tab s
3
Latch the other end of battery door so that it
clicks into pl ace.
Charging the Battery
New batteries are partially charged. Before using y our
phone, charge the battery as described below. Some
batteries perform best after several full charge/discharge
cycles.
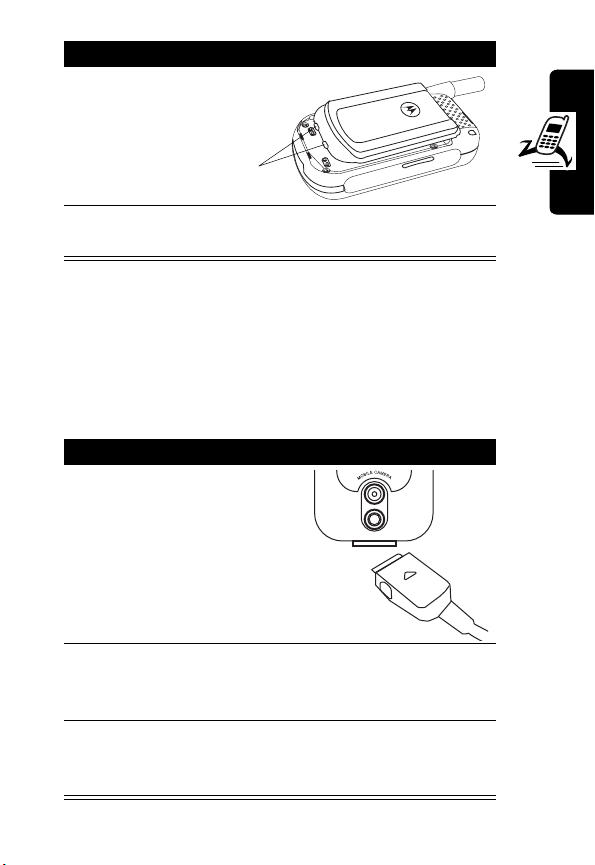
Action
1
With your phone facing
up, plu g in the tr ave l
charger, with the LED
facing u p.
Getting Started
2
Plug the other end into the appropriate electrical
outlet. The LED turns green when the battery is
being charged.
3
When done charging, unplug the charger from
the outlet, and press th e rel ease tabs to remove
the charger from your phone.
21

When you charge the battery, the battery power level
indicator in the external and internal displays shows how
much of the charging process is complete. At least 1
segment of the battery power level indicator must be
visibl e to en sure full phone functionali ty while charging.
When battery power is lo w, your phone will play the
warning tones to warn you (s ee page 97). Charge the
battery immediately.
If battery power runs out, your phone turns off.
Battery Use
To maximize your battery’s performance:
Getting Started
•
Always use Motorola Original™ batteries and battery
chargers. The phone warran ty does not cov er damage
caused from using non-Motorola batteries and/o r
battery chargers.
•
Charging begins when LED on connector is lit.
Batteries stored for a long time ma y require 10-20
minutes to charge before the display is turned on.
•
Maintain the battery at or near room temperature
when charging.
•
Do not expose batteries to temperatures below -10°C
(14°F) or above 45°C (113°F). Alwa ys take your
phone with you when you leave your vehicle .
•
When you do not intend to use a battery for a while,
store it un charged in a co ol, dark , dry place , such as a
refrigerator.
22
•
Over time, batteries gradual ly w ear down and require
longer chargi ng tim es. This is normal. If you charge
your ba ttery regul arly and not ice a d ecr ease in talk
time or an increase in charging time, then it is
probably tim e to b uy a new battery.
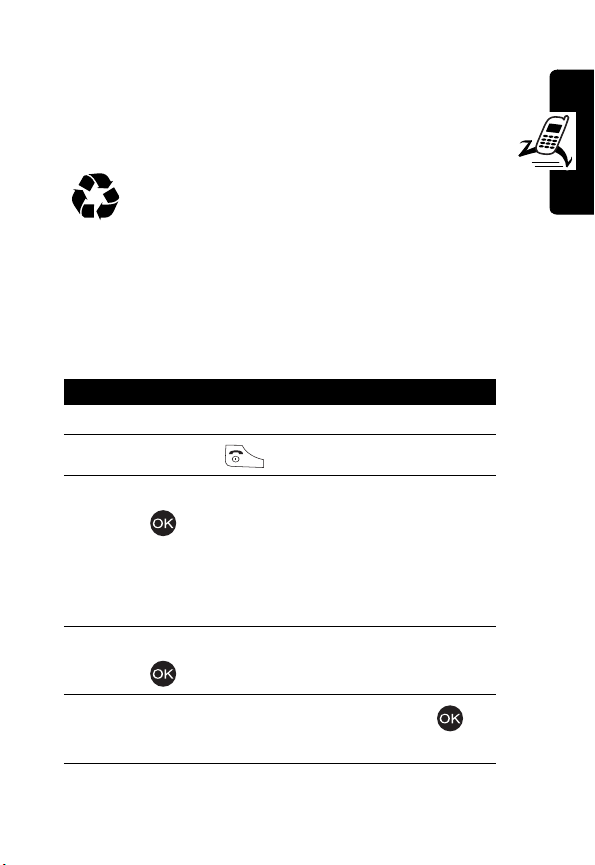
The rechargeable batteries that power this
phone must be dis posed of properly and may
need to be recycled. Contact you r local recycl i ng
center for proper disposal methods. Never dispose of
batteries in a fire becaus e they may explo de. Refer t o your
battery’s label for battery type.
Turning On Your Phone
Action
1
Open your phone’s flip.
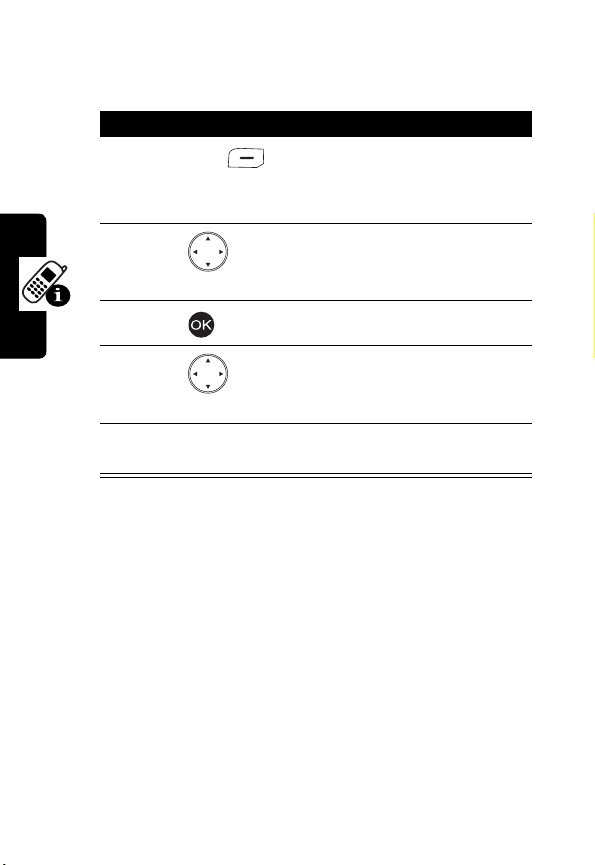
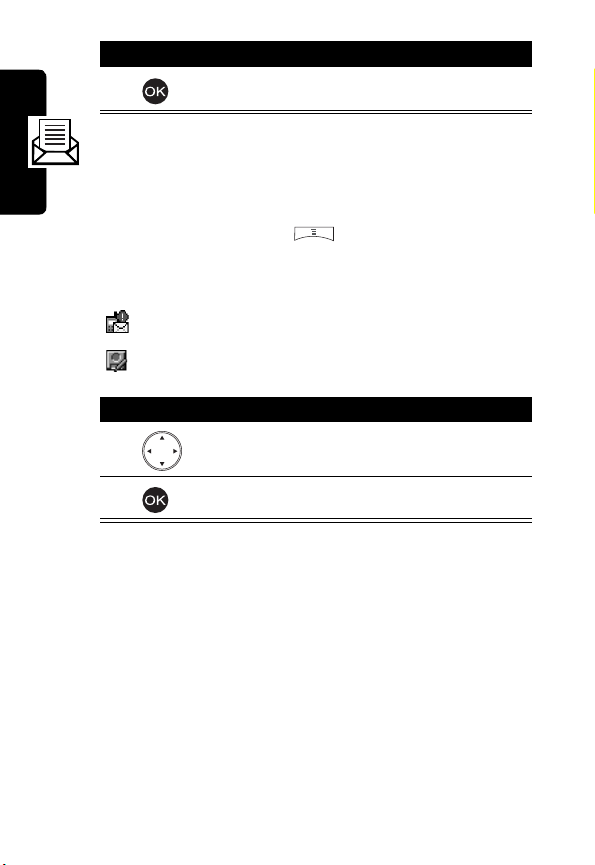
2
Press and hold t o turn on the phone.
3
If necessary, enter your SIM card PIN code and
press to unlock the SIM card.
Getting Started
Caution:
times in a row, your phone disab les th e SIM card
and displays
4
If necessary, enter your 4-digit unlock code and
press to unlock the SIM card.
5
Enter th e cu r ren t t ime (
confirm.
If you enter an incorrect PIN code 3
SIM Blocked
.
HH:MM
) and press to
23
Action
6
Enter the current dat e (
press to confirm.
Tip:
To reset time and date, press >
>
Set the time
Your phone starts to connect to your service pro vi der and
then enters the idl e dis p lay if connection i s successfully
established.
and
Set the date
.
YYYY/MM/DD
) and
Settings >Clock
Adjusting the In-Call Volume
Getting Started
Press To
1
up in-cal l volum e
key
increas e earpiec e volume
during a call
or
or
24
down in-call
volume key
2
Note:
Adjust the in-call volume from the idle displ ay.
decrease earpiece volume
during a call
save the setting
Displaying Your Phone Number
You can display your phone number to
people you call.
Tip:
Scroll to
your service provider .
Preset
to use the default set by
Find the Feature
>
Settings
>
Call features
>
Show number>On
Making a Call
Press To
1
key pad keys enter a phone numb er
Tip:
If you m a ke a mista ke,
press
CLEAR
last digit, or pres s and hol d
CLEAR
2
3
Tip:
Press and hold to insert a “P” (pause ch aracter)
and then enter an extension following it.
Tip:
Press and hold to insert a “+” and then enter the
country code, area code (omitting the starting 0), and
phone number to make an international call.
Note:
Dial phone numbers from the id le displ ay.
make the call
end the call
to clear the
to clear all digits .
Getting Started
25
Answering a Call
When you recei ve a call, your phone rin gs and/or
vibrates and displays an in com ing call message .
Press To
1
answer the call
2
Tip:
When
call. (To activate, press >
>
Flip answer > ON
Getting Started
Tip:
When
except to answer the call. (To activate, press >
Settings >Call features >Anykey answer > ON
Note:
If the phone is lock ed, you must unlock it to answer
calls.
Flip answer
Anykey answer
is active , open the phone to ans w er the
.)
end the call
Settings >Call features
is active, press any of the keys
.)
Muting/Unmuting a Call
When you are on a call:
Press To
1
2
3
OPTIONS
open the options menu
scroll to
mute or unmute the call
Mute
or
Unmute
26
Learning to Use Your
Phone
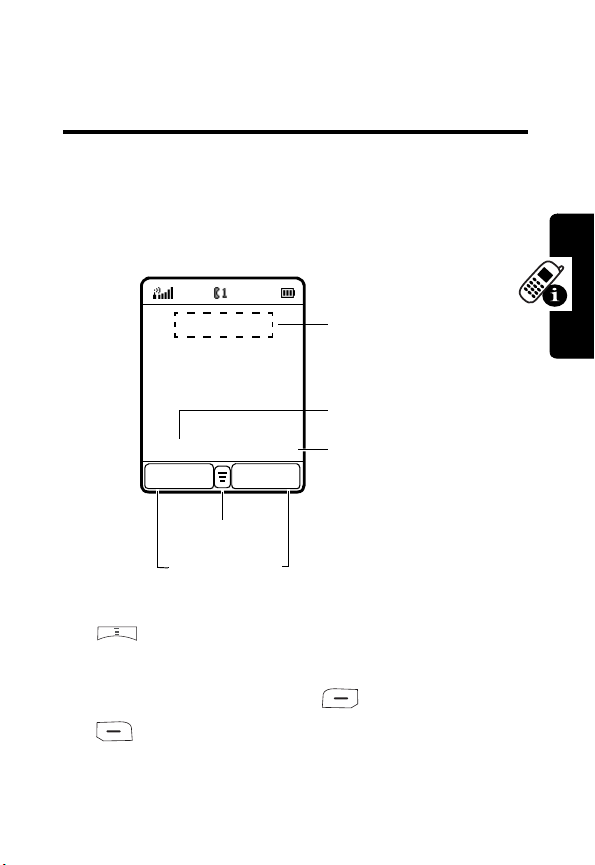
Using the Internal Display
The
idle display
on a call or using the menu .
The Menu indi cator indicates that you can press the menu
key to display the main or options menu.
is the standard displ ay when you are
Service Provider Name
Date
2003/12/10 21:52
R.STYLE
Menu Indicator
Soft Key Labels
P.BOOK
Time
not
Learning to Use Your Phone
Labels at the bottom corners show the current soft key
functions . Pr ess the left soft key or right soft
key to perf orm the fu nct ion indicated by the lef t or
right soft key label.
27
Press from the idle display to select 4 menu features.
You can also decide whic h 4 m enu features you would li ke
to select by setting the home ke ys (see page 94).
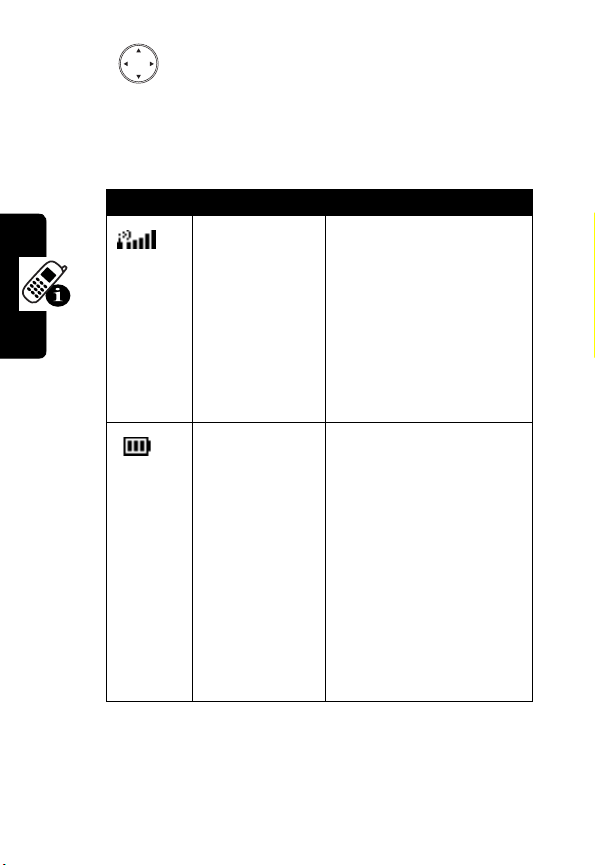
At the top of the display are the following status indicators:
Icon Name Description
Learning to Use Your Phone
Signal Strength
Battery Power
Level
Indicates st rength of
signal being received.
The more vertical bars,
the better the recept ion
(5 bars maximum).
Bars differ i n col or b y
the signal strengt h:
green > orange > red
Indicates remai ning
battery power. The
more bars, the more
battery power available
(3 bars maximum).
Bars differ i n col or b y
power level:
green > orange > red
icon flashes when
battery power is near
empty.
.
. The
28
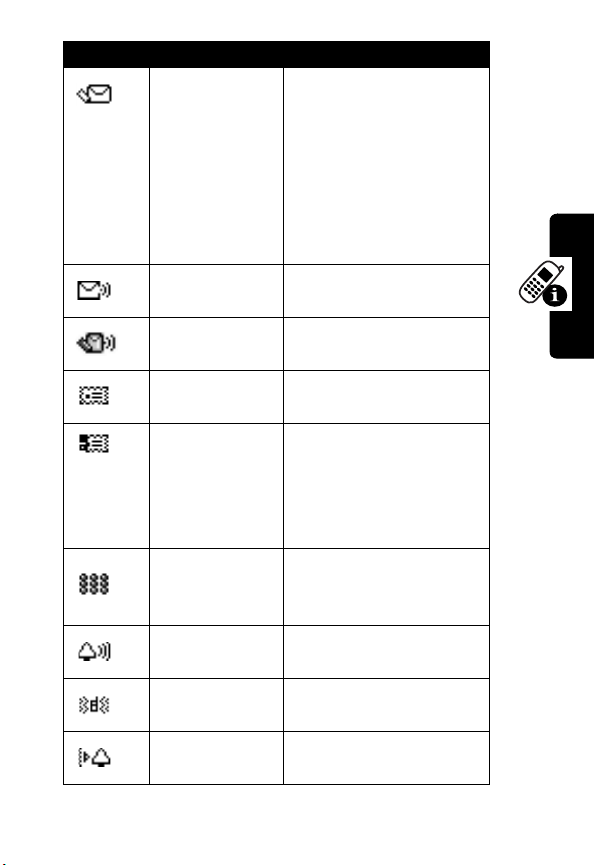
Icon Name Description
New SMS Message
New Voicemail
Message
New SMS/Voicemail
Message
New MMS Message
MMS Memory Full
MMS Message
Processing
Ringer On
Vibrator On
Ringer/Vibrator On
Indicates ne w unread
SMS message(s). The
icon flashes when the
SMS memory is full.
You must read new
SMS messages to
receive more SMS
messages.
Indicates ne w unheard
voicemail message(s).
Indicates ne w unread/
unheard message(s).
Indicates ne w unread
MMS message(s).
indicates the MMS
memor y is ful l. You
must read ne w MMS
messages to receive
more MMS messages.
Indicates y ou are
receiving/sending MMS
message(s).
Indicates ringer is
turned on.
Indicates vi brator is
turned on.
Indicates ringer and
vibrator are turned on.
Learning to Use Your Phone
29

Icon Name Description
Silent
GPRS Mode
Roaming
Chatroom Mode
Line 1/Line 2
Call Connected
Call Waiting
Call Muted
Indicates ringer i s
turned off.
Indicates y ou are on the
GPRS network.
Indicates y ou are on
another network.
Indicates y ou open
Chatroom
to have an
online chat.
Indicates te lephone line
you are using.
Indicates y ou are on a
call.
Indicates a cal l is
waiting to answer.
Indicates a cal l is
muted.
Using Menus
From the idle display, press to display the main
Learning to Use Your Phone
menu.
Selecting a Menu Feature
To select a menu feature, starting from the idle displ ay:
Find the Feature
30
>
Phonebook
>
Add

Use to scroll, and the left/right soft keys to select the
soft key funct ions listed in the bottom le ft and right corners
of the displa y. functions the same as the right so ft ke y.
To select
Note:
indicates the feature's posi t ion in the main menu.
Add
in a list, you may press .
In this user’s guide, “Find the Feature” always
Entering Feature Information
Some features require you to enter information:
•
Enter numbers or text with alphanumeric keys. A
flashing cursor shows where text is entered.
•
Press to select an option.
•
If you en ter or edit inf ormation an d do not wa nt to sa ve
changes, press to exit without saving.
Entering Text
Multiple text entry modes make it easy for you to enter
names, numbers, and messages on y our phone.
Setting Ready-to-Use Text Entry Modes
Find the Feature
Press To
1
>
Settings
>
Input mode
>
Preferred input mode
scr oll to the des ire d te x t e n try
mode
Learning to Use Your Phone
31

Press To
2
ON
3
BACK
4
select the mode
change the setti ngs
save the settings
Choosing a Text Entry Mode
Most te xt entry screens let you enter let ter s, numbers,
and/or symbols as required.
Press (or >
screen to select a text entry mode:
Input mode
) from a text entry
TAP English
iTAP English
123
Symbol
Enter symbols only.
Note:
The text entry mode you select remains active until
you change it by selecting another mode.
Learning to Use Your Phone
To select a text entry mode with ease:
Action
Press to insert a space.
Press and hold to switch among
entry modes.
32
Type letters, numbers , and symbols by
pressing a key 1 or more times (see
“Using TAP English”
Let the phone predict each word as y ou
type it (see page 34).
Enter numbers only.
on page 33).
abc/Abc/ABC
text

Action
Press to select
Symbol
.
Press and hold to switch between
default text entry mode.
123
/the
Using TAP English
TAP English
phone.
Press >
select
General Text Entry Rules
Press a ke y repeatedly to cycle through its characters.
is the standard mode for entering tex t on your
Input mode
TAP English
Press To
1
keypad key 1 or
more times
2
keypad keys enter remai ni ng characters
3
•
If you d o no t pres s a ke y for 2 sec onds , t he h ighlight ed
character i s accepted, and the cursor moves to the
next pos ition.
from any text entry screen and
.
select a letter, number, or
symbol
store text
Learning to Use Your Phone
33

Setting Words to Complete Automatically
Word completion
you enter the 1st 3 characters.
Find the Feat ure
To enter text using
1
2
3
allows you to sele c t a wor d fro m a lis t a fter
>
Settings
>
Input mode
>
Word completion>ON
TAP English
Press To
keyp ad keys enter the 1 st 3 char acter s of a
up
:
word
open the possible words list
scroll to the desired word
4
Using iTAP™ Softwar e P redictive Text
Entry Mode
iTAP English
Learning to Use Your Phone
a word using 1 key press per letter.
Press >
select
is a predictive text entry mode that lets y ou enter
Input mode
iTAP English
.
select the word
from any text entry screen, and
34

Entering Words
Press To
1
keypad key 1
time
2
keypad keys (1
per letter)
3
4
For e xam pl e, to spell the word “art,”
press . The display shows
enter the 1st letter of a word
Tip:
The letters associat ed
with the key are shown at the
bottom of the display.
enter the rest of a word
Tip:
Alternative words and
letter combi nations are
shown at the bottom of the
display. The word choice s
update with each key press .
highlight the word y ou want
enter the word at fl ashi ng
cursor locat i on
Tip:
iTAP English
inserts a space after each
word.
automatically
art
Learning to Use Your Phone
.
35
Entering Novel Words
You can coin words
Action
1
Press
until a lett er combi nation matches t he start of the
word.
2
Press to highlight letter or lett er
combination.
3
Press to select letter or letter combinati on.
4
Press left to move cursor to the left and
“lock” t he sel ected word portion.
5
Continue to enter l ett ers and highlight letter
combinations to spell the word.
Your phone stores the unrecognized word and includes it
in the l ist of al ternativ e wor d choices . W hen m emory space
for unrecognized words is filled, your phone deletes the
oldest words as it adds new words.
Learning to Use Your Phone
CLEAR
iTAP English
does not recogniz e.
1 or more times to del ete letters
36

Entering Punctuation
Press To
or
Entering Nu mb e rs
Press To
1
keypad key 1
time
2
3
keypad keys enter numbers
4
enter punctuat i on
prepare to put
tex t entry mode
scroll to the number
enter the numbers at flashi ng
cursor locat i on
iTAP English
in
123
Deleting Letters and Words
With the cursor to the right of the text you want to delete:
Action
Press
CLEAR
to delete 1 letter at a time .
Learning to Use Your Phone
Press and hold
CLEAR
to delete the entire line.
37

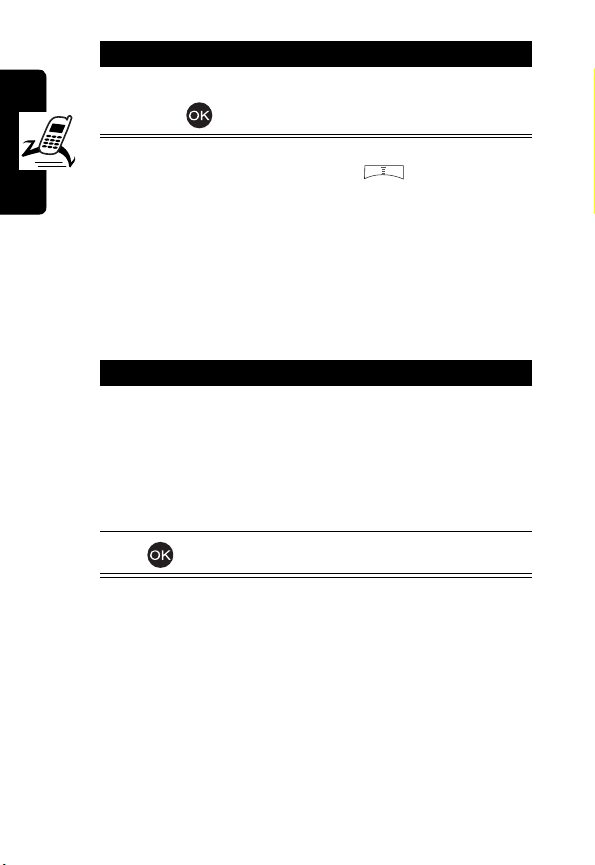
Using the External Display
The external display shows the phone status, including
network signal and batt ery power level . Press the in-call
volu me key to show/hide tim e and date.
21:52
12/10 Wed
You can also set a clock type:
Find the Feat ure
Press To
1
2
When you recei ve an incoming call, the external display
Learning to Use Your Phone
may show the caller’s number and name .
Note:
To see a caller’s name in the external display, the
caller’s number must match an entry in your phonebook.
To create a phonebook entry, see page 71.
scroll to the desired clock
type
select the clock type
Time
Date
>
Settings
>
External display
>
Clock type
38

Locking and Unlocking Your
Phone
You can lock your phone manually or set the phone to lock
automatical ly whenever you turn it off. To use a locked
phone, y ou must enter the unloc k code. A locked phone
still rings and/or vi brates for i ncom ing calls/messages,
you must unlock it to answer/read
You can make emergency calls on your phone even
when it is locked.
Tip:
Contact your service provider for the phone codes.
.
but
Locking Your Phone Manually
Find the Feature
Press To
1
key pad keys enter your unlock code
2
>
Settings
>
lock the phone
Security
>
Code status>Phone lock
>
Lock now
Unloc k ing Your Phone
Press To
1
key pad keys enter your unlock code
2
unlock the phone
Learning to Use Your Phone
39

Setting Your Phone to Lock Aut o matically
To lock your phone every time you turn it off:
Find the Feat ure
Setting and Changing Codes
You can set and change the following codes that block
other people from usi ng your phone and data in it:
PIN code
PIN2
Phone code
SIM lock
Tip:
Contact your service provider for those codes.
To set codes:
Learning to Use Your Phone
Find the Feat ure
To change codes:
>
Settings
>
Security
>
Code status>Phone lock
>
Automatic lock> ON
Lock your SIM card when you turn off
your phone.
Lock certain subscription-dependent
features every time you use them.
Lock your phone when you turn it off.
Lock your phone when you insert an
unidentified SI M card.
>
Settings
>
Security >Code status
40
Find the Feat ure
>
Settings
>
Security >Change code

If You Forget Codes
If you forget your codes , contact your service pro vi der.
If You Enter the Wrong PIN or
PIN2 Code 3 Times in a Row
If you enter a wrong PIN or PIN2 code 3 times in a row,
your phone prompts you to enter the PUK or PUK2
code to unb loc k y our SI M card. F or the PUK a nd PUK2
codes, conta ct your service provider.
Learning to Use Your Phone
41

Setting Up Your Phone
Adjusting the Backlight
You can set the a mount of tim e that the di spla y and k e ypad
backlights remain on, or turn off backlights to extend
batt e ry li fe.
Find the Feat ure
>
Settings
>
Backlight
Adjusting Display Contrast
Find the Feat ure
Press To
1
2
right/left
>
Settings
>
Adjust contrast
scroll to the desired contrast
select the cont rast
Setting Time and Date
To see time and date in the idle displays , set time and date
first:
Setting Up Your Phone
42
Find the Feat ure
>
Settings
>
Clock
>
Set the time/Set the date
Then set the date format:
Find the Feature
To see time and date in the internal idle displa y:
Find the Feature
To see time and date in the external idle disp lay:
Press To
the in-call v olume
key
>
Settings
>
Clock >Date format
>
Settings
>
Clock >Show clock>ON
display time and date in the
ext ernal displ ay
Setting Local Time
Find the Feature
>
Settings
>
Clock >Local time zone
Setting Power-Off Time
Find the Feature
Tip:
Press right/left to selec t a
>
Settings
>
Auto power off >On
Repeat type
.
Setting Up Your Phone
Setting Display Color
Find the Feature
>
Settings
>
Display >Color scheme
43

Setting a Wallpaper Image
You can set a picture or animation as a wal l paper
(back ground) image in your pho ne’s display, internal or
external.
Note:
When you set an animation as a wallpaper image,
only the 1st fram e of t he ani ma ti on di splays.
Find the Feature
>
Settings
>
Display/External display
>
Wallpaper
Setting a Screen Saver Image
You can set a picture or animation as a screen saver
image in your phone’s external or internal display. The
image disp la ys when no acti vit y occurs in 1 m inut e (the
default, but it depends on regions).
An animation repea ts f or 3 minut es; then the last fr ame
of the animation displays.
Find the Feat ure
Tip:
Scroll to
battery life. To turn on
consumes more bat tery power.
Setting Up Your Phone
Off
or
Power saving
Screen saver
>
Settings
>
Display/External display
>
Screen saver
to turn off
Screen saver
in the external disp lay
to extend
44

Using Anykey Answer
Press any k eys except to answer calls .
Find the Feature
>
Settings
>
Call features
>
Anykey answer>ON
Using Flip Answer
Find the Feature
>
Settings
>
Call features
>
Flip answer>ON
Setting an Ambient Light
Sensor
Find the Feature
>
Settings
>
Light sensor
Setting Up Your Phone
45

Calling Features
Putting a Call on Hold
When you are on a call, you can put the call on hold.
Press To
1
2
3
OPTIONS
open the options menu
scroll to
Tip:
the call on hold.
put the call on hold
Hold
Scroll to
Activate
to answer
Answering a New Call
Calling Features
To turn on
Find the Feat ure
To answer a new incoming call:
1
46
When you are on a call, you can answer a
new incoming call.
Call waiting
Press To
:
>
Settings
>
Call features
On
>
put the call on hold and
answer the new call
>
Call waiting

Press To
2
Tip:
incoming call , you must end the activ e or held call to
answer the new incoming call. Depending on your service
provider, you can also transfe r an in com ing call to another
phone. (To activ ate , pr ess
desired phone number > press .)
If you have an active cal l , a hel d call, and a new
end the ne w call and contin ue
with the ca ll
OPTIONS
>
Deflection
> enter the
Making a New Call
When you are on a call, you can make a new outgoing call.
Press To
open the options menu
1
OPTIONS
2
3
key pad keys enter the phone number
4
select
Dial new call
dial the phone nu mb er
Making an Emergency Call
With or without your SIM card installed, you can make an
emergency call t o the Emergency phone number your
service provider gave you.
Press To
1
key pad keys enter the phone number
Calling Features
47

Press To
2
dial the phone number
Selecting a Phone Number to
Use
You can select a phone number (li ne) t o mak e
and receive calls.
Find the Feat ure
Redialing Automatically
Find the Feat ure
Calling Features
Checking Recent Calls
Find the Feat ure
Tip:
If the phone number of the selected recent call
displays, press to dial.
Erasing Recent Calls
You can erase 1 or all of the recent cal l s.
48
>
Settings
>
Call features >Phone lines
>
Settings
>
Call features
>
Auto redial>ON
>
Recent calls
>
Missed calls/Received calls/
Dialed calls

Erasing a Recent Call
Find the Feature
Press To
1
2
3
4
Erasing
All Recent Calls
>
Recent calls
>
Missed calls/Received calls/
Dialed calls
scroll to a recent call you
want to erase
open the options menu
scroll to
erase the selected recent call
Erase
Find the Feature
Redialing Recent Calls
You can redial recent calls if the phone num ber
displays.
Find the Feature
>
Recent calls
>
Erase all
>
Recent calls
>
Missed calls/Received calls/
Dialed calls
Calling Features
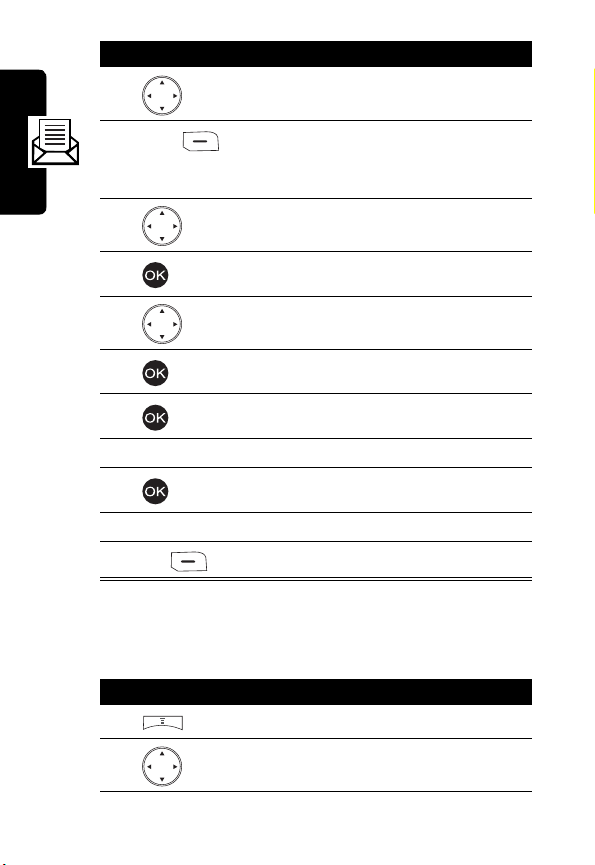
Press To
1
scroll to the desi red recent
call
49

Press To
2
3
open the options menu
scroll to
Call
4
make the phone call
Saving Recent Calls in Your
Phonebook
You can save recent calls as phonebook entries if the
phone number di splays.
Find the Feat ure
Calling Features
Press To
1
2
3
4
5
keypad keys enter a name
6
>
Recent calls
>
Missed calls/Received calls/
Dialed calls
scroll to the desired recent
call
open the options menu
scroll to
select
save the entry in your
phonebook
Save
Save
50

Messages and Chat
You can write, send, and receive messages, either by
Short Messaging Service (SMS) or by Multimedia
Messaging Service (MMS). You can also open a
chatroom to have an online chat.
Writing an SMS Message
You can insert quic k notes , p honebo ok ent ries ( numb ers or
names), image objects (picture s or animation s), and sound
objects (sounds or melo die s) when writing an SMS
message.
Messages and Chat
Find the Feature
Press To
1
keypad keys enter text
2
3
4
5
6
open the options menu
scroll to the desi red option
select the option
scroll to the desi red sub-
option, if necessary
select the sub-option, if
necessary
>
Msg. center
>
Text messages
>
Write message
51

Press To
7
8
scroll to the desired object
you want to inse rt to your
SMS message
select the obj ect
Tip:
Repeat steps 7-8, if
necessary.
Sending an SMS Message
After you finish wri ting an SM S message:
Press To
select
Messages and Chat
1
SEND
2
P.BOOK
3
SEND
open your phonebook
scroll to the desired entry
52
4
5
6
7
BACK
8
BACK
9
select the entry
scroll to the desired phone
number
select the phone nu mb er
return to the previ ous m enu
Tip:
Repeat steps 3-7 to add
other recipients.
return to the previ ous m enu
open the options menu

Press To
10
scroll to
Send
11
send your SMS message
Saving an SMS Message as a
Draft
After you finish writi ng an SMS mess age:
Press To
1
2
3
4
P.BOOK
5
6
7
8
9
SAVE
open the options menu
scroll to
select
select a recipient
scroll to the desi red entry
select the entry
scroll to the desi red phone
number
select the phone number
sav e your SMS message in
Msg. center
Save to drafts
Save to drafts
>
Text messages
>
Drafts
Messages and Chat
53

Writing an MMS Message
An MMS message may consist of several page sets. A
page set includ es an image object (photo/pic tur e/
animation/ video), a sound object (melod y/voice
note), and/or text objects (quic k note/phone number ).
Note:
You can insert only 1 ima ge or s ound object t o a page
set. To insert more objects, press
existed, add to next page?
.
YES
when displays
...
54
Messages and Chat
Find the Feat ure
Press To
1
keypad keys enter text
2
3
4
5
6
7
open the options menu
scroll to
select
scroll to the desired option
select the option
scroll to the desired sub-
option, if necessary
>
Msg. center
>
Multimedia msgs.
>
Write message
Insert object
Insert object

Press To
8
9
10
11
select the sub-option, if
necessary
Tip:
Repeat steps 7-8, if
necessary.
scroll to the desi red object
you want to insert to your
MMS message
select the object
Tip:
Repeat steps 9-10, if
necessary.
insert the selected object
Messages and Chat
Going to a Page Set
In any page set:
Press To
1
2
3
4
5
open the options menu
scroll to
select
scroll to the desi red page set
go to the selected page set
Go to...
Go to...
55

Displaying an Object in a Page Set
In the desired pag e set:
Press To
1
2
3
open the options menu
scroll to
select
View object
View object
4
5
Messages and Chat
scroll to the desired object
display the selected object
Deleting an Object from a Page Set
In the desired pag e set:
Press To
1
2
3
4
5
6
56
open the options menu
scroll to
select
scroll to the desired object
select the obj ect
delete the selected object
Remove object
Remove object
Deleting a Page Set
You can delete a page set, including all objects and a
page. If there is only 1 page set, you can delete all
objects, not a page from it.
In the desired page set:
Press To
1
2
3
In the only 1 page set:
Press To
1
2
3
open the options menu
scroll to
delete the sel ected page set,
including all objects and a
page
Delete page
open the options menu
scroll to
delete all objec ts, not a page
from the only 1 page set
Delete page
Previewing an MMS Message
In any page set:
Press To
1
open the options menu
Messages and Chat
57

Press To
2
3
scroll to
select
Preview
Preview
4
preview the next/pr evious
page set
Sending an MMS Message
Note:
To send/receive MMS messages, you must apply for
MMS from your service provider(s) and then sel ect a
service provider to use MMS, which are offered via GPRS
your selected service provider pro vides. To select a
service provider, press >
Messages and Chat
press >
.
settings
To send by a phone number:
1
2
3
4
5
6
Msg. center
Press To
SEND
P.BOOK
>
Browser
>
Profiles
, or
Settings
>
Multimedia msgs.
select
SEND
open your phonebook
scroll to the desired entry
select the entry
scroll to the desired phone
number
select the phone nu mb er
>
Connection
58

Press To
7
BACK
8
BACK
9
10
retu rn to t h e previous m e nu
Tip:
Repeat steps 3-7 to add
other recip ients.
retu rn to t h e previous m e nu
open the options menu
scroll to
Send
Messages and Chat
11
To send by an e-mail address:
Press To
1
SEND
2
3
4
5
key pad keys enter an e-mail address
6
7
8
send your MMS message
select
SEND
open the options menu
scroll to
select
add the e-mail address to the
Recipients
Tip:
other recip ients.
open the options menu
scroll to
New e-mail address
New e-mail address
box
Repeat steps 2-6 to add
Send
59
Press To
9
send your MMS mes sage
Saving an MMS Message as a
Draft
After you finish wri ting an M MS message:
Press To
open the options menu
scroll to
select
save the name
Messages and Chat
1
2
3
4
keypad keys enter a name
5
Set title
Set title
60
6
7
8
open the options menu
scroll to
save your MMS message in
Msg. center
Drafts
Save to drafts
>
Multimedia msgs.
>

Checking a Received SMS/MMS
Message
Find the Feature
Press To
1
2
>
Msg. center
>
Text messages/
>
Multimedia msgs.
scroll to the desi red message
check t he sel ected message
Inbox
Checking a Sent or Unsent
SMS/MMS Message
Find the Feature
This icon indicat es a sent SMS message.
This icon indicat es an unsent SMS
message.
This icon indicat es a sent MMS message.
This icon indicat es an unsent MMS
message.
>
Msg. center
>
Text messages/
Multimedia msgs.
>
Outbox
Messages and Chat
Press To
1
scroll to the desi red message
61
Press To
2
check the selected message
Checking a Draft SMS/MMS
Message
Messages and Chat
Find the Feat ure
This icon indicates a draft SMS message.
This icon indicates a draft MMS message.
Press To
1
2
>
Msg. center
>
Text messages/
Multimedia msgs.
scroll to the desired message
check the selected message
Managing an SMS/MMS
Message
You can perform thes e function s on a SMS/MMS m essage
stored in yo ur
•
Erase
•
Send
•
Reply
•
Forward
Inbox, Outbox
, or
Drafts
folder:
>
Drafts
62

•
Edit
•
View
(to display objects)/
objects)
•
Use address
connect to a URL, or to save a URL as a
bookmark)
•
Detail info.
•
Callback
•
Open chatroom
(to dial or save a phone number, to
(to check messages)
(to call to senders)
(to chat with senders)
Save object/Object info.
(to check
Messages and Chat
Find the Feature
Press To
1
2
3
OPTIONS
or
>
Msg. center
>
Text messages/
Multimedia msgs.
>
Inbox/Outbox/Drafts
scroll to the desi red message
select the message
open the options menu
63

Editing an MMS Template
You can edit an MMS temp lat e and save i t ei ther in
>
Multimedia msgs.
center
>
MMS template
msgs.
Find the Feat ure
>
Drafts
, or in
Msg. center
.
>
Msg. center
>
Multimedia msgs.
>
MMS template
>
Setting a Voice Mail Service
Number
Your service provi der may set a voice m ail service number
befo re you receive your phone. If not, refer to the f ollowing
Messages and Chat
procedures.
Find the Feat ure
Press To
1
keypad keys enter the voice mail service
2
>
Msg. center
>
Voice mailbox
number your service provider
provided
save the setting
Msg.
Multimedia
64

Setting Message Topics
You can set topic messages y ou want to receive from
your service pro vi der, such as traffic reports and
today’s news.
Find the Feature
>
Msg. center
>
Cell broadcast
Setting Service Commands
You can set service commands you want your service
provider to operate.
Find the Feature
Press To
1
keypad keys enter the service command
2
>
Msg. center
>
Service command
you want your service
provider to operate
send the service command to
your service provider
Opening a Chatroom
You can open up to 4 chatrooms and hav e an
online chat.
Find the Feature
>
Chatroom
Messages and Chat
65
Press To
1
scroll to an y chatroom
select from y our phonebook a
person you want to have a
chat with
scroll to the desired entry
select the entry
scroll to the desired phone
number
select the phone nu mb er
save the setting
save the setting
send your message
Messages and Chat
2
NAMES
3
4
5
6
7
8
keypad keys enter yo ur ni ckname
9
10
keypad keys enter your message
11
SEND
Adding a Quick Note to Your Chatroom
Message
Press To
1
2
open the options menu
scroll to
Insert quick note
66

Press To
3
select
Insert quick note
4
5
scroll to the desi red quick
note
add the s elected quic k note to
your message
Add ing a S m iley Sym bol t o Your Chatroom
Message
Press To
1
2
3
4
5
open the options menu
scroll to
select
scroll to the desi red smiley
symbol
add the selected smiley
symbol to your message
Insert smiley
Insert smiley
Editing Your Nick name
Press To
1
2
open the options menu
scroll to
Nickname
Messages and Chat
select
3
Nickname
67

Press To
4
keypad keys edit yo ur nickname
5
save the setting
Editing a Chatroom Phone Number
Press To
open the options menu
scroll to
select
Chat Numbers
number
save the setting
Messages and Chat
1
2
3
4
keypad keys edit a chatroom phone
5
Checking Old Chatroom Messages
Press To
1
2
open the options menu
scroll to
Chat Numbers
View history
68
3
check ol d messages

Setting SMS
Find the Feature
>
Msg. center
>
Settings >Text messages
Setting MMS
Find the Feature
>
Msg. center
>
Settings >Multimedia msgs.
Setting Memory for Saving SMS
Messages
Find the Feature
>
Msg. center
>
Settings >Memory in use
>
Select SMS memory
Checking SIM Card/Phone
Memory for Saving SMS
Messages
Find the Feature
>
Msg. center
>
Settings >Memory in use
>
SMS status
Messages and Chat
Checking Phone Memory for
Saving MMS Messages
Find the Feature
>
Msg. center
>
Settings >Memory in use
>
MMS status
69

Setting Up Your
Phonebook
Setting Memory for Saving Your
Phonebook
Find the Feat ure
>
>
Checking SIM Card/Phone
Memory for Saving Your
Phonebook
Find the Feat ure
X/100
Setting Up Your Phonebook
X/300
70
>
>
Number (X) of phone numbers in SIM
card memory. You can store up to 100
phone numbers in SIM ca rd mem ory.
Note:
The capacity of SIM ca rd mem ory
depends on your service provider
settings.
Number (X) of phone n umber s in p hone
memory . You can store u p to 300 p hone
numbers in phone memory.
Phonebook
Option >Memory
Phonebook
Option >Memory status

X/100
Number (X) of notes in phone memory.
You can store up to 100 notes in phone
memory.
Creating a Phonebook Entry
Find the Feature
Press To
1
keypad keys enter a name
2
3
key pad keys enter a phone numb er
4
>
Phonebook
>
Add
save the name
sav e the phone number
Phonebook Entry Options
You can perform several functions on a phonebook entry:
Option Description
Edit
Add number*
Set as default*
Change type
Add text*
Change group
edit a phone numb er/nam e
add phone number( s) (up to
4)
set a phone number to be
called by default
change a phone number type
add note(s)
set a caller group
Setting Up Your Phonebook
71

Option Description
Add picture*
Remove picture*
Copy
Erase
* The option is available onl y for the phone numbe r/ name
sav ed on phone memory.
create an incomin g cal l
display icon
remove an incoming call
display icon
copy/move a phonebook
entry saved on SIM car d or
phone memory to phone or
SIM card memory
remov e ph onebook en try(ies )
or note(s)
Setting Up Your Phonebook
72
Find the Feat ure
Press To
1
keypad keys enter the 1st letter(s) of a
2
3
4
5
6
>
Phonebook
>
Search
name
open your phonebook
scroll to the desired entry
select the entry
scroll to the name or the
desired phone num ber/note
open the options menu

Sorting Phonebook Entries
Find the Feature
>
Phonebook
>
Option >Sort by
Looking Up Your Phonebook to
Make a Call
You can look up your phonebook and then make a
phone call from the idl e dis play.
To turn on
Find the Feature
To dial from the idle display:
1
2
3
Dialing number lookup
1st:
>
Phonebook
>
Option
>
Dialing number lookup >ON
Press To
key pad keys enter the 1st lett er(s) of a
name
scroll to the desi red entry
make a phone call
Setting Up Your Phonebook
Setting 1-Touch Dialing
Numbers
You can press and hold a key f rom to to make
the phone call from the idle display.
73

To turn on
Speed dialing
1st:
Find the Feat ure
To set 1-touch dialing numbers:
Find the Feat ure
Press To
1
2
3
4
>
Settings
>
Call features
>
Speed dialing>ON
>
Phonebook
>
Speed dial
scroll to the desired speed
dial key
open your phonebook
scroll to the desired entry
assign the key for the
selected phone number
Checking 1-Touch Dialing Numbers
Find the Feat ure
Setting Up Your Phonebook
Press To
1
>
Phonebook
>
Speed dial
scroll to the desired name
74

Press To
2
or
open the options menu
or
VIEW
3
check t he sel ected
phonebook ent ry
check t he sel ected
phonebook ent ry
Changin g 1 -Touch Dia ling Number s
Find the Feature
Press To
1
2
3
4
5
6
>
Phonebook
>
Speed dial
scroll to the desi red name
open the options menu
scroll to
select
scroll to the desi red
phonebook ent ry
assign the speed di al key f or
the selected phone num ber
Change
Change
Setting Up Your Phonebook
Erasing 1-Touch Dialing Numbers
Find the Feature
>
Phonebook
>
Speed dial
75
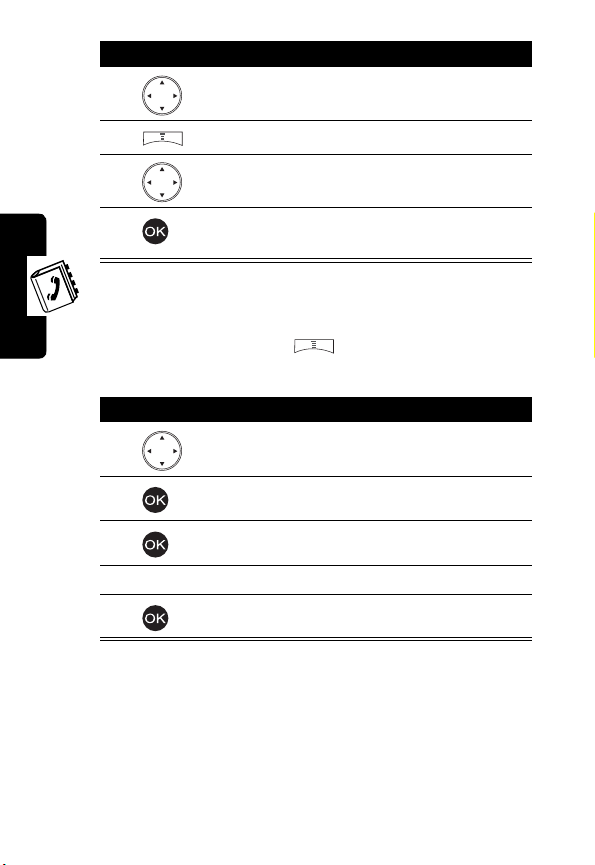
Press To
1
scroll to the desired name
Setting Up Your Phonebook
2
3
4
open the options menu
scroll to
erase the speed dial k e y fr om
the selected phone number
Erase
Renaming a Caller Group
Find the Feat ure
Press To
1
2
3
4
keypad keys enter a new name
5
>
Phonebook
>
Caller group
scroll to the desired caller
group
select the caller group
select
Rename
save the new name
76
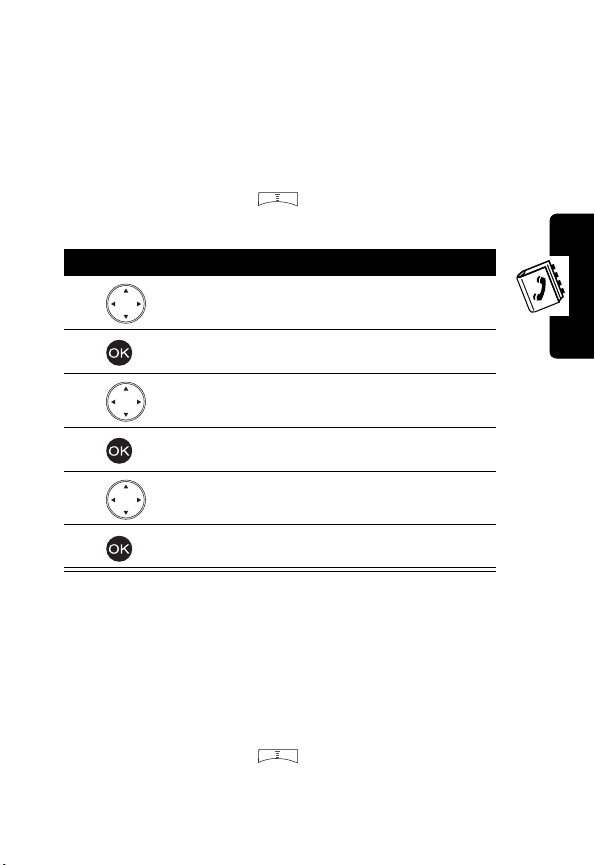
Setting a Caller Group Ring
To n e
You can select a ring tone for a caller group to use. The
ring tone plays when 1 of t he caller group calls you.
Find the Feature
Press To
1
2
3
4
5
6
>
Phonebook
>
Caller group
scroll to the desi red caller
group
select the caller group
scroll to
select
scroll to the desi red ring tone
select the ring tone
Ring tone
Ring tone
Setting a Default Image as a
Caller Group Icon
You can select a default image for a caller group to use.
The image displays when 1 of the caller group calls you.
Find the Feature
>
Phonebook
>
Caller group
Setting Up Your Phonebook
77

To turn on
Press To
1
2
Graphic
1st:
scroll to the desired caller
group
select the caller group
3
4
5
ON
To set a caller group icon:
Press To
1
2
3
Setting Up Your Phonebook
4
scroll to
select
turn o n
scroll to
select
scroll to the desired icon
select the ico n
Graphic
Graphic
Graphic
View
View
78

Setting a Multimedia Center
Object as a Caller Group Icon
You can also set a photo, picture, or an animation in
as a caller group icon.
center
Find the Feature
To turn on
1
2
3
4
5
To set a caller group icon:
1
Graphic
1st:
Press To
ON
Press To
>
Phonebook
>
Caller group
scroll to the desi red caller
group
select the caller group
scroll to
Graphic
select
Graphic
turn on
scroll to
Graphic
View
Media
Setting Up Your Phonebook
select
scroll to
View
Media center
79
2
3

Press To
4
select
Media center
5
6
7
8
9
10
11
scroll to the desired option
select the option
scroll to the desired folder, if
necessary
select the f older , if necessary
scroll to the desired object
select the obj ect
set the selected object as the
caller group icon
Creating Your Personal
Phonebook Entries
Find the Feat ure
Setting Up Your Phonebook
To create the 1st phonebook entry of your own:
Press To
1
keypad keys enter yo ur name
2
>
Phonebook
>
Personal number
save your name
80
3
keypad keys enter yo ur phone number

Press To
4
To add other phonebook entries of your own:
Press To
1
2
3
4
keypad keys enter y our name
5
6
key pad keys enter your phone number
7
sav e your phone number
open the options menu
scroll to
select
sav e your name
sav e your phone number
Add
Add
Editing Your Pe rsonal Phonebook E nt ries
Setting Up Your Phonebook
Find the Feature
Press To
1
>
Phonebook
>
Personal number
scroll to the desi red entry
81

Press To
2
EDIT
or
>
3
keypad keys enter yo ur name
4
5
keypad keys enter yo ur phone number
6
prepare to edit the sel ect ed
entry
save your name
save your phone number
Erasing Your Person a l Ph one book Entrie s
Setting Up Your Phonebook
82
Find the Feat ure
Press To
1
2
3
4
>
Phonebook
>
scroll to the desired entry
open the options menu
scroll to
erase the selected entry
Personal number
Erase

Setting Fixed Dialing Numbers
You can restrict outgoing calls to phone
numbers that begin with the same digit(s) you
set on the fixed dialing list.
Tip:
Enter the PI N 2 c ode to se t
Fixed dial number
.
Find the Feature
To turn on
1
2
3
To set the 1st fixed dialing num ber:
1
2
3
4
5
6
Fixed dial number
Press To
ON
key pad keys enter the PIN2 code
Press To
key pad keys enter the PIN2 code
keypad keys enter a name
>
Phonebook
>
Fixed dial number
1st:
turn on
turn on
Enable fixed dialing
Fixed dial number
scroll to
select
select
confirm the code
Number list
Number list
Add
Setting Up Your Phonebook
83

Press To
7
8
keypad keys enter a phone number
9
To add other fixed dialing n um bers:
save the name
save the phone number
Setting Up Your Phonebook
84
Find the Feat ure
Press To
1
2
3
4
5
keyp ad keys enter the PIN2 code
6
7
keypad keys enter a name
8
9
keypad keys enter a phone number
10
>
Phonebook
>
Fixed dial number
>
Number list
scroll to an y fi xed dialing
entry
open the options menu
scroll to
select
confirm the code
save the name
save the phone number
Add
Add

Changin g Fixed Dialing N umbers
Find the Feature
Press To
1
2
EDIT
or
>
3
key pad keys enter the PIN2 code
4
5
keypad keys enter a name
6
7
key pad keys enter a phone numb er
8
>
Phonebook
>
Fixed dial number
>
Number list
scroll to the desi red fixed
dialing entry
select
EDIT/Edit
confirm the code
save the name
sav e the phone number
Erasing a Fixed Dialing Number
Setting Up Your Phonebook
Find the Feature
>
Phonebook
>
Fixed dial number
>
Number list
85

Press To
1
2
3
4
5
keyp ad keys enter the PIN2 code
6
scroll to the desired fixed
dialing entry
open the options menu
scroll to
select
confirm the code
Erase
Erase
7
erase the selected fixed
dialing entry
Erasing All Fixed Dialing Numbers
scroll to an y fi xed dialing
entry
open the options menu
scroll to
select
confirm the code
Setting Up Your Phonebook
86
Find the Feat ure
Press To
1
2
3
4
5
keyp ad keys enter the PIN2 code
6
>
Phonebook
>
Fixed dial number
>
Number list
Erase all
Erase all

Press To
7
erase all fixed dialing entrie s
Setting Voice Dialing Numbers
To dial by voice activation, press and hold the voice
activat ion key from the idle display unti l
displays; then say a name into the microphone.
command
You can create up to 10 voice dialing numbers.
Note:
This option is available only for phone numbers
saved on phone memory.
Please say name or
Find the Feature
Press To
1
key pad keys enter the 1st lett er(s) of a
2
3
4
5
6
7
8
>
Phonebook
>
Search
name
open your phonebook
scroll to the desi red entry
select the entry
scroll to the desi red phone
number
open the options menu
scroll to
select
Add voice tag
Add voice tag
Setting Up Your Phonebook
87

Press To
9
say a name into the
microphone
Tip:
Repeat this step unt il
displays.
tag saved
Voice
Playing Voice Dialing Num ber Commands
Find the Feat ure
Press To
1
2
or
>
scroll to the desired entry
play the selected entry
command
Changing Voice Dialing Number
Commands
Setting Up Your Phonebook
Find the Feat ure
Press To
1
2
scroll to the desired entry
open the options menu
>
Phonebook
>
Voice tags
>
Phonebook
>
Voice tags
88

Press To
3
4
scroll to
select
Change
Change
5
say a name int o th e
microphone
Tip:
Repeat this step unti l
displays.
tag saved
Voice
Erasing Voice Dialing Numbers
Find the Feature
Press To
1
2
3
4
>
Phonebook
>
Voice tags
scroll to the desi red entry
open the options menu
scroll to
erase the selected voice
dialing entry
Erase
Sending a Phonebook Entry
Find the Feature
>
Phonebook
>
Search
Setting Up Your Phonebook
89

Press To
1
keypad keys enter the 1st letter(s) of a
name
2
open your phonebook
Setting Up Your Phonebook
3
4
5
6
7
8
9
10
11
12
13
14
NAMES
down
scroll to the desired entry
select the entry
open the options menu
scroll to
select
select
open your phonebook
scroll to the desired recipient
select the recipient
scroll to the desired phone
number
select the phone nu mb er
add other recipient (s), if
necessary
Tip:
other recipient(s).
Send business card
Send business card
Send as SMS
Repeat steps 9-14 to add
90

Press To
15
SEND
send th e sel ected p honeb ook
entry
Sending a Phonebook Entry as
an SMS Message
Find the Feature
Press To
1
key pad keys enter the 1st lett er(s) of a
2
3
4
5
6
7
>
Phonebook
>
Search
name
open your phonebook
scroll to the desi red entry
select the entry
open the options menu
scroll to
card
select
card
Tip:
see page 51 to write and
send an SMS message. If
you select
continue th e following steps.
Send message/Send business
Send message/Send business
If you selec t
Send message
Send business card
Setting Up Your Phonebook
,
,
91

Press To
8
9
scroll to
select
Tip:
send an SMS message .
Send as text
Send as text
See page 51 to write and
Creating Your Name Card
You can create your personal profile.
Find the Feat ure
Press To
1
2
keypad keys enter the suit able words
3
>
>
scroll to an y bl ank box
save the settings
Checking Your Name Card
Setting Up Your Phonebook
92
Find the Feat ure
>
>
Phonebook
My Own Card >Edit
Phonebook
My Own Card >View

Sending Your Name Card
To select information on your name card you want to send:
Find the Feature
Press To
1
2
ON
3
BACK
4
To send your name card:
Find the Feature
To
Send as SMS
To
Send as text
page 91.
, see “
Sending a Phonebook Entry
, see “
Sending a Phonebook Entry as an SMS Message
>
Phonebook
>
My Own Card
>
Send my own>Info. setting
scroll to the desi red
information
send the select ed information
retu rn to t h e previous m e nu
save the settings
>
Phonebook
>
My Own Card
>
Send my own
>
Send as SMS/Send as text
” on page 89.
Erasing Your Name Card
Setting Up Your Phonebook
” on
Find the Feature
>
Phonebook
>
My Own Card >Erase
93

Personalizing Your
Phone
Setting a Language
Find the Feat ure
>
Settings
>
Language
Replacing the Service Provider
Name
You can replace the service provid er name in the idle
display with the standby logo you downloaded.
Find the Feat ure
>
Settings
>
Display >Standby logo>ON
Setting Home Keys
You can set the navigati on key , right soft key ,
and left soft key as shortcuts to menu features.
Find the Feat ure
Personalizing Your Phone
>
Settings
>
Home keys
94

Restoring Factory Settings
Find the Feature
Note:
Enter your phone’s unlock code to restore factory
settings.
>
Settings
>
Restore factory settings
Creating an Option Shortcut
Find the Feature
Press To
1
2
3
key pad keys enter a number between 1
4
SAVE
>
Quick access
>
Edit
scroll to the desi red option
select the option
and 9
save the setting
Using an Option Shortcut
Find the Feature
>
Quick access
Personalizing Your Phone
Press To
1
2
scroll to the desi red option
shortcut
open the selected option
95

Setting a Phone Profile
You can set a phone profile, which includes ring tone, key
tone, and vibrator settings. You can also rename a phone
profile.
Tip:
Press and hold from the idle display to change
phone profiles.
Turning On a P hone Profile
Find the Feat ure
Tip:
To turn on
phone’s accessory port.
Tip:
T o turn on
acce ssory port .
Handsfree
Headset
, plug a headset kit in you r pho ne’ s
, plug a handsfree kit in your
>
Profile
>
Normal/Meeting/Outdoors/
Car/ Customized/Office
>
Activate
Custo mizing a P hone Profile
You can customize the following options for a phone
profile:
Ringing volume
Ringing tone
Personalizing Your Phone
96
Select ring tone vol um e. Maximum is
Volume 5
.
Select a ring t o ne.

Incoming call
alert
Vibrating
Message alert
tone
Key tone volume
Key tone type
Warning tones
Startup music
Voice dial
Select how the ring tone works with
incoming calls.
Tip:
Scroll to
you tur n off
Vibrating
receive calls.
Turn vibrator on or of f.
Select an alert tone when your phone
receive m essages.
Tip:
Scroll to
. If yo u tu rn o ff
tone
tur n on
when it receive m essages.
Select key tone volume. Maximum is
Level 5
.
Select a key tone.
Tip:
Scroll to
Turn on/off
played when ba ttery po wer is l ow or
there is any oper at ion error.
Turn on/off
when you turn on/off your phone.
Turn on/off
numbers, see page 87.
Off
to turn off
Ringing tone
, your phone vibrates when you
Off
to turn off
Vibrating
, your phone vibrates
Ringing tone
and turn on
Message alert
Message alert tone
. If
and
Off
to turn off the key tone.
Warning tones
Startup music
Voice dial
, which are
, which is play ed
. To set voice dialing
Personalizing Your Phone
Auto answer
Note:
Voice dial
Turn on/off
Note:
Auto answer
is fo r
Handsfree/Headset
Auto answer
is for
only.
.
Handsfree/Headset
only.
97

Find the Feat ure
Renam ing a Phon e Profile
>
Profile
>
Normal/Meeting/Outdoors/
Car/ Customized/Office/
Handsfree/Headset
>
Customize
Find the Feat ure
Muting Your Phone
Find the Feat ure
Tip:
Press and hold to turn on/off
idle display.
Personalizing Your Phone
>
Profile
>
Meeting/Outdoors/Car/
Customized/Office
>
Profile
>
Silence>ON
Silence
>
Rename
from the
98

Getting More Out of
Your Phone
Sending DTMF Tones
When you are on a call, y ou can send Dual Tone MultiFrequency (DTMF) tones, for example, to enter your
account number duri ng a banki ng servi ce cal l.
Press To
key pad keys enter your account number
Making a Conference Call
In the idle display:
Press To
1
key pad keys enter a phone numb er
2
3
key pad keys enter a phone numb er
4
5
OPTIONS
make the 1st call
make the 2nd call
Tip:
The 1st call is held when
the 2nd call is acti ve.
open the options menu
Getting More Ou t of Your Phon e
99
 Loading...