


APPLICANT: MOTOROLA, INC. FCC ID: IHDT6BK1
INSTRUCTION MANUAL
A preliminary draft copy of the Users Manual follows:
EXHIBIT 8

Table of Contents
INTRODUCTION............................................................................................1
SAFETY AND GENERAL INFORMATION ........................................................3
Important Information on Safe and Efficient Operation .....................................3
Read this Information before using your Personal Communicator .................3
Portable Personal Communicator Operation and EME Exposure..................4
Electromagnetic Interference / Compatibility...................................................4
Facilities............................................................................................4
Aircraft..............................................................................................4
Medical Devices .................................................................................5
Safety and General ...................................................................................5
Use in Vehicles ..................................................................................5
Operational Warnings ..........................................................................6
Operational Cautions ...........................................................................6
European Union Directives Conformance Statement ........................................7
Total Customer Satisfaction ........................................................................8
Warranty Information..................................................................................9
How to get Warranty Service ................................................................9
GETTING STARTED .................................................................................... 13
Checklist ............................................................................................... 13
Inserting Your SIM Card........................................................................... 15
Installing the Battery ............................................................................... 16
Charging the Battery................................................................................ 17
Battery Performance and Maintenance ....................................................... 17
Low Battery Warning ............................................................................... 18
Battery Indicators ................................................................................... 18
Turning Your Device On - General.............................................................. 18
Turning Your Device On ........................................................................... 19
Turning Your Device On - Phone Mode................................................. 19
Turning Your Device On - PDA Mode ................................................... 19
Complete Process of Turning On Your Device........................................ 20
Selecting the Handset Operation Mode ................................................ 22
Turning OFF the phone ...................................................................... 22
Screen Displays and Operation ........................................................... 22
Icons .................................................................................................... 23
Table of Contents i

Status Display Icons ......................................................................... 23
Phone Mode Function........................................................................ 23
Function Display Icons............................................................................. 25
Main Menu Function Icons ....................................................................... 26
Buttons ................................................................................................. 28
The Function Selection Button ............................................................ 28
Title................................................................................................ 28
Key-in Area...................................................................................... 29
Pull Down Selection Box .................................................................... 29
Single Selection Box ......................................................................... 29
Scroll Bar ........................................................................................ 30
Dialogue Box.................................................................................... 30
How to Enter Words .......................................................................... 30
Handwriting Script Board.................................................................... 31
English and Numeric Keyboard ............................................................ 32
Numeric Keypad................................................................................ 32
Terms Used In this Guide ......................................................................... 33
"Tap" or "Press" ................................................................................ 33
"Edit" or "Enter" ................................................................................ 33
"Select" ...........................................................................................33
"Highlight"........................................................................................ 33
"Select Character"............................................................................. 33
PHONE FUNCTIONS.................................................................................... 35
Making a Phone Call................................................................................ 35
GSM Emergency Phone Call ............................................................... 36
Receiving a Phone Call ............................................................................ 36
Before Connection and During Dialling Functions .......................................... 38
Dialling an International Call ...................................................................... 38
Call a Direct Extension or Voice Mailbox..................................................... 38
During Conversation Functions .................................................................. 39
One Call Connected .......................................................................... 39
Hold Call and Dial another Number ....................................................... 40
Switch Call ...................................................................................... 41
Transfer Call .................................................................................... 41
To transfer an active call to the call on hold:......................................... 42
Turbo Dialling ................................................................................... 42
Dialling numbers stored in a SIM card .................................................. 43
Auto Re-dial ........................................................................................... 44
Making a Conference Call......................................................................... 44
ii Table of Contents

Initiating a Conference Call................................................................. 45
Adding a New Call to the Conference Call ............................................. 45
Call Waiting...................................................................................... 47
ADDRESS BOOK......................................................................................... 49
Personal Contact Information ................................................................... 49
Grouping................................................................................................ 49
Adding New Contact Information ................................................................ 50
Inserting Pauses .............................................................................. 51
Storing a Number After a Call .............................................................. 52
Storing a number into a New Contact ................................................... 53
Storing a Number into an Existing Contact ............................................ 53
Search/Edit Contact Information .......................................................... 54
Finding Contact Information ................................................................ 55
Deleting a Contact ............................................................................ 56
Deleting Contacts ............................................................................. 57
Creating Your Own Categories .................................................................. 59
Adding Your Own New Category ......................................................... 59
Editing Your Own Category ................................................................ 60
Deleting Your Own Category............................................................... 61
Creating Groups...................................................................................... 62
Setting Up a New Group .................................................................... 62
Searching Group Recipients ............................................................... 63
Adding Group Recipients.................................................................... 64
Deleting Groups................................................................................ 64
Copying Contact Information from the Phone Memory to a SIM Card................ 66
Copying Contact Information from a SIM Card to the Phone Memory................ 67
Sending and Receiving Contact Information........................................... 68
Sending Contact Information ............................................................... 69
Receiving Contact Information............................................................. 71
Making Phone Calls and Sending Information Through Your Address Book. 72
Making Phone Calls Through Your Address Book................................... 72
Sending Short Messages from Through Address Book ............................ 73
Sending E-Mail from Your Address Book............................................... 73
Printing Contact Information................................................................ 74
Sending Contact Information using IrDA................................................ 76
SMS............................................................................................................ 77
Sending SMS Messages .......................................................................... 80
Receiving SMS Messages........................................................................ 84
Table of Contents iii

Receiving Voicemail Messages.................................................................. 84
Receiving Text Messages .................................................................. 85
Forward a Message................................................................................. 87
Information Service ........................................................................... 88
Quick Text ............................................................................................. 89
Viewing and Adding a New Quick Text Message ................................... 89
Resetting to Default Quick Text List .................................................... 89
Adding a Quick Text Message to an SMS ............................................ 90
SIM Card......................................................................................... 90
Outbox............................................................................................ 91
Sent Message.................................................................................. 92
Drafts ............................................................................................. 93
Trash.............................................................................................. 94
Storing Phone Numbers from SMS Messages ........................................ 94
Adding New Message Folders............................................................. 96
Editing Message folder ...................................................................... 97
Deleting Message folder .................................................................... 97
Empty Trash folder ............................................................................ 97
Making Phone Calls or Sending Messages Through Address Book .......... 98
CALL REGISTERS....................................................................................... 99
Last 20 Call Records ....................................................................... 100
E-MAIL ..................................................................................................... 101
E-mail Access....................................................................................... 103
Accessing your Mailbox................................................................... 103
Composing a New E-mail .................................................................. 105
E-mail Attachments.......................................................................... 106
Adding a Contact ............................................................................ 107
Receiving E-mail ............................................................................. 108
Managing your Email ....................................................................... 109
Creating your Own Folders ............................................................... 109
Moving Email from One Folder to another ............................................ 111
iv Table of Contents

WAP BROWSER........................................................................................ 113
Connecting to Internet ........................................................................... 114
Activating WAP Browser ........................................................................ 115
Your Browser Menu ........................................................................ 115
Browsing Information ............................................................................. 116
Making a Selection ......................................................................... 116
Entering Information ........................................................................ 116
NOTE PAD ................................................................................................ 117
Creating a Note Pad entry ...................................................................... 117
Searching and Editing Notepad entries .................................................................. 117
Deleting all Notepad Entries .................................................................... 118
Deleting a Single Note Pad Entry ............................................................. 118
Sending a Note ..................................................................................... 118
Sending via email ............................................................................ 118
Sending via SMS ............................................................................ 119
Sending via Fax.............................................................................. 119
Beam via Infrared............................................................................ 119
Print Note ...................................................................................... 120
DATE BOOK ............................................................................................. 121
Month View.......................................................................................... 121
Day View ............................................................................................. 122
Setting a New Event ....................................................................... 123
Jump to ......................................................................................... 125
Delete Event .................................................................................. 125
INK PAD ................................................................................................... 127
Viewing existing Sketches...................................................................... 127
Creating a New Sketch .......................................................................... 127
Searching and Editing Images ................................................................. 128
Deleting Images .................................................................................... 128
Sending Ink Pad Drawings...................................................................... 129
Table of Contents v

TASKS...................................................................................................... 131
Entering a New Task ............................................................................. 131
Deleting All Tasks ................................................................................. 132
Cleaning Up your Task List .............................................................. 132
Deleting a Single Task ..................................................................... 132
VOICE NOTES ........................................................................................... 133
Recording a Voice note .......................................................................... 133
Searching and Replaying a Voice Note ..................................................... 133
Recording a New Voice Note................................................................... 134
ALARMS................................................................................................... 135
Setting an alarm .................................................................................... 135
Setting an Alert or Ring Tone .................................................................. 136
Switching off an activated alarm .............................................................. 136
CALCULATOR .......................................................................................... 137
Standard Calculator ............................................................................... 137
Memory Functions ................................................................................. 137
Scientific Calculator............................................................................... 137
UNITS CONVERTER .................................................................................. 139
WORLD TIME............................................................................................ 141
Selecting a City .................................................................................... 141
Select Time .......................................................................................... 142
Select Date .......................................................................................... 142
Setting Daylight Saving .......................................................................... 142
CURRENCY CALCULATOR ....................................................................... 143
vi Table of Contents

GAMES..................................................................................................... 145
Wu Zi Qi .............................................................................................. 145
The Object of the Game ................................................................... 146
Wu Zi Qi Basic Violations ................................................................. 147
Sokoban .............................................................................................. 148
Object of the Game ......................................................................... 148
Black Jack........................................................................................... 150
Object of the Game ......................................................................... 150
Player as Dealer ............................................................................. 151
RING TONE COMPOSER............................................................................ 153
Ringer Tone Editor................................................................................. 153
Selecting and Playing a Ring Tone ........................................................... 153
Composing and Adding a New Ring Tone................................................... 154
Sending your Ring Tone ......................................................................... 155
Receiving a Ring Tone via SMS............................................................... 155
Sending your Ring Tone via Infra Red....................................................... 156
Deleting your Ring Tones........................................................................ 156
RECEIVE USING INFRARED ...................................................................... 157
DATA SYNCHRONISATION WITH PC......................................................... 159
Software Synchronisation....................................................................... 159
Installation..................................................................................... 159
Performing Data Synchronisation ....................................................... 160
MODEM .................................................................................................... 161
Using Infrared for Data Transmission........................................................ 162
J2ME ........................................................................................................ 163
J2ME Application Manager............................................................... 166
Table of Contents vii

STK APPLICATION ................................................................................... 167
Viewing the List of Applications............................................................... 167
Viewing the List of Options within an Application ....................................... 167
Service Message .................................................................................. 167
Entering a Message .............................................................................. 167
Connect to Service................................................................................ 167
Sending a Short Message ...................................................................... 167
SYSTEM SETUP ........................................................................................ 169
Security............................................................................................... 169
Locking and Unlocking your Phone.................................................... 170
Auto Lock...................................................................................... 171
Fixed Dialling.................................................................................. 172
SIM Request.................................................................................. 173
Call Barring .................................................................................... 173
Passwords .................................................................................... 175
Memory Usage ..................................................................................... 177
Checking Memory Usage Status ....................................................... 177
Initial Setup.......................................................................................... 178
Daylight Saving .............................................................................. 178
Time Settings ................................................................................. 178
Time Format.................................................................................... 179
Location (Current Location) .............................................................. 179
Date Settings ................................................................................. 180
Date Format ................................................................................... 180
Language ...................................................................................... 181
Text Input...................................................................................... 181
Owner Information........................................................................... 182
Startup Greetings ........................................................................... 183
Master Reset ................................................................................. 183
Master Clear .................................................................................. 183
Phone Setup .................................................................................. 184
Network Setup ............................................................................... 185
Search Setup ................................................................................. 186
Phone ........................................................................................... 191
Flip Answer.................................................................................... 194
Auto Answer .................................................................................. 195
Prepend (Prefix Dialling)................................................................... 195
Turbo Dial ...................................................................................... 195
My Numbers................................................................................... 196
viii Table of Contents

Call Meters (Charge Meters)............................................................. 196
Available Credits............................................................................. 198
Sounds & Alerts.................................................................................... 199
Speaker Volume Setup..................................................................... 200
Touch Screen Volume ...................................................................... 200
Notifications................................................................................... 201
Display Setup ....................................................................................... 201
Calibrate screen ............................................................................. 202
Date book Setup ................................................................................... 202
Messaging Setup .................................................................................. 203
Voice Mail Setup ............................................................................ 203
Inbox Setup ................................................................................... 204
Service Centre Info ......................................................................... 204
Information Services........................................................................ 205
Drafts ........................................................................................... 205
Sent ............................................................................................. 206
Outbox.......................................................................................... 207
Trash............................................................................................ 207
Internet Setup ...................................................................................... 208
Connection Setup ........................................................................... 209
Browser Setup ............................................................................... 212
Setting the Parameters .................................................................... 212
Bookmark Setting............................................................................ 213
Email Setup.................................................................................... 216
Power Management......................................................................... 221
Accessories Setup.......................................................................... 222
Table of Contents ix

x Table of Contents

Introduction
Congratulations on being the proud owner of the latest wireless triband
communications device the Motorola A008388.
Your handset combines a host of mobile phone features with the power and flexibility of a
Personal Digital Assistant (PDA).
In addition to making calls, sending short messages and faxes , you can send and receive
IMAP and POP3 email messages, browse the Internet, download J2ME applications and
organise your communication needs using the large touch screen.
Your handset comes equipped with:
• A Scheduler diary with reminder alert functions
• A NotePad and InkPad to capture moments of thoughts- which can be sent as faxes or
beamed
via infrared to compatible devices
• World Time and Alarm Clock
• A Graphical Composer to enable you to personalise your ringer tones
• A powerful Scientific calculator
• Conversion tools for Foreign exchange and units
• Advanced GPRS functionality for fast and efficient data transfer
The advanced design of the handset together with the capability of the software make the
A008 388
a revolutionary new concept in mobile communications.
Introduction 1

2 Introduction

Safety and General Information
Important Information
on Safe and Efficient Operation
Read this Information before using your Personal Communicator
The information provided in this document supersedes the general safety information
contained in user guides published prior to this date. For information regarding radio use in a
hazardous atmosphere please refer to the Factory Mutual (FM) Approval Manual Supplement
or Instruction Card, which is included with radio models that offer this capability.
RF Operational Characteristics
Your Personal Communicator contains a transmitter and a receiver. When it is ON, it
receives and transmits radio frequency (RF) energy. The Personal Communicator operates in
the frequency range of
900 MHz to 1990 MHz and employs digital modulation techniques.
When you communicate with your Personal Communicator, the system handling your call
controls the power level at which your personal communicator transmits. The output power
level typically may vary over a range from 0.063 watts to 1.58 watts.
Exposure to Radio Frequency Energy
Your Motorola Personal Communicator is designed to comply with the following national and
international standards and guidelines regarding exposure of human beings to radio frequency
electromagnetic energy:
• United States Federal Communications Commission, Code of Federal Regulations; 47
CFR
part 2 sub-part J
• American National Standards Institute (ANSI) / Institute of Electrical and Electronic
Engineers (IEEE) C95. 1-1992
• Institute of Electrical and Electronic Engineers (IEEE) C95.1-1999 Edition
• National Council on Radiation Protection and Measurements (NCRP) of the United States,
Report 86, 1986
• International Commission on Non-ionizing Radiation Protection (ICNIRP) 1998
• National Radiological Protection Board of the United Kingdom 1995
• Ministry of Health (Canada) Safety Code 6. Limits of Human Exposure to Radio
Frequency Electromagnetic Fields in the Frequency Range from 3 kHz to 300 GHz, 1999
• Australian Communications Authority Radio Communications (Electromagnetic Radiation Human Exposure) Standard 1999 (applicable to wireless phones only)
Safety and General Information 3

To assure optimal performance and make sure human exposure to radio frequency
electromagnetic energy is within the guidelines set forth in the above standards, always
adhere to the following procedures:
Portable Personal Communicator Operation and EME Exposure
Antenna Care
Use only the supplied or an approved replacement antenna. Unauthorised antennas,
modifications, or attachments could damage the Personal Communicator and may violate
FCC and/or other applicable regulations.
DO NOT hold the antenna when the Personal Communicator is “IN USE”. Holding the antenna
affects call quality and may cause the Personal Communicator to operate at a higher power
level than needed.
Phone Operation
The Personal Communicator is designed to be used with a headset for talking and listening.
The Personal Communicator can also be placed inside the holster, then the holster can be
clipped onto your belt, pocket, handbag, or other apparel and used with the headset.
Body-Worn Operation
To maintain compliance with FCC RF exposure guidelines, if you wear the Personal
Communicator on your body when transmitting, always place the Personal Communicator in a
Motorola supplied or approved clip, holder, holster, case, or body harness. Use of nonMotorola-approved accessories may exceed FCC RF exposure guidelines. If you do not use
a body-worn accessory, ensure the antenna is at least one inch (2.5 cm) from your body
when transmitting.
Approved Accessories
For a list of approved Motorola accessories, look in the accessory section of this manual.
Electromagnetic Interference / Compatibility
Nearly every electronic device is susceptible to electromagnetic interference (EMI) if
inadequately shielded, designed or otherwise configured for electromagnetic compatibility.
Facilities
To avoid electromagnetic interference and/or compatibility conflicts, turn off your Personal
Communicator in any facility where posted notices instruct you to do so. Hospitals or health
care facilities may be using equipment that is sensitive to external RF energy.
Aircraft
When instructed to do so, turn off your Personal Communicator when on board an aircraft.
Any use of a Personal Communicator must be in accordance with applicable regulations per
airline crew instructions.
4 Safety and General Information

Medical Devices
Pacemakers
The Health Industry Manufacturers Association recommends that a minimum separation of 6
inches
(15 centimetres) be maintained between a handheld wireless phone and a pacemaker.
These recommendations are consistent with the independent research by, and
recommendations of, Wireless Technology Research.
Persons with pacemakers should:
• ALWAYS keep the Personal Communicator more than six inches (15 centimetres) from
their pacemaker when the Personal Communicator is turned ON.
• Not carry the Personal Communicator in the breast pocket.
• Use the ear opposite the pacemaker to minimise the potential for interference.
• Turn the Personal Communicator OFF immediately if you have any reason to suspect
that interference is taking place.
Hearing Aids
Some digital wireless phones may interfere with some hearing aids.
In the event of such interference, you may want to consult your hearing aid manufacturer to
discuss alternatives.
Other Medical Devices
If you use any other personal medical device, consult the manufacturer of your device to
determine if it is adequately shielded from RF energy. Your physician may be able to assist
you in obtaining this information.
Safety and General
Use in Vehicles
Check the laws and regulations on the use of phones in your vehicle. You are advised to
always obey them.
When using your Personal Communicator in a vehicle, please:
• Use hands-free operation, if available.
• Pull off the road and park before making or answering a call.
Safety and General Information 5

Operational Warnings
For Vehicles with an Air Bag
Do not place the Personal Communicator in the area over an air bag or in the air bag
deployment area. Air bags inflate with great force. If the Personal Communicator is placed in
the air bag deployment area and the air bag inflates, the Personal Communicator may be
propelled with great force and cause serious injury to occupants of the vehicle.
Potentially Explosive Atmospheres
Turn off your Personal Communicator prior to entering any area with a potentially explosive
atmosphere, unless it is especially qualified for use in such areas as “Intrinsically Safe” (for
example, Factory Mutual, CSA, or UL Approved). Do not remove, install, or charge batteries
in such areas. Sparks in a potentially explosive atmosphere can cause an explosion or fire
resulting in bodily injury or even death.
The areas with potentially explosive atmospheres referred to above include fuelling areas
such as below decks on boats, fuel or chemical transfer or storage facilities, areas where the
air contains chemicals or particles, such as grain, dust or metal powders, and any other area
where you would normally be advised to turn off your vehicle engine. Areas with potentially
explosive atmospheres are often but not always posted.
Blasting Caps and Areas
To avoid possible interference with blasting operations, turn off your Personal Communicator
when you are near electrical blasting caps, in a blasting area, or in areas posted: “Turn off
two-way radio”. Obey all signs and instructions.
Operational Cautions
Antennas
Do not use the Personal Communicator if it has a damaged antenna.
If a damaged antenna comes into contact with your skin, a minor burn can result.
Batteries
All batteries can cause property damage and/or bodily injury such as burns if a conductive
material such as jewellery, keys, or beaded chains touch exposed terminals. The conductive
material may complete an electrical circuit (short circuit) and become quite hot. Exercise care
in handling any charged battery, particularly when placing it inside a pocket, purse, or other
container with metal objects.
6 Safety and General Information
European Union Directives Conformance Statement
Hereby, Motorola declares that this product is in compliance with
• The essential requirements and other relevant provisions of Directive
1999/5/EC
• All other relevant EU Directives
IMEI: 350034/40/394721/9
0168
Type: MC2 -41H14
The above gives an example of a typical Product Approval Number.
You can view your product's Declaration of Conformity (DoC) to Directive 1999/5/EC (the
R&TTE Directive) at www.motorola.com/rtte - to find your DoC, enter the Product Approval
Number from your product's label in the "Search" bar on the Web site.
Product
Approval
Number
Safety and General Information 7

Total Customer Satisfaction
At Motorola, Total Customer Satisfaction is a top priority. If you have a question, a
suggestion or
a concern about your Motorola Cellular Phone, Motorola wants to hear from you.
Please contact the Motorola Cellular Response Centre by fax on: +44 (0) 131 458 6732, or
use one
of the local phone numbers in the following countries:
Austria 0800 297246 Norway 22 55 10 04
Belgium 0800 72 370 Oman 790925
Canada 1 800 461 4575 Poland 0801 620 620
Czech Republic 00420 2 21 85 21 01 Portugal 21 318 0051
Denmark 4348 8005 Qatar 418999
Egypt 02 3411800 Saudi Arabia 01 2303294
Eire 01 402 6887 South Africa 0800 11 48 49
Finland 0800 117 036 Spain 902 100 077
France 0 803 303 302 Sweden 08 445 1210
Germany 0180 35050 Switzerland 0800 553 109
Greece 00800 441 28150 Turkey 0212 425 9090
Hungary 0036 40 200 800 UK 0870 9010 555
Italy 02 696 333 16 United Arab
Emirates
Jordan 06 863750 Hong Kong 852 25063888
Kuwait 484 2000 Ext 1177 People’s Republic
of China
Lebanon 01 744156 Singapore 65 4855 333
Luxembourg 0800 21 99 Taiwan 886 2 87731746
Netherlands 0800 022 27 43 United States of
America
For e- mail queries contact: mcrc@ei.css.mot.com
04 32 11 66
86 10 68466060
1 800 331 6456
8 Safety and General Information

For Internet queries contact: http://www.motorola.com
Safety and General Information 9

Warranty Information
Motorola guarantees to you, the original purchaser, the Personal Communicator and
accessories which you have purchased from an authorised Motorola dealer (the “Products”),
to be in conformance with the applicable Motorola specifications current at the time of
manufacture for a term of [1] year from date of purchase of the Product(s) (Warranty Term).
You must inform Motorola of the lack of conformity to the applicable specifications of any of
the Products within a period of two (2) months from the date on which you detect a defect in
material, workmanship or lack of conformity and in any event within a term not to exceed the
Warranty Term, by submitting the Product for service to Motorola. Motorola shall not be
bound by Product related statements not directly made by Motorola.
A list of the Motorola Call Centre numbers is enclosed with this Product.
During the Warranty term, Motorola will, at its discretion and without extra charge, as your
exclusive remedy, repair or replace your Product which does not comply with this warranty;
or failing this, to reimburse the price of the Product but reduced to take into account the use
you have had of the Product since it was delivered. This warranty will expire at the end of the
Warranty Term.
This is the complete and exclusive warranty for a Motorola Personal Communicator and
accessories and in lieu of all other warranties, terms and conditions, whether express or
implied.
Where you purchase the product other than as a consumer, Motorola disclaims all other
warranties, terms and conditions express or implied, such as fitness for purpose and
satisfactory quality.
In no event shall Motorola be liable for damages nor loss of data in excess of the purchase
price nor for any incidental special or consequential damages* arising out of the use or
inability to use the Product, to the full extent such may be disclaimed by law.
*
This Warranty does not affect any statutory rights that you may have if you are a
consumer, such as a warranty of satisfactory quality and fit for the purpose for which
products of the same type are normally used under normal use and service, nor any rights
against the seller of the Products arising from your purchase and sales contract.
How to get Warranty Service
In order to be eligible to receive warranty service, you must present your receipt of purchase
or a comparable substitute proof of purchase bearing the date of purchase. The Personal
Communicator should also clearly display the original compatible electronic serial number
(IMEI) and mechanic serial number [MSN]. Such information is contained with the Product.
*
) including without limitation loss of use, loss of time, loss of data, inconvenience,
commercial loss, lost profits or savings.
10 Safety and General Information

In order to claim the warranty service, you must return the Personal Communicator and/or
accessories in question to Motorola. Please avoid leaving any supplementary items like SIM
cards. The Product should also be accompanied by a label with your name, address, and
telephone number; name of operator and a description of the problem. In the case of
vehicular installation, the vehicle in which the Personal Communicator is installed should be
driven to the Authorised Repair Centre, as analysis of any problem may require inspection of
the entire vehicular installation.
Conditions
This warranty will not apply if the type or serial numbers on the Product have been altered,
deleted, duplicated, removed, or made illegible. Motorola reserves the right to refuse free-ofcharge warranty service if the requested documentation cannot be presented or if the
information is incomplete, illegible or incompatible with the factory records.
Repair, at Motorola's option, may include reflashing of software, the replacement of parts or
boards with functionally equivalent, reconditioned or new parts or boards. Replaced parts,
accessories, batteries, or boards are guaranteed for the balance of the original warranty time
period. The Warranty Term will not be extended. All original accessories, batteries, parts, and
Personal Communicator equipment that have been replaced shall become the property of
Motorola. Motorola does not warrant the installation, maintenance or service of the products,
accessories, batteries or parts.
Motorola will not be responsible in any way for problems or damage caused by any ancillary
equipment not furnished by Motorola which is attached to or used in connection with the
Products, or for operation of Motorola equipment with any ancillary equipment and all such
equipment is expressly excluded from this warranty.
When the Product is used in conjunction with ancillary or peripheral equipment not supplied by
Motorola, Motorola does not warrant the operation of the Product/peripheral combination and
Motorola will not honour any warranty claim where the Product is used in such a combination
and it is determined by Motorola that there is no fault with the Product. Motorola specifically
disclaims any responsibility for any damage, whether or not to Motorola equipment, caused in
any way by the use of the Personal Communicator, accessories, software applications and
peripherals (specific examples include, but are not limited to: batteries, chargers, adapters,
and power supplies) when such accessories, software applications and peripherals are not
manufactured and supplied by Motorola.
What is not Covered by the Warranty?
This warranty is not valid if the defects are due to damage, misuse, tampering, neglect or
lack of care and in case of alterations or repair carried out by unauthorised persons.
1 Defects or damage resulting from use of the Product in other than its normal and
customary manner.
2 Defects or damage from misuse, access to incompatible sources, accident or neglect.
Safety and General Information 11

3 Defects or damage from improper testing, operation, maintenance, installation,
adjustment, unauthorised software applications or any alteration or modification of any
kind.
4 Breakage or damage to aerials unless caused directly by defects in material or
workmanship.
5 Products disassembled or repaired in such a manner as to adversely affect performance
or prevent adequate inspection and testing to verify any warranty claim.
6 Defects or damage due to range, coverage, availability, grade of service, or operation of
the system by the operator.
7 Defects or damage due to moisture, liquid or spills of food.
8 Control unit coil cords in the Product that are stretched or have the modular tab broken.
9 All plastic surfaces and all other externally exposed parts that are scratched or damaged
due to customer normal use.
10 Leather cases (which are covered under separate manufacturer's warranties).
11 Products rented on a temporary basis.
12 Periodic maintenance and repair or replacement of parts due to normal wear and tear;
Α The talk-time, stand-by time and total life cycle of a Motorola rechargeable battery for your
Personal Communicator will depend on usage conditions and network configurations. As a
consumable product, the specifications indicate that you should be able to obtain optimum
performance for your Motorola Personal Communicator within the first six months from date
of purchase and up to (200) charges.
The warranty for Motorola rechargeable batteries becomes void if
(i) the batteries are charged other than by Motorola approved battery chargers specified for
the charging of the battery;
(ii) any of the seals on the battery are broken or show evidence of tampering;
(iii) the battery is used in equipment or services other than the equipment for which it is
specified.
12 Safety and General Information

Safety and General Information 13

Getting Started
Checklist
Make sure that the following items are in the box when you unpack it.
• Your A008388 unit
• Your A008388's battery
• Touchscreen Stylus
• Handsfree headset
• Charger with plug adapter
• Leather Pouch (not available in Hong Kong)
• Data Cable
• User Manual
• CD-ROM
! Do not use a rough cloth or any abrasive material to clean the device as these might
scratch the surface of the device. Also do not use any solvents to clean the device.
Rocker Switch
Moving the button up will:
• increase the ear piece volume during a phone call
• in the main menu screen, "Move Forward" to select the various functional symbols
• in the display, "Move Forward" to select the various display selections
• in dial pad screen, without entering any numbers, press to enter in Address Book
• turn off the Ringer or VibraCall when the phone is ringing or vibrating.
Moving the button down will:
• decrease the ear piece volume during a phone call
• in the main menu screen, "Move Backward" to select the various functional symbols
• in the display, "Move Backward" to select the various display selections
• in the dialogue box, "Move Backward" to select the various buttons
• to turn off the Ringer or VibraCall when the phone is ringing or vibrating
• in dial pad screen, press to display the last 20 calls made.
(Below diagram need to be updated for 388)
Getting Started 13

Rocker Switch &
Smart Button
(See below for
functionality)
Touch
Screen
On/Off Button
Press this key to
scroll up the screen
Infra Red port
Press this key to scroll
down the screen
Battery Cover
Battery
Release Catch
Voice Record
Button Smart
button??
Motorola Button
- Press this key at most screens
to return to the main screen
- Turns backlighting On and Off
Handsfree Earpiece
Socket
Ringer Speaker
Smart Button
Pressing the button inwards will:
• answer a phone call upon opening the flip
• answer a phone call upon connecting to an ear piece
• redial the last number
• select functions.
14 Getting Started
Touch Screen
Stylus
Inserting Your SIM Card
Your SIM (Subscriber Identity Module) card was supplied by your Cellular Service Provider
when you bought your phone. Your phone is connected to the network via the SIM card. You
will not be able to make or receive calls if you do not have a SIM card inserted in your phone.
! Some networks allow you to make emergency calls without a SIM card inserted.
The SIM card is a Smart Card that contains your phone number, service details and memory
for storing Phone Book numbers and messages. You can use your SIM card in any GSM
handset and you will be charged for the call.
! Like a bank or credit card, you should keep your SIM card secure. Do not bend or scratch
your card and avoid exposure to static electricity or water.
! Switch off your phone before inserting or removing the SIM card. Failure to do so may
damage the memory of your SIM card.
1 Press and hold the Power button to turn off your phone.
2 If the phone's battery door is already in place, push down the battery door release latch,
then slide the door down and lift off to remove it. Pull upwards the battery release latch ,
the battery will automatically pop up.
3 Slide the SIM holder towards the right and lift up the left side of the holder.
Diagram needed to be updated.
4 To insert the SIM card, slide it into the holder with the notch at the top and facing towards
the base of the device.
5 To replace the holder, press and slide the it to the left to lock it in place.
6 To replace the battery, insert it, printed arrows first, into the compartment. Align the
connections on the battery with the connections on the device. and push down.
7 To replace the battery door, slide it up until it clicks into place.
Getting Started 15
After inserting the SIM card, turn on the device. If the SIM card is inserted in the wrong way
round, damaged or there is no SIM, the Check Card ”No Sim” message may be displayed.
Remove the SIM card, check that it is the right way round and then re-insert it into the phone.
If either of the Bad Card See Supplier, or Blocked See Supplier messages are displayed, then
you will need to contact your Cellular Service Provider.
Installing the Battery
Before you can use your device, you need to install and charge the battery. Your phone is
designed to be used only with Motorola Original Batteries and accessories. We recommend
that you store batteries in their protective cases when not in use.
1 Remove the battery from its protective plastic case.
2 If the old device's battery door is already in place, push down pull up the battery door
release latch, then slide the door down and lift of f the battery will automatically pop up .
3 Insert the battery, printed arrows first, into the compartment. Align the connections on the
battery with the connections on the device and push down.
4 Replace the battery door then slide the door up until it clicks i nto place.
(Diagram needed to be updated)
16 Getting Started
Charging the Battery
Before you can use your device, you need to install and charge the battery. A Travel
Charger will be able to charge a battery fitted in a phone (as well as providing power to the
phone directly).
To ensure maximum battery performance, a new battery (or a battery that has not been used
for several months) should be charged for at least 14 hours before use (but NOT more than
24 hours).
Α A new battery will require several full charge / discharge cycles in order to achieve its
optimum performance.
Α A new battery, or a battery that has not been used for several months, may cause a
prematurely fully charged indication. Ignore this indication and let the battery charge for
several more hours.
Α Do not use lithium ion batteries at extremely low temperatures as the maximum standby /
talk time will not be available when cold.
1 Make sure that the phone is fitted with a battery. Plug the travel charger into your phone
with the release tab facing up.
2 Plug the other end of the travel charger into a suitable mains power socket.
! Please make sure that the local mains supply voltage at your location matches that of your
charger.
3 When charging starts, you will hear an alert beep and the screen will show (Battery
Charging). Charging can take place when the device is on or off. When the device is on,
charging does not affect the normal operation of the device.
4 When your device indicates that the battery is fully charged (Charging Complete), press
the release tab and remove the travel charger.
When your device is turned on, the battery level indicator in the top right hand corner of the
screen shows the amount of charge left in your battery.
Battery Discharged, , , Battery fully charged.
Battery Performance and Maintenance
• Best battery performance will be achieved when you regularly charge and discharge
batteries as instructed in this manual.
• Battery performance is greatly affected by network coverage.
• Set Battery Saving Mode to on (Please refer to Power Management in System Setup) and
/ or Frequency of Search to slow or medium (Please refer to Network Setup menu).
• If left unused, a fully charged battery will discharge itself in approximately one month.
• When not in use, store your battery uncharged in a cool, dark and dry place.
Getting Started 17
! Always treat your batteries with care. Please refer Safety Information on batteries.
! Never leave your batteries in extremely high temperatures (over 60 degrees Celsius), for
example near the window, under the direct sunlight.
! Only Motorola Original Accessory batteries can be charged in the phone or the optional
desktop charger. This is to protect you and your phone from the risks of incorrect charging.
Low Battery Warning
Your handset allows you to monitor your battery level via the battery level indicator.
When the battery level is low and only a few minutes of talk time remain, a warning signal
(two beeps) will sound, the battery symbol will begin to flash, and Low Battery will be
displayed, prompting you to charge your battery.
Battery Indicators
Insert battery: the display will prompt you to insert the battery if you have connected the
Invalid battery: this display will be accompanied by a warning beep. This is to warn
phone to an external current mains before inserting the battery.
you that the battery cannot be re-charged (though the battery can provide
power to the phone). This may indicate that the battery is not Motorola
Original Accessory Battery. It is suggested that you use only Motorola
Original Batteries and other accessories as Motorola will not be held
responsible for any damage to the phone, financial loss or bodily injuries
arising from the use of non-Motorola original batteries and accessories.
Turning Your Device On - General
Your device may be turned on in a number of different ways, depending on the mode in
which you want it to operate.
If your device is new, or you do not want to change the default phone settings, please refer
to the step s in Phone Mode.
When you require the diary, memo pad or calculator features, please refer to the steps in
PDA Mode.
If you have preset the PIN, phone number lock or the device is preset with Manual Network
Selection, please refer the Complete Process of T urning On the Device.
18 Getting Started
Turning Your Device On
To turn on your device, open the flip, press the Power button and hold for a short while
(about 1 to 2 seconds) before releasing the button.
Turning Your Device On - Phone Mode
! As this mode transmits the wireless radio frequency which may affect the normal operation
of some electronic equipment, please ensure that safety regulations are adhered to before
activating the phone mode.
! Do not turn on phone mode on board aircraft.
1 Open the flip, press the Power button and hold for about 4 to 5 seconds (until the screen
shows the mode of operation in the dialogue box) before releasing the button.
2 Select Antenna ON, (Under this mode, you can make phone calls and send messages).
Phone Mode
Antenna Off
Antenna On
Done
3 Press Done. To confirm your selection.
Turning Your Device On - PDA Mode
1 Open the flip then press the Power button and hold the button for about 4 to 5 seconds
(until the screen shows the mode of operation in the dialogue box) before releasing the
button.
2 Select Antenna Off to turn off Phone Mode and select PDA Mode; under this mode, you
cannot make phone calls and send messages.
Phone Mode
Antenna Off
Antenna On
Done
3 Then press Done to confirm your selection.
Α Besides using the above method to activate the PDA mode, you can also refer to the
"Complete Process of Turning On the Phone" to activate the PDA mode.
Getting Started 19

Complete Process of Turning On Your Device
If you have pre-set the PIN, phone number lock or the device is preset with manual network
selection (refer to System Setup), you will need a few more steps to turn Phone Mode ON.
But it also enhances the security of your phone and the versatility of its functions.
Open the flip then press the Power button and hold the button until the screen shows the
Phone Mode dialogue box, then release.
If the SIM card is not inserted, locked, not registered or damaged, the screen will show the
following
2 selections:
12:26
No SIM Card!
!
Continue with:
Antenna Off
Antenna On
Power Off OK
Tap Antenna OFF then press OK, the phone will operate in PDA mode. Calls cannot be
made, short messages cannot be sent, etc.
Tap Antenna On and then OK, the phone can make Emergency Calls (if the SIM is locked or
registered) and use the PDA functions. Refer to the Security Setup under System Setup.
Tap Power Off to turn off the device.
If the SIM card is working and the PIN is set the following screen will prompt you to key in
your PIN
as follows:
12:26
Enter SIM Pin
20 Getting Started
PDA Mode Enter

To enter the PDA mode, simply select PDA Mode to turn on the phone. Alternatively, key in
your PIN (for security reasons, the screen will only show # to represent each digit; to correct
the last digit, simply press to delete the last digit).
Press Enter to confirm your selection and enter the Phone Mode.
If the PIN is incorrect, the screen will show Invalid Pin . You can either:
Select PDA Mode to turn on the phone with PDA mode, or
Select Try Again to key in the PIN again.
! The SIM card will be automatically locked upon 3 consecutive keying of the wrong PIN.
Please refer to the "System Setup" to unlock the SIM card or contact your service
provider.
If you have set up the phone number lock (refer to Security Setup under System), the
screen will prompt you to key in your number lock code to unlock the phone. Please key in
the number lock using the same method as keying in your PIN.
If the wrong number lock is entered, the screen will show Invalid Unlock Code and you
have to press Try Again. The phone will be turned off and locked automatically (even the
PDA mode will not work) if you keyed in the wrong number lock 3 consecutive times.
Α Refer "System Setup" to pre-set the PIN and Phone Number Lock. If the correct PIN and
Phone Lock Code have been entered, the phone will then scan and register with the
network. If the phone is pre-set with Automatic Network Selection (see Network Settings
under Network Setup), the main menu will appear after scanning and selecting an available
network. The process of turning on a phone is now complete.
If the phone is pre-set with Manual Network Selection, the screen will prompt you to select
one network form the list presented to you. You can either:
Press Cancel to select PDA mode.
Press OK to select a network from the available networks.
12:26
Available Networks
Network 1
Network 2
Network 3
Network 4
Network 5
Network 6
Back
Your phone will try to register with the selected network. If this is successful, the phone will
display the network name and will return to the main menu.
The entire process of turning on the phone is now complete.
Getting Started 21

Α Depending on the different settings, you may not need to go through the entire process to
turn on the phone.
Α If the phone is turned on for the first time, it is recommended that you calibrate the screen.
For details, please see Calibrate Screen under Display Setup of Phone Setup.
Selecting the Handset Operation Mode
After turning on the phone, the top left hand corner of the screen will show the icon
(Phone mode) or icon (PDA mode), prompting you to select the operation mode.
12:26
Current Network
PDA Mode
Net ID:No Network
Antenna Off
Antenna On
Cancel
OK
GSM Carrier
Select Antenna ON and press OK to confirm your selection to go to Phone Mode.
Select Antenna OFF and press OK to confirm your selection to go to PDA Mode.
Select Cancel to dismiss the dialogue box and the current phone operation mode remains
unchanged.
Turning OFF the phone
With the phone ON, open the flip then press and hold the Power button for about 1 second
before releasing.
Screen Displays and Operation
Your device is the latest wireless communications device that combines the capability of a
phone and
a PDA. The LCD screen displays the main menu icons and all of the function group icons.
You can navigate around the touch screen using the stylus to select the functions you
require. The screen will change in accordance with the functions you select.
After turning ON the phone, the screen will show the following
Your screen shows 4 3 main menus arranged as tabs on the right hand side of the screen.
Each main menu consists of up to six function icons, to make up a function group. Menu
items are selected by pressing on the relevant tab.
22 Getting Started

The tab represents the Communication Group . The functions within this group help you
to keep in touch with the world.
The tab represents the Application Group . The functions within this group help you to
manage your daily business.
The tab represents the Tool Group . It provides you with some practical tools and utilities.
The tab represents the Setup Group . Here you can configure and personalise the phone,
as well as providing you with the capability to connect the phone to other devices.
Communications Applications Tools Setup
12:26
12:26
12:26
12:26
GSM Carrier
GSM Carrier
GSM Carrier
GSM Carrier
Need to be updated for the above diagrams.
Icons
Status Display Icons
The top section of the display shows the Phone Status indicators. The following are some of
the common indicators that you may see when using your phone.
Phone Mode Function
Call status
off hook (connected)
Getting Started 23

on hold
on hook (disconnected)
addition of "2" represents line 2
The icons indicate whether the handset is in phone mode, and also the status of the lines
(Call mode). Pressing the icon will invoke the dial pad.
24 Getting Started

Antenna status
no GPRS
no RF
no GPRS
GPRS svc, but not
attached
GPRS svc + attached
Notification
SIM Card Full
GPRS
attached +
connected +
roaming
GPRS
attached +
connected +
no roaming
SIM Card Full & new notification (i.e. missed call, new SMS, etc.)
New notification
Getting Started 25
Battery status
Strongest
Charging: battery flashes while bars increase
See battery charging
Weakest
Invalid battery
Clock
12:26 Selecting this icon allows you to adjust the world time.
Function Display Icons
The bottom left hand section of the display shows the function display indicators. Selecting a
function icon will activate the function that it represents.
Ringer status
Ring
Vibrate
Ring / Vibrate
Silent
Call Divert on (when all voice calls are diverted)
26 Getting Started

GSM Carrier Service Provider’s service trademark.
• Shows Antenna Off when phone mode is not turned on.
• Shows Emergency Call when the phone can only make emergency calls.
When the phone is turned ON, it will systematically show the phone mode, network
registration and other information.
Pressing this icon will show information about the phone owner and SIM card number
details. (Requires owner to enter his own information. Please refer to Searching and Editing
contact messages in Address Book).
If the SIM Application Tool kit is included, the main screen will be different. will be
displayed in the bottom right corner instead of .
Main Menu Function Icons
Selecting a function icon will activate the function that it represents.
To send, retrieve, check and manage short messages and voicemail
services.
Records important phone numbers, addresses and other contact details.
Records the last 20 outgoing, incoming and missed calls.
Sending and Receiving E-mails.
Allows you to surf the internet.
new
icon
A simple text feature which allows you to compose short notes and send
them via fax , email, SMS or IrDA, or to print them.
The datebook is a calendar which allows you to schedule and organise
your daily activities such as appointments and meetings.
Allows you to create simple sketches and send them via fax and email
or to send them to other A008 devices.
Getting Started 27

Allows you to create and prioritise simple to-do lists.
The Voicenote feature enables you to record up to 3 minutes of personal
messages.
The integrated Alarm clock allows you to set alarm times and choose
from a list of different alerts to remind you.
An integrated tool with functions of a standard calculator and a scientific
calculator.
A useful conversion utility for the Conversion of Length, Mass, Volume,
Temperature and Area.
Allows you to set the local time and the time for major cities around the
world.
Allows you to define rates of exchange and perform conversions
between world currencies defined in a list.
Allows you to choose fro m three different games to play.
The Ring Tone Composer allows you to compose your own ring tones
and send them via SMS or beam them via IrDA to another phone.
Allows you to receive information via Infra Red.
Data synchronization with your PC using the Truesync application.
Allows you to download applications from you PC or the Internet written
in J2ME and to install an execute them on your device.
28 Getting Started
Allows you to transmit and receive in formation via Modem.
Allows you to customise the settings of the phone to your individual
needs.

Buttons
Button may consist of either words or icons, and are used to execute a certain function.
The mostly common used buttons are Cancel and OK, which are found at the bottom of a
screen
(at the Function Display or Dialogue Box). Selecting OK executes the function then returns to
the previous menu. Selecting Cancel aborts the function at the screen and merely returns to
the previous menu.
The Function Selection Button
This is the most frequently used button.
This button appears in the last line at the function displays of many screens. It efficiently
selects the functions available at the current operation mode. Press and a dialogue box
with different options will appear. Use the stylus to select the option you require.
The options in each menu bar change depending on the handset operation modes.
If you do not wish to select any options, you may press any area other than the to
dismiss the function dialogue box.
Α The items in the menu bar will vary according to different status of the phone. That is, even
though they are under the same menu, the one showing in your phone may vary from the
diagram shown in the manual. For example, if you did not setup any self defined folder in
the email section, when you press (menu bar icon), there will not be any "Edit Folder" or
"Delete Folder" command. It is because system defines that user can only edit or delete
self-defined folder, but not any of the preset folder. Therefore, when there is no selfdefined folder, the two commands will not be shown in the menu bar.
Title
Normally it is the first row displayed on the screen (except Operation Display). It consists of
text, icons, tabs, pull down selection box, … etc. Some title fields only show numbers, e.g.
when dialling a number.
12:26
Turbo Dialing
1
13601229254
2
13901313676
3
4
5
6
Cancel OK
Getting Started 29

Key-in Area
Normally consists of titles and Key-in rows. You can use either the stylus or the keyboard to
input text, figures and your message in the Key-in Area.
12:26
Edit John Smith
Category: Unfiled
Name: John Smith
Work1:01065641
678
Work2:01065641
577
Cancel OK
Pull Down Selection Box
A Pull Down Selection Box is identified by the small arrow. The currently selected option is
displayed alongside it. To view other options, press the small arrow. To change the current
option, simply select the it to make it current.
Single Selection Box
A Single Selection Box is displayed as a bulleted list with the current selection highlighted.
If you wish to change the current selection, simply make your choice and press OK to make
it current. In this case, only ONE selection is allowed.
Select Type
work 1
work 2
home
mobile
OKCancel
30 Getting Started

Scroll Bar
When there is a lot of information that cannot be shown on the screen at the same time, you
can either Scroll Up or Scroll Down to see more information. The position of the Scroll Box
shows the amount of current information relative to the total amount of information that is
available.
You can use the following methods to scroll.
1 By using touchscreen, tap the up and down arrows to move up or down the screen one
row at a time (to move a smaller area at one time).
2 Press the scroll bar between the Scroll Box and the Scroll Up or Scroll Down keys to
move either up or down by one screen (to move a bigger area at one time).
3 Press and drag the Scroll Box to any position that you wish You may also use the scroll
up and scroll down keys at the handset keypad to scroll the screen. With these keys, you
can scroll up or down one screen at a time.
You may also use the Rocker Switch located at the left-hand side of the handset to scroll up
or down one row at a time.
The highlighted icon shows where the cursor position is, press the Rocker Switch to select it.
Α The Rocker Switch located at the left-hand side of the handset can also be used to move
forward or backward to select the Function Icon as well as move up and down to select
the various selections in the dialogue box. Press the switch to execute the highlighted icon
function.
Dialogue Box
The dialogue box consists of a title, buttons, and selection boxes. It is the means by which
the user receives status information and communicates instructions to the phone.
12:26
Messageing Center
Emial Crane
Franklin Ben
New Text
Message
Gerherdt Will
Golf Group
Herry Ha
Hiedi Ho
New Select
A - E
F - J
F - J
K - O
P - T
U - Z
ReadDismiss
How to Enter Words
Your device provides a two ways to efficiently enter information. You may use the keyboard
or hand write your entry using the hand writing application.
Getting Started 31

Handwriting Script Board
Your device uses the Motorola Wisdom Pen Handwriting Recognition technology. It
recognises handwritten characters and punctuates in a natural and efficient manner. It allows
you to enter text in the language of your choice using either a left or right handed script
board.
Tap the icon and select the Handwriting option.
Similar Characters Panel
Handwritten Small Letter
Handwritten Capital Letter
Handwritten Number
Commonly Used
Punctuations
Blank Space
Handwriting Area
Backspace
Return to
next line
Need to be Chinese HWR ones
The upper part of the screen shows the words that are to be edited. Use the stylus to touch
the key-in area at a position where you wish to enter, edit or delete words. The cursor will
appear at that point.
Before entering any information, select and press (Chinese), ABC, abc or 123 to choose the
type of information you wish to enter.
Use the stylus to enter information in the Handwriting area. When you have finished writing
or if you pause, it will automatically recognise the most similar character and place it at the
cursor position. If an incorrect word results, you can edit it by selecting one of the characters
in the Similar Characters Panel and insert it at the last cursor position.
Press OK after you have finished writing to speed up the recognition.
You can make use of the function keys around the Key-In Area to add punctuation marks,
backspace, return, etc.
When you have finished entering information, press OK to reflect the changes and to return
to the previous menu. Press Cancel if you do not want to save the changes and return to the
previous menu.
Press to select other options to enter information.
32 Getting Started

English and Numeric Keyboard
If you select English Keyboard to enter your information (which can be English or Numbers),
a Simulated alphanumeric Keyboard will appear in your screen (as shown in the diagrams
below):
Tap the up arrow or shift buttons to switch between upper and lower case.
Need to be US Keyboard instead.
1 2 3
4 5 6 #*.
7 8 9 0
Numeric Keypad
Using the stylus, tap on the Numeric buttons to enter numbers in the Key-in area, then tap
OK.
1 2 3
4 5 6 #*.
7 8 9 0
Α To enter punctuation, tap the (%#& (#*.key.) and the numeric keypad screen will change
into punctuation screen.
Getting Started 33

Terms Used In this Guide
The following terms are frequently used in this user guide, to describe the basic operation of
the device. We recommend that you take time to understand this terminology as it will
enhance the usability of the device.
"Tap" or "Press"
Use the stylus or your finger to "Press" a certain position of the screen (e.g. Button, Function
Icon, Pull Down Selection Box, Single Selection Box, Multiple Selections Box to execute the
function that the icon or button represents. Tap would also apply to using your fingers to
press the device keypad (e.g. to turn on/ off a phone, recording button, rolling button etc.).
"Edit" or "Enter"
To perform the function of entering or editing information.
After pressing the Key-in Area, you can either use Handwriting Recognition method or a
Simulated Keyboard to enter or edit information. Press OK to confirm your selection in the
Similar Character Panel and the character will be placed at the position of the cursor. You will
then be returned to the previous menu and the characters entered will appear at the Key-inArea.
"Select"
Use to operate the Pull Down Selection Box, Single Selection Box, Multiple Selection Box or
Listings Display Selection etc.
"Highlight"
On a usual screen display, icons and text are usually black in colour and the screen should
have no colour for the background. If a particular icon or text has been selected, the colour
will be inverted; that is the character or icon will be in white and the background will be black
to show the highlighting.
"Select Character"
When reading a Short message, you can use your Stylus to press on a particular words ,
keep contact with the screen and slide. The words at the sliding path will then be having an
inverted colour. You may release the Stylus from the screen when the desired destination
has been reached. The characters which appear in inverted colour from the point your Stylus
touches the screen until the point your Stylus releases the screen are considered to be
selected.
34 Getting Started

Getting Started 35

Phone Functions
! Phone mode is only operational in areas where the network/service is available.
Making a Phone Call
Apart from the usual dial-up methods, your device has many other dial-up methods to choose
from:
• calling from the address book;
• calling from the SIM card;
• dialling a number from an SMS message;
• calling from the missed call record;
• calling from the answered call record;
• single key dialling.
Other call related functions provided by your device, such as Call Divert, Call Waiting,
Conference Call... etc., can help you to increase the efficiency of your communications.
Moreover, it is able to record the last 20 calls (including missed calls, outgoing calls and
received calls).
1 Tap at the main menu and your screen will appear as follows:
12:26
55555555555
1 2 3
4 5 6
7 8 9
0 #
*
2 Tap the number that you wish to call and the number will appear at the Number Display
Panel.
3 Tap if you wish to delete the last digit.
4 Tap Clear to clear the entire phone number at the display panel.
5 Tap Send to make a phone call by dialling the number at the display panel.
6 Tap End to end a call or just close the phone flip to hang up the phone.
Α Exit appears instead of Clear when no numbers entered.
SendClear
Phone Functions 35

Α To make International Direct Dial (IDD) calls or call direct extensions, see the Dialling
International Calls and Call Direct Extensions sections.
36 Phone Functions

Α Tap or Tap button to return to the main menu.
Α If there is no number in the Number Display Panel, Tap "Redial" to redial the last dialled
number.
Α You can continue to dial the extension number after you have made a successful phone
call. You can get back the dial-up screen by pressing button in the function panel,
and then press the extension number.
GSM Emergency Phone Call
The worldwide GSM standard provides a single uniform number, 112, to dial in cases of
emergency. Provided that your phone has found a network, you will be able to make an
emergency call. The call can be made regardless of any security codes and, depending on
the network, with or without a SIM card inserted.
The emergency call will be directed to a central emergency operator.
To dial the emergency number, tap
While the emergency call is being made and connected, the display will show Calling…..
to enter the dial-up screen, then tap 112 and tap OK.
Emergency.
Receiving a Phone Call
To receive a phone call, your phone must be switched on and have a network connection with
adequate signal strength. If your phone is locked, you must unlock the phone to answer the
call.
Your All Call Diversion and Call Barring settings should not be set to divert or bar incoming
calls.
Please refer to the Security Features section under System Setup, and to the Phone Setup
section.
When there is an incoming call, your phone will ring (or vibrate) and the screen will display an
incoming call message.
12:26
Message center
Voice Mail
Incoming call
Text Msgs
Heidi Ho
Info Svc
Quick Text
Busy Drop Answer
SIM Card
Outbox
Exit Compose
Phone Functions 37

1 Tap Answer to answer the call. When the call is finished, either Tap End to end the call or
simply close the flip.
2 Tap Drop to reject a call.
3 Tap Busy to reject a call as busy.
Α If there is a phone number stored in the address book corresponding to the caller’s number,
the phone will display the caller’s name. If the caller uses the Hide Caller Display function,
the number will not be shown.
Α If you pre-set the "Key Answer OnlyFlip Answer" to OFF, please refer to Flip Answer in the
Phone Setup section under System Setup. The call will be answered upon opening the flip.
If the flip is currently open, tap either the Smart Button or the Rocker switch to answer the
call.
Α When in Phone mode, the Function status will change according to the current call state.
Not dialling or not during a phone call.
Dialling or in use.
Call Waiting / Call on hold.
Α The functions will change in accordance with the current call state.
Whilst in a call, tap and the Function Display Box will appear. Select the function you
require using the stylus. The functions will change in accordance with the current call state.
If you do not wish to select a function, tap to dismiss the Function Display Box.
12:26
Connected
Heidi Ho
00:01
End Hold
38 Phone Functions
MENU
- mute
- transfer
- new call
- my number

Under a Closed Flip status:
When there is an incoming call, the Open Window display will show “ Voice Calls”
following by the incoming call telephone number (if this phone number has been
recorded in the Address Book, the associate name will be displayed instead).
You could open the flip to answer t he call according to the procedures mentioned
before.
Hints: If headset has been plugged in, you can use the Smart Button to pick up
the incoming call.
Phone Functions 39

Before Connection and During Dialling Functions
! Availability of some services may depend on the type and settings of your SIM card, and/or
your subscription to these services where available from your service provider.
In the Dial Pad screen, Tap and you could select the following options, including:
Show ID: This option allows you to make a call and permits the receiver of the call to
Hide ID: This option allows you to make a call without the receiver of the call seeing
Switch to Line 2: Some SIM cards have 2 numbers associated with them. This option
Insert +: This allows you to call from any country without knowing the local
Insert Pause: Inserts a three-second pause character in a phone number. When the
My Number: Allows you to view, enter or edit your phone number
see your phone number
your phone number
allows you to switch between the two when making a call.
international access code. Simply add the international dialling prefix + (by
Tapping “0”
for 3-4 seconds, “+” will then be displayed).
pause is reached, the phone will wait until the call is answered.
Dialling an International Call
This allows you to call from any country without knowing the local international access code.
Simply add the international dialling prefix + (by Tapping “0” for 3-4 seconds, “+” will then be
displayed). Now enter the country code and the phone number, and Tap SEND to make your
international call.
Call a Direct Extension or Voice Mailbox
The A008388 allows you to dial extensions or voice mailboxes directly.
To insert a three-second pause character in a phone number. However, the first pause in the
dialling string is an exception. When the pause is reached, the phone will wait until the call is
answered.
1 Enter the phone number as usual.
2 Go to the position that you wish to insert a pause character and Tap .
3 Select Insert Pause from the pop-up menu. A letter P (the pause sign) will be shown.
4 Key in the extension number.
5 Tap Send after you have finished keying in all the numbers.
For example, key in a pause sound after the phone number 01065642288, then key in “9999”,
the phone call will be transferred to extension “9999” of the called phone number (the called
party should have the extension function).
40 Phone Functions

Or, if 01065642288 has a Mailbox “1011” which can be controlled by dial-up method and its
password is “0211”, you can Tap the following numbers to enter the whole bundle of numbers:
01065642288P1011P0211. For details of inserting pause sounds when saving phone numbers
to the Address Book, please refer to the “Adding New Contact Information in Address Book”
section.
During Conversation Functions
! Availability of some services may depend on the type and settings of your SIM card, and/or
your subscription to these services where available from your service provider
One Call Connected
When you are in the middle of the conversation, the screen will appear as follows:
12:26
Connected
Heidi Ho
00:01
End Hold
You may:
1 Tap End to end the call.
2 Tap Hold to put the call on hold.
3 Tap to select the Dial Pad (the Function Icon will show , indicating that the call
has been put on hold). You may then dial another number.
4 Tap to select the following options:
• Mute: Turns Mute On or Off. This function temporarily turns the microphone off during a
phone call. Reselect this option to resume your conversation.
• Transfer: This option transfers a call to another number.
• New Call: This function allows you to make a new call.
• My Number: Shows the phone number of the handset.
Phone Functions 41

Hold Call and Dial another Number
! Availability of some services may depend on the type and settings of your SIM card, and/or
your subscription to these services where available from your service provider.
During an active call if you want to put the current call on hold so that you can make a
second call do the following:
1 Tap and select New Call or simply press the screen will appear as follows:
12:26
1555555555
1 2 3
4 5 6
7 8 9
0 #
*
Clear Send
2 Using the stylus, Tap the number that you wish to call and the number will appear in the
display panel. Tap if you want to delete the last digit, or Clear to clear the entire
number.
3 Tap Send to make the call. If the new call is successful, you will have two active calls
with the previous call on hold, as shown in the following screen.
12:26
On Hold
Heidi Ho
02:00
Connected
55555555555
00:2000.30
End Switch
Tap to return to the original call without dialling the second phone.
42 Phone Functions

Switch Call
! Availability of some services may depend on the type and settings of your SIM card, and/or
your subscription to these services where available from your service provider.
With one call on hold, and a second number successfully dialled, you can switch between the
active call and the call on hold. This enables you to talk to two different people alternately.
Only one of the people can hear your voice at a time. To do this tap Switch.
The screen will appear as follows:
12:26
On Hold
5555555555
00:20
Connected
Heidi Ho
02:0004.00
End Switch
Tap End to continue with the active call.
Transfer Call
! Availability of some services may depend on the type and settings of your SIM card, and/or
your subscription to these services where available from your service provider.
To transfer an active call to another number:
1 Tap and then tap Transfer. The screen will appear as follows:
12:26
5555555555
1 2 3
4 5 6
7 8 9
0 #
*
Back Send
2 Tap Send to transfer the call.
3 Tap and the call will not be transferred.
Phone Functions 43

To transfer an active call to the call on hold:
Tap and then tap Transfer. The screen will appear as follows:
12:26
5555555555
Transferring
1 2 3
Call to Call
4 5 6
On Hold
7 8 9
Cancel
0 #
*
Back Transfer
This transfer will connect the two parties. When the call is transferred, it will automatically end
your call.
Turbo Dialling
Turbo dialling permits you to make a phone call easily by dialling a single number.
To make a phone call using this feature, first store your nine most frequently used numbers
in your Turbo dialling list. For storing number in the Turbo Dial List, please refer Turbo Dial
List in the “Phone Setup” section.
To quickly retrieve and dial a number stored in the first nine locations of your address book
1 Tap to display dial pad.
2 Tap and hold the desired numeric key for more than 3 seconds. The phone number stored
at this location will be dialled automatically.
12:26
1 2 3
4 5 6
7 8 9
0 #
*
Exit Send
44 Phone Functions

If the key you tapped did not have a phone number assigned to it, you will be prompted if
you want to be taken to the Turbo Dial Setup screen, see below
Setup Turbo
Dialing?
OKCancel
Dialling numbers stored in a SIM card
If you have numbers stored in your SIM card, you can dial them directly from the dial pad.
1 Tap in the main menu to switch to the Dialling Display.
2 Tap the number key corresponding to the memory location of the phone number stored in
your SIM card, then tap the key.
3 Tap SEND to call.
12:26
2#
1 2 3
4 5 6
7 8 9
0 #
*
Α If a name was not entered when storing the number in the SIM card, the SIM card Dialling
2#
SIM Card Dialing
Call Now?
1 2 3
4 5 6
7 8 9
Location 002
Cancel
SendClear
*
Confirmation Panel will not show any name.
2#
SIM Card Dialing
Call Now?
1 2 3
4 5 6
7 8 9
Location 002
Cancel
*
CoCo Liu
5555555555
0 #
CoCo Liu
5555555555
0 #
12:26
Send
12:26
Send
12:26
Calling...
CoCo
00:00
SendClear
SendClear
End Hold
Phone Functions 45

Α If you Tap a number key or keys which correspond to an empty location in your SIM card,
(a location that does not have a phone number stored in it), you will receive a warning
message that the location is empty and be prompted to return to the dial pad.
12:26
2#
SIM Location
1 2 3
is Empty
4 5 6
7 8 9
OK
0 #
*
Α For instructions on how to store numbers in your SIM card, please refer to the relevant text
SendClear
in Storing Contact Person Information in your SIM Card in the Contact List section.
Α For dialling the numbers from address book, please refer to the “Making Phone Calls or
Sending SMS Messages through Address Book” section.
Α For dialling phone numbers from SMS messages, please refer to the “Taking Phone Numbers
from SMS Messages” section.
Auto Re-dial
If the network is busy, you will hear a fast busy signal. With Auto Re-dial set to On, your
phone repeats the call attempt automatically until your call is connected. When your call is
answered, your phone will ring or vibrate to notify you. To set up Auto Redial, please refer to
the Auto Re-dial section in “Phone Setup”.
Making a Conference Call
! You must subscribe to both Conference Call and Call Waiting Supplementary Services to be
able to use this feature.
This option joins the active call with a hold call. With conference call, you can have a
conference with up to five other telephones. At any time during your call, you can add,
disconnect or separate individuals from the Conference Call.
46 Phone Functions

Initiating a Conference Call
To initiate a conference call, you should:
1 Firstly, dial one party of the conference call.
2 Then, place this call on hold and dial another phone number. You will then have one active
call and one call on hold. Please refer to the section Hold Call and Dial another Number.
3 Tap to enter the In-Call menu and select Link Call . Yourself, the currently active call
and the call on hold will then join into one conference call. The following screen shows the
number of parties in the conference call.
12:26
Connected
Conference call
30:3614.00
End Hold
Adding a New Call to the Conference Call
There are a number of different ways to add new calls to the conference call:
• Using the dial pad.
• By answering a call waiting
Regardless of which method is chosen to add a new call, the original Conference Call will be
first placed on hold while the new call is being connected.
Tap and then Tap Link Call to connect the new call with the original Conference Call in
progress.
Phone Functions 47

Separating a Member From a Conference Call
During a conference call, you will also have the option to separate a selected member from
the main Conference Call.
Α In order to separate a member from the main Conference Call, there must not be any calls
on hold.
1 Tap and then Tap Split
12:26
Split...
Heidi Ho
12345678901234
123456789012
OKCancel
00:00
2 Find the selected member (telephone numbers or names) whom you wish to separate
from the Conference Call by scrolling down the selection box.
3 Tap OK to confirm splitting the selected member from the Conference Call.
4 Tap Cancel to cancel the split call.
5 The selected call will be separated from the main Conference Call and private
conversation between you and the selected member is possible (other parties in the
conference will be on hold). To re-join all the parties again, Tap and then select Link
Call.
48 Phone Functions

Call Waiting
If you have 2 active calls with one call on hold, and there is an incoming call, the screen will
show:
12:26
Incoming Call
Heidi Ho
To answer,drop:
Current call
12345678901234
Call on hold
123456789012
BusyDrop Call
00:00
End Hold
You have to end one active call at this time before you can receive the third call:
1 If " Drop Current " is selected and you tap " Drop ", the current call will be dropped and the
incoming call will be answered.
2 If " Call to Answer" is selected and you tap " Drop ", the call that is on hold will be dropped
and the incoming call will be answered.
3 If you tap " Busy ", the incoming call will be rejected with busy.
Phone Functions 49

50 Phone Functions

Address Book
Personal Contact Information
The Address Book stores and records important contact details and information including
names, addresses, telephone numbers, fax numbers, pager numbers, e-mail address,
important dates etc. Once stored, a number can be quickly retrieved and dialled, and can also
be used to send faxes and e-mails.
You can classify your contacts according to your communication needs. Defining categories
for your contact details helps you to organise and retrieve your information efficiently. For
example, you can put all your business partners contacts into a Business category, all your
friends into a Personal category. Your device provides some basic information categories:
Fixed Dialling: The feature allows you to limit use (typically third-party use) of your phone
! Availability of Fixed Dialling may depend on the type and settings of your SIM card, and/or
your subscription to this service where available from you service provider
All Contacts: Lists all contacts from all categories.
SIM Card: Lists the contacts information saved in the SIM card. The SIM card icon in
Unfiled: Lists contacts that have not been classified. This is the default category
Owner: This category is where you provide information about yourself.
In addition to the above, you can add your own categories to allow you to manage your
information efficiently or customise existing categories to meet your specific needs.
You can specify contacts information to be stored in the Phone Memory or SIM Card
Memory. If you do not specify a location, your contact information will be stored in the
Phone Memory.
Depending on the type of SIM card and the services that you subscribe to, most SIM cards
allow only basic contacts information to be stored, usually a name and a phone number for
each contact.
When you change your cellular device, the information stored in the SIM Card Memory (of
the original SIM card) is transferable whilst the information stored in the Phone Memory
remains with the original device.
Grouping
Your device allows you to group relevant contacts together to facilitate the sending of the
same information to the group. A group could contain members of a club or colleagues
to a predefined list of telephone numbers, country codes, area codes or
other prefixes of your choosing.
front of the contact name identifies these.
setting for all new contacts.
Address Book 49

working on a project. A icon before the group name indicates that the contacts listed as
recipients are in the same group. How to create and manage groups is described later in this
section.
Adding New Contact Information
1 Tap at the main menu to enter the Address Book. If you already have contacts
stored in the Phone or SIM memory, a list of contacts will be displayed as shown below.
12:26
All Contacts
Eric Crane
Jon Mak
Gerherdt Will
Golf Group
Herry Ha
Hiedi Ho
Exit New
New Contact
Category: Unfiled
Name:
Work1:
Work2:
WkFax:
Home:
Cancel OK
If you have no contacts stored either in the phone or the SIM memory, then the screen will
display no contact information.
2 Tap New to add a new contact to the Address Book.
3 At the Category prompt, tap and scroll down the Categories Selection box.
12:26
All Contacts
Emial Crane
Categories
Franklin Ben
SIM Card
Unfiled
Gerherdt Will
Golf Group
Herry Ha
Hiedi Ho
Exit New
OKCancel
You will be presented with a list of default categories, which are:
• SIM Card
• Unfiled
To select one of the default categories, tap the single selection box alongside the category
you require.
If you do not select a category, the contact will be added to the category Unfiled . If you
select SIM Card, basic contacts information will be saved in the SIM card. Contacts
information under the rest of the categories will be stored in the device.
A - E
F - J
F - J
K - O
P - T
U - Z
12:26
50 Address Book

Α The type and the amount of information, which can be stored in SIM card depends on the
type, and setup of SIM card itself.
4 Tap OK to return to the New Contact display.
5 Tap the field alongside each entry and enter the relevant information.
To fully utilize the Address Book function, we advise you to enter as much information as
possible. For example, if you did not enter the mobile phone number in a contact, you will not
be able to find this contact in the listing table when you are sending an SMS message.
12:26
Edit John Smith
Home:
Cancel OK
Different Keypad for Hong Kong
Inserting Pauses
You can insert pause sounds in a series of numbers. To do so, tap to change from the
Numeric Keypad to the Symbol Keypad, and at the position that you want to insert a pause
character tap “P”.
1 After entering any information, tap OK to save it in the particular field. When you are in
the editing display, you may tap to change the method of input.
2 Tap CANCEL to abort all editing and return to the previous screen.
Your device can store various types of information.
• Name:
• Work1:
• Work2:
• WkFax:
• Home:
Α The SMS message number will be generated once you have keyed in a mobile phone
number. The SMS message number is represented by the symbol and has the same
number as the mobile phone number. It is used to send SMS and will be automatically
modified if the mobile phone number is changed.
The following information is stored under Business Contacts:
• Title: • Province: • PostCode:
• HmFax:
• Mobile:
• SMS Message Number
(See note below)
• Pager:
• E-mail1:
• E-mail2:
Address Book 51

• Company:
• Country:
• City:
• Address:
The following information is stored under Personal Contacts
• Country:
• Province:
• City:
• Address:
• PostCode:
• Web Page:
• Birthday:
• Anniversary:
• Note:
3 Press OK to save the changes.
4 Press Cancel to cancel any changes made and return to the Address Book menu.
Α After Making a call, you can save the Phone number of the last call in your Address Book.
Storing a Number After a Call
You can save the phone number you last called in your Address Book. The number can be
saved in two ways:
• Store the number into a new Contact .
• Store the number into an existing Contact.
After tapping End to end a call, tap the Store button within 5 seconds. A Store Number
display will be shown. You can choose to store the number as a New Contact in your Address
Book or add the number to an existing Address Book entry.
12:26
Call Ended
Heidi Ho
10:41
New Redial
Add new contact
in adressbook
Add new info into
old contact
All contacts
Emial Crane
Franklin Ben
Create Contact
Gerherdt Will
Add to Contact
Golf Group
Herry Ha
Hiedi Ho
Exit New
12:26
Store Number
unavailable
A - E
F - J
F - J
K - O
P - T
U - Z
OKCancel
52 Address Book

Storing a number into a New Contact
If you choose Create Contact , you will be prompted to select the type of phone number
from the list. Make your selection and tap OK. The last number called is then added to the
appropriate place.
Tap OK to save the phone number.
All Contacts
Select Type
Emial Crane
Work 1
Franklin Ben
Work 2
Gerherdt Will
Home Phone
Golf Group
Mobile
Herry Ha
Cancel
Hiedi Ho
Exit New
12:26
A - E
F - J
F - J
K - O
P - T
U - Z
OK
New Contact
Category: Unfiled
Name:
Work1:01065555
555
Work2:
WkFax:
Cancel OK
12:26
Storing a Number into an Existing Contact
If you choose Add to Contact , a list of All Contacts will be displayed. Select the entry you
want to edit and tap OK. As before, you will be prompted to select the type of phone number,
make your selection and tap OK. The last number called will be added to the appropriate
place.
Tap OK to update the Address Book.
Address Book
Eric Crane
Franklin Ben
Gerherdt Will
Golf Group
Herry Ha
Hiedi Ho
Cancel OK
12:26
All Contacts
Emial Crane
Franklin Ben
Gerherdt Will
Golf Group
Herry Ha
Cancel
Hiedi Ho
Exit New
Select Type
Work 1
Work 2
Home Phone
Mobile
12:26
A - E
F - J
F - J
K - O
P - T
U - Z
OK
Edit:Jon Hua
Category: Unfiled
Name:Jon Hua
Work1:01065555
555
Work2:
WkFax:
Cancel OK
12:26
Address Book 53

Search/Edit Contact Information
1 Tap at the main menu to enter the Address Book. Tap “All Contacts” on the pull down
selection box to show the following Category Display.
12:26
All Contacts
Category
Selection Box
All contacts
Emial Crane
Franklin Ben
SIM Card
Personal
Alphabet
Scroll Bar
Gerherdt Will
Unfiled
Golf Group
Herry Ha
Hiedi Ho
Exit New
Exit New
2 Select the Category and tap OK to confirm your choice.
3 If you want to return to the previous screen Tap Cancel.
4 Tap on the first letter of the contact that you want to search for, then use the up and
down arrow to select the name of the contact, for example John Smith. When you have
found John Smith in the list, select it by tapping on it. Currently stored contact
information for John Smith will then be displayed. Use the scroll bar to display more
information.
12:26
John Smith
01065645555
01065555555
01055555555
13911111111
13911111111
Jon@yahoo.com
Back Edit
12:26
John Smith
Manager
Motorola
600 US Hwy 45 N
Libertyville,IL
USA
1
Birthday:2000
Back Edit
Categories
12:26
A - E
F - J
F - J
K - O
P - T
U - Z
OKCancel
54 Address Book

5 To edit any of the contact information, Tap Edit. Then select the entry you want to edit.
6 Tap and select the text entry method.
7 Enter the new information at the relevant field and tap OK to save changes to the data.
12:26
Edit John Smith
Category: Unfiled
Name: John Smith
Work1:01065641
678
Work2:01065641
577
Cancel OK
Edit John Smith
Home:
Cancel OK
12:26
Wrong Keypad again.
8 Tap Cancel to return to the previous menu.
Sorting Contacts
The order of your contacts can be changed according to your needs.
1 Tap at the Address Book screen.
2 Tap Sort Names and the Sort Names By selection box will appear prompting you to
select the order (Pin Yin, Zhu Yin and Strokes)
3 Tap OK to confirm. The surnames will then be re-arranged accordingly
12:26
All contacts
Emial Crane
Franklin Ben
Gerherdt Will
Golf Group
Herry Ha
Hiedi Ho
Exit New
A - E
F - J
K - O
P - T
U - Z
F - J Pinyin
Zhuyin
Strokes
Sort Name By
OK Cancel
Finding Contact Information
1 Tap at the main menu to enter the Address Book.
2 Then, tap and select Find Contact and the Find By box will appear in the display:
Address Book 55

12:26
All contacts
Emial Crane
Find By
Franklin Ben
Name
Gerherdt Will
Number
Golf Group
Text
Herry Ha
Hiedi Ho
Exit New
A - E
F - J
F - J
K - O
P - T
U - Z
OKCancel
3 You can choose to search the contacts by Name, Number or Text. Make your search
selection and tap OK.
4 If you selected find by Name, enter the name that you would like to search for and tap
OK.
The screen will then show the search results.
Edit John Smith
Home:
Cancel OK
12:26
Search Results
Jobling,Jeremy
Jobling,Fran
Jobling,Simon
Job Center
Jober,Kim
Jasmine
change this Keypad too.
12:26
Cancel
5 Tap and select the name to show more contact information.
6 Tap Cancel to return to the previous menu. If there are no matches to the search criteria,
the screen will show No Match Found .
Deleting a Contact
1 Tap at the main menu to enter the Address Book. Tap on the first letter of the
contact that you want to search for, then use the up and down arrow to select it.
2 At the Contact Information, tap .
56 Address Book

John Smith
01065645555
01065555555
01055555555
13911111111
13911111111
Jon@yahoo.com
Back Edit
MENU
- new contact
- find contact
- delete contact
- send SMS
- send e-mail
- copy to SIM
- print contact
- beam contact
12:26
Address Book 57

3 Tap Delete Contact and the Delete dialogue box will appear.
12:26
All contacts
Emial Crane
Delete This
Franklin Ben
Contact?
Gerherdt Will
Golf Group
Cancel OK
Herry Ha
Hiedi Ho
Exit New
U - Z
4 Tap OK to delete the contact information and save changes to the data.
5 Tap Cancel to abort the deletion and return to the previous menu.
Deleting Contacts
If you want to delete more than one contact:
1 Tap in the All Contacts display.
12:26
All Contacts
Eric Crane
Jon Mak
Gerherdt Will
Golf Group
Herry Ha
Hiedi Ho
Exit New
MENU
- find contact
- new category
- edit category
- delete category
- new group
- copy to SIM
- sort names
- print contact
- delete contact
58 Address Book

2 Then tap Delete Contacts and a Delete Dialogue Box will appear.
12:26
All Contacts
Fran Li
Gid E.Yup
Giordano Wi
Golf Group
Jon Hua
Sarry Lu
Cancel OK
3 Tap OK to start to delete all the selected contact information.
4 Tap Cancel to keep all the contact information and return to the All Contacts menu
Display.
Deleting...
<name>
Cancel
5 If you tap Cancel whilst deleting is in progress, you will stop the delete process and return
to the All Contacts screen.
Address Book 59

Creating Your Own Categories
Adding Your Own New Category
1 Tap at the main menu to enter the Address Book.
2 Tap and select New Category.
12:26
All Contacts
Eric Crane
Jon Mak
Gerherdt Will
Golf Group
Herry Ha
Hiedi Ho
Exit New
MENU
- find contact
- new category
- edit category
- delete category
- new group
- copy to SIM
- sort names
- print Contact
- delete Contact
3 At the Category: field,enter the name of the new category.
4 Tap OK to confirm the creation of your new category.
Α A Category Name may not exceed 10 characters in length.
New Category
Category:
Cancel OK
12:26
60 Address Book
Editing Your Own Category
1 Tap at the Main Menu to enter the Address Book. Select All Contacts from the pull
down selection box.
12:26
All Contacts
Eric Crane
Jon Mak
Gerherdt Will
Golf Group
Herry Ha
Hiedi Ho
Exit New
MENU
- find contact
- new category
- edit category
- delete category
- new group
- copy to SIM
- sort names
- print Contact
- delete Contact
2 Tap Edit Category to display the List of Categories that you can modify.
! Only categories that you have defined yourself may be edited, the default categories of All
Contacts, SIM Card, Unfiled, and Owner may not. If you have not added a category of
your own, the Edit Category item will not be present.
3 Select the category that you wish to edit and tap OK. The Edit Category screen will be
displayed. At the prompt Name: enter the modifications to your chosen category.
4 Tap OK to save the changes.
Address Book 61

Deleting Your Own Category
1 Tap at the Main Menu to enter the Address Book.
12:26
All Contacts
Eric Crane
Jon Mak
Gerherdt Will
Golf Group
Herry Ha
Hiedi Ho
Exit New
MENU
- find contact
- new category
- edit category
- delete category
- new group
- copy to SIM
- sort names
- print Contact
- delete Contact
2 Tap and tap Delete Category to display the list of categories that you can delete.
12:26
All contacts
Delete Category
Emial Crane
Meeting
Franklin Ben
Personal
Gerherdt Will
Running Group
Golf Group
Game
Herry Ha
Cancel
Hiedi Ho
Exit New
Α Only categories that you have defined yourself may be deleted, the default categories of
All Contacts, SIM Card, Unfiled, and Owner may not and will not be shown.
A - E
F - J
F - J
K - O
P - T
U - Z
OK
62 Address Book

3 Select the category that you wish to delete and tap OK.
Delete
Category?
OKCancel
4 Tap OK to confirm deletion of the selected category. All contacts will remain in the
address book and be moved to the Unfiled category.
5 Tap Cancel to return to the previous menu and the selected category will NOT be deleted.
Creating Groups
Setting Up a New Group
The purpose of creating groups is for sending SMS messages to multiple recipients. Only
those contacts with mobile phone numbers entered in their contact information will be able to
be part of a group.
1 Tap at the main menu to enter the Address Book.
2 Tap and Tap New Group.
12:26
All Contacts
Eric Crane
Jon Mak
Gerherdt Will
Golf Group
Herry Ha
Hiedi Ho
Exit New
MENU
- find contact
- new category
- edit category
- delete category
- new group
- copy to SIM
- sort names
- print contact
- delete contact
New Group
Category: Unfiled
Name:
Recipients:
12:26
OKCancel
Address Book 63

3 Tap the Category selection box to select the category in which the Group should appear.
4 Tap the field at the prompt Name: and enter the name of the group that you wish to
create and tap OK.
5 Tap the field at the prompt Recipients: go through the listing and select each recipient by
marking an X in front of the name.
12:26
Recipients
Fon Brewer
Fred Simth
Matt Klapman
Num Pisutha
Peter Jones
Bob Mak
Cancel Ok
6 Tap OK after selecting the members. Selected members will appear in the recipient’s field.
7 Tap OK.
Your newly added group will appear under the category in which you placed it, and are
identified as a group by a mark in front of the group name.
! Only those contacts with mobile numbers entered will be displayed on the Group display.
The purpose for creating groups is for sending SMS messages to multiple recipients. In this
respect, contacts without mobile phone numbers cannot create a group.
Searching Group Recipients
1 Tap at the main menu to enter the Address Book. At the Address Book menu,
information that has a icon in front its name belongs to a group. In this example, the
group GOLF has been selected.
2 Tap the Name of the Group to view the group members.
12:26
Golf Group
Category: Unfiled
Name: Golf group
Recipients:Coco;
Jon Hua;Lily;
Shary Shang;Veli
Zhao;Jeny Mu;Sarry
Cancel OK
64 Address Book

Adding Group Recipients
1 Tap at the main menu to enter the Address Book . Scroll and select the group that
you want to display more information about.
2 Tap the field at the prompt Recipients: go through the listing and select each recipient
that you want to add to the group.
3 Tap OK. The new recipients will be added to the recipients list
4 Tap OK.
Deleting Groups
1 Tap at the main menu to enter the Address Book . Scroll and select the group that
you want to delete.
2 Tap .
3 Tap Delete Group and a confirmation screen will be shown.
12:26
Golf Group
Category: Unfiled
Name: Golf group
Recipients:Coco;
Jon Hua;Lily;
Shary Shang;Veli
Zhao;Jeny Mu;Sarry
Cancel OK
All contacts
Emial Crane
Franklin Ben
Gerherdt Will
Golf Group
Herry Ha
Hiedi Ho
Exit New
MENU
- delete group
4 Tap OK to confirm deletion. After the group has been deleted, the group recipient
information will remain.
12:26
Delete This
Contact?
A - E
F - J
F - J
K - O
P - T
U - Z
OKCancel
Address Book 65

Entering and Editing Owner’s information
! You should carry out this setup before you can surf the Internet. The Internet setting
should at least include your mobile phone number with your country code added before the
number. The Internet terminal will use this number as your account number for calculating
connection charges.
1 Tap at the Main Menu to enter the Address Book.
2 Tap on All Contacts in the title bar to show the Categories Listing Display.
3 Scroll and select Owner and tap OK to display the Owner's information screen.
12:26
New Contact
Category: Owner
Name:
Work1:
Work2:
WkFax:
Home:
Cnacel OK
4 Tap each field and enter the relevant information.
5 Tap OK to save the information.
To edit owner information, repeat steps 1 and 2 above to display the Owner's Information
1 Tap edit to display the Owner's information edit screen.
2 Tap each field and edit the information.
3 Tap OK to save the changes.
Jon Mak
01065555555
01065555555
01063555555
15555555555
15555555555
Jon@yahoo.com
Back Edit
12:26
Edit:Jon Mak
Category:Owner
Name: Jon Mak
Work1:01065555
555
Work2:01065555
555
Cancel OK
12:26
66 Address Book

Copying Contact Information from the Phone Memory
to a SIM Card
You can copy contact information stored in your device to a SIM Card. By using the same
SIM Card, you can also retrieve the contact information stored in another GSM phone.
! The size of the SIM Card memory determines the amount of information that can be stored in
the SIM Card, while the function of the SIM Card determines what type of information can
be saved. Usually, a SIM Card can only store names and phone numbers.
1 Tap at the main menu to enter the Address Book.
2 Tap and Tap Copy to SIM to display all contacts except those stored on your SIM
card.
3 Select the contact name that you wish to copy and tap OK.
4 The Copy to display shows all the numbers associated with the contact you have
selected. Select one of the numbers from the list and tap OK.
Α Normally a SIM card memory can only store one contact number under each name.
12:26
All Contacts
Eric Crane
Jon Mak
Gerherdt Will
Golf Group
Herry Ha
Hiedi Ho
Exit New
MENU
- find contact
- new category
- edit category
- delete category
- new group
- copy to SIM
- print contact
- delete contact
All Contacts
Fran Crane
Franklin Be
Gerherdt Wi
Gomer Ziegf
Henry Ha
Hiedi Ho
12:26
OKCancel
Address Book 67

12:26
All Contacts
Copy
work 1
work 2
home
mobile
A - D
E - H
E - H
I - L
M - P
Q - T
U - Z
OKCancel
Cancel Copy
5 Tap OK to save the selected information in your SIM Card then tap Cancel to return to
the
All Contacts screen to select another contact.
6 If the memory in the SIM card is full, “SIM Memory full” will be displayed.
12:26
All Contacts
Emil Crane
Franklin Be
SIM Card
!
Andrea De
Memory Full
Gomer Ziegf
OK
Henry Ha
Mike Sk
Exit Copy
Copying Contact Information from
a SIM Card to the Phone Memory
You can also copy contact information stored in your SIM Card to the Phone Memory.
1 At the main menu, tap to enter the Address Book.
2 Tap the Category pull down selection box, scroll and select SIM Card and tap OK. The
display will show all contacts stored on your SIM card.
3 Tap and select Copy to Phone .
4 Select the contact that you wish to copy to the phone memory.
68 Address Book

12:26
All Contacts
Fran Li
Gid E.Yup
Giordano Wi
Golf Group
Jon Hua
Sarry Lu
Cancel OK
5 Select the number type from the Copy to screen corresponding to the number you are
copying from the SIM card memory.
6 Tap OK to save the contact information in the phone memory.
12:26
All Contacts
Select Type
work 1
work 2
home
mobile
A - D
E - H
E - H
I - L
M - P
Q - T
U - Z
OKCancel
Cancel Copy
7 Tap Cancel to return to the All Contacts screen without copying any contacts information
to the phone memory.
Α To facilitate the search of contacts information saved in a SIM Card, you may select the
category as SIM Card. All contacts information saved in a SIM Card will then have an
icon in front of the contacts’ surnames.
Α Displays may vary if you always tap in the main menu to enter the All Contacts
screen.
The display shown depends on the sort method you selected when searching the contact
information previously. The group of contact persons in this sort will be displayed first
when entering the Contact List again.
Sending and Receiving Contact Information
Your device allows you to send contact information as a short message. If the recipient is
using a normal GSM mobile phone, the information received will be viewed as a normal short
message; if the recipient is using the A008388 mobile phone, the information received will be
saved in their Contact List, at the appropriate phone number type.
Address Book 69

Sending Contact Information
1 At the main menu, tap to enter All Contacts screen. Find the person whose
information you want to send and Tap on their name. All phone numbers associated with
this contact will be displayed.
12:26
12:26
All Contacts
Eric Crane
Jon Mak
Gerherdt Will
Golf Group
Herry Ha
Hiedi Ho
Exit New
2 Tap , then select Send SMS to display the Select Type screen.
3 Tap on the checkboxes to select the phone numbers to be sent and tap OK to display the
New Message screen.
4 Tap on the To: prompt, to display the Send To screen. Select the recipients of the contact
information by tapping on the check boxes and tap OK.
Jon Mak
01065555555
01065555555
01063555555
15555555555
15555555555
Jon@yahoo.com
Back Edit
MENU
- new contact
- find contact
- delete contact
- send SMS
- send eMail
- copy to SIM
- print contact
- beam contact
All contacts
Select Type
Emial Crane
Work 1
Franklin Ben
Work 2
Gerherdt Will
Home Phone
Golf Group
Mobile
Herry Ha
Cancel
Hiedi Ho
Exit New
12:26
A - E
F - J
F - J
K - O
P - T
U - Z
OK
70 Address Book

Alternatively,
1 Tap on the field next to the To: prompt to display the New Message dial screen.
Enter the recipient's mobile number and tap OK.
New Message
Message:
Jon Hua
12:26
SendCancel
Send to
Fran Li
Gid E.Yup
Giordano Wi
Golf Group
Jon Hua
Sarry Lu
Cancel OK
12:26
2 Tap Send to send the information.
! If you try to send contact information of a length exceeding the string length limitation
(160 English characters), this notice will be displayed: “Unable To Send Information
Exceeding Length Limitation”.
Address Book 71

Receiving Contact Information
When a new message arrives, there will be an alert sound and the following dialogue box will
be displayed.
12:26
Message Center
Emial Crane
Franklin Ben
New Text
Message
Gerherdt Will
Golf Group
Herry Ha
Hiedi Ho
New Select
1 Tap Read to read the message immediately.
New Contact
Catagory: Unfiled
Name:Jon Hua
Work1:01065555
555
Work2:01065555
555
Cancel Store
2 Tap the pull down selection box alongside the Category: prompt to select the category in
which the contact information should be stored.
3 Tap Store to save the information in the selected category.
If you tap "Dismiss", you may read the short message later.
ReadDismiss
12:26
72 Address Book

Making Phone Calls and Sending Information
Through Your Address Book
Your device provides several quick and easy ways to communicate with other people. You
can make phone calls, send faxes send short messages or emails direct from your Contact
List. The advantage of this dialling method is that you do not need to enter phone number
digits one by one. The examples below show how you can call, email or send an SMS
message to Herry Ha.
Making Phone Calls Through Your Address Book
1 Tap at the Main Menu. Search for the person to whom you want to place a call.
Once located, tap the name and the particulars of this recipient will appear on the display.
2 Select the phon e number or mobile phone number to place the call.
! If Prepend in Phone Setup is set to OFF, the call will be placed immediately once you tap
the phone number. For more detail about Prepend, please refer to “Prepend Setup” section.
All Contacts
Eric Crane
Jon Mak
Gerherdt Will
Golf Group
Herry Ha
Hiedi Ho
Exit New
12:26
Herry Ha
01065555555p555
01065555555
01065555555
15555555555
15555555555
HaHa@yahoo.com
Back Edit
12:26
Calling...
Herry Ha
End Hold
12:26
00:00
Address Book 73

Sending Short Messages from Through Address Book
1 Repeat step 1 from Making Phone Calls Through Your Address Book.
2 Tap on the mobile phone number to display the New Message screen.
12:26
New Message [0000]
Herry Ha
Message:
Cancel Send
3 Compose your SMS, and then tap SEND .
Sending E-Mail from Your Address Book
1 Repeat step 1 from Making Phone Calls Through Your Address Book.
2 Tap on the email address of the recipient to display the New Message screen.
3 Compose your email, then tap send.
12:26
New Message
To:HaHa@yahoo.com
CC:
Subject:
Message:
Cancel Send
Α For more detail on how to add an attachment to the email, please refer to Send Attachment
from the Email Function section.
74 Address Book

Printing Contact Information
! Your PC should have the appropriate infrared equipment installed before using this function.
You should also ensure that there are no obstructions between your device and the
receiving device and that the two infrared ports are located close together prior to
transmitting information.
1 At the main menu, tap to enter All Contacts screen.
2 Tap and select Print Contacts. Select the contact information to be printed by tapping
on the check boxes and tap OK.
12:26
All Contacts
Eric Crane
Jon Mak
Gerherdt Will
Golf Group
Herry Ha
Hiedi Ho
Exit New
MENU
- find contact
- new category
- edit category
- delete category
- new group
- copy to SIM
- print contact
- delete contact
All Contacts
Fran Crane
Franklin Be
Gerherdt Wi
Gomer Ziegf
Henry Ha
Hiedi Ho
12:26
OKCancel
Address Book 75

3 At the Print via IR screen, select the printer type and tap PRINT. If a connection can be
established the device will start to transmit the information to the printer. You will be
informed if printing is successful by a series of display messages.
Print via IrDA
Printer Type:
Canon
Print via IrDA
Sending...
Print via IrDA
Sent to
Printer
Cancel
Print Cancel
OK
If a connection cannot be established, or printing failed, you will receive messages to that
effect.
Print via IrDA
Printer Not
Found
OK
OR
Print via IrDA
IrDA Link
Broken
OK
76 Address Book

Sending Contact Information using IrDA
Your Motorola A008388 allows you to send contact information to another device, with Vcard
capability, by using infrared transmission. This capability really increases the convenience to
exchange information between handsets and handheld devices of your friends and
colleagues.
When you are using two A008388 to exchange Contact information, the procedure is as
follows:
1 At the main menu, tap to enter All Contacts screen.
2 Find the person whose information you want to send and Tap on their name. All phone
numbers associated with this contact will be displayed.
3 Tap and select Beam Contact and the following display will result.
Sending via IR
Looking for
Device...
Cancel
Alternatively, you may tap on the icon box located at the right side of the heading.
4 At the second A008388, tap . Alternatively, you may tap on the icon box at the right
hand side
of the title bar.
5 Providing the two A008388 Infrared ports are aligned within the right angle and right
distance, data transmission will start. This will be confirmed by the following display.
Receive IR
Receiving...
Cancel
6 If there is any interruption or an error occurs during transmission, an error message will be
displayed.
If you have too much information stored in your phone, the phone will remind you that the
storage is already full when you try to enter new contact information. In this case, you must
transfer the contact information to your PC and free up some storage, before entering new
information into the phone. Please refer to the " TrueSync" section for more details regarding
synchronisation.
Address Book 77

SMS
Your device besides being used for normal voice calls possesses the capability of sending,
managing and receiving messages to and from other devices.
At the Main menu tap to enter the Message Centre display. The Message Centre is
where your messages are organised. There are 9 default folders where messages of various
types can be stored. You may also create your own personal folders. A number that appears
outside the brackets indicates the total number of messages in each folder. A number inside
the brackets indicates the number of new or unread messages.
12:26
GSM Carrier
MESSAGE CENTRE
List of Folders
• Voice Mail
• Inbox
• Info Services
• Quick Text
For example, the screen below shows that your Text Msgs. folder contains a total of 14
messages of which 12 are new or unread.
• Personal Folders (if
created)
• SIM Card
• Outbox
12:26
Message Centre
Voice mail
Inbox [12]14
Info Svc
Quick Text
SIM card [2]5
Outbox 1
Exit Compose
• Sent
• Draft
• Trash
SMS 77

Voice Mail
You can listen to your voicemail messages by calling your network voicemail phone number.
Voicemail messages are stored on the network - not on your device. When you are unable to
answer an incoming call, it will be automatically diverted to the voicemail number you have
stored in your voicemail folder.
Α Voicemail is a network subscription feature and requires the Cellular Service Provider to
support the service; your service provider supplies your voicemail number.
Inbox
Incoming Messages appear on your device display or in your Inbox. You must setup your
message inbox before you can send or receive messages.
The total number of messages the inbox can hold depends on the length of the messages
and the number of other messages and drafts stored in your phone memory.
Indicates New Messages (unread messages)
Indicates Old Messages (read messages)
Indicates New Contact Messages
Indicates Old Contact Messages
Indicates New Music Ringer Tone Messages
Indicates Old Music Ringer Tone Messages
Α SMS (Text) messaging is a network subscription feature and requires your Cellular Service
Provider to support the service.
Info Service
These are general messages such as weather forecasts or stock market information
broadcasted to your device.
Α SMS (Text) messaging is a network subscription feature and requires your Cellular Service
Provider to support the service.
Quick Text
The Quick Text feature allows you to select and send pre - written messages from the built-in
library of commonly used phrases.
SMS 78

Personal Folder
As well as the above-mentioned folders, you can create personal folders to suit your
particular requirements for managing your message types. You can send and receive, delete
or file messages from your personal folders.
SIM Card
Incoming SMS messages will be stored in this folder by default. You can transfer the
messages to another folder in accordance with your message management requirements.
Outbox
All outgoing text messages waiting to be sent will be stored in this folder. Messages stored
here can still be edited before sending.
Sent
A copy of all successfully delivered messages are stored in this folder.
Draft
This is where messages that you have written but not sent and messages that require editing
are stored.
Trash:
Messages that you have deleted are stored in this folder. These messages can be restored
before the folder is emptied.
Α To enable efficient filing of your messages, ensure that your device setup configuration is
correct. Please see Messaging Setup.
SMS 79

Sending SMS Messages
This option allows you to send messages to other cellular phones that support SMS service.
1 At the Main menu Display, tap to enter the Message Centre Display.
2 At the Message Centre Display, tap Compose to enter New Message display.
12:26
New Message[0000]
Message:
Cancel Send
GSM Carrier
12:26
Message Centre
Voice mail
Inbox [12]14
Info Svc
Quick Text
SIM card [2]5
Outbox 1
Exit Compose
There are two ways to input recipients particulars.
3 Tap on the field alongside the To: prompt to display the numeric keypad. Use the keypad
to enter the recipient's phone number and tap OK.
12:26
New Message
To:15555555555
1 2 3
4 5 6
7 8 9 0
Cancel Ok
Alternatively, tap on the To: prompt to display a list of names. Scroll through the list to make
your selection. This method allows multiple entries of recipients.
12:26
Needed to chang e
#*.
SMS 80

12:26
Send to
Fran Lang
Gid E.Yup
Giordano Wi
Golf Group
Jon Hua
Sarry Lu
Cancel OK
4 Tap OK and the recipients name will be placed in the To: field.
5 Tap Cancel to return to the New Message display and the To: field will remain unchanged.
12:26
New Message[0000]
To: Fran Lang;
Jon Hua;
15555555555
Message:
Cancel Send
! Only those names with mobile phone numbers stored in the Address book will be shown in
the list for selection. Names with other phone numbers will not displayed.
Α Selecting multiple recipients allows one message to be sent to multiple recipients.
6 Tap on the Message field to enter the text editor. Enter your message and Tap OK to
save the message and return to the New message display.
SMS 81

New message
Message:
12:26
Cancel Ok
Needed to be changed for the keypad
7 To speed up message editing, you can also make use of the library of pre-defined
phrases. At the New Message display, tap and select Quick Text. Tap any of the text
to select it and place it into the message editor. Tap New to add your own words or texts
into the existing library and then tap OK to save.
12:26
New Message[0000]
Message:
Cancel Send
MENU
- QuickText
- save to draft
- send later
Quick Text
Please call me
No
Yes
Will arrive in
Later for meet
Where are you
Back New
12:26
New QuickText
Quick Text
Cancel OK
12:26
If you want to continue entering text, go back to step 6. After you have finished entering
your message, tap OK to save it and go back to the New Message display.
If you want to save the message and work on it later, tap at the New Message display
and then tap Save to Drafts to save the message in your Draft Folder without sending it.
You can still retrieve edit or send the message later.
Α If you want to send the message later at a particular time instead of sending it immediately,
tap at the New Message display and then tap Send Later. To set the time for sending
the message. Use the up or down arrows to adjust the time and tap OK to set it. Your
message will be stored in the Outbox and will be sent automatically at the time you set.
Α The time format depends upon your initial set up.
SMS 82
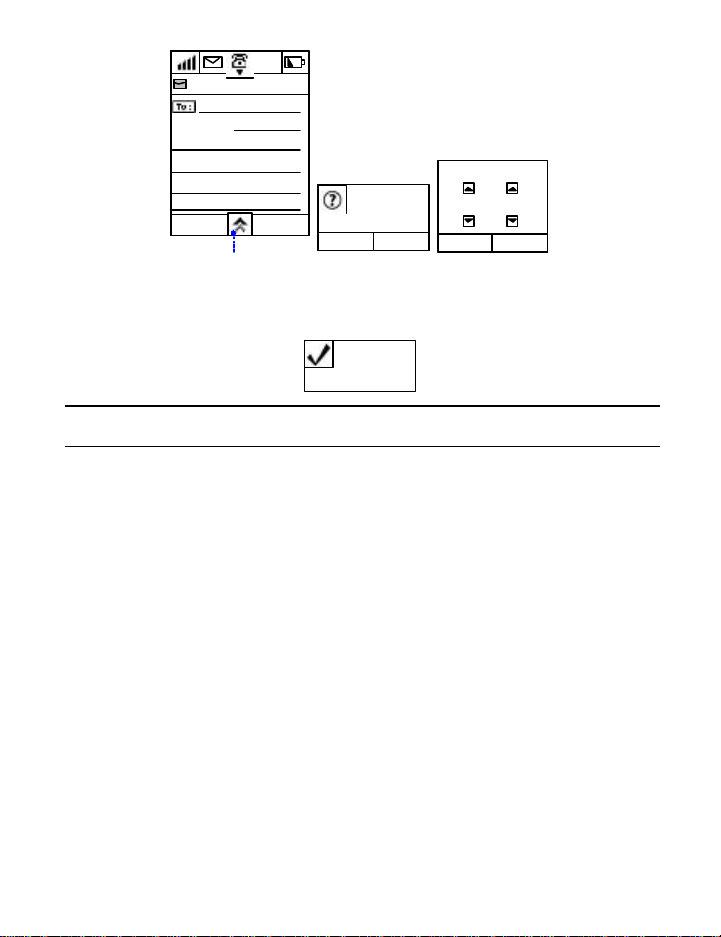
12:26
New Message[0000]
Message:
Select Time
Save Message
to Drafts?
12
: 45
Cancel Send
OKCancel
Cancel
OK
MENU
- QuickText
- save to draft
- send later
Sending
Scheduled
! Scheduled sending of message will only be effective provided that you are within your
Cellular Service Providers coverage and your device is turned on at the scheduled time.
SMS 83

Receiving SMS Messages
When you receive a new text message, your phone displays the New Text Mail dialogue and
gives an alert sound. Tap Dismiss to store the message in your Inbox Folder for future
reading. An icon will also be placed in the Notification bar.
Tap OK to read the message immediately.
12:26
Text message
From:13901099899
2000/05/07 12:35PM
I'm busy right
OR
now, will call
you later.
I'm sorry.
Back Reply
New Text Mail
OkDismiss
Α If you miss the Incoming message alert, you will still see the flashing at the top left
corner of the display. Tap , to display the Notifications screen where you may choose
to read the message.
Α If your device is off, the service centre will send the message to your device as soon as it
is turned on.
Receiving Voicemail Messages
At the Main Menu tap to enter the Message Centre display;
To check for voicemail messages, Tap Voice Mail and the device will dial the Voicemail
Service Centre to retrieve the voice message. Follow the verbal instructions given by your
service provider.
SMS 84
 Loading...