

Page 1
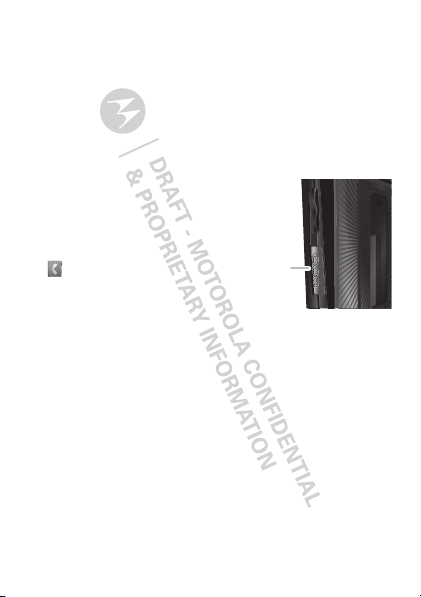
Push-to-Talk
PTT
Button
one or more, talk to them all
Private calls
Private calls are push-to-talk calls between two people.
Make and answer private calls
To make a private call:
• Enter the recipient’s PTT
number.
• Press Menu / >
Contacts, and select a
contact that has a PTT
number.
To talk, press and hold the PTT Button. To listen,
release the PTT Button.
To answer a private call, press the PTT Button after the
caller has stopped talking.
To end a private call, press End/Power @ or do
nothing. The call will end after a few seconds.
Set push-to-talk speaker
You can listen to push-to-talk calls through your
phone’s speaker or earpiece. Press Speaker ) to turn
the speaker on or off.
17Push-to-Talk
Page 2

Call alerts
Use call alerts to tell someone you want to speak to
them.
To send a call alert:
• Enter a Private ID, and press
press the PTT Button.
Contacts, and highlight a contact containing a
• Press
Private ID. Press
when prompted.
When you receive a call alert, you can:
•Answer: Press the PTT Button to begin a private call
with the sender.
• Queue: Press
call alert queue.
•Clear: Press
alert.
Note: Call alerts will automatically be moved to the
queue after a few minutes of inactivity. You won’t be
able to make phone calls or private calls until the call
alert is moved, or you’ve chosen one of the options
above.
Alert, and press the PTT Button
Queue to store the call alert to the
Clear to dismiss and delete the call
Alert. When prompted,
Turn off a call alert
You can press the volume keys to turn off a call alert
before answering the call.
18 Push-to-Talk
Page 3

SDG calls
Need to talk to more than one person at a time? With
SDG (Selective Dynamic Group) calls you can talk to up
to 20 people at a time.
Note: To store groups on your phone you need a
group-call-capable SIM card. Contact your service
provider for more information.
Create SDG lists in contacts
Find it: Menu / > Contacts
1 Select [New SDG List].
2 If you want to assign a name to the SDG list, enter
the name.
Note: If you do not assign a name, the SDG list is
named “SDG” followed by the number of members
in the SDG list. For example, “SDG (8)” for an SDG
list with eight members.
3 Add Private IDs.
Save.
4 Press
Make SDG calls
1 From Contacts or the recent calls list, scroll to or
select the SDG list you want.
2 Press the PTT button.
19SDG calls
Page 4

Web
Find it: Menu / > Net
Note: Your service provider may charge you to surf the
Web or download data.
Go to a Web site
1 From the home page, select Go to URL.
Edit.
2 Press
3 Enter the Web address and press
Ok to go to the Web site.
4 Press
Create a bookmark
1 While on a Web page, press and hold Menu / >
Mark page.
2 Name the bookmark and select
Access a bookmark
From a web page:
1 Press and hold Menu / > Favorites.
2 Highlight a bookmark and press r, or press its
number on the keypad.
20 Web
Done.
Save.
Page 5

Text entry
Your phone provides convenient ways to enter words,
letters, punctuation, and numbers whenever you are
prompted to enter text (for example, when adding a
contact or when sending a message).
Change character input mode
1 When you see a screen where you can enter text,
press Menu / to change the character input mode.
2 Select one of the following options:
Options
Alpha Press a key one or more times to
cycle through the letters and
numbers of that key. When you
see the character you want, just
press another key or wait a
second or two to move on.
21Text entry
Page 6
Options
Word Predictive text – predicts the word
you want, with just one keypress
per letter. If the prediction is
correct, press the Navigation Key
right to accept the word. If the
prediction is not correct, press
and hold the Navigation Key down
to see other options. Highlight the
correct word and press r to
select.
Symbols Enter symbols.
Numeric Enter numbers.
Text Settings Select the desired entry language
and Word Prediction features.
Insert Select an item to be inserted,
such a picture, an audio clip or a
voice recording.
Note: Only available when using
MMS messaging.
Tip: When entering text, press and hold # to change
letter capitalization (Abc > ABC > abc).
22 Text entry
Page 7

Contacts
Store a phone number or Private ID
Find it: Menu / > Contacts > [New Contact]
1 Enter a name for the new contact. Each contact’s
name can contain up to 20 characters.
2 Select a ringtone.
3 Select a type for the contact (
Work1, Work2, Home, Email, Fax, Pager, Talkgroup,
SDG, Msg Group, IP, or Other). Choose Private to
store a Private ID.
4 Enter the number for the contact and press
Call a stored phone number or
Private ID
Find it: Menu / > Contacts
1 Scroll to the contacts.
2 If the contacts contains more than one number,
scroll left or right until the type of number you want
to call is displayed (such as
Work2, Home).
3 If you chose a phone number, press Talk ` to begin
a call. If you chose a Private ID, Talkgroup ID, or SDG
list, press and hold the PTT Button to start a call.
Mobile, Private,
Save.
Mobile, Private, Work1,
23Contacts
Page 8

Messaging
Find it: Menu / > Messages
Your phone can use both SMS and Multimedia
Messaging Service (MMS) messaging. The type of
messaging your phone uses is determined by your
service provider.
Create & send messages
Find it: Menu / > Messages > [Create Message]
1 Enter the phone number of the person you want to
send the message to and press r, or press
to select a contact or recent call.
2 Enter your message in the
3 Optionally, insert (embed) or attach a picture, sound,
or quick note.
• Quick notes are short, pre-written phrases.
QNotes to enter a quick note.
Press
• To insert pictures, sounds, (audio files), or voice
recordings into the body of your message,
press Menu / >
Picture
, Insert Audio, Capture Picture, or
Record Voice.
Note: You can only insert one item at a time. To
remove an item from a message, highlight it
and press
24 Messaging
Delete.
Mesg field.
Insert > Add QNotes, Add
Search
Page 9

• To attach a file to the end of your message,
Note: You can’t attach or insert files in SMS
messages.
4 When finished, press r.
5 To send the message, press
....MORE.... > Attach > [New] > Browse
select
Pictures
, Capture Picture, or Browse Audio, or
Record Voice.
Note: You can only attach pictures and audio
files if they’re not forward locked and if they’re
not DRM-protected.
Tip: To remove an attachment, select
Highlight the attachment to remove, and press
Menu / >
Unattach.
Send.
Attach.
Receive messages
• To view the message, press Read.
• To dismiss the message notification, press
To read your messages later, press Menu / >
Messages > Inbox.
Exit.
Message groups
You can create a message group to send messages to
a group of up to 20 contacts.
25Messaging
Page 10

Note: Your service provider may not support this
feature.
Create message groups
Find it: Menu / > Contacts > [New Msg Group]
1 Select [Add Member] and select the contacts you
want to add to the group.
2 When you’re finished press
3 Enter a name for the group in the
Done.
Name field.
Note: If you don’t name the group, it will be named
Msg Group followed by the number of group
members. For example,
Save.
4 Press
Msg Group (3).
Voicemail
To receive voicemail, you must first contact your
service provider to set up a voicemail account.
Receiving a message
To listen to the message, press Call.
To dismiss the notification when the phone open,
Back. If the phone is closed, press the Smart
press
Key (.
To listen to your messages later, press Menu / >
Messages > Voice Mail.
26 Messaging
Page 11

Personalize
Ringtones
Find it: Menu / > Ring Tones
1 Make sure Vibrate All is set to Off.
2 Scroll through the list of ringtones and select one to
3 Select the features, such as
4 When you’re finished press
Note: , appears if the phone is set to
appears if the phone is set to
Set to vibrate
You can set your phone to vibrate for all calls and
alerts.
Find it: Menu / >
Set this option to On or Locked.
To turn the ringer on when
press the volume key up. To turn the ringer on when
Vibrate All is set to Locked, press and hold the volume
up key until the phone vibrates, then press the volume
key up again.
Vibrate sets your phone to vibrate instead of
assign.
making a sound.
vibrate nor make a sound.
assign the ringtone to.
Silent sets your phone to neither
Messages, you want to
Done.
Vibrate All.
Ring Tones > Vibrate All
Vibrate All is set to On,
Silent. 5
27Personalize
Page 12

Backlight
Set the amount of time the backlight remains on for
the display and java applications, or turn off the
backlight to extend battery life.
Find it: Menu / >
Backlight
Settings > Display/Info >
Wallpaper
Find it: Menu / > Settings > Display/Info >
Wallpaper
1 Select Wallpaper.
2 Scroll through the list of pictures and press r to
select a picture.
You can set the wallpapers to change automatically by
selecting
Auto Cycle.
Menu Language
Find it: Menu / > Settings > Display/Info >
Language
Profiles
Your phone has different profiles. You can customize
ringtones, display settings, call settings, volume, and
call filters.
Find it: Menu / >
28 Personalize
Profiles
Page 13

Camera
Take photos
Find it: Press Camera ?
1 Aim the camera lens and press the navigation key
up to zoom in or down to zoom out. To change the
picture size, press the navigation key left or right.
Capture or press r to take the picture.
2 Press
3 To save the picture to memory,
to delete it, or you can press
MMS message.
Share
To send the picture you’ve just taken via Bluetooth,
PTT, or MMS message, press Menu / >
Camera options
To set camera options such as Zoom, Picture Quality,
Picture Size, press Menu /.
and
Store, press Discard
Send to send it in an
Send Via ...
29Camera
Page 14

Media center
Find it: Menu / > Media Center
The Media Center lets you view and manage your
pictures and audio recordings stored in your phone’s
memory.
Tip: Press * or # to scroll through the different
media types in Media Center.
View pictures
1 Press the navigation key to scroll to Media: Pictures.
2 Select a picture to view it.
You can also press the navigation key left or right to
scroll through all the pictures stored on your phone.
Manage sounds
1 Press the navigation key to scroll to Media: Audio.
2 Select an audio file to play it.
To stop playing an audio file, press the navigation key
down. To play the audio file again, press r. Press the
navigation key left or right to scroll through the audio
files stored on your phone.
Share
To send a picture or audio file via Bluetooth, PTT, or
MMS, highlight it and press Menu / >
30 Media center
Send via ...
Page 15

FM radio
Note: Your service provider may not support this
feature.
Find it: Menu / >
Note: A wired 2.5mm headset is required for FM radio
use.
Find a station
Seek
Press the navigation key up or down to search for the
next available station
Enter a station frequency
Press Menu / > Enter Freq. to use your key pad to
enter a station frequency.
Station Presets
Your phone can store up to nine station presets.
Store a station to a preset
To store a station to your presets, tune into it and then
press and hold the corresponding number (1-9) on your
keypad.
Use station presets
To tune in a station preset, press the corresponding
number on your keypad.
FM Radio
31FM radio
Page 16

Bluetooth™ wireless
lose the wires and go wireless
Turn Bluetooth power on or off
Find it: Menu / > Bluetooth > Setup > Power
Note: To extend battery life, turn Bluetooth power off
when not in use.
Connect devices
Note: This feature requires an optional accessory.
1 Make sure the Bluetooth device is in discoverable
mode.
Note: Refer to the guide that came with the
Bluetooth device for details.
2 Press Menu / >
[Find Devices] to connect to an audio Bluetooth
device. Press Menu / >
Devices
to connect to any other type of Bluetooth
device. Your phone will scan for the device.
3 Select your Bluetooth device from the list.
Yes when you’re prompted to bond.
4 Press
5 Enter the Bluetooth PIN, such as 0000.
32 Bluetooth™ wireless
Bluetooth > Hands Free >
Bluetooth > Link to
Page 17

Some Bluetooth devices require a PIN. Please refer to
your Bluetooth device’s user guide to locate this
information.
If your device doesn’t have a Bluetooth PIN, you can
enter any PIN for that device.
Ok.
6 Press
Note: Using a mobile device or accessory while
driving may cause distraction and may be illegal.
Always obey the laws and drive safely.
Reconnect devices
To automatically reconnect your phone to a paired
device, simply turn on the device.
To manually reconnect your phone with a paired
device, select the device name in the
Devices
list.
Hands Free
Disconnect devices
To automatically disconnect your phone from a paired
device, simply turn off the device.
To manually disconnect your phone from a paired
device, select the device name in the
Devices
list. When prompted to disconnect, press Yes.
Hands Free
33Bluetooth™ wireless
Page 18

Tools
Datebook
Feat ures
create datebook events
To create a new Datebook event press Menu / >
Datebook > [New Event].
see datebook events
To see a datebook event press Menu / >
Datebook. Press the navigation key left or right to
see the day and up or down to see the events.
Voice Record
Feat ures
create a voice record
Press Menu / >
VoiceRec]
playing vo ice records
Press Menu / >
record and press r to play it. To stop the voice
record while it’s playing, press r.
34 Tools
. Press r to stop recording.
VoiceRecord > [New
VoiceRecord. Highlight a voice
Page 19

Note: Recording of phone calls is subject to varying
State and Federal laws regarding privacy and recording
of phone conversations. Always obey the laws and
regulations on the use of this feature.
Accessibility
Hearing aids
To help get a clear sound when using a hearing aid or
cochlear implant, your phone may have been rated for
use with hearing aids. If your phone’s box has “Rated
for Hearing Aids” printed on it, then please read the
following guidance.
Note: Ratings are not a guarantee of compatibility, see
“Hearing Aid Compatibility with Mobile Phones” in
your legal and safety information. You may also want to
consult your hearing health professional, who should
be able to help you get the best results.
•Settings: Press Menu / >
Calls
> Hearing Aid. Select Microphone to optimize
your phone for microphone coupling, or select
Telecoil to optimize your phone for telecoil coupling.
•Call volume: During a call, press the side volume
keys to set a call volume that works for you.
Settings > Phone
35Tools
Page 20

•Position: During a call, hold the phone to your ear
as normal, and then rotate/move it to get the best
position for speaking and listening.
TTY
You can use your phone in TTY mode with standard
teletype machines. Pres Menu / >
Phone Calls > TTY and select the mode you need:
TTY: Type and read text on your TTY device.
•
HCO: Hearing-Carry-Over—type text on your TTY
•
device and listen to voice replies on your phone’s
speaker.
VCO: Voice-Carry-Over—speak into your phone and
•
read text replies on your TTY device.
Note: You’ll need a cable/adapter to connect your TTY
device to the headset jack on your phone.
Refer to your TTY device guide for mode and usage
information.
36 Tools
Settings >
Page 21

Security
Phone lock
Find it: Menu / > Settings > Security > Phone
Lock
> Lock Now or Auto Lock
Change unlock code
When you receive your phone, your unlock code is
0000.
To change your unlock code, press Menu / >
Settings > Security > Change Passwds > Unlock
Code
. Enter the current unlock code and enter the new
four digit unlock code. Re-enter the new four digit
unlock code to confirm.
Keypad lock
Find it: Menu / > Settings > Security > Keypad
Lock
> Lock Now or Auto Lock
Shortcut: To lock the keypad, press Menu / > *.
Lock your SIM
To lock your SIM, press Menu / > Settings >
Security > SIM PIN > On.
37
Page 22

Caution: If you enter an incorrect PIN code three
times, your phone locks your SIM card and asks for
your PIN unlock code.
Change SIM PIN
To change your SIM PIN, press Menu / >
Settings > Security > Change Passwds > SIM PIN.
PUK code
To unlock your SIM PIN, you need to enter your PIN
unlock code (PUK code) when prompted.
Note: Your PUK code is provided by your service
provider.
GPS PIN
When you receive your phone, your GPS PIN is 0000.
To change your GPS PIN press Menu / >
Security > Change Passwords > GPS PIN. Enter the
>
current GPS PIN and enter the new four-to-eight digit
GPS PIN. Re-enter the new four- to eight-digit GPS PIN
to confirm.
Settings
Forgot your password?
If you forget your password, contact your service
provider.
38
Page 23

Safety, Regulatory & Legal
Battery Use & Safety
Battery Use & Safety
Important: Handle and store batteries properly to avoid injury or damage.
battery issues arise from improper handling of batteries, and particularly from the
continued use of damaged batteries.
DON’Ts
• Don’t disassemble, crush, punctur e, shred, or otherwise attempt to change
the form of your battery.
• Don’t let the mobile device or battery come in contact with water.*
get into the mobile device’s circuits, leading to corrosion. If the mobile device and/or
battery get wet, have them checked by your service provider or contact Motorola, even
if they appear to be working properly.*
• Don’t allow the battery to touch metal objects.
stay in prolonged contact with the battery contact points, the battery could become
very hot.
• Don’t place your mobile device or battery near a heat source.*
temperatures can cause the battery to swell, leak, or malfunction.
• Don’t dry a wet or damp battery with an appliance or heat source
hair dryer or microwave oven.
DOs
• Do avoid leaving your mobile device in your car in high temperatures.*
• Do avoid dropping the battery or mobile device.*
especially on a hard surface, can potentially cause damage.*
• Do contact your service provider or Motorola if your mobile device or battery
has been damaged from dropping or high temperatures.
* Note:
Always make sure that the battery compartment is closed and secure to avoid
direct exposure of the battery to any of these conditions.
Important: Use Motorola Original products for quality assurance and safeguards.
To aid consumers in identifying authentic Motorola batteries from non-original or
counterfeit batteries (that may not have adequate safety protection), Motorola provides
holograms on its batteries. Consumers should confirm that any battery they purchase has
a “Motoro la Original” hologram.
If metal objects, such as jewelry,
Dropping these items,
Most
Water can
High
, such as a
39
Page 24

Motorola recommends you always use Motorola-brande d batteries and
032375o
chargers.
Motorola mobile devices are designed to work with Motorola batteries. If you
see a message on your display such as
Unable to Charge
•
Remove the battery and inspect it to confirm that it has a “Motorola Original”
hologram;
•
If there is no hologram, the battery is not a Motorola battery;
•
If there is a hologram, replace the battery and try charging it again;
•
If the message remains, contact a Motorola authorized service center.
Important:
Motorola’s warranty does not cover damage to the mobile device caused by
non-Motorola batteries and/or chargers.
War ning :
Use of a non-Motorola battery or charger may present a risk of fire, explosion,
leakage, or other hazard.
Proper and safe battery disposal and recycling:
important for safety, it benefits the environment. Consumers may recycle their used
batteries in many retail or service provider locations. Additional information on proper
disposal and recycling may be found on the Web:
•
www.motorola.com/recycling
•
www.rbrc.org/call2recycle/
Disposal:
Promptly dispose of used batteries in accordance with local
regulations. Contact your local recycling center or national recycling
organizations for more information on how to dispose of batteries.
War ning :
Never dispose of batteries in a fire because they may explode.
Battery Charging
Battery C harg ing
Notes for charging your produc t’s battery:
•
During charging, keep your battery and charger near room temperature for efficient
battery charging.
•
New batteries are not fully charged.
•
New batteries or batteries stored for a long time may take more time to charge.
•
Motorola batteries and charging systems have circuitry that protects the battery from
damage from overcharging.
40
Invalid Battery
, take the following steps:
(in English only)
or
Proper battery disposal is not only
Page 25

Driving Precautions
Responsible and safe driving is your primary responsibility when behind the wheel of a
vehicle. Using a mobile device or accessory for a call or other application while driving
may cause distraction. Using a mobile device or accessory may be prohibited or restricted
in certain areas, always obey the laws and regulations on the use of these products.
While driving, NEVER:
•
Type or read texts.
•
Enter or review written data.
•
Surf the web.
•
Input navigation information.
•
Perform any other functions that divert your attention from driving.
While driving, ALWAYS:
•
Keep your eyes on the road.
•
Use a handsfree device if available or required by law in your area.
•
Enter destination information into a navigation device
•
Use voice activated features (such as voice dial) and speaking features (such as
audible directions), if available.
•
Obey all local laws and regulations for the use of mobile devices and accessories in
the vehicle.
•
End your call or other task if you cannot concentrate on driving.
Remember to follow the “Smart Practices While Driving” in this guide and at
www.motorola.com/callsmart
(in English only).
before
driving.
Seizures/Blackouts
Some people may be susceptible to epileptic seizures or blackouts when exposed to
flashing lights, such as when playing videos or games. These may occur even if a person
has never had a previous seizure or blackout.
If you have experienced seizures or blackouts, or if you have a family history of such
occurrences, please consult with your physician before playing videos or games or
enabling a flashing-lights feature (if available) on your mobile device.
Discontinue use and consult a physician if any of the following symptoms occur:
convulsion, eye or muscle twitching, loss of awareness, involuntary movements, or
disorientation. It is always a good idea to hold the screen away from your eyes, leave the
lights on in the room, take a 15-minute break every hour, and stop use if you are tired.
41
 Loading...