

Page 1

A
LX4/FLX4
®
User’s Guide
SCRIPTOR
Page 2

Contents
P age
SCRIPT OR LX4/FLX4 Message Receiver..................1
Getting the Most from Your Message Receiv er...........1
Display Symbols .........................................................2
Controls ......................................................................2
Message Receiver Symbols.......................................3
Turning Your Message Receiv er On............................4
Turning Your Message Receiv er Off............................4
Receiving and Reading Your Messages......................5
Using the Function Menu............................................6
Backlighting.................................................................6
Locking and Unloc king Messages ..............................6
Setting the Time and Date ..........................................7
Setting the Alarm ........................................................8
Setting the Message Alarm.........................................9
Setting the Alert Mode..............................................10
Setting the Alert Pattern............................................10
Turning the Maildrop Alert On and Off......................11
Deleting Messages from Memory.............................11
Moving Messages to Your Notebooks.......................12
Deleting Messages F rom Your Notebooks................13
Setting Auto On/Off...................................................13
Other Features..........................................................14
Battery Information ...................................................16
Care of Your Message Receiver................................17
Cleaning Your Message Receiver.............................17
Repair and Maintenance...........................................17
P atent Information.....................................................17
ii
Page 3

SCRIPT OR LX4/FLX4 Message Receiver
Congratulations on purchasing an SCRIPTOR LX4/
FLX4 message receiver by Motorola. Your new message receiver pro vides exciting capabilities in messaging and can become a vital part of your business and
personal life .
The message receiver’s four-line display and
expanded functionality incorporates many of the most
advanced electronic, communications and wireless
technologies available. It is reliable, convenient, and
designed for easy oper ation.
These operating instructions explain how to use your
message receiver and provide helpful suggestions for
first-time as well as e xperienced users.
Getting the Most from Your Message Receiver
• Spend a few minutes learning all of the functions
and messaging capabilities of your message
receiver.
• Give your message receiver number to your secretary, business associates, friends, and family.
• Include your message receiver number on business
cards and on your ans wering machine message.
• Leave your message receiver number at your children’s school and with the baby-sitter so you can
alwa ys be reached in an emergency.
1
Page 4
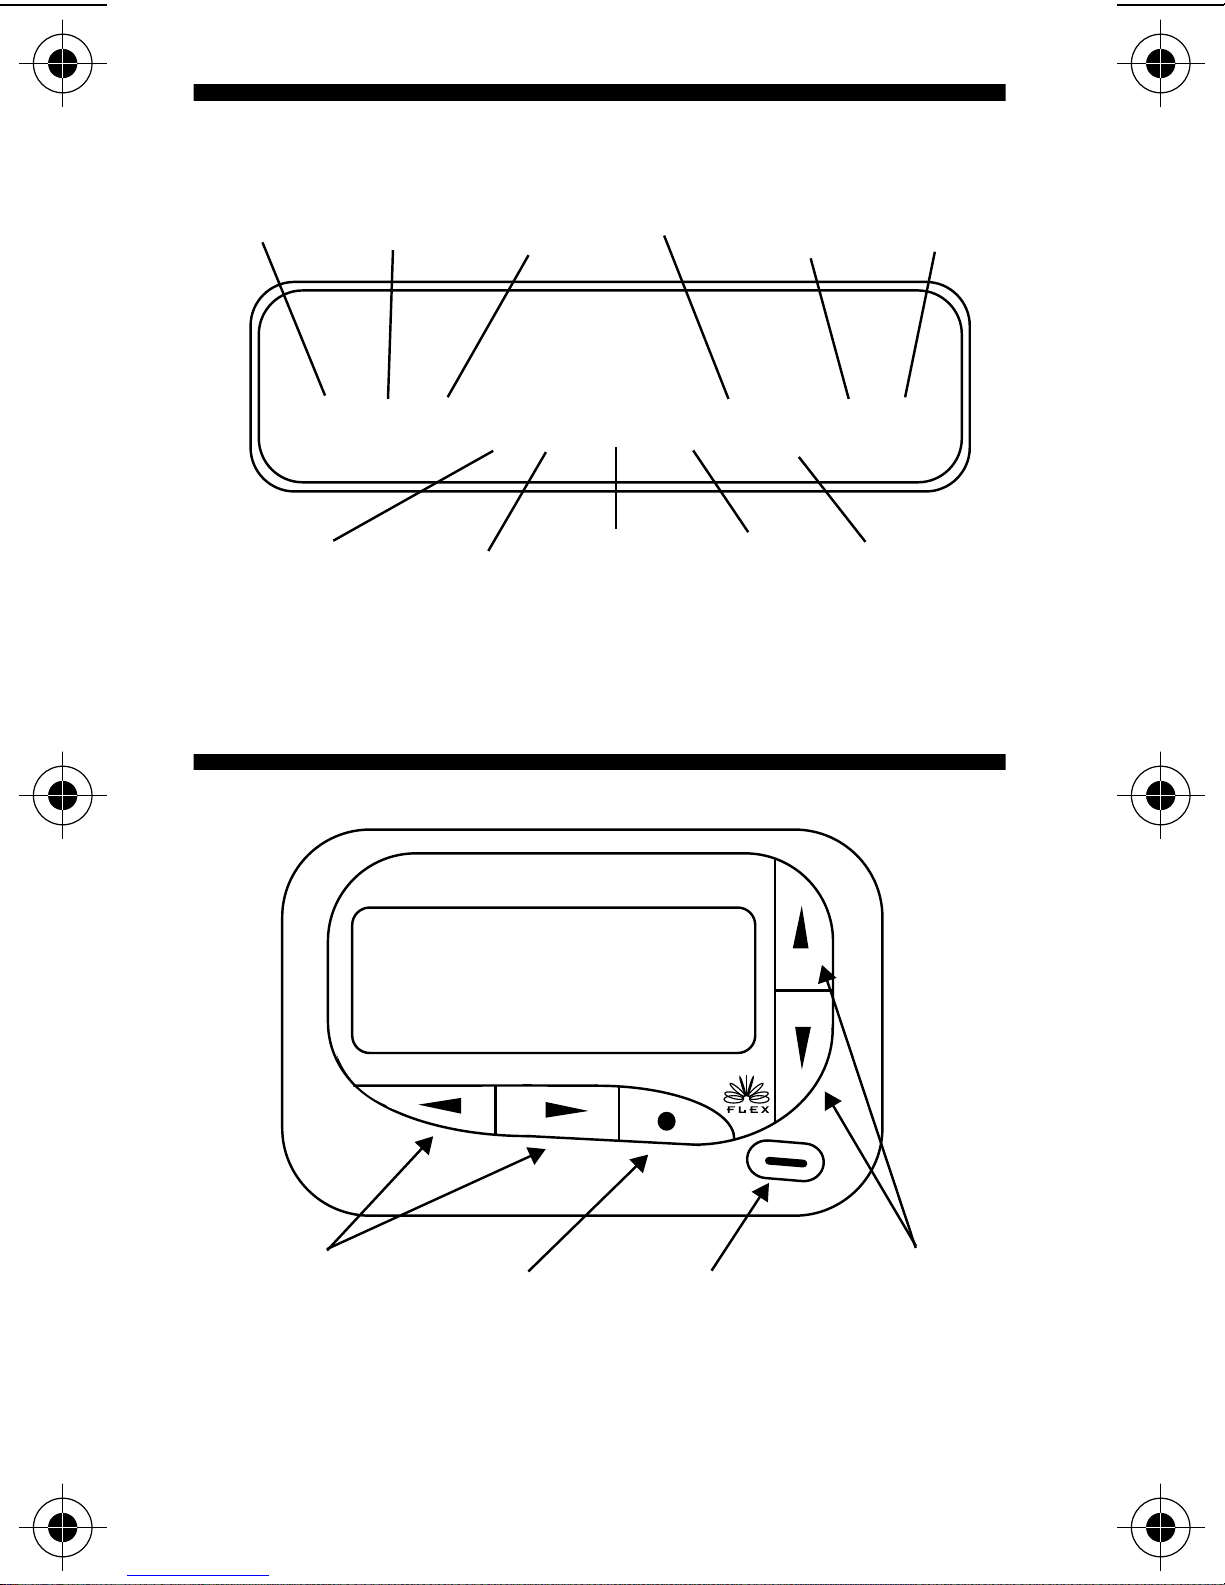
Display Symbols
Choose
Alert
ESCAPE
È Ñ å É ó ò ï ñ í Ö 
Set
Audible/
Silent
Alert
Set Time
and Alarm
Turn
Message
Receiver
Off
Set
Auto
On/Off
Escape
(to status
screen)
Delete All
Messages
Delete
Message
Set
Message
Alarm
Unlock
Message
Add T o
Note-
book
Lock/
Controls
Left/Right
Directional
Buttons
A
Function/
Select Button
Up/Down
Read/
Directional
Escape/
Buttons
P ow er On
2
Button
Page 5
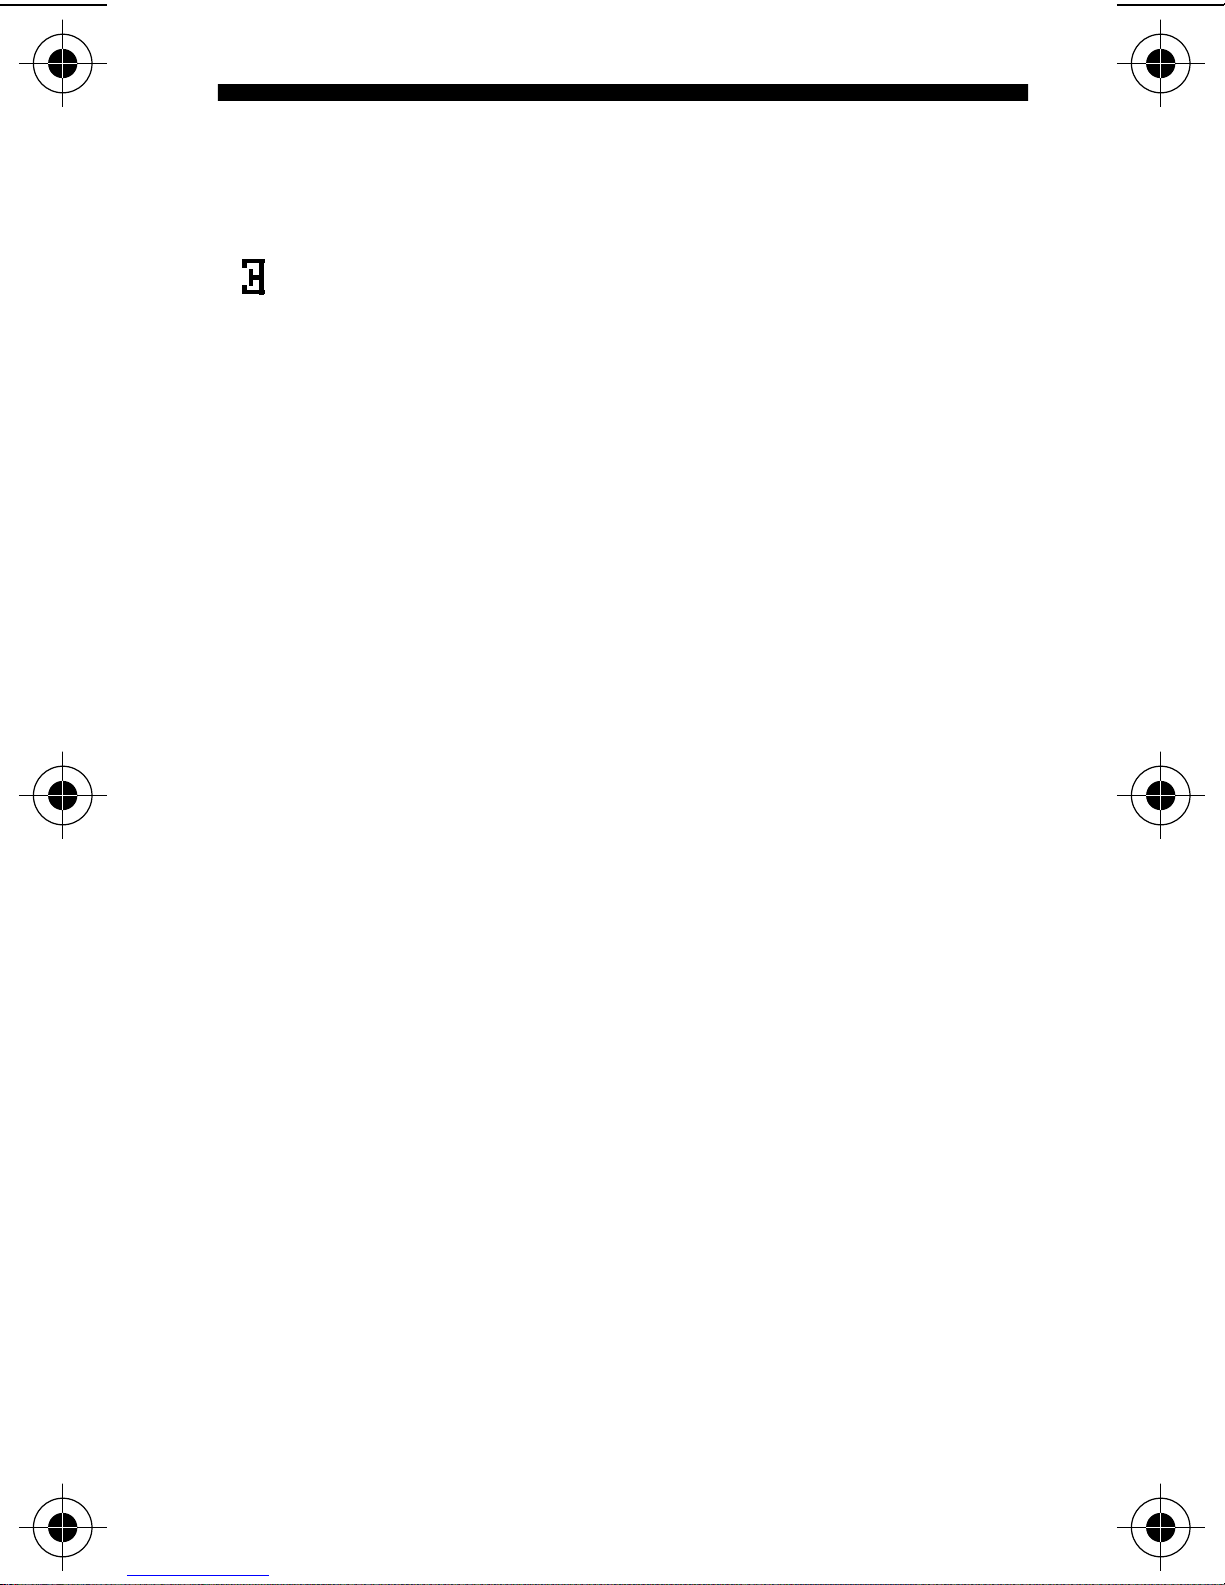
Message Receiver Symbols
Message Receiver Status Symbols: (Left column)
ë
Í
Ö
Message Status Symbols: (Top two ro ws of
display)
í
Õ
V
ü
é
Ö
Function Menu Symbols: (Bottom r ow of displa y)
P ow er On
Audib le Alert Mode
Auto On/Off
Alarm
Lock ed Message
Maildrop Indicator (Alert Enab led)
Maildrop Indicator (Alert Disab led)
Message In Memory Indicator
Memory Full Indicator
Alarmed Message
È
Ñ
å
É
Ç
ó
ò
ï
ñ
í
ì
Õ
Ì
Choose Alert
Set Time and Alarm
Set Auto On/Off
Set Audib le Alert
Set Silent Alert
Turn Message Receiv er Off
Escape (to status screen)
Delete Message
Delete All Messages
Lock Message
Unlock Message
Maildrop Indicator (Alert Enab led)
Maildrop Indicator (Alert Disab led)
Ö

Set Message Alarm
Add to Notebook
3
Page 6
Other Symbols:
å
õ
ô
AM
PM
Ã
c
Ç
Õ
(
,
T
Enter Auto On/Off Men u and A uto On/Off
Enabled
Auto On/Off Disab led
24 Hour Time
AM Time
PM Time
Disable Alarm
Enable Alarm
No Message Alert (On Choose Alert Menu)
Chirping Alert (On Choose Alert Menu)
Full Battery Gauge
Low Battery Gauge
Out of Range
Ü
<..> Alphanumeric Missing F ragment Indicator*
_____ Long Numeric Missing Fr agment Indicator*
ú
*
These symbols are applicable to SCRIPTOR FLX4
only.
Message Continuation
Truncated Message
Errored Data Indicator
Turning Your Message Receiver On
Press
Your message receiver alerts and shows
column of the display. The time and date are shown at
the bottom of the display.
Ë
.
ë
in the left
Turning Your Message Receiver Off
➊
Press
➋
Press
➌
Press
4
to display the function men u.
Á
to move the cursor to ó.
ä
twice to turn the message receiver off.
Á
Page 7
Receiving and Reading Your Messages
When a message is received, your message receiver
alerts and displa ys a flashing
➊
Press any button to stop the alert.
➋
Press
The message receiver automatically stores the message and the time and date it is received.
A flashing arrow
screen indicates the message you are reading continues bey ond the f our lines of the displa y.
Press
sage.
You can also press to read your message line by
line.
Press and hold
sage, screen by screen.
Ë
Ë
to display y our message.
at the bottom right cor ner of the
Ü
to advance to the next screen of the mes-
Ë
to rapidly scroll through your mes-
symbol.
ü
If more than one message exists, press
select the message you want to read. The symbol
indicates the location of the message. Press
display your message. While reading your messages,
you can press
message.
A flashing
that has not been read. The message receiver alerts
at predetermined intervals to remind you of any
unread messages.
ë
H
symbol indicates you have a message
or
I
to view the previous or next
ä
or
ã
Ë
to
Ó
to
5
Page 8

Using the Function Menu
Press
The function menu gives y ou access to the many f eatures
of your message receiv er through a series of symbols and
prompts. For e xample, when the function men u screen is
first displayed, the
present position of the cursor . You can now press
to mov e the cursor within the function menu.
ã
NO TE:
press
Backlighting
The message receiver’s backlight illuminates in lowlight conditions when any button is pressed. You can
manually activate or deactivate the backlight at any
to display the function men u.
Á
symbol flashes, indicating the
ò
ä
To exit from any menu without making changes ,
.
Ë
or
for tw o seconds . If no
Á
time by pressing and holding
other buttons are pressed, the backlight automatically
turns off when the message receiver returns to the
standby mode.
Locking and Unloc king Messages
Up to 10 messages can be lock ed in memory, prev enting
them from being replaced when memory is full (indicated
by the é symbol).
➊
Press
➋
Press
➌ Press
➍ Press
ì).
(
Ë
.
or ã to select the message to lock.
ä
Á to display the function men u.
ã to move the cursor to lock (í) or unlock
➎ Press
➏ The symbol
of the message in memory .
6
Á to lock or unlock the message.
í or ì is displa y ed, indicating the status
Page 9

Setting the Time and Date
➊ Press Á to display the function menu.
➋ Press
➌ Press
➍ Press
➎ Press or to adjust the hour .
➏ Press
➐ Press or to adjust the minute.
➑ Repeat the process for each set of digits: AM/PM/
24 hr ., month/da y/y ear .
➒ Press
ä to mov e the cursor to Ñ.
Á to display the set-time screen.
ã to move the cursor to the hour digit.
ã to mov e the cursor to the minute digit.
Á to activate the time and date change .
●Ñ22:23ô05/06/96●
Ö0:00ô--/--/- SET TIME
Example of Set-T ime Scr een
If you move the cursor past the last symbol in the row
(far right), it automatically wraps around and is display ed at the first symbol in the beginning of that same
row (f ar left).
NO TE: To exit from any menu without making changes ,
press Ë .
7
Page 10

Setting the Alarm
The alarm on your message receiver can be set for a
specific time and date, or it can be used as a daily
alarm.
To set the alarm for a specific time and date:
➊ Press Á to display the function menu.
➋ Press
➌ Press
➍ Press to move the cursor to
ä to mov e the cursor to Ñ.
Á to display the set-time-and-alarm screen.
Ö.
Ñ22:23ô05/06/96
Ã0:00ô--/--/--●
●
SET ALARM
Example of Set-T ime-and-Alarm Scr een
The alarm symbol defines the alarm status -- either
alarm enabled (
➎ Press
➏ Press or to enable or disable the alarm.
➐ Press
ã to mov e the cursor to Ö.
ã to mov e the cursor to the hour digit.
c) or alarm disabled (Ã).
➑ Repeat the process for each entry (minute, AM/PM,
and date).
➒ Press
is shown on the displa y.
At the selected time, your message receiver emits a
12-second audible alert even if the message receiver
is in the silent mode.
To set the alarm to alert daily:
Follow the steps previously described, except when
setting the date, press for the date entries until y ou
see a blank month, da y, and year (--/--/--). The alarm is
now set to alert every day at this specified time .
NOTE: If the alarm expires without being acknowledged, the
receiver b uttons is pressed.
Á to activate your selection. The Ö symbol
Ö symbol flashes until one of the message
8
Page 11

NO TE: To exit from any menu without making changes,
press
Ë.
Setting the Message Alarm
This feature allows you to set a one-time or a daily
alarm for a particular personal message. You can set
an alarm for up to five personal messages .
To set a one-time message alarm:
➊ Press Ë.
➋ Press
alarm.
➌ Press
➍ Press
➎ Press
When the screen is first displayed, the cursor is at the
ä or ã to select the message you want to
Á to display the function men u.
ã to mov e the cursor to Ö.
Á to display the set-message-alarm screen.
far left position.
This symbol defines the alarm status -- either alarm
enabled (
➏ From the set-message-alarm screen follow the
same steps described in Setting the Alarm.
To set a daily message alarm:
Follow the instructions above to set the alarm time,
then follo w the instructions in “To set the alarm to alert
daily” under Setting the Alarm.
The
sage alarm is set.
At the selected time, your message receiver vibrates
or emits a 12-second alert, depending on the current
alert mode. Press
alarm is set for .
b symbol replaces the m symbol when the mes-
c) or alarm disabled (Ã).
J to display the message the
The
has sounded unless the alarm is set to alert daily.
NOTE: If the alarm expires without being acknowledged, the
m symbol replaces the b symbol after the alarm
Ö flashes until the message is read.
9
Page 12

Setting the Alert Mode
The alert can be set as either audib le or silent.
➊ Press
➋ Press
The
the silent alert mode (prompting you to enter the audible
mode, if desired). The
sage receiver is in the audib le alert mode (prompting you
to enter the silent mode, if desired).
➌ Press
If the selected mode is audible (É) , your message
receiver emits a short chirp. If the selected mode is silent
(
tor , your message receiv er vibrates.
Setting the Alert Pattern
É symbol is displayed if the message receiv er is in
Œ) and your message receiver is equipped with a vibr a-
Á to display the function men u.
ä to mov e the cursor to É or Œ.
Œsymbol is displa yed if the mes-
Á to select the desired alert mode .
NOTE: The message receiver must be in the audible
alert mode to select the alert pattern.
Your message receiver has a standard alert (1), seven diff erent pleasing alerts (2 through 8), and a chirping alert
(Õ), allowing you to select and change the alert. You can
also select no alert (
To change your alert:
➊ Press
➋ Press
➌ Press
The message receiver gives a sample of each alert
when scrolling through the selections.
Á to display the function men u.
ä to mov e the cursor to È, then press Á.
ä or ã to mo ve the cursor to the desired alert.
Œ).
10
Page 13

➍ Press Á to activate the alert.
1 2 3 4 5 6 7 8 j r
PLEASING ALERT
Example of the Alert Pattern Scr een
Turning the Maildrop Alert On and Off
You can set your message receiver to alert when a
maildrop (also known as infor mation services) message is received.
➊ Press
➋ Press to move the cursor to Õ.
➌ Press Á to display the function menu.
➍ Press ã to move the cursor to the alert on (Õ) or
alert off (
The symbol Õ is displayed if the maildrop alert is on
(prompting you to turn it off, if desired).
The symbol
(prompting you to turn it on, if desired).
➎ Press
Ë.
Ì ) symbol.
Ì is displayed if the maildrop alert is off
Á to select the desired maildrop alert mode .
Deleting Messages from Memory
You can delete an unlocked and un-alarmed message
from memory while you are viewing the message or
through the function menu.
To delete messages using the function menu:
➊ Press ä or ã to select the message you want to
delete from memory.
➋ Press
➌ Press ã to move the cursor to ï.
➍ Press Á to receive confirmation of the delete
request.
➎ Press
Á to display the function men u.
Á to delete the message.
11
Page 14
To delete all unlocked, un-alarmed and read
messages from memory:
➊ Press Á to display the function men u.
➋ Press
➌ Press
All unlock ed, un-alarmed and read messages are now
deleted.
NOTE: Personal and maildrop notebooks are not
deleted with this feature .
ã to mov e the cursor to ñ.
Á twice.
Moving Messages to Your Notebooks
Your message receiver has two notebook areas: a personal notebook for storing personal messages, and a
maildrop notebook for stor ing information services
messages.
To store a message in your personal notebook:
➊ Press Ë .
➋ Press
sage you desire to move into your personal notebook.
➌ Press
➍ Press
➎ Press
notebook.
The ¶ symbol is shown in the top right-hand corner of
the display.
To store a message in the maildrop (information
services) notebook:
Follow the same steps as described for storing personal notebook messages.
The ¶ symbol is shown in the second row, r ight-hand
ä or ã to mov e the cursor to select the mes-
Á to display the function menu.
ã to mov e the cursor to ¶.
Á to move the message into your personal
corner of the display.
12
Page 15

Deleting Messages from Your Notebooks
➊ Press ã to mo ve the cursor to ¶.
➋ Press
➌ Press
play ed at the notebook message you want to delete .
➍ Press
➎ Press
➏ Press
➐ Press
steps to delete each message.
Setting Auto On/Off
To set your message receiver’s auto on/off feature,
proceed as follo ws:
➊ Press
Ë to display a list of notebook messages .
F or G to scroll through the list until K is dis-
Á to display the function menu.
ã to mov e the cursor to ï.
Á to confirm the delete request.
Á to delete the message. Repeat these
Á to display the function men u.
➋ Press
➌ Press
When the screen is first displayed, the cursor is at the
farthest left position. The enabled (
symbol indicates the current status.
ä to mov e the cursor to å.
Á to display the auto on/off screen.
å) or disabled (õ)
ON OFF
õ 0:00ô 0:00ô
Example of Auto On/Off Scr een
➍ Press or to select
➎ Press
ã to move the cursor to the hour digit. The
å or õ.
Auto On time is displayed on the left and the Auto
Off time is display ed on the right.
➏ Press or to adjust the hour.
13
Page 16

➐ Repeat the process for each set of digits f or both the
on time and the off time (hour, minute, AM/PM if
your message receiver is set to display time in the
12 hour mode).
➑ Press
The symbol
Á to activate auto on/off .
å is display ed if the auto on/off function is
enabled. If the on time is equal to the off time , the message receiver does not enab le the auto on/off function.
Other Features
Battery Gauge: The battery gauge indicator is located
on the status screen and keeps you informed of the
battery energy level. The five indicators range from full
to low:
, (lo w).
Key Clic k: When this f eature is enab led, and the message receiver is in the audible mode, a “click” is emitted whenever a button is pressed. The click is not
heard when the message receiver is in the silent
( (full), ) (3/4), * (1/2), + (1/4), and
mode.
Duplicate Message: If the same message is received
more than once,
DUPLICATE MESSAGE is displayed
at the beginning of the new message. The new message contains the latest time stamp.
14
Page 17

Out of Range: With this option enabled, T is dis-
pl ayed whenever you are out of range of the paging
transmitter. Your message receiver can also alert y ou of
this if this feature is enabled. The symbol T is no
longer displayed when you return to your transmitting
area.
Errored Data Indicator: The symbol ú is displayed
when potentially corrupt data is received. The indicator
alternates with the corrupted char acter .
Alphanumeric and Long Numeric Missing Fragment Indicators: If part of the message has not been
received <...> or _____ is displayed. NOTE: Applica-
ble to SCRIPT OR FLX4 only.
Maildrop History: When this option is enabled, the
message receiver stores f our history files per maildrop
(information services) slot selected. When a message
is received on a specific slot, the existing message is
“pushed” into the history area. When a fifth history file
is received, the oldest history file is deleted.
15
Page 18

Battery Information
Your message receiver is designed to operate with a sin-
AA-size alkaline battery (carbon zinc batteries are not
gle
recommended). See the diagram for the battery door
location.
To install or replace the battery, place the message
receiver f ace down and proceed as f ollows:
➊ Unlock the battery door by sliding the door latch
awa y from the battery door .
➋ Slide the battery door in the direction of the arrow
(toward the outer edge).
➌ Lift the battery door away from the housing to
remov e it. Lift the battery out of the battery compart-
ment, taking note of the positive ( +) and negativ e (-)
markings on the battery and the message receiver
housing.
➊
➌
Ì
➋
SCRIPTOR LX4/FLX4 Message Receiver
Battery Replacement (r ear view)
To install a new battery, reverse this procedure, taking
note of the positive (+) and negativ e ( -) markings.
CAUTION: Do not insert the battery backwards or the
messages stored or lock ed in memory will be er ased.
16
Page 19

Care of Your Message Receiver
To maintain the fine optical quality of the display in the
message receiver, you should not subject the message receiver to e xtreme temperatures and moisture .
Cleaning Your Message Receiver
To clean smudges and grime from the exterior of the
housing, use a soft, nonabrasive cloth moistened in a mild
soap and water solution. Rinse the surface using a second cloth moistened in clean water. Do not immerse the
message receiver in water. Do not use any other
solutions.
Repair and Maintenance
Your message receiver , properly handled, is capable of
many years of troub le-free service.
However, if your message receiver ever requires service, Motorola’s Service Organization, staffed with
specially trained technicians, offers conveniently
located repair and maintenance facilities throughout
the world. Please contact your paging service representative or a Motorola sales office for more information.
Patent Inf ormation
This Motorola product is manuf actured under one or more
Motorola U.S. Patents. A listing of these patents is provided inside the battery door. Other U.S . P atents co vering
this product are pending.
17
Page 20

t, Motorola, SCRIPTOR, and are trademarks
or registered trademarks of Motorola, Inc.
© 1996 by Motorola, Inc.
All Rights Reserved.
Paging Products Group
1500 Gatewa y Blvd.,
Boynton Beach, FL 33426-8292
Printed in U.S.A. 4/96
@6881027B15@
6881027B15-A
 Loading...