

Page 1

⽧
2B. Settings
Sound Sett ings (page 26)
⽧
Display Settings (page 28)
⽧
Location Settings (page 29)
⽧
Messaging Settings (page 30)
⽧
Airplane Mode (page 30)
⽧
Security Settings (page 31)
Personalize
Display Language
You can choose to display your phone’s onscreen
menus in one of several languages.
1.
Touch
Select locale
2.
Touch a language to select it.
>Settings > Language & keyboard >
.
26 2B. Settings
Sound Settings
Ringtones
Your phone provides a variety of ringer options that
allow you to customize your ring and volume settings.
These options allow you to identify incoming calls and
messages by the ring.
Selecting Ringtones
To personalize your ringtones:
1.
Touch
ringtone
2.
Touch a ringtone to select it, and touch OK to
assign it. (To preview a ringtone, touch it or use the
Navigation Key to scroll through and hear
samples.)
Assigning a Ringtone to a Contact
You can also assign a ringer to a specific contact entry
so you know who's calling without looking at the
phone.
1.
Touch
>Settings > Sound & display > Phone
,
Alert ringtone
Dialer > Contacts
, or
Notification ringtone
.
.
Page 2
2.
Touch a contact to open it, and then press
Menu/ > Options > Ringtone
3.
Touch a ringtone to select it, and touch OK to
.
assign it. (To preview a ringtone, touch it or use the
Navigation Key to scroll through and hear
samples.)
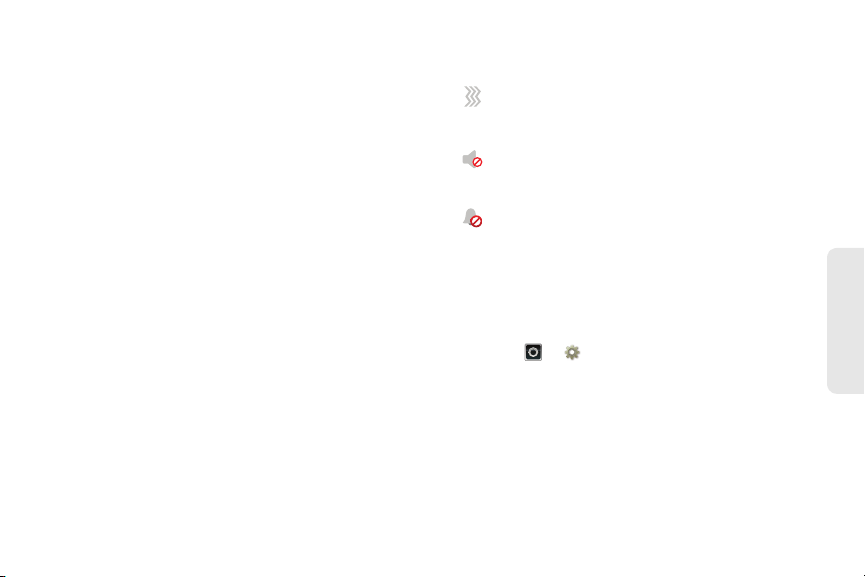
Vibrate Settings
Vibrate All
The Vibrate All option allows you to be notified of calls
and messages with a vibration instead of an audible
alert.
To activate Vibrate All:
䊳
Press and hold the Volume button down while on
the home screen until the phone vibrates.
To deactivate Vibrate All:
䊳
Press and hold the Volume button up.
These icons indicate how the ringer is set:
The phone vibrates instead of making a
sound for phone calls.
Direct Connect calls, Group Connect calls,
and Talkgroup calls are heard through the
earpiece, not the speaker.
The ring volume is set to zero for all calls.
Ring and Vibrate
To set your phone to ring and vibrate when you receive
phone calls or Call Alerts:
䊳
Touch
Vibrate
>Settings > Sound & display >
.
2B. Settings 27
Settings
Page 3
Silent Mode
The Silent Mode option allows you to mute all sounds
without turning your phone off.
To activate and deactivate Silent Mode:
䊳
Press and hold
the Phone Options menu and touch
Power/Screen Lock
Silent mode
to open
Adjusting the Phone’s Volume Settings
Adjust your phone’s volume settings to suit your needs
and your environment.
1.
Touch
2.
Select
3.
Choose a volume level and touch OK.
Tip:
28 2B. Settings
>Settings > Sound & display
Ringer volume
You can adjust the ringer volume while on the home
screen (or the earpiece volume during a call) by using
the Volume button on the left side of your phone.
or
Media volume
.
.
Display Settings
Changing the Screen Timeout
Select how long the display screen remains backlit
after any screen touch or keypress is made.
䊳
.
Touch
Screen timeout
Note:
Changing the Wallpaper
Choose what you see on the display screen while
powering on or off and while on the home screen.
䊳
From the home screen, press
Wallpaper > Wallpaper gallery
To select a wallpaper from the Wallpaper gallery:
1.
Flick the thumbnail images left or right to select a
wallpaper
2.
Touch
>Settings > Sound & display >
and then touch a duration.
Long backlight settings reduce the battery’s talk and
standby times.
Menu/ >
or
Media Gallery
.
Set wallpaper
to assign an image.
.
Page 4

To select a wallpaper from Media Gallery:
1.
Touch
2.
Touch an image to open it.
3.
Crop the picture if prompted, and then touch
Media Gallery
.
to set the image as your wallpaper.
Tip:
You can also set an image as a wallpaper from within
Media Gallery
thumbnail and then touching
by touching and holding the image
Set as > Wallpaper
Changing the Clock Display
Select a format for the time and date display.
䊳
Touch
䡲
Touch
24-hour time display and 12-hour time display.
䡲
Touch
format to assign it.
Note:
>Settings > Date & time
Use 24-hour format
Select date format
The time, time zone, and date are set by the network,
and even though they show up as options, they cannot
be changed.
to toggle between
, and then touch a date
.
Location Settings
Your phone is equipped with a Location feature for use
Save
.
in connection with location-based services.
The Location feature allows the network to detect your
position. Turning Location off will hide your location
from everyone, except 911.
Note:
Turning Location on will allow the network to detect
your position using GPS technology, making some
Sprint applications and services easier to use. Turning
Location off will disable the GPS location function for all
purposes except 911, but will not hide your general
location based on the cell site serving your call. No
application or service may use your location without
your request or permission. GPS-enhanced 911 is not
available in all areas.
To enable your phone’s Location feature:
䊳
Touch >
Settings >Location & security
select one or more services to use.
2B. Settings 29
Settings
and
Page 5

Messaging Settings
Messaging settings make messaging easier by letting
you decide how you would like to be notified of new
messages, create a signature with each sent message,
and create your own preset messages.
Setting Message Notification
When you receive a message, your phone notifies you
by displaying an icon in the notification bar. You can
also choose to be notified with a sound while making a
phone call.
To turn messaging notifications on and off:
䊳
Touch > Messaging > Menu/ >
Settings > Notifications
To select a message notification ringtone:
䊳
Touch > Messaging> Menu/ >
Settings > Select ringtone
select it, and then touch
30 2B. Settings
.
, touch a ringtone to
OK
.
To set your phone to vibrate when you receive a message:
䊳
Touch > Messaging > Menu/ >
Settings > Vibrate
.
Setting Reports
You can also choose to receive read and delivery
reports for each message you send.
To receive read reports:
䊳
Touch > Messaging > Menu/ >
Settings > Read reports
.
To receive delivery reports:
䊳
Touch > Messaging > Menu/ >
Settings > Delivery reports
.
Airplane Mode
Sometimes you may want to have your phone on, but
turn off its ability to make and receive calls and other
transmissions.
Page 6

To set your phone so that it cannot make or receive phone
calls, Direct Connect calls, Group Connect calls, Talkgroup
calls, or transfer data:
䊳
Press and hold
the Phone Options menu and touch
.
mode
Power/Screen Lock
Airplane
to open
When in Airplane Mode, appears in your
notifications bar.
To turn Airplane Mode off:
䊳
Press and hold
the Phone Options menu and touch
Note:
When you select airplane mode, all wireless services
are disabled. You can then turn Wi-Fi back on, if
permitted by your airline. Other wireless voice and data
services (such as calls and text messages) remain off
in airplane mode. Emergency calls to your region's
emergency number can still be made.
Tip:
To add a quick switch for
Airplane mode
blank spot on your home screen,
then touch
Airplane Mode Tog gl e
Power/Screen Lock
, touch and hold a
Motorola Widgets
.
to open
Airplane mode
>
Security Settings
䊳
Touch
Location & security settings
Security
Set up screen lock
Lock screen with a pattern, PIN, or password
Security lock timer
20 minutes
Allow Bluetooth bypass
Allow Voice Commands to be launched via
Bluetooth Multi-function button while device
is locked
.
Manage restriction lock
Set up restriction lock
Data encryption
Data encryption
Protect the data on your phone or memory card.
Requires screen lock
Passwords
Visible passwords
Show password as you type
> Settings > Location & security
.
Select & set up a
screen lock method.
Set lock timer.
Touch to see the passwords
you enter.
2B. Settings 31
Settings
Page 7

Your Phone’s Lock Feature
Screen Lock
Note:
You can make emergency calls on a locked phone
(see “Emergency Calls” on page 33).
To lock the screen:
䊳
Press
Screen Lock
– or –
Let the screen time out (don’t press or touch
anything).
To unlock the screen:
䊳
Press
Screen Lock
right.
Security Lock
To access the Security lock menu:
䊳
Touch >
Set up screen lock
䡲
To set a password or an unlock pattern that you
need to draw to unlock your screen, touch
Pattern, PIN
32 2B. Settings
# on the top of the phone.
# and then drag to the
Settings >Location & security
, and then select an option.
, or
Password
.
>
䡲
To turn the lock off, touch
䡲
To change the password or lock pattern, touch
Change screen lock
>
Pattern, PIN
None
.
, or
Password
.
Unlocking Your Phone
䊳
At the “Enter password to unlock” prompt, enter
your password or PIN and touch
Enter
.
– or –
At the “Draw pattern to unlock” prompt, draw the
saved pattern to unlock the phone.
Forgot Your Pattern, PIN, or Password?
When you set up your screen lock, you were asked to
choose two security questions.
If you forgot your pattern, PIN, or password, touch
Forgot password?
answer to unlock your phone. If you also forgot your
security question answer, touch
enter your Gmail address and password.
Note:
You will need to enter a new pattern, PIN, or password
after your phone is unlocked.
and enter your security question
Forgot answer?
, and
Page 8

Calling in Lock Mode
You can place calls to 911 when in lock mode.
䊳
Touch the
the screen, dial 911, and press
Emergency call
button at the bottom of
Tal k
`.
Resetting Your Phone
Phone Reset
Selecting
their default values, and clears all information (text
messages, contacts, emails, etc.) and downloaded
apps.
Reset phone
1.
Touch
Master Clear > Reset phone
WARNING:
2.
Enter your phone’s six-digit security code and
touch
OK
Note:
Your security code is a six-digit number used for
resetting your phone. Please contact Sprint Customer
Service if you do not know your security code.
resets all phone settings back to
>Settings > Privacy >
.
All data on your phone will be deleted.
. (A disclaimer is displayed.)
3.
Read the prompt and touch
complete the reset. (Press
Erase everything
Back
% to cancel.)
Feature Reset
Selecting
to their default settings.
Feature Reset
1.
Touch
SD card & phone storage > Feature Reset >
Feature Reset
2.
Enter your phone’s six-digit security code and
touch
Note:
3.
Read the prompt and touch
>Settings >
OK
. (A disclaimer is displayed.)
Your security code is a six-digit number used for
resetting your phone. Please contact Sprint Customer
Service if you do not know your security code.
complete the reset. (Press
resets all phone settings back
.
Re-apply All
Back
% to cancel.)
2B. Settings 33
to
to
Settings
Page 9

Update my phone
Troubleshooting
Stay up to date with the latest software for your phone.
You can check, download, and install updates using
your phone or your computer:
䢇
Using your phone:
You may get an automatic notification of an available
update on your phone. Follow the instructions to
download and install.
To manually check for updates, touch >
Settings
>
About phone
Your phone downloads any updates over your
mobile network. Remember, these updates can be
quite large (25MB or more) and may not be
available in all countries. If you don’t have an
unlimited data plan, or mobile network updates are
not available in your country, you can update using a
computer.
䢇
Using your computer:
On your computer, go to
mytitanium
update is available, simply follow the installation
instructions.
and check the “Software” links. If an
>
System updates
www.motorola.com/
.
34 2B. Settings
Crash recovery
In the unlikely event that your phone stops responding
to touches and key presses, try a quick reset. Remove
the back cover and battery (see “Removing the
Battery” on page 15), then replace and switch your
phone on as usual.
Page 10

⽧
2C. History
Recent Calls (page 35)
⽧
Frequent Calls (page 35)
Recent Calls
To see all recent calls (call history):
䊳
Touch >
䡲
To call a number, touch it.
䡲
To send a text message, create a contact, view a
contact, or other options, touch and hold an entry.
䡲
To clear the list, touch >
Recent
.
Clear list.
Frequent Calls
䊳
Press >
䡲
To call a number, touch it.
䡲
To send a text message, view a contact, or other
options, touch and hold an entry.
Favorites
.
History
2C. History 35
Page 11

Viewing and Using Contacts
2D. Contacts
⽧
Viewing and Using Contacts (page 36)
⽧
Creating Contacts (page 37)
⽧
Transferring Contacts (page 37)
⽧
Calling Or Emailing Contacts (page 39)
⽧
Editing Or Deleting Contacts (page 39)
⽧
Linking Contacts (page 39)
⽧
Synchronizing Contacts (page 39)
⽧
Making Groups (page 39)
36 2D. Contacts
From the home screen, touch
Recent Favorites
Dialer
Displaying 297 contacts
In case of emergency
A
Abe Baudo
Allie Smyth
Anna Medina
Astrid Fanning
Contacts
Dialer > Contacts
11:35
Group
Create and view
groups of contacts.
Create Contacts
#
A
B
C
Contacts List
D
E
Touch to view contact
F
information. Touch & hold
G
H
to call, send a text
I
J
message, & more.
K
L
M
N
O
.
When you set up a social networking account (see
page 4), you’ll know what everybody’s up to and when.
䊳
Touch
Dialer > Contacts
.
Page 12

䡲
To find a contact, type the contact name. Touch a
contact to open its details. Flick the screen left or
right to see
䡲
To change which group of contacts is shown (
Facebook
Social Networking
updates or
, and so on) touch the filter name at the
top.
䡲
To change how you view the list of contacts, flick
left or right at the bottom of the screen to select
History
(recently used),
Status
(list with status).
A-Z
(list without status) , or
Creating Contacts
Note:
Before entering contacts, you must set up at least one
email account on your phone. See “Setting Up Your
Voicemail” on page 4 or “Setting Up Messaging” on
page 53.
1.
Touch
2.
Fill in as much or as little information as you'd like.
Dialer > Contacts
> >
Add contact
History
.
3.
All
When you’re finished, touch
.
,
Contacts
Google contact
from youraccount@gmail.com
Sara
Walker
Phone
Home
Email
Home
Postal address
More
Save
Save
Cancel
Transferring Contacts
Get all your contacts, all in one place. Here’s a few
helpful hints:
䢇
Use Gmail™
automatically synced to your phone. Various
computer applications for mobile phones and email
accounts allow you to export your contacts as a
“.CSV” file. You can then use Gmail to import the file.
: All your Gmail contacts are
2D. Contacts 37
.
Contacts
Page 13

For more details, go to
www.motorola.com/transfercontacts
or log in to your
Gmail account on your computer and select ”Help”.
䢇
Use a SIM card or a microSD card
: You can transfer
contacts from your old phone to your new Motorola
phone using your SIM card or a microSD card. See
“Transfering Contacts Using Your SIM Card” on
page 38 or “Transfering Contacts Using Your SIM
Card” on page 38.
䢇
More
: Find other methods and tools to help you at
www.motorola.com/transfercontacts
Transfering Contacts Using Your SIM Card
1.
On your old phone, copy all the contacts you want
.
to your SIM card.
Tip:
For Motorola Android phones, touch >
card
>
Export contacts
SIM card.
2.
Insert your SIM card in your new phone. See “Your
to save your contacts to your
Manage SIM
SIM Card” on page 71.
3.
To import the contacts from your SIM card,
touch
Import/Export
Dialer > Contacts
.
, and then touch >
38 2D. Contacts
Transferring Contacts Using a microSD
Card
1.
On your old phone, copy all the contacts to your
microSD card. (They'll be copied as a VCard file.)
2.
Insert the microSD card in your new phone. See
“Your Phone’s microSD Card” on page 37.
3.
To import the contacts from your SIM card,
touch
Import/Export
Dialer > Contacts
. >
Import contacts from: SD card
, and then touch >
.
Link Contacts
You might have two or more
person, such as a friend with two email addresses. To
combine these contacts:
1.
Touch
2.
Touch a contact to open it, then touch >
contact
Dialer > Contacts
and touch the second entry.
Contacts
.
for the same
Link
Page 14

Calling Or Emailing Contacts
1.
Touch
2.
For
Send email
contact.
Dialer > Contacts
View contact, Call contact, Send text message
, or other options, touch and hold the
.
,
Editing Or Deleting Contacts
1.
Touch
2.
Touch the contact, and then touch >
Delete
Dialer > Contacts
.
.
Edit
or
Linking Contacts
You might have two
such as a friend with two email addresses. To combine
these two contacts:
1.
Touch
2.
Touch a contact to open it, and then touch >
Link contact
Contacts
for the same person,
Dialer > Contacts
and touch the second entry. Your
.
social networking account remembers this
connection.
Synchronizing Contacts
When you change one of your
automatically updates your other social networking
accounts. Also, your phone updates your
social networking account whenever you change a
friend in your social networking accounts.
Contacts
, your phone
Contacts
Making Groups
䊳
Touch
Display group
You can put your
create (like “friends”, “family”, or “work”). Then, you
can find contacts faster by showing one group at a
time.
Dialer > Contacts
>
Create new group
Contacts
> >
.
into groups that you
2D. Contacts 39
Contacts
and
Page 15

⽧
2E. Calendar & Tools
Calendar (page 40)
⽧
File Manager (page 41)
⽧
Alarm Clock and Timer (page 41)
⽧
Calculator (page 42)
⽧
Quickoffice (page 42)
⽧
Accessibility (page 43)
⽧
Updating Your Phone (page 47)
⽧
Updating Your Phone (page 47)
Calendar
䊳
Touch >
Calendar
.
Your calendar events can be viewed in different ways:
Touch >
Agenda, Day, Week
, or
Month
. When you
40 2E. Calendar & Tools
highlight an event, more details appear.
Tip:
You can set up multiple calendars through your Gmail
account so you can access them from your phone
wherever you go.
Adding Calendar Events
1.
From any view, touch >
More >New event.
Enter the event start time and other details. You
can even set a reminder so you don’t forget about
the event. (When you set the reminder time to
, it plays at the event start time.)
minutes
2.
When you finish entering event details, touch
Managing Calendar Events
䊳
To edit an event, touch and hold it, and then
touch
Edit event
䊳
To delete an event, touch and hold it, and then
touch
Delete event
䊳
To go to today, touch >
. When you’re done, touch
.
Tod ay
.
Save
0
Save
.
.
Page 16

File Manager
Alarm Clock and Timer
File Manager allows you to manage files such as
pictures, videos, music, and applications stored on the
microSD card.
䊳
Touch >
Files >SD card
.
Touch a file or folder to open, and then touch and hold
a file to
Delete
or
Share
.
Alarm Clock
Your phone has multiple alarm
capabilities.
䊳
Touch >
>
Timer
䡲
To turn on an alarm,
Alarm
Alarm &
.
touch the check box.
䡲
When an alarm sounds,
slide to
Dismiss
off or
Snooze
to turn it
to delay for
five minutes.
䡲
To add an alarm,
touch >
details. Touch
䡲
To enable or disable an alarm, touch the check
Add alarm
, and then enter alarm
Done
when you are finished.
box.
2E. Calendar & Tools 41
Alarm Timer
AM
7:00
PM
every day
AM
PM
8:30
Tuesday
AM
9:00
PM
Tue, Fri
Calendar / Tools
 Loading...