

Page 1

CONTENTS
Page 3 Introduction
Page 8 Using this guide
Page 11 Getting started
Page 13 Tools
Page 20 Messages
Page 28 Calls & times
Page 31 Phonebook
Safety and General Informa tion __________________ 3
Use and Care __________ ___________________ __ 6
European Union Directives Conformance Statement _ 7
Caring for the Environme nt by Recycling __________ 7
Recycling Mobile Phones and Acces sories _______ __ 7
Preparing the phon e for operation ______________ _ 11
Basic operations _________________ ___________ 11
Diary ___________ __________________ ________ 13
Calculator __________ ___________________ ____ 16
Currency converter ______________________ ____ 17
Alarm clock ____________________________ ____ 17
Bluetooth ________ __________________ ________ 18
Using your mobile as a modem _________________ 19
Reading a received SMS m essage ______________ 20
Reading stored SMS mess ages __ ______________ 20
Moving messages to SIM _____________________ 20
Forwarding message s _____________ ___________ 21
Activating or dea ctivating the messag e alert tone ___ 21
Preparing the phon e to send SMS messages ______ 21
Entering text ______________ _________________ 22
Creating text models _____ ___________________ _ 24
Editing a text mo del __________________ ________ 24
Sending a new SMS messa ge _________________ 24
Signature ___________ ___________________ ____ 25
Outbox and SIM archive se nt messages ______ ____ 25
Status request _____________ _________________ 25
Storage consumpt ion ______________ ___________ 26
Broadcast - cell broadcast (CB) messages ________ 26
Calls log __________________ _________________ 28
Call timers _ __________________ ______________ 28
Call costs - man agement __ ___________________ _ 29
Recorded call _____ __________________________ 30
Storing names and telepho ne numbers ___________ 31
Editing a phoneboo k or a SIM name card _________ 32
Viewing and calling phoneb ook numbers _________ 33
Voice dialling ____________________ ___________ 33
Free space in the phonebook ____ ______________ 34
Creating a Category of card s ___________________ 34
My card ______ _____________________ ________ 35
My number(s) display _____________ ___________ 35
Fixed dialling numbers _ ___________________ ____ 35
Export _____________ ___________________ ____ 36
Page 37 Camera
Page 40 Fun & media box
Page 46 Calendar
Page 46 Network services
Page 47 i-mode™
Page 58 Settings
Page 69 Appendix
Page 75 Index
Taking a picture __________________________ ___ 37
Adjusting your pic ture ___ ______________________ 38
Storing/erasing you r picture _______ _____________ 39
Self timer _______________ ___________________ 39
Pictures __________ ______________________ ___ 40
Melodies __________ __________________ _______ 41
Games & applications _________________ _______ 42
Speech notes ______ _________________________ 43
Others ____________ __________________ _______ 44
Storage used ________________________ _______ 45
User interface _____________________ __________47
i-mode menu _____________________ __________47
i-mode applications _____________ _____________48
Mail system ____ __________________ __________ 51
Mail system settings _______________________ ___ 55
Quick access t o i-mode basic features _____ _______ 56
Tones ____________ __________________ _______ 58
Display ________ _____________________ _______ 59
Keypad ___________ __________________ _______ 60
Voice mail _______________ ___________________ 61
Phone settings __ __________________ __________ 61
GSM services _______________________________ 63
Security features ___ ______________________ ___ 67
Glossary __________ ______________________ ___ 69
Trouble shooting _____________________________ 70
Error messages __________ ___________________ 71
Specific Absorption Rat e Data __________________ 74
Information from the World H ealth Organisation ____ 74
Contents
1-
Contents
2-
Page 2
INTRODUCTION
ertain mobile phone feat ures are dependent on the capabilities and se ttings of your service
provider’s network. Add itionally, certain features may not have been activated by your
C
service provider, and/ or the provider’s network settings may limit th e features' functionality.
Always contact your ser vice provider about feature availa bility and functionality. All featu res,
functionality, and other produ ct specifications, as well as the information containe d in this user’s
guide are based upon the latest available information and are believ ed to be accurate at t he
time of printing. Mo torola reserves the right to change or modify an y information or
specifications witho ut notice or obligat ion.
MOTOROLA and the St ylized M Logo are registered in the US Patent & Trade mark Office. The
Bluetooth trademar ks are owned by the ir proprietor and use d by Motorola, Inc. under license.
Java and all other Java-base d marks are trademarks or registere d trademarks of Sun
Microsystems, Inc. in the U.S. and other countries. Americ a Online, AOL, the America Online
& Design logo, the AOL & D esign logo, and the Triangle Log o, are registered trademarks of
America Online, Inc. in the United States and/or other countries. All other product or service
names are the property of their respective owners.
© Motorola, Inc., 2006.
Any changes or modification s to the radio phone which are not expres sly approved
by Motorola will void approved by Mo torola, will void the user’s authority to operate
the equipment.
Manual Number: 6803622D08
Safety and General Information
IMPORTANT INFO RMATION ON SAFE A ND EFFICIENT OPE RATION. READ THIS
INFORMATION BEFO RE USING YOUR PHONE.
Exposure To Radio Frequency (RF) Energy
Your phone contains a tr ansmitter and a receiver. Wh en it is ON, it receives and tran smits RF
energy. When you use y our phone, the system handlin g your call controls the pow er level at
which your phone transmit s.
Your Motorola phone is de signed to comply with local re gulatory requirements i n your country
concerning exposu re of human being s to RF energy.
Operational Precau tions
For optimal phone per formance, and to ensure that human ex posure to RF energy is within the
relevant guidelines, always adhere to the following instruc tions.
External Antenna C are
If your phone has an external an tenna, use only the supplied or Mo torola-approved
replacement antenna . Unauthorised antennas , modifications, or att achments could damage
the phone and/or ma y result in non-comp liance with local regul atory requirements in y our
country.
Do NOT hold the ex ternal antenna when the phon e is IN USE. Holding the external antenna
affects call quality and may c ause the phone to operate at a higher pow er level than needed.
Phone Operation
When placing or receiving a ph one call, hold your phone as you woul d a fixed-line phone.
Body-Worn Operation: Voice Communication
To maintain complia nce with RF energy exposure guidelines, if you wear a phone on your body
when when transmitting , always place the phone in a Motorola-supp lied or approved clip,
holder, holster, case , or body harness desig ned for this product. U se of accessories not
approved by Motorola ma y exceed RF energy exposure gu idelines.
If you do not use one of the body -worn accessories approv ed or supplied by Motorola, and are
not using the phone held in t he normal use position, ens ure the phone and its antenn a are at
least 2.5 centimetres (1 inc h) from your body when transmittin g.
1
Introduction
3-
Data Operation
When using any data feature of the pho ne, with or without an accessory cable , position the
phone and its anten na at least 2.5 centimetres (1 in ch) from your body.
Approved Accessories
Use of accessories not approved by Motorola, inc luding but not limited to b atteries, antennas,
and convertible covers, may cau se your phone to exceed RF energ y exposure guidelines.
For a list of approved Motorola acc essories, visit our website at www.m otorola.com.
RF Energy Interference/Co mpatibility
Nearly every electronic device is susceptible to RF e nergy interference from external sources
if inadequately shielded, designed, or otherwise configured for RF energy compatibility.
In some circumstances your phone may cause interference.
This device complies with Part 15 of the FCC Rules. Operation is subject to the following
two conditions: (1) this device may not cause harmful interference, and (2) this device must
accept any interference received, including interference that may cause undesired operation.
Hospitals and Other Facilities
Turn off your phone in any facility whe re posted notices ins truct you to do s o. Such facilities
may include hospitals or health car e facilities using equipment that is sensitive to external RF
energy.
Aircraft
Turn off your wireless device whenever instructed to do so by airline staff. If your device has a
flight mode or simil ar feature, consult airline staff about use in flight. If your device offers a
feature that automatically turns on the phone, then turn off this feature before boarding an
aircraft or entering an area where the use of wireless devices is restricted.
Medical Devices
Pacemakers
Pacemaker manufacturers recommend that a minimum separ ation of 15 centimetres (6 inches)
be maintained between a handh eld wireless phone and a pacem aker.
If you have a pacemaker, you:
- ALWAYS keep the ph one more than 15 centimetres (6 in ches) from your pacemaker when
the phone is turned ON.
- NOT carry the ph one in the breast pocket.
- Use the ear oppos ite the pacemaker t o minimise the po tential for interferenc e.
- Turn OFF the phone immed iately if you have any reason to suspect that interferen ce is
taking place.
Hearing Aids
Some digital wireless phones may interfere with some hea ring aids. In the event of such
interference, you may want to consult your hearing aid manufacturer to discuss alternatives.
Other Medical Devices
If you use any othe r personal medical de vice, consult the man ufacturer of your device to
determine if it is adequately shield ed from RF energy. Your doctor m ay be able to assist you in
obtaining this information.
Use While Driving
Check the laws and regulat ions on the use of phones in the area where you drive. Always obey
them.
When using your phone while driving , please:
- Give full attention to drivin g and to the road. Usi ng a phone may be dist racting in certain
circumstances. Discontinu e a call if you can’t concentrate on drivin g.
- Always use hands-free operat ion.
- Pull off the road and park before making or answering a call if driv ing conditions so require.
Best practices for resp onsible driving can be found in the “Wirel ess Phone Safety Tip s” at the
end of this guide and/or at the Motorol a website: www.motorola.com/callsmart.
Operational Warnings
For Vehicles With an Air Bag
Do not place a phone in the area over an a ir bag or in the air bag deployment area. Air bags
Introduction
4-
inflate with great force. If a ph one is placed in the air bag deploy ment area and the air bag
inflates, the phone may be prop elled with great force and caus e serious injury to occupants of
the vehicle.
Petrol Stations
Obey all posted s igns with respect to the use of radio equipment in petrol stations. Turn off your
wireless device if instructed by authorised staff.
Potentially Explosiv e Atmospheres
Turn off your phone prior to ent ering any area with a potentially expl osive atmosphere. Do not
remove, install, or charge ba tteries in such areas. Sparks in a potentially explosive atm osphere
can cause an explosion or fire resulting in bodily injury or even dea th.
The areas with pot entially explos ive atmospheres referred to abov e include fuellin g areas
such as below decks on boats, fuel or ch emical transfer or storage facilities, and areas where
the air contains chemicals or particles, such as grain, dust, or metal powders. Areas with
potentially exp losive atmosphe res are often but not always posted .
Blasting Caps and Blasting Areas
To avoid possible inter ference with blasting operation s, turn OFF your phone when you are
near electrical blastin g caps, in a blasting area, or in areas posted “Turn off elect ronic devices.”
Obey all signs and instructions .
Damaged Products
If your phone or bat tery has been submerged in water, punct ured, or subjected to a severe fall,
do not use it until you take it to a Motorola Auth orised Service Centre to determine if it has been
damaged. Do not attempt t o dry it with an external heat source, suc h as a microwave oven.
Batteries and Chargers
Batteries can cause prope rty damage and/or bodily injury such as burns if a conductiv e material
such as jewellery, key s, or beaded chains touch exposed terminals. The c onductive material
may complete an electrical circuit (sho rt circuit) and becom e hot. Take care w hen handling a
charged battery, particularly when placing it inside a pocket, purse, or other container with
metal objects. Use only Motoro la Original™ batteries and charg ers.
To avoid risk of personal injury, do not dis pose of your battery in a fire.
Your battery, charger, or pho ne may contain symbols, defined as follows:
SYMBOL DEFINITION
032374o
Important safety in formation will follow .
Your battery or phone should no t be disposed of in a fire.
032376o
Your battery or phone may require recycling in accordance with loc al laws.
032375o
Contact your loca l regulatory authoritie s for more informat ion.
Your battery or phone should no t be thrown in the rubbish bin.
032377o
Your phone contains an intern al lithium ion battery.
Li Ion BATT
032378o
Choking Hazards
Your phone or its acce ssories may include deta chable parts which could p resent a choking
hazard to small children. Kee p your phone and its accessories awa y from small children.
Glass Parts
Some parts of your mobile device may be made of glass. This glass could brea k if the product
is dropped on a hard su rface or receives a substan tial impact. If glass breaks, do not touch or
attempt to remove. Stop u sing your mobile device u ntil the glass is replaced by a qu alified
service centre.
Seizures/Blackouts
Some people may be susc eptible to epileptic seizure s or blackouts when expose d to flashing
Introduction
5-
lights, such as when watc hing television or playing video games. These seiz ures or blackouts
may occur even if a person never had a pr evious seizure or blackout.
If you have experienced seizures or blackouts, or if you have a family history of such occurrences, please consult with your doctor be fore playing video games on your phon e or enabling a
flashing-light feature on your phone. (The flashing -light feature is not available on all products.)
Parents should monitor their child ren's use of video games or o ther features that incorporate
flashing lights on the phones. All pe rsons should discontinue us e and consult a doctor if any of
the following symptoms occ ur: convulsion, eye or muscle twitching, loss of awareness,
involuntary movements, or disorientation.
To limit the likelihood of such symp toms, please take the following safet y precautions:
- Do not play or us e a flashing light feature if you are tired or need sleep.
- Take a minimum of a 15-minute break every hour.
- Play in a room in which all lights are on.
- Play at the farthest distance possible from the screen.
Caution About High Volume Usage
Listening at full volume to m usic or voice through a headset may dama ge your hearing.
Repetitive Motion Injuries
When you repetitively perfor m actions such as pressing ke ys or entering finger-written
characters, you may experience occasional discomfort in your hands, arms, shoulders, neck,
or other parts of your bod y. Follow these instruc tions to avoid problems such as tendonitis,
carpal tunnel syndrome, or other musculoskeletal disorders:
- Take a minimum 15-minute break every hour of game playing.
- If your hands, wrists, or arm s become tired or sore whi le playing, stop and rest for s everal
hours before playing again.
- If you continue to have s ore hands, wrists, or arm s during or after play, s top playing and
see a doctor.
The informati on provided in t his document supersedes th e general safety information i n user
1
guides publish ed prior to Januar y 28, 2005.
Use and Care
To care for your Motorola phone, pleas e keep it away from:
LIQUIDS OF ANY KIND
Do not expose your phone to wate r, rain, extreme humidity, sweat, or ot her
moisture.
EXTREME HEAT OR COLD
Avoid temperatures belo w -10°C/14°F or above 45°C/113° F.
MICROWAVES
Do not try to dry your phone in a micro wave oven.
DUST AND DIRT
Do not expose your phone to dus t, dirt, sand, food, or other inappropri ate
materials.
CLEANING SOLUTIONS
To clean your ph one, use only a dry soft cloth. Do not use alcohol or other c leaning
solutions.
THE GROUND
Do not drop your phone.
Introduction
6-
Page 3
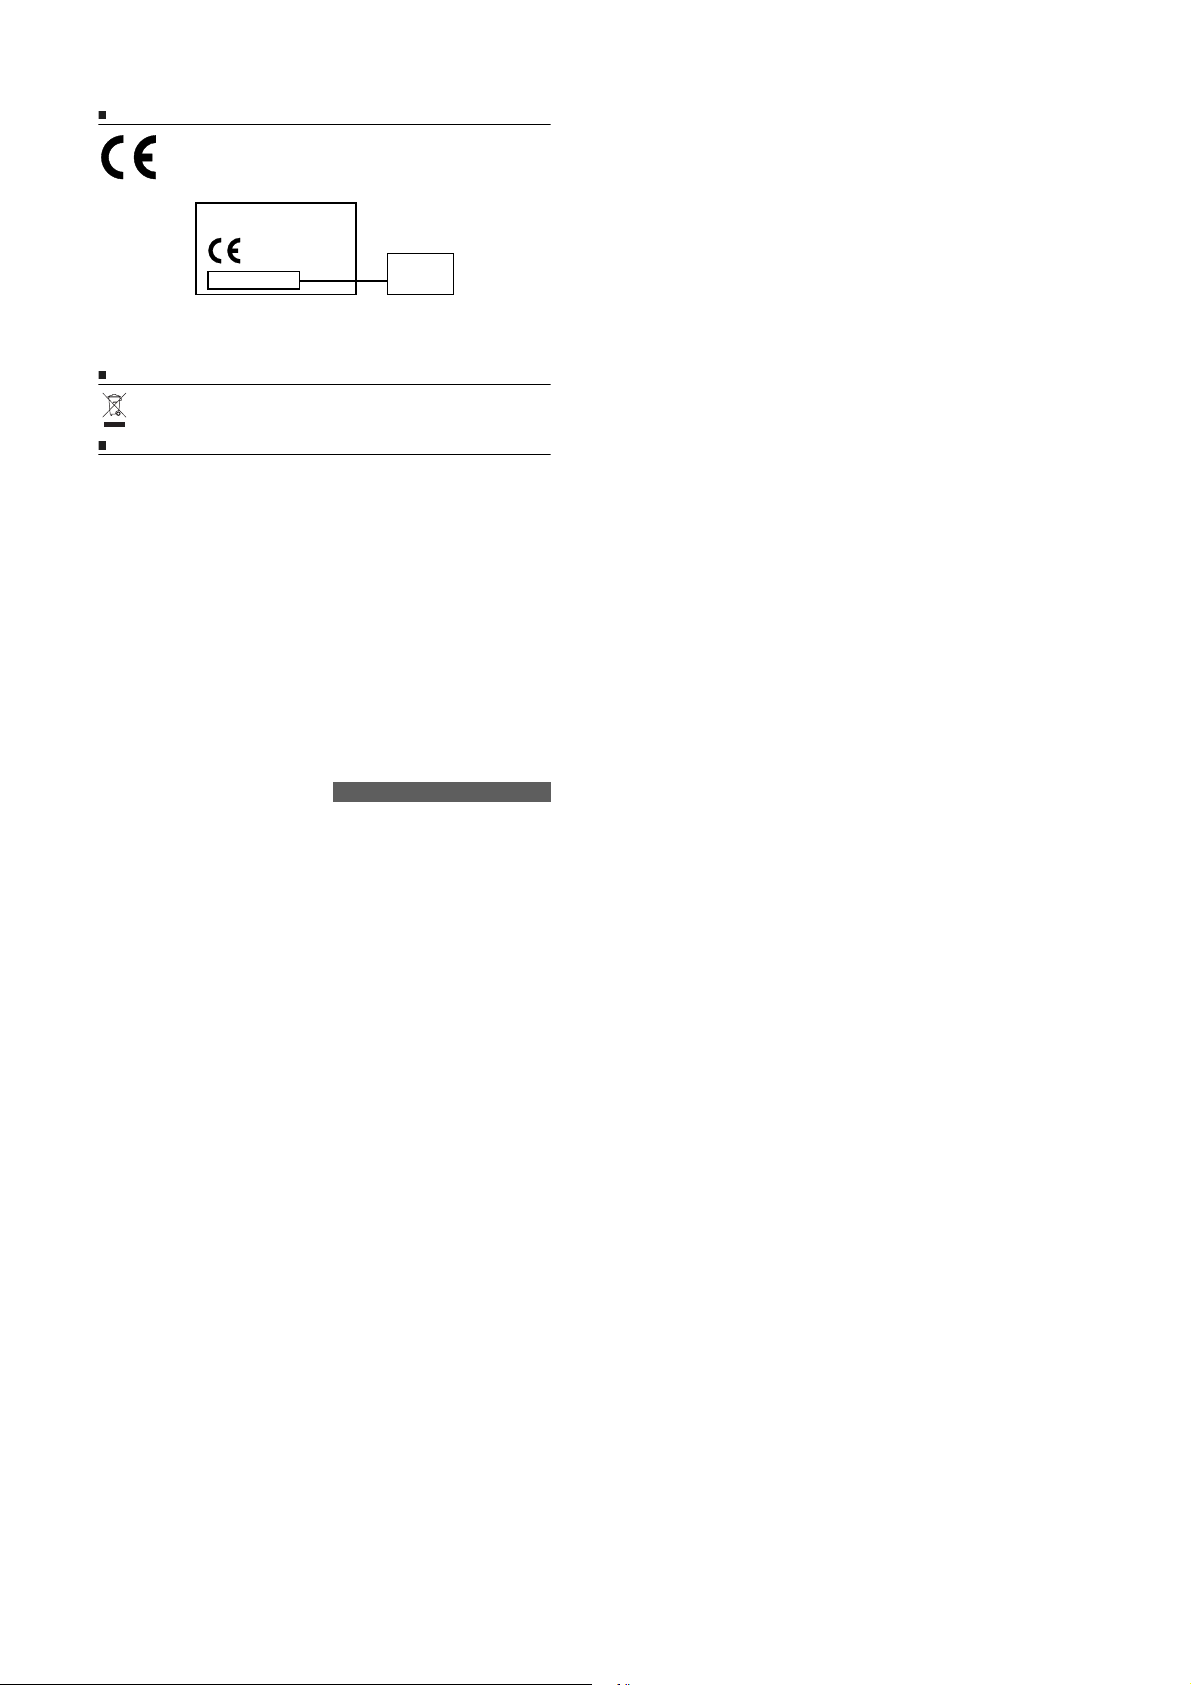
European Union Directives Conformance Statement
Hereby, Motorola declares that this product is in compliance wit h:
- The essential requirements and other relevant provisions of Directive 1999/5/EC
- All other releva nt EU Directives
IMEI: 350034/40/39 4721/9
0168
Type: MC2-41H14
The above gives an example of a typical Product Approval Num ber.
You can view your product's Decla ration of Conform ity (DoC) to Directi ve 1999/5/EC (the
R&TTE Directive) at www.motorola.com/rtte - to find your DoC, enter the product Approval
Number from your product 's label in the Search bar on the website.
Product
Approval
Number
Caring for the Environment by Recycling
When you see this symb ol on a Motorola product, do not dispose the product
with household waste.
Recycling Mobile Phones and Accessories
Do not dispose of mobile phones or electr ical accessories, such as chargers or headsets, with
your household waste. In some countries or regions, collection systems are set up to handle
electrical and electronic was te items. Contact your region al authorities for more details. If
collection systems aren’t available, return unwanted mobile phones or electrical accessories to
any Motorola Approved Se rvice Centre in your region.
Introduction
7-
Page 4
USING THIS GUIDE
lease carefully read this user guide. It contains inf ormation about your p hone and the way
that it operates on th e network. Some of the features described in this user guide are
P
network dependent. Do n ot forget to check with you r service provider which o f these you can
use. You may need to take out additi onal subscriptions to activate cert ain features.
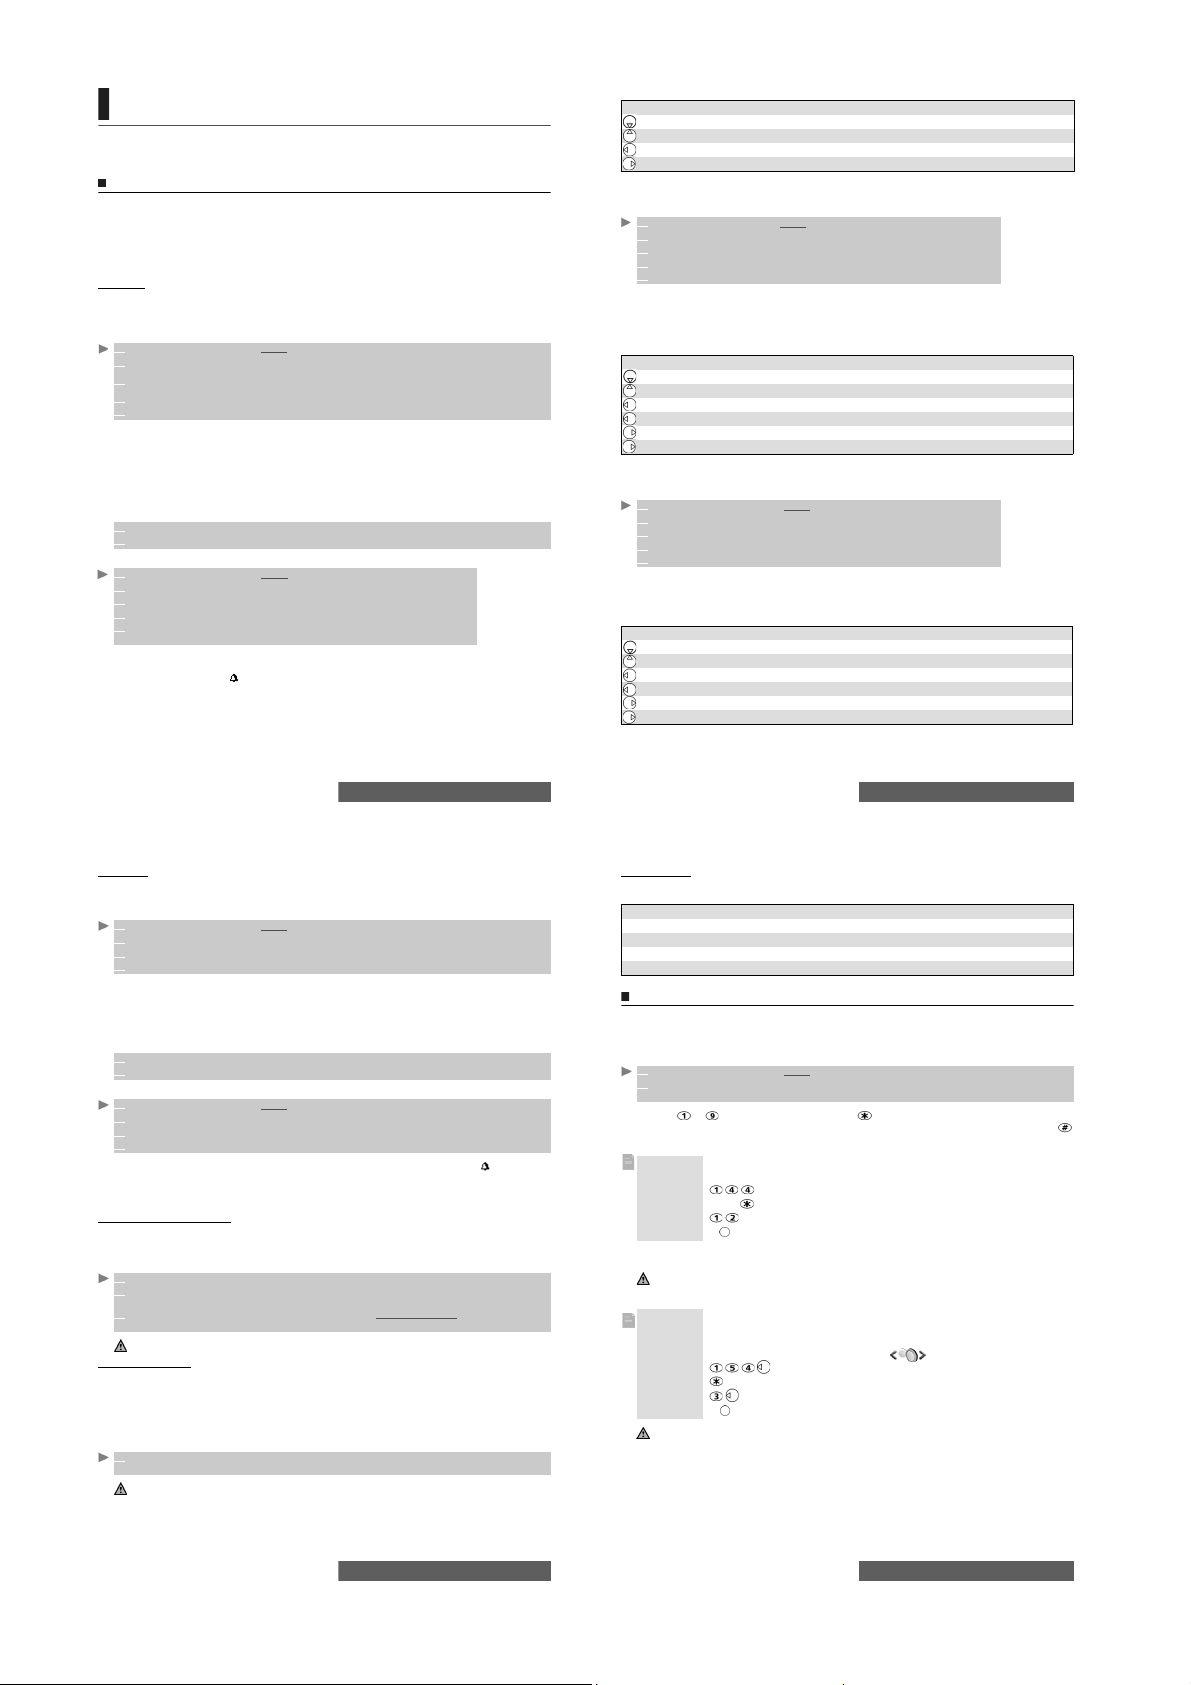
Key functions
These are the keys available on your keypad.
OK key in the middle of t he navigation key to select highlighted item and ac cess the main
menu: see pictures below).
Menu key (to access the Main menu from the Idle screen or to access op tions lists when
indicated on the display).
Left softkey (to validate item in bottom left display prompt, usually an action).
Right softkey (to validate item in bottom right dis play prompt, usually Exit).
Right arrow on navigation key.
Left arrow on navigation key.
Up arrow on navigation key.
Down arrow on navigation key.
Send and Call key.
End, On and Off key.
Main menu
The availability of the Calendar or Network services menu depends on
your SIM card.
Following user guide instructions
The following are examples of ho w to follow the instructions contain ed in this user guide.
Press OK
Press the Menu key.
Select
Settings.
Select Read (item above
left softkey)
Select ’Cancel’
or ’Exit’ (item above
right sof tkey)
Select Melodies Use the nav igation key to scroll u p, down, left or right to the requ ired
View... The ... indicates that more options or s ub-menus are available when
Using the dynamic scroll panels
When scrolling the menu, this scroll panel type g ives you a clear view of t he information to be
entered.
1 The list of elements to be ent ered is displaye d. Scroll down to the field(s) yo u want to fill in
and press OK.
2 Enter the re quested informa tion or select the requested item an d select OK to validate.
3 Fill in as many f ields as necessar y and select Save to store all the information entered.
The arrow keys displayed at the bottom of the screen show the scrolling possibilities.
Press the key to select OK.
From the standby display press the key to access the main
menu, scroll up, down, left or right to th e
press OK to access the sub- menu.
Press the key undernea th Read.
Press once to retur n to the previous screen. Press and hold
to return to the standby screen (except whilst in the i-mode menu).
menu item and validate by pressing OK.
E.g. ’Select Melodies’: scroll to Melodies
OK key to validate your selection.
pressing OK.
Settings menu item and
menu item and press the
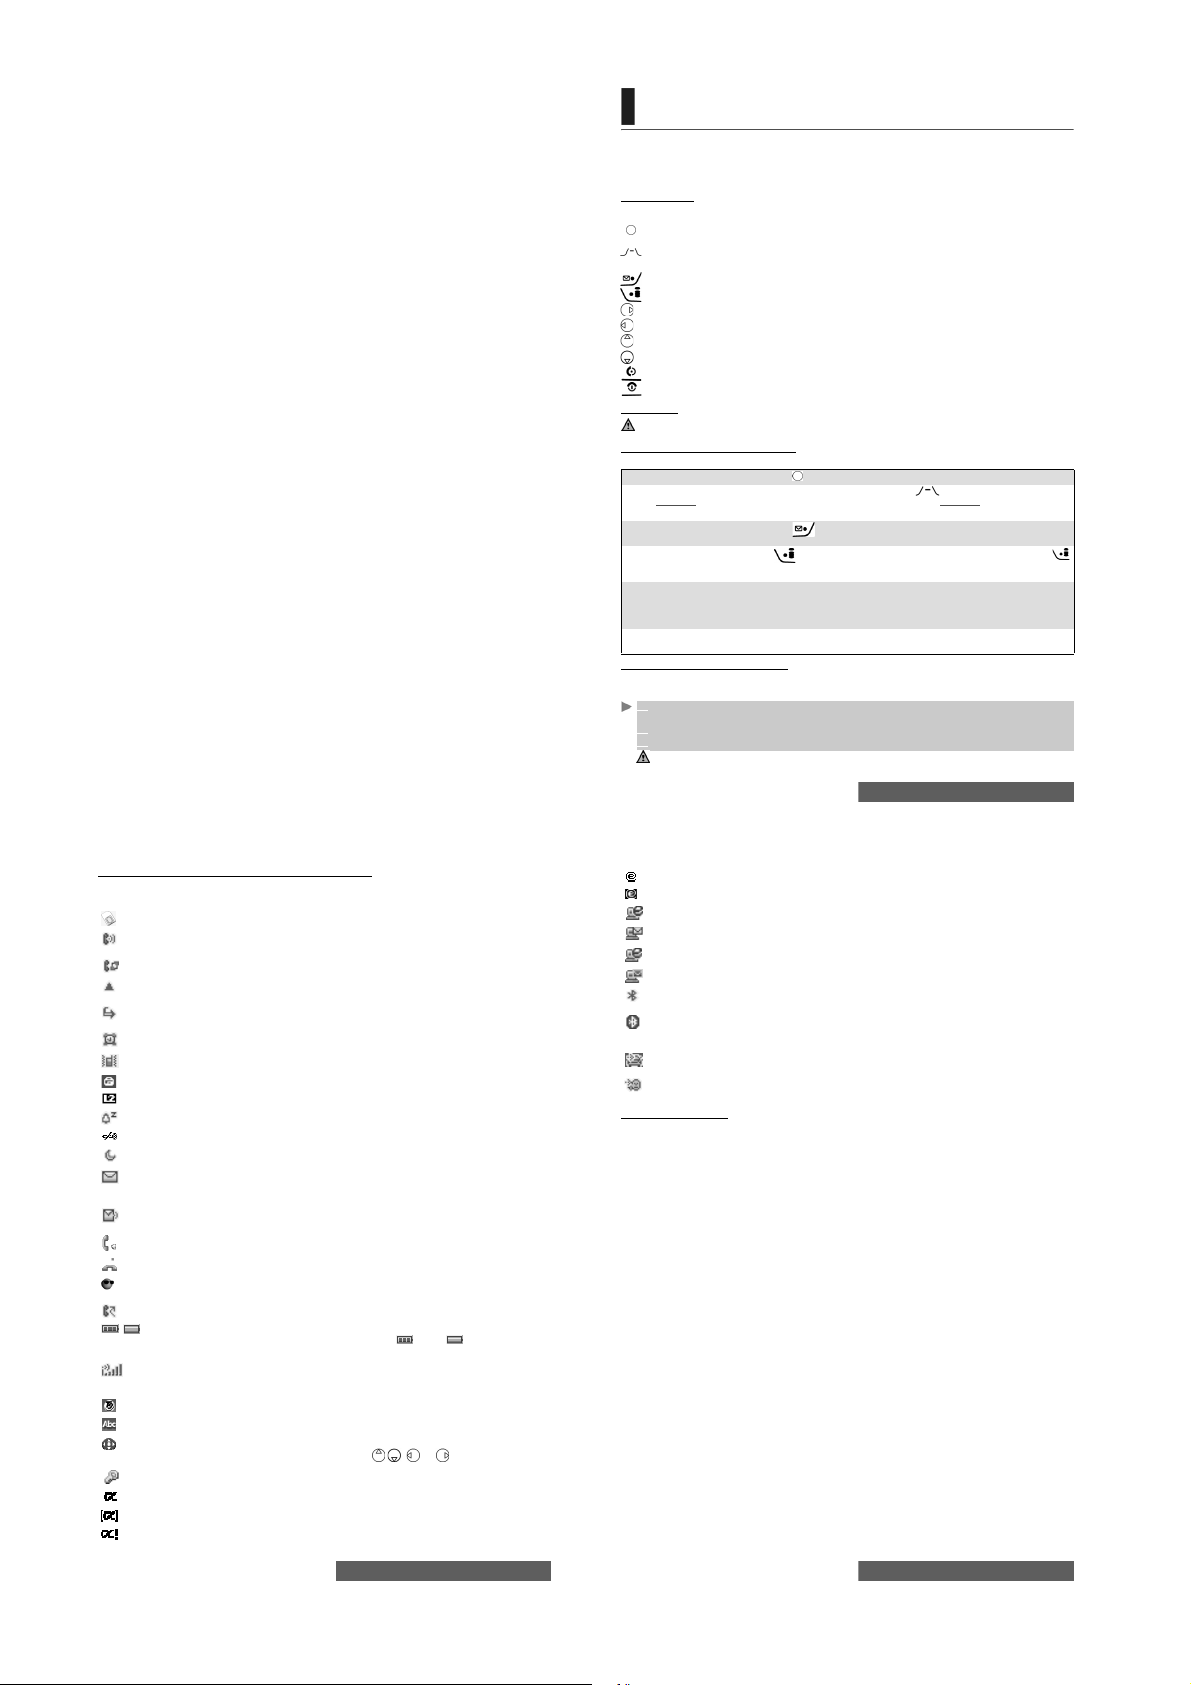
Understanding the graphic display indicators (icons)
The icons indicate the phone state and operational condition s when in use.
The following ico ns may be displayed :
SIM memory in use
GPRS service icon. This indicates th at data packet services or connection to the i-mode
are available.
GPRS connection icon. This is displayed when a GPRS connection is in progress.
Roaming. This is displayed when the phone is connected to a network other than its
home network.
Call diverting. This indicates that all incoming calls are be ing diverted. Call divert ing is
network depend ent.
Alarm clock.
Vibrate alert.
Keypad lock.
Line 2. This indicates that the second line is in use (subscription dependent).
Silent mode on.
Mute.
Auto-switch-off mode on.
Short message ser vice (SMS). This is displayed when one or more SMS have been
received and not yet read.
box is full and no new mes sage can be store d. SMS availability is network depend ent.
Voice Mail. This is displayed when a Voice Mail mes sage has been received and stored
by the network's Voice Mail centre. Voice Mail availability is network dependen t.
Outgoing Call.
Incoming Call.
Withheld number. This is displayed when the caller does not wish his identity to be
shown.
Unanswered call. This is displayed when an inco ming has not been answered.
Battery level indicator. This is permanently displayed to show the current battery
charge level. Thre e levels are shown: from f ull (3 bars) to low ( no bar). If the icon
is empty, the mobile needs re charging.
Signal strength level. There are five strength levels. These show the strength of the
received signal. T he more bars shown, the stronger the signal. If the net work cannot be
found, no strength level i s displayed.
Tegic edit mode.
Multitap edit mode.
Arrow keys. These icons are displayed during menu operation to indicate that more
items in the menu c an be accessed by pr essing
Secured connection. This icon is displayed when a secured connection is in progress.
Games & Applications software in use.
Games & Applications icon. Displayed when a game or an application is running.
Problem with the Games & Applications auto-start.
A red envelope icon is di splayed when the SMS message
or .
Using this guide
8-
Mail or MMS on mobile
Mail or MMS box on mobile full
Mail on server
MMS on server
Mailbox on server full
MMS box on server full
Bluetooth active. This icon is displayed when the Bluetooth service is activated on the
mobile phone.
Bluetooth connection with another device active. This icon is displayed when the
mobile is connec ted to another Bl uetooth device, except when conn ected to ’My car k it’
and ’My headset ’.
Bluetooth connection with ’My car kit’ active. This icon is displayed when the mobile
is connected to ’My car kit’.
Bluetooth connection with ’My headset’ active. This icon is displa yed when the mobile
is connected to ’My headset’.
Figures on Menu list
When on a menu list, you c an select the required item by scrolling up or dow n and pressing the
OK key.
Using this guide
9-
Using this guide
10-
Page 5
GETTING STARTED
Preparing the phone for operation
Please r efer to you r Quick Sta rt Guide.
Basic operations
Turning the phone on
1
Press and hold the On/Off key. A beep sounds when the mobile is activated. When switching
the mobile on for the first time or if the phone has been incorrectly switched off may be
displayed.
2 If your SIM card is PIN protected, Enter PIN is displayed.
Enter the PIN cod e and select OK.
3 If prompted, enter the date & time settings or select Exit if the settings are correct.
Please refer to "Security features", page 67 for more details on your PIN and lock codes.
If an image is set as a Welcome s creen and/or a melody has been se t as a Welcome melody, the
mobile first requests the PIN c ode then shows the selected image/animation and plays the selected
melody before showin g the standby screen (see "Settin g an image as standby scr een, a Welcome
screen or a Goodbye screen fro m the pictures folder", page 41 and "Melod ies", page 41).
Making a call
The phone can make and receive calls only when it is switched on, when a valid SIM ca rd is
inserted and when it is connect ed to a GSM, DCS or PCS network serv ice.
If the keypad is locked you can receive c alls but you cannot make a ny (see "Keypad lock", page 1 2).
To make a call:
1 Dial the phon e number or selec t one from your phone book (press the dow n arrow key from
the standby scree n and select one of the available names).
2
Press the Call/Send key ( is displayed).
To maintain high au dio quality during calls, please note the location of the phone's microphone
and keep this area free of obst ruction during use.
Whilst in conversation the Options list (AutoDTMF, Hold or Retrieve, Speaker On or Speaker
Off, Mute or Unmute, End call and Record) is activated. The Main menu is availab le by
pressing the Menu key.
In compliance with European regulations, you are obliged to infor m the person you a re
speaking to before recording a phone co nversation.
1. When using the hands-free mode, do not put the phone to your ear.
2. The option Route to phone or Route to headset may appear if a bluetooth device is connected.
Answering a call
When receiving a phone call ( is displayed):
1 Press the Call/Send key.
If a Bluetooth accessory (headset or car kit) is connected to the mobile and you wish to take the call on the
handset, press Options and select Route to phone or select Phone (Left softkey).
Rejecting a call
When receiving a phone call :
1 Press the On/Off key to reject the call (the call is then forwarded to your mailbox).
Ending a call
1 Press the On/Off key.
Getting started
11-
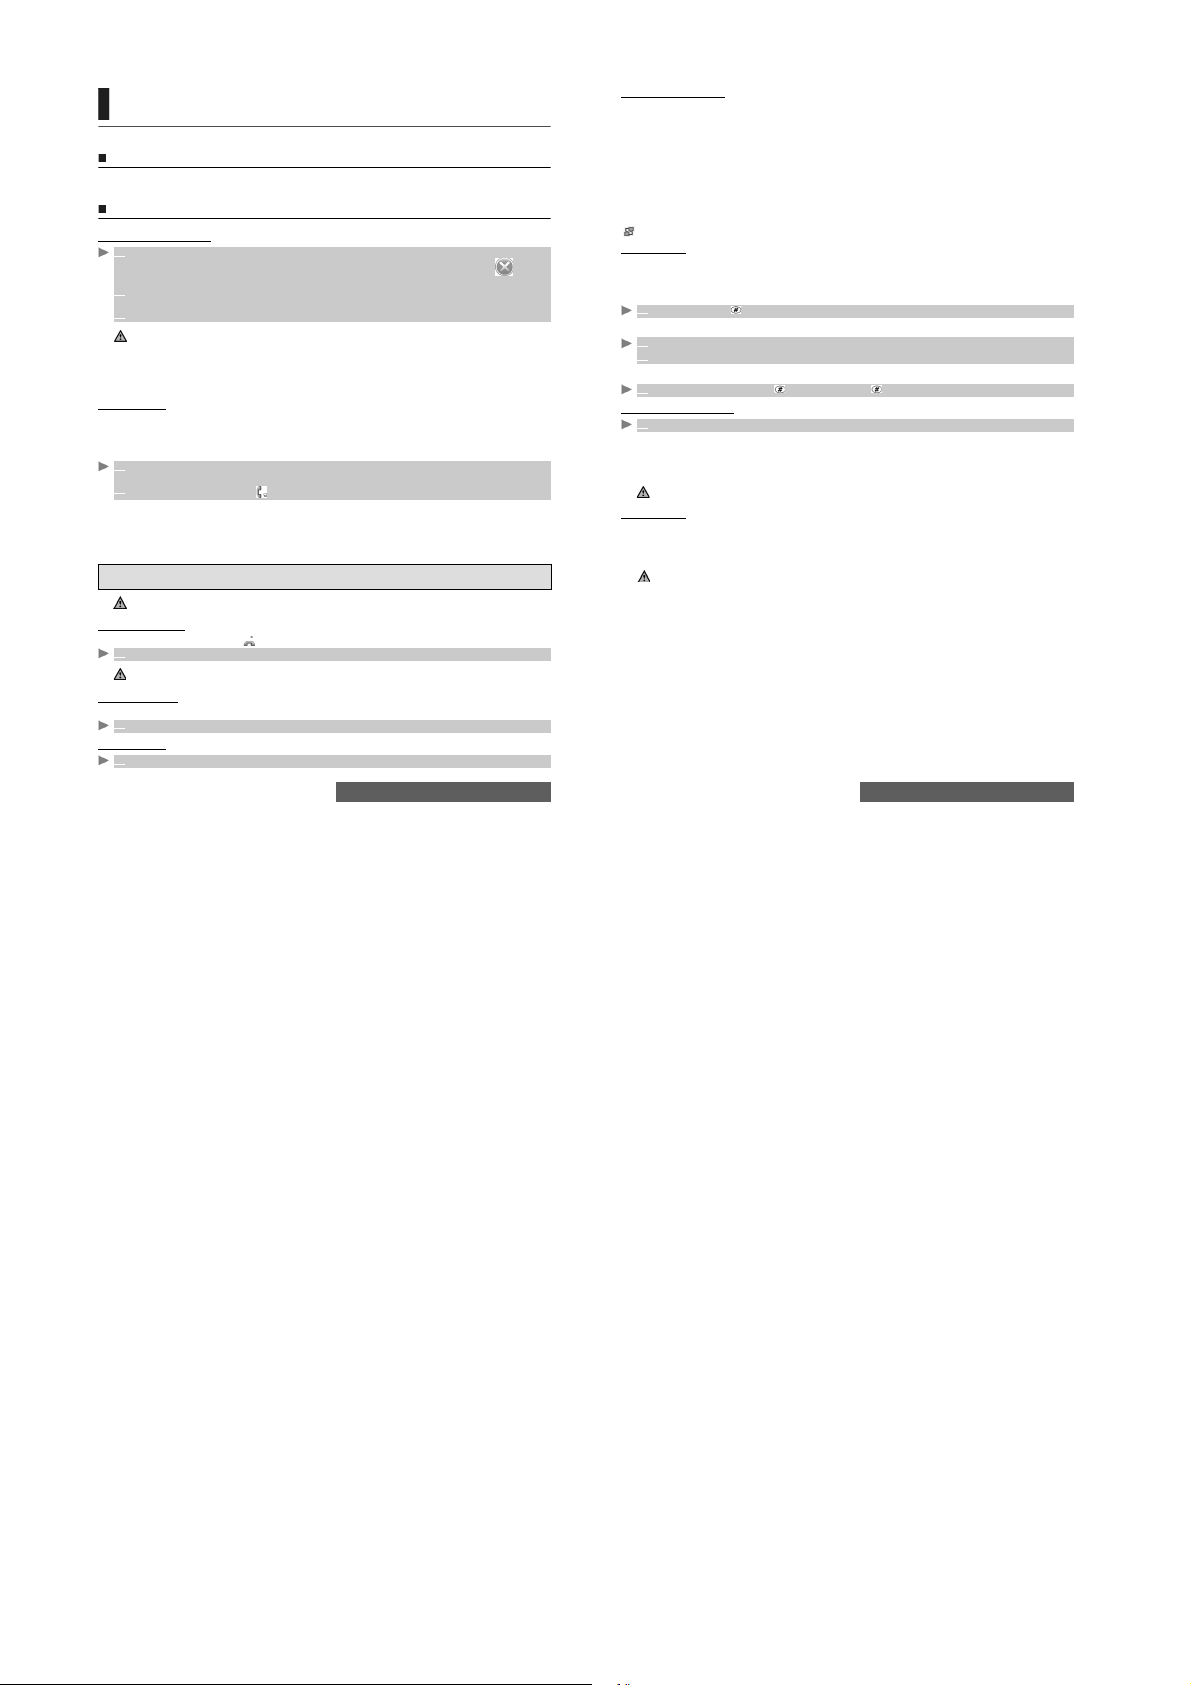
The Standby screen
When switched on, t he mobile searches for connection with the ne twork. Once the co nnection
has been established, a beep sounds and the network and/or service provider nam e or logo
are displayed together wit h the time and date, the signa l strength and the battery charge level.
If the mobile cannot f ind a valid network, t he signal strength an d the operator name a re not
displayed.
The four arrows indicate that feature s can be accessed via the four arrows on the navigation
key.
The symbol in the middle o f the four arrows indicates that an action ca n be selected by pressing
the OK key.
Mail and i-mode indicate that you can directly access the Mail and the i-mode service by
pressing the soft keys.
indicates that your mobile is attached to a GPRS network.
Keypad lock
When activated, the keypad lock feature prevents accidental actions (e.g. camera activation) whilst
the phone is being carried in a pocket or a bag. Incoming calls can still be received and answered.
Once the call is over, the keypad lock is automatically reactivated.
To activate the keypad lock from the standby screen:
1 Press and hold . Keypad l ocked is displayed.
To activate the keypad lock from the main menu:
1 Press the Me nu key. Select Settings.
2 Select Keypad, then select Keypad lock .
To deactivate the keypad lock:
1 Select Unl ock and press , or press and hold . Keypad unlocked is displayed.
Turning the phone off
1 Press and hold the On/Off key.
A tone sounds to confirm your actio n. A Goodbye screen is displayed whilst the mobile switch es
off (you can set a Goodbye m elody and/or picture to b e played/displayed at mo bile switch off
(please see "Setting an image as s tandby screen, a Welcome scree n or a Goodbye screen
from the pictures f older", page 41 and "Melodies", page 41).
Ensure the phone is switched off before removing battery. Failure to do so may result in loss of data. This will
be indicated by a cross symbol the next time the phone is switched on.
Power saver
To allow you to enjoy optimum use of your mobile a power saver screen is automatically displayed
when the phone has not been used for more than one minute. The screen turns black.
The power saver does not prevent operation, so you can r eceive a call, an SMS, etc. whilst the
power saver is on. Pressing any key returns you to an active screen.
If a PC cable is connected to the mobile and the PC is in idle mode, the battery may become flat after a while.
To enjoy optimum use of your mobile standby and talk time, please do not forget to disconnect the PC cable
after use.
Getting started
12-
Page 6
TOOLS
T
he Tools menu allows access to the diary, calculator, currency converter, alarm clock and
Bluetooth.
Diary
The Diary has three parts:
-The Calendar (to manage events)
-The Tasks list (to manage tasks)
-The Storage used (to give information on the memory used)
An event is a d iary entry that h as a direct effect o n your timetable (e .g. a meeting).
A task is a diary entry that has no direct effect on your timetable (e.g. organising a journey).
Calendar
The calendar allows you to store up to 100 events scheduled to occur either once, daily, weekly,
monthly or yearly. Each entry ca n contain up to 50 characters plus a reminde r alarm. Events
may be viewed on a daily, a wee kly or a monthly basis, and may be sent by SM S.
To enter an event:
1 Press the Menu key. Select Tool s.
2 Select Diary.
Select Calendar. A Monthly or Daily view is displayed (th e Daily view is displa yed if an event
3
is related to the current day).
4 Select Options.
5 Select New event .
An empty new event card is display ed with the following fields:
-Title (u p to 10 charact ers)
-Description (up to 50 charac ters)
-Start date & time
-End date & time
-Alarm
-Location
-Repetition
6 Enter o r select the requ ested data. Conf irm each entr y by pressing OK.
7 Select Save t o confirm da ta storage.
To view the current day’s entries:
1 Pr ess the Menu key. Select Tools.
2 Sele ct Diary.
3 Sele ct Calendar.
4 Sele ct Options.
5 Sele ct View... and then Today to view the current day’s entries or select Day
view to view the selected day’s entries.
In the Today view each event is displayed on one line as follows :
-A graphic representation ( ) if an alarm h as been set
-The event start time.
-The first part of the event title.
Red events indicate that two or more events clash.
The following actions are available:
ACTION FUNCTION
An Options list is available. It lets you change t he current View...
Modify event, Send by SMS or Bluetooth, Export..., Delete event or Delete all events.
To view weekly entries:
1
Press the Menu key. Select Too ls .
2 Select Diary.
3 Select Calendar.
4 Select Options.
5 Select View... and then Week view.
The week’s events are display ed in chronological order. Each event is represented as a bar. Its
length depends on its d uration. Red indicates clashes. Purple in dicates that the alarm has been
activated.
The following actions are available:
ACTION FUNCTION
(short press) To move to the previous day
(long press) To scroll to the previous week
(short press) To move to the following day
(long press) To scroll to the following week
An Options list is available. It allows you to change the current View...
Export... Events in period (events in a defined period) or All events or Delete all events.
To view monthly entries:
1
Press the Menu key. Select Too ls.
2 Select Diary.
3 Select Calendar.
4 Select Options.
5 Select View... and Month view.
The whole month i s displayed.
If the selected mon th is the current one, the da te is ringed i n a different colour. Colours ar e used to
indicated the days (and alarm activation) of the stored events. The following actions are available:
ACTIONS PURPOSE
(short press) To move to the previous day
(long press) To scroll to the previous month
(short press) To move to the following day
(long press) To scroll to the following month
An Options list is available. It allows you to change the current
Export... Events in period (events in a defined period) or All events
To move down to the next event or loop back to the first one
To move up to the previous event or loop down to the last one
To move to the previous day
To move to the next day
, Create a New event or
To move down to the next time interval
To move up to the next time interval
, create a New event,
To move down within the current display
To move up within the current display
View..., create a New event
or
Delete all events
.
,
Tools
13-
Tasks list
This feature allows you to store up to 100 tasks to be done (To do), scheduled with a start and
a due date, with or without a remin der alarm.
To enter a new task:
1
Press the Menu key. Select Tools .
2 Select Diary.
3 Select Tasks list.
4 Select New task and enter the required information.
An empty task card is displayed with the following fields:
- A title
- A description
- A starting dat e
- A due date
- An audio alar m which can be activated at your sp ecified time
5 Enter o r select the requ ested data. Conf irm each entr y by pressing OK.
6 Select Save t o confirm da ta storage.
To display a tasks list:
1
Press the Menu key. Select Tools .
2 Select Diary.
3 Select Tasks list.
4 Select Curren t tasks or Elapsed tasks.
The tasks are displayed in a list, ordered by date. If an alarm is activated for a task is displayed.
An Options list is avai lable. It allows you to crea te a New task, Modify task, Send... a task by
SMS, Mail or Bluetooth, Export Tasks in period or All tasks, to Delete task or Delete all
tasks period.
Exporting an event/a task
The Export... option allows you to create a file so as to exchange events or tasks with another
device such as a PC or another mobi le. The created file can contain all the events or tasks
stored in the calendar or in the tasks list (select All events/tasks ) or in a time interval (Select
Events/Tasks in period).
1 Press Options (from the Day , Week or Month view). Scroll down an d select Export...
2 Select All events/tasks or select Events/Tasks in period then define the time pe riod
(Between / And) and select Export.
3 The expo rted file is stored in the Others folder of the Fun & Media box menu. You can then
send it to anothe r device (please see "Others", page 44).
The exported calendar or tasks list item is stored as a .vcs file.
Alarm notificatio n
The alarm notification screen is displayed at t he specified time according to the event or task
to which it relates.
If it is not acknowledged, the alarm stops ringing after 60 seconds. It automatically restarts after a
snooze time until it is stopped or up to the beginning/ending time and date of the event/task. If t he
phone is off at alarm time, it autom atically switches on.
If the phone is lock ed or if the PIN setting is on, the phone returns to this locked s tate after the
alarm has rung until you use it.
1 Press Va lid to acknowledge the alarm or press Snooze to repeat the alarm after th e snooze
period.
Snooze is only available on an event alarm.
Tools
14-
Storage used
This feature displays th e number of Diary regi stered events and task s. The following actions
are available in the Options menu:
ACTIONS PURPOSE
Delete events To delete the events of the defined time period.
Delete tasks To delete the tasks of the defined time period.
Delete all events To delete all the events stored in Calendar.
Delete all tasks To delete the tasks stored in the Diary.
Calculator
This feature allows you t o make simple calcula tions using + (plus), - ( minus), * (multiplicatio n),
/ (division) and % ( percentage) functions.
If the currency converter is activate d, numbers can be converted during calculations.
To use the calculator
1
Press the Menu key. Select Too ls.
2 Select Calculator.
The phone is ready to perform simple calculations.
Press keys to to enter numbers . Press the multitap (for further det ails on the multitap
text entry method please se e "Entering text", page 22) to get + , -, * and / symbols. Use the
multitap to enter decimal points or %.
Press Clear du ring a calculation to correct an entry. Press = to get the operation result.
Example 144 x 12 = 1728
In the above example, pressing = again calculates 1 728 x 12 = 2073 6
Pressing Clear deletes the result.
The % function can only be used (entered) as the last operation during a calculation.
e.g. 250 - 10% = 225
An integrated currency convert er facility is also available. See Curren cy converter below.
Example
1. This example was made on the basis of the following exchange rate: €1 = £0.61871
2. The Currency converter feature can be accessed from the Calculator and from the Currency converter
submenus.
:
key sequence display
144
Press three times *
12
= 1728
using the currency converte r £ - €:
€ 154 + € 3 = £ 97.1374
key sequence display
Select Curr.
95.2813
+
1.8561
= 97.1374
15-
Tools
16-
Tools
Page 7

Currency converter
This feature allows currenc y converting. The currencie s and exchange rates must be en tered
prior to use. The conversion is c alculated on the per unit exchange rate of th e second selected
currency.
To select the currencies and the exchange rate:
1
Press the Menu key. Select Tools .
2 Select Curren cy converter.
3 Select Settings.
4 Enter the first currency name (e.g. Euro). Press the OK key.
Enter the second currency name (e.g. Dollar). Press the OK key.
Enter the exchange rate using to en ter a decimal poi nt.
5 Press the OK key to validate the entry. Press Save to confirm dat a storage.
To calculate the conversion between the selected curren cies:
1
Press the Menu key. Select Tools .
2 Select Curren cy converter.
3 Select one of the first two options.
4 Enter the amount to be converted. Press to insert a decimal point if needed.
5 Press the OK key. The converted amount and the exchange rate information are displayed.
Alarm clock
This feature allows you to se t a daily Reminder Alarm.
To set a time and turn the alarm on:
1
Press the Menu key. Select Tools .
2 Select Alarm cl ock.
3 Select On and enter the alarm time or press the OK key to validate the displayed time.
is displayed when reverting to the Idle screen.
When 'on', the alarm operates at the same time every day until turned off.
If the phone is off at alarm time, it automatically switches on.
If the phone is lock ed or if the PIN setting is on, the phone returns to this locked s tate after the
alarm has rung until you use it.
If the alarm is acknowledg ed but not validated after the 3
indicators remain on the disp lay for up to 15 minutes (the mobile then eit her goes back to its
previous 'on' or 'off').
If a call is in progress at alarm time a 'Call in progress' alert beep sounds and a visual alert is displayed every
3 minutes. Validate or acknowledge the alarm in the usual way.
To use the alarm as a Reminder or a Sno oze Alarm:
1 Press No ring, or any other key (except Val id. and OK) to snooze the alarm. The alarm
icons remain on the display and the al arm starts ringing aga in 3 minutes later.
Or press Valid or OK to acknowledge the alarm and stop the alarm clo ck process.
To turn the alarm off:
1
Press the Menu key. Select Tools .
2 Select Alarm cl ock.
3 Select Off.
rd
(and final) alarm, the alarm
Bluetooth
Bluetooth connections are ra dio connections. Bluetooth c onnections allow you to excha nge
data and to launch wir eless connections bet ween the mobile and a nother phone, a comp uter,
a headset, a car kit or other devices (provided they are Bluetooth compatible). You can for
instance receive or send files such as images for your standby screen (see "Pictures",
page 40), send or receive name card s, melodies, use a Bluetooth head set...
You can send files via Bluet ooth from several menus or s ub-menus (e.g. by pressing on the
Options key
after having captured a picture, th en by selecting Send by... Bluetoot h).
To initiate a connection via Bluetooth, your mob ile must be close to ano ther Bluetooth
compatible device.
When both ports are opened, the Bluetooth connection can then b e activated and the
requested connection perfo rmed. Files (e.g name cards or pictures) are trans ferred one by one.
Caution:
If you activate the Camera or if you initiate a Speech notes recording while a Bluetooth connection
is active, the connection is automatically closed.
Opening a Bluetooth connection
To launch a connection with ano ther device, the Bluetooth conne ction must be open:
1 Press the Menu key. Select To ol s.
2 Select Bluetooth then select Settings.
3 Select Bluetooth activation. Select On. The Bluetooth connection is launched and the
mobile automatically acknowledges the state of the other device.
Allowing handset detection
This option allows you to d efine whether the handset should be detected by any dev ice or by
paired devices only:
1 Press the Menu key. Select To ol s.
2 Select Bluetooth then select Settings.
3 Select Phone is detectable. Select By all devices or Only by paired devices.
Naming your handset for other devices detection
1 Press the Menu key. Select To ol s.
2 Select Bluetooth then select Settings.
3 Select Phone name then type the required name into the edit screen.
Exporting a file to another device
When you wish to export one or seve ral files:
1 Press Options. Select Send by.... Bluetooth.
2 If the ’Send to’ list is empty, select the type of device to send the file to (A phone, A computer,
Other device).
2’ If the ’Send to’ list bears items, select the required one or select Search to find the Bluetooth
connection with the other device.
3 The Bluetoot h connection is automatically la unched, and th e file is transferre d.
Searching Bluetooth connections
You may wish to search connections with surrounding Bluetooth devices (provided their
Bluetooth connection is open an d the connection is allowed):
1 Press the [ Menu] key. Sele ct Too ls.
2 Select Bluetooth.
2’ Press Paired d evices and select Search.
Select My headset, My car kit, A phone, A computer or Other device.
3 The list of the found devices is displayed, or the ’No peer found’ message is displayed if no
Bluetooth device is found.
A ’Bluetooth passkey’ may be required by one of the other devices. The connection cannot be established if
the typed code is wrong.
Tools
17-
Accessing the list of pair ed device(s)
The paired devices are other Blu etooth compatible devices alre ady registered in the mobile:
1 Press the [Menu] key. Se lect Tool s.
2 Select Bluetooth.
3 Select Paired devices . The list of registere d paired devices is dis played. The following op tion
menu is available if device names are registered in the list:
OPTION DESCRIPTION
Edit To view/modify informa tion on the selected device.
Connect To connect the mobile to the se lected device.
Disconnect To disconnec t the mobile from the selected devic e.
Search new To search a new Bluetooth compatible device.
Delete To delete the selected de vice from the list.
Delete all To delete all the devices from the lis t.
When on a paired device n ame, pressing OK allow s you to change the devic e name but also
to define a security level:
OPTION DESCRIPTION
Accept them To accept connection requests from selected device.
Always ask me A message is displayed on each c onnection request from selec ted device
Connection with audio accessories
You can establish a wireless conn ection between your mobile phone and a Bluetooth headset
or car kit. You can then make or receive calls from the connected accessory, without handling
your mobile.
To establish a wireless conn ection with an audio accessory , please proceed as described
above ("Opening a B luetooth connection ", page 18).
When Bluetooth is activa ted, Press Paired devices and select Connect from the Options
menu.
so that you can accept or rejec t the connection.
Using your mobile as a modem
You can use your mobile as a modem for other devices (PC, PDA,...) via a PC cable or Bluetooth.
In order to activate a connection, a standard modem driver must already be installed in the other
appliance:
1 Install the PC cable on your PC or PDA or open a Bluetooth connection.
2 Install the modem drive r.
3 Configure the PC according to the instructions given with the modem driver.
Please enter the following parameters:
- Flow control: Hardware
- Data Bits: 8
- Parity: No parity
- Stop Bit: 1 stop Bit
- Speed: 11 5200b/s.
1. The PC cable may not be supplied with your mobile. Please ask your retailer for an L6 i-mode compatible
PC cable.
2. The compatibility between GPRS and i-mode features is operator dependent.
Your mobile:
1 Plug in the PC cable or open a Bluetooth connection (please refer to your Quick Start Guide).
Once both devices are ready, the Internet connection can be activated (without any action being
performed on your mobile).
18-
Tools
19-
Tools
Page 8
MESSAGES
T
his section describes the c ontents of the Messages m enu and contains full informa tion on
the Short Message Service (S MS). Other types of messag es can be sent and received via
your mobile. Please r efer to the i-mode sec tion (page 47) for full information on E-mail and
MMS.
The Short Message Se rvice (SMS) lets you send or receive tex t messages to or from other
mobile phones. You can store, edi t and forward messages as well as save any of the numbers
they may contain.
These SMS are stored o n the phone memory; they may also be store d in the SIM card if they
are sent by a se rvice provider.
You can access the Mess ages menu via the Main men u or by pressing and holding t he Mail
softkey from the standby display.
Reading a received SMS message
When the phone receives an S MS message, informat ion about the message se nder is
displayed on the Idle screen. T he message is automatically s tored in the phone or in the SIM
card. A flashing ind icates that the SIM or the ph one memory are full and c annot store any
further messages. Delete mess ages to allow new messages to be deliv ered.
1 Press Read to read new messages (from the standby dis play only).
2
Press Options to View, Reply, Reply (+text), Delet e, Delete all , Forward, Send as mail,
Move to SIM or Numbers (to store or call the number(s) contained in the SMS header or
text)
.
Reading stored SMS messages
1 Press the Menu key. Select Messages.Or press and hold the Mail softkey.
2 Select Inbox or SIM archive then select Received messages to display the message list.
Use the arrow key t o scroll up and dow n and access the me ssage you want t o read.
3 Select OK or Options/View to read the message text.
Unread messages are indicat ed by the icon. Messages that have alread y been read are
indicated by .
Moving messages to SIM
It is possible to move a message from the Inbox or the Outbox to the SIM memory. However,
according to the message size, the message may be truncated (the 160 first characters only are
moved to the SIM memory). The sending date (for sent messages) and the 'Copy to' addressees
are lost when moving the message to the SIM memory.
To move a message to the SIM memory:
1 Press the Menu key. Select Messages.
2 Select Inbox or Outbox.
3 Choose the message to be moved and select Options.
4 Select Move to SIM.
Forwarding messages
You can forward a received me ssage to other people/numbe r(s):
1 Press the Menu key. Select Messages.
2 Select Inbox or SIM archive/Receiv ed messages.
3 Select the message to be forwarded and select Options.
4 Select Forwar d.
5 Press OK. Select the To fiel d and select on e of the displ ayed names or s elect More... if you
want to send your message to another mobile number (simply key in the number). Press OK
to valida te.
6 In the Tex t field enter the message text (see "E ntering text", pa ge 22) or select o ne of the
models (Models) and press OK.
7
If you want to send the message to several addressees, enter one or several phone numbers/
names in the
previous screen.
8 Select Option s.
9 Select Send, Send without storing or Store.
10 A warning displays the number of SMS needed to send the message if it is more than one.
Select Go on if you want to send the message or select Cancel if you do not want to send it
or if you want to amen d your message.
Copy to
list (up to 4 more addr essees) and press
OK
then
Valid
to return to the
Activating or deactivating the message alert tone
Each time a me ssage is recei ved, a new SMS a lert tone soun ds.
To activate or deactivate this tone:
1 Press the Menu key. Select Messages.
2 Select Settings.
3 Select Recept ion Alert. Sele ct On or Off.
You can choo se an alert mel ody for your SMS:
1 Press the Menu key. Select Messages.
2 Select Settings.
3 Select Recept ion alert.
4 Select Aler t and select On.
5 Select Melody and select one of the available ringtones.
Preparing the phone to send SMS messages
Before sending your first SMS or if you w ant to register a new profile, the network SM S centre
number (obtainable from your service provider) must be stored:
1 Press the Menu key. Select Messages.
2 Select Settings.
3 Select Sending profile.
4 Enter the message centre number or select a template (if several available) then enter the
following fields (o perator depend ent).
FIELDS DESCRIPTION DEFAULT
Name To enter the profile name. Profile1
Message
centre
Format To set the message format: text, voice, fax or paging. Tex t
Vali dity
period
To enter the centre number. Empty
Time the message remains at the message centre
until delivered.
You may not be allowed to change your sending profile (format and validity period). Please contact your
service provider for further details.
5 Select Save to validate.
Messages
21-
Maximum
Messages
20-
The SMS centre number may alrea dy be available in your SIM card and may be auto matically
displayed. If you want to select a Send ing profile for your message:
1 Press the Menu key. Select Messages.
2 Select Settings.
3 Select Sending profile and select the prof ile you want to use . Select Options.
4 Select Select.
Entering text
Some features and fun ctions (storing names in the phonebook or typing SMS te xt messages,
Tools, Settings,...) re quire you to know how to enter and edit text in the display.
Three modes are av ailable. They are indicated by in lower ca se mode, by in upper case
mode and by in numeric mode. Text, figures and a lphabet characters can then be e ntered
or edited directly from the keypad. Pr ess to switch from one mode to another.
There are two methods of entering text characte rs: the Multitap or Multip ress key method, and
the quicker intuitive method, calle d T9 text input.
Press the down arrow key to swa p between the T9 and the Multit ap methods. When on T9
mode, is displayed on the upper part of the display to indicate that T9 is the current mode.
is displa yed on t he lower part of t he screen to indic ate that the Multi tap text method c an
be accessed by pressin g the down arrow key. When on Multitap mode, is displayed on the
upper part of the display to ind icate that Multitap is the curre nt mode. is displayed on the
lower part of the screen to indicate that the T9 method ca n be accessed by pressing the down
arrow key.
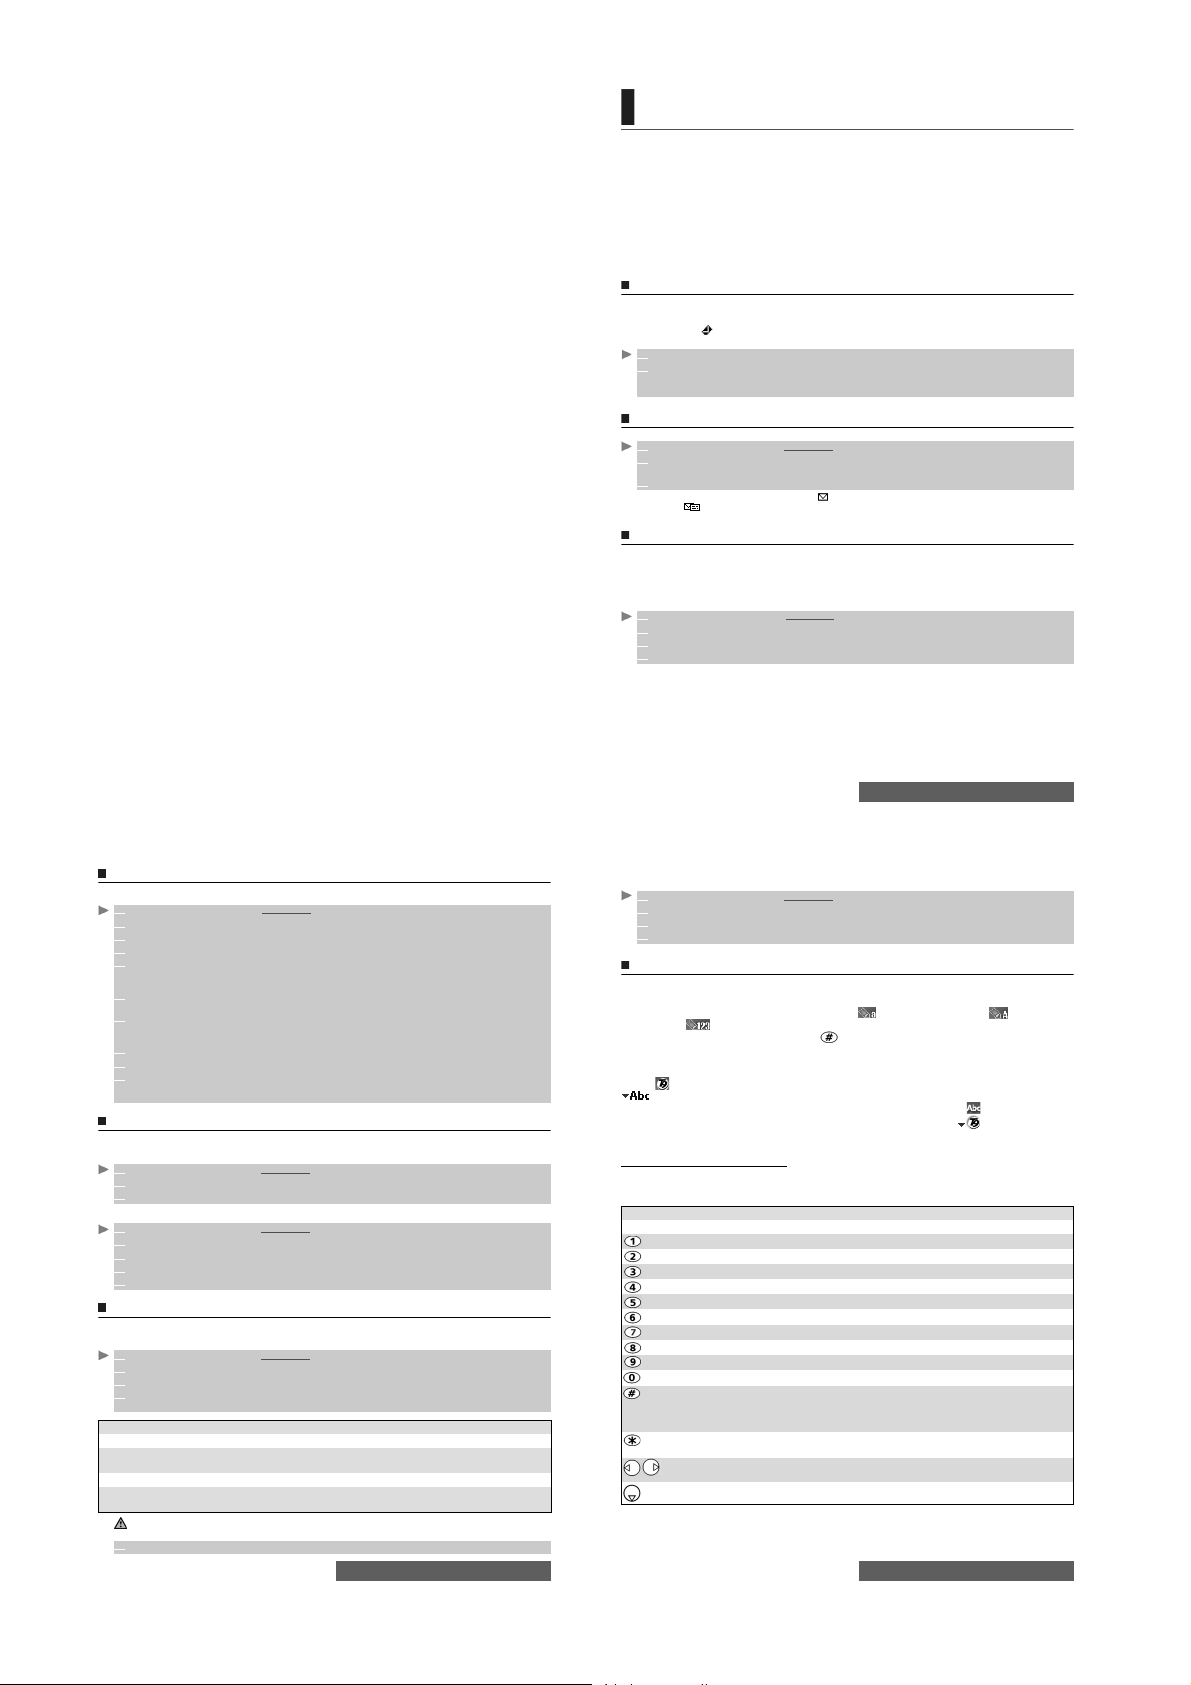
The multitap/multipress me thod
A brief press on a key displays the first character associated with the key and sh ows the other
available characters at the top of the displa y. Here is the list of the available characte rs (the
available characters list is langua ge dependent):
KEY CHARACTER
Lower case Upper case
. , - ' @ : ?/_1
a b c 2 A B C 2
d e f 3 D E F 3
g h i 4 G H I 4
j k l 5 JK L 5
m n o 6 M N O 6
p q r s 7 P Q R S 7
t u v 8 T U V 8
w x y z 9 W X Y Z 9
0 0
Short press: to switch mode (T9 or multitap) to lower case, upper case or
numeric mode.
Long press: to switch from lower case to upper case. Only the first letter entered
is upper case, the following ones are lower case (e.g.: to wri te a surname).
Short press : to enter a spa ce.
Long press: to access special cha racters.
Short press: m oves the cursor through the text one place to the left or to the right.
Long press: moves the cursor to the text beginning or end.
Swap between the Multitap/Mu ltipress method and the T9 text input
Messages
22-
Page 9

To enter text, press the k ey bearing the required char acter until it appears in the d isplay.
Holding the key displays the number correspondin g to the key. If you need to use two
characters from the s ame key, wait for a few seconds after entering the first character (until the
key characters on the u pper part of the screen are cleared) or press the right arrow key before
pressing the key again.
Correct mistakes by a short press on Clear.
Holding the Clear key deletes all the text. Use th e left or right arrow keys to move the c ursor in
the text. Holding allows you access to 25 special characters:
To select and insert a character int o the text:
1 Move the cursor to the required character.
2 Select OK.
The ↵ symbol is only displayed when in SMS and i-mode.
It allows you to go to the following line.
Multitap method:
Example To type Card:
Press the Menu key and select Messag es.
Select Write new.
Fill in the To fiel d (see "Sending a new SMS message", page 24).
In the Text field, press the key until is displayed. Press br iefly three
times, C is displayed.
Press until is displayed. Press once, a is displayed
Press three times, r is displayed
Press once, d is displayed. The word Card is now displayed.
The T9 method
A press on the down arrow key allows you to swap between T9 text entry and the Multitap method
Press the key bearing the required letter once only (the requested character may not be
1
displayed first).
2 The ac tive word changes as you enter text. Ente r all the word characters up to th e end of the word.
If the right word is not displayed when all the characters have been entered, press until
3
you get the required word.
If the requested word does not correspond to the one displayed, press the down arrow key to
4
swap to the multitap method and enter the correct letters.
Use the left or right arrow keys to move the cursor ar ound the text to ins ert or del ete
5
characters.
To insert a text symbol such as :) or :-) or press two or three times. Press as many times as necessary
to change the symbol to :( or :-( etc.
Tips and Operation
KEY ACTION
Clear Clear or backspace
Short press: to switch m ode (T9 or multitap) to lower case, upper case or num eric
mode.
Long press: to switch from lower c ase to upper case. Only the first letter entered
is upper case, the following ones are lower case (e.g.: to wri te a surname).
Short press: to enter a s pace.
Long press: to access special chara cters.
Another matching word.
Smart punctuat ion.
Sh ort press: moves the cursor to each word beginning or end .
Long press: moves the cursor to the text beginning or end .
Swap between the T9 and the Multita p method
Example To wr it e card:
Press the Menu key and select Messages.
Select Write new.
Fill in the To field (see " Sending a new SMS message", page 24).
In the Tex t field, press the down arrow key until is disp layed.
Press , a appears.
Press , cc appears.
Press , car appears.
Press , case appears.
Press as many times as necessary to view card.
Creating text models
You can create a set of messages to be used as models. The se texts can contain up to 50
characters and allow you to add text when you want to use them. Thes e templates are stored
in the mobile memory.
To create text models:
1 Press the Menu key. Select Messages.
2 Select Text models.
3 Choose any blank template ([...]) and press OK.
4 Enter the template text and press OK.
Editing a text model
.
1 Press the Menu key. Select Messages.
2 Select Text models.
3 Select the text model to be modif ied and press OK.
4 Edit the text and press OK.
Sending a new SMS message
You can send message texts (up to 918 characters). The standard size for an SMS is 160
characters (your service provider charges you acc ording to the number of SMS used to send
your message). The icon (1 = n umber of SMS used - it is updated while writing your
message and shows the n umber of SMS needed to send y our message) is displaye d on the
left corner of the screen.
To send SMS from the Menu:
1 Press the Menu key. Select Messages.
2 Select Write new.
3 Press OK. Select the To field and choose one of the displayed names or select More... if you
want to send your message to anoth er mobile number (simpl y key in the number) . Press OK
to validate.
4 In the Text field, enter the message text (see "Entering text", page 22) or select one of the
models (Models) and press OK.
5 If you want to send the message to several a ddressees, enter one or several phone
numbers/names i n the Copy to list (up to 4 more addres sees) and pres s OK then Va lid to
return to the previous screen.
6 Select Options.
7 Select Send, Send without storing or Store.
8 A warning di splays the number o f SMS needed to se nd the message if it is more than one.
Select Go on if you want to sen d the message or select Cancel if you do not want to send it
or if you want to amend your message.
1. The message is automatically stored in the Outbox, except if you have selected Send without storing.
2. If you have registered an automatic signature, the number of characters used is automatically added to the
message length.
Messages
23-
To send SMS from the standby display:
1 Press the up arrow key, then proceed as described above.
or:
1 Press the down arrow key to access the phonebook. Select one of the available names or
numbers.
2 Select Options.
3 Scrol l down and select Send SMS to, then proceed as descri bed above.
or:
1 Press and hold the softkey underneath Mail.
2 Select Write new, then proceed as described above.
Signature
You can register a si gnature to be automatic ally added to your text m essages. The signature
is not displayed whe n typing the message text but it is disp layed on message re ception by the
addressee. The m aximum size for the signature is 30 characters. If the message t ext to be sent
already 918 characters , the signature cannot be added.
To register a signature:
1 Press the Menu key. Select Messages.
2 Select Settings.
3 Select Signature.
4 Select Insert in message. Select Ye s.
5 Select Text and enter your signature text.
6 Select Save to store your signature.
Outbox and SIM archive sent messages
The Outbox and SIM archiv e sent messages contain unsent draft messages and stored sent
messages (delivere d or undelivered). These messages can be selected from the outbox or SIM
archive menu and can be mo dified and resent as new SMS messag es.
To select one of these messag es:
1 Press the Menu key. Select Messages.
2 Select Outbox or select SIM archive then Emitte d messages and use the up or down
arrow keys to s croll to the req uired message. Messages are e ither 'transmitted ' or 'to be
sent'.
3
Press Options to View, Delete, Delete all, Status (for sent messages only) Send, Send as
mail, Modify,
number(s) contained in the SMS header or text) or Details
Move to SIM (for outbox mess ages only), Numbers (to store or call the
.
Status request
If a status is requ ested on a sent message , a status request is s ent to the network (mus t be
network supported). If the s tatus is requested on a delive red message the date and time of
delivery may be sho wn.The network then answers by sendin g a status report (SR ) back to the
phone. Press OK to ack nowledge it.
To activate the status request:
1 Press the Menu key. Select Messages.
2
Select Settings.
3 Select Messag e config.
4 Select Delivery report and select On.
5 Select Save.
Messages
25-
Messages
24-
To request a reply:
A reply to your message can be requested from your correspondent. If you activate this feature,
you will be charged for the cost of the reply m essage.
The availability of this feature is oper ator dependent.
1 Press the Menu key. Select Messages.
2
Select Settings.
3 Select Messag e config.
4 Select Reply requested and select On.
5 Select Save.
To read the sent message, delete or re-s end it when receiving the status:
1
Press Options. Send again, Clear, Associated message or Delete message is displayed.
2 Select the re quired action .
Storage consumption
The storage status for SMS mes sages can be viewed.
To view the number of messages stored, the total available spa ce on the Phone m emory and
on the SIM card:
1 Press the Menu key. Select Messages.
2 Select Storage used. The SMS memory used is displayed. Scroll down to access the SIM
archive.
3 Select Details for more information on the Phone and SIM stored messa ges (use up and
down arr ow keys to sc roll to the
required information).
Broadcast - cell broadcast (CB) messages
These messages are broadcast by the networks to GSM users and may provide general
information about local area dialling codes, weather reports, traffic, news, etc. Each type of
message is numbered, allowing you to select the type of information you wish to receive.
Up to 5 types of messages can be program med into the selection list.
16 standard message t ypes are pre-progra mmed into the phone for your selection. New
message types can be programmed into the selection list using the 3 digit cell broad cast type
number. Contact your service pro vider for details about the type of mess ages they broadcast.
Before you activate the broadcast messa ge service, you must enter at least one message type
in the selection list.
Entering a message type in the selection list
1 Press the Menu key. Select Messages.
2 Select Settings.
3 Select Broadcast.
4 Select Messag e types and select one of the empty types ([...]). Select OK.
5 Select Modify by list (or Modify by code if the type number is known ).
6 Select the message type(s) you wish to receive and select Va lid .
7 Select Save to stor e your setting.
Activating / deactivating the b roadcast service
1 Press the Menu key. Select Messages.
2 Select Settings.
3 Select Broadcast.
4 Select Reception and select On or Off.
5 Select Save to stor e your setting.
Reading broadcast mess ages
Broadcast messages are displayed whilst the phone is on standby . If a broadcast message is
received whilst in conversation or operating the menu, it only becomes visible once the mob ile reverts
to the standby display. A message can contain up t o 93 characters and may be displayed on several
pages.
Messages
26-
Page 10

Options on mes sage display
Press Exit to clear the CB message display ed. Press the Call key to dial the number con tained
in the message.
Press Options to display the following menu:
OPTION ACTION
Delete To delete the current message
Delete All To delete all the received CB message s
Numbers To display all phone numbers contained in the message text and dial or store
Broadcast
Off
Activating/deactiva ting the alert tone
An alert tone can be set to beep every ti me a new or updated broadcast messag e is received.
Broadcast language
All the broadcast messages can be displayed in several language s.
To select a language:
them in the phonebook if requ ired.
To deactivate cell broadcast.
1 Pre ss the Menu key. Select Messages.
2 Se lect Settings.
3 Se lect Broadcast.
4 Se lect Reception alert and select On or Off.
5 Se lect Save to store your setting.
1 Press the Menu key. Select Messages.
2 Select Settings.
3 Select Broadcast.
4 Select Language and select one of the available languages.
5 Select Save to s tore your setting.
The availability of this feature is network dependent.
27-
Messages
Page 11

CALLS & TIMES
ccess the Calls & Times menu to check the details of individual incoming and ou tgoing calls,
A
the duration of the last call, the total call time for all sent and received calls or to play the
recorded calls.
Calls log
This feature stores details (identity, time and date and call duration) about the last 10 numbers
dialled, the last 10 unanswered calls and the last 10 received calls. The Calls log can be activated
for Line 1 and Line 2 (Line 1 is your main line. Line 2 availability is subscription dependent).
1
Press the Menu ke y. Select Calls & Times.
2 Select Calls lo g.
3 Select Last dial, Unanswered c alls or Received calls.
4 Use the up or down arrow keys to scroll through the calls list .
The last number dialled or re ceived is displayed first. The caller’s name is displayed if it is
registered in one of the pho nebooks (if not the phone number is displayed). If your subscription
does not have Caller Line Identification (C LI) ’Unknown number’ is displayed. If the caller has
withheld his number, ’Withheld number’ is displayed.
Press the Call key to call the selected nu mber.
Press Options to access the following menu:
OPTION ACTION
Store To store the number in the phonebook.
Delete To delete the entry.
Delete all To delete all entries.
Edit To edit the displayed number.
Details To view the name, number, time and date and call duration (for answered
Call To call the selected number.
Send SMS To send an SMS message to the selected phone number.
Use the up or down arrow keys to select the required option and follow the instructions displayed.
calls only) of the selected number.
Press the Call key from the standby display to access the last dialled numbers.
Call timers
The voice, Modem and GPRS call information for Line 1 and Line 2 is stored in t he Call timers
menu.
The
Details
sub-menu stores time information on calls made and received via the home network
and whilst roaming (national and international networks).
1
Press the Menu ke y. Select Calls & Times.
2 Select Call time rs.
3 Select Show.
4 Use the up or down arrow keys to view all the timer information.
If the call timers have been res et (see "Call timer - reset", page 29) the date of the latest counter res et is displayed.
The call type and the accumulated ti mes of outgoing and incoming calls are displayed.
Selecting Details displays information on calls made on your ho me network, on Na tional
roaming and on International roa ming.
If Line 2 is active too, 'All Calls' for Line 1 and Line 2 are displayed separately.
Balance information (subscription dependent)
This service may be s upplied by your service pro vider. It allows you to v iew the remaining
airtime balance on your phon e line.
Please contact your serv ice provider for more information. If your subscr iption allows access to
this information:
1 Press the Menu key. Select Calls & Times.
2 Select Call ti mers.
3 Select Balance information.
4 Select Call or Se t number.
When selecting Call
balance information centre . If no number is stored, select Set number
to store the number, then selec t Call to call the information centre number.
Reminder - call duration
You can set a duration reminder to beep regularly to remind you of the time s pent on your call.
The frequency can be any mult iple of 1 minute (up to 59 minutes).
1
Press the Menu key. Select Calls & Times.
2 Select Call ti mers.
3 Select Reminder.
4 Select On to activate the Call timer.
5 Enter t he call timer inte rval (e.g.: 2 = a beep sounds every 2 minut es whilst in conversa tion).
6 Press OK to validate the entry.
Call timer - reset
This feature allows you to reset the call timers. The 4 digit lock code is required to reset the call
timers (default lock code: '00 00').
1
Press the Menu key. Select Calls & Times.
2 Select Call ti mers.
3 Select Reset .
4 Select Ye s.
5 Enter t he phone lock cod e and press OK.
, if the balance inform ation number is already stored, a call is se nt to the
and enter it. Press OK
Call costs - management
Some service provide rs offer an Advice of C harge (AoC) subscri ption service allowing y ou to
view the last call cost, the total c alls cost and the remaining balan ce on your account (once a
'credit limit' has been set ).
To display these, you must first set a currency value and enter a n average cost per unit (only
calls units are displayed if the cos t information is not stored).
To set a currency value per unit:
1
Press the Menu key. Select Calls & Times.
2 Select Call cos ts.
3 Select Display co st type.
4 Select Curren cy. The current currency unit value is displayed.
5 Select Modify. Enter your PIN2 code and press OK.
6 Enter the currency name (up to 3 letters). Press OK to validate.
7 Enter t he unit cost (e.g.: 0.15 Euro per minut e). And press OK to validate.
To set cal l cost type to units:
1
Press the Menu key. Select Calls & Times.
2 Select Call cos ts.
3 Select Display co st type.
4 Select Units .
When the cost type is set to units, the credit limit and the remaining credit are shown in units.
Calls & Times
29-
Calls & Times
28-
Setting the credit limit (subscription dependent)
You may also be able to set a credit limit to your calls. Once the credit limit has been reached, no
more chargeable outgoing or incoming calls are allowed. You can however still make emergency
calls.
The PIN2 code is r equired to set the credit limit.
1
Press the Menu ke y. Select Calls & Times.
2 Select Call cost s.
3 Select Credit limit. The display indicates the current credit limit set.
4 Select Edit. Enter your PIN2 code and press OK.
5 Enter the credit limit (use to enter a decimal point for currencies). Press OK to validate.
When a credit limit has been set, the selection from the 'Credit limit' display is Edit or Set no limit.
Show costs
1
Press the Menu ke y. Select Calls & Times.
2 Select Call cost s.
3 Select Show.
4 Use up and down arrow keys to display the Last Call and All Calls or show the Remaining
credits.
The remaining credit is shown in either units or currency, as set by Cost Type menu above.
Call costs - resetting all costs to zero
To reset all call costs to zero:
1
Press the Menu ke y. Select Calls & Times.
2 Select Call cost s.
3 Select Reset .
4 Select Yes .
5 Enter the PIN2 number and press OK.
Alternate line service - selecting line 2 (subscription dependent)
Some operators support the use of a second line. You may then have two mobile phone numbers
(e.g. a business line plus a personal line). To use them you need to select the line to be used.
1
Press the Menu ke y. Select Calls & Times.
2 Select Line selection.
The current line selection is displayed.
3 Use up and down arrow keys to scroll to the required line. Press OK to validate.
1. The Line selection sub-menu may not be available on your mobile. Please contact your service provider for
further details about this service.
2. Line 1 and Line 2 can be named (Office and Home for instance). Refer to My number menu (see "My
number(s) display", page 35). Whichever line is selected to send calls, incoming calls can still be received on
either li ne.
Recorded call
This submenu allows you to pla y the recorded phone calls. If several phone conve rsations have
been recorded, they are playe d one after another.
1 Select Calls & Times, select Recorded call.
In compliance with European regulations, you are obliged to inform the person you are
speaking to before recording a phone co nversation.
Calls & Times
30-
Page 12

PHONEBOOK
hone numbers can be stored in the phone and in the SIM card memorie s (= phonebook).
The phone memory can sto re up to 255 'extended' cards (called 'phonebook cards') . These
P
cards allow you to store dif ferent types of information: family name, first name, home number,
mobile number, two E-mail addresses, p ostal address, busine ss information, voice tag,
category and a related icon or picture. The SIM card mem ory capacity may vary accor ding to
your operator or serv ice provider. The SIM memory allows you t o store one name, one ph one
number and one voice tag per card .
Both the SIM a nd the phone memo ries are searched when reading the Phonebook content s.
Press the down arrow to access the phonebook from the Idle screen.
Storing names and telephone numbers
Names and numbers ca n be stored directly in the phon ebook or copied from different sou rces
such as SMS messages, last dia lled number list, etc.
There are several ways to sto re numbers in the phonebooks:
Phone names card
From the Idle screen:
1 Enter the number. Select Store.
2 Select Phon e names .
3 The Home number, Work nu mber, Mobile number or FA X nu m be r lis t is displayed ,
thereby allowi ng you to select a nu mber type.
4 Enter the card data requested and select Save to store the infor mation.
Via the menu:
1
Press the Menu key. Select Phone Book.
2
Select Add name.
3
Select Phone names.
4 Enter the card data requested and select Save to store the informatio n.
1. The categor y field allows you to ide ntify the caller’s type acc ording to entries you h ave previously set (see
"Creating a Category of cards", page 34).
2. If you do not set pictures for your phoneb ook cards, a default icon i s displayed on incoming call .
You can also link melod ies to your phonebook cards . The melody is then played w hen a call is
received from on e of the card num bers.
1 Press the down arrow key (from the Idle screen) to access the phonebook.
2 Scroll down to the card you want to access and select OK, or select Options and then View.
3
Scroll down to the
down the list of available melodies and select one. Press
SIM names card
From the Idle screen:
1 Enter the number. Select Store.
2
Select SIM names.
3 Fill in t he available fiel ds and select OK to validate your entries.
4 Select Save to store the card.
Ringtones
field and select OK.
Phonebook
31-
No sound
is the default selection. Scroll
OK
to confirm your selection.
Via the menu:
1
Press the Menu ke y. Select Phone Book.
2
Select Add name.
3
Select SIM names.
4 Enter the name and select OK.
5 Enter th e number and select OK.
6 Select Save to store the card.
Storing a received number
Numbers stored in the last dialled, receiv ed, unanswered call information and SMS m essage
locations can also be stored in the pho nebook:
1 With a received call, unanswered call or SMS message select Options.
2 For an SMS message, select Nu mbers if the number is contained in an SMS. The message
number(s) is/are displayed. Select on e if several numbers are available.
2’ For received and unanswered calls, select Store.
3 Follow the above procedure to create a phone name or a SIM name card then select Save to
store the card.
1. While entering a number, selecting Clear once deletes the last character. Holding the Clear key deletes the
whole number.
2. The *, +, p (pause) and _ characters, which are accessible by pressing and holding the key when
registering a number, can be stored as part of the numbers.
3. You can use _ (wildcard spaces) to store numbers (wildcard spaces cannot be obtained when registering a
number from the Idle screen).
When calling a number containing wildcard spaces, select the number from the phonebook, select Options or
press the Call/Send key and enter the number corresponding to the wildcard spaces (=missing figures).
4. If the SIM card or phone memory are full, a warning message is displayed on the phonebook selection.
Copying all names and numbers
When consultin g your phoneboo k for the first tim e the ’Copy all SI M names to phon e?’ message is
displayed. Sel ect Yes.
You can copy all the names cards from the Phone to the SIM card and from the SIM card to the Phone.
1 Press the Men u key. Select Phone Book.
2 Select Read.
3 Select Options.
4 Select Copy all na mes.
5 Select Phone to SIM or SIM to phone.
All the names are copied unless the SIM card memory does not have enough free space when
copying the Phone entries to the SIM card. A warning message is then displayed.
If your Phonebook cards include more than one number (home, mobile, work, fax numbers), the first available
number from the list is copied to the corresponding SIM card entry.
Editing a phonebook or a SIM name card
From the Idle screen:
1 Press the dow n arrow to access the phonebook.
2 Scroll down to the card you want to access and select OK .
3 Scroll down to the field(s) you want to modify and amend it/them. Select Save to store the
changes.
Via the menu:
1
Press the Menu ke y. Select Phone Book.
2
Select Read.
3 Select one of the stored card s.
4 Select Options.
5 Select View.
6 Scroll down to the field(s) you want to mod ify and amend it/them. Select Save to store the changes.
You can choose one melody per Phonebook card.
Phonebook
32-
You can create a v oice dialling pattern on phonebook cards. This voice dialling pattern can only
be recorded in edit mode.
Recording a Voice dialling pat tern:
1 Press the down arrow key (from the Idle screen) to access the phonebook.
2 Scroll down to the card you want to access and select OK or select Options then select View.
3
Scroll down to the
select
Repeat the nam e until it is stored (minimum = twice). Pronounce it as clearly as pos sible and
in a quiet environment. When the voice patterns match, Stored is displayed.
You may have to select the number the voice dialling pattern is to be attached to if several numbers are stored
on the card. Select Home number, Mobile number or Work number if you have registered several numbers on
a phonebook card.
Voice dialling
Options then Record
field and select OK. Select
if a voice pattern is already recorded and you want to change it.
New
to record the voice pattern or
Viewing and calling phonebook numbers
There are two ways of viewin g and calling entries stored in the pho nebook:
Directly from the Idle screen:
1 Press the down arrow key to display the ph onebook list.
2 To access the require d name, either scroll up or down using the up and down arrows or press
a numeric key to access the different letters associated with the key. E.g.: press twice to
reach the names starting with letter ’B’.
3 Press the call key or select Options then select Ca ll.
Via the menu:
1 Press the Menu key. Select Phone Book.
2 Select Read to display the phonebook list, then scroll up and down to the required name
press a numeric key to access the different letters associated with the key. E.g.: press twice
to access the names star ting with letter 'B'.
3 Press the call key or select Options then select Call.
The list of phonebook entries is displayed in alphabetical order.
1. Selecting a category from the Category selection displays the names/phone numbers of the corresponding
category. This category is then displayed when next reading the Phonebook contents.
2. Selecting Options displays the following menu choice: View, Call, Add name, Delete, Delete all (Phone
names or SIM names), Copy, Copy all names, Move, Category selection (to select All names, the Phone
names only, the SIM names only or the categories members), Send by... SMS or Bluetooth, Send SMS to.
3. If several phone numbers are stored on a Phone name card, scroll down to the required number and select
it before activating the call.
Voice dialling
You can make a call by using your voice.
To create a voice pattern:
1
Press the Menu key
2 Select Voice dialling.
3 Select New entr y. All name entries are dis played.
4 Use th e up and down arrow keys to s elect the card you want to use and press OK.
If several phone number s are registered on a card (e.g. Home number, Mobile number or
Work number) select one by pressing OK.
5 You are then prompted to pronounce the name at least twice (pronounce it as clearly as
possible). Stored is displayed when both voice patterns match.
If the voice patterns do not match, Failed is displayed.
Repeat the whole voice registration procedure.
To view the voice dialling numbe rs list:
1
Press the Menu key
2 Select Voice dialling.
3 Select Lis t.
4 Use th e up and down arrow keys to vie w the requested e ntry.
5 Press Options to play the voice pattern, select Play Back, select Eras e to remove a voice
tag from the voice dialling list, or select Record to create a new voice patt ern.
.
Select Phone Book.
.
Select Phone Book.
Phonebook
33-
To remove all phone numbers from th e voice dialling list:
1
Press the Menu ke y
2 Select Voice dialling.
3 Select Delet e all.
To call a phone number using voice re cognition:
1 From the Idle scree n, press and hold the call key.
2 Pronounce the name as clear ly as possible.
3
The name called and an ani mated icon are then displayed and the call proceeds as normal.
.
Select Phone Book.
Free space in the phonebook
To view the remaining capacity in the phonebook:
1 Press the Menu key. Select Phone Book.
2 Select Storag e used to get to th e Phone names stor age used; press the down arrow key to
get to the SIM card storage used.
If available, the free memories in the FDN list are also displayed. Please see "Fixed dialling numbers", page 35
for more information on FDN numbers.
Creating a Category of cards
Categories of cards can be defined for the phonebook. This feature allows you to group certain
cards and to play a specific melody on receiving an incoming call from one of the category
or
members.
To create a category:
1
Press the Menu ke y. Select Phone Book.
2 Select Categories.
3 Select any blank template [...] and select OK. The following items are displayed:
ITEM FUNCTION
Category name To enter and store a category name.
Melody To select a melody to be used as a ringtone for Categor y member calls.
4 Enter or select the request ed data. Press OK to validate.
5 Press Save to store the defined category.
Category characteristics c an be modified or deleted (w hen in the Categories menu, s elect OK
to amend the settings or select De lete to erase the category).
To modify a category:
1 Press the Menu key. Select Phone Book.
2 Select Categories.
3
Select the categor y to be modified and select OK, then select the categor y name and/or the
melody. Select the new parameters (name/melody).
4 Select Save to store your settings.
To select a category when storing a nu mber:
1 Repeat the Phone names st orage procedure (see "Sto ring names an d telephone num bers",
page 31) and fill in the Phone names card.
2 Scroll down to Categories and select OK.
3 Select one of the displayed categories from the list.
4 Select Save to store your settings.
Categories can only be set for the Phone names cards (not for the SIM names cards).
Phonebook
34-
Page 13

My card
My card is a specific storage location where you can enter personal data. You can easily access
My card and send its contents to another device via SMS or Bluetooth.
My card contents is identical to the phone cards contents except for the Categories and Voice
dialling fi elds.
To enter My card data set:
1
Press the Menu key. Select Phone Book.
2 Select My card.
3
Select View and enter the requested information as for a phonebook card (validate each
entry by selecting OK).
4 Select Save to store your card.
To send My card by SMS or by Bluet ooth:
1
Press the Menu key. Select Phone Book
2 Select My card.
3 Select Send by... SMS or Bluetooth , then ente r the mobile number or se lect it fro m the
Names list to send the card (SMS sen ding) or launch the connection with the requi red device
(Bluetooth sen ding) and press OK.
Press and hold the up arrow key from the Idle screen to access Send my card by SMS.
My number(s) display
The phone can display your m ain line (Line 1) mobile number, the mob ile number for Line 2
(Alternate Line Service) an d your data and fax numbers (these are SIM card dependent ). These
numbers may be stored in the SI M card. You can also enter them manua lly.
To view, name and edit your own number(s):
1
Press the Menu key
2 Select My numbers. The mobil e number for Line 1 is dis played if it is stored in the SIM card.
If not, select Edit and enter your num ber and your na me in (select OK to save the entered
information).
3 Scrol l down to view or enter Li ne 2, your fax and data numbers.
1. Line 2, data and fax numbers can only be accessed if your SIM card has these subscriptions.
2. My numbers availability depends on your service provider.
.
Select Phone Book
.
Fixed dialling numbers
Fixed dialling is a feature that restricts outgoing calls to 'fixed' numbers or 'prefixes' contained in
SIM cards that support this feature. When the Fixed Dialling Numbers (FDN) feature is activated,
dialling numbers, diverting calls and sending SMS to numbers not registered in the FDN list is
forbidden. The number of FDN entries to be stored depends on the SIM card capacity. Activating
the FDN feature or registering numbers in the FDN list is PIN2 protected (contact your service
provider to get the PIN2 number).
The following menu (Fixe d dialling) and operations are only available on y our mobile if your SIM
card allows fixed dialling.
To activate or de activate FDN operation:
1
Press the Menu key
2 Select Fixed dialling. Select Status.
3 Select On or Off. Enter the PI N2 number.
4 Select OK to validate.
The Fixed dialling sub -menu may not be available on your mobile. Pl ease contact your service p rovider for further
details.
.
Select Phone Book
.
To view the numbers stored in the FD N list:
1
Press the Menu ke y
2 Select Fixed Dialling.
3 Select View to view the FDN list entries. Pressing Options allows y ou to view, c all, add a
name, delete, copy or move numbers to the phone or SIM card memory, but also to send
these numbers by SMS, or send a SMS.
To add a new number to the FDN list:
1
Press the Menu ke y
2 Select Fixed dialling.
3 Select Add new.
4 Enter you PIN2 code and press OK;
5 Fill in the displayed fields as in any SIM name card th en select Save to store your setting s.
1. Wildcard spaces can be used with the numbers stored in the FDN list. E.g. number +44 1707 278_ _ 9
allows calls to all numbers from 278009 to 278999 to be dialled. The number can be edited and dialled from
the Idle screen.
2. You may be asked to enter your PIN2 code.
.
Select Phone Book
.
Select Phone Book.
.
Export
The purpose of the Export feature is to allow you to send the phonebook contents to another
device (e.g. a PC). You firs t need to export the ca rd(s) to the Fun & Media b ox/Others submenu (see "Others", pag e 44).
1 Press the Men u key. Select Phone Book.
2 Select Export..., then select Yes . The entire contents of the phonebook are exported and
grouped togeth er in a Vcard file an d stored in Fun & Media box
When exporting a Vcard file you can send it directly by Bluetooth or by SMS.
/Others.
Phonebook
35-
Phonebook
36-
Page 14

CAMERA
T
he camera application allows you to take pictures with your mobile.
These pictures can then be :
- used to personalise your I dle screen, your Welcome or y our Goodbye screen (pleas e see
"Setting an image as standby screen, a Welcome screen o r a Goodbye screen from the
pictures folder", page 41),
- sent to other d evices (mobile phones, PC) by E-mail (see "Mail system", page 51), MMS (see
"Composing an MMS", page 52) or Bluetooth (see "Bluetooth", pag e 18).
- linked to your phone cards (see "Phone names card", page 31).
You can take pic tures in 3 sizes: large (VGA: 640x 480 pixels), normal (160x120 pixels) or
portrait (60x80 pixels).
The use of the camera and the s ending, forwarding and reproduci ng of the pictures taken are
subject to propert y and privacy rights. Do not take a picture unles s authorised.
Taking a picture
1 Press the Menu key. Select Camera.
2 Press OK to take your picture.
Once it has been taken, the picture is displayed. You can then acces s the following options
sub-menu:
OPTIONS FUNCTION
Store To store the picture.
Send by... To send the picture by Mail, MMS or by Bluetooth.
Rename To change the name of the picture.
Set as... To set the picture as an Idle screen, a Welcome or a G oodbye screen
Details To view information about the nam e, resolution, size, date and file
Delete To delete the current picture.
Camera To go back to the preview screen.
Full view To see the picture on full screen.
Zoom +/- To change the full view mode to a Smaller, Medium and Larger size.
From another application:
The Camera applicati on can be activated from the Options menu whilst using other applications
on the mobile. The resolution types availab le vary according to th e application. The cam eraaccessible applications are the following:
APPLICATIONS AVAILABLE RESOLUTION
Phonebook Port rait.
Settings (Idle,
Welcome or
Goodbye screen)
i-mode mail and
MMS
image
.
protection status.
Portrait and normal.
All.
To access the cam era application from the Phone Book:
1 Press the Menu key. Select Phone Book.
2 Select Add name, then Phone names.
3 Once in the phone card, select Picture.
4 From the picture browser, select Options.
5 Select Camera.
To access the cam era application from the Settings menu:
1 Press the Menu key. Select Settings.
2 Select Display, then Idle screen, Welcome screen or Goodbye screen.
3 Scroll down to My P icture and select Pictures (left soft key).
4 From the picture browser, select Options.
5 Select Camera.
To access the cam era application from the Mail menu:
1 From the Idle screen, select Mail (left softkey) or select i-mode then Mail.
2 Select Compose mail, scroll down to the Attachment field, press OK and select Pictures.
2’ Or select Compose MMS, select SMIL, select Compose MMS and then Add image.
3 From the pictures browser, select Options.
4 Select Camera.
If a call is in progress, access to the camera is not possible.
Adjusting your picture
You can adjust 4 types of settings before taking a picture: Resolution, Exposure, Brightness
and Zoom. These settings mus t be entered from the preview screen.
To select the picture size:
1 Use the left or right arrow keys to select the Large (VGA), Normal or Portrait mode.
2 Press OK or press on the sid e key to take your picture.
To select the exposure mode:
These modes allow you to optim ise the picture quality according to th e context.
1 Press the up or down arrow key to access the exposure mode selection.
2 Use the left or right arrow to access and select the Standard, Night, B&W, Antique, Reddish,
Greenish or Bluish modes.
3 Press OK or press on the sid e key to take your picture.
To select the brightness:
1 Press the up or dow n arrow key to access the brightness s etting mode.
2 Select one of t he seven brightness levels.
3 Press OK or press on the sid e key to take your picture.
To adjust the zoom:
1 Use the up or down arrow key to access the zoom mode (the zoom is not available from the
Large VGA mode).
2 Use the left or right arrow key to zoom in or out: .
3 Press OK or press on the sid e key to take your picture.
Camera
37-
Options menu
You can set default settings on the camera application. Thes e parameters are then
automatically activa ted when entering t he camera applicat ion:
1 Press the Menu key. Select Camera.
2 Select Option s then select Settings:
Image resolution La rge (VGA: 640x480 pixels)
Image quality H igh, Normal and Basic
Shutter sound 1, 2, 3 (= volume levels)
1. The Shutter sound is a ’Camera-like’ sound that is heard when a picture is taken.
2. You cannot deactivate the shutter sound option on your mobile.
Normal (160x120 pixels)
Portrait (60x80 pixels)
Storing/erasing your picture
When a picture is t aken (see above "Taking a pi cture", page 37), the ’K eep this photo ?’
message is displayed.
1 Press the OK to store the picture or select Discard then Yes to erase it.
The image is automatically stored in the
page 40). It is stored as a .jpg file
Fun & Media box Pictures sub-folder (see "Pictures",
.
Self timer
The camera application of fers the possibility of takin g delayed pictures, thereby allo wing the
user to be in the picture.
1 Press the Menu key key and then Camera.
2 Press Options.
3 Select Self timer ca pture.
4 Press OK.
5 The capture time delay before the pict ure is taken is after 10 seconds.
The 10 second countdown is displayed. The picture is auto matically taken and the countdow n
and the Self timer function automatically reverts to Off.
If any event occurs after countdown has started, the sel ftimer reverts to Off. Once the event ha s been processed,
the mobile return s to the preview screen.
Camera
38-
39-
Camera
Page 15

FUN & MEDIA BOX
T
his menu groups and manages all the images, melodies, speech notes, Games and applications contained in the mobile as well as all the files received via the i-mode browser, by Mail,
Bluetooth, MMS or SMS.
Pictures
The Pictures sub-menu allows yo u to view and set pre-set, stored and downloa ded images as
a standby display, a Welcom e or a Goodbye screen in order to configure and personalis e your
mobile screen (see "Displa y", page 59).
Y
ou can download and record images via Bluetoot h, via the i-mode browse r and mailer, and
via the Camera application . It is then possible to store t hem and/or set them as an I dle screen,
a Welcome screen or a Goodbye screen.You r mobile allows you to s et one Idle screen, one
Welcome screen or one Goo dbye screen from the downloaded and/or stored images (to download and store images, see the followi ng sections)
Pictures browser
The Pictures browser allows you to display the stored images as a list or as a mosaic. When the
pictures are displayed as a list the screen is divided into two parts: the image names list and the
selected image. When they are displayed as a mosaic (Thumbnails mode: see Options/My preferences below) the screen contains a mosaic of pictures and the name of the selected image.
Viewing an image
1 Press the Men u key. Select Fun & Media box.
2 Select Pictures.
3 Scroll the images list or mosaic. S elect the requir ed image or select Al bum 1 or Album 2 to
view their contents (press OK).
4 Press OK or Options and View to view the selected image in full size.
Options
The Pictures folder Options list contains the follow ing items:
OPTIONS FUNCTION
View To view the full image and name.
Send by... To send the image by Mail, MMS or Bluetooth.
Set as... To set the image as an Idle screen, as a Welcome screen on switching on
Details To show the name, resolution, size, registering dat e and protection status of
Delete To delete the current image.
Delete all To delete all the selected folder contents.
Move To move the current image to Pictures, Album 1 or Album 2.
My preferences To sort the stored images (by date, name, size) and select a view mode (List
your mobile or as a Goodbye animation on switching it off.
the current file.
or Thumbnails) in the Picture s browser mode.
1. When sending a .jpeg im age by Mail, the image may be compressed if it is too big. This may affect the
picture quality.
2. Album 1 and Album 2 are sub-folders of the Pictures menu.
3. The Album 1 and Album 2 Options list only contains View and My preferences.
4. The sending of an image may not be allowed if it is exportation (copyright) protected (the ’File protected’
message is then displayed).
5. To send an image via the Mail (E-mail or MMS), please see "Mail system", page 51
6. Error messages may be displayed when setting, viewing or storing an image: ’File too big’: Please see
"Error messages", page 71 ; ’Decoding failure’: the image cannot be viewed by the phone.
.
.
When viewing an image, an Options menu is available:
OPTIONS FUNCTION
Send by... To send the picture by Mail, MMS or by Bluetooth.
Rename To change the name of the picture.
Set as... To set the image as an Idle screen , as a Welcome screen on switching on
Details To show the name, resolution, size, regist ering date and protection status of
Delete To delete the current picture.
Full view To see the picture on full screen.
Zoom +/- To change the picture view to a Smaller, Medium and Larger size.
Rotate... To rotate the picture to the right (90° ), to the left (90°) or turnover (180°).
Setting an imag e as standby scre en, a Welcome scr een or a Goodby e screen from the
pictures folder
1 Press the Menu key. Select Fun & Media box.
2 Select Pictures.
3 Use the u p and down arrow k eys to scroll t hrough the imag e names list and select one.
4 Select Idle screen, Welcome screen or Goodbye sc reen.
Cropping
If the image you want to set as an I dle screen is too large to be inserted into the available space,
your phone will propose a crop ped image.
This allows you to move the image left, right, up and dow n (cursor key). The image yo u have
cropped is then displayed as suc h on the mobile (as an Idle screen).
1 Select Set as... then select Idle screen. If the image is too big, the crop screen is displayed.
2 Use th e cursor key to move the image up, down, left or r ight (the availability of the four arrow s
3 Select OK. Stored i s then displayed.
Downloading image s via the i-mode
Please refer to "Q uick access to i-mode basic features", p age 56.
your mobile or as a Goodbye screen on switching it off.
the current file.
Select Options and then Set as...
depends on the image size).
Melodies
The Melodies sub-men u groups Downloaded and Predef ined melodies.
Melodies
Select a ringtone from the list of me lodies available on your mobile.
1
Press the Menu key. Select Fun & Media box.
2 Select Melodies.
3 Scrol l up or down and selec t a melody. The melody is played wi thin 2 seconds. The Options
menu allows you to Play the melody, or use the following options: Delete it, Delete all, Set
as ringtone, Set as alarm, Set as ringtone L2 (if Line2 is activated), Se t as Welcome mel-
ody or Goodbye me lody, Send by... Mail, Bluetooth or MMS.
The sending of a melody by Mail or by MMS may be denied according to the melody type.
Melody download
You can download mel odies by Bluetooth, from the Internet, from inter active voice servers, or
from the i-mode browser and mailer.
In addition to the usual SM S download of melod ies, you can download melo dies by browsing
Internet websites.
This is done via the 'Digiplug' or the Nokia™ Smart Messaging system for Motoro la phones.
Fun & Media box
40-
The principle is the following:
1 Melodies are st ored on a Web ser ver.
2 Select your Motorola mobile type to access a choice of melodies.
3 Select one or mo re melodies to be downloaded to your ph one.
4 All selected me lodies are downl oaded via SMS.
5 Once the melody is received, a reception screen is displayed. Press OK or select Options
then Play to play the received melody.
To set a melody as a ringt one, an alarm, a Welcome or a Goodbye, pl ease see "Tones",
page 58.
The phone manages .mid, .mld an d .nsm formats.
To play a downloaded melody from the reception screen:
1 Select OK or select Options then Play.
2 Se lect Exit to stop playing.
The melody is automatically saved as soon as it is received by the mobile. It is stored in the Melodies folder.
To store a downloaded melody:
The melodies dowload via the I nternet or Bluetooth are automa tically stored in the Melodies
folder. For the melodies downloade d via SMS, the principle is the follow ing:
1 Select Ins tall and the melody is stored in the Melodies folder.
If the memory space is sufficient, the melody is automatically stored in the Melodies file. If there is no space
left, you need to select one or several melody(ies) to be replaced from the set of melodies (melodies associated
with a ring feature cannot be deleted).
Once stored, a message is displayed. The melody can be played and selected via the Fun & Media box menu.
To discard a downloaded melo dy:
1 Se lect Delete. The melody is erased and is therefore lost for further installation.
Games & applications
This sub-menu allows you to activate games and various applications that may be stored on
your mobile, download new gam es and applications via the i-mode browser, upgrade or dele te
the stored games and applications .
Your mobile may contain pre-set gam es or applications (operat or dependent).
You can store/download up to 10 ga mes and/or applications on your m obile.
To activate a game/application:
1
Press the Menu key. Select Fun & Media box.
2 Select Games & applications.
3 Select one of the available games/ap plications.
or:
1 Press and hold the i-mode softkey from the Idle screen.
2 Select one of the available games/ap plications.
1. Depending on the game/application stored on your mobile, you may need to activate a network connection
via the i-mode browser. Select Yes or No.
2. The downloaded games/applications can only be activated if the mobile contains the SIM card that was
used during the downloading process.
Fun & Media box
41-
Fun & Media box
42-
Page 16

Select Options to get to:
OPTIONS FUNCTION
1. Properties To display detailed information about the game or application (name, URL,
2. Upgrade To download the latest version of the game from the network.
3. Delete To delete the current game or applica tion from your mobile.
4. Network
connection
5. Auto Start
settings
or press the Menu key to access the following System menu:
OPTIONS FUNCTION
1. Description
Setting
2. Delete all To delete all the mobile games/applications.
3. Storage
status
4. Trace Info. To view the errors history list.
5. About To view the Games & Applications software details.
size, etc.).
To enable/disable automatic connection to the network or to confir m the
activation of the network connec tion prior to the game/applic ation start.
To enable or disable the automatic activation of the current game or
application.
The items on this options list may vary according to the contents of the selected application.
To enable/disable an Application Description File (ADF) display before
downloading a new game/applicat ion.
To view the used memory, information about the available remainin g
memory space, as well as the name and size of each stored game/
application.
The items of this options list may vary according to the contents of the page displayed.
Speech notes
This feature allows you to rec ord speech notes on your mobile
To record a speech note:
1
Press the Menu key. Select Fun & Media box.
2 Select Speech notes.
3 If no speech note has been recorded, select New. If one/several speec h note(s) is/are s tored
in the mobile, select Options then Record new.
4 Select Stop to end the recording.
5 Enter the note name and press OK.
To play a sp eech note:
1
Press the Menu key. Select Fun & Media box.
2 Select Speech notes.
3 Scrol l up or down to the req uired speech not e. Press OK or select Options then select Play.
Contents of the options me nu :
OPTIONS FUNCTION
Play To play the recorded speech note(s).
Record new To record a new speech n ote.
Send by... To send the speech note by MMS or via Bluetooth.
Delete To delete the current speech n ote.
Delete all To delete all the Speech notes contents.
Rename To change the name of the curre nt speech note.
Details To view information about the name, file size and recor ding date, and file
protection status
.
Others
This file allows you to store v card files (Phonebook), vcalendar files (Diary c ards), text files and
files with unknown/unsuppor ted format.
To display the Others file conten ts:
1
Press the Menu key. Select Fun & Media box.
2 Select Others.
3 Use the up an d down arrow keys to scroll the require d file.
The following Options list is available :
OPTIONS FUNCTION
View To view the file contents.
Store To store the file in the required application.
Delete To delete the current file.
Delete all To delete all the folder files.
Details To view the current file name, size, storage date and file protection status
Send by... To send the current file by SM S or Bluetooth.
Data exchange
The purpose of this feature is to allow the easy transfer of vCards and vCalendars. vCards and
vCalendars are phonebook cards and diary cards that are sent or received to/from another device
(mobile, PC,...).
Storing a received vcard
1 Select Options on the information screen when you receive the file.
2 Select View.
3 The recei ved file is displayed. Select Store.
4 Select Phone names, SIM names, SIM fixed or My card. The vCard is then st ored.
Storing a received v calendar
1 Select Options (left softkey) on the information screen when you receive the file.
2 Select View.
3 The recei ved file is displayed. Select Store.
Sending a vcard or a vcalendar
1 Select the vCard or the vC alendar you wish to transfer as explain ed in "Diary", page 13, "Cal-
2 Select Options.
3 Select Send by... SMS or Bluetooth. A warning may be displayed regar ding the number of
4 Select OK if you wish to continue.
5 Enter the number to which you want to send the vCard or the vCalendar, or select a name
information.
1. The contents of this Options list may vary according to the file type.
2. You cannot send any copyright protected file (the ’File protected’ message is displayed on any attempt to
send copyright protected files).
A received file may contain several vcards. Select the one(s) you want to keep, then select Store.
A received file may contain several vcalendars. Select the one(s) you want to keep, then select Store.
endar", page 13 and "Tasks list", page 15 or select it from Others.
SMS required to send the card (if more than one SMS is required).
from the Names list.
Fun & Media box
43-
Storage used
To consult the percentage of memor y used for the Pictures, Melodies, Others and Speech
notes folders:
1
Press the Menu key. Select Fun & Media box.
2 Select Storage used. The total memory used is displayed (all file types). Select Details to
view storage infor mation per file type.
3 Use th e up and down arrow keys to scroll to the r equired informa tion type (Pict ures, Melo-
dies, Speech notes, Others).
The Fun & Media box space is managed as a single folder. The Pictures, Melodies, Others and Speech notes
files therefore share the same space in the mobile.
You may not be able to store more files. You can however remove pictures, for instance, to free some space
and create a new Speech note.
Fun & Media box
44-
Fun & Media box
45-
Page 17

CALENDAR
T
T
he availability of this menu is network dependent. If y our SIM card does not con tain an
access to the Network services the Calendar menu is accessible from the Tools menu.
Please see "Calendar" , page 13 for full details.
NETWORK SERVICES
he availability of this menu is network de pendent (it may not be available or be n amed
Network services, Network,...).
Your network operator may provide value adde d services, information and contact phone
numbers. These serv ices and phone num bers are stored i n your SIM card a nd appear on the
phone menu, as they are accessibl e from the
provider for further details.
Some operators may prov ide up to two service s on the same SIM card . The displayed submenus in the
Three kinds of services can be register ed in this menu:
SIM application tool kit
An automatic way to pro vide services related to your network. The se services are SIM c ard
dependent.
SDN numbers stored in the SIM card
Up to 32 numbers may be stored in the SIM. These numbers cannot be mo dified or deleted.
Informat ion numbe rs
A list or a menu allowing calls to network or information services offered by the ne twork.
Network serv. menu may then be named Applications, Services or Information.
Network serv. menu. Please contact your service
Calendar/Network Services
46-
Page 18

i-mode™
Y
NetFront is a tr ademark and regi stered tradema rk of Access Co. L td.
i-mode and the i-mode logo are registered trademarks of NTT DoComo inc. in Japan
our mobile allows y ou to access dedicated i-mode websites an d webpages thanks t o the
i-mode standards. You c an for instance send an d receive e-mails and M MS, connect to
i-mode sites and dow nload images and 32-tone melodies for your mobile (s ee "Setting an
image as standby scre en, a Welcome screen or a Good bye screen from the pictures f older",
page 41 and "Pho nebook", page 31).
Access to the i-mode is netwo rk dependent. Please cont act your service provider for full details
about subscription c onditions. To be able to u se the i-mode feature s on your mobile, you m ust
have a GPRS subscription.
User interface
Whilst navigating th e i-mode menu, pleas e note that the up, do wn, left and right arrow keys
allow you to access further setting s or fields to be filled in, as well as validation and can cellation
options (Ok, Cancel, Send, Save, etc.).
Scroll up or down to high light (blue highlighting) the correct field, select a n option or enter text.
Depending on the menu y ou are in, you may have to scroll t hrough many items until you rea ch
the correct option.
i-mode menu
This section describes acce ss to the i-mode lock, i-mode profile s and New mail alert.
To access these features:
1
Press the Menu key. Select i-mode.
i-mode
lock
The purpose of this fe ature is to lock access to all i-mode features, there by protecting your
mobile from any unauthoris ed operation.
1
Press the Menu key. Select i-mode.
2 Select i-mode lock.
3 Select lock.
4 Enter your 4 digit i-mode lock code and select OK.
1. The default i-mode lock code is 0000. To change the code, sel ect Change lock code instead of Lock and follow
the instructio ns displayed.
2. Mail reception is not affected by the i-mode lock. However, it does not allow you to read the e-mails
received.
i-mode
profiles
To use the i-mode and c onnect to the i-mode web page, you must first define an d store the
profile details, then select the req uired i-mode profile.
1
Press the Menu key. Select i-mode.
2 Select i-mode profiles.
3 Select one of the available prof iles.
4 Press OK.
in Japan and other countries.
Copyright © 199 6-2004 ACCESS CO . LTD.
and other countr ies.
New mail alert
This sub-menu allows you to define the alert melody that is played on new incoming mail or MMS.
To select a melody:
1
Press the Menu key. Select i-mode.
2 Select New mail alert.
3
Under Alert select On.
4 Under Melody select one of the available ringtones.
5 Select Save to store the settings.
1. The Alert field must be set to On to allow access to the melod ies list.
2. If Alert is set to Off, the New e-mail icon only is displayed on new incoming e-mail.
3. The default melodies and downloaded melodies are available from the Melody list.
i-mode applications
The i-mode applications menu al lows access to the main i-mode featu res.
To access it:
1
From the idle screen select i-mode.
Whilst browsing an i-mode site, press the Menu key to access the following options if the Menu
icon is displayed :
OPTION FUNCTION
Browser m enu 1/2
1. Add bookmark To select the current page as a bookma rk.
2. Bookmarks To see the list of stored bookmarks.
3. Save image To store the displayed image in the Pictures folder.
4. Save page To store the current page.
5. Save Selection To store the selection (eg.: to store the selected pho ne number in
Browser m enu 2/2
1. Go to webpage To enter a webpage address or select one from a list (s ee "Go to
2. Reload To refresh the page displayed.
3. Page info To display the URL of the current page.
4. Create message To access the mail composer.
The items on this options list may vary according to the contents of the page displayed.
Mail
This feature allows you to compos e e-mails and MMS, to access the inbox, se nt mail, drafts,
new mails and the mail s ettings. Please refer to "Mail system", p age 51 for details about the
Mail sub-menu.
SMS
This feature allows you to access the Messages feature. P lease refer to " Messages", page 20
for details about the SMS menu.
the phonebook).
webpage", page 49).
i-mode
47-
Bookmarks
You can view the list of bookmark ed pages (see "i-mode menu", page 47):
1
From the idle screen select i-mode.
2 Select Bookmarks or press .
Press the Menu key to access to the following options:
OPTION FUNCTION
1. Open To display the selected bookmarked page.
2. Edit title To modify the selected bookmark name.
3. Create message To access the mail composer.
4. Delete one To delete the selected bookmark.
5. Delete all To delete all the bookmarks list.
Go to webpage
You can go to a specific webpage by entering the page address or selecting it from the Address
history list.
To go to a specific page:
1
From the idle screen select i-mode.
2 Select Go to webpage or press .
3 Select Enter address or press and press OK then enter th e required we bpage address .
Press OK.
4
Press down arrow key so that is highlighted and press OK to confirm connection.
To go back to a page you have prev iously visited:
1
From the idle screen select i-mode.
2 Select Go to webpage or press .
3 Select Address history or press .
4 Scrol l to the required p age address and se lect OK to display it.
Saved pages
You can view pages that you have previously saved without hav ing to connect to the i-mode.
1
From the idle screen select i-mode.
2 Select Saved pages or press .
Scroll down to the required page name, then press the Menu key to access the following
options:
OPTION FUNCTION
1. Open To display the selected saved page.
2. Edit title To modify the selected page name.
3. Protect on/off To protect/unprotect the selected s aved page from deletion.
4. Delete one To delete the sele cted saved page.
5. Delete all To delete all the saved pages.
Once on a saved page, you c an edit its contents. P
options:
OPTION FUNCTION
1. Save image To store the page ima ge(s) in the Picture s browser.
2. Edit title To modify the selected page name.
3. Page info To display the page URL (address) information.
4. Protect on/off To protect/unprotect the selected s aved page from deletion.
5. Delete To delete the current saved page.
The items on this options list may vary according to the contents of the page displayed.
ress the Menu key
to access the following
i-mode
48-
Settings
This sub-menu allows you to custom ise your connection settings .
To optimise use of t he i-mode and the way in formation is displayed on your mobile whilst
connected you may wish to adju st a few settings.
For each of the following settings:
1
From the idle screen select i-mode.
2 Select Settings or press
Then go through the opt ions below. When you hav e validated your settin g the mobile
automatically reverts to the setti ngs menu.
Setting the time out
This allows you to set the time l imit for i-mode disconn ection when there is no respons e from
the network:
1 Select Set time out or press .
2
Select 60 seconds, 90 seconds or Disabled (if you do not want automa tic disconnect ion).
3
Scroll down until is highlighted and press OK to validate.
Loading images
This allows you to choose whet her or not your mobile can do wnload and therefore displa y the
images contained on the webpa ges.
1 Select Load images or press .
2
Select Yes or No.
3
Scroll down until is highlighted and press OK to validate.
Adjusting text
The text on webpages may not automatically fit the size of your mobile display. This setting allows
you to wrap the text and adjust it so that it fits the screen of your mobile.
1 Select Wrap text or press .
2
Select Yes or No.
3
Scroll down until is highlighted and press OK to validate.
Reading certificates
Certificates are used for network security exchange (e.g. for secure payment transactions).
1 Select Certificates or press .
2 Select one of the cert ificates available on the mobile and p ress OK. The se lected cert ificate
is then displayed.
3 Press Cancel (left softkey) to return to the certificates list.
Sending terminal info
To allow or forbid the automatic sending of mobile-related informa tion (linked to the i-mod e) to
the server.
1 Select Send terminal info or press .
2 Select Yes or No.
3
Scroll down until is highlighted and press OK to validate.
Setting homepage
To define the homepage address. This allows you to access your favouri te webpage via the Go
to webpage menu (s ee "i-mode applica tions", page 48).
1 Select Home page or press .
2 Select Va lid and enter the http:// address.
3
Scroll down until is highlighted and press OK to validate.
49-
i-mode
50-
i-mode
Page 19

Checking the settings
You can check the status of all y our settings via this menu.
1 Select Check s ettings or press to view the contents of each parameter.
Going back
1 Select Back or press to go back to the i-mode menu.
Getting back to the main menu
Whilst adjusting or modifying one of the above features, selecting allows you to go back
to the Settings sub-menu and selecting i-mode allows you to go back to the i-mode main menu.
Whilst in the Settings menu, se lect Cancel, Back or to return to the i-mode m ain menu.
Mail system
Your mobile allow s you to send a nd receive e-mails and MMS.
However, the availability of th ese features is operator depend ent. Please read the following
instructions to configure your mail system and use the Mail menu.
You can access the i-mode Ma il sub-menu in 2 ways:
1
From the idle screen select Mail.
or:
1
From the idle screen select i-mode.
2 Select Mail or pres s .
1. The contents of the Mail menu may vary according to your service provider.
2. Pressing on the left arrow key while navigating the Mail menu leads to the i-mode menu.
3. The maximum e-mail size (for e-mail sending or receiving) is 100Kb, attachment included (operator dependent).
Once in the Mail sub-menu:
Composing an e-mail
1 Select Compose mail or press .
2 Highlight Subject. Press OK and enter the mail header text (30 characters maximum). Press
OK.
3 Highlight To 1. Press OK and select one of the available names from the displayed list or
select More... then enter the r equired mail addr ess or phone numb er. Press OK.
4
Highlight Message. Press OK and type in the mail text (maximum 10KB). Press OK.
5
Highlight the Attachment field if you want to add a melody or an image to your message.
Press OK then select Pictures or Melodies and select one of the available files. Press OK.
6
Scroll down to hi ghlight (to send your mes sage) or (to sto re your message
in the Draft folder) and select OK to validate your choice.
1. The content of this page and the information to be entered is operator dependent.
2.The maximum content of the message text is 10KB provided there is no header, no signature and no
attached file. Each additional text or file uses the available memory space and reduces the maximum content
of the message text.
Whilst writing your e-mail, you can access the Edit menu at any time by pres sing the Menu key.
OPTION FUNCTION
Edit menu 1/3
1. Send To send your mail.
2. Save To store your mail in the Draft folder.
3. Attach image To attach a picture from the Fun & Media box menu.
4. Attach melody To attach a MIDI Melody from the Fun & Media box menu.
5. Add To To add (an) addressee(s)
Edit menu 2/3
1. Add Cc To add (a) secondary addressee(s).
2. Add Bcc To add (a) hidden addressee(s) - their name is not shown to the main and
3. Attach header To attach a pre-entere d header (make sure you have previously written a nd
4. Attach sign. To attach a pre-entered signature (make sure you have previously written
5. Del. message To delete the contents of the messag e field.
Edit menu 3/3
1. Del. mail To delete the contents of the whole mail.
Composing an MMS
The Multimedia Me ssage Service (MMS) is a s ervice that allows you t o send and receive messag es
to and from other MMS enabled mobile phones. An MMS con tain several slides compo sed of text
+ image and/or melody/s peech note.
1 Select Compose MMS or press .
2 Highlight Subject. Press OK and type in the MMS header text (30 characters maximum).
3 Highlight To1 . Press OK and select one of the available names from the list displayed or
Whilst in the Subject or To1 fields, you c an access the Edit menu at any time by pressing the
Menu key.
OPTION FUNCTION
Edit menu 1/2
1. Send To sen d yo ur MM S.
2. Save To store your MMS in the Draft folder.
3. Add To To add (an) addressee(s).
4. Add Cc To add (a) secondary addressee(s).
5. Add Bcc To add (a) hidden addressee(s) - the ir name is not shown to the main and
Edit menu 2/2
1. Del. mail To delete the contents of the whole MMS.
4
OPTION FUNCTION
1. Add media To Add text (to write your message text), Add image (to ad d one of your
2. Preview To preview the full page contents.
3. Background
colour
4. Options A slide time option is available, allowing you to select the time each s lide
Once the first page has bee n created, other Options are available when pressing the Menu key.
You can then add other sl ides, insert another slide b efore the current one or d elete the current
slide.
secondary addressee(s).
stored one. See "Edit header", pa ge 55).
and stored one. See "Edit signature", page 55 ).
1. The items on this options list may vary according to the contents of the page displayed.
2. You can send your mail to a maximum of 5 people (To + Cc + Bcc)
Press OK.
select More... then enter the r equired mail addr ess or phone number. Press OK.
secondary addressee(s).
The items on this options list may vary according to the contents of the page displayed.
Highlight SMIL. Press OK to access the Compose men u. The following options are available:
Pictures folder images) or Add audi o (to attach a MIDI Melody or a Speech
note from the Fun & Media box menu).
To select one of the available colours for the page(s) background (one
colour only per message).
remains displayed before switching to the next one.
The items on this options list may vary according to the contents of the page displayed.
i-mode
51-
Once in this options menu and an image has been selected, the Set Fit mode item (page 2/2)
leads to the following options :
OPTION FUNCT ION
1. Hidden To display the image in its current size.
2. Fill To adapt the image size to the available image-dedicated space.
3. Meet To adapt the longest side of the image to the available image-dedicated
4. Slice To adapt the shortest side of the imag e to the available image-dedicated
Inbox
To view the received mails and MMS:
1 Select Inbox or press .
2 Scroll to the required mail and select OK to view it.
Whilst in the Inbox, pressing th e Menu key allows you to:
OPTION FUNCTION
Inbox menu 1/2
1. Show all To display all the received mails.
2. Show unread To display the unread mails only.
3. Show read To display the read mails only.
4. Show protect. To display the protected mails only.
5. Title sort To sort the mails according to their titles.
Inbox menu 2/2
1. Address sort To sort the mails according to their send’s addresses.
2. Date sort To sort the mails according to the date.
3. Delete one To delete the current (highlighted) mail.
4. Delete read mail To delete all read mail.
5. Delete all To delete all stored mails from the reception box.
The protected and unread mails cannot be deleted.
When viewing a specific mail , pressing the Menu key allows you t o:
OPTION FUNCTION
Inbox menu 1/2
1. Reply To reply to the current mail.
2. Reply quoted To reply and attach the text contents of the received mail.
3. Reply all To reply to the current mail and send it to all To and Cc addresses.
4. Reply quoted all To reply to all the current mail To and Cc addresses and attach the
5. Forward To forward the current mail.
Inbox menu 2/2
1. Protect on/off To protect/unprotect the curren t mail (this feature allows you to protect
2. Copy message To forward the mail message by SMS.
3. Save address To store the sender’s address in the phonebook.
4. Delete To delete the current mail.
The items on this options list may vary according to the contents of the page displayed.
space.
space.
current (received) mail contents.
the mail from unauthorised deletion).
i-mode
52-
Sent mail
This sub-menu allows you to view an d edit sent mails and MMS.
You must have saved your mails before sending them to be able to find them in the Sent mail
sub-menu .
1 Select Sent mail or press .
Whilst in the sent mail list, pressing the M enu key allows you to:
OPTION FUNCTION
1. Title sort To sort the mails according to the title.
2. Address sort To sort the mails according to the address.
3. Date sort To sort the mails according to the date.
4. Delete one To delete one mail.
5. Delete all To delete all mails.
2 Scroll to the required mail and select OK to view it.
Whilst reading a mail, pressing the Menu key allows you to:
OPTION FUNCTION
1. Re-edit To edit the sent mail and modify it if necessary.
2. Protect on/off To protect/unprotect the current mail (this feature allows you to protect the
3. Copy message To forward the mail message by SMS.
4. Save address To save the address contained in the message.
5. Delete To delete the current mail.
Draft
The mails you have stored (see "Composing an e-mail", page 51 and "Composing an MMS",
page 52) are filed in the Draft folder.
To edit the stored mails:
1 Select Draft or press .
2 Scroll to the required mail and select OK to view and edit it.
Whilst in the Draft folder, pressing the Menu key allows you to:
OPTION FUNCTION
1. Delete one To delete the selected mail.
2. Delete all To delete all the draft mails.
Selective retrieval
You can retrieve pending mails and MMS from the server:
1 Select Selective retrieval or press .
2 The screen is divided into 2 p arts (Selec t retrieval and Sele ct delete): Sele ct the Display
Check new mail
This allows you to view new incomi ng mails and MMS.
1 Select Check new mail or press .
2 The mobile connects to the network and displays any new mail(s) or MMS. Select OK to view
mail from unauthorised delet ion).
The availability of these options may vary according to the page contents type.
only title or Display detail in the required part then select Enter.
Select the message(s) to be retrieved or deleted according to its/their title or detailed contents.
The availability of this option depends on your service provider.
it/them.
Depending on your operator you may be allowed to select whether you want All, mails only or MMS only to be
checked.
53-
i-mode
54-
i-mode
Page 20

Mail settings
Please see the "Ma il system settings" s ection (below) for full details.
Back
1 Select Back or press to come back to the i-mode main menu.
Mail system settings
This section explains how to personalise your messaging service when sending and receiving mail.
All of these settings are accessible from the Mail settings sub-menu
1 From the Idle screen, select Mail.
2 Select Mail settings or press .
or:
1
From the Idle screen select i-mode.
2 Select Mail or pres s .
3 Select Mail settings or press .
Edit header
This allows you to config ure your mails so that text is ad ded (once or each time mail is sent) at
the beginning of your message.
1 Select Edit he ader or press .
2 Select OK if you want to select Auto attach (to tick the corresponding box).
3
Scroll down to the h eader field (unt il the header fiel d is highlighted ) and select OK.
4 Enter your header text and select OK.
5
Scroll down unt il is highlight ed and select OK to save the header.
1. The header is automatically added to all your mails if you tick Auto attach. If you do not tick Auto attach the
header is stored in the mobile (see "Composing an e-mail", page 51).
2. The header is not available in MMS edit mode.
Edit signature
This allows you to config ure your mails so that text is ad ded (each time mail is sent) at the end
of your message.
1 Select Edit signature or press .
2 Select OK if you want to select Auto attach (to tick the corresponding box).
3
Scroll down to the si gnature field (u ntil the box is highlighted) and sele ct OK.
4 Enter your signature text and select OK.
5
Scroll down unt il is highlight ed and select OK to save the signature.
1. The signature is automatically added to all your mails if you tick Auto attach.
If you do not tick Auto attach, the header is stored in the mobile (see "Composing an e-mail", page 51).
2. The signature is not available in MMS edit mode.
Reply marker
You can add text or symbols autom atically to your message when y ou reply to mail received.
1
Select Reply marker or press .
2 Press OK and enter the reply marker text or symbol(s). Press OK.
3
Scroll down until is highlighted and select OK to save the reply marker.
The > symbol is the default reply marker. It is automatically added to your reply mails.
Auto play
When contained in a mail or MMS, you can choose whet her or not a melody s hould play or an
image should be shown on ope ning mail.
1
Select Auto p lay or press .
2 Select iMai l and/or MMS and press OK.
3
Scroll down until is highlight ed and press OK to validate.
.
Auto reception
Your mails and/or M MS can automatica lly be received on y our mobile. If this feature is not
activated, go to the server and che ck manually if you have received any mails or MMS (see
"Check new mail", page 54 ).
1 Select Auto recepti on or press .
2 Select Yes or No.
3
Scroll down until is highlighted and press OK to validate.
Receive attachment
When contained in a mail, you can c hoose whether or not an image and /or a MIDI file should
be downloaded to your mobile.
1 Select Receive a ttachment or press .
2 Select MIDI and/or image.
3
Scroll down until is highlighted and press OK to validate.
Attachment data
When contained in a message, you can ch oose whether or not a melody file is recognise d as
a valid file and should be played.
1 Select Attachment data or press .
2
Select Val id or Invalid.
3
Scroll down until is highlighted and press OK to validate.
Checking the settin gs
You can check the status of all your mail settings via this menu.
1 Select Check settings or press to view the contents of each parameter.
Back
1 Select Back or press to go back to the Mail main menu.
Quick access to i-mode basic features
This section shows you how to use th e quick access a few i-mode features .
To connect to a new i-mode site:
1 Select i-mode from the idle screen.
2 Press
3 Press OK and enter the site addres s. Press OK.
4
Scroll down until is highlighted and select OK. The connection is then automatically activated.
To access a stored address:
1 Select i-mode from the idle screen.
2 Press
3 Select the re quired address .
4
Scroll down until is highlighted and select OK. The connection is then automatically activated.
To bookmark a page:
1 Whilst visiting a webpage, press the Menu key to return to the options menu.
2 Select Add Bo okmark .
3
Confirm your boo kmark by selectin g . The selected page URL address is now st ored
in your Bookmarks list.
To go to a bookmarked page:
1 Select i-mode from the idle screen.
2 Press .
3 Select the req uired bookmar k and press OK. The connection is then automatically activated.
i-mode
55-
To save a webpage:
1 Whil st visiting a webpag e, press the Menu key to go to the options menu .
2 Select Save pag e.
3
Confirm your choice by selecting . The selected page is now stored in your Saved
pages list.
To display a saved page:
1 Select i-mo de from the idle screen.
2 Press .
3 Select the required page name and press OK.
To download a melody:
1 Whils t visiting a webpage conta ining melodies, select on e and press OK. The melody is then
downloaded to your mobile.
2 Once the download has bee n completed, play or s tore the melody (t he melody is stored in
the Melodies li st. See "Melody dow nload", page 41).
The maximum size for i-mode downloadable melodies is operator dependent.
To download images and ph onebook pictures:
You can download images to be se t as Idle screen, Welcome screen , Goodbye screen or as
phonebook images (s ee "Setting an image as standby screen , a Welcome screen o r a
Goodbye screen f rom the pictures f older", page 41 and " Phonebook", page 31).
1
Whilst v isiting a webpage c ontaining an i mage,
2 Select S ave image and press OK. If several images ar e displayed on the pag e, use the up
and down arrow keys un til the required im age is highlighte d and select OK.
3
Confirm your choice by selecting .
4 Press OK to validate the image name or de lete and rename it (select OK to confirm).
The image is then stored in the Pictures list (see "Pictures", page 40).
1. You cannot send any of the images or melodies received via the i-mode by mail or by MMS.
2. The maximum size for i-mode downloadable images is operator dependent.
press the Menu key
to go to the options menu.
56-
i-mode
57-
i-mode
Page 21

SETTINGS
T
his menu allows you to adjus t the features on your mobile to your o wn convenience and to
ensure the security of the phone .
Tones
Alert mode
You can set the ring, alert and alarm tone types via the Mode menu.
If you select the 'Vibrate' or 'Vibrate then ring' option, the vibrating option replaces all the alert and alarm tones.
To modify the alert mode:
1
Press the Menu key. Select Settings.
2 Select Tones.
3 Select Mode.
4 Select one of the available settings (Ring, Silent, Vibrate, Vibrate & ring or Vibrate then
ring) and press OK to validate.
1. You can access the Mode menu directly from the Idle screen by pressing the left arrow key.
2. You can select the Vibrate mode by pressing and holding the key.
3. If the Alert mode is set to Silent, the icon is displayed on the Idle screen.
4. If the Alert mode is set to Vibrate, Vibrate & ring or Vibrate then ring, the icon is displayed on the Idle
screen.
5. When the phone is connected to either the HF kit, CLA or AC adaptor, the vibrate mode selection is
temporarily inhibited and the phone rings instead of vibrating.
Ringtone selection
You can select a melody from the avai lable ringtones stored in the pho ne.
1
Press the Menu key. Select Settings.
2 Select Tones.
3 Select Ringtones.
4
Select
Incoming call, Incoming call L2, Alarm, Welcome me lody
mobile, a welcome melody plays before the Idle screen is displayed) or
switching off the mobile, a Goodbye melody plays).
5 Scroll up or down to listen to the different ringtones. Select one by pressing OK.
6 Select Save to store your settings.
1. When scrolling up or down, wait for a few seconds for the selected melody to be played (except when on
Silent mode).
2. The ‘No sound’ item may be selected to deactivate the Welcome and Goodbye melodies.
Volume ad justment s
The ringtone, ramping, key tones, conv ersation and alarm tones (alarm clock, diary alarm and
low battery alarm) audio levels can all be individually adjusted via the Settings menu:
1
Press the Menu key. Select Settings.
2 Select Tones.
3 Select Vo lu me .
4 Select Ring, Ramping, Keys, Conversation or Alarm.
5 Scroll up or down to adjust the settings. You can also use the numeric keys to set the
required audio level: pressing sets the volume to 2, pressing or se ts the volume to 6
or 7, pressing sets the volume to the minimum value (1 for speech and 0 for all others).
6 Press OK to val idate the set ting.
7 Select Save to stor e your setting.
During a call you can adjust the conversation volume level by using the up and down arrow keys.
1. If the ringtone volume level is set to 0, the icon is displayed on the Idle screen.
2. Setting the key tones to 0 deactivates the key tones.
Settings
58-
(On switching on the
Goodbye melody
(on
Ramping
When activated, this feature gradually increases the incom ing ringtone to the maximum volume
level if the call is not answered afte r the first ring.
1
Press the Menu key. Select Settings.
2 Select Tones.
3 Select Vo lu me .
4 Select Rampi ng.
5 Select On.
6 Select Save to s tore your setting.
Display
Idle screen
Themes can be changed to personalise your Idle screen.
To select a standby backgroun d image for your Idle screen:
1
Press the Menu key. Select Settings.
2 Select Display.
3 Select Idle screen.
4 Select My picture or one of the available background images.
4’ If My picture is selected, select Pictures (left softkey) and select one of the available images
(see "Pictures", page 40). If the image is too large, a Crop screen is displayed (see "Cropping",
page 41).
5 Select Save to s tore your setting.
You can also set your Idle screen image from the Pictures menu (see "Setting an image as standby screen, a
Welcome screen or a Goodbye screen from the pictures folder", page 41).
Welcome screen
On switching on your m obile, a Welcome scre en is displayed prior to the Idle screen. This
screen is a default one but it can be cust omised by selecting a ny of the Pictures folder images
(see "Pictures", page 40) .
1
Press the Menu key. Select Settings.
2 Select Display.
3 Select Welcome screen.
4 Select Default o r scroll down to My picture. Select Pictures (left softkey) to select one of the
stored images.
5 Select Save to s tore your setting.
You can also set the Welcome screen from the Pictures menu (see "Setting an image as standby screen, a
Welcome screen or a Goodbye screen from the pictures folder", page 41).
Goodbye screen
On switching off your m obile, a Goodbye screen is displayed. This screen is a default one but
it can be customised by select ing any of the Pictures folder images (se e "Pictures", page 40).
1
Press the Menu key. Select Settings.
2 Select Display.
3 Select Goodbye screen.
4 Select Default or scroll down to My picture. Select Pictures to select one of the stored
images.
5 Select Save to s tore your setting.
You can also set the Goodbye screen from the Pictures menu (see "Setting an image as standby screen, a
Welcome screen or a Goodbye screen from the pictures folder", page 41).
Backlight
To adjust th e backlig ht for the Id le screen :
1
Press the Menu key. Select Settings.
2 Select Display.
3 Select Backlight.
4 Adjust the b acklight from 1 to 3 with the up or do wn arrow keys and s elect OK.
5 Select Save to store the setting.
Keypad
Keypad lock
When the keypad lock is activated, this pre vents the accidental op eration of the keys. The key
tones are muted.
The keypad lock is suspend ed when an incoming call is rec eived and resumed once the call is
over. Emergency calls (999) can however be made. If a key is pressed, a reminder message is
displayed.
To activate and deactivate the k eypad lock:
1
Press the Menu key. Select Settings.
2 Select Keypad.
3 Select Keypad lock.
4 To unlock the keypad, press Unlock then .
or:
1 From the Idle screen, press and hold to activate the keypad lock.
2 Press and ho ld to de-activat e the keypad lock .
Any key answer
This feature allows you to answer a cal l by pressing any key (except from the Off, No ring and
Side keys)
.
1
Press the Menu key. Select Settings.
2 Select Keypad.
3 Select Any key answer and select On.
Speed dial
Phonebook numbers can be as signed to keys to . The key cannot be assigned a
phonebook number a s it is already assig ned by default to the Voice Mail numbe r (see "Calling
the Voice Mail centre to check your mes sages", page 61).
Numbers stored in both the SIM card and the pho ne (except fixed dialling numbers) can be
selected.
To assign phonebook numbe rs to the speed dialling keys:
1
Press the Menu key. Select Settings.
2 Select Keypad.
3 Select Speed dial.
4 The Key number and the attached name (if any) are disp layed. Select Names (or Options
then Names if a number has already been attached to the key) to select a name from the
names list.
5 Select OK to validate.
If a number which has been assigned to a speed dial key is deleted from the phonebook, the corresponding
number is automatically deleted from the speed dial key.
Settings
59-
60-
Settings
Page 22

Voice mail
Your network provider may offer a Voice Mail service which operates like an answering machine.
You may be able to access it directly by pressing and holding the .
Contact your ser vice provider for furt her details.
Storing a Voice Mail centre number
If your SIM card does not contain the Voice Mail centre number, you mus t store it manually:
1
Press the Menu key. Select Settings.
2 Select Voice Mail.
3 Select Numbe r. Enter the number (either by keying it or selecting it from the Names list).
4 Press OK to v alidate.
1. The Voice Mail number is automatically assigned to speed dial locatio n number 1 (see "Speed dial" on page 60).
2. If you subscribe to the 'Line 2' service, an additional Voice Mail centre number must be stored separately.
Activating/deactiva ting the voice mail alert tone
If you wish to be advised by a tone when receiving a new Voice Mail message :
1
Press the Menu key. Select Settings.
2 Select Voice Mail.
3 Select Aler t. Select On.
The availability of this feature is operator dependent.
Calling the Voice Mail cen tre to check your messages
You can either:
- Dial the Voice Mail centre number directly after rece iving a message:
1
From the Idle screen, pr ess and hold .
- or:
1 Press the Menu key. Select Settings.
2 Select Voice Mail.
3 Select Call.
Phone settings
Language selection
You can change the language on your mobile:
1
Press the Menu key. Select Settings.
2 Select Phone settings.
3 Select Language.
4 Select a language from t he list displayed and p ress OK to validate.
Auto features
Auto-answer
This feature is only operat ional when the phone is connected to a headset. The phone answe rs
the call automatically after about 5 seconds without the need to press a key.
1
Press the Menu key. Select Settings.
2 Select Phone settings.
3 Select Auto features.
4 Select Auto-answer and select On.
5 Select Save to store your setting.
Auto-retry
This feature allows the phone to redial a number automatically if call has failed due to an engaged
line or an unava ilable sign al from the netwo rk. The number i s re-dialled 10 times maximu m until a
connection is establishe d.
1
Press the Menu key. Select Settings.
2 Select Phone settings.
3 Select Auto features.
4 Select Auto-retry and select On.
5 Select Save to store your setting.
When activated, Retrying and a countdo wn timer are displaye d prior to each new at tempt. An
auto-retry warning tone beeps each time a new call attem pt is made.
Selecting Exit or pressing any key during the r etry process cancel s the operation.
Auto switch-on/off
This feature allows the phone to switc h on or off automatically at a pre-det ermined time.
1
Press the Menu key. Select Settings.
2 Select Phone settings.
3 Select Auto features.
4 Select Auto switch-on or Auto switch-off and select On to activate the feature.
5 Enter the ti me you want your mobile t o switch on and/or off an d press OK.
6 Select Save to store your setting.
If the phone is already on at automatic switch-on time, it remains on.
When the phone is about to automatically switch off a w arning message and a countdown tim er
are displayed. Selecting Exit cancels the switch-off process.
If the mobile is already off at switch-off, it remains off.
If a call is in progress at switch-off time, the switch-off process is postponed until the call has ended.
Time
& date
This feature allows you to set the mobile time acco rding to the world time zo ne map, based on
Greenwich Mean Time (Origi n clock). A Secondary clock is also ava ilable.
This feature is useful for the Diary. To import or export calendar cards, events a nd tasks, schedules
must be set according to time zones.
Both clocks are displayed on the same screen. Th e date and time and the city name are displayed
for both clocks.
Clock setti ng
To set the clocks:
1
Press the Menu key. Select Settings.
2 Select Phone settings.
3 Select Time & date.
4 Select the Origin clock. Scroll through the panels and enter fill in the required information.
5 Select Save to store the data.
6 Select th e Secondary clock. Scroll through the panels and enter the required information.
7 Select Save to store the data.
Clocks swa p
This feature is useful when t ravelling: the local clock is di splayed but you can swap bet ween
the origin clock and the secondary clock.
To swap clocks:
1
Press the Menu key. Select Settings.
2 Select Phone settings.
3 Select Time & date.
4 Select Swap.
An information message is displayed. The secondary clock becomes th e origin/mobile clock
and the origin clock becomes the secondary one.
Settings
61-
Default settings
You can reset your phone an d return to your mobile default set tings via the Settings menu.
This has no effect on the phoneb ook entries or the phone lock cod e.
1
Press the Menu key. Select Settings.
2 Select Phone settings
3 Select Default settings.
4 Select Ye s (Set default ?)
The following features are re set:
FEATURE DEFAULT SETTING
Alert Modes Ring
Volumes, Ring, Key, Speech, Alarm Mid values
Backlight, Contrast Mid value
Any key, Auto-retry, Auto-answer features Off
Ramping Off
GSM services
Call dive rting
This Network-dependent service allows you to divert incoming calls (voice, fax or data calls) to
another number
To divert a call:
1
Press the Menu key. Select Settings.
2 Select GSM Services.
3 Select C all diverting. The following su b-menu is displ ayed (the con tents of this m enu may
vary according to your service provider).
DIVERT OPTIONS FUNCTION
Always To divert all incoming voice calls.
When not
reachable
On no reply To divert all voice calls when the call is not answered.
When busy To divert all voice calls when the line is engaged.
All conditions To divert all voice calls when not reachable, on no replay and when busy.
Cancel all To cancel all diverting options.
All FAX calls To divert incoming fax calls un conditionally.
All DATA calls To divert incom ing data calls unc onditionally.
4 Select one of these optio ns and select OK.
5 Select Activate.
6 Select Voice Mail (if you want the calls to be diverted to your voice mailbox), Names (select
To check the call divert status or de activate it:
1
2 Select GSM Services.
3 Select the call diverting type to be checked or cancelled.
4 Select Status or Ca ncel.
To divert all voice calls when the phone cannot be reached (out of ser vice).
one of the phoneb ook entries) or Number (Enter the number to which the calls are to be
diverted and select OK. A validation message containing the selected number is displayed).
1. If the 'On no reply' option is selected, please enter the time limit (5, 15 or 30 seconds; this also depends on
your network) after which the feature is valid.
2. Call diverting must be set individually for Line 1 and Line 2. Only the selected line is affected by the call
divert.
Press the Menu key. Select Settings.
Settings
62-
To cancel all call diverts:,
1
Press the Menu key. Select Settings.
2 Select GSM Services.
3 Select Call diverting.
4 Select Cancel all.
1. This action cancels all call diverts (voice, faxes and data calls) for the current line.
2. To cancel call diverts for the other line, you must select this line first (menu Calls & Times - Line selection).
Call waiting
This network-dependent feature allows you to receive a new call while a call is already in progress.
To activate the call waiting feature:
1
Press the Menu key. Select Settings.
2 Select GSM Services.
3 Select Call waiting.
4 Select Activate. Activated or Check your r equest is then displayed.
You can also cancel or check the service status.
To put a call on hold and switch from Call 1 to Call 2:
1 Whilst a call is in progress, a beep sounds to indicate a second incoming call.
Select Replace to take Call 2 and end Call 1, Select Reject to refuse Call 2 or press the Call/
Send key to put Call 1 on hold and take Call 2.
Press the End/Off key to end Call 1 and press the Call/Send key to take Call 2.
2 Select Options then select Swap to get back to Call 1 and put Call 2 on hold or select Join
to have a 3-party co nversation.
Sending my ID
You can disable the sending of your own nu mber on a call-by-call basis by adding #31# before
the number you are dialling. You can also ask your service operator t o hide your mobile phone
number by default. Onc e hidden by your operator, you can show y our number, on a call-by-call
basis, by entering *31# before the nu mber you are calling.
Please contact your service prov ider for more information.
Caller line identity - showing/hiding your mobile number (network dependent)
Most networks have Calle r Line Identity feature (CLI). This featur e allows the phone number or
the identity of the caller to be displayed on incoming calls.
Standard network setting
To reset to the standard network set ting and send your mobile ID:
1
Press the Menu key. Select Settings.
2 Select GSM Services.
3 Select Sending my ID.
4 Select My settings.
5 Select Preset. The phone reset s and reverts to it s original networ k setting.
Hiding or showing your number
1
Press the Menu key. Select Settings.
2 Select GSM Services.
3 Select Sending my ID.
4 Select My settings.
5 Select Hide my ID or Show my ID.
Viewing your current ID status
1
Press the Menu key. Select Settings.
2 Sele ct GSM Services.
3 Sele ct Sending my ID.
4 Sele ct Status.
Your current ID status is displayed.
Settings
63-
64-
Settings
Page 23

Receiving calle r ID
You can check the availability of this feature on your network or subsc ription.
1
Press the Menu key. Select Settings.
2 Select GSM Services.
3 Select Receiving caller ID.
The network t hen either ret urns Presentation available or Presentation unavailable
information.
Network automatic searc h
When the phone is on, it auto matically searches the last netw ork to which it was registered
(usually the home ne twork). If this is not ava ilable, the phone automati cally searches and
selects one of the networks reg istered in the preferred network lis t (located in the SIM card).
Editing the preferre d list
Your mobile contains a list of networks which can be selected (e.g.: to suit yo ur travel
arrangements). You can als o transfer items from this list to the pref erred networks list.
The order and n ames of the networks in t he preferred networks list c an be edited and amende d.
1
Press the Menu key. Select Settings.
2 Select GSM Services.
3 Select Network .
4 Select Preferred list. A list of networks is displayed.
5 Use the up and down arrows to view the list and select one of the following Options if you
want to amend the list:
OPTION FUNCTION
Modify by list To choose from a list of all networks stored in the phone.
Modify by code To edit or enter the identification operator number if you have the
Delete To delete an entry
Your SIM card may c ontain a forbidden list o f networks which cannot be used. To view this or
show your home network:
1
2 Select GSM Services.
3 Select Network .
4 Select either Forbidden to view the list of forbidden networks, or select Home network to
Selecting manual s earch
You may need to select a specific network (e.g. offering better coverage than your own in the current
location).
1
2 Select GSM Services.
3 Select Network .
4 Select Search.
5 Select Manual. The Scanning for networks... message is displayed.
6 Use th e up or down arrow keys to select a networ k from the list.
7 Press OK to confir m your choice.
information.
Press the Menu key. Select Settings.
view the name of your usual network.
Press the Menu key. Select Settings.
Requesting... is displayed, after which the phone will return to the Idle screen.
1. You cannot select a network for manual change if it is on the forbidden list (even if it is still listed as a
choice).
2. You cannot delete a network from the forbidden list. This list is automatically updated when the manual
network selection is performed.
3. If the Manual search has been selected before turning the mobile off and if the manually selected network
cannot be found when the mobile is next turned on, you must select another network manually for your mobile
to lock on.
Selecting automatic search
To perform an automatic search fro m the preferred list, proceed as follow s:
1
Press the Menu ke y. Select Settings.
2 Select GSM Services.
3 Select Network.
4 Select Search.
5 Select Automatic.
Call barring
This network-dependent serv ice forbids certain outgoing or inco ming call types. It requires a
call barring password .
To bar a call:
1
Press the Menu ke y. Select Settings.
2 Select GSM Services.
3 Select Call barring.
4 Select Outgoing calls or Incoming calls:
SELECT FUNCTION
Outgoing
All outgoing
Outgoing
Int'nal ca lls
Outgoing
Int'nal excl.
home
Incoming
All incoming
Incoming
Roaming
only
5 Select Activate. Enter the password and press OK.
The network the n confirms the s election.
To remove call barring or check its stat us:
1
Press the Menu ke y. Select Settings.
2 Select GSM Services.
3 Select Call barring.
4 Scroll up or down to select th e barring type to be deactivated (C ancel) or checked and follow
the instructions displayed.
Call barring password
The call barring password is used to select the call barr ing options. It is supplied via your
service provider.
To change the password:
1
Press the Menu ke y. Select Settings.
2 Select GSM Services.
3 Select Call barring.
4 Select Change password.
First enter the former password then enter the new password twice. A Confirmation message
is displayed.
To bar all outgoing calls.
To bar all outgoing international calls.
To bar all outgoing international calls except for calls to subscribers
within your home network.
To bar all incoming calls.
To bar all incoming calls when not on the home network.
Settings
65-
Security features
The security features des cribed in this section protect your ph one from unauthorised use.
When prompted, enter the code and press OK. Codes are displayed as asterisks (*).
Press Clear if you need to amend y our entry.
Avoid using codes similar to emergency numbers such as 999 to prevent the accidenta l dialling of these numbers.
KEEP A RECORD OF YOUR CODES IN A SAFE PLACE.
Phone lock cod e
A phone lock code is supplied with the phone for security purpo ses. It prevents unau thorised
access to the phone.
The default code is 0000. We suggest that you chan ge this code and keep the new one in a
safe place.
Once this feature is activated , the code is requested each time the phone is turned on.
To change the p hone lock code:
1
Press the Menu key. Select Settings.
2 Select Security.
3 Select Phone lock change and follow the instructions displayed.
4 Press OK to vali date the n ew code.
To activate/deactivate t he phone lock code:
1
Press the Menu key. Select Settings.
2 Select Security.
3 Select Phone lock enable (if the code has been disabled) or Phone lock disa ble (if the
code has been enabled) and enter your Phone lock code.
Emergency calls can still be made when phone lock is activated.
PIN code
Your SIM card wa s provided with a 4 to 8 digit PIN code f or protection against u nauthorised
use. When enabled, the PIN code is required each time you turn your mobile on. If an incorrect
PIN code is entered three times in succession, your SIM card will be blocked . The 8 digit PUK
code is then require to unblock your phone. Plea se contact your service prov ider for this code.
To activate the PIN protect ion:
1
Press the Menu key. Select Settings.
2 Select Security.
3 Select PIN enable (if the code has been dis abled) or PIN disable (if the code has been
enabled) and ent er your PIN code.
To change the P IN code (PIN mus t first be enabled ):
1
Press the Menu key. Select Settings.
2 Select Security.
3 Select PIN chan ge and follow the promp ts displayed.
4 Press OK to validate your new PIN code.
PIN2 code
PIN2 code prevents unauthor ised access to some of the mobile fe atures (e.g. activating/
deactivating FDN ope rations, modifying the FDN p honebook, setting call costs to zero,
modifying the costs d isplay features). This c ode can be changed but n ot activated or
deactivated.
Please contact your service pro vider for your PIN2 code. To chan ge the PIN2 code:
1
Press the Menu key. Select Settings.
2 Select Security.
3 Select PIN2 change and follow the prompts displayed.
4 Press t he Menu key to validate your new PIN2 code.
Settings
66-
PUK code
The PUK (PIN unblock key) is an 8 dig it code supplied by your service provi der. It is used to
unblock the phone whe n an incorrect PIN code has been entered three times in succession. A
PUK code cannot be changed .
When prompted, e nter the PUK code and select OK. You are then requ ested to enter a n ew PIN
code. Follow the promp ts displayed to reset the PIN code.
If you have entered an incorrect PUK code 10 times in succession your SIM card will be permanently blocked.
Contact your service provider for a new card.
PUK2 code
The PUK2 is an 8 digit code supplied by your serv ice provider. It is used to unblock the phone
when an incorrect PIN2 c ode has been entered three times in succes sion. A PUK2 code cannot
be changed. When prompted , enter the PUK2 code.
If you have entered an incorrect PUK2 code 10 times in succession to use the features requiring the PIN2
code, your mobile will be permanently blocked. Contact your service provider for a new card.
Summary of code/passwor d entry chart
PASSWORD LENGTH NUMBER OF ATTEMPTS ALLOWED IF BLOCKED OR FORGOTTEN
Phone lock code 4 digit s Unlimited Return phone to manufacturer
PIN 4-8 digits 3 Unblock with PUK code
PIN2 4-8 digits 3 Unblock with PUK2 code
PUK 8 digits 10 Contact your service provider
PUK2 8 digits 10 Contact your service provider
Call barring
password
i-mode lock code 4 digits Unlimited Return phone to manufacturer
4 digits D efined by service provider Contact your service prov ider
Settings
67-
68-
Settings
Page 24

APPENDIX
Glossary
EXPRESSION MEANING
Active call The call currently in progress
ALS Alternate Line (L ine 2) Service
AoC Advise of Charge - subscription service
CB Cell Broadcast
CLI Caller Line Identity - displays caller’s telephone number
DES Data E ncryption Stand ard
Diverting Diverts incoming calls to another num ber
DTC De sk Top Charger
DTMF Dual Tone Multifrequency Tones
FDN Fixed Dial ling Number
GSM Global System for Mobile communications
http HyperText Transfer Protocol
IN Information Numbers of your operator
IP Internet Protocol
LCD Liquid Crystal Display
MMI Man Machine Inter face
MMS Multimedia Messaging Serv ice
PIN/PIN2 Personal Identification Number. Supplied by your network/service
PPP Point to Point Protocol
PUK/PUK2 PIN Unblocking Key. Used to unlock PIN and PIN2. Supplied by your
Roaming (Rm) The ability to use your teleph one on networks other than your ho me
SDN Serv ice Dialling Number of your operator or ser vice provider
SIM Subscr iber Identity Module. Supplied by your networ k/service provider
SMS Short Message Service
SPN Service Provider Nam e
SR Status Report - relates to SMS messages
Standby m ode When the phone is on but not re ceiving/making a call or menu navigating.
URL Uniform Resource Locator
provider
network/service pr ovider
network.
Trouble shooting
PROBLEM POSSIBLE CA USE AND SOLUTION
Phone does not
switch on
No flashing
battery icon
whilst
charging
Short standby
and talk times
Impossible to
dial numbers
Impossible to
make or receive
a call
Stored
telephone
numbers cannot
be recalled
The mobile is on
but nothin g is
displayed
Battery icon
not flashing
1-2-3 during
charging
No charge
symbol when
connecting the
charger
symbol
displayed
Flashing T here is not enough memory to store another SMS message. Delete o ne or
Check that the batter y is fully charged and correctly connected to the phone.
There may be no mains supply. Try a different electrical socket.
The charger may be faulty. Return to your dealer and try substitution with
another Motorola adapto r. If faulty, contact your dealer.
Cell broadcast is perm anently on, using more batter y power.
Phone is in a poor signal area and therefore always on full power.
Incorrect charging and discharging. Always charge and dischar ge your
battery fully.
The battery is wearin g out. Replace the batter y.
Keypad lock is on ( appears). Press Unlock and to turn the keypad lock
off.
Check that at least one signal strengt h bar ( ) is displayed. Try a stronger
signal strength area.
If no network name is d isplayed, check registration and area coverage with
your service/networ k provider and check that the SIM is correctly ins erted.
Call barring option is on. Deac tivate it (see page 66).
Call cost limit has been reache d (see page 30).
Fixed Dialled Number or Call barri ng features are activated. Deactivate
feature (see page 66).
Display contrast is too low. Reset contrast (see page 60).
May indicate a charge or battery problem. Disconnect the charger.
Reconnect and tr y again.
May also indicate that the b attery is fully recharged and does not require any
further charging.
If the battery is totally emp ty the battery level symb ol may not be displayed
at once when connectin g the battery charger. In this case the mobile ca nnot
be turned on. Up to 15 minutes may be necessary to reach the required 4%
battery charge to turn your mobile on and allow the battery charge symbol
to be displayed.
There is not enough memo ry to store another E-mail or an other MMS.
Delete one or more of the existing stored messages.
more of the existing stored messag es.
Appendix
69-
Error messages
PROBLEM POSSIBLE CAUSE AND SOLUTION
Allowed cr edit reach ed! You are trying to place an outgo ing call and you have reached
An internal error has
occured
Busy You are trying to make a call and the ca ll fails because the
Call failed The user is unreachable.
Cancelled. No type
selected
Cannot execute command You have made a request which is impossible to be executed in
Can’t display messag e The short message text cannot be displayed (charac ters not
Charge e rror A problem occured during the mobil e battery charge process.
Check battery! A battery problem has been detected.
Check SIM! There is no SIM present or th e SIM is incorrectly inser ted.
Check your password You changed the call barring password or
Check your request You made a request for a ser vice that seems to be impossible to
Check your subscription You tried to activate a GSM ser vice. You are requested to check
Connection failed Connection w ith the server cannot be established for one of the
Connection failure The data connection failed.
Error! The network cannot perform your request and gen erates an
Failed An SMS sendi ng process failed (SMS cannot be sent).
File protected The file cannot be expor ted (copyright).
File too big The file dimensions (pixels) and/ or weight (kB) are not adapted
Incorrect entry You entered a character string with a syntax error.
Invalid data received The received file includes invalid information or the m elody
your credit limit.
You have reached your credit limit during an ou tgoing call (the
call is then aborted).
An error occured in a game execution.
destination number is alread y engaged.
The outgoing call has failed because:
- the network can not take the call due to system busy o r
- the number is out of order or
- the number is unreachable or
- the network does not answer or
- the option to hide your phone number whe n calling is not
supported by the networ k. (You can control the ability to hide
your ID when making a call. This serv ice is available in the
network).
Cell broadcast activation has bee n requested but no message
type has been selected.
the current call sit uation.
recognised, incorrect format etc.)
You changed the call barring se rvice status.
The entered password seems to be incorr ect.
fulfil.
your subscription regarding th e related service rights of use/
access.
following reasons:
The server is busy. Try to connect later.
The server is down. Try to connect later.
The network is not reachable. Check the GPR S service icon is
displayed on Idle screen.
error result.
to your mobile.
format cannot be recognise d by the mobile
Appendix
71-
Appendix
70-
Invalid number - You tried to make a call and the call is rejected by the networ k
Low battery! The battery is low and the phone will soon be switched off
Network busy You tried to make a call. The call is rejected by the network due
Network not allowed In manual networ k search, you have selected a network that
New PIN2 incorrect. Try
again
New PIN incorrect. Try
again
No connection No connection has been defin ed defined in the connection
No match! No matching pattern ha s been found between the spoken
No response You made a call to a remote user and no response ha s been
Not allowed Your number/character entry is not allowed.
Not allowed fixed dialling An attempted call is cancelled due to fixed dialling control (the
Not enough place in the
phone memory
Not enough place in the
SIM memory
Number changed The called number has c hanged.
Page has no content Your request was accepted by the network but the required
Phone permanently
blocked
PIN blocke d A wrong PIN code has been entered 3 times.
PIN blocke d A wrong PIN2 code has been entered 3 times.
PUK2 blocked A wrong PUK2 code has bee n entered 10 times.
Reaching allowed credit! The cost limit is abou t to be reached. The connected call end s
Ring volume Off The r ing volume is set to 0 (n o volume)
Service not available The GSM services that have been activated are not available on
SIM blocke d. Contact
provider
SIM names phonebook full
Phone names phonebook
full
Undeletable file The file cannot be deleted (copyright protected).
Wrong code. Try again A wrong phone lock code has been entered .
because the network does not recognise the phone number
structure or
- you tried to store a phone number that is too long to be st ored
in the selected location or
- you tried to move a phone entry to a locatio n that is unable to
receive the phone num ber (phone number t oo long).
automatically.
to congestion problems.
rejects the connection.
Changing PIN2: the n ew PIN2 code values dif fer (value control).
Changing PIN: the new PIN code values differ (value control).
profile.
sentence and the recorded se ntences from the voice dailling
database.
received.
number dialled does not match w ith one of the fixed dialling
numbers in memor y).
The corresponding memory is full.
server page is empty.
A wrong phone unlock code has bee n entered 10 times. The
phone is now per manently blocked.
The SIM services protected by the PIN2 code have now been
permanently d isabled.
automatically when the limit is re ached.
the network
A wrong PUK has been entered 10 times.
The SIM card has been per manently disabled and needs to be
replaced by a new one.
The corresponding memory is full.
Appendix
72-
Page 25

Wrong new code. Try again The new phone lock codes do not match (value control).
Wrong PIN, try again
Wrong PIN2, try again
Wrong PUK, try again
Wrong PUK2, try again
Wrong SIM inserted: phone
locked
Invalid SIM
File too big The midlet size exceeds the maxim um size supported (96 kB).
Not enough space The corresponding memor y is nearly full.
Too many applications The number of applicatio ns in the mobile h as already reache d
The wrong code has been entered .
A SIM card, different from the SIM to which the phone is locked,
has been inserte d in the phone.
the maximum (50).
Specific Absorption Rate Data
THIS MODEL MEETS IN TERNATIONAL GUIDELINES FOR EXPOSU RE TO RADIO WAVES
Your mobile device is a radio transmitter and receiver. It is designed not to exceed the limits for
exposure to radio wav es recommended by in ternational guidelines. These guidelines were
developed by the indepen dent scientific body I CNIRP and include safet y margins designed to
ensure the protection of all perso ns, regardless of age or health.
The guidelines use a unit of measureme nt known as the Specific Absorption Rate, or SAR. The
ICNIRP SAR limit for mo bile devices used by the general public is 2 W/kg and the highest SAR
value for this device when tested at the ear was 1.36 W/kg
of functions, they can be used in other positions, such as on the bo dy, as described in this user
2
guide
. In this case, the highest tested SAR value is 0.75 W/kg1.
As SAR is measur ed using the device’s highest transmitting po wer, the actual S AR of this
device while operating is typical ly below that indicated above. This is because the power level
of the device is set automat ically to ensure it only uses the minimum level re quired to reach the
network.
While there may be varia tions between the SAR le vels of different phones and of the different
positions in which they are used, they all me et the government requirements for safe exposure.
Please note that improvements to this model could cause differences in the SAR values for later
models, but in all cases, products are designed to conform to the guidelin es.
The World Health Organiz ation has stated that current scientific evidence does not indicate the
need for any special precautions when using mobile devices. They not e that if you want to
reduce your exposure, you can do so by lim iting the length of calls or using a 'hands-free' device
to keep the mobile phone away fro m the head and body.
Additional Information can be f ound on the website of the World Hea lth Organization
(http://www.who.int/emf) or Motorola, Inc.
(http://www.motorola.com/rfhealth).
1
The tests are carried out in accordance with international guidelines for testing. The limit
incorporates a substantial margin for safety to give additional protection and to allow for any
variations in me asurements. Additional rela ted information includes the Mo torola testing protocol,
assessment pro cedure, and meas urement unce rtainty range for t his product.
2 Please see the Safet y and General Information sec tion about body-worn operation .
1
. As mobile devices offer a range
Information from the World Health Organisation
WHO Information
Present scientific information does not indicate the need for any special precautions for the use
of mobile phones. If you are concerned , you may want to limit your own or your child ren’s RF
exposure by limiting the length of calls or by using hand sfree devices to keep mobile phones
away from your h ead and body.
Source: WHO Fact Sheet 193
Further information: http://www.who.int./peh-emf
Appendix
73-
Appendix
74-
Page 26

INDEX
A
Adjusting your picture .............. 38
Aircraft ....................................... 4
Alarm clock .............................. 17
Alert mode ............................... 58
Answering a call ...................... 11
Any key answ er ....................... 60
Approved Accessories ............... 4
Auto Switch Off ........................ 62
Auto Switch On ........................ 62
Automatic search ..................... 66
Auto-retry ................................. 61
B
Backlight ............................ 59, 60
Balance information .................29
Batteries and Chargers .............. 5
Blasting Caps and
Blasting Areas .......................... 5
Bluetooth
Paired devices ...................... 19
Bluetooth®
Bluetooth activation .............. 18
Body-Worn Operation ................ 3
Bookmarks ............................... 49
Broadcast
Language ............................. 27
Message types ............... 26, 27
C
Calcula tor ................................ 16
Calendar .................................. 46
Call
Duration ................................ 29
Recorded .............................. 30
Reminder .............................. 29
Times ................................... 28
Call barring .............................. 66
Call barring password
Call ....................................... 66
Call cost
Reset .................................... 30
Call hold ................................... 64
Call management
Call costs .............................. 29
Call timer
Reset .................................... 29
Call waiting .............................. 64
Caller line identity .................... 64
Calls & Times .......................... 28
Call costs ........................ 29, 30
Call timers ...................... 28, 29
Calls log ............................... 28
Line selection ....................... 30
Camera .................................... 37
Adjusting your picture ........... 38
Brightness ............................ 38
Picture resolution ................. 39
Picture settings ..................... 38
Self timer .............................. 39
Taking a picture .................... 37
Zoom .................................... 38
Caring for the Environment by
Recycling ................................. 7
CB ............................................26
CB messages
Reading ................................26
Cell broadcast ..........................26
Choking Hazards ........................5
CLI ............................................64
Credit limit ................................30
Cropping ...................................41
Currency converter ...................17
D
Damaged Products ....................5
Data exchange .........................44
Data Operation ...........................4
Diary
Calendar .........................13, 14
Storage used ........................16
Tasks list ...............................15
Display .....................................59
Downloaded melodies ..............42
E
Editing a phonebook card ........32
Editing a SIM name card ..........32
Editing a text model ..................24
Ending a call .............................11
Entering text .............................22
Error messages ........................71
European Union Directives
Conformance Statement ...........7
Export .......................................36
Exposure to Radio Frequency
Energy ......................................3
External Antenna Care ...............3
F
Figures on Menu list .................10
Fixed dialling numbers .............35
Fun & Media box ......................40
Fun & Mediabox
Games & app lications ...........42
Others ...................................44
Storage used ........................45
G
Games & app lications ..............42
Gas or Petrol Stations ................5
General Information ...................3
Glass Parts .................................5
Glossary ...................................69
GPRS ...................................9, 12
Graphic display icons ...........9, 10
GSM Services
Call diverting ...................63, 64
Network .................................65
I
Icons ...........................................9
Idle screen ................................12
Image download .......................57
i-mode ......................................47
Bookmarks ............................49
Composing an e-mail ............51
Composing an MMS .............52
Inbox .....................................53
Mail .......................................48
Menu .....................................47
User interface .......................47
Information numbers ................46
Index
75-
Infrared port
Opening ................................18
K
Key .............................................8
Keypad .....................................60
Keypad lock ............................. 60
L
Line 1 .....................28, 30, 35, 63
Line 2 ...............28, 30, 35, 61, 63
M
Mail ..........................................48
Selective retrieval .................5 4
Making a call ............................11
Medical Devices .........................4
Hearing Aids ...........................4
Other Medi cal Devices ...........4
Pacemakers ............................4
Melodies ...................................41
Download ..............................41
Melody
Download ..............................57
Messages
Outbox ..................................25
Reception Alert .....................21
Settings .................................21
SMS alert ..............................21
Storage used ........................ 26
Text models ..........................24
Text symbol s ........................23
Write new ........................24, 25
Mobile number
Hiding ...................................64
Showing ................................64
Modem .....................................19
Multipress text entry .................22
Multitap ....................................23
Multitap text entry .....................22
My number ...............................35
My picture ................................59
N
Network ....................................65
Network serv. ...........................46
O
Operational Precautions ............3
Operational Warnings ................4
Outbox .....................................25
P
Phone
Settings .................................58
Phone lock ...............................67
Code .....................................67
Phone names card ...................31
Phone numbers
Storing ..................................31
Phone Operation ........................3
Phonebook ...............................31
Add name 31, 32, 33, 34, 35, 36
Calling numbers ....................33
Category ...............................34
Export ...................................36
Fixed dialling ...................35, 36
Free space ............................34
My numbers ..........................35
Read .....................................33
SIM names card ................... 31
Storage used ........................ 34
Storing a received number ...32
Storing names ......................31
Storing phone numers .......... 31
Viewing & calling .................. 33
Voice dialling .................. 33, 34
Pictures
Album ...................................40
Browser ................................40
Phonebook ...........................57
Resolution ............................. 39
Size ......................................37
Potentially Explosive
Atmospheres ............................5
R
Recorded call ...........................30
Recycling Mobile Phones and
Accessorie s ..............................7
Rejecting a call .........................11
Reminder - call duration ........... 29
Repetitive Motion Injuries ...........6
RF ..............................................3
RF Energy Interference/
Compatibility ............................. 4
Ring ..........................................58
Ringtones .................................58
S
Safety Information ......................3
SAR .......................................... 74
Security .................................... 67
Features ...............................67
Seizures/Blackouts ....................5
Selective retrieval .....................54
Self timer ..................................39
Setting an image
Goodbye screen ................... 41
Idle screen ............................41
Welcome screen ...................41
Settings
Any key answ er ....................60
Auto features .................. 61, 62
Broadcast .......................26, 27
Default settings .....................63
Idle screen ............................59
Keypad .................................60
My picture ............................. 59
Phone settings ......................61
Security .................................67
Time and date .......................62
Tones .............................58, 59
Voice Mail .............................61
Welcome screen ...................59
Show costs ...............................30
Silent ........................................ 58
SMS
Forward ................................21
Move to SIM ......................... 20
Reading ................................ 20
Sending ................................24
Writing ..................................22
SMS messages
Sending ................................24
Solutions ............................ 70, 71
Specific Absorption Rate Data .74
Speech note
Record new ..........................43
Speech notes ...........................43
Speed dial ................................60
Standy display and Welcome
screen animation .................... 40
Storage consumption ...............26
Storage used ........................... 45
Storing names ......................... 31
T
T9 ............................................ 23
T9 text entry ............................. 23
Taking a picture ....................... 37
Text
Writing .................................. 22
Text entry
Multipress mode ................... 22
Multitap mode .......................22
T9 mode ............................... 23
Text model
Editing .................................. 24
Tones .......................................58
Tools
Alarm clock ........................... 17
Calculator ............................. 16
Diary ..................................... 13
Turning the phone off .............. 12
U
Use While Driving ...................... 4
User interface .......................... 47
V
vCalendar
Sending ................................44
Storing ..................................44
vCard
Sending ................................44
Storing ..................................44
Vehicles With an Air Bag ........... 4
Vibrate .....................................58
& ring .................................... 58
Then ring ..............................58
Viewing an image .................... 40
Voice dialling
Creating a voice pattern ....... 33
Voice Mail
Alert ...................................... 61
Call .......................................61
Number ................................ 61
Voice rec ognition
Making a call ........................ 34
Volume
Alarm .................................... 58
Conversation ........................ 58
Key tones ............................. 58
Ring ...................................... 58
Volume adjustments ................ 58
W
Webpage .................................49
Welcome screen ......................40
Index
76-
 Loading...