

Page 1
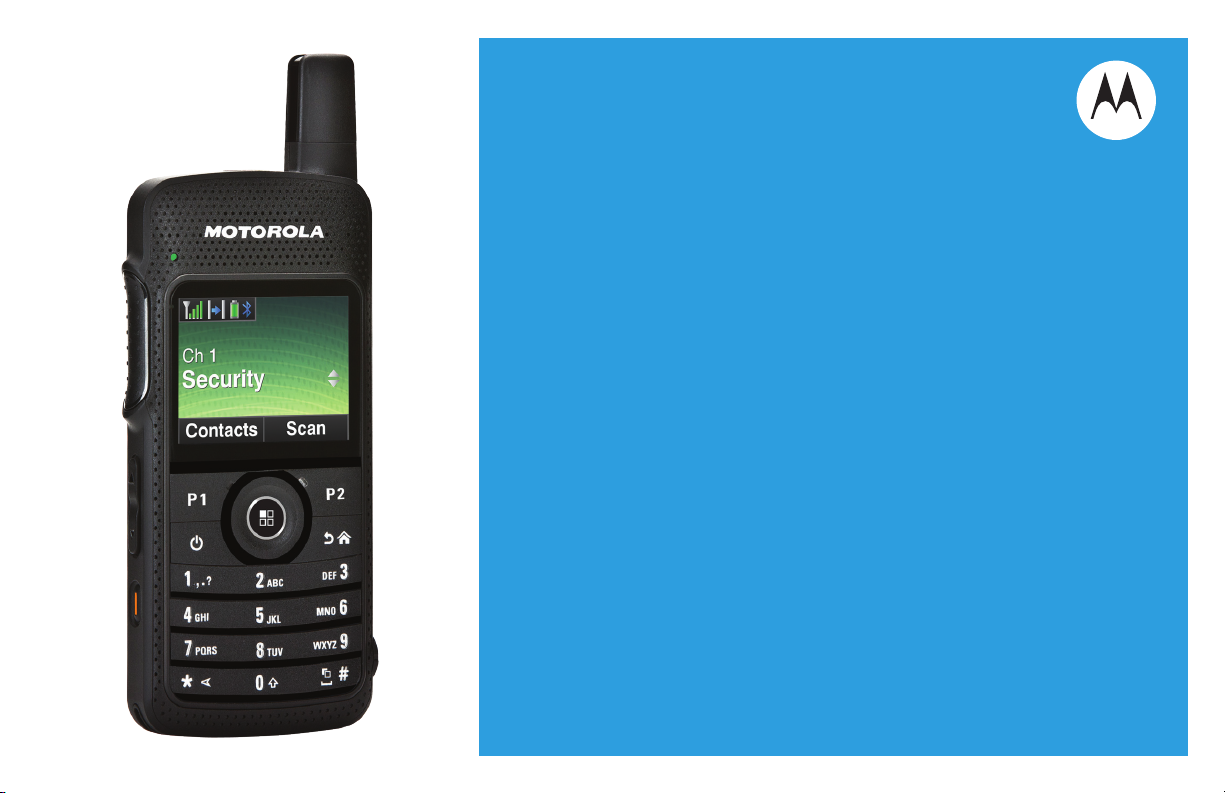
PROFESSIONAL DIGITAL TWO-WAY RADIO
MOTOTRBO™
SL
Series
PORTABLES
USER GUIDE
Page 2

Page 3

Contents
Contents
Declaration of Conformity....................... 13
Notes...............................................15
Important Safety Information........16
Software Version............................17
Computer Software Copyrights....18
Handling Precautions.................... 19
RF Energy Exposure and
Product Safety Guidelines
and Instructions......................... 20
Notes...............................................21
Getting Started............................... 22
How to Use This Guide..................................22
What Your Dealer/System Administrator
Can Tell You.............................................22
Preparing Your Radio for Use.......23
Charging the Battery......................................23
Attaching the Battery..................................... 24
Attaching the Earpiece/Audio Accessory.......24
Powering Up the Radio..................................25
Adjusting the Volume.....................................25
Identifying Radio Controls............ 26
3
English
Page 4

Contents
4
Radio Controls...............................................26
Using the 4-Way Navigation Disc.................. 27
Using the Keypad.......................................... 28
Additional Radio Controls in
Non-Connect Plus Mode............30
Push-To-Talk (PTT) Button............................30
Programmable Buttons..................................30
Assignable Radio Functions............... 31
Assignable Settings or Utility
Functions....................................... 33
Accessing the Programmed Functions..........33
Identifying Status Indicators...........................34
Display Icons.......................................34
Call Icons............................................ 37
Utilities Icons.......................................37
Mini Notice Icons.................................38
Sent Item Icons ..................................38
Job Tickets Icons................................ 39
LED Indicator...................................... 39
Audio Tones........................................40
Indicator Tones................................... 41
Switching Between Connect Plus and
Non-Connect Plus Modes.........................41
IP Site Connect..............................................41
Capacity Plus.................................................42
Linked Capacity Plus..................................... 42
Making and Receiving Calls..........44
Selecting a Site..............................................44
Roam Request....................................44
Site Restriction....................................44
Selecting a Zone............................................44
Selecting a Channel.......................................45
Receiving and Responding to a Radio Call... 46
Receiving and Responding to a
Group Call......................................46
Receiving and Responding to a
Private Call.................................... 47
Receiving an All Call...........................48
Receiving and Responding to a
Phone Call..................................... 48
Making a Radio Call.......................................49
Making a Group Call........................... 50
Making a Private Call .........................51
Making an All Call............................... 52
Making a Phone Call with the One
Touch Access Button.....................52
Making a Private Call with a One
Touch Call Button.......................... 54
English
Page 5

Contents
Advanced Features in Non-
Making a Group, Private or All Call
with the Programmable Number
Key ................................................55
Making a Phone Call with the
Programmable Phone Button........ 56
Stopping a Radio Call....................................57
Talkaround.....................................................58
Monitoring Features.......................................59
Monitoring a Channel..........................59
Permanent Monitor............................. 59
Connect Plus Mode.................... 60
Radio Check.................................................. 60
Sending a Radio Check...................... 60
Remote Monitor............................................. 61
Initiating Remote Monitor....................62
Scan Lists...................................................... 63
Viewing an Entry in the Scan List....... 63
Viewing an Entry in the Scan List
by Alias Search..............................64
Editing the Scan List........................... 64
Scan...............................................................68
Setting an Active Scan List................. 68
Starting and Stopping Scan................ 69
Responding to a Transmission
During a Scan................................ 69
Deleting a Nuisance Channel............. 70
Restoring a Nuisance Channel........... 70
Contact Settings............................................ 70
Making a Group Call from Contacts....71
Making a Private Call from
Contacts ........................................72
Making a Phone Call from Contacts... 73
Making a Call Alias Search ................75
Making a Group, Private, Phone or
All Call by Alias Search .................77
Assigning an Entry to a
Programmable Number Key ......... 78
Removing the Association between
Entry and Programmable
Number Key ..................................79
Adding a New Contact........................ 80
Sending a Message to a Contact........80
Call Indicator Settings....................................81
Activating and Deactivating Call
Ringers for Call Alert .....................81
Activating and Deactivating Call
Ringers for Private Calls ............... 81
Activating and Deactivating Call
Ringers for Text Message..............82
5
English
Page 6

Contents
6
Activating and Deactivating Call
Ringers for Telemetry Status
with Text........................................ 83
Assigning Ring Styles......................... 83
All Tones.............................................84
Ring Alert Type Selection................... 84
Escalating Alarm Tone Volume...........85
Call Log Features.......................................... 85
Viewing Recent Calls..........................86
Missed Call Screen.............................86
Storing an Alias from a Call List..........86
Deleting a Call from a Call List............86
Viewing Details from a Call List.......... 87
Call Alert Operation....................................... 87
Receiving and Responding to a
Call Alert........................................ 88
Making a Call Alert from the
Contact List....................................88
Making a Call Alert with the One
Touch Access Button.....................89
Emergency Operation....................................89
Receiving an Emergency Alarm..........90
Responding to an Emergency
Alarm............................................. 90
Sending an Emergency Alarm............ 91
Sending an Emergency Alarm with
Call.................................................92
Sending an Emergency Alarm with
Voice to Follow ............................. 93
Reinitiating an Emergency Mode........94
Exiting Emergency Mode....................94
Text Message Features.................................94
Writing and Sending a Text
Message........................................ 95
Sending a Quick Text Message..........96
Sending a Quick Text Message..........97
Accessing the Drafts Folder................98
Managing Fail-to-Send Text
Messages.................................... 100
Managing Sent Text Messages........ 102
Receiving a Text Message................105
Managing Received Text Messages.105
Job Tickets...................................................109
Accessing the Job Ticket Folder.......109
Responding to the Job Ticket........... 110
Deleting a Job Ticket........................ 111
Privacy.........................................................111
Covert Mode................................................ 113
Entering Covert Mode.......................113
Exiting Covert Mode..........................113
Dual Tone Multi Frequency (DTMF)............ 113
Multi-Site Controls....................................... 113
Starting an Automatic Site Search....114
Stopping an Automatic Site Search.. 115
English
Page 7

Contents
Starting a Manual Site Search.......... 115
Security........................................................116
Radio Disable....................................116
Radio Enable.................................... 118
Lone Worker................................................ 119
Password Lock Features............................. 120
Accessing the Radio from
Password..................................... 120
Unlocking the Radio from Locked
State............................................ 121
Turning the Password Lock On or
Off................................................ 121
Changing the Password....................122
Bluetooth Operation.....................................123
Turning Bluetooth On and Off...........123
Finding and Connecting to a
Bluetooth Device..........................124
Finding and Connecting from a
Bluetooth Device (Discoverable
Mode)...........................................125
Disconnecting from a Bluetooth
Device..........................................125
Switching Audio Route......................126
Viewing Device Details..................... 126
Editing Device Name........................ 126
Deleting Device Name...................... 127
Bluetooth Mic Gain............................127
Notification List............................................ 127
Accessing the Notification List.......... 128
Over-the-Air-Programming (OTAP)............. 128
Utilities......................................................... 129
Locking and Unlocking the Keypad.. 129
Turning Keypad Tones On or Off......129
Turning the Option Board
Feature(s) On or Off.................... 130
Identifying Cable Type...................... 130
Turning the Voice Operating
Transmission (VOX) Feature
On or Off...................................... 130
Controlling the Display Backlight...... 131
Turning the Radio Tones/Alerts On
or Off............................................132
Setting the Tone Alert Volume
Offset Level..................................132
Turning the Talk Permit Tone On
or Off............................................133
Setting the Text Message Alert
Tone.............................................134
Changing the Display Mode..............134
Adjusting the Display Brightness...... 135
Wallpaper Mode................................136
Screen Saver Mode.......................... 136
Audio Accessory............................... 137
Auto Keypad Lock.............................137
7
English
Page 8

Contents
8
Language..........................................138
Turning the LED Indicator On or Off. 138
Voice Announcement........................138
Digital Mic AGC (Mic AGC-D)........... 139
Intelligent Audio................................ 140
Turning the Acoustic Feedback
Suppressor Feature On or Off..... 141
Text Entry Configuration................... 142
Flexible Receive List.........................147
Accessing General Radio
Information...................................150
RSSI Values......................................153
Additional Radio Controls in
Connect Plus Mode.................. 154
Push-To-Talk (PTT) Button..........................154
Programmable Buttons................................154
Assignable Radio Functions............. 155
Assignable Settings or Utility
Functions..................................... 155
Identifying Status Indicators in Connect
Plus Mode...............................................156
Display Icons.....................................156
Call Icons.......................................... 158
Sent Item Icons ................................158
LED Indicator.................................... 159
Indicator Tones................................. 160
Audio Tones......................................160
Making and Receiving Calls in
Connect Plus Mode.................. 161
Selecting a Site............................................161
Roam Request..................................161
Site Lock On/Off................................161
Site Restriction..................................161
Selecting a Zone..........................................162
Using Multiple Networks.............................. 162
Selecting a Call Type...................................163
Receiving and Responding to a Radio Call. 163
Receiving and Responding to a
Group Call....................................163
Receiving and Responding to a
Private Call.................................. 164
Receiving an All Call.........................165
Making a Radio Call.....................................165
Making a Call with the Channel
Selector Knob.............................. 166
Making a Private Call with a One
Touch Call Button........................ 168
English
Page 9

Contents
Advanced Features in Connect
Making a Call with the
Programmable Manual Dial
Button.......................................... 168
Plus Mode................................. 170
Auto Fallback...............................................170
Indications of Auto Fallback Mode....170
Making/Receiving Calls in Fallback
Mode............................................170
Returning to Normal Operation.........171
Radio Check................................................ 171
Sending a Radio Check.................... 171
Remote Monitor........................................... 172
Initiating Remote Monitor..................172
Scan.............................................................173
Starting and Stopping Scan.............. 173
Responding to a Transmission
During a Scan.............................. 174
User Configurable Scan...............................174
Turning Scan On or Off.....................175
Editing the Scan List......................... 175
Understanding Scan Operation.........176
Contacts Settings.........................................177
Making a Private Call from Contacts.177
Making a Call Alias Search...............178
Adding a New Contact...................... 179
Call Indicator Settings..................................179
Activating and Deactivating Call
Ringers for Call Alert ...................179
Activating and Deactivating Call
Ringers for Private Calls.............. 180
Activating and Deactivating Call
Ringers for Text Message............181
Assigning Ring Styles....................... 181
Escalating Alarm Tone Volume.........182
Call Log Features........................................ 182
Viewing Recent Calls........................183
Deleting a Call from a Call List..........183
Viewing Details from a Call List........ 184
Call Alert Operation..................................... 184
Receiving and Responding to a
Call Alert...................................... 184
Making a Call Alert from the
Contact List..................................184
Making a Call Alert with the One
Touch Access Button...................185
Emergency Operation..................................185
Receiving an Incoming Emergency.. 187
Saving the Emergency Details to
the Alarm List...............................188
Deleting the Emergency Details........188
9
English
Page 10

Contents
10
Responding to an Emergency Call... 188
Responding to an Emergency Alert.. 189
Initiating an Emergency Call............. 189
Initiating an Emergency Call with
Voice to Follow............................ 190
Initiating an Emergency Alert............190
Exiting Emergency Mode..................191
Text Message Features...............................191
Writing and Sending a Text
Message...................................... 192
Sending a Quick Text Message........193
Sending a Quick Text Message
with the One Touch Access
Button.......................................... 194
Accessing the Drafts Folder..............195
Managing Fail-to-Send Text
Messages.................................... 197
Managing Sent Text Messages........ 199
Receiving a Text Message................202
Reading a Text Message..................202
Managing Received Text Messages.202
Privacy.........................................................206
Making a Privacy-Enabled
(Scrambled) Call.......................... 207
Security........................................................207
Radio Disable....................................207
Radio Enable.................................... 209
Password Lock Features............................. 210
Accessing the Radio from
Password..................................... 210
Unlocking the Radio from Locked
State............................................ 211
Turning the Password Lock On or
Off................................................ 211
Changing the Password....................212
Bluetooth Operation.....................................213
Turning Bluetooth On and Off...........213
Finding and Connecting to a
Bluetooth Device..........................214
Finding and Connecting from a
Bluetooth Device (Discoverable
Mode)...........................................215
Disconnecting from a Bluetooth
Device..........................................215
Switching Audio Route......................216
Viewing Device Details..................... 216
Editing Device Name........................ 216
Deleting Device Name...................... 217
Bluetooth Mic Gain............................217
Notification List............................................ 217
Accessing the Notification List.......... 218
Utilities......................................................... 218
Turning the Radio Tones/Alerts On
or Off............................................218
English
Page 11

Contents
Turning Keypad Tones On or Off......219
Setting the Tone Alert Volume
Offset Level..................................219
Turning the Talk Permit Tone On
or Off............................................220
Changing the Display Mode..............220
Adjusting the Display Brightness...... 221
Controlling the Display Backlight...... 222
Locking and Unlocking the Keypad.. 222
Language..........................................223
Turning the LED Indicator On or Off. 223
Identifying Cable Type...................... 224
Voice Announcement........................224
Wallpaper Mode................................225
Screen Saver Mode.......................... 225
Audio Accessory............................... 226
Auto Keypad Lock.............................226
Digital Mic AGC (Mic AGC-D)........... 226
Intelligent Audio................................ 227
Turning the Acoustic Feedback
Suppressor Feature On or Off..... 228
Text Entry Configuration................... 229
Accessing General Radio
Information...................................234
Accessories..................................245
Antennas......................................................245
Audio Accessories....................................... 245
Batteries.......................................................245
Bluetooth......................................................245
Cables..........................................................245
Carry Devices.............................................. 245
Chargers......................................................246
Miscellaneous Accessories..........................246
Batteries and Chargers Warranty......... 247
The Workmanship Warranty........................247
The Capacity Warranty................................247
Limited Warranty....................................248
MOTOROLA COMMUNICATION
PRODUCTS........................................... 248
I. WHAT THIS WARRANTY COVERS
AND FOR HOW LONG:......................... 248
II. GENERAL PROVISIONS:....................... 249
III. STATE LAW RIGHTS:............................249
IV. HOW TO GET WARRANTY SERVICE:.249
V. WHAT THIS WARRANTY DOES NOT
COVER:..................................................250
VI. PATENT AND SOFTWARE
PROVISIONS:........................................ 250
11
English
Page 12

VII. GOVERNING LAW:...............................252
Contents
12
English
Page 13
Declaration of Conformity
Declaration of Conformity
This declaration is applicable to your radio only if your radio is labeled with the FCC logo shown below.
Declaration of Conformity
Per FCC CFR 47 Part 2 Section 2.1077(a)
Responsible Party
Name: Motorola Solutions, Inc.
Address: 1303 East Algonquin Road, Schaumburg, IL 60196-1078, U.S.A.
Phone Number: 1-800-927-2744
Hereby declares that the product:
Model Name: SL7550/ SL7590/ SL7580
conforms to the following regulations:
FCC Part 15, subpart B, section 15.107(a), 15.107(d) and section 15.109(a)
13
English
Page 14

Class B Digital Device
Declaration of Conformity
As a personal computer peripheral, this device complies with Part 15 of the FCC Rules. This device complies with
Industry Canada licence-exempt RSS standard(s). Operation is subject to the following two conditions:
1 This device may not cause harmful interference, and
2 This device must accept any interference received, including interference that may cause undesired operation.
Note:
This equipment has been tested and found to comply with the limits for a Class B digital device, pursuant to part
15 of the FCC Rules. These limits are designed to provide reasonable protection against harmful interference in a
residential installation. This equipment generates, uses and can radiate radio frequency energy and, if not installed
and used in accordance with the instructions, may cause harmful interference to radio communications. However,
there is no guarantee that interference will not occur in a particular installation.
If this equipment does cause harmful interference to radio or television reception, which can be determined by
turning the equipment off and on, the user is encouraged to try to correct the interference by one or more of the
following measures:
— Reorient or relocate the receiving antenna.
— Increase the separation between the equipment and receiver.
— Connect the equipment into an outlet on a circuit different from that to which the receiver is connected.
— Consult the dealer or an experienced radio/TV technician for help.
14
English
Page 15

Notes
Notes
English
15
Page 16

Important Safety Information
Important Safety Information
RF Energy Exposure and Product Safety Guide
for Portable Two-Way Radios
ATTENTION!
This radio is restricted to Occupational use only.
Before using the radio, read the RF Energy Exposure
and Product Safety Guide for Portable Two-Way
Radios which contains important operating
instructions for safe usage and RF energy awareness
and control for Compliance with applicable standards
and Regulations.
For a list of Motorola-approved antennas, batteries,
and other accessories, visit the following website:
http://www.motorolasolutions.com
Any modification to this device, not expressly
authorized by Motorola, may void the user’s authority
to operate this device.
Under Industry Canada regulations, this radio
transmitter may only operate using an antenna of a
type and maximum (or lesser) gain approved for the
transmitter by Industry Canada. To reduce potential
16
radio interference to other users, the antenna type
and its gain should be so chosen that the equivalent
isotropically radiated power (e.i.r.p.) is not more than
that necessary for successful communication.
This radio transmitter has been approved by Industry
Canada to operate with Motorola-approved antenna
with the maximum permissible gain and required
antenna impedance for each antenna type indicated.
Antenna types not included in this list, having a gain
greater than the maximum gain indicated for that
type, are strictly prohibited for use with this device.
English
Page 17

Informations importantes sur la
sécurité
Exposition aux radiofréquences et sécurité du produit pour
radios bidirectionnelles portatives
ATTENTION!
Cette radio ne doit être utilisée qu'à des fins professionnelles.
Avant d'utiliser la radio, lisez le guide Exposition aux
radiofréquences et sécurité du produit pour radios
bidirectionnelles portatives, qui contient d'importantes
instructions de fonctionnement pour une utilisation sécuritaire et
des informations sur l'exposition aux fréquences
radioélectriques afin d'assurer la conformité aux normes et
règlements applicables.
Pour obtenir une liste d'antennes et d'autres accessoires
approuvés par Motorola, consultez le site Web:
http://www.motorolasolutions.com
Selon la règlementation d'Industrie Canada, cet émetteur radio
ne peut être utilisé qu'avec une antenne dont le type et le gain
maximal (ou minimal) sont approuvés par Industrie Canada
pour cet émetteur. Afin de limiter les interférences radio pour les
autres utilisateurs, le type et le gain de l'antenne doivent être
choisis de façon à ce que la puissance isotrope rayonnée
équivalente (P.I.R.E.) ne soit pas plus forte qu'il ne le faut pour
établir la communication.
Le présent émetteur a été approuvé par Industrie Canada pour
fonctionner avec les types d'antenne agréés par Motorola et
ayant un gain admissible maximal ainsi que l'impédance
requise pour chaque type d'antenne indiqué.
Les types d'antenne non inclus, dont le gain est supérieur au
gain maximal indiqué, sont strictement interdits pour
l'exploitation de l'émetteur.
Informations importantes sur la sécurité
vi
Français Canadien
Page 18

Software Version
Software Version
All the features described in the following sections are
supported by the radio's software version R02.30.00
or later.
See Checking the Firmware Version and Codeplug
Version on page 151 to determine your radio's
software version.
Check with your dealer or system administrator for
more details of all the features supported.
English
17
Page 19

Computer Software Copyrights
Computer Software Copyrights
including patent rights, copyrights and trade secrets
of Digital Voice Systems, Inc.
18
The Motorola products described in this manual may
include copyrighted Motorola computer programs
stored in semiconductor memories or other media.
Laws in the United States and other countries
preserve for Motorola certain exclusive rights for
copyrighted computer programs including, but not
limited to, the exclusive right to copy or reproduce in
any form the copyrighted computer program.
Accordingly, any copyrighted Motorola computer
programs contained in the Motorola products
described in this manual may not be copied,
reproduced, modified, reverse-engineered, or
distributed in any manner without the express written
permission of Motorola. Furthermore, the purchase of
Motorola products shall not be deemed to grant either
directly or by implication, estoppel, or otherwise, any
license under the copyrights, patents or patent
applications of Motorola, except for the normal nonexclusive license to use that arises by operation of
law in the sale of a product.
The AMBE+2™ voice coding Technology embodied in
this product is protected by intellectual property rights
This voice coding Technology is licensed solely for
use within this Communications Equipment. The user
of this Technology is explicitly prohibited from
attempting to decompile, reverse engineer, or
disassemble the Object Code, or in any other way
convert the Object Code into a human-readable form.
U.S. Pat. Nos. #5,870,405, #5,826,222, #5,754,974,
#5,701,390, #5,715,365, #5,649,050, #5,630,011,
#5,581,656, #5,517,511, #5,491,772, #5,247,579,
#5,226,084 and #5,195,166.
English
Page 20

Handling Precautions
Handling Precautions
The MOTOTRBO Series Digital Portable radio meets
IP54 specifications, allowing the radio to withstand
adverse field conditions such as being exposed to
water or dust.
— Keep your radio clean and exposure to water
should be avoided to help ensure proper
functionality and performance.
— To clean the exterior surfaces of the radio, use a
diluted solution of mild dishwashing detergent and
fresh water (i.e. one teaspoon of detergent to one
gallon of water).
— These surfaces should be cleaned whenever a
periodic visual inspection reveals the presence of
smudges, grease, and/or grime.
Caution: The effects of certain chemicals and
their vapors can have harmful results on
certain plastics. Avoid using aerosol sprays,
tuner cleaners and other chemicals.
English
19
Page 21

RF Energy Exposure and Product
RF Energy Exposure and Product...
Safety Guidelines and Instructions
For more detailed proper usage instructions,
warnings and cautions, refer to the RF Energy
Exposure and Product Safety Guide for Portable
Two-Way Radios booklet.
— To ensure a comfortable audio level and
compliance with RF energy exposure limits, do not
hold the radio against the ear or alongside the
head.
— Use only in front of the face or with Motorola
Solutions approved audio accessories and carry
cases to ensure compliance with RF energy
exposure limits.
20
English
Page 22

Notes
Notes
English
21
Page 23
Getting Started
Getting Started
How to Use This Guide
This User Guide covers the basic operation of the
MOTOTRBO Portables.
However, your dealer or system administrator may
have customized your radio for your specific needs.
Check with your dealer or system administrator for
more information.
For features that are available in both conventional
Analog and Digital modes, no icon is shown.
Conventional Analog Mode-Only features are not
available in Connect Plus mode of operation. See
Additional Radio Controls in Connect Plus Mode on
page 154 for more information.
For features that are available in a conventional multisite mode, see IP Site Connect on page 41 for more
information.
Selected features are also available on the single-site
trunking mode, Capacity Plus. See Capacity Plus on
page 42 for more information.
Selected features are also available in the multi-site
trunking mode, Linked Capacity Plus. See Linked
Capacity Plus on page 42 for more information.
What Your Dealer/System Administrator Can
Tell You
You can consult your dealer or system administrator
about the following:
— Is your radio programmed with any preset
conventional channels?
— Which buttons have been programmed to access
other features?
— What optional accessories may suit your needs?
— What are the best radio usage practices for
effective communication?
— What maintenance procedures will help promote
longer radio life?
22
English
Page 24
Preparing Your Radio for Use
Preparing Your Radio for Use
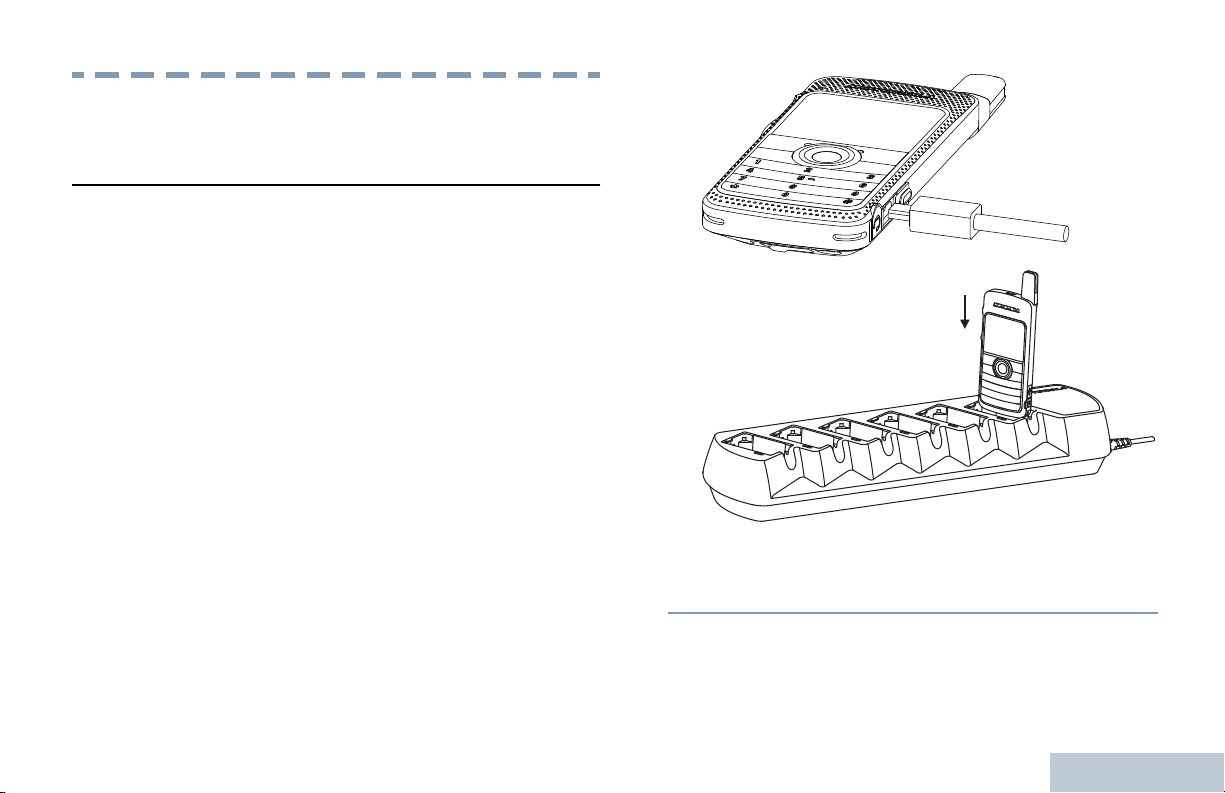
Charging the Battery
Your radio is powered by a Lithium-Ion (Li-lon)
battery. To avoid damage and comply with warranty
terms, charge the battery using a Motorola charger
exactly as described in the charger user guide. All
chargers can charge only Motorola authorized
batteries. Other batteries may not charge. It is
recommended your radio remains powered off while
charging.
Charge a new battery 14 to 16 hours before initial
use for best performance. Prior to charging a
battery with the radio, it is recommended to turn
the radio off. Batteries charge best at room
temperature.
The battery charging icon will be displayed until
the user unplugs the USB cable or takes the radio
out of the charger.
English
23
Page 25
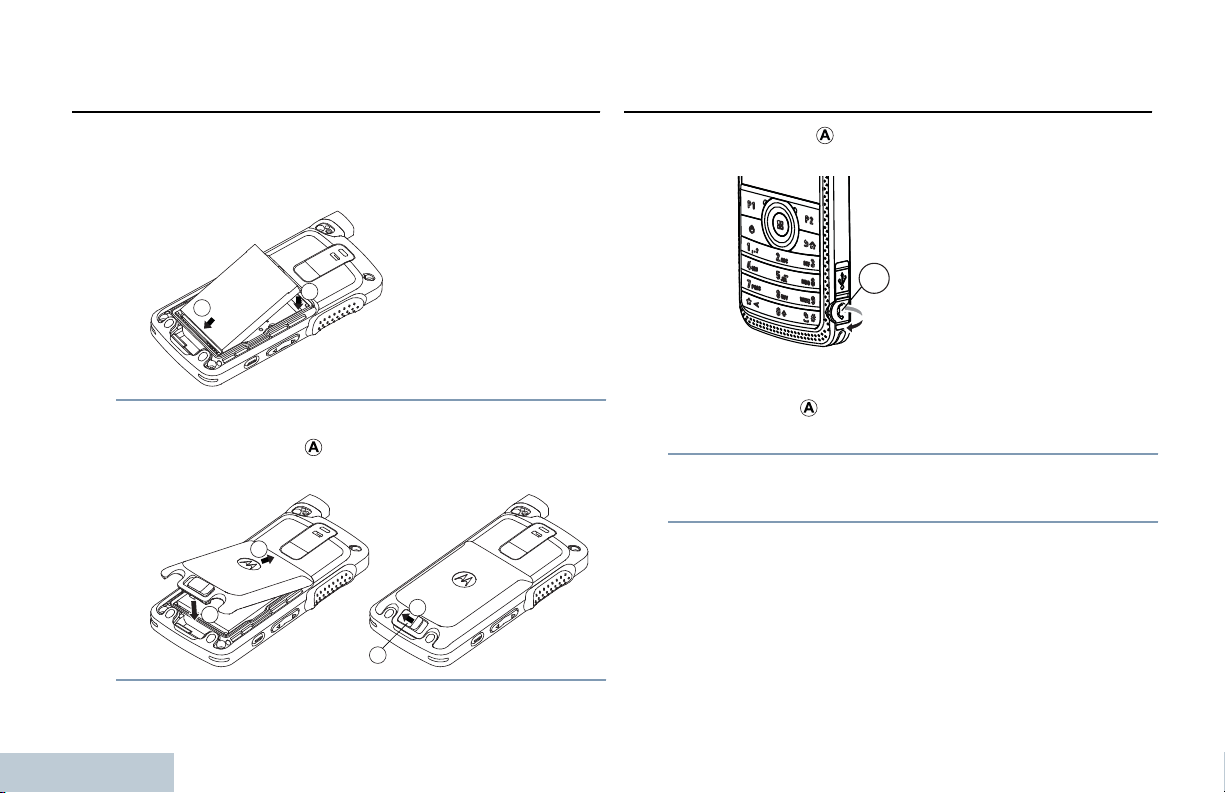
Attaching the Battery
1
2
1
2
A
3
A
Preparing Your Radio for Use
Attaching the Earpiece/Audio Accessory
1 Align the battery contacts with the contacts inside
the battery compartment. Insert the contact side of
the battery first. Gently push the battery into place.
2 To attach battery cover, align it in place and slide
the battery latch ( ) until it snaps into place. Slide
battery latch into lock position.
24
English
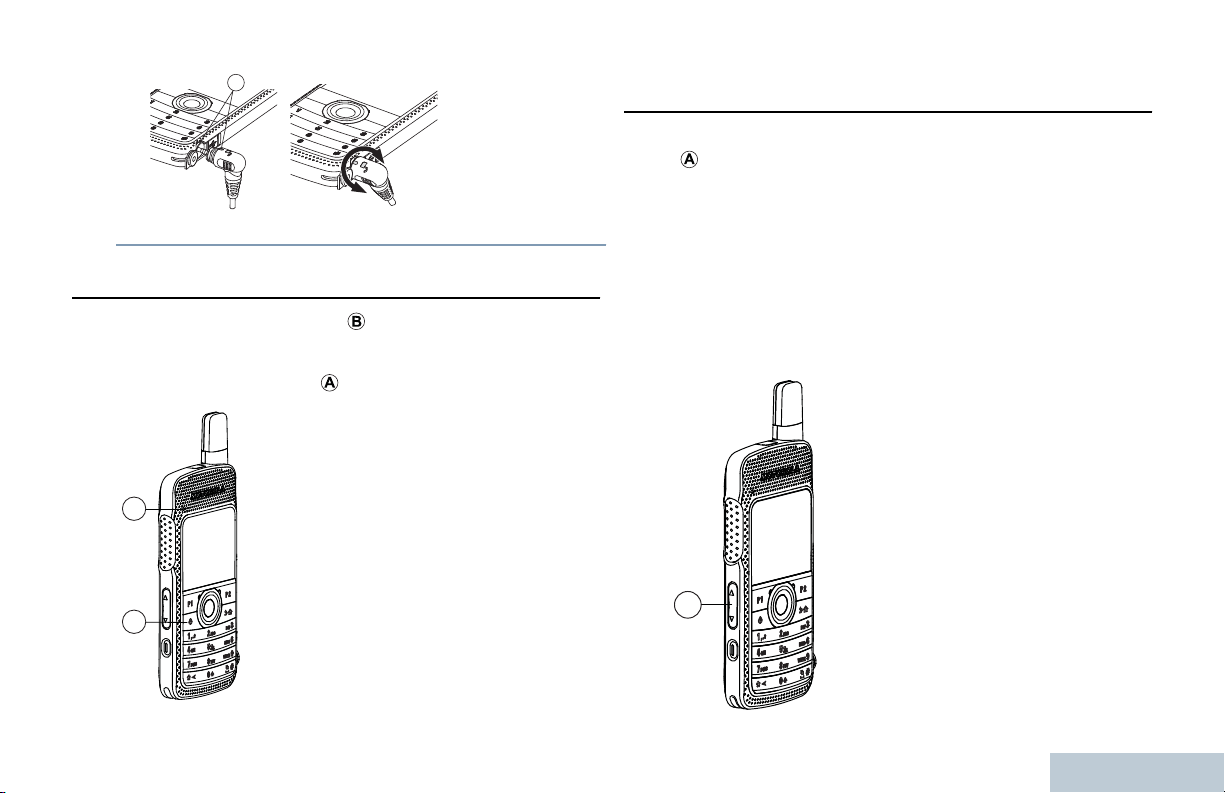
The audio jack ( ) is located on the antenna side of
the radio. It is used to connect accessories to the
radio.
1 Lift up the flap of the Audio Jack cover. Align the
indicators (
then push until it fits in properly.
2 Rotate connector clockwise or counterclockwise to
lock.
3 To unlock, rotate until the indicators on both the
connector and housing are aligned. Pull out the
connector gently to disconnect from radio.
) on both the connector and housing,
Page 26
A
A
B
A
Preparing Your Radio for Use
Powering Up the Radio
Press the On/Off button ( ) on the front keypad. You
see a welcome message or welcome image.
The LED blinks green(
Adjusting the Volume
To increase the volume, push the Volume Button
( ) up.
To decrease the volume, push the volume button
down.
Note: Your radio can be programmed to have a
minimum volume offset where the volume level
cannot be lowered past the programmed minimum
volume. Check with your dealer or system
administrator for more information.
).
25
English
Page 27
Identifying Radio Controls
5
9
4
3
7
8
2
1
15
11
12
10
6
14
13
Identifying Radio Controls
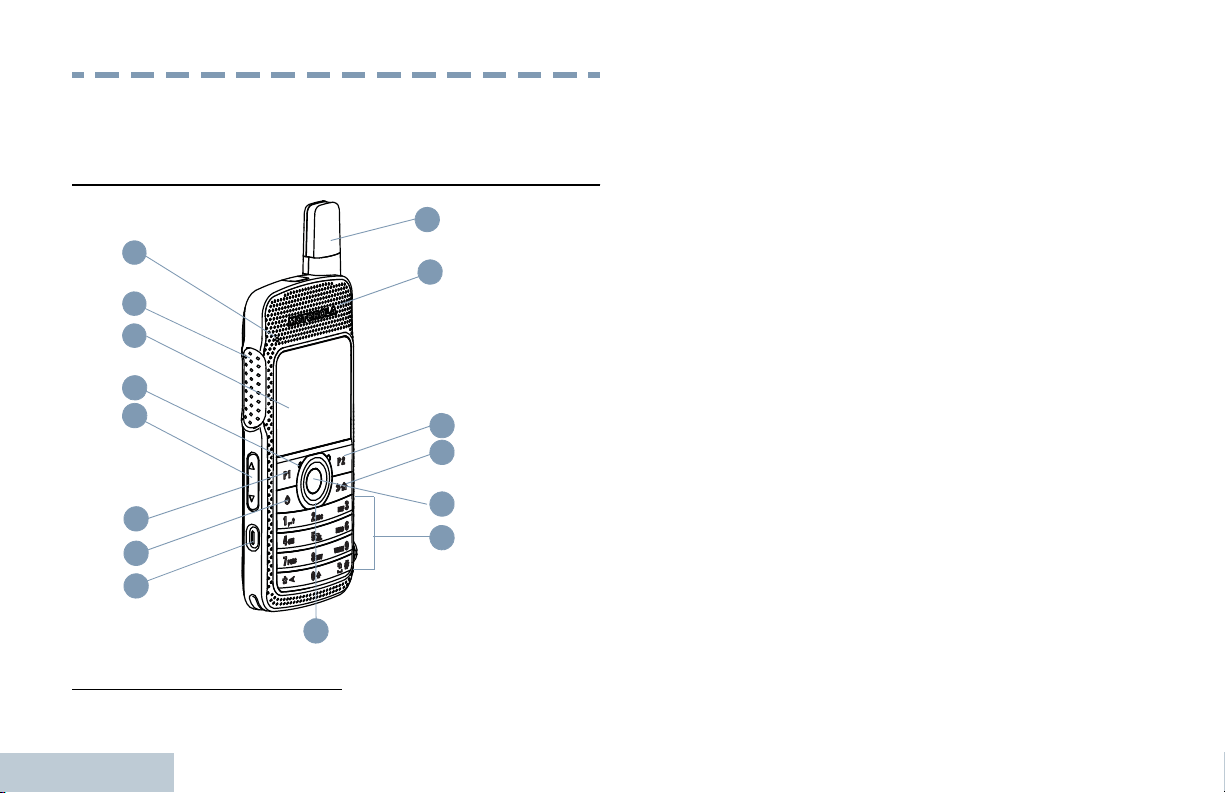
Radio Controls
1 LED Indicator
2 Push-to-Talk (PTT) Button
3 Display
4 Microphone
5 Volume Button
6 Front Button P1
7 On/Off Button
8 Emergency Button
9 4–way Navigation Disc
10 Antenna
11 Speaker
12 Front Button P2
13 Back/Home Button
14 Menu/OK Button
15 Keypad
[1]
[1]
[1]
26
1
English
These buttons are programmable.
Page 28
Identifying Radio Controls
Using the 4-Way Navigation Disc
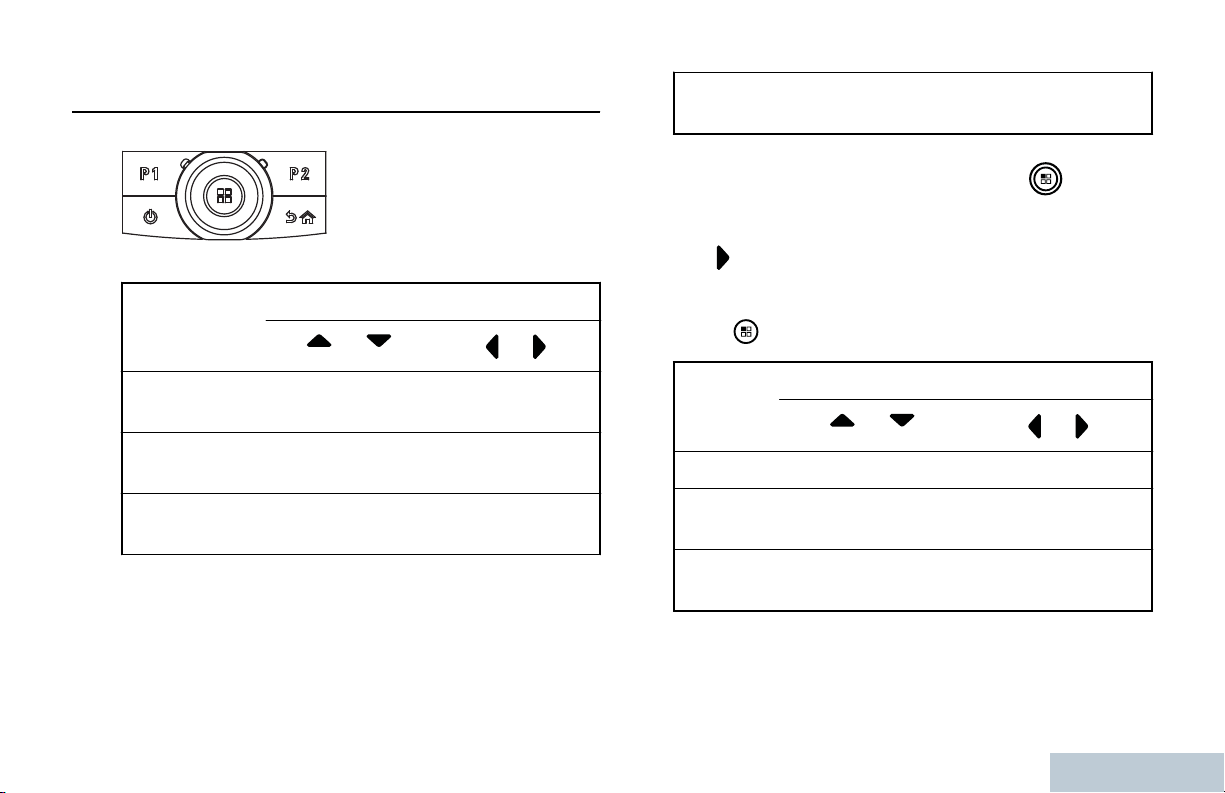
You can use the 4-way navigation disc,
, to scroll through options,
increase/decrease values, and navigate vertically.
Category Direction
Numeric
Values
You can use the 4-way navigation disc, , as a
number, alias, or free form text editor.
The button can be used to change the channels in
the home screen.
Increase/
Decrease
-
or
Menu Vertical
Navigation
Lists Vertical
Navigation
View Details Vertical
Navigation
or
-
-
Previous/Next
Item
Press to select your desired channel.
Editor
Category
Number - -
Alias - Move cursor one
Free
Form Text
or
Move cursor up/
down
Direction
or
character left/right.
Move cursor one
character left/right.
27
English
Page 29
Using the Keypad
Identifying Radio Controls
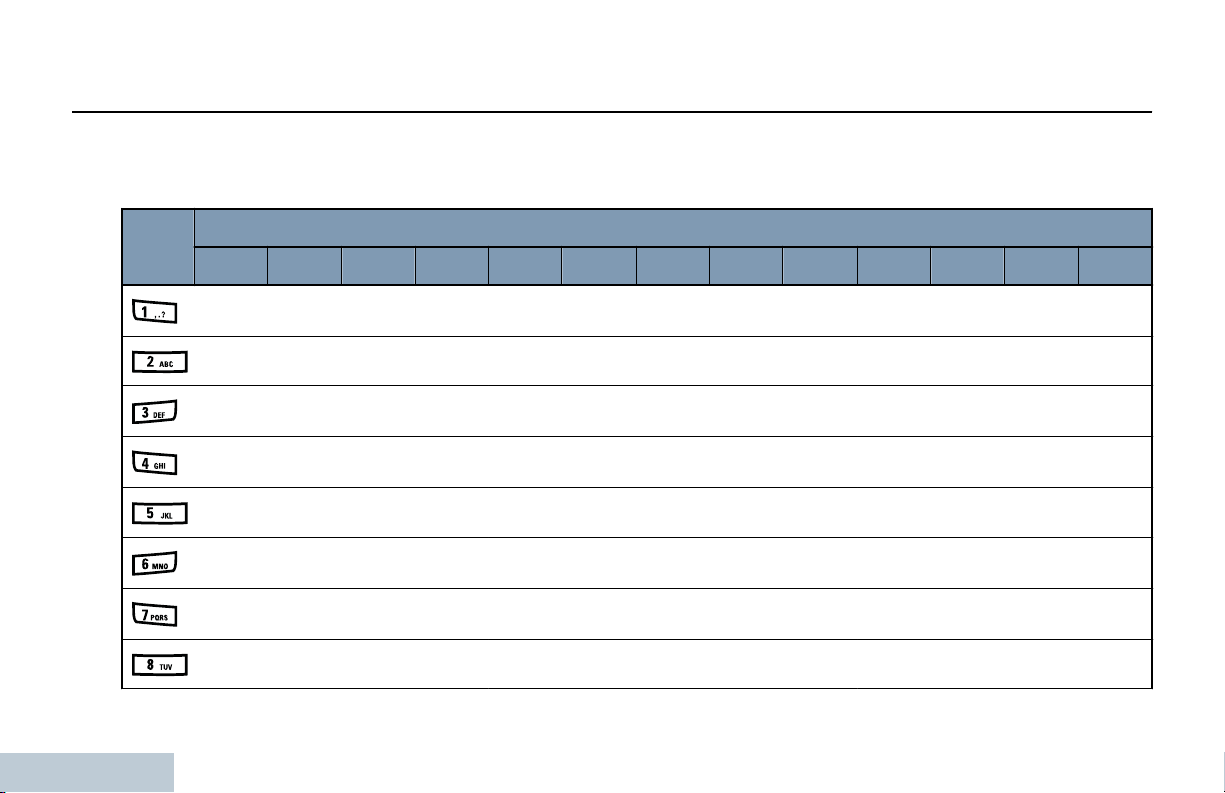
You can use the 3 x 4 alphanumeric keypad to access your radio’s features. You can use the keypad to enter
subscriber aliases or IDs, and text messages. Many characters require that you press a key multiple times. The next
table shows the number of times a key needs to be pressed to generate the required character.
Key Number of Times Key is Pressed
1 2 3 4 5 6 7 8 9 10 11 12 13
1 . , ? ! @ & ' % — : * #
A B C 2
D E F 3
G H I 4
J K L 5
M N O 6
P Q R S 7
T U V 8
28
English
Page 30
Identifying Radio Controls
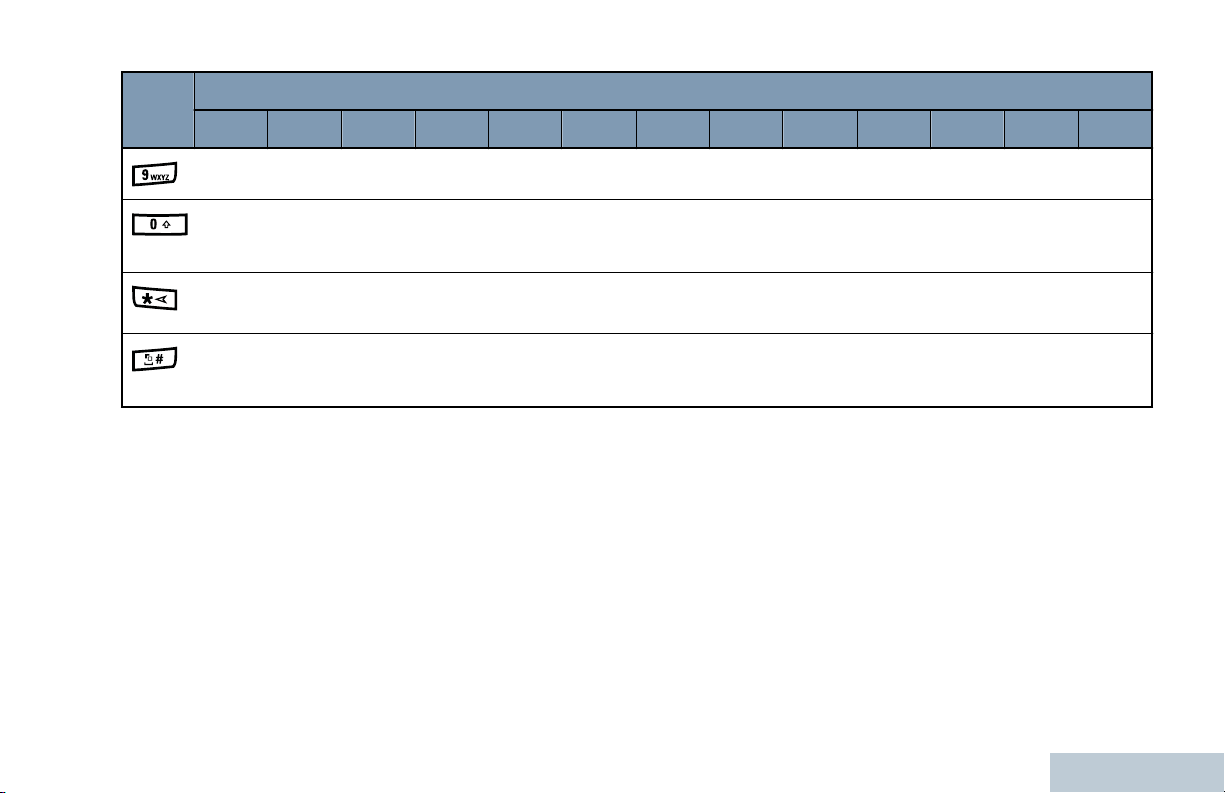
Key Number of Times Key is Pressed
1 2 3 4 5 6 7 8 9 10 11 12 13
W X Y 8
0
* or
del
# or
space
Note: Press to enter “0” and long press to activate the CAPS lock. Another long press to turn off
the CAPS lock.
Note: Press during text entry to delete the character. Press during numeric entry to enter a “*”.
Note: Press during text entry to insert a space. Press during numeric entry to enter a “#”. Long
press to change text entry method.
29
English
Page 31
Additional Radio Controls in Non-
A
Additional Radio Controls in Non-Connect...
Connect Plus Mode
Push-To-Talk (PTT) Button
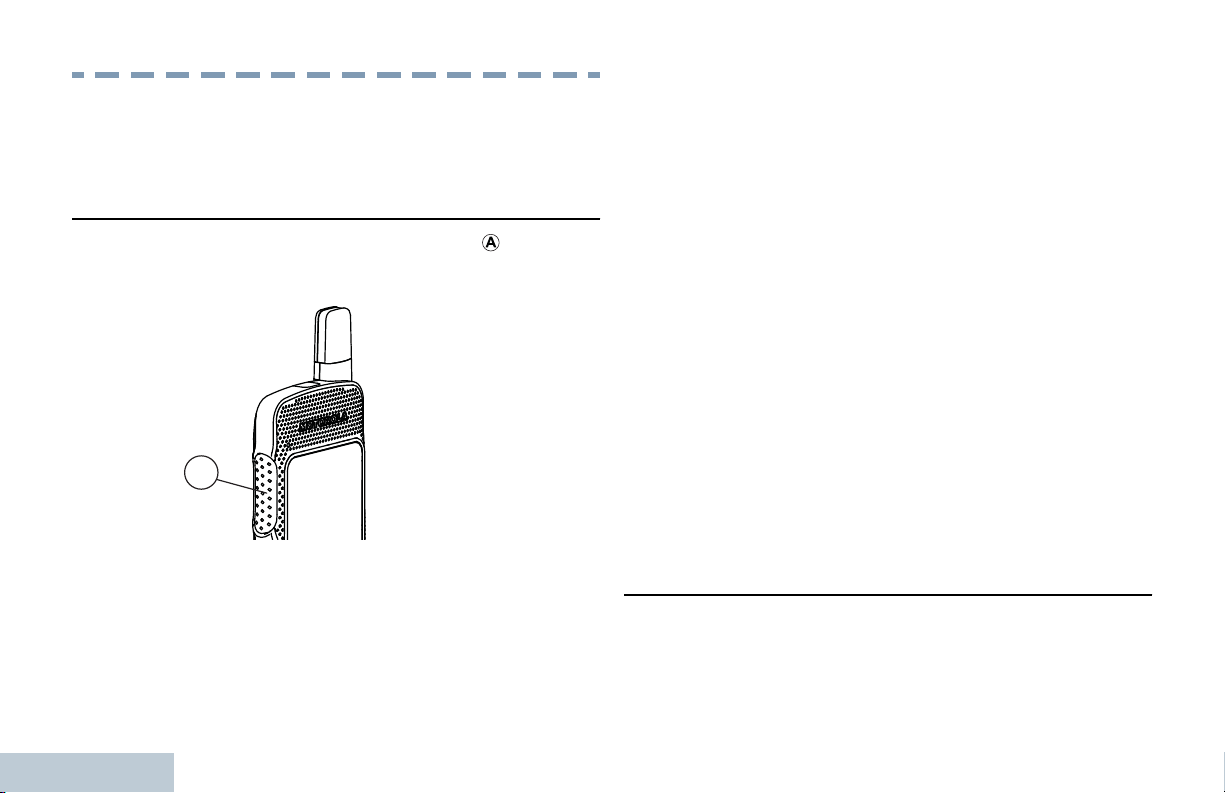
The PTT button on the side of the radio ( ) serves
two basic purposes:
The microphone is activated when the PTT button
is pressed.
— While a call is not in progress, the PTT button is
used to make a new call (see Making a Radio Call
on page 49).
If the Talk Permit Tone (see Turning the Talk Permit
Tone On or Off on page 133) is enabled, wait until
the short alert tone ends before talking.
During a call, if the Channel Free Indication feature is
enabled on your radio (programmed by your dealer),
you will hear a short alert tone the moment the target
radio (the radio that is receiving your call) releases
the PTT button, indicating the channel is free for you
to respond.
You will also hear a continuous talk prohibit tone, if
your call is interrupted, indicating that you should
release the PTT button, for example when the radio
receives an Emergency Call.
— While a call is in progress, the PTT button allows
the radio to transmit to other radios in the call.
Press and hold down PTT button to talk. Release
the PTT button to listen.
30
English
Programmable Buttons
Your dealer can program the programmable buttons
as shortcuts to radio functions depending on the
duration of a button press:
— Short press – Pressing and releasing rapidly.
Page 32

Additional Radio Controls in Non-Connect...
— Long press – Pressing and holding for the
programmed duration.
— Hold down – Keeping the button pressed.
Note: The programmed duration of a button press is
applicable for all assignable radio/utility functions or
settings. See Emergency Operation on page 185 for
more information on the programmed duration of the
Emergency button.
Assignable Radio Functions
Actions — A programmable button to access a CPS
programmable action list.
Audio Routing — Toggles audio routing between
internal and external speakers.
Bluetooth® Audio Switch — Toggles audio routing
between internal radio speaker and external
Bluetooth-enabled accessory.
Contacts — Provides direct access to the Contacts
list.
Call Alert — Provides direct access to the contacts
list for you to select a contact to whom a Call Alert
can be sent.
Call Log — Selects the call log list.
Channel Announcement — Plays zone and channel
announcement voice messages for the current
channel.
Display Radio Alias — Shows radio display name.
Emergency — Depending on the programming,
initiates or cancels an emergency.
Intelligent Audio — Toggles intelligent audio on or
off.
Job Tickets — Allows the user to view and act upon
job tickets.
Manual Dial — Depending on the programming,
initiates a Private or Phone Call by keying in any
subscriber ID or phone number.
Manual Site Roam
search.
[2]
— Starts the manual site
2
Not applicable in Capacity Plus and Linked Capacity Plus
31
English
Page 33

Additional Radio Controls in Non-Connect...
32
Mic AGC On/Off — Toggles the internal microphone
automatic gain control (AGC) on or off.
Monitor — Monitors a selected channel for activity.
Notifications — Provides direct access to the
Notifications list.
Nuisance Channel Delete
[2]
— Temporarily removes
an unwanted channel, except for the Selected
Channel, from the scan list. The Selected Channel
refers to the user’s selected zone/channel
combination from which scan is initiated.
One Touch Access — Directly initiates a predefined
Private, Phone or Group Call, a Call Alert or a Quick
Text message.
Option Board Feature — Toggles option board
feature(s) on or off for option board-enabled
channels.
Permanent Monitor
[2]
— Monitors a selected
channel for all radio traffic until function is disabled.
Phone— Provides direct access to the Phone
Contacts list
Power Battery Indicator — Displays the current
status of the battery level.
Privacy — Toggles privacy on or off.
Radio Alias and ID — Provides radio alias and ID.
Radio Check — Determines if a radio is active in a
system.
Radio Enable — Allows a target radio to be remotely
enabled.
Radio Disable — Allows a target radio to be remotely
disabled.
Remote Monitor — Turns on the microphone of a
target radio without it giving any indicators.
Repeater/Talkaround
[2]
— Toggles between using a
repeater and communicating directly with another
radio.
Ring Alert Type — Provides direct access to the
Ring Alert Type Setting.
[2]
Scan
— Toggles scan on or off.
Site Info — Displays current Linked Capacity Plus
site name and ID. Plays site announcement voice
messages for the current site (this function is
unavailable when Voice Announcement is disabled).
Site Lock On/Off
[2]
— When toggled on, the radio
searches the current site only. When toggled off, the
English
Page 34
Additional Radio Controls in Non-Connect...
radio searches other sites in addition to the current
site.
Display Mode — Toggles the day/night display mode
on or off.
Telemetry Control — Controls the Output Pin on a
local or remote radio.
Text Message — Selects the text message menu.
Transmit Interrupt Remote Dekey — Stops the
transmission of a remote monitored radio without
giving any indicators, or an ongoing interruptible call
to free the channel.
Unassigned — Unassigned programmable button.
Voice Announcement On/Off — Toggles voice
announcement on or off.
Voice Operating Transmission (VOX) — Toggles
VOX on or off.
Zone — Allows selection from a list of zones.
Assignable Settings or Utility Functions
All Tones/Alerts — Toggles all tones and alerts on
or off.
Brightness — Allows brightness to be set via the
manual brightness mode or auto brightness control
via the radio’s photo sensor.
Wallpaper — Displayed on home screen.
Accessing the Programmed Functions
You can access various radio functions through one
of the following ways:
— A short or long press of the relevant
programmable buttons.
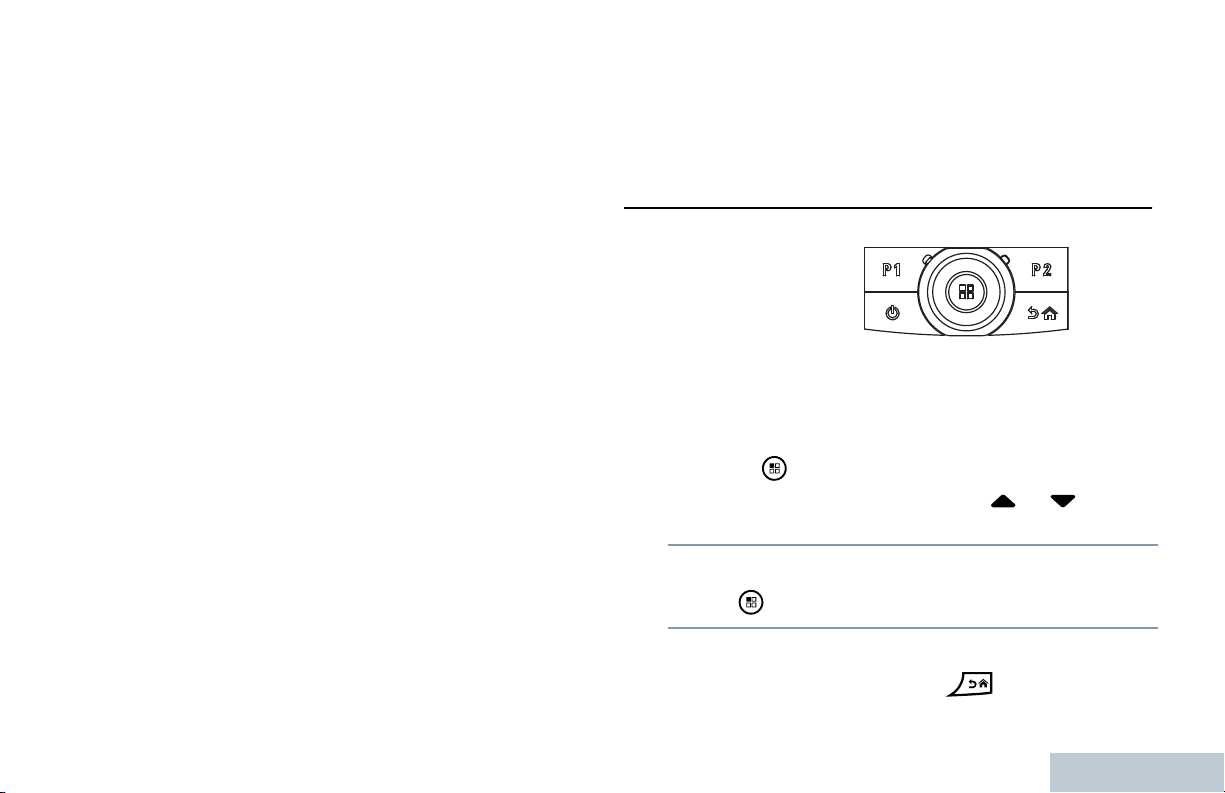
— Use the 4-Way Navigation Disc as follows:
1
Press
appropriate Menu Scroll button ( or ) to
access the menu functions.
2 To select a function or enter a sub-menu, press
the button.
3 To go back one menu level, or to return to the
previous screen, press the button. Long
to access the menu. Press the
33
English
Page 35
press the button to return to the Home
Additional Radio Controls in Non-Connect...
screen.
Note: Your radio automatically exits the menu
after a period of inactivity and returns to your
Home screen.
Identifying Status Indicators
Monitor
Selected channel is being monitored.
Bluetooth Not Connected
The Bluetooth feature is enabled but
there is no remote Bluetooth device
connected.
Display Icons
Your radio has a 2 inch landscape display with QVGA
(Quarter Video Graphics Array) 16-bit color
resolution.
The following are icons that appear on the radio’s
display. Icons are displayed arranged left-most in
order of appearance/usage.
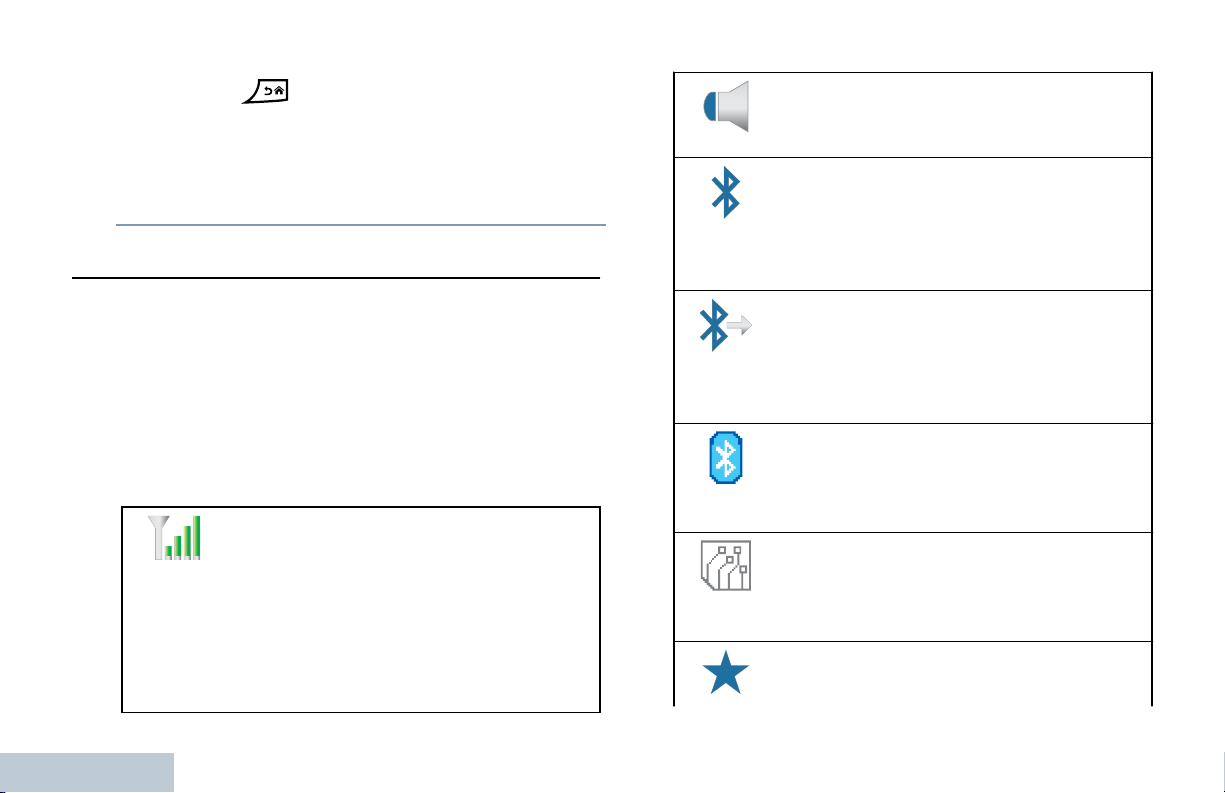
Received Signal Strength Indicator
(RSSI)
The number of bars displayed
represents the radio signal strength.
Four bars indicate the strongest signal.
This icon is only displayed while
receiving.
34
English
Bluetooth Connected
The Bluetooth feature is enabled. The
icon stays lit when a remote Bluetooth
device is connected.
Bluetooth Discoverable
The Bluetooth feature is enabled and
radio is in discoverable mode.
High Volume Data
Radio is receiving high volume data and
channel is busy.
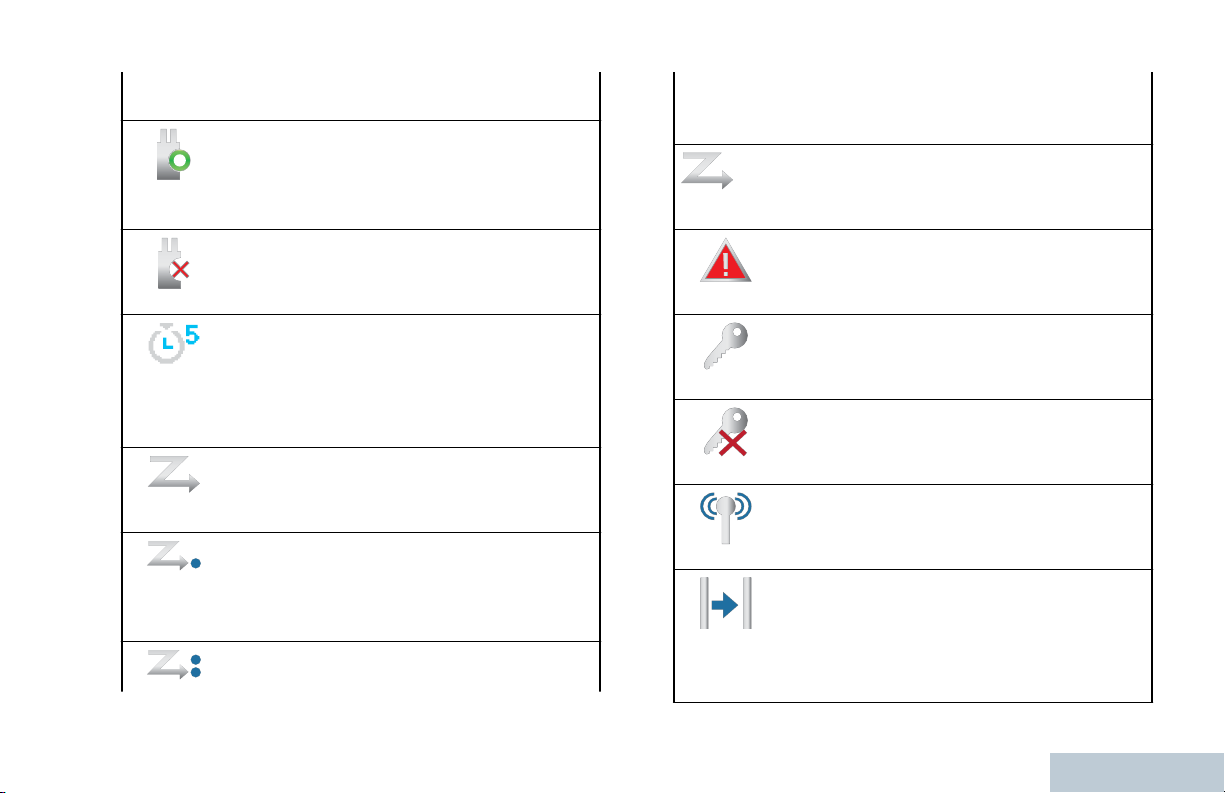
Job Ticket Notification
Page 36
Additional Radio Controls in Non-Connect...
Notification List has items to review.
Option Board
The Option Board is enabled. (Option
board enabled models only)
Radio detects activity on channel/group
designated as Priority 2.
Flexible Receive List
Flexible receive list is enabled.
Option Board Non-Function
The Option Board is disabled.
Over-the-Air Programming Delay
Timer
Indicates time left before automatic
restart of radio.
[3][4]
Scan
Scan feature is enabled.
Scan- Priority 1
[3][4]
Radio detects activity on channel/group
designated as Priority 1.
Scan- Priority 2
[3][4]
Emergency
Radio is in Emergency mode.
Secure
The Privacy feature is enabled.
Unsecure
The Privacy feature is disabled.
Site Roaming
[3]
The site roaming feature is enabled.
Talkaround
[3][4]
In the absence of a repeater, radio is
currently configured for direct radio to
radio communication.
English
35
Page 37
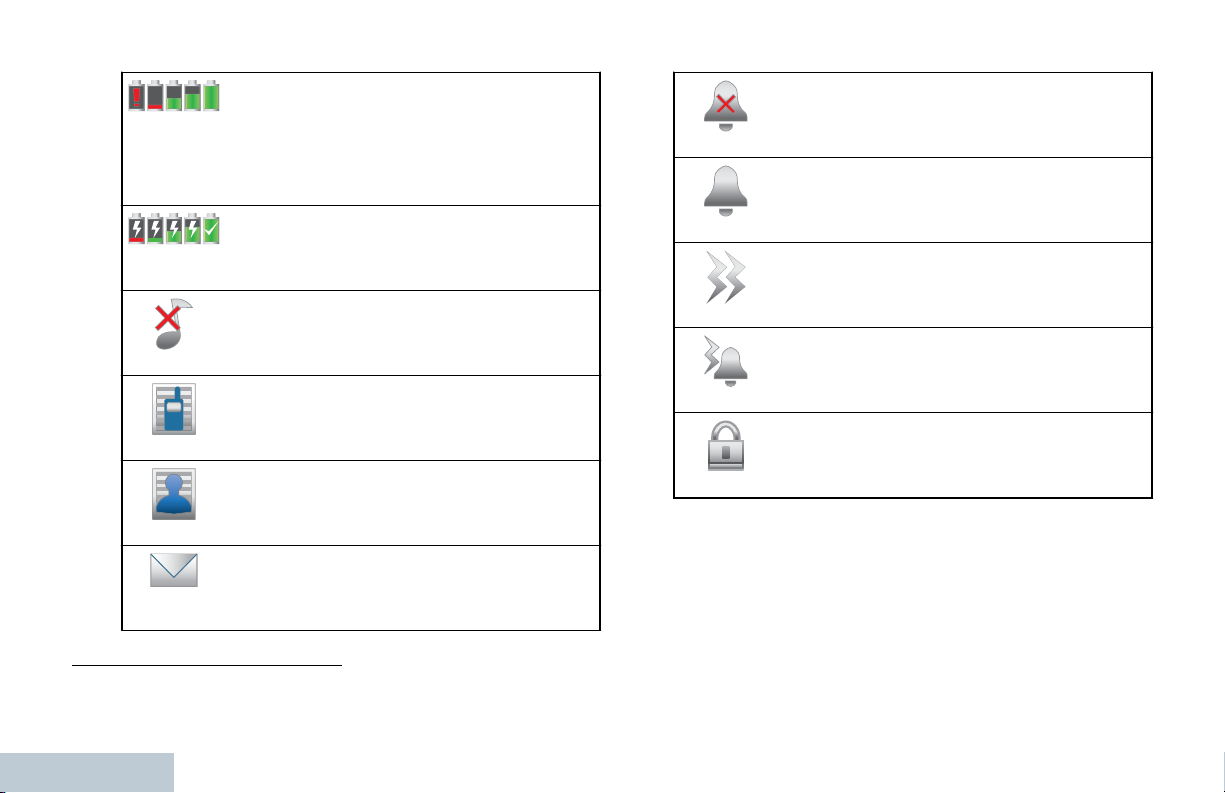
Battery
Additional Radio Controls in Non-Connect...
Silent Ring
36
The number of bars (0 – 4) shown
indicates the charge remaining in the
battery. Blinks when the battery is low.
Battery Discharging Status
Shows battery discharging status.
All Tones Disabled
No ring tones available.
Call Log
Radio call log.
Contact
Radio contact is available.
Message
Incoming message.
3
Not applicable in Capacity Plus
4
Not applicable in Linked Capacity Plus
Silent ring mode is enabled.
Ring Only
Ringing mode is enabled.
Vibrate
Vibrate mode is enabled.
Vibrate and Ring
Vibrate and Ring mode is enabled.
Keypad
Keypad locked.
English
Page 38
Call Icons
Additional Radio Controls in Non-Connect...
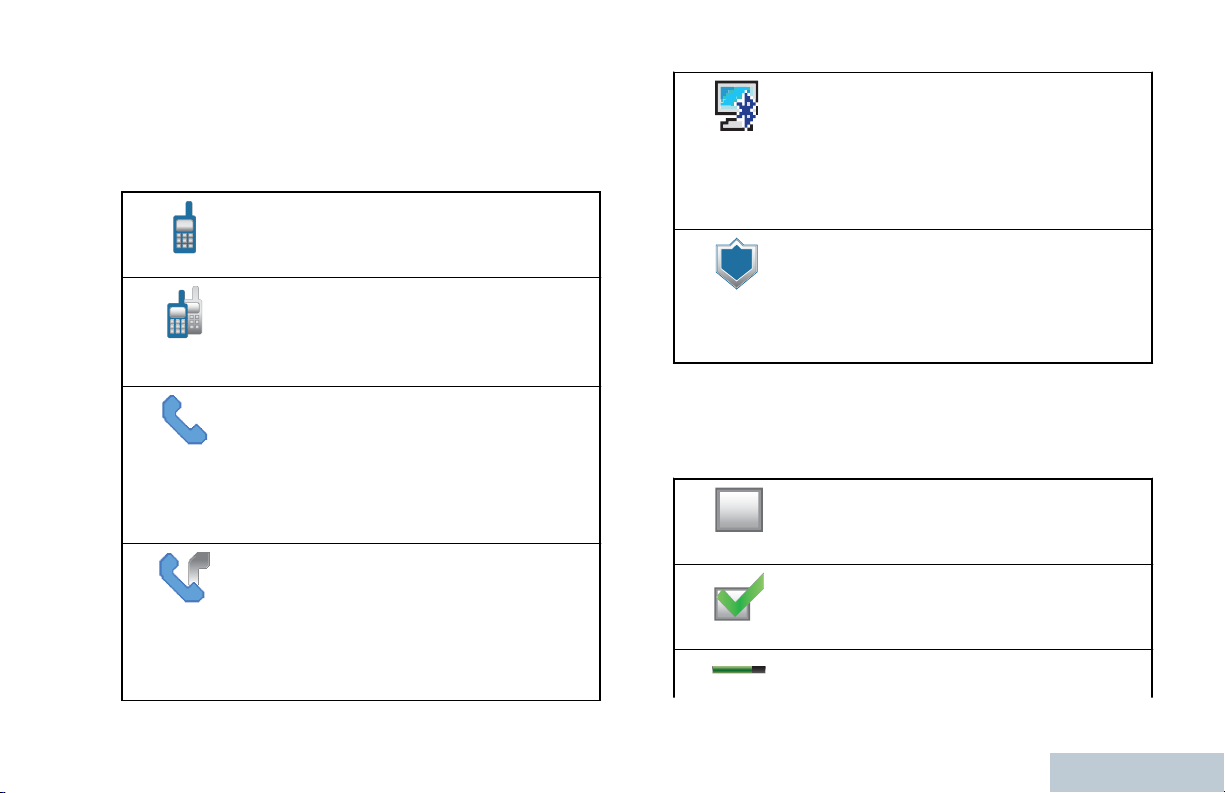
The following icons appear on the radio’s display
during a call. These icons also appear in the Contacts
list to indicate ID type.
Private Call
Bluetooth PC Call
Indicates a Bluetooth PC Call in
progress. In the Contacts list, it
indicates a Bluetooth PC Call alias
(name) or ID (number).
Indicates a Private Call in progress.
Group Call/All Call
Indicates a Group Call or All Call in
progress.
Phone Call as Private Call
Indicates a Phone Call as Private Call
in progress. In the Contacts list, it
indicates a phone alias (name) or ID
(number).
Phone Call as Group/All Call
Indicates a Phone Call as Group/All
Call in progress. In the Contacts list, it
indicates a group alias (name) or ID
(number).
Private Call Alert
In the Contacts list, it indicates a
subscriber alias (name) or ID
(number).
Utilities Icons
The following icons appear beside menu items on the
radio’s display that offer the following options.
Checkbox (Empty)
Indicates the option is not selected.
Checkbox (Checked)
Indicates the option is selected.
Brightness
37
English
Page 39
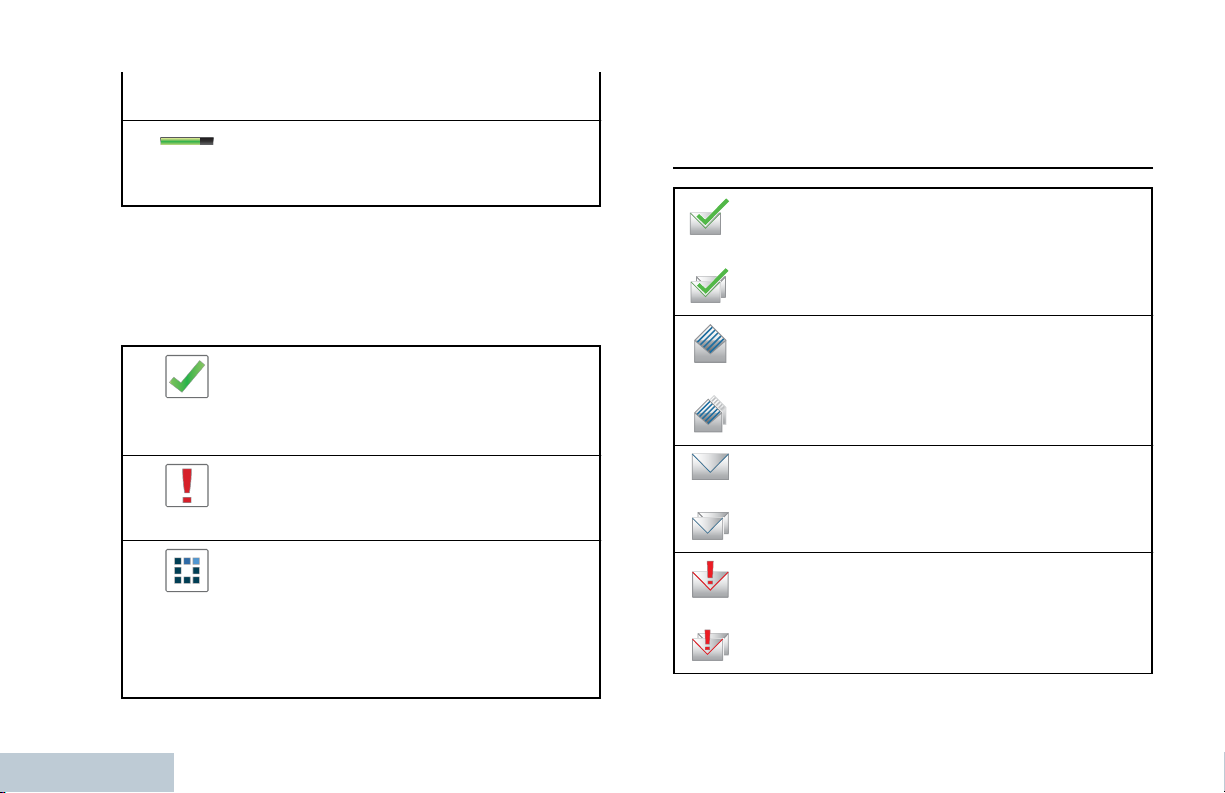
Indicates the brightness level.
Additional Radio Controls in Non-Connect...
Brightness Highlighted
Highlights the brightness level.
Mini Notice Icons
The following icons appear momentarily on the
radio’s display after an action to perform task is
taken.
Successful Transmission
(Positive)
Successful action taken.
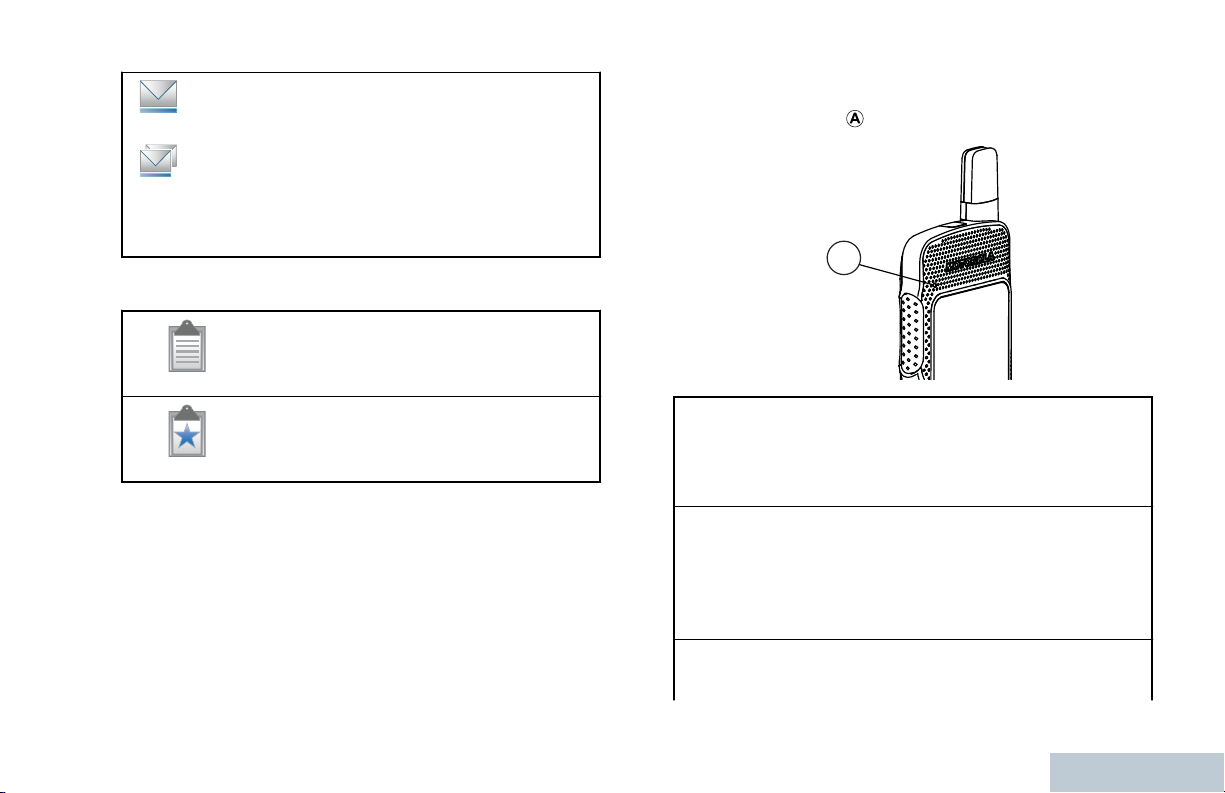
Sent Item Icons
The following icons appear at the top right corner of
the radio’s display in the Sent Items folder.
Sent Successfully
The text message is sent successfully.
OR
Individual or Group Message Read
The text message has been read.
OR
Failed Transmission (Negative)
Failed action taken.
Transmission in Progress
(Transitional)
Transmitting. This is seen before
indication for Successful
Transmission or Failed Transmission.
38
English
Individual or Group Message Unread
OR
The text message has not been read.
Send Failed
The text message has not been sent.
OR
Page 40
A
Additional Radio Controls in Non-Connect...
Job Tickets Icons
In-Progress
OR
— The text message to a group alias or ID
is pending transmission.
— The text message to a subscriber alias
or ID is pending transmission, followed
by waiting for acknowledgement.
All Jobs
LED Indicator
The LED indicator ( ) shows the operational status of
Indicates all jobs listed.
New Jobs
Indicates new jobs.
your radio.
Blinking red Radio is transmitting at low battery
condition, receiving an emergency
transmission or has failed the selftest upon powering up.
Solid yellow Radio is monitoring a digital
conventional channel or in Bluetooth
Discoverable Mode. Also indicates
fair battery charge when
programmable button is pressed.
Blinking
yellow
Radio is scanning for activity or
receiving a Call Alert, flexible receive
39
English
Page 41
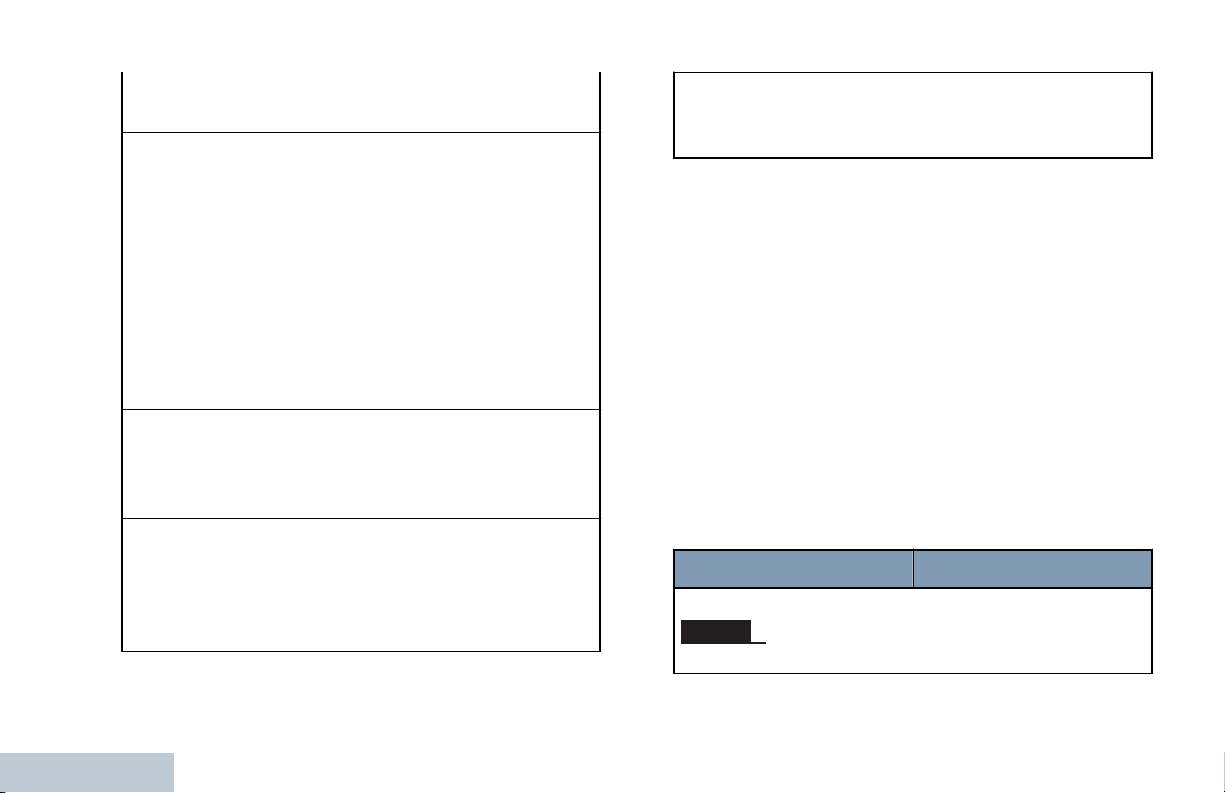
list is enabled or all local Linked
Additional Radio Controls in Non-Connect...
Capacity Plus channels are busy.
Double
blinking
yellow
Solid green Radio is powering up or transmitting.
Blinking
green
Radio is no longer connected to the
repeater while in Capacity Plus or
Linked Capacity Plus; all Capacity
Plus or Linked Capacity Plus
channels are currently busy . Auto
Roaming is enabled, radio is actively
searching for a new site, or radio has
yet to respond to a group call alert.
Also indicates that radio has yet to
respond to a group call alert, or radio
is locked.
Also indicates full charge of the
battery when the programmable
button is pressed.
Radio is powering up, receiving a
non-privacy- enabled call or data,
detecting activity, or retrieving Overthe-Air Programming transmissions
over the air.
Rapidly
blinking
green
Note:
While in conventional mode, when the LED blinks
green, it indicates the radio detects activity over the
air. Due to the nature of the digital protocol, this
activity may or may not affect the radio's programmed
channel.
For Capacity Plus and Linked Capacity Plus, there is
no LED indication when the radio is detecting activity
over the air.
Audio Tones
Alert tones provide you with audible indications of the
radio’s status or the radio’s response to data
received.
High pitched tone Low pitched tone
Continuous Tone A monotone sound.
Radio is receiving a privacy-enabled
call or data.
Sounds continuously
until termination.
40
English
Page 42
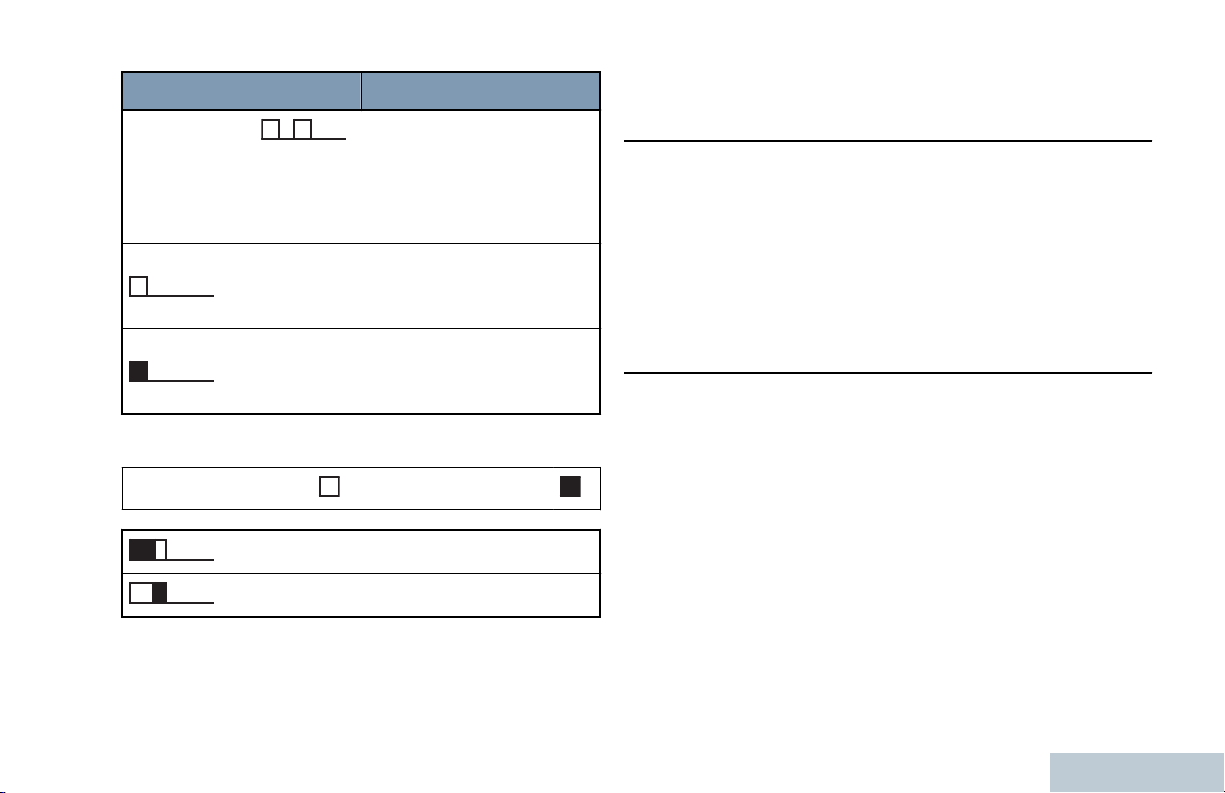
Additional Radio Controls in Non-Connect...
High pitched tone Low pitched tone
Periodic Tone
Repetitive Tone A single tone that
Sounds periodically
depending on the
duration set by the radio.
Tone starts, stops, and
repeats itself.
repeats itself until it is
terminated by the user.
Switching Between Connect Plus and NonConnect Plus Modes
To switch to a non-Connect Plus mode, you must
change to another zone, if programmed by your
dealer or system administrator. Check with your
dealer or system administrator to see if your radio has
been programmed with non-Connect Plus zones, and
what features are available while operating in nonConnect Plus zones.
Momentary Tone Sounds only once for a
short period of time
defined by the radio.
Indicator Tones
High pitched tone Low pitched tone
Positive Indicator Tone
Negative Indicator Tone
IP Site Connect
This feature allows your radio to extend conventional
communication beyond the reach of a single site, by
connecting to different available sites which are
connected via an Internet Protocol (IP) network.
When the radio moves out of range from one site and
into the range of another, it connects to the new site's
repeater to send or receive calls/data transmissions.
Depending on your settings, this is done
automatically or manually.
If the radio is set to do this automatically, it scans
through all available sites when the signal from the
current site is weak or when the radio is unable to
41
English
Page 43

detect any signal from the current site. It then locks
Additional Radio Controls in Non-Connect...
on to the repeater with the strongest Received Signal
Strength Indicator (RSSI) value.
Groups. This feature allows your radio to efficiently
utilize the available number of programmed channels
while in Repeater Mode.
Capacity Plus
42
In a manual site search, the radio searches for the
next site in the roam list that is currently in range (but
which may not have the strongest signal) and locks
on to it.
Note: Each channel can only have either Scan or
Roam enabled, not both at the same time.
Channels with this feature enabled can be added to a
particular roam list. The radio searches the channel(s)
in the roam list during the automatic roam operation
to locate the best site.
A roam list supports a maximum of 16 channels
(including the Selected Channel).
Note: You cannot manually add or delete an entry to
the roam list. Check with your dealer or system
administrator for more information.
Capacity Plus is a single-site trunking configuration of
the MOTOTRBO radio system, which uses a pool of
channels to support hundreds of users and up to 254
You hear a negative indicator tone if you try to access
a feature not applicable to Capacity Plus via a
programmable button press.
Your radio also has features that are available in
conventional digital mode, IP Site Connect, Capacity
Plus and Linked Capacity Plus. However, the minor
differences in the way each feature works does NOT
affect the performance of your radio.
Check with your dealer or system administrator for
more information on this configuration.
Linked Capacity Plus
Linked Capacity Plus is a multi-site multi-channel
trunking configuration of the MOTOTRBO radio
system, combining the best of both Capacity Plus and
IP Site Connect configurations.
Linked Capacity Plus allows your radio to extend
trunking communication beyond the reach of a single
site, by connecting to different available sites which
are connected via an Internet Protocol (IP) network. It
also provides an increase in capacity by efficiently
English
Page 44

Additional Radio Controls in Non-Connect...
utilizing the combined available number of
programmed channels supported by each of the
available sites.
Note: You cannot manually add or delete an entry to
the roam list. Check with your dealer or system
administrator for more information.
When the radio moves out of range from one site and
into the range of another, it connects to the new site's
repeater to send or receive calls/data transmissions.
Depending on your settings, this is done
automatically or manually.
If the radio is set to do this automatically, it scans
through all available sites when the signal from the
current site is weak or when the radio is unable to
detect any signal from the current site. It then locks
on to the repeater with the strongest Received Signal
Strength Indicator (RSSI) value.
In a manual site search, the radio searches for the
next site in the roam list that is currently in range (but
which may not have the strongest signal) and locks
on to it.
Any channel with Linked Capacity Plus enabled can
be added to a particular roam list. The radio searches
these channels during the automatic roam operation
to locate the best site.
Similar to Capacity Plus, icons of features not
applicable to Linked Capacity Plus are not available
in the menu. You hear a negative indicator tone if you
try to access a feature not applicable to Linked
Capacity Plus via a programmable button press.
Check with your dealer or system administrator for
more information on this configuration.
43
English
Page 45
Making and Receiving Calls
Making and Receiving Calls
Selecting a Site
A site provides coverage for a specific area. A
Connect Plus site has a site controller and a
maximum of 15 repeaters. In a multi-site network, the
Connect Plus radio will automatically search for a new
site when the signal level from the current site drops
to an unacceptable level.
Roam Request
A Roam Request tells the radio to search for a
different site, even if the signal from the current site is
acceptable.
Note: This is programmed by your dealer.
Press the programmed Roam Request button.
You hear a tone, indicating the radio has switched
to a new site. The display shows Site ID <Site
Number>.
is not allowed to use. Your radio does not need to be
reprogrammed to change the list of allowed and
disallowed sites. If your radio attempts to register at a
disallowed site, you see a brief message stating:
Site <number given> Not Allowed. The radio
then searches for a different network site.
Selecting a Zone
A zone is a group of channels. Your radio supports up
to 250 zones, with a maximum of 160 channels per
zone.
1 Access the Zone feature.
Radio Controls Steps
Programmed
Zone button
Radio menu
Press the programmed Zone
button.
1
to access the menu.
2
or to Zone and
press to select.
Site Restriction
Your Connect Plus radio system administrator has the
44
English
ability to decide which network sites your radio is and
The current zone is displayed and indicated by a
.
Page 46
Making and Receiving Calls
2 Select the required zone.
Radio
Control
or or and scroll to the required
Steps
zone.
Radio
Control
Steps
zones matches the keyed in
characters, the radio displays the
zone that is listed first in the zone list.
Keypad
1 Enter the first character of the
required zone.
2 A blinking cursor appears allowing
you to continue entering the
subsequent characters of the
required zone.
Note: Press to move one space to
the left. Press
to the right. Press the key to
delete any unwanted characters.
Note: The first line of the display
shows the characters you keyed in.
The second line shows a zone that
matches what you have already
keyed in. The alias search is caseinsensitive. If there are two or more
to move one space
3
Press
The display shows <Zone> Selected
momentarily and returns to the selected zone
screen.
to select.
Selecting a Channel
Transmissions are sent and received on a channel.
Depending on your radio’s configuration, each
channel may have been programmed differently to
support different groups of users or supplied with
different features. After selecting the relevant Zone,
select the relevant channel you require to transmit or
receive on.
45
English
Page 47

—
Making and Receiving Calls
On the navigation disc, press to access the
Channel List (while on the Home Screen). The
active channel is displayed and indicated by a .
Receiving and Responding to a Radio Call
Once the channel, subscriber ID or group ID is
displayed, you can proceed to receive and respond to
calls.
The LED lights up solid green while the radio is
transmitting and blinks green when the radio is
receiving.
Note: The LED lights up solid green while the radio is
transmitting and blinks green rapidly when the radio is
receiving a privacy-enabled call . To unscramble a
privacy-enabled call, your radio must have the same
Privacy Key, OR the same Key Value and Key ID
(programmed by your dealer), as the transmitting
radio (the radio you are receiving the call from).
Note: See Privacy on page 111 for more information.
Receiving and Responding to a Group Call
To receive a call from a group of users, your radio
must be configured as part of that group.
46
When you receive a Group Call (while on the Home
screen), the LED blinks green. The first line of the
display shows the caller alias, and the RSSI icon. The
second line displays the group alias and the Group
Call icon (in Digital mode only). Your radio unmutes
and the incoming call sounds through the radio's
speaker.
1 Hold the radio vertically 1 to 2 inches (2.5 to 5.0
cm) from your mouth.
— If the Channel Free Indication feature is
enabled, you hear a short alert tone the
moment the transmitting radio releases the
PTT button, indicating the channel is free for
you to respond. Press the PTT button to
respond.
— If the Voice Interrupt feature is enabled, press
the PTT button to stop the current call from the
transmitting radio and free the channel for you
to talk/respond.
The LED lights up solid green.
2 Wait for one of the following tones to finish (if
enabled), and speak clearly into the microphone.
— the Talk Permit Tone
English
Page 48

Making and Receiving Calls
— the PTT Sidetone
3 Release the PTT button to listen.
If there is no voice activity for a predetermined period
of time, the call ends.
Note: See Making a Group Call on page 50 for
details on making a Group Call.
Note: If the radio receives a Group Call while not on
the Home screen, it remains on its current screen
prior to answering the call.
Note: Long press the button to go to the Home
screen to view the caller alias before replying.
1 Hold the radio vertically 1 to 2 inches (2.5 to 5.0
cm) from your mouth.
— If the Channel Free Indication feature is
enabled, you hear a short alert tone the
moment the transmitting radio releases the
PTT button, indicating the channel is free for
you to respond. Press the PTT button to
respond.
— If the Voice Interrupt feature is enabled, press
the PTT button to stop the current call from the
transmitting radio and free the channel for you
to talk/respond.
The LED lights up solid green.
Receiving and Responding to a Private Call
A Private Call is a call from an individual radio to
another individual radio.
When you receive a Private Call, the LED blinks
green. The first line of the display shows the
subscriber alias or ID, and the RSSI icon. The second
line displays Private Call and the Private Call icon.
Your radio unmutes and the incoming call sounds
through the radio's speaker.
2 Wait for the Talk Permit Tone to finish (if enabled),
and speak clearly into the microphone.
3 Release the PTT button to listen.
If there is no voice activity for a predetermined period
of time, the call ends.
The display shows Call Ended.
See Making a Private Call on page 51 for details on
making a Private Call.
47
English
Page 49

Receiving an All Call
Making and Receiving Calls
An All Call is a call from an individual radio to every
radio on the channel. It is used to make important
announcements requiring the user’s full attention.
When you receive an All Call, a tone sounds and the
LED blinks green.
The first line of the display shows the caller alias, and
the RSSI icon. The second line displays All Call
and the All Call icon. Your radio unmutes and the
incoming call sounds through the radio speaker.
Once the All Call ends, the radio returns to the
previous screen before receiving the call. An All Call
does not wait for a predetermined period of time
before ending.
If the Channel Free Indication feature is enabled, you
will hear a short alert tone the moment the
transmitting radio releases the PTT button, indicating
the channel is now available for use.
You cannot respond to an All Call.
Note: See Making an All Call on page 52 for details
on making an All Call.
Note: The radio stops receiving the All Call if you
switch to a different channel while receiving the call.
During an All Call, you will not be able to use any
programmed button functions until the call ends.
Receiving and Responding to a Phone Call
Phone Call as Private Call
When you receive a Phone Call as a Private Call, the
Phone Call icon appears in the top right corner; the
display shows the caller alias or Phone Call.
If Phone Call capability is not enabled in your radio,
the first line of the display shows Unavailable and
your radio mutes the call. Your radio returns to the
previous screen when the call ends.
1 Press the PTT button to talk and release it to
listen.
2
Press to end the call.
The display shows Ending Phone Call.
If successful, a tone sounds and the display shows
All Call and Call Ended.
48
English
Page 50
Making and Receiving Calls
If unsuccessful, your radio returns to the Phone
Call screen. Repeat Step 2 on page 48 to end the
call.
If Phone Call capability is not enabled in your radio,
the first line of the display shows Unavailable and
your radio mutes the call.
Phone Call as Group Call
When you receive a Phone Call as a Group Call,
1 Press the PTT button to talk and release it to
listen.
2
Press to end the call.
The display shows Ending Phone Call.
If successful, a tone sounds and the display shows
All Call and Call Ended.
If unsuccessful, your radio returns to the Phone
Call screen. Repeat Step 2 on page 49 to end the
call.
Phone Call as All Call
When you receive a Phone Call as an All Call, the
Phone Call icon appears in the top right corner; the
display shows All Call and Phone Call.
Note: When you receive a Phone Call as an All Call,
you can respond to the call or end the call, only if an
All Call type is assigned to the channel.
1 Press the PTT button to talk and release it to
listen.
2
Press to end the call.
The display shows Ending Phone Call.
If successful, a tone sounds and the display shows
All Call and Call Ended.
If unsuccessful, your radio returns to the Phone
Call screen. Repeat Step 3 to end the call.
Making a Radio Call
After selecting your channel, you can select a
subscriber alias or ID, or group alias or ID by using:
— The PTT button.
— A programmed One Touch Access button – The
One Touch Access feature allows you to make a
49
English
Page 51

Making and Receiving Calls
50
Group or Private Call to a predefined ID easily.
This feature can be assigned to a short or long
programmable button press. You can ONLY have
one ID assigned to a One Touch Access button.
Your radio can have multiple One Touch Access
buttons programmed.
— The programmed number keys – This method is
for Group, Private and All Calls only and is used
with the keypad (see Making a Group, Private or
All Call with the Programmable Number Key on
page 55).
— A programmable button – This method is for
Phone Calls only (see Making a Phone Call with
the Programmable Phone Button on page 56).
— The Contacts list (see Contact Settings on page
70).
— Manual Dial – This method is for Private and
Phone Calls only and is dialed using the keypad
(see Making a Private Call from Contacts on page
72, and ).
Note: Your radio must have the Privacy feature
enabled on the channel to send a privacy-enabled
transmission. Only target radios with the same
Privacy Key OR the same Key Value and Key ID as
your radio will be able to unscramble the
transmission.
Note: See Privacy on page 111 for more information.
Making a Group Call
To make a call to a group of users, your radio must
be configured as part of that group.
1 Do one of the following.
— Select the channel with the active group alias
or ID. See Selecting a Channel on page 45
— Press the programmed One Touch Access
button.
2 Hold the radio vertically 1 to 2 inches (2.5 to 5.0
cm) from your mouth.
3 Press the PTT button to make the call.
The LED lights up solid green. The Group Call
icon appears in the top right corner. The first text
line shows the group call alias.
4 Wait for the Talk Permit Tone to finish (if enabled),
and speak clearly into the microphone.
5 Release the PTT button to listen.
When the target radio responds, the LED blinks
green, the radio unmutes and the response
sounds through the radio’s speaker. You see the
English
Page 52

Making and Receiving Calls
Making a Private Call
Group Call icon, the group alias or ID, and
transmitting radio alias or ID on your display.
6 If the Channel Free Indication feature is enabled,
you hear a short alert tone the moment the
transmitting radio releases the PTT button,
indicating the channel is free for you to respond.
Press the PTT button to respond.
If there is no voice activity for a predetermined
period of time, the call ends. Radio returns to the
screen you were on prior to initiating the call.
While you can receive and/or respond to a Private
Call initiated by an authorized individual radio, your
radio must be programmed for you to initiate a Private
Call.
There are two types of Private Calls. The first type,
where a radio presence check is performed prior to
setting up the call, while the other sets up the call
immediately.
Only one of these call types can be programmed to
your radio by your dealer.
You will hear a negative indicator tone, when you
make a Private Call via the Contacts list, Call Log,
One Touch Access button, the programmed number
keys, or the Channel Selector Knob, if this feature is
not enabled.
Use the Text Message or Call Alert features to
contact an individual radio. See Text Message
Features on page 94 or Call Alert Operation on
page 87 for more information.
1 Do one of the following.
— Select the channel with the active subscriber
alias or ID. See Selecting a Channel on page
45
— Press the programmed One Touch Access
button.
2 Hold the radio vertically 1 to 2 inches (2.5 to 5.0
cm) from your mouth.
3 Press the PTT button to make the call.
If you release the PTT button while the radio is
setting up the call, it exits without any indication
and returns to the previous screen.
The LED lights up solid green, the radio unmutes
and the response sounds through the radio’s
speaker. The Private Call icon appears on the top
51
English
Page 53

right corner. The first text line shows the
Making and Receiving Calls
subscriber alias. The second text line displays the
call status..
4 Wait for the Talk Permit Tone to finish (if enabled),
and speak clearly into the microphone.
Making an All Call
This feature allows you to transmit to all users on the
channel. Your radio must be programmed to allow
you to use this feature.
Users on the channel cannot respond to an All Call.
5 Release the PTT button to listen.
When the target radio responds, the LED blinks
green, the radio unmutes and the response
sounds through the radio's speaker.
6 If the Channel Free Indication feature is enabled,
you hear a short alert tone the moment the
transmitting radio releases the PTT button,
indicating the channel is free for you to respond.
Press the PTT button to respond.
If there is no voice activity for a predetermined
period of time, the call ends. You hear a short
tone. The display shows Call Ended.
Your radio may be programmed to perform a radio
presence check prior to setting up the Private Call. If
the target radio is not available, you hear a short tone
and see negative mini notice on the display.
52
English
1 Select the channel with the active All Call group
alias or ID. See Selecting a Channel on page 45
2 Hold the radio vertically 1 to 2 inches (2.5 to 5.0
cm) from your mouth.
3 Press the PTT button to make the call.
The LED lights up solid green.The Group Call icon
appears in the top right corner. The first text line
shows All Call.
4 Wait for the Talk Permit Tone to finish (if enabled),
and speak clearly into the microphone.
Making a Phone Call with the One Touch Access
Button
1 Press the programmed One Touch Access
button to make a Phone Call to the predefined
alias or ID.
Page 54

Making and Receiving Calls
If the entry for the One Touch Access button is
empty, a negative indicator tone sounds. If the
access code was not preconfigured in the
Contacts list, the display shows Access Code:.
Enter the access code and press
The LED lights up solid green. The Phone Call
icon appears in the top right corner. The first text
line shows the subscriber alias. The second text
line displays the call status.
If the call-setup is successful, the DTMF tone
sounds. You hear the dialing tone of the telephone
user. The first text line shows the subscriber alias.
The Phone Call icon remains in the top right
corner.
If the call-setup is unsuccessful, a tone sounds
and the display shows Phone Call Failed. Your
radio returns to the Access Code input screen. If
the access code was preconfigured in the
Contacts list, the radio returns to the screen you
were on prior to initiating the call.
to proceed.
3 Press the PTT button to talk and release it to
listen.
To enter extra digits, if requested by the Phone
Call, enter the extra digits using the keypad and
press
The DTMF tone sounds with each keypad press,
and the radio returns to the previous screen.
4 Press to end the call.
If de-access code was not preconfigured in the
Contacts list, the display shows De-Access
Code:. Press the One Touch Access button, if it
is programmed with the de-access code. If the
entry for the One Touch Access button is empty,
a negative indicator tone sounds.
The DTMF tone sounds with each keypad press,
and the display shows Ending Phone Call.
If the end-call-setup is successful, a tone sounds
and the display shows Call Ended.
to proceed.
2 Hold the radio vertically 1 to 2 inches (2.5 to 5.0
cm) from your mouth.
If the end-call-setup is unsuccessful, your radio
returns to the Phone Call screen. Repeat Step 4
on page 53 or wait for the telephone user to end
the call.
English
53
Page 55
Note:
Making and Receiving Calls
When the telephone user ends the call, a tone
sounds and the display shows Call Ended.
If the call ends while you are entering the extra
digits requested by the Phone Call, your radio
returns to the screen you were on prior to initiating
the call.
During channel access, press to dismiss the
call attempt. A tone sounds to indicate success.
During the call, if you press the One Touch
Access button with the deaccess code
preconfigured or enter the deaccess code as the
input for extra digits, your radio attempts to end
the call.
The access or deaccess code cannot be more
than 10 characters.
Making a Private Call with a One Touch Call Button
Note: Programmable buttons press must be initiated
from the Home screen.
The One Touch Call feature allows you to easily
make a Private Call to a pre-defined Private Call alias
54
or ID. This feature can be assigned to a short or long
programmable button press.
You can ONLY have one alias or ID assigned to a
One Touch Call button. Your radio can have multiple
One Touch Call buttons programmed.
1 Press the programmed One Touch Call button to
make a Private Call to the pre-defined Private Call
alias or ID.
2 Hold the radio vertically 1 to 2 inches (2.5 to 5.0
cm) from your mouth.
3 Press the PTT button to make the call.
The LED lights up solid green.
The display shows the Private Call alias or ID.
4 Wait for the Talk Permit Tone to finish (if enabled)
and speak clearly into the microphone.
5 Release the PTT button to listen.
When the target radio responds, the LED blinks
green.
6 If the Channel Free Indication feature is enabled,
you will hear a short alert tone the moment the
English
Page 56

Making and Receiving Calls
Making a Group, Private or All Call with the
Programmable Number Key
target radio releases the PTT button, indicating the
channel is free for you to respond. Press the PTT
button to respond.
If there is no voice activity for a predetermined
period of time, the call ends.
The Programmable Number Key feature allows you to
make a Group, Private or All Call to a predefined alias
or ID easily. This feature can be assigned to all the
available number keys on a keypad.
You can ONLY have one alias or ID assigned to a
number key, but you can have more than one number
key associated to an alias or ID.
1 Long press the programmed number key, when
you are on the Home screen, to make a Group,
Private or All Call to the predefined alias or ID.
If the number key is not associated to an entry, a
negative indicator tone sounds.
2 Hold the radio vertically 1 to 2 inches (2.5 to 5.0
cm) from your mouth.
3 Press the PTT button to make the call.
The LED lights up solid green, the radio unmutes
and the response sounds through the radio’s
speaker. The Group/Private Call icon appears in
the top right corner. The first text line shows the
caller alias. The second text line displays either
the call status for a Private Call or All Call for
All Call.
4 Wait for the Talk Permit Tone to finish (if enabled),
and speak clearly into the microphone.
5 Release the PTT button to listen.
When the target radio responds, the LED blinks
green, the radio unmutes and the response
sounds through the radio's speaker..
6 If the Channel Free Indication feature is enabled,
you hear a short alert tone the moment the
transmitting radio releases the PTT button,
indicating the channel is free for you to respond.
Press the PTT button to respond.
If there is no voice activity for a predetermined
period of time, the call ends. Radio returns to the
screen you were on prior to initiating the call.
For a Private Call, you hear a short tone when the
call ends.
55
English
Page 57

See Assigning an Entry to a Programmable
Making and Receiving Calls
Number Key on page 78 for details on assigning
an entry to a number key on the keypad.
Making a Phone Call with the Programmable Phone
Button
1 Press the programmed Phone button to enter into
the Phone Entry list.
The Phone Call icon remains in the top right
corner.
If call-setup is unsuccessful, a tone sounds and
the display shows Phone Call Failed. Your
radio returns to the Access Code input screen. If
the access code was preconfigured in the
Contacts list, the radio returns to the screen you
were on prior to initiating the call.
2
or to the required subscriber alias or ID,
and press to select.
If the access code was not preconfigured in the
Contacts list, the display shows Access Code:.
Enter the access code and press the
proceed.
The LED lights up solid green. The Phone Call
icon appears in the top right corner. The first text
line shows the subscriber alias. The second text
line displays the call status.
If the call-setup is successful, the DTMF tone
sounds. You hear the dialing tone of the telephone
user. The first text line shows the subscriber alias.
56
English
button to
3 Hold the radio vertically 1 to 2 inches (2.5 to 5.0
cm) from your mouth.
4 Press the PTT button to talk and release it to
listen.
5 To enter extra digits, if requested by the Phone
Call, do one of the following.
— Press any keypad key to begin the input of the
extra digits. The first line of the display shows
Extra Digits:. The second line of the display
shows a blinking cursor. Enter the extra digits
and press the
DTMF tone sounds and the radio returns to the
previous screen.
button to proceed. The
Page 58
Making and Receiving Calls
— Press One Touch Access button. The DTMF
tone sounds. If the entry for the One Touch
Access button is empty, a negative indicator
tone sounds.
6
Press to end the call.
If deaccess code was not preconfigured in the
Contacts list, the first line of the display shows De-
Access Code:. The second line of the display
shows a blinking cursor. Enter the deaccess code
and press the button to proceed. The radio
returns to the previous screen.
The DTMF tone sounds and the display shows
Ending Phone Call.
When the telephone user ends the call, a tone
sounds and the display shows Phone Call
Ended.
If the call ends while you are entering the extra
digits requested by the Phone Call, your radio
returns to the screen you were on prior to initiating
the call.
Note: During channel access, press to
dismiss the call attempt and a tone sounds.
Note: During the call, when you press One Touch
Access button with the deaccess code
preconfigured or enter the deaccess code as the
input for extra digits, your radio attempts to end
the call.
If the end-call-setup is successful, a tone sounds
and the display shows Call Ended.
If the end-call-setup is unsuccessful, your radio
returns to the Phone Call screen. Repeat Steps 4
on page 56 and 5 on page 56 or wait for the
telephone user to end the call.
When you press PTT button while in the Phone
Contacts screen, a tone sounds and the display
shows Press OK to Place Phone Call.
Note: The access or deaccess code cannot be
more than 10 characters.
Stopping a Radio Call
This feature allows you to stop an ongoing Group or
Private Call to free the channel for transmission. For
example, when a radio experiences a “stuck
microphone” condition where the PTT button is
inadvertently pressed by the user.
57
English
Page 59
Your radio must be programmed to allow you to use
Making and Receiving Calls
this feature.
1 Press the programmed Transmit Interrupt
Remote Dekey button, while on the relevant
channel.
This is called “talkaround”.
Note: This feature is not applicable in Capacity Plus
and Linked Capacity Plus.
The Talkaround setting is retained even after
powering down.
2 Wait for acknowledgment.
The radio sounds a positive indicator tone and the
display shows Remote Dekey Success, indicating
that the channel is now free. The display shows
Call Interrupted, and the radio sounds a
negative indicator tone until the PTT button is
released, if it is transmitting an interruptible call
that is stopped via this feature.
OR
The radio sounds a negative indicator tone and
the display shows Remote Dekey Failed.
Talkaround
You can continue to communicate when your
repeater is not operating, or when your radio is out of
the repeater’s range but within talking range of other
radios.
58
English
You can toggle between talkaround and repeater
modes by pressing the programmed Repeater/
Talkaround button OR using the radio menu as
described next.
1
to access the menu.
2
or to Utilities and press to select.
3
or to Radio Settings and press to
select.
4
or to Talkaround and press to select.
You can also use or to change the selected
option.
5
Press to enable/disable the Talkaround.
Page 60

Making and Receiving Calls
The display shows beside Enabled.
The disappears from beside Enabled.
Monitoring Features
Monitoring a Channel
Use the Monitor feature to make sure a channel is
clear before transmitting.
This feature is not applicable in Capacity Plus and
Linked Capacity Plus.
1 Press and hold the programmed Monitor button
and listen for activity.
The Monitor icon appears on the display and the
LED lights up solid yellow. You hear radio activity
or total silence, depending on how your radio is
programmed. This indicates that the channel is in
use.
2 Press the PTT button to talk and release it to
listen.
Permanent Monitor
Use the Permanent Monitor feature to continuously
monitor a selected channel for activity.
Note: This feature is not applicable in Capacity Plus
and Linked Capacity Plus.
1 Press the programmed Permanent Monitor
button to activate permanent monitoring of the
channel.
Radio sounds an alert tone, the LED lights up solid
yellow, and the display shows Permanent
Monitor On. The Monitor icon appears on the
display.
2 Press the programmed Permanent Monitor
button to exit Permanent Monitor mode.
Radio sounds an alert tone, the LED turns off, and
display shows Radio sounds an alert tone, the
LED turns off.
English
59
Page 61

Advanced Features in Non-Connect
Advanced Features in Non-Connect...
Plus Mode
Radio
Control
Steps
2
or to Contacts and
Radio Check
If enabled, this feature allows you to determine if
another radio is active in a system without disturbing
the user of that radio. No audible or visual notification
is shown on the target radio.
Sending a Radio Check
1 Access the Radio Check feature.
Radio
Control
Programmed
Radio Check
button
Menu
Steps
1 Press the programmed Radio
Check button.
2
or to the required
subscriber alias or ID and
press to select.
1
to access the menu
60
English
press to select
3 Use one of the steps
described next to select the
required subscriber alias or
ID
— select the subscriber alias
or ID directly
—
or to the
required subscriber
alias or ID and press
to select.
—
use the Manual Dial
menu
—
or to Manual
Dial and press to
select.
Page 62
Advanced Features in Non-Connect...
Radio
Control
Steps
—
or to Radio
Number and press
to select.
— If there was previously
dialed ID, the ID
appears along with a
blinking cursor. Else,
the first line of the
display shows Radio
Number:; the second
line of the display
shows a blinking
cursor. Use the keypad
to edit/enter the ID,
The display shows transitional mini notice,
indicating the request is in progress. The LED
lights up solid green.
2 Wait for acknowledgement.
If the button is pressed when the radio is
waiting for acknowledgement, a tone sounds, and
the radio terminates all retries and exits Radio
Check mode.
If Radio Check is successful, a positive indicator
tone sounds and the display shows positive mini
notice.
If Radio Check is unsuccessful, a negative
indicator tone sounds and the display shows
negative mini notice.
Radio returns to the subscriber alias or ID screen.
and press
select.
4
or to Radio Check
and press
to
to select.
Remote Monitor
Use the Remote Monitor feature to turn on the
microphone of a target radio (subscriber alias or IDs
only). No audible or visual indication is given to the
target radio. You can use this feature to monitor,
61
English
Page 63
remotely, any audible activity surrounding the target
Advanced Features in Non-Connect...
radio.
Your radio must be programmed to allow you to use
this feature.
Initiating Remote Monitor
1 Access the Remote Monitor feature.
Radio
Control
Program
med
Remote
Monitor
Button
Menu
Steps
1 Press the programmed Remote
Monitor button.
2
or to the required
subscriber alias or ID and press
to select.
1
to access the menu
2
or to Contacts and
press to select
3 Use one of the steps described
next to select the required
subscriber alias or ID
Radio
Control
Steps
— select the subscriber alias or
ID directly
—
—
use the Manual Dial menu
—
—
— If there was previously
or to the required
subscriber alias or ID and
press to select.
or to Manual
Dial and press to
select.
or to Radio
Number and press to
select.
dialed ID, the ID appears
along with a blinking
cursor. Else, the first line
of the display shows
62
English
Page 64
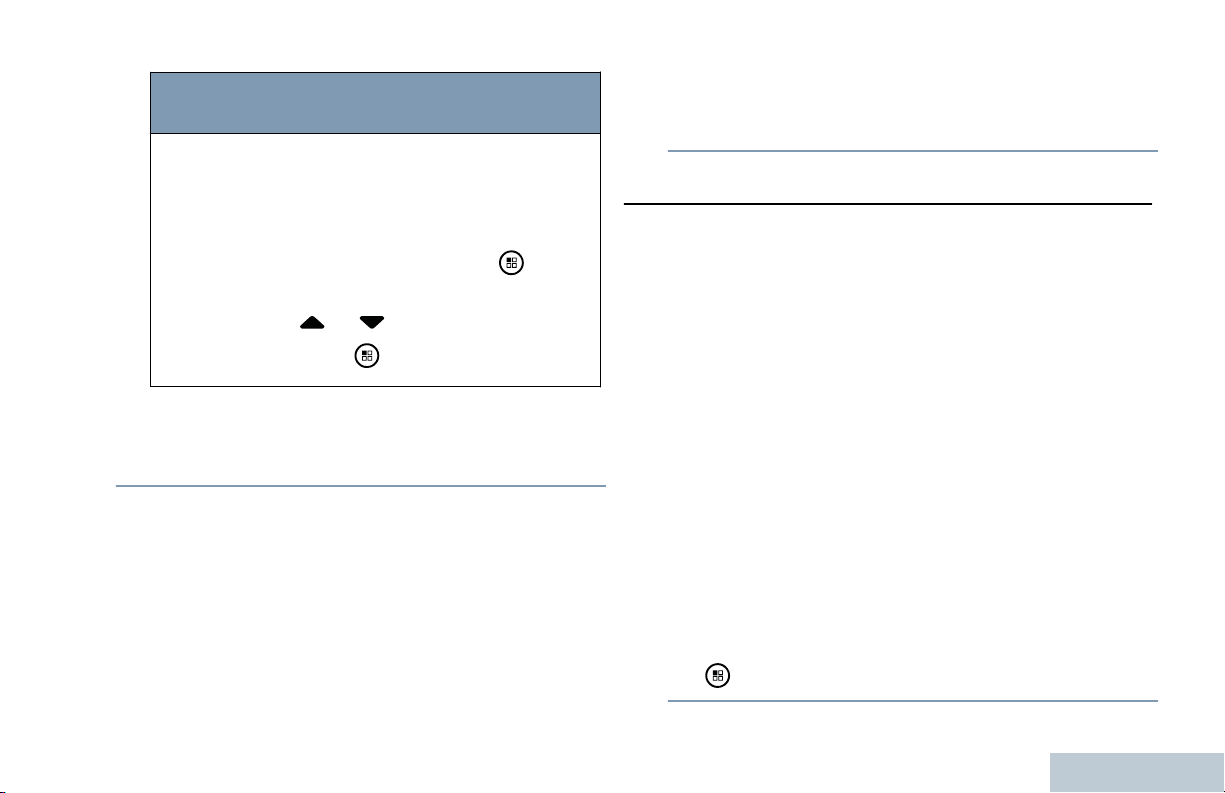
Advanced Features in Non-Connect...
Radio
Control
The display shows transitional mini notice,
indicating the request is in progress. The LED
lights up solid green.
Steps
Radio Number:; the
second line of the display
shows a blinking cursor.
Key in the subscriber alias
or ID and press
select.
4
or to Remote Mon. and
press
to select.
to
If unsuccessful, the radio sounds a negative
indicator tone the display shows negative mini
notice.
Scan Lists
Scan lists are created and assigned to individual
channels/ groups. Your radio cycles through the
programmed scan list for the current channel looking
for voice activity. At each channel in the cycle the
radio also cycles through the group list for that
channel.
Your radio can support up to 250 scan lists, with a
maximum of 16 members in a list.
You can add, delete, or prioritize channels by editing
a scan list.
2 Wait for acknowledgement.
If successful, a positive indicator tone sounds and
the display shows positive mini notice. Your radio
starts playing audio from the monitored radio for a
programmed duration and display shows Rem.
Monitor. Once the timer expires, the radio sounds
an alert tone and the LED turns off.
You can attach a new scan list to your radio via Front
Panel Programming.
Note: This feature is not applicable in Capacity Plus
and Linked Capacity Plus.
Viewing an Entry in the Scan List
1
to access the menu.
63
English
Page 65
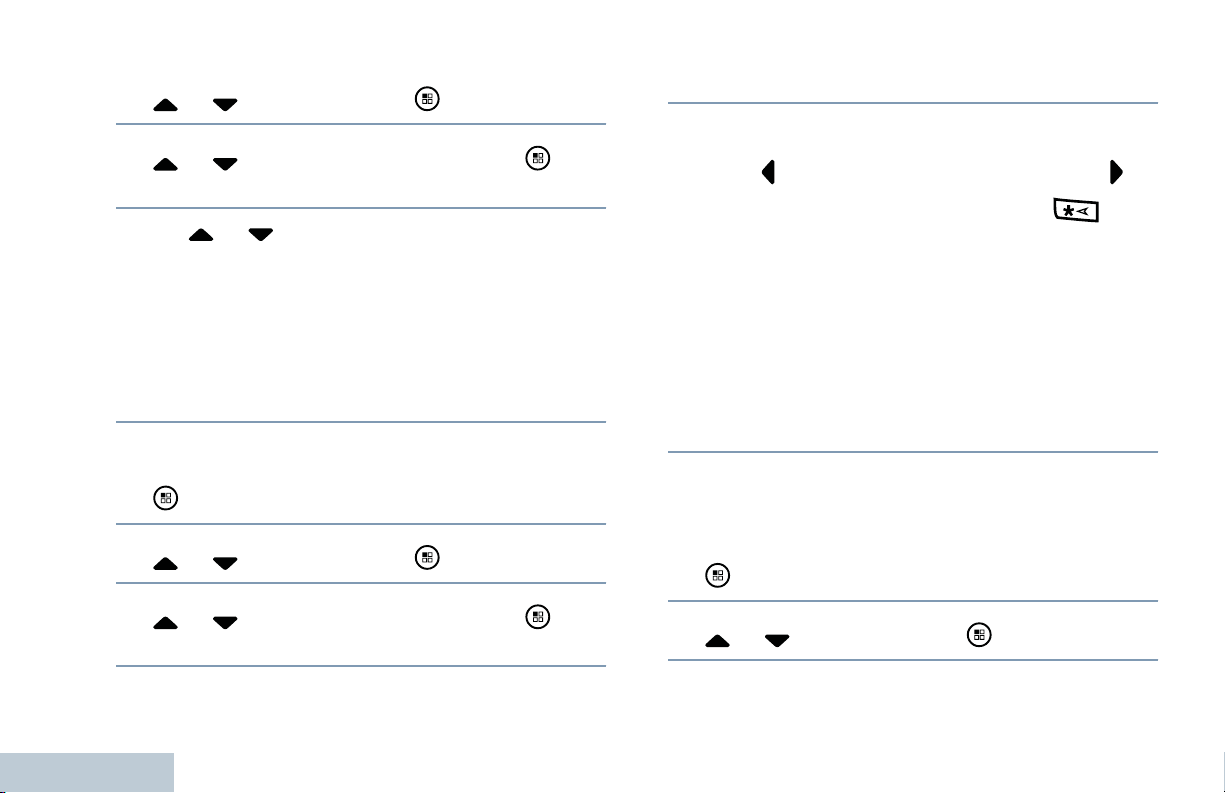
2
Advanced Features in Non-Connect...
or to Scan and press to select.
3
or to View/Edit List and press to
select.
4
Use or to view each member on the list.
The Priority icon appears left of the member’s
alias, if set, to indicate whether the member is on
a Priority 1 or Priority 2 channel list. You cannot
have multiple Priority 1 or Priority 2 channels in a
scan list.
There is no Priority icon if priority is set to None.
Viewing an Entry in the Scan List by Alias Search
1
to access the menu.
2
or to Scan and press to select.
3
or to View/Edit List and press to
select.
A blinking cursor appears.
5 Use the keypad to type the required alias.
Press to move one space to the left. Press to
move one space to the right. Press the key
to delete any unwanted characters.
The first line of the display shows the characters
you keyed in. The second line of the display
shows an alias that matches what you have keyed
in.
The alias search is case-insensitive. If there are
two or more entries with the same name, the radio
displays the entry that is listed first in the scan list.
Editing the Scan List
Adding a New Entry to the Scan List
1
to access the menu.
2
or to Scan and press to select.
4 Key in the first character of the required alias.
64
English
Page 66
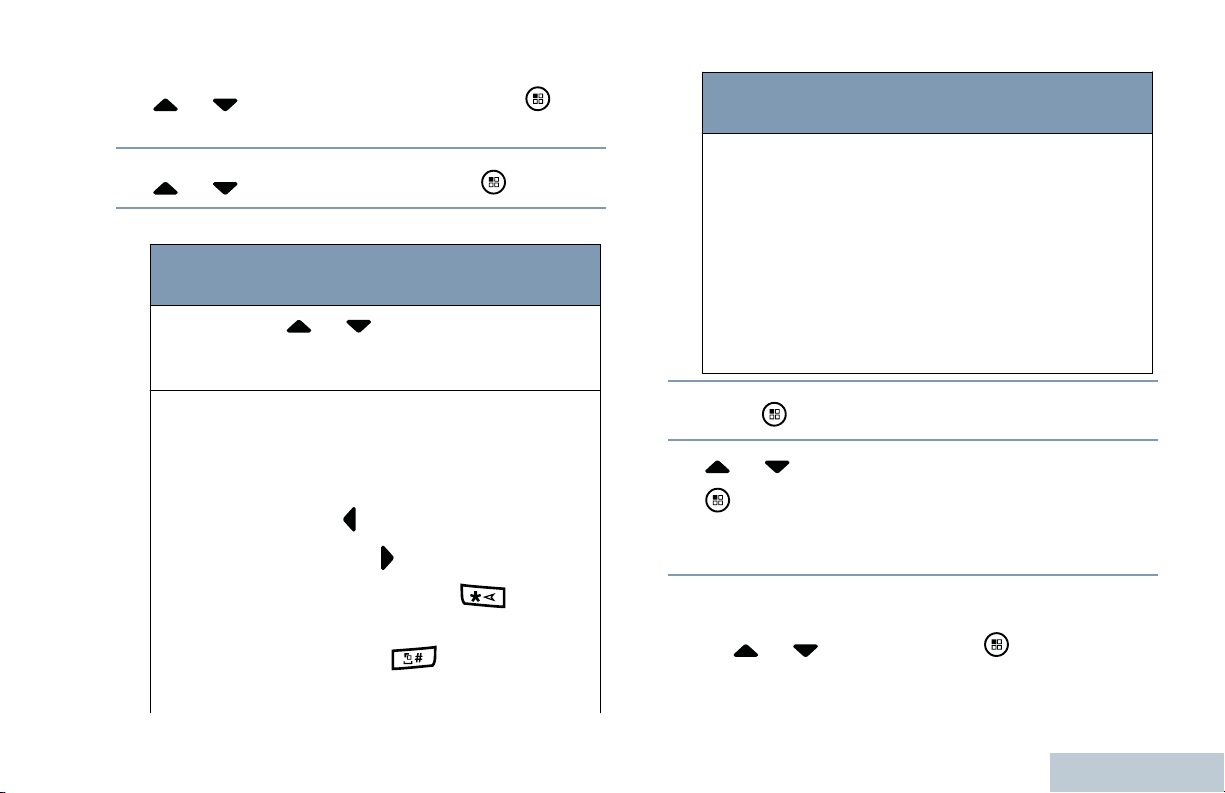
Advanced Features in Non-Connect...
3
or to View/Edit List and press to
select.
4
or to Add Member and press to select.
5 Select the required alias or ID by
Radio
Control
Radio
Navigation
Buttons
Keypad
Steps
or to the required alias or
ID.
Key in the first character of the
required alias.
A blinking cursor appears.
Press to move one space to the
left. Press
to move one space to
Radio
Control
6
Press
7
or to the required priority level and press
to select.
The display shows Entry Saved, followed
immediately by Add Another?.
Steps
The first line of the display shows
the characters you keyed in. The
next lines of the display show the
short listed search results. The
alias search is case-insensitive. If
there are two or more aliases with
the same name, the radio displays
the alias that is listed first in the
list.
to select.
the right. Press the key to
delete any unwanted characters.
Long press
text entry method.
to change the
8 Do one of the following:
—
or to Yes and press to select, and
repeat Steps 5 on page 65 to 7 on page 65.
65
English
Page 67
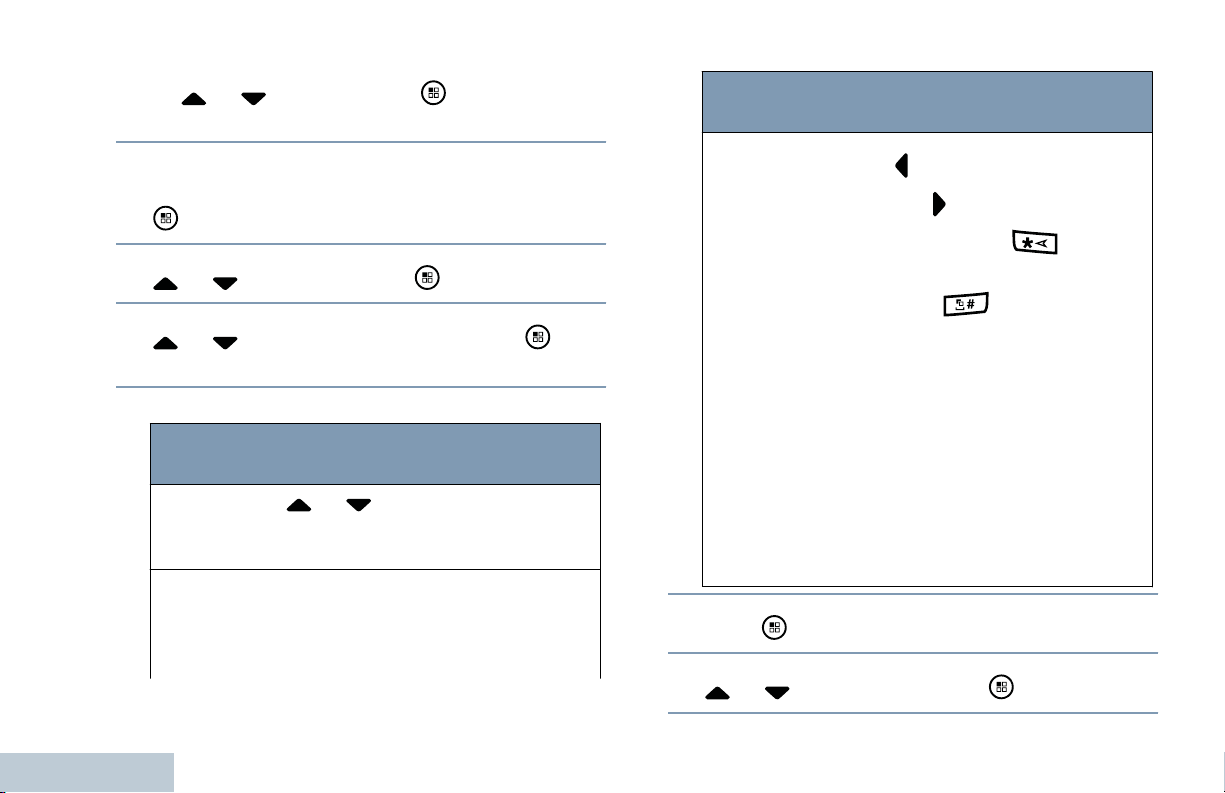
—
Advanced Features in Non-Connect...
or to No and press to save the
current list.
Radio
Control
Steps
66
Deleting an Entry from the Scan List
1
to access the menu.
2
or to Scan and press to select.
3
or to View/Edit List and press to
select.
4 Select the required alias or ID by
Radio
Control
Radio
Navigation
Buttons
Keypad
Steps
or to the required alias or
ID.
Key in the first character of the
required alias.
A blinking cursor appears.
Press to move one space to the
left. Press to move one space to
the right. Press the key to
delete any unwanted characters.
Long press to change the
text entry method.
The first line of the display shows
the characters you keyed in. The
next lines of the display show the
short listed search results. The
alias search is case-insensitive. If
there are two or more aliases with
the same name, the radio displays
the alias that is listed first in the
list.
5
6
Press
to select.
or to Delete and press to select.
English
Page 68
Advanced Features in Non-Connect...
7 Do one of the following:
—
At Delete Entry?, or to Yes and press
to delete entry. The display shows Entry
Deleted.
—
or to No and press to return to the
previous screen.
Radio
Control
Radio
Navigation
Buttons
Keypad
Steps
or to the required alias or
ID.
Key in the first character of the
required alias.
8 Repeat Steps 4 on page 66 to 7 on page 67 to
delete other entries.
After deleting all required aliases or IDs, long
press
Setting and Editing Priority for an Entry in the
Scan List
1
to access the menu.
2
or to Scan and press to select.
3
or to View/Edit List and press to
select.
4 Select the required alias or ID by
to return to the Home screen.
A blinking cursor appears.
Press to move one space to the
left. Press
the right. Press the key to
delete any unwanted characters.
Long press
text entry method.
The first line of the display shows
the characters you keyed in. The
next lines of the display show the
short listed search results. The
alias search is case-insensitive. If
there are two or more aliases with
to move one space to
to change the
English
67
Page 69
5
Advanced Features in Non-Connect...
Radio
Control
Press
Steps
the same name, the radio displays
the alias that is listed first in the
list.
to select.
Scan
When you start a scan, your radio cycles through the
programmed scan list for the current channel looking
for voice activity.
The LED blinks yellow and you see the Scan icon on
the display.
There are two ways of initiating scan:
6
or to Edit Priority and press to
select.
7
or to the required priority level and press
to select.
The display shows Entry Saved before returning
to the previous screen.
Note:
The Priority icon appears left of the member’s
name.
There is no Priority icon if priority is set to None.
68
English
— Main Channel Scan (Manual): Your radio scans
all the channels/groups in your scan list. On
entering scan, your radio may – depending on the
settings – automatically start on the last scanned
“active” channel/group or on the channel where
scan was initiated.
— Auto Scan (Automatic): Your radio automatically
starts scanning when you select a channel/group
that has Auto Scan enabled.
Note: This feature is not applicable in Capacity Plus
and Linked Capacity Plus.
Setting an Active Scan List
1
to access the menu.
Page 70
Advanced Features in Non-Connect...
2
or to Scan and press to select.
3
or to Set Active List and press to
select.
—
The display shows Turn On if scan is disabled.
—
The display shows Turn Off if scan is
enabled.
4
Press
to select.
4
or to the required list and press to
select.
The list selected will be your active scan list.
Starting and Stopping Scan
While scanning, the radio will only accept data (e.g.
text message, location, telemetry, or PC data) if
received on its Selected Channel.
You can start and stop scanning by pressing the
programmed Scan button OR follow the procedure
described next.
1 Use the Channel Selector Knob to select a
channel programmed with a scan list.
2
to access the menu.
3
or to Scan and press to select.
— The LED blinks yellow and the Scan icon is
displayed, when Scan is enabled.
— The LED turns off and the Scan icon is not
displayed, when Scan is disabled.
Responding to a Transmission During a Scan
During scanning, your radio stops on a channel/group
where activity is detected. Your radio unmutes and
the incoming call sounds through the radio's
speaker.The radio stays on that channel while the
activity is present and for a programmed time period
known as “hang time”.
1 Hold the radio vertically 1 to 2 inches (2.5 to 5.0
cm) from your mouth.
If the Channel Free Indication feature is enabled,
you hear a short alert tone the moment the
transmitting radio releases the PTT button,
indicating the channel is free for you to respond.
69
English
Page 71

2 Press the PTT button during hang time.
Advanced Features in Non-Connect...
The LED lights up solid green.
Nuisance Channel Delete button until you hear a
tone.
3 Wait for the Talk Permit Tone to finish (if enabled)
and speak clearly into the microphone.
4 Release the PTT button to listen.
If you do not respond within the hang time, the
radio returns to scanning other channels/groups.
Deleting a Nuisance Channel
If a channel continually generates unwanted calls or
noise (termed a “nuisance” channel), you can
temporarily remove the unwanted channel from the
scan list.
This capability does not apply to the channel
designated as the Selected Channel.
Deleting a “nuisance” channel is only possible
through the programmed Nuisance Channel Delete
button. This feature is not accessible through the
menu.
1 When your radio “locks on to” an unwanted or
nuisance channel, press the programmed
70
2 Release the Nuisance Channel Delete button.
The nuisance channel is deleted.
Restoring a Nuisance Channel
To restore the deleted nuisance channel, do one of
the following:
— Turn the radio off and then power it on again.
— Stop and restart a scan via the programmed Scan
button or menu.
— Change channel or zone.
Contact Settings
Contacts provides “address-book” capabilities on your
radio. Each entry corresponds to an alias or ID that
you use to initiate a call.
Each entry, depending on context, associates with
one of five types of calls: Group Call, Private Call, All
Call, PC Call or Dispatch Call.
PC Call and Dispatch Call are data-related. They are
only available with the applications. Refer to the data
applications documentation for more information.
English
Page 72
Advanced Features in Non-Connect...
Note:
If the Privacy feature is enabled on a channel, you
can make privacy-enabled Group Call, Private Call,
and All Call on that channel. Only target radios with
the same Privacy Key OR the same Key Value and
Key ID as your radio will be able to unscramble the
transmission.
Making a Group Call from Contacts
1
to access the menu.
2
or to Contacts and press to select.
The entries are alphabetically sorted.
See Privacy on page 111 for more information.
Additionally, Contacts menu allows you to assign
each entry to a programmable number key or more
on a keypad. If an entry is assigned to a number key,
your radio can perform a quick dial on the entry.
Your radio supports maximum of 1000 Contact list
entries.
Each entry within Contacts displays the following
information:
— Call Type
— Call Alias
— Call ID
Note:
You can add or edit subscriber IDs for the Digital
Contacts list.
3
or to the required group alias or ID.
4 Hold the radio vertically 1 to 2 inches (2.5 to 5.0
cm) from your mouth.
5 Press the PTT button to make the call.
The LED lights up solid green. The first line
displays the subscriber alias or ID. The second
line displays Private Call and the Private Call
icon
6 Wait for the Talk Permit Tone to finish (if enabled),
and speak clearly into the microphone.
7 Release the PTT button to listen.
When any user in the group responds, the LED
blinks green, the display shows the transmitting
user's ID, the radio unmutes and the response
sounds through the radio's speaker.
English
71
Page 73
8 If the Channel Free Indication feature is enabled,
Advanced Features in Non-Connect...
you hear a short alert tone the moment the
transmitting radio releases the PTT button,
indicating the channel is free for you to respond.
Press the PTT button to respond.
If there is no voice activity for a predetermined
period of time, the call ends.
9
You hear a short tone. The display shows Call
Ended.
Making a Private Call from Contacts
—
use the Manual Dial menu
—
or to Manual Dial and press to
select.
—
or to Radio Number and press
to select.
— If there was previously dialed ID, the ID
appears along with a blinking cursor. Else,
the first line of the display shows Radio
Number:; the second line of the display
shows a blinking cursor. Use the keypad to
1
to access the menu.
2
or to Contacts and press to select.
The entries are alphabetically sorted.
3 Use one of the steps described next to select the
required subscriber alias or ID:
— select the subscriber alias or ID directly
—
or to the required subscriber alias or
ID and press
to select.
72
English
edit/enter the ID. Press to select.
4 Hold the radio vertically 1 to 2 inches (2.5 to 5.0
cm) from your mouth.
5 Press the PTT button to make the call.
The LED lights up solid green. The first line
displays the subscriber alias or ID. The second
line displays Private Call and the Private Call
icon.
6 Wait for the Talk Permit Tone to finish (if enabled),
and speak clearly into the microphone.
Page 74
Advanced Features in Non-Connect...
7 Release the PTT button to listen.
When the target radio responds, the LED blinks
green and the display shows the transmitting
user's ID. the radio unmutes and the response
sounds through the radio's speaker.
— select the subscriber alias or ID directly
—
or to the required subscriber alias or
ID and press to select.
—
use the Manual Dial menu
8 If the Channel Free Indication feature is enabled,
you hear a short alert tone the moment the
transmitting radio releases the PTT button,
indicating the channel is free for you to respond.
Press the PTT button to respond.
If there is no voice activity for a predetermined
period of time, the call ends.
The display shows Call Ended.
Making a Phone Call from Contacts
1
to access the menu.
2
or to Contacts and press to select.
The entries are alphabetically sorted.
3 Use one of the steps described next to select the
required subscriber alias or ID:
—
or to Manual Dial and press to
select.
—
or to Phone Number and press
to select.
—
The first line of the display shows Phone
Number: , the second line of the display
shows a blinking cursor. Use the keypad to
enter a telephone number, and press
select the entered number.
If the entry selected is empty, a negative indicator
tone sounds and the display shows Phone Call
Invalid # .
When you press PTT button while in the Phone
Contacts screen, a negative indicator tone sounds
and the display shows Press OK to Place
Phone Call.
to
English
73
Page 75
4
Advanced Features in Non-Connect...
or to Call Phone and press to select.
5 If the access code was not preconfigured in the
Contacts list, the first line of the display shows
Access Code: . The second line of the display
shows a blinking cursor. Enter the access code
the Access Code input screen. If the access code
was preconfigured in the Contacts list, the radio
returns to the screen you were on prior to initiating
the call.
6 Hold the radio vertically 1 to 2 inches (2.5 to 5.0
cm) from your mouth.
and press to proceed.
During channel access, press to dismiss the
call attempt and a negative indicator tone sounds.
Your radio returns to the Call Phone screen.
The access code cannot be more than 10
characters.
The first line of the display shows Calling. The
second line of the display shows the subscriber
alias or ID, and the Phone Call icon.
If successful, the DTMF tone sounds. You hear
the dialing tone of the telephone user. The first line
of the display shows the subscriber alias or ID,
and the RSSI icon. The second line of the display
shows Phone Call and the Phone Call icon.
If unsuccessful, a tone sounds and the display
74
English
shows Phone Call Failed. Your radio returns to
7 Do one of the following:
— Press the PTT button to talk and release it to
listen.
Note:
The RSSI icon disappears during transmission.
To enter extra digits, if requested by the Phone
Call, press any keypad key to begin the input of
extra digits. The first line of the display shows
Extra Digits: . The second line of the
display shows a blinking cursor. Enter the extra
digits and press
tone sounds and the radio returns to the
previous screen.
If the call ends while you are entering the extra
digits requested by the Phone Call, your radio
to proceed. The DTMF
Page 76
Advanced Features in Non-Connect...
returns to the screen you were on prior to
initiating the call.
— Press One Touch Access button.
Note:
The DTMF tone sounds.
If the entry for the One Touch Access button
is empty, a negative indicator tone sounds.
During the call, when you press One Touch
Access button with the deaccess code
preconfigured or enter the deaccess code as the
input for extra digits, your radio attempts to end
the call.
During channel access and access/deaccess code
or extra digits transmission, your radio responds to
On/ Off/Volume Control Knob and Channel
Selector Knob only. A tone sounds for every
invalid input.
8
Press to end the call.
9 If deaccess code was not preconfigured in the
Contacts list, the first line of the display shows De-
Access Code:. The second line of the display
shows a blinking cursor. Enter the deaccess code
and press to proceed.
The deaccess code cannot be more than 10
characters.
The DTMF tone sounds and the display shows
Ending Phone Call.
If successful, a tone sounds and the display shows
Phone Call Ended. Your radio returns to the Call
Phone screen.
If unsuccessful, your radio returns to the Phone
Call screen. Repeat Steps 8 on page 75 and 9 on
page 75 or wait for the telephone user to end the
call.
When the telephone user ends the call, a tone
sounds and the display shows Phone Call
Ended.
Making a Call Alias Search
You can also use alias or alphanumeric search to
retrieve the required subscriber alias.
This feature is only applicable while in Contacts.
Note:
75
English
Page 77
Press button or to exit alias search.
Advanced Features in Non-Connect...
If you release the PTT button while the radio is setting
up the call, it exits without any indication and returns
to the previous screen.
Your radio may be programmed to perform a radio
presence check prior to setting up the Private Call. If
the target radio is not available, you hear a short tone
and see negative mini notice on the display.
1
to access the menu.
2
or to Contacts and press to select.
The entries are alphabetically sorted.
The first line of the display shows the characters
you keyed in. The next lines of the display show
the short listed search results. The alias search is
case-insensitive. If there are two or more entries
with the same name, the radio displays the entry
that is listed first in the Contacts list.
5 Hold the radio vertically 1 to 2 inches (2.5 to 5.0
cm) from your mouth.
6 Press the PTT button to make the call.
The LED lights up solid green. The display shows
the destination alias.
7 Wait for the Talk Permit Tone to finish (if enabled),
and speak clearly into the microphone.
3 Key in the first character of the required alias.
A blinking cursor appears.
4 Use the keypad to type the required alias.
Press to move one space to the left. Press to
move one space to the right. Press the key
to delete any unwanted characters. Long press
to change text entry method.
76
English
8 Release the PTT button to listen.
When the target radio responds, the LED blinks
green, the radio unmutes and the response
sounds through the radio’s speaker.
9 If the Channel Free Indication feature is enabled,
you hear a short alert tone the moment the
transmitting radio releases the PTT button,
indicating the channel is free for you to respond.
Press the PTT button to respond.
Page 78
Advanced Features in Non-Connect...
If there is no voice activity for a predetermined
period of time, the call ends.
The display shows Call Ended.
2
or to Contacts and press to select.
The entries are alphabetically sorted.
Making a Group, Private, Phone or All Call by Alias
Search
You can also use alias or alphanumeric search to
retrieve the required subscriber alias.
This feature is only applicable while in Contacts.
Note:
Press
If you release the PTT button while the radio is setting
up the call, it exits without any indication and returns
to the previous screen.
Your radio may be programmed to perform a radio
presence check prior to setting up the Private Call. If
the target radio is not available, you hear a short tone
and see Party Not Available on the display; the
radio returns to the menu prior to initiating the radio
presence check.
1
button or to exit alias search.
to access the menu.
3 Key in the first character of the required alias.
A blinking cursor appears.
4 Use the keypad to type the required alias.
Press to move one space to the left. Press to
move one space to the right. Press the key
to delete any unwanted characters.
The first line of the display shows the characters
you keyed in. The second line of the display
shows an alias that matches what you have keyed
in. The alias search is case-insensitive. If there are
two or more entries with the same name, the radio
displays the entry that is listed first in the Contacts
list.
5
or to scroll to desired entry, if necessary.
6 Hold the radio vertically 1 to 2 inches (2.5 to 5.0
cm) from your mouth.
7 Press the PTT button to make the call.
77
English
Page 79
The LED lights up solid green. The first line
Advanced Features in Non-Connect...
displays the target radio’s ID. The second line
displays the call type and the Call icon.
8 Wait for the Talk Permit Tone to finish (if enabled)
and speak clearly into the microphone.
9 Release the PTT button to listen.
When the target radio responds, the LED blinks
green.
10 If the Channel Free Indication feature is enabled,
you will hear a short alert tone the moment the
target radio releases the PTT button, indicating the
channel is free for you to respond. Press the PTT
button to respond.
If there is no voice activity for a programmed
period of time, the call ends.
You hear a short tone. The display shows Call
Ended.
1
to access the menu.
2
or to Contacts and press to select.
The entries are alphabetically sorted.
3
or to the required alias or ID and press
to select.
4
or to Program Key and press to
select.
5
or to the desired number key and press
to select.
If the number key is currently assigned to another
entry, the display shows The Key is Already
Assigned and then, the first line of the display
shows Overwrite?. Do one of the following.
Assigning an Entry to a Programmable Number Key
Note: See Making a Group, Private or All Call with
the Programmable Number Key on page 55 for
details on making a Group, Private or All Call with the
78
English
programmed number key(s).
—
or to Yes and press to overwrite
the number key assignment.
—
or to No and press to return to the
previous step.
Page 80
Advanced Features in Non-Connect...
Removing the Association between Entry and
Programmable Number Key
Each entry can be associated to different number
keys. You see a before each number key that is
assigned to an entry. If the is before Empty, that
number key is not assigned.
If a number key is assigned to an entry in a
particular mode, this feature is not supported when
you long press the number key in another mode.
The radio sounds a positive indicator tone and the
display shows Contact Saved.
The screen automatically returns to the previous
menu.
1 Access the required alias or ID via:
Radio Control Steps
Programmed
number key
Menu
Long press the programmed
number key to the required
alias or ID; press to select.
1
to access the menu
Radio Control Steps
2
or to Contacts and
press to select. The
entries are alphabetically
sorted.
3
or to the required
subscriber alias or ID and
press to select.
2
or to Program Key and press to
select.
3
or to Empty and press to select.
The first line of the display shows Clear from
all keys? .
4
or to Yes and press to select.
Note: When an entry is deleted, the association
between the entry and its programmed number
key(s) is removed.
English
79
Page 81
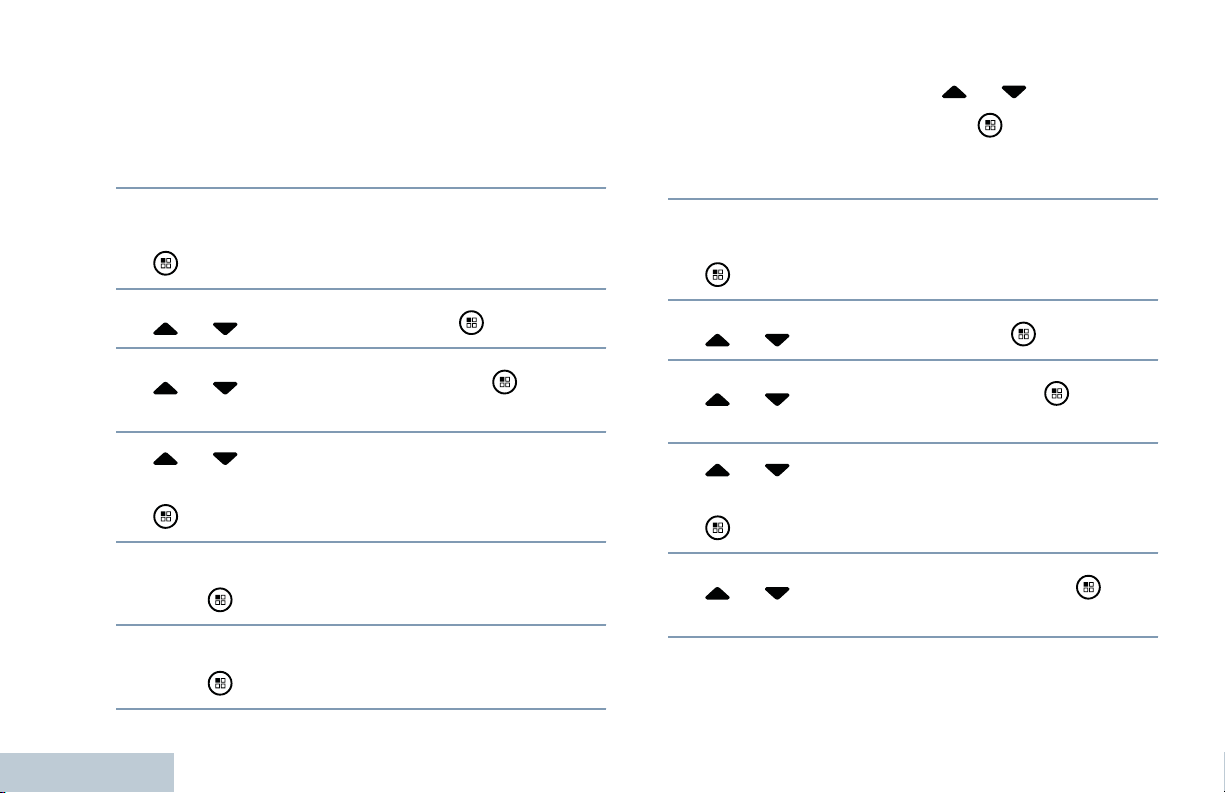
The radio sounds a positive indicator tone and the
Advanced Features in Non-Connect...
display shows Contact Saved.
The screen automatically returns to the previous
menu.
Adding a New Contact
1
to access the menu.
2
or to Contacts and press to select.
3
or to New Contact and press to
select.
4
or to the required contact type, either
Radio Contact or Phone Contact, and press
to select.
5 Use the keypad to enter the contact number and
press to confirm.
6 Use the keypad to enter the contact name and
7
If adding a Radio Contact, or to the
required ringer type and press to select.
The radio sounds a positive indicator tone and the
display shows positive mini notice.
Sending a Message to a Contact
1
to access the menu.
2
or to Contacts and press to select.
3
or to New Contact and press to
select.
4
or to the required contact type, either
Radio Contact or Phone Contact, and press
to select.
5
or to the required alias and press to
select.
press to confirm.
80
English
Page 82

Advanced Features in Non-Connect...
6
or to Send Message and press to
select.
5
or to Call Ringers and press to
select.
7
Press to send the message.
Call Indicator Settings
Activating and Deactivating Call Ringers for Call Alert
You can select, or turn on or off ringing tones for a
received Call Alert.
1
to access the menu.
2
or to Utilities and press to select.
3
or to Radio Settings and press to
select.
4
or to Tones/Alert and press to
select.
6
or to Call Alert and press to select.
The current tone is indicated by a .
7
or to the required tone and press to
select.
You can also use or to change the selected
option.
appears beside selected tone.
Activating and Deactivating Call Ringers for Private
Calls
You can turn on or off the ringing tones for a received
Private Call.
1
to access the menu.
2
or to Utilities and press to select.
81
English
Page 83
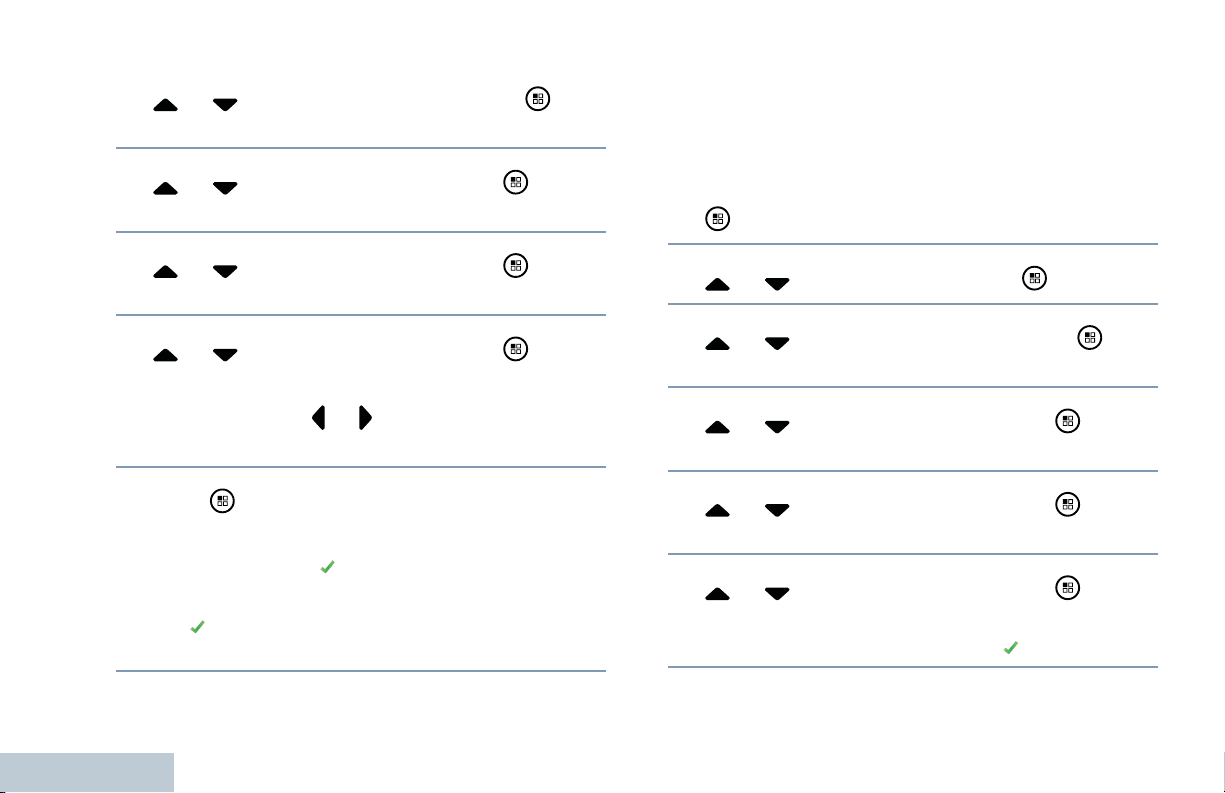
3
Advanced Features in Non-Connect...
or to Radio Settings and press to
select.
4
or to Tones/Alerts and press to
select.
5
or to Call Ringers and press to
select.
6
or to Private Call and press to
select.
You can also use
option.
or to change the selected
Activating and Deactivating Call Ringers for Text
Message
You can turn on or off the ringing tones for a received
Text Message.
1
to access the menu.
2
or to Utilities and press to select.
3
or to Radio Settings and press to
select.
4
or to Tones/Alerts and press to
select.
7
Press to enable/disable the Private Call
ringing tones.
The display shows beside Enabled, if Private
Call ringing tones are enabled.
The disappears from beside Enabled, if Private
Call ringing tones are disabled.
82
English
5
or to Call Ringers and press to
select.
6
or to Text Message and press to
select.
The current tone is indicated by a .
Page 84
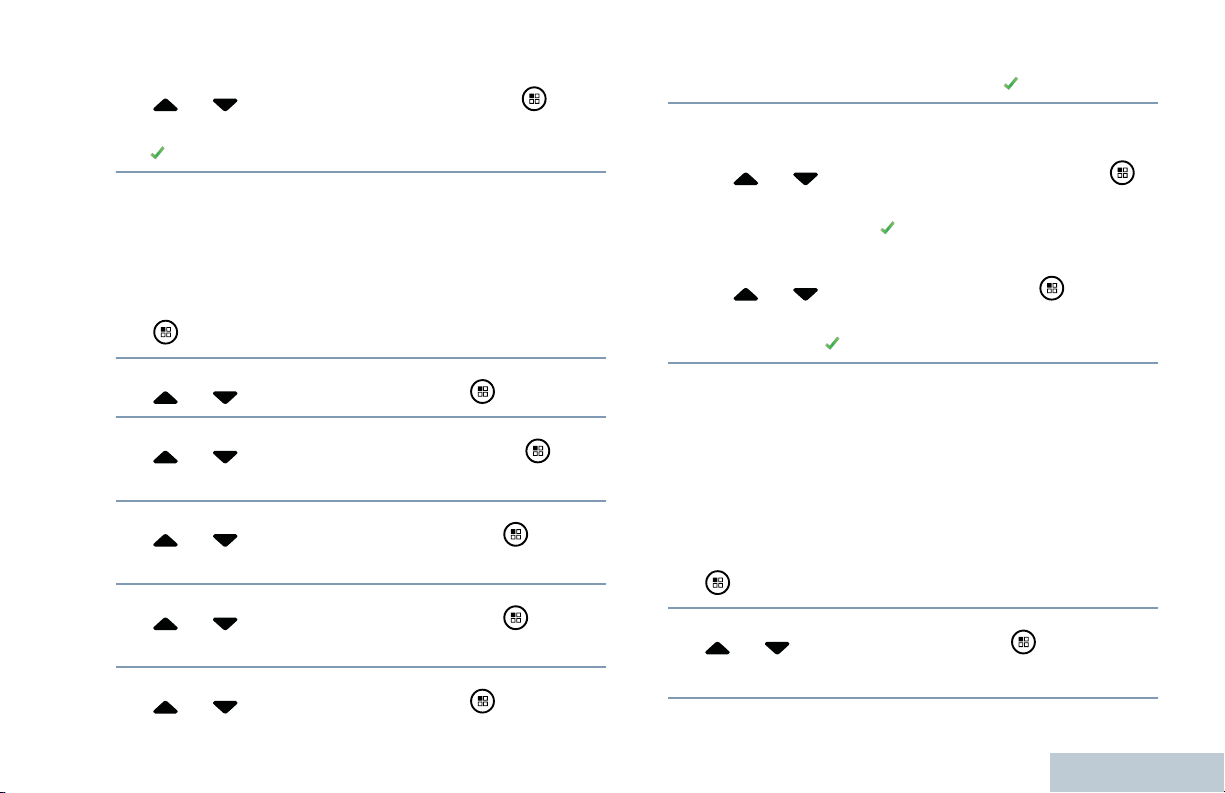
Advanced Features in Non-Connect...
7
or to the required tone and press to
select.
appears beside selected tone.
Activating and Deactivating Call Ringers for Telemetry
Status with Text
You can turn on or off the ringing tones for a received
Telemetry Status with Text.
1
to access the menu.
The current tone is indicated by a .
7 Do one of the following:
—
or to the preferred tone and press
to select. The display shows Tone <Number>
Selected and a appears left of the selected
tone.
—
or to Turn Off and press to
select. The display shows Telemetry Ringer
Off and a appears left of Turn Off.
2
or to Utilities and press to select.
3
or to Radio Settings and press to
select.
4
or to Tones/Alerts and press to
select.
5
or to Call Ringers and press to
select.
6
or to Telemetry and press to select.
Assigning Ring Styles
You can program your radio to sound one of ten
predefined ringing tones when receiving a Call Alert
or a Text Message from a particular contact.
The radio sounds out each ring style as you navigate
through the list.
1
to access the menu.
2
or to Contacts and press to select.
The entries are alphabetically sorted.
83
English
Page 85
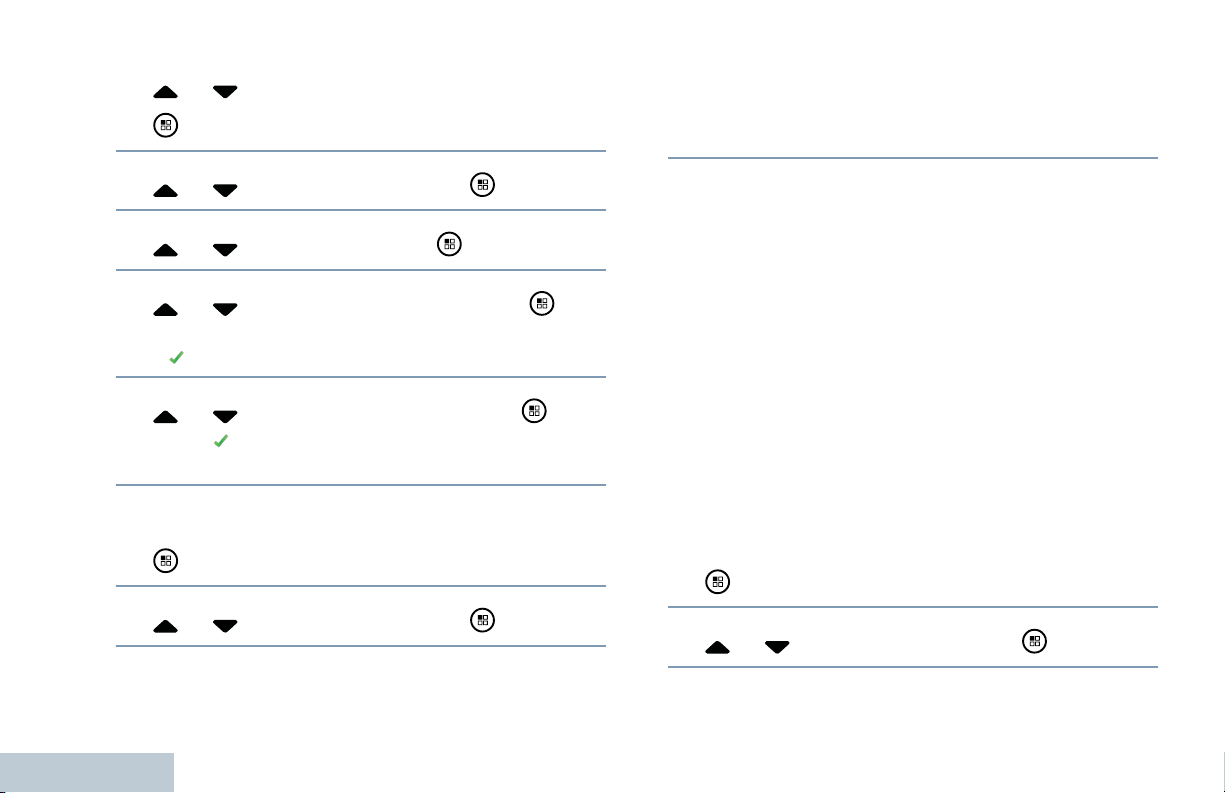
3
Advanced Features in Non-Connect...
or to the required alias or ID and press
to select.
3
Go to Radio Settings. SelectTones/Alerts.
Select All Tones. Toggle All Tones to be
enabled or disabled.
84
4
5
6
7
All Tones
1
2
or to View/Edit and press to select.
or to Ringer and press to select.
or to required ring style and press to
select.
A indicates the current selected tone.
or to the required tone and press to
select. appears beside selected tone.
The display shows Contact Saved.
to access the menu.
or to Utilities and press to select.
Ring Alert Type Selection
You can program your the radio calls to one
predeternined vibrate call. If All Tones status is
disabled, the radio displays the All Tone Mute icon.
If All Tones status is enabled, the related ring alert
type is displayed.
The radio sounds one vibration if it is a momentary
ring style. The radio will vibrate repetitively if it is a
repetitive ring style. When set to Ring & Vibrate, the
radio sounds a specific ring tone if there is any
incoming radio transaction (i.e. Call Alert, Message or
Job Ticket). It sounds like a good key tone or missed
call. If the notification list is not empty, the radio
repeats a vibration every 5 minutes.
1
to access the menu.
2
or to Utilities and press to select.
English
Page 86

Advanced Features in Non-Connect...
3
Go to Radio Settings. Select Tones/Alerts.
Select Ring Alert Type.
4 Choose from one of the following:
—
Ring
—
Vibrate
—
Vibrate & Ring
—
Silent
Escalating Alarm Tone Volume
You can program your radio to continually alert you
when a radio call remains unanswered. This is done
by automatically increasing the alarm tone volume
over time. This feature is known as Escalert.
1
to access the menu.
2
or to Utilities and press to select.
3
or to Radio Settings and press to
select.
4
or to Tones/Alerts and press to
select.
5
or to Escalert and press to select.
You can also use
option.
6
Press
The display shows beside Enabled.
The disappears from beside Enabled.
to enable/disable the Escalert.
or to change the selected
Call Log Features
Your radio keeps track of all recent outgoing,
answered, and missed Private Calls. Use the call log
feature to view and manage recent calls.
You can perform the following tasks in each of your
call lists:
— Store ID to Contacts
— Delete
— View Details
85
English
Page 87
Viewing Recent Calls
Advanced Features in Non-Connect...
The lists are Missed, Answered, and Outgoing.
1
to access the menu.
—
Press to store or delete the entry.
Storing an Alias from a Call List
You can also store an ID without an alias.
2
or to Call Log and press to select.
3
or to preferred list and press to select.
The display shows the most recent entry at the top
of the list.
4
or to view the list.
Press the PTT button to start a Private Call with
the current selected alias or ID.
Missed Call Screen
Whenever a call is missed, your radio displays a
missed call message in the notification list. The
display shows Missed Calls.
Do one of the following:
—
Press
missed call log list appears on display.
to view the missed call ID. The
86
English
1
to access the menu.
2
or to Call Log and press to select.
3
or to the required list and press to
select.
4
or to Store and press to select.
A blinking cursor appears. If needed, key in the
alias for that ID and press
positive mini notice.
Deleting a Call from a Call List
1
to access the menu.
2
or to Call Log and press to select.
. The display shows
Page 88
Advanced Features in Non-Connect...
3
or to the required list and press to
select.
When you select a call list and it contains no
entries, the display shows List Empty, and
sounds a low tone if Keypad Tones are turned on
(see Turning Keypad Tones On or Off on page
129).
4
or to the required alias or ID and press
to select.
5
or to Delete Entry? and press to
select.
6 Do one of the following:
—
Press
display shows Entry Deleted.
—
return to the previous screen.
to select Yes to delete the entry. The
or to No, and press the button to
Viewing Details from a Call List
1
to access the menu.
2
or to Call Log and press to select.
3
or to the required list and press to
select.
4
or to the required alias or ID and press
to select.
5
or to View Details and press to
select.
Display shows details.
Call Alert Operation
Call Alert paging enables you to alert a specific radio
user to call you back when they are able to do so.
This feature is applicable for subscriber aliases or IDs
only and is accessible through the menu via Contacts
or manual dial.
87
English
Page 89
Receiving and Responding to a Call Alert
Advanced Features in Non-Connect...
When you receive a Call Alert page, you see the
notification list listing a Call Alert with the alias or ID of
the calling radio on the display.
When you hear a repetitive tone and the LED
blinks yellow, do one of the following:
— Press the PTT button while the display still
shows the Call Alert in the Notification List to
respond with a Private Call.
—
Press to exit the Notification List. The
alert is moved to the Missed Call Log.
See Notification List on page 127 for details
about the Notification List.
See Call Log Features on page 85 for details
about the Missed Call List.
Making a Call Alert from the Contact List
1
to access the menu.
2
or to Contacts and press to select.
88
3 Use one of the steps described next to select the
required subscriber alias or ID:
— select the subscriber alias or ID directly
—
or to the required subscriber alias or
ID and press to select.
—
use the Manual Dial menu
—
or to Manual Dial and press to
select.
—
or to Radio Contact and press
to select.
—
The first line of the display shows Radio
Number: , the second line of the display
shows a blinking cursor. Enter the
subscriber ID you want to page and press
.
4
or to Call Alert and press to select.
The display shows Call Alert and the
subscriber alias or ID, indicating that the Call Alert
has been sent.
English
Page 90

Advanced Features in Non-Connect...
Making a Call Alert with the One Touch Access Button
The LED lights up solid green when your radio is
sending the Call Alert.
If the Call Alert acknowledgement is received, the
display shows positive mini notice.
If the Call Alert acknowledgement is not received,
the display shows negative mini notice.
— Press the programmed One Touch Access
button to make a Call Alert to the predefined alias
or ID.
The display shows Call Alert and the
subscriber alias or ID, indicating that the Call Alert
has been sent.
The LED lights up solid green when your radio is
sending the Call Alert.
If the Call Alert acknowledgement is received, the
display shows positive mini notice.
If the Call Alert acknowledgement is not received,
the display shows negative mini notice.
Emergency Operation
An Emergency Alarm is used to indicate a critical
situation. You are able to initiate an Emergency at
any time on any screen display even when there is
activity on the current channel.
Your dealer can set the duration of a button press for
the programmed Emergency button, except for long
press, which is similar with all other buttons:
The Emergency button is assigned with the
Emergency On/Off feature. Check with your dealer for
the assigned operation of the Emergency button.
Note:
If the short press for the Emergency button is
assigned to turn on the Emergency mode, then the
long press for the Emergency button is assigned to
exit the Emergency mode.
If the long press for the Emergency button is
assigned to turn on the Emergency mode, then the
short press for the Emergency button is assigned to
exit the Emergency mode.
Your radio supports three Emergency Alarms:
— Emergency Alarm
89
English
Page 91
— Emergency Alarm with Call
Advanced Features in Non-Connect...
— Emergency Alarm with Voice to Follow
Note: Only ONE of the Emergency Alarms above can
be assigned to the programmed Emergency button.
In addition, each alarm has the following types:
— Regular – Radio transmits an alarm signal and
shows audio and/or visual indicators.
— Silent – Radio transmits an alarm signal without
any audio or visual indicators. Radio receives calls
without any sound through the radio’s speaker,
until you press the PTT button to initiate the call.
— Silent with Voice – Radio transmits an alarm
signal without any audio or visual indicators, but
allow incoming calls to sound through the radio’s
speaker.
Receiving an Emergency Alarm
On receiving an emergency alarm the emergency
icon appears, a tone sounds, the LED blinks red and
the radio displays the emergency caller alias. If more
than one alarm has occurred all emergency caller
aliases are displayed in an Alarm List.
1 When receiving an emergency alarm, do one of
90
the following:
— If a single emergency call alias is displayed,
press to view more details. press again
to view your action details.
— If the multiple emergency caller aliases are
displayed in the Alarm List, or to the
required alias and press to view more
details. Press
items.
2
Press and select Yes to exit the Alarm List.
To revisit the Alarm List, press to access the
menu and select Alarm List.
Responding to an Emergency Alarm
1
In the Alarm List, or to the required alias.
2 Hold the radio vertically 1 to 2 inches (2.5 to 5.0
cm) from your mouth.
If the Channel Free Indication feature is enabled,
you will hear a short alert tone the moment the
again to view your action
English
Page 92

Advanced Features in Non-Connect...
transmitting radio releases the PTT button,
indicating the channel is now available for use.
3 Press PTT button to transmit non-emergency
voice to the same group that the Emergency
Alarm was targeted to.
Emergency voice can only be transmitted by the
emergency initiating radio. All other radios
(including the emergency receiving radio) transmit
non-emergency voice.
The LED lights up solid green. Your radio remains
in the Emergency mode.
4 Wait for the Talk Permit Tone to finish (if enabled)
and speak clearly into the microphone.
5 Release the PTT button to listen.
When the emergency initiating radio responds, the
LED blinks green, the LED blinks green, the radio
unmutes and the response sounds through the
radio's speaker.You see the Group Call icon, the
group ID, and transmitting radio ID on your
display.
6 Your radio displays the Alarm List.
Sending an Emergency Alarm
This feature allows you to send an Emergency Alarm,
a non-voice signal, which triggers an alert indication
on a group of radios.
If your radio is set to Silent, it will not display any
audio or visual indicators during Emergency mode.
Press the programmed Emergency On button.
The display shows Tx Alarm and the destination
alias. The LED lights up solid green and the
Emergency icon appears on the Home screen
display.
When an Emergency Alarm acknowledgement is
received, the Emergency tone sounds and the
LED blinks green. The display shows Alarm Sent.
If your radio does not receive an Emergency
Alarm acknowledgement, and after all retries have
been exhausted, a tone sounds and the display
shows Alarm Failed.
Radio exits the Emergency Alarm mode and
returns to the Home screen.
English
91
Page 93

Sending an Emergency Alarm with Call
Advanced Features in Non-Connect...
This feature allows you to send an Emergency Alarm
to a group of radios. Upon acknowledgement by a
radio within the group, the group of radios can
communicate over a programmed Emergency
channel.
If your radio is set to Silent, it will not display any
audio or visual indicators during Emergency mode, or
allow any received calls to sound through the radio’s
speaker, until you press the PTT button to initiate the
call.
If your radio is set to Silent with Voice, it will not
display any audio or visual indicators during
Emergency mode, but allow incoming calls to sound
through the radio’s speaker. The indicators will only
appear once you press the PTT button to initiate, or
respond to, the call.
When an Emergency Alarm acknowledgment is
received, the Emergency tone sounds and the
LED blinks green. The display shows Alarm Sent.
2 Hold the radio vertically 1 to 2 inches (2.5 to 5.0
cm) from your mouth.
3 Press PTT button to make the call.
The LED lights up solid green and the Group icon
appears on the display.
4 Wait for the Talk Permit Tone to finish (if enabled)
and speak clearly into the microphone.
5 Release the PTT button to listen.
If the Channel Free Indication feature is enabled,
you hear a short alert tone the moment the
transmitting radio releases the PTT button,
indicating the channel is free for you to respond.
1 Press the programmed Emergency On button.
The display shows Tx Alarm and the destination
alias. The LED lights up solid green and the
Emergency icon appears on the Home screen
display.
92
English
6 Press the PTT button to respond.
7 Once your call ends, press Emergency Off button
to exit the Emergency mode.
The radio returns to the Home screen.
Page 94

Sending an Emergency Alarm with Voice to Follow
Advanced Features in Non-Connect...
This feature allows you to send an Emergency Alarm
to a group of radios. Your radio’s microphone is
automatically activated, allowing you to communicate
with the group of radios without pressing the PTT
button.
This activated microphone state is also known as “hot
mic”.
If your radio has Emergency Cycle Mode enabled,
repetitions of hot mic and receiving period are made
for a programmed duration.
If your radio is set to Silent, it will not display any
audio or visual indicators during Emergency mode, or
allow any received calls to sound through the radio’s
speaker, until the programmed hot mic transmission
period is over, and you press the PTT button.
If your radio is set to Silent with Voice, it will not
display any audio or visual indicators during
Emergency mode when you are making the call with
hot mic, but allow sound through the radio’s speaker
when the target radio responds after the programmed
hot mic transmission period is over. The indicators will
only appear when you press the PTT button.
Note: During Emergency Cycle Mode, received calls
sound through the radio’s speaker.
If you press the PTT button during the programmed
programmed receiving period, you will hear a prohibit
tone, indicating that you should release the PTT
button. The radio ignores the PTT press and remains
in Emergency mode.
Note: If you press the PTT button during hot mic, and
continue to press it after the hot mic duration expires,
the radio continues to transmit until you release the
PTT button.
Note: If the Emergency Alarm request fails, the radio
does not retry to send the request, and enters the hot
mic state directly.
1 Press the programmed Emergency On button.
The display shows Tx Alarm and the destination
alias. The LED lights up solid green and the
Emergency icon is displayed.
2
Once the display shows Alarm Sent, speak
clearly into the microphone.
When hot mic has been enabled, the radio
automatically transmits without a PTT press until
the hot mic duration expires. While transmitting,
English
93
Page 95

the LED lights up solid green and the Emergency
Advanced Features in Non-Connect...
icon appears on the display.
3 The radio automatically stops transmitting when
the cycling duration between hot mic and receiving
calls expires, if Emergency Cycle Mode is
enabled.
4 Once the hot mic duration expires, the radio
automatically stops transmitting. To transmit
again, press the PTT button.
Exiting Emergency Mode
Note: This feature is only applicable to the radio
sending the Emergency Alarm.
Your radio exits Emergency mode when one of the
following occurs:
— Emergency Alarm acknowledgement is received
(for Emergency Alarm only)
— All retries to send the alarm have been exhausted
— The Emergency Off button is pressed.
Reinitiating an Emergency Mode
Note: This feature is only applicable to the radio
sending the Emergency Alarm.
There are two instances where this can happen:
— You change the channel while the radio is in
Emergency mode. This exits the Emergency
mode. If Emergency Alarm is enabled on this new
channel, the radio reinitiates Emergency.
— You press the programmed Emergency On
button during an Emergency initiation/transmission
state. This causes the radio to exit this state, and
to reinitiate Emergency.
94
English
Note:
If your radio is powered off, it exits the Emergency
mode. The radio will not reinitiate the Emergency
mode automatically when it is turned on again.
If you change channels when your radio is in
Emergency mode to a channel that has no
emergency system configured, No Emergency is
shown on your display.
Text Message Features
Your radio is able to receive data, for example a text
message, from another radio or an e-mail application.
Page 96
Advanced Features in Non-Connect...
The maximum length of characters for a text
message, including the subject line (seen when
receiving message from an e-mail application), is 140
whereas for receiving this is 280 characters.
Note: Long press at any time to return to the
Home screen.
Writing and Sending a Text Message
1 Access the Text Message feature.
Radio Controls Steps
Programmed
Text Message
button
Menu
2
or to Compose and press to select.
A blinking cursor appears.
3 Use the keypad to type your message.
Press the programmed Text
Message button.
1
to access the menu.
2
or to Messages
and press to select.
Press
the key to move one space to the right.
Press the key to delete any unwanted
characters. Long press to change text entry
method.
4
Press once message is composed.
5 Depending on whether you want to send, save, re-
edit, or delete the newly composed message, do
one of the following.
—
—
—
—
The display shows transitional mini notice,
confirming your message is being sent.
to move one space to the left. Press or
or to Send, and press to send the
message.
or to Save, and press to save the
message to the Drafts folder.
to edit the message.
again to choose between deleting the
message or saving it to the Drafts folder.
95
English
Page 97
If the message is sent successfully, a tone sounds
Advanced Features in Non-Connect...
and the display shows positive mini notice.
If the message cannot be sent, a low tone sounds
and the display shows negative mini notice.
If the text message fails to send, the radio returns
you to the Resend option screen (see Managing
Fail-to-Send Text Messages on page 100
Sending a Quick Text Message
Radio Controls Steps
2
or to Messages
and press to select.
2
or to Quick Text and press to select.
3
or to the required Quick Text and press
Your radio supports a maximum of 50 Quick Text
messages as programmed by your dealer.
While Quick Text messages are predefined, you can
edit each message before sending it.
1 Access the Text Message feature.
Radio Controls Steps
Programmed
Text Message
button
Menu
Press the programmed Text
Message button.
1
to access the menu.
96
English
to select.
4 Use the keypad to edit the message, if required.
Press to move one space to the left. Press or
the key to move one space to the right.
Press the key to delete any unwanted
characters. Long press to change text entry
method.
5
Press
once message is composed.
Page 98
Advanced Features in Non-Connect...
6 Depending on whether you want to send, save, re-
edit, or delete the newly composed message, do
one of the following.
—
or to Send, and press to send the
message.
—
or to Save, and press to save the
message to the Drafts folder.
—
—
7 If you are sending the message, select the
recipient by
—
—
to edit the message.
again to choose between deleting the
message or saving it to the Drafts folder.
or to the required alias or ID and press
to select.
or to Manual Dial, and press to
select. The first line of the display shows Radio
Number:. The second line of the display shows
a blinking cursor. Key in the subscriber alias or
ID and press
.
The display shows , transitional mini notice,
confirming your message is being sent.
If the message is sent successfully, a tone sounds
and the display shows positive mini notice.
If the message cannot be sent, a low tone sounds
and the display shows negative mini notice.
If the text message fails to send, the radio returns
you to the Resend option screen (see Managing
Fail-to-Send Text Messages on page 100).
Sending a Quick Text Message
— Press the programmed One Touch Access
button to send a predefined Quick Text message
to a predefined alias or ID.
The display shows transitional mini notice,
confirming your message is being sent.
If the message is sent, a tone sounds and the
display shows positive mini notice.
If the message cannot be sent, a low tone sounds
and the display shows negative mini notice.
If the text message fails to send, the radio returns
you to the Resend option screen (see Managing
Fail-to-Send Text Messages on page 100).
97
English
Page 99
Accessing the Drafts Folder
Advanced Features in Non-Connect...
You can save a text message to send it at a later
time.
If a PTT button press or a mode change causes the
radio to exit the text message writing/editing screen
while you are in the process of writing or editing a text
message, your current text message is automatically
saved to the Drafts folder.
The most recent saved text message is always added
to the top of the Drafts list.
The Drafts folder stores a maximum of ten (10) last
saved messages. When the folder is full, the next
saved text message automatically replaces the oldest
text message in the folder.
Note:
Long press at any time to return to the Home
screen.
Viewing a Saved Text Message
1 Access the Text Message feature.
Radio Controls Steps
Programmed
Text Message
button
Menu
2
or to Drafts and press to select.
3
or to the required message and press
to select.
Editing and Sending a Saved Text Message
1
Press again while viewing the message.
2
or to Edit and press to select.
A blinking cursor appears.
Press the programmed Text
Message button.
1
to access the menu.
2
or to Messages
and press to select.
98
English
3 Use the keypad to type your message.
Page 100
Advanced Features in Non-Connect...
Press to move one space to the left. Press or
the key to move one space to the right.
Press the key to delete any unwanted
characters. Long press to change text entry
method.
If the message cannot be sent, a low tone sounds
and the display shows negative mini notice.
If the text message cannot be sent, it is moved to
the Sent Items folder and marked with a Send
Failed icon.
Deleting a Saved Text Message from Drafts
4
Press once message is composed.
5 Select the message recipient by
—
or to the required alias or ID and press
to select.
—
or to Manual Dial, and press to
select. The first line of the display shows Radio
Number:. The second line of the display shows
a blinking cursor. Key in the subscriber alias or
ID and press .
The display shows transitional mini notice,
confirming your message is being sent.
If the message is sent successfully, a tone sounds
and the display shows positive mini notice.
1 Access the Text Message feature.
Radio Controls Steps
Programmed
Text Message
button
Menu
2
or to Drafts and press to select.
3
or to the required message and press
to select.
Press the programmed Text
Message button.
1
to access the menu.
2
or to Messages
and press to select.
99
English
 Loading...