

Page 1
MODE
Page 2

Contents
Getting Started
Installing AA Batteries......
Using the NiMH Battery
and Charger ................
Attaching the Belt Clip ..................
Controls.........................................
Turning On Your Radio..................
Standby Screen.............................
Two-way Menus ............................
Turning Off Your Radio..................
Backlight........................................
Time
Alarm................................
TurningOff the Alarm .......
Alerts
Setting the Alert for Incom-
ing Calls.......................
Talking
Before You Can Talk ......
Setting the Channel ........
Setting the Code.............
TurningOn the Monitor .................
Talking...........................................
Hands Off Use
Hands Off Use ................
Setting the Sensitivity
Level............................
Privacy
Set Quiet.........................
Set Scramble Code.........
Stopwatch
Timing Your Activities......
Timing Your Calls............
Page 3

Contents
Weather(T6310 & T6320)
Turning on the Weather ..
Setting the Weather
Channel......................
Reset............................................
KeyPad Lock ................................
Channel Scanning........................
Call Tones.....................................
FM Stereo (T6310)
Turning On the FM.........
Finding an FM station.....
Tuning your FM .............
Preset FM stations........................
Outdoors (T6320)
Barometer.......................
Altimeter.........................
Compass........................
Advanced Two-Way
Roger Beeps ..................
Button Beeps..................
Automatic Shut-Off.........
Use and Care ................
FAQs..............................
Accessories..................
Charts
Chanel Frequency..........
Interference Eliminator
Codes.........................
Safety Information......................
Page 4

Getting Started
Hi, I’m QuickStart and I’m going help you get started.
The MotorolaâTalkAbout
that allow you to keep track and stay connected to family, friends and
d
e
t
r
a
t
S
g
n
i
t
t
e
G
1
TM
T6300 radios are durable two-way radios
companions. And, when you use the special
scrambling option, you can be sure that your
group’s communications stay private.
But, the T6300 radios offer more than just a
way of keep in touch. They also help you and
your group stay on schedule because a clock,
an alarm and a stopwatch is built into each
model.
Page 5

The TalkAbout T6310 is a stylish, sophisticated twoway radio that offers FM stereo reception and weather
information. It’s fun and cool, a great accessory to take
to the beach.
The Talkabout T6320 is rugged and
sporty with special features to help you navigate the
great outdoors. In addition to weather information, it
offers a compass, an altimeter and a barometer.
Accessories ???
But, they all have something in common -- they are all
easy to use. Just take a few minutes to read this user’s gude and
you’re ready to go.
A detachable Quick Reference Card is on the back cover.
d
e
t
r
a
t
S
g
n
i
t
t
e
G
2
2
Page 6
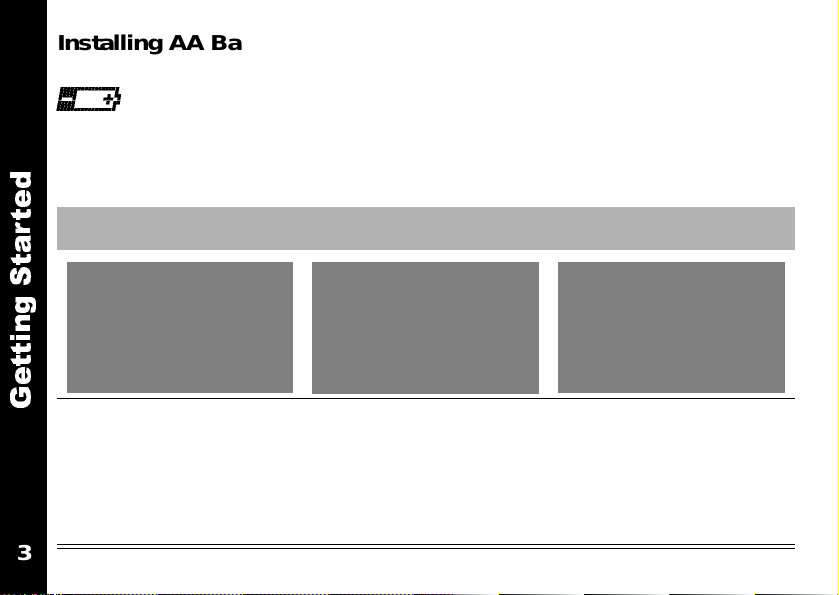
Installing AA Batteries
Your radio uses 3 AA-size alkaline batteries. When the battery is low,
((Does the radio emit a Low Battery Alert)
To install the batteries:
d
e
t
r
a
t
S
appears on the standby screen.
First Then Finally
g
n
i
t
t
e
G
• Turn off the radio
(see page ?).
• Push latch up until it
clicks.
• Lift back cover off.
3
• Remove old
batteries, if
necessary
• Insert new batteries
??? polarity???
• Hook back cover on
the hinges.
• Close battery door,
pressing lightly until
latch clicks
Page 7
Using the NIMH Battery and Charger
Your T6300 two-way radio can use a variety of Motorola power accessories. See “Accessories on page XXX” for more information.
An NiMH battery kit, consisting of the NiMH battery, adapter and
charger, is included with some T6300 radios as well as sold separately as an accessory.
The (Nickle-Metal Hydride) NiMH rechargable battery provides about
11 hours of normal use. Charge it for at least five hours before using it
for the first time. The NiMH battery will only need 3 hours of charging
thereafter.
d
e
t
r
a
t
S
g
n
i
t
t
e
G
4
4
Page 8
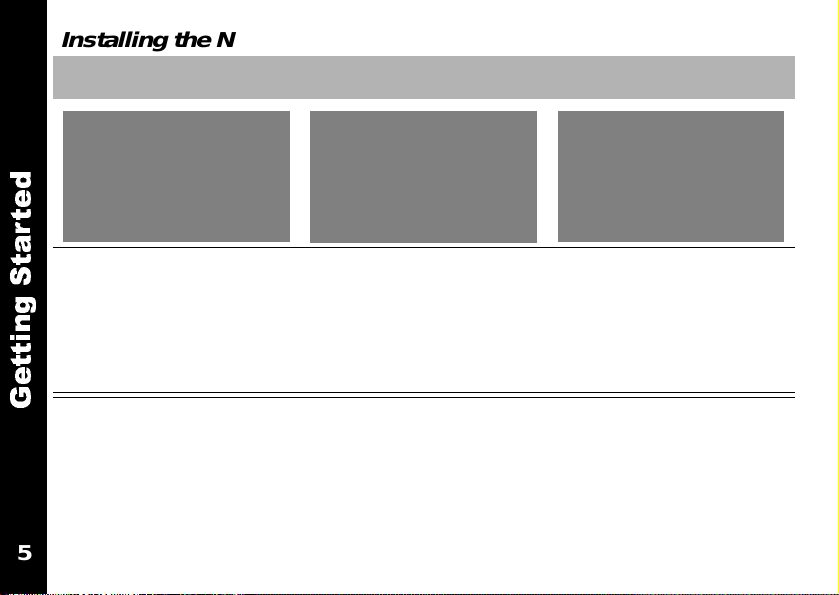
Installing the NIMH battery:
First Then Finally
d
e
t
r
a
t
• Turn off the radio
S
(see page ?).
g
• Push latch up until it
n
i
t
clicks.
t
• Lift back cover off.
e
G
5
• Insert the NiMH
battery with the
contacts facing up
• Hook back cover on
the hinges.
• Close battery door,
pressing lightly until
the latch clicks
Page 9
Charging the NiMH battery;
First Then Finally
• Turn off the radio
(see page ?).
• Plug the charger
into a AC wall outlet
Note: The NIMH battery may be charged outside the radio by clamping
the adapter directly on the battery.
Reading the LED light
The LED light indicates battery charging status.See “Charts” on page XXX for more information.
6
• Clamp the adapter
onto the
connectors on the
back of the radio
• When the LED turns
green, the battery is
fully charged.
6
d
e
t
r
a
t
S
g
n
i
t
t
e
G
Page 10
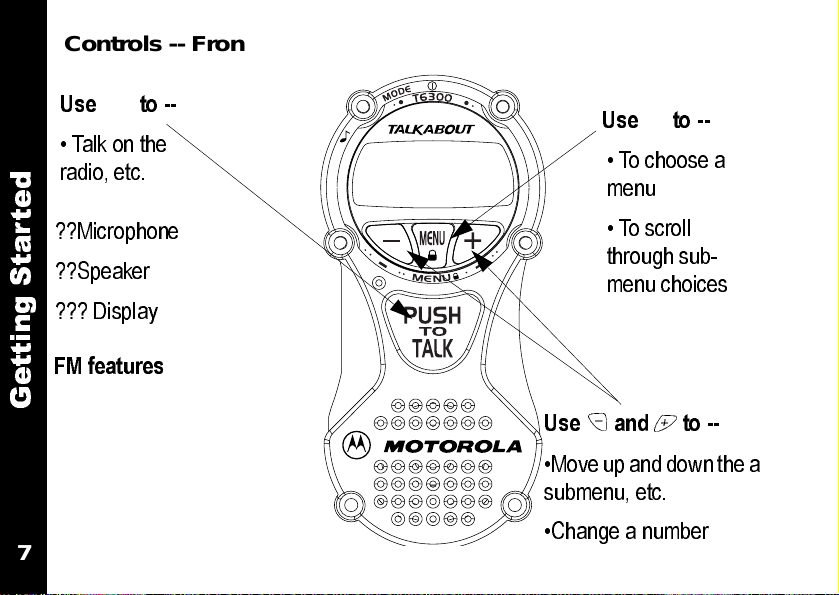
Controls -- Front View
Use { to --
• Talk on the
radio, etc.
d
e
t
r
??Microphone
a
t
??Speaker
S
g
??? Display
n
i
t
t
FM features
e
G
7
Use y to --
• To choose a
menu
• To scroll
through sub-
menu choices
Use and to --
•Move up and down the a
submenu, etc.
•Change a number
Page 11
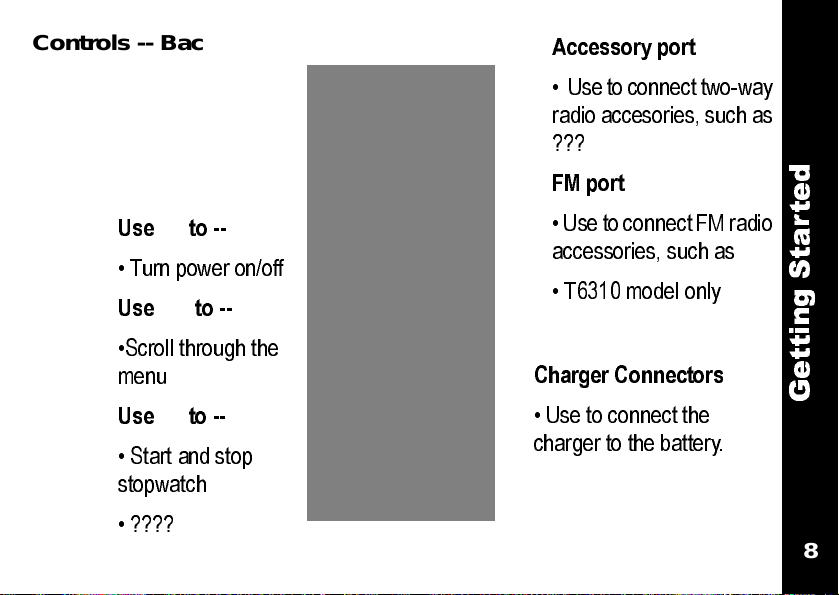
Controls -- Back View
Use | to --
• Turn power on/off
Use ~ to --
•Scroll through the
menu
Use} to --
• Start and stop
stopwatch
Accessory port
• U se to c onn ect two- way
radio acce sor ies, su ch as
???
FM port
• Use to c onne ct FM rad io
access ories , such as
• T6310 model only
Charger Connectors
• Use to connect the
charger to the battery .
d
e
t
r
a
t
S
g
n
i
t
t
e
G
8
• ????
8
Page 12
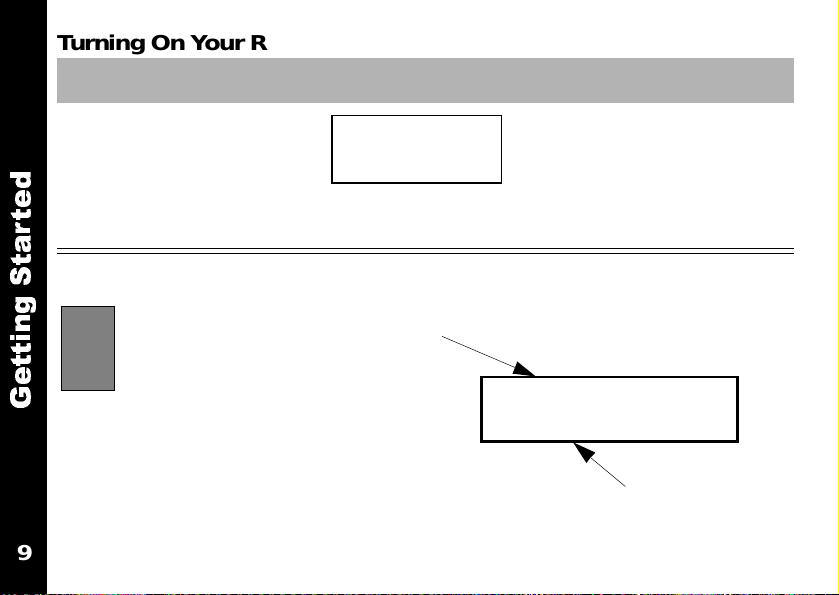
TurningOnYourRadio
Press To D i s p l a y Then Press
What about hide clock display???
|
d
e
t
r
a
t
Standby Screen
S
g
n
i
t
t
e
G
Most actions described in this guide start on the standby screen. It’s very important!
9
Your radio displays the standby screen whenever it’s turned on and nothing else is happening.
MOTOROLA
Battery Status
???does an alert sound,
can it be turned off by
pressing anything else?
any icons always appear,
or do all of them.
b
1:54 PM
Time
Page 13
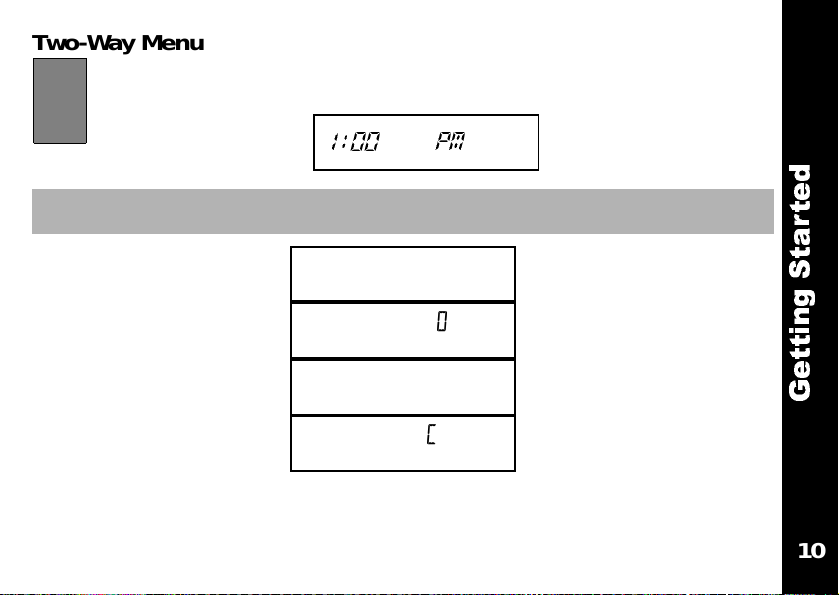
Two-W a y Menus
(
You can use your radio’s menus to select options and set features. Let’s look at them now. From --
Press To Display Then Press
~
and release until you
see each menu
10
b
TWO WAY
FM STEREO
TIME
STPWATCH
10
d
e
t
r
a
t
S
g
n
i
t
t
e
G
Page 14
Press To Display Then Press
~
and release until you
see each menus
WEATHER
SETTINGS
d
e
t
r
a
t
S
g
n
i
t
on models T6310 and T6320. The T6320 also features a compass,
t
e
an altimeter and a barometer.
FM STEREO
only avaible on the T6310.
WEATHER
is only available
G
11
Page 15
Turning Off Your Radio
To turn off your radio, just press
blank.
Backlight
Being in the dark is never a
problem. Just turn on the backlight by pressing any button,
except the {.
The backlight turns off automatically. To extend the backlight,
you press the button again.
12
|.
The screen then goes
You light up my radio ....
12
d
e
t
r
a
t
S
g
n
i
t
t
e
G
Page 16
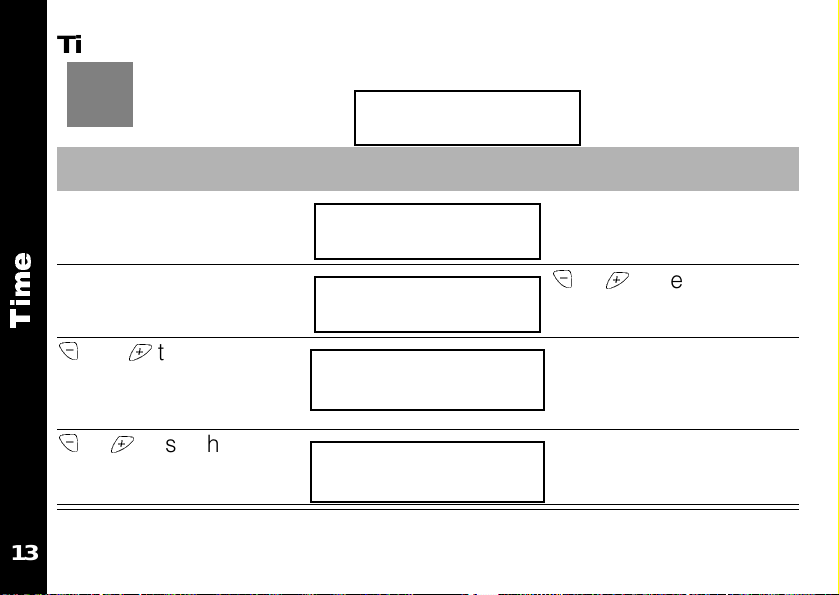
Time
(
Here’s how to set the time. From --
Press To Display Then Press
~
until
SET TIME
appears
e
y
m
i
T
and to set the hour
-- making sure to note
AM/PM
or to set the min-
utes
1:00 PM
d
TIME
d
SET TIME
d
3:00 AM
d
3:56 PM
y
to enter menu
or to select
y
to move to next field
?? to set
13
Page 17

Showing your clock display
??? do we want to include this???
Choosing a 12 or 24 hour display
??? do we want to include this???
e
m
i
T
14
14
Page 18
15
(
m
r
a
l
A
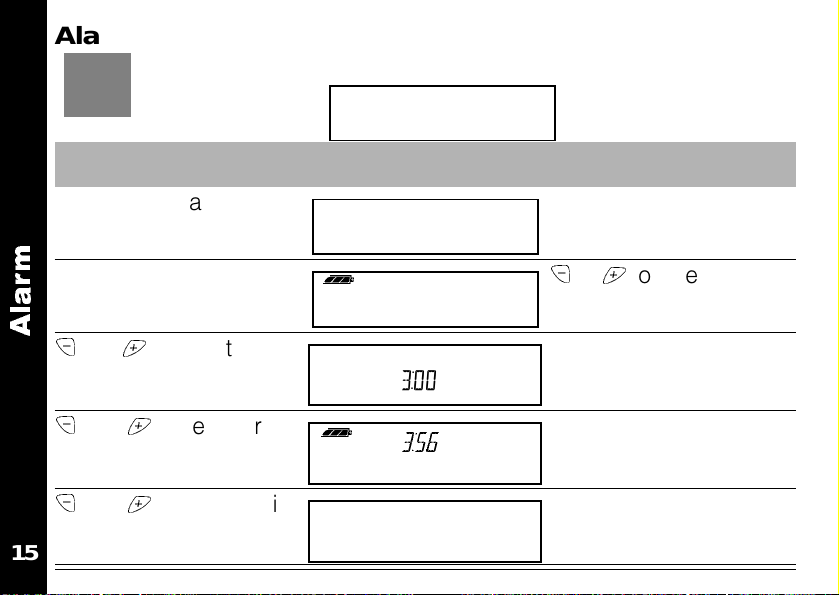
Alarm
Here’s how to set the alarm. From --
Press To D is p la y Then Press
~
until
TIME
appears
y
until
SET ALARM
appears
and to select
(or
ON
utes
ALARM OFF
and to set hour
and to set the min-
ALARM
)
1:00 PM
d
TIME
SET ALARM
d
3:00 AM
d
3:56 PM
PM
y
to enter menu
or to select
y
to set
y
to move to next field
?? to set
Page 19

“I’m all shook up.”
Your alarm will now go
off at the set time every
day.
Your standby screen shows ?? to indicate the alarm is activated
Turning Off the Alarm
When the alarm sounds
--
TURN IT OFF ----
PLEEASE!!!
By????
Alarm set
d
3:56
??screen displays??
m
r
a
l
A
16
16
Page 20
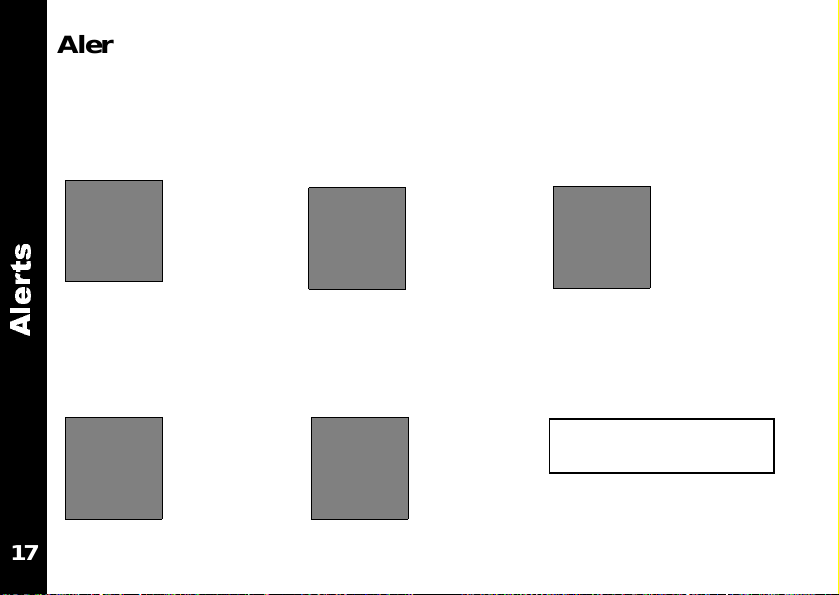
Alerts
(
You can program
how your radio alerts
you when a call
comes in.
s
t
r
e
l
A
VIB+RING
-- your radio
vibrates and RINGS
when a call comes
in.
17
VIB ONLY
-- your radio
vibrates but doesn’t
make any loud
noises.
OFF
- your radio
doesn’t alert you
when a call comes
in.
RING-
- your radio
RINGS when a call
comes in.
Here’s how to set
the alert.
From
1:00 PM
Page 21
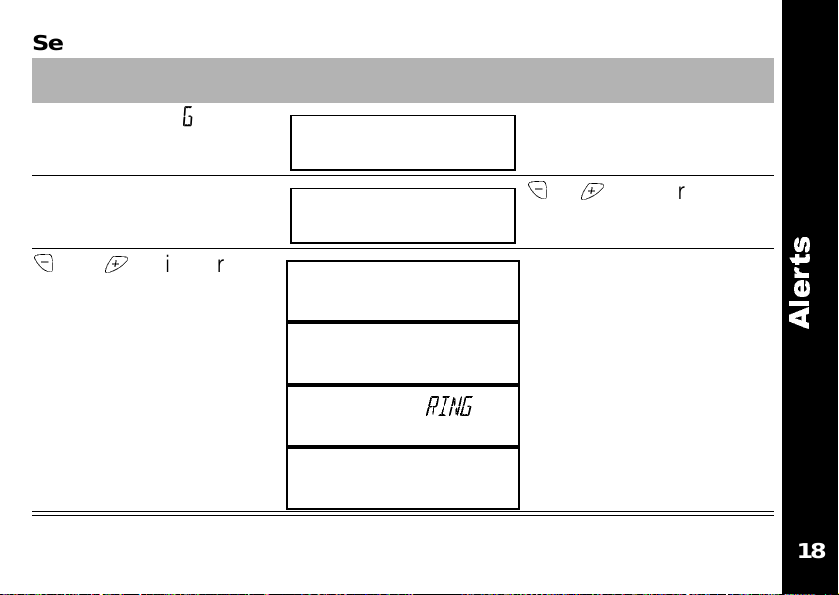
Setting the Alert for Incoming Calls
Press To Display Then Press
~
until
SETTINGS
appears
y
until
SET VIB
and until your
choice of alert appears
appears
d
SETTINGS
d
SET VIB
d
VIB ONLY
d
RING
d
VIB
d
OFF
y
to enter menu
or to enter menu
??? to select
s
t
r
e
l
A
18
18
Page 22

Talking
Before You Can Talk
You know how you can’t really,
REALLY talk to someone else
unless you are both “on the
same wavelength.”
g
n
i
k
l
and no one’s
interrupting?
a
The channel is the radio fre-
T
quency wave you use to transmit. See “Charts” on page XXX
for channel choices.
19
Well, you can’t talk with someone
else on your two-way unless you
are both on the channel
and the same
interference eliminator
code.
The interference eliminator code
filters out static, noise and
unwanted messages. See
“Charts” on page XXX
for channel choices.
Page 23
Setting the Channel
(
Set the channel like this. ??? after setting the channnel and code, a screen
flashes -- what’s this about???
Press To Display Then Press
~
until
TWO WAY
appears
y
until
SET CHAN
appears
and until your
choice of channels displays
Note: Only the chan-
nel scrolls, the code just
repeats the number.
20
1:00 PM
From --
d
TWO WAY
d
SET CHAN
d
11 0
k m
y
to enter menu
or to enter menu
?? to set
Note: If the sound isn’t
clear, change the channel/code setting.
g
n
i
k
l
a
T
20
Page 24
Setting the Code
(
From --
Press To Display Then Press
~
until
g
appears
n
i
k
y
l
a
appears
until
TWO WAY
SET CODE
d
TWO WAY
d
SET CODE
y
to enter menu
or to enter menu
T
and until your
choice of code displays
d
11 0
k m
Note: Only the code
scrolls, the channel
stays the same.
???how does someone know which channel/code to choose??
21
?? to set
Note: If the sound isn’t
clear, change the channel/code setting.
1:00 PM
Page 25

TurningOntheMonitor
(
The monitor function allows you to eavesdrop on a
channel so you can tell whether it’s currently being
used.
From --
Press To Display Then Press
~
until
TWO WAY
appears
y
until
or until
SET MON
MON ON
appears
=/1
appears
d
TWO WAY
d
SET MON
d
MON ON
1:00 PM
y
to enter menu
or to enter
??? to set
g
n
i
k
l
a
T
Note: To deactivate the monitor feature, select
22
screen, what happens if the user doesn’t turn it on???
MON OFF
. ???Any icon on
22
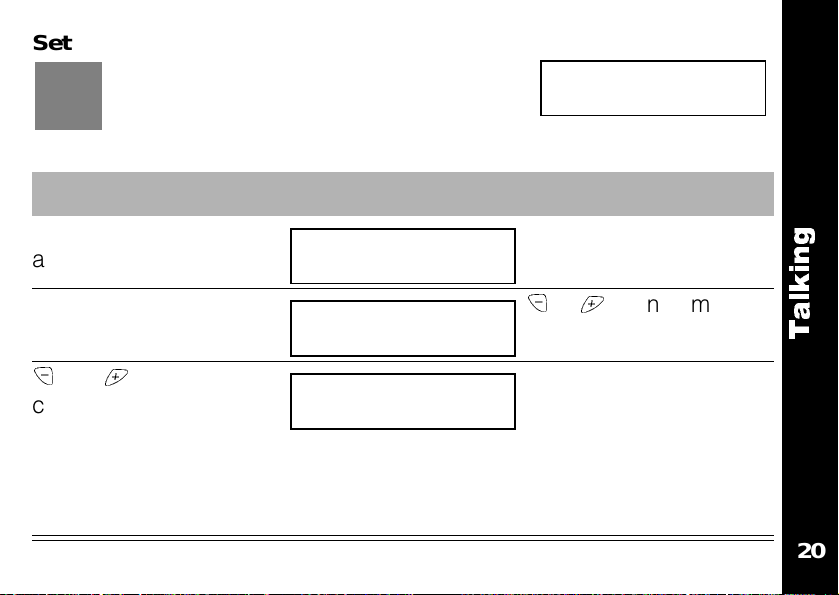
Page 26

Talking
Can we talk? Well, you’re
almost ready. Just a couple
things more -- but they’re super
easy.
g
n
i
k
l
Next, adjust the volume --
a
press and until it’s just
T
right.
23
First -- check to see if the channel your group is using is clear.
Just press? -- if you
hear static, its clear. If
not, change channels.
Now talk -- press {and talk.? to
finish the call do???? does anything happen while its transmit-
ting - LCD glowing, etc.
Page 27

Hands Off Use
(
Explain features and benefits.
1:00 PM
Press To Display Then Press
~
until
SETTINGS
appears
y
until
SET VOX
or until
appears
Note: To deactivate Hands Off use, select VOX OFF. Icon on screen, any
24
other indication on radio???.
appears
VOX ON
d
SETTINGS
=/1
d
SET VOX
d
VOX ON
From --
y
to enter menu
or
to enter
??? to set
24
e
s
U
f
f
O
s
d
n
a
H
Page 28

Setting the Vox-Sensitivity Level
(
The Vox sensitivity levels allow you to compensate for
background noise.
From --
1:00 PM
e
s
~
until
U
f
appears
f
O
y
until
s
appears
d
n
a
or until your choice
H
of sensitivity level
appears
25
Press To Display Then Press
SETTINGS
d
to enter menu
y
SETTINGS
SET SENS
You can choose options
is recommended for most situations, although you may need
to experiment until you get the right setting.
=/1
d
d
SET SENS
VOX HI
VOX LO, VOX MED
or
to enter
??? to set?? icon on
screen
, and
VOX HI. VOX MED
Page 29

Privacy
We all need to keep our conversations private. TalkAbout
T6300 two-radio have some nifty features for making sure
of this.
y
c
a
v
i
r
P
26
26
Page 30

Set Quiet
(
The Set Quiet function prevents any two-way radio that
is not a T6300 from????? This is great because????
From --
1:00 PM
y
c
~
a
v
appears
i
r
P
y
appears
appears
until
or until
Press To Display Then Press
until
SETTINGS
d
SETTINGS
SETQUIET
QUIET ON
=/1
d
SETQUIET
d
QUIET ON
Note: To deactivate the Set Quiet feature, select
on screen, what happens if the user doesn’t turn it on???
27
to enter menu
y
or
to enter
??? to set
QUIET OFF
. ???Any icon
Page 31

Setting a Scramble Code
(
From --
Press To Display Then Press
~
until
TWO WAY
appears
y
until
SETSCRAM
appears
or until your choice
of scramble code
appears
Note: Scramble codes
1 through 4 are available.
Note: Any icon on screen,
28
d
=/1
d
SETSCRAM
d
1:00 PM
TWO WAY
SCRM 1
to enter menu
y
or
to enter
??? to set
Note: Choose SCRM
to deactivate
OFF
scramble.
28
y
c
a
v
i
r
P
Page 32

Stop Watch
You can time your activities by using the stopwatch on your radio.
h
c
t
a
W
p
o
t
S
29
You can use your stopwatch to time your calls.
Page 33

Timing Your Activities
(
From --
Press To Display Then Press
~
until
SETTINGS
appears
y
until
STPWATCH
appears
}
to begin stopwatch
d
SETTINGS
d
STPWATCH
d
00:00:00
Note: To reset the stopwatch ???
1:00 PM
y
to enter menu
}
to stop
h
c
t
a
W
p
o
t
S
30
30
Page 34

Timing Your Call
You can also time your calls. This is useful because????
While talking
Press To Display Then Press
h
c
t
a
W
p
o
Note: To reset the stopwatch ???
t
S
31
Page 35

Weather (T6310 & T6320)
You won’t find yourself stuck in
the rain, or snow, or hail when
you tune in to your radio’s
weather channel.
It even alerts you when a new weather advisory is received.
32
Your two-way radio receives seven weather channels?????
???Provide info and benefits??
The weather channel is only available on models T6310 and
T6320. Other restrictions???/
32
)
0
2
3
6
T
&
0
1
3
6
T
(
r
e
h
t
a
e
W
Page 36

TurningOntheWeather
(
First off -- you have to “turn on” the weather. No that
)
0
2
3
doesn’t mean you need to get a rainmaker or call Mr.
Freeze. You have to activate the reception of weather
channels on your radio. Here’s how.
6
T
&
0
Press To Display Then Press
1
3
~
until
6
appears
T
(
r
y
e
appears
h
t
a
e
appears
W
WEATHER
until
SET WEA
or until
WEA ON
=/1
d
WEATHER
d
SET WEA
d
WEA ON
1:00 PM
From --
y
to enter menu
or to enter
??? to set
Note: To deactivate weather channel reception, select
33
WEA OFF
.
Page 37

Setting the Weather Channel
(
Your radios can tune in to seven different weather channels.
(Explain channels briefly) From --
1:00 PM
Press To Display Then Press
~
until
WEATHER
appears
y
until
SET CHAN
appears
and until your
choice of weather chan-
d
WEATHER
d
SET CHAN
d
CHAN 1
y
to enter menu
or to enter menu
?? to set
nel appears.
??does the radio emit a sample of each channel as it scrolls through. Does
an icon appear on the standby screen???
)
0
2
3
6
T
&
0
1
3
6
T
(
r
e
h
t
a
e
W
34
34
Page 38

Setting the Alert for Weather Advisories
(
You can also program your 2way radio to alert when
)
there’s a new weather advisory. Here’s how.
0
2
1:00 PM
3
6
T
&
~
0
appears
1
3
y
6
T
appears
(
r
e
h
appears
t
until
Press To Display Then Press
until
WEATHER
SET ALERT
or until
ALERT ON
y
d
WEATHER
=/1
d
SET ALERT
d
ALERT ON
to enter menu
or to enter
??? to set
a
e
Note: ??what alert sounds??, does the standby screen change.
W
From --
35
Page 39

FM Stereo (T6310)
Your T6310 has an FM radio, to
let you tune in and tune out,
stay cool and hip wherever you
go.
Advanced features allow you to preset FM stations and tune the receiver for better reception.
36
Your radio allows you to search for FM stations in the area.
The FM stereo reception is only
available on the T6310 model.
Other restrictions???/ does the
stereo headset come
with the T6310 or sold
separately????
36
)
0
1
3
6
T
(
o
e
r
e
t
S
M
F
Page 40

TurningOntheFM
(
Turning the radio is easy here’s how.????can the user
still receive messages???.
From --
)
0
1
3
6
~
T
(
appears
o
e
y
until
r
e
t
S
M
appears
F
Note: To deactivate FM stereo reception, select
SCREEN, HEADSET??
37
Press To Display Then Press
until
FM STEREO
d
FM STEREO
SET FM
or until
appears
FM ON
=/1
d
SET FM
d
FM ON
1:00 PM
y
to enter menu
or to enter
??? to set
FM OFF
. ANY ICON ON
Page 41

Finding an FM Station
(
Finding a cool station when you are in a
new area is easy with your radio’s
feature. It scans the airwaves for
FM
active radio stations, stopping at each one.
Press To Display Then Press
~
until
FM STEREO
appears
y
until
SEEK FM
and until your
choice of stations
appears
Note: Your radio plays
each stations as it
scans it.
38
appears
d
FM STEREO
d
SEEK FM
d
SRCHING
d
98.7 FM
SEEK
1:00 PM
From -
y
-
to enter menu
or to enter menu
?? to set
Note: ??? any change
to standby screen.
38
)
0
1
3
6
T
(
o
e
r
e
t
S
M
F
Page 42

Tuning Your FM
(
This feature allows you to change the FM radio station setting
by increments of.2. This benefits the user how????
From --
)
1:00 PM
0
1
Press To Display Then Press
3
6
~
until
T
(
appears
FM STEREO
d
FM STEREO
y
to enter menu
o
y
until
e
r
appears
e
t
S
and until reception
M
is clearest
TUNE FM
d
TUNE FM
d
98.7 FM
or to enter menu
?? to set
F
Note: Any change to the standby screen, any icons flashing, etc.
39
Page 43

Preset FM Stations
?????how does this work??? describe feature and benefit briefly??/
????The Set2Way command -- is this something that allows you to receive calls and play the radio??
)
0
1
3
6
T
(
o
e
r
e
t
S
M
F
40
40
Page 44

Outdoors (T6320)
Barometer
Altimeter
Compass
)
0
2
3
6
T
(
s
r
o
o
d
t
u
O
41
Page 45

Advanced Two-Way
(
Roger Beeps
Roger -- Over. Whenever you turn on the Roger Beep
feature, your two-way radio will beep when you finish
transmitting. It’s like saying “Roger--Over” Here’s how.
~
until
appears
y
until
appears
or until
appears
From --
Press To Display Then Press
SETTINGS
SETROGER
ROGER ON
d
=/1
d
SETROGER
d
1:00 PM
SETTINGS
ROGER ON
to enter menu
y
or
to enter
??? to set
y
a
W
-
o
w
T
d
e
c
n
a
v
d
A
Note: To deactivate the Roger beeps, select
42
screen, is it the same alert chosen before or a different sound?
ROGER OFF
. ???Any icon on
42
Page 46

Button Beeps
(
The button beeps feature makes the radio alert every
time you press a button. That way you can tell if your
action ‘took.’
From --
y
1:00 PM
a
W
-
o
w
T
~
d
appears
e
c
y
until
n
a
appears
v
d
or until
A
appears
Note: To deactivate the button beeps, select
screen, is it the same alert chosen before or a different sound?
43
Press To Display Then Press
until
SETTINGS
d
y
SETTINGS
SET BEEPS
BEEPS ON
=/1
d
SET BEEPS
d
BEEPS ON
??? to set
BEEPS OFF
to enter menu
or
to enter
. ???Any icon on
Page 47

Automatic Shut Off
e
(
You can program your radio to turn it off after a certain tim
of inactivity. Here’s how.
From --
Press To Display Then Press
~
until
TWO WAY
appears
y
until
SETPWRDWN
appears
or until your choice
of scramble code
appears
Note: You can choose
HOURS 0 -- 7.
Note: Any icon on screen,
44
d
TWO WAY
=/1
d
SETPWRDWN
d
HOURS 3
1:00 PM
to enter menu
y
or
to enter
??? to set
Note: Choose HOURS
to deactivate auto-
matic shut off.
y
a
W
-
o
w
T
d
e
c
n
a
v
d
A
44
Page 48

45
y
a
W
-
o
w
T
d
e
c
n
a
v
d
A
Reset
Page 49

Key Pad Locks
Menu Lock
Make sure your settings won’t be changed
accidentally. Just turn
on the menu lock by pressing
for 3 seconds.
y
Note: Deactivate by????
Child Lock
??? Need more information -- how is it different from the menu lock??
activated by pressing yfor 10 seconds, deactivate how?? icon on screen???
Locked Screen
f
1:00 PM
f
displays
y
a
W
-
o
w
T
d
e
c
n
a
v
d
A
46
46
Page 50

Channel Scanning
Well, what about when you just
want to find other transmitting
two-way radios and strike up a
y
a
W
-
conversation.
o
w
T
d
By using the Scan feature, you
e
can monitor channels and
c
n
codes for transmissions and
a
v
d
A
47
lock in on the one
your are interested.
Hard to do ‘cause you don’t know
their channels or codes. But,
don’t worry with your
TalkAbout two-way radio
you won’t be lonely.
You don’t have to set a new channel or code, the radio just resets
itself and you start talking.
Here’s how it works.
Page 51

Turning on Channel Scanning
(
But, first you have to turn it on.
From --
1:00 PM
Press To Display Then Press
~
until
appears
y
until
appears
or until
appears
SETTINGS
SET SCAN
SCAN ON
d
SETTINGS
=/1
d
SET SCAN
d
SCAN ON
Note: To deactivate the Set Quiet feature, select
screen, what happens if the user doesn’t turn it on???
48
to enter menu
y
or
to enter
??? to set
SCAN OFF
.???Any icon on
48
y
a
W
-
o
w
T
d
e
c
n
a
v
d
A
Page 52

Scanning
Scanning is easy. Just
press??? and your Talk-
y
a
W
-
This screen will flash to let you
o
know that the scanning function is
w
working.
T
d
To lock on a channel???/
e
c
Note: If you want to scan channels without Interference Eliminator Codes,
n
change your code to zero. See Setting the Code on page XXX for more
a
v
information.
About will start scanning
channels and codes.
Scanning Screen
d
SCAN
Scanning
d
Scan List -- does this feature apply???? Any other scanning screens -
A
- there seems one that comes on and off on my unit??/
49
Icon?
Page 53

Call Tone
It’s so important for your companions to know you are calling.
Just press ?? before you start
talking and the radio will transmit a unique sound to others on
the same channel and
code.
50
Your TalkAbout Two-Way radio
has 10 call tones to identify the
sender and alert the
receiver.
Can user have different call tones
for each channel, what sound is
it???If alert tones are disabled ---
50
y
a
W
-
o
w
T
d
e
c
n
a
v
d
A
Page 54

TurningonCallTone
(
From --
1:00 PM
y
a
W
-
~
o
appears
w
T
y
d
appears
e
until
Press To Display Then Press
until
TWO WAY
d
to enter menu
y
TWO WAY
SET CALL
=/1
d
SET CALL
or
to enter
c
n
or until your choice
a
of call tone appears
v
d
Note: Call tone codes
A
1 through 10 are available.
d
SET 1
Note: ????Does the radio emit a sample of the call tone. Any icon on
screen, how to deactivate call tone?
51
??? to set
Page 55

Use and Care
Talking Range
Not less than 5 feet
apart
Care and Maintenance
Or more than two miles
apart
Harder if obstacles in
the way
e
r
a
C
d
n
a
e
s
U
Clean with soap and
water on a soft cloth
52
Do not immerse in
water.
Do not use alcohol or
cleaning solutions.
52
Page 56

If the radio gets wet...
e
r
a
Turn it off and remove
C
batteries.
Dry with soft cloth. Do not use until com-
pletely dry.
d
n
Contact Information.
a
e
s
U
Repairs -- Phone #s Warranty -- Phone #s Questions Phone #s.
53
Page 57

Attaching the Belt Clip
Your radio comes with a belt clip for easy carrying. To attach the belt clip:
First Then Finally
• Squeeze the clip as
shown.
• Insert into the
accessory
connector on the
back of the phone.
• Release clip.
e
r
a
C
d
n
a
e
s
U
54
54
Page 58

FAQs
???? see suggested list below???
Question:
Answer:
Question:
Answer:
s
Q
A
F
Question:
Answer:
Question:
Answer:
55
The radio doesn’t power up.
Reposition or replace alkaline batteries.
Recharge or replace NiMH battery
Message not transmitted?
Make sure {fully depressed while talking
Reposition, replace or recharge batteries.
Message not received.
Make sure that radios have same channel and codes
Change your location
Reposition, replace or recharge batteries.
Make sure volume is turned up.
Make sure {is not pressed.
Hearing Noise or Another Conversation
Make sure Interference Eliminator Code is set
Page 59

Try another Channel or Code
Question:
Answer:
Question:
Answer:
Question:
Answer:
Question:
Answer:
56
Talk range is limited
Check for obstacles and interference. Move to clear sight
position.
Don’t wear radio close to body.
Hearing heavy static or interference.
Radios too close -- move to at least 5 feet apart.
Radios too far away -- can’t be more than 2 miles apart
Change location -- make sure no obstacles in the way.
Channel Code is locked
Unlock it. How???
Low Batteries
Replace or recharge batteries.
56
s
Q
A
F
Page 60

Accessories
TalkAbout T6300 series radios have specially designed accessories
to improve the quality of use -- these are ---
NiMH battery
NiMH battery upgrade kit
s
e
Ear piece with Boom Mic Comfortable, lightweight headset eliminates
i
r
o
s
background noise and makes it easy to use
hands off transmission
s
Bike Mount ?is this the helmet accessory??
e
c
Vehicular Power Adapter ?? is this the cigarette lighter adapter??/
c
A
Arm Pack/Belt Carry Case
??? Are these the correct names?? Which are included with the radio??
In addition, TalkAbout T6300 radios can use other Motorola TalkAbout accessories, including --
57
Page 61

-
Remote Speaker Mic
Headset with Swivel Boom
Mic
Earbud Discreet, lightweight ear piece that fits com-
fortably inside the ear. Allows clear reception
without disturbing others.
Earbud with PTT Mic The above with a hand-operated lapel or col-
lar mounted microphone.
Flexible Ear Receiver ?? is this the cigarette lighter adapter??/
Waterproof Bag
Call 1-800-353-2729 for more information on how to order or visit our web site at www.motorola.com
58
58
s
e
i
r
o
s
s
e
c
c
A
Page 62

Charts
The channel/frequency and Interference Eliminator Code charts on
these pages provide frequency and code compatibility information.
These charts are useful when using TalkAbout two-way radios with
other two-way radios.
Channel Frequency Chart
s
59
t
r
a
h
C
Channel MHz Channel MHz
1 462.5625 8 467.5625
2 462.5875 9 467.5875
3 462.6125 10 467.6125
4 462.6375 1 1 467.6375
5 462.6625 12 467.6625
6 462.6875 13 467.6875
7 462.7125 14 467.7125
Page 63

Interference Eliminator Code Chart
TalkAbout
Code Hz Freq 7/7x Code
1 67.0 11 97.4 C
2 71.9 12 100.0
3 74.4 13 103.5
4 77.0 A 14 107.2
5 79.7 15 110.9
6 82.5 16 114.8
7 85.4 17 118.8 E
8 88.5 B 18 123.0
9 91.5 19 127.3 F
10 94.8 20 131.8
60
TalkAbout
Code Hz Freq 7/7x Code
60
s
t
r
a
h
C
Page 64

Interference Eliminator Code Chart
TalkAbout
Code Hz Freq 7/7x Code
21 136.5 G 30 186.2
22 141.3 31 192.8
s
61
t
r
a
h
C
23 146.2 32 203.5
24 151.4 33 210.7
25 156.7 34 218.1
26 162.2 35 225.7
27 167.9 36 233.6
28 173.8 37 241.8
29 179.9 18 250.3
Note: Carrier Squelch (0) disables Interference Eliminator Codes. This
allows you to monitor all activity on the channel you are using
TalkAbout
Code Hz Freq 7/7x Code
Page 65

Reading your LED light.
LED Color Charging Status
Solid Red
Flashing Green
Solid Green
Flashing Red
Flashing Yellow
62
Charging
Almost finished
Fully charged
Something wrong with battery
Something wrong with temperature
62
s
t
r
a
h
C
Page 66

Safety Information
Exposure to Radio Frequency Energy
The design of your Motorola two-way radio, which generates radio
frequency (RF) electromagnetic energy (EME), is designed to comply
n
with the following national and international standards and guidelines
o
i
regarding exposure to human beings to radio frequency electromag-
t
a
netic energy.
m
r
• FCC Report and Order FCC 96-325 (August, 1996)
o
f
• American National Standards Institute (C95-1 - 1992)
n
I
• National Council on Radiation Protection and Measurements
63
y
t
e
f
a
S
(NCRP - 1986)
• International Commission On Non-Ionizing Radiation Protection
(ICNRP - 1986.)
• European Committee for Electrotechnical Standardization (CENELEC)
- Env. 50166 - 1 1995E - Human Exposure to Electromagnetic Fields Low Frequency (0Hz to 10 kHz)
Page 67

- Env. 50166 -2 1995E - Human Exposure to Electromagnetic
Fields High Frequency (10kHz to 300 kHz)
- Proceeding of SC211/8 1996 - Safety Considerations for
Human Exposure to EMFs from Mobile Telecommunications Equipment (MTE) in the Frequency Range 30 MHz - 6
GHz (EMF - Electromagnetic Fields).
To assure optimal radio performance and to ensure that exposure to
RF energy is within the guidelines in the above standards, the following operating procedures should be observed:
• When transmitting with a two-way portable radio, hold radio in a
vertical position with its microphone 2-3 inches (5.0 to 7.5 cm)
away from your mouth.
• Keep antenna at least 1 inch (2.5 cm) from your head and body.
• If you wear a portable radio on your body, ensure that the antenna
is at least one inch (2.5 cm) from your body when transmitting.
Electromagnetic Interference Compatibility
Nearly every electronic device is susceptible to electromagnetic
64
64
n
o
i
t
a
m
r
o
f
n
I
y
t
e
f
a
S
Page 68

interference (EMI) if inadequately shielded, designed or otherwise
configured for electromagnetic compatibility.
• Turn your radio OFF in any facilities where posted notices instruct
you to do so. Hospitals or health care facilities may be using
equipment that is sensitive to external RF energy.
• Turn your radio off when on board aircraft when instructed to do
so. Any use of the radio must be in accordance with airline regulations or crew instructions.
Damaged Antennas
Do not use the radio with a damaged antenna. If a damaged antenna
comes in contact with the skin, a minor burn may result.
Batteries
All batteries can cause property damage and/or bodily injury or
burns if a conductive material such as jewelry, keys or beaded
chains touches exposed terminals. The material may complete an
electrical circuit (short circuit) and become quite hot. Exercise care in
handling any charged battery, particularly when placing it inside a
65
n
o
i
t
a
m
r
o
f
n
I
y
t
e
f
a
S
Page 69

pocket, purse or other container with metal objects.
For Vehicles with an Air Bag
Do not place a portable radio in the area over an air bag or in the air
bag deployment area. Air bags inflate with great force. If a portable
radio is placed in the air bag deployment area and the air bag
inflates, the radio may be propelled with great force and cause serious injury to occupants of vehicle.
Potentially Explosive Atmospheres
Turn your radio OFF when in any area with a potentially explosive
atmosphere, unless it is a type especially qualified for such use (for
example, Factory Mutual Approved). Sparks in such areas could
cause an explosion or fire resulting in bodily injury or even death.
Batteries
Do not replace or charge batteries in a potentially explosive atmosphere. Contact sparking may occur while installing or removing batteries and cause an explosion.
66
To avoid possible interference with blasting operations, turn your
66
n
o
i
t
a
m
r
o
f
n
I
y
t
e
f
a
S
Page 70

radio OFF near electrical blasting caps or in a “blasting area” or in
areas posted: “Turn off two-way radio.” Obey all signs and instructions.
Note: Areas with potentially explosive atmospheres are often, but not
n
always, clearly marked. They include fuelling areas such as below deck on
o
i
boats, fuel or chemical transfer or storage facilities; areas where the air con-
t
a
tains chemicals or particles, such as grain, dust, or metal powders; and any
other where you would normally be advised to turn off your vehicle engine.
m
r
o
Charging Safety Instructions
f
n
Before using the battery charger, read all instructions and cautionary
I
markings on,
y
t
e
1. the battery
f
a
2. battery charger, and
S
3. the radio using the battery.
Caution
To reduce the risk of injury, charge only the rechargeable batteries
listed. Other types of batteries may burst, causing personal injury
67
Page 71

and damage.
Single-Unit Charger
Kit Number Description
NTN8871 110V - NiMH Charging Adapter
NTN9150 110V - NiMH Charging Adapter
Batteries
Kit Number Capacity in milliampere-h our mAH/
Descriptor/Composition
HNN 9720 750 mAH/T289/280 SLK/NiMH
???? I don’t think these numbers are right???
Save these Instructions
1. Do not expose the charger to rain or snow.
2. Do not operate the charger if it has received a sharp blow, or has
68
been dropped or damaged in any way.
68
n
o
i
t
a
m
r
o
f
n
I
y
t
e
f
a
S
Page 72

3. Do not disassemble the charger if it has received a sharp blow, or
has been dropped or damaged in any way.
4. Never alter the AC cord or plug provided with the unit. If plug will
not fit the outlet, have proper outlet installed by a qualified electrician. An improper condition can result in a risk of electric shock.
5. To reduce risk of damage to cord or plug, pull the plug rather than
the cord when disconnecting charger from AC receptacle.
6. To reduce the risk of electric shock, unplug the charger from the
outlet before attempting any maintenance or cleaning.
7. Use of an attachment not recommended or sold by Motorola may
result in a risk of fire, electric shock, or personal injury.
8. Make sure that the cord is located so that it will not be stepped
on, tripped over, or subjected to damage or stress.
9. An extension cord should not be used unless absolutely necessary. Use of an improper extension cord could result in a risk of
fire and/or electric shock. If an extension cord must be used,
make sure:
• That the pins on the plug of the extension cord are the same
69
n
o
i
t
a
m
r
o
f
n
I
y
t
e
f
a
S
Page 73

• Number, size and shape as those on the plug of the charger.
• That the extension cord is properly wired and in good electrical
condition, and
• That the cord size 18 AWG for lengths up to 100 feet, and 16 AWG
for lengths up to 150 feet.
10.The supply cord of this charger cannot be replaced. If the cord is
damaged, the charger should be discarded or returned to the
point of purchase if within 90 days of purchase.
Computer Software Copyrights
The Motorola equipment described in this manual may included
copyrighted Motorola computer programs stored in semiconductor
memories or other media. Laws in the United States and other countries preserve for Motorola certain exclusive rights for copyrighted
computer programs, including the exclusive right to copy or reproduce in any form the copyrighted computer program. Accordingly,
any copyrighted Motorola computer programs contained in the
Motorola equipment described in this manual may not be copied or
reproduced in any manner without the express permission of Motor-
70
70
n
o
i
t
a
m
r
o
f
n
I
y
t
e
f
a
S
Page 74

ola, Inc. Furthermore, the purchase of Motorola equipment shall not
be deemed to grant either directly or by implication, estoppel, or otherwise any license under the copyrights, patents or patent applications of Motorola, except for the normal nonexclusive, royalty free
license to use arising by operation of law in the sale of this product.
n
o
i
FCC License Not Required
t
a
Changes or modifications not expressly approved by Motorola may
m
void the user’s authority granted by the FCC to operate this radio and
r
o
should not be made. To comply with FCC requirements, transmitter
f
n
adjustments should be made only by or under the supervision of a
I
person certified as technically qualified to perform transmitter main-
y
t
tenance and repairs in the private land mobile and fixed services as
e
f
certified by an organization representative of the user of those ser-
a
vices. Replacement of any transmitter component (crystal, semicon-
S
ductor, etc.) not authorized by the FCC equipment authorization for
this radio could violate FCC rules.
Patent Notice
This product is covered by one or more of the following United States
71
Page 75

patents.
????? which patent numbers????
Export Law Assurances
This product is controlled under the export regulations of the United
States of America and Canada. The governments of the United
States and Canada may restrict exportation and re-exportation of this
product to certain destinations. For further information, contact the
U.S. Department of Commerce or the Canadian Department of Foreign Affairs and International Trade.
n
o
i
t
a
m
r
o
f
n
I
y
t
e
f
a
S
72
72
Page 76

Personal Numbers
Just one more thing... You can use this page to keep track of
important information, frequencies and codes.
Frequency / Codes ????
???? ????
Page 77

Motorola, T, TalkAbout and all other trademarks indicated as such
herein are trademarks of Motorola, Inc.
â
!Reg. U.S. Pat. & Tm. Off.
ã
by Motorola, Inc. All rights reserved. Printed in the U.S.A.
Personal Communications Sector
1500 Gateway Blvd.
Boynton Beach, FL 33426-8292
O
-
4
9
Z
7
0
9
0
8
8
6
688097Z94
 Loading...