

Page 1
BRAVO PLUS
®
A
User’s Guide
Page 2
INTRODUCTION
BRAVO PLUS
On/Off
Switch
Congratulations on your purchase of a Motorola BRAVO
PLUS numeric display pager. This compact pager has
been designed with simple-to-use operating buttons, rugged housing, and an easy-to-read display.
The BRAVO PLUS pager fits easily in your pocket or
purse, or can be worn on your belt.
The BRAVO PLUS pager offers a number of features. We
encourage you to read this instruction manual carefully to
obtain the full benefits from your BRAVO PLUS pager.
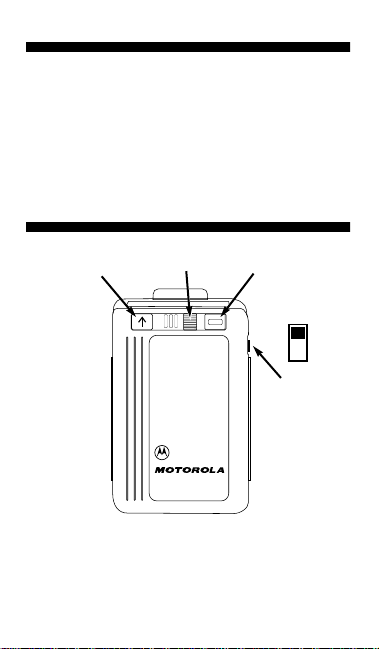
CONTROLS
Alert
Lamp
Menu (F)
Button
Switch
Side
View
# $ %
R)
Read (
Button
Read Button (
vate pager functions. Also used to scroll through the hours
and minutes for time setting.
Menu Button (
menus and set the time of day.
2
R) – Used to read messages and to acti-
F) – Used to scroll through the pager
Page 3
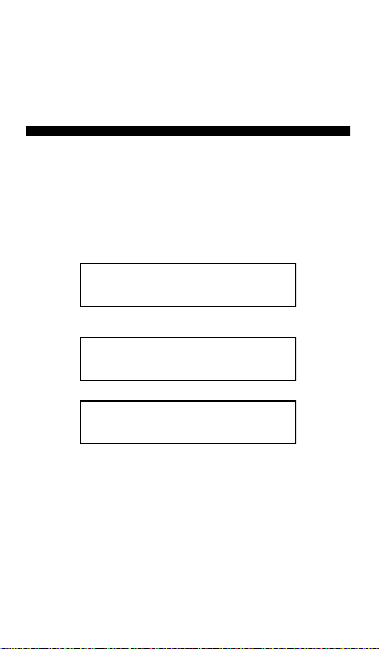
On/Off Switch
888888888888
8:59a
8:59a
turn the pager on and off, acts as a master reset button,
and activates the backlight.
Alert Lamp
message is received.
TURNING THE PAGER ON
SILENT Mode: Slide the On/Off Switch in an upward direc-
tion to the SILENT symbol (
equipped) and the lamp flashes for 4 seconds.
ON Mode: Slide the On/Off Switch in an upward direction
to the ON symbol (
and the lamp flashes for 4 seconds .
A full-segment display accompanies the power-up alert.
– This three-position slide switch is used to
– Flashes to give a visual indication when a
$). The pager vibr ates (if
#). The pager emits an interrupted beep
The display then changes to the standby screen.
Standby Screen in SILENT Mode
D
Standby Screen in ON Mode
3
Page 4
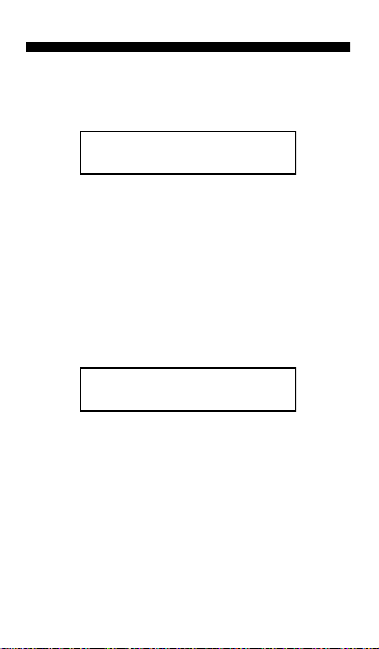
SETTING THE TIME
12:00a
8:00a
• To set the time, press F until seTr Trime is displayed,
then press
• The hours digits (represented by the grey characters in
the sample shown below) begin to b link.
R.
Set the hours digits by pressing
is displayed along with the appropriate
(for P.M.) symbol. Keep pressing R to cycle through the
hours from A.M. to P.M. When the correct hour (A.M. or
P.M) is displayed, press
digits.
• The first digit of the minutes (represented by the grey
character) begins to blink. Press
digit of the minutes. Press
digit of the minutes. Press
of the minutes. Press
setting function.
R until the correct hour
a (for A.M.) or p
F to advance to the minutes
R to change the first
F to advance to the second
R to change the second digit
F one more time to leave the time
• All portions of the time of day screen, except the colon
(
:), stop blinking. The time of day is now set and the
pager is in the standby mode.
4
Page 5

READING A MESSAGE
1 page
3 pages
555-1212 B
01 12:46p
When a message is received, the pager gives an audible
and/or visual alert (or vibrates if equipped) for 8 seconds.
The number of unread messages is displayed. The alert
automatically stops, or you can reset the pager by pressing
any of its buttons.
1 Unread Message Indicator
3 Unread Messages Indicator
To read y our messa ge, press R.
The first screen of your message is displayed. To “freeze”
your message, press and hold
automatically advances to the next screen of the message, or
you can view it by pressing
indicates there are additional screens.
R while viewing it. The pager
R. The continuation symbol (B )
The screen following your message is the timestamp
screen. It shows the message slot number and the time
that the message was received (the order that the message was received).
First Screen of a Message
Second Screen of a Message
The pager returns to the standby mode.
5
Page 6

LOCKING A MESSAGE
555-1212 A
01 12:46p A
To lock a message (protect it from being overwritten or
erased), press
is displayed.
of the screen to indicate that the message has been
locked. Up to 5 messages can be locked in memory.
F while the message or timestamp screen
= is displayed on the upper, right-hand corner
First Screen of a Locked Message
To unlock a message, follow the procedure used to lock it.
The lock symbol disappears from the message and timestamp screens.
ERASING MESSAGES
The “Erase All” function deletes all read, unlocked messages from memory.
To erase unwanted messages, press
is displayed, then press R. All read, unlocked messages
are removed from memory. All unread and locked messages are moved to the first memory slots and carry the new
message slot number.
NOTE: You must first read a message before it can be
erased.
Second Screen of a Locked Message
F until erase all
6
Page 7

SELECTING AN ALTERNATE FREQUENCY
Synthesized and Auto-Synthesized Models:
F until your choice of scan mode or frequency
• Press
designator is displayed (for example:
etc.).
• To view alternate frequencies, press
the frequency designator you wish to select is displayed,
F to “lock in” the new frequency or mode.
press
confirm is displayed, press R to activate your
• When
selection.
scan1, f1 , f2,
R. When scan or
STANDARD FEATURES
Time of Day/Standby Screen: The time of day is dis-
played while the pager is on and in the standby mode.
Time Stamp: The time of day that each message was re-
ceived is displayed on a separate screen following the
message.
Memory Retention: When the pager is turned off, all messages and the time of day remain in memory.
Memory Capacity: The pager can store up to 16 messages or a total of 160 characters. Individual messages can be
up to 20 characters in length.
Message Protect/Lock: Up to five individual messages can
be locked in memory so they will not be overwritten by new
messages or discarded during the “Erase All” function.
Hold Full Indicator: You can selectiv ely protect up to 5
messages by locking them in memory. When an attempt to
lock more than 5 messages is made
played for 2 seconds indicating that this message cannot
be protected.
Automatic Reset: If you do not reset your pager during an
alert, it will automatically reset after 8 seconds.
Chirp in Silent (Non-Vibrate Models Only): When the pager is in the SILENT mode, a short chirp (beep) will alert you
to incoming messages.
hold full is dis-
7
Page 8

Master Reset
pager and causes the pager to return to the standby mode.
Reminder Chirp
memory, the pager gives a reminder chirp (short beep) every two minutes. Vibrate models emit a short vibration in
place of the chirp when in the SILENT mode.
Duplicate Message
to messages stored in memory. If a new message is identical to a message in memory,
seconds at the beginning of the message. The new timestamp follows the duplicate message.
Low Battery Indicator
its life, the time-of-day screen is replaced with
The battery must be replaced within a few days to avoid interruption of pager operation.
Tone Alerting
as a basic tone-alert model. When a tone-only message is received,
Unread Message Counter
the standby screen is replaced by the unread message indicator. The unread message indicator displays the number of
pages that have not been read, and is updated anytime a
message is received (e xcept if message duplication occurs).
R
If
pages
Memory Full Indicator
are stored in memory,
of the standby screen. A new message could cause the
oldest (first) unlocked, read message to be overwritten.
When some or all of the read messages are erased, the
pager returns to the standby mode.
Overflow Indicator
es is greater than the number of available memory slots
(16),
ouerflow
has been “pushed out” of memory by a more recent message.
8
: Pressing the On/Off Switch twice resets the
: When an unread message is stored in
: Incoming messages are compared
duplicaTre
: When the battery nears the end of
: The BRA VO PLUS pager can also respond
Trone only
is pressed, and there are no messages in memory,
is displayed.
ouerflow
replaces the standard message screen.
: When unread messages exist,
: If 16 messages or 160 characters
memory full
: When the number of unread messag-
replaces the unread message indicator.
indicates that the oldest (first) unread message
is shown for 2
lo cell
is displayed in place
.
no
Page 9

Message Slot Number
ceding the time stamp, the message slot number is displayed to indicate the order in which the message was received. (Example:
message received.)
Erase All
: All read, unlocked messages can be deleted
from memory using the “Erase All” function.
Backlighted Display
lighting in low-light conditions.
Freeze Screen
“freeze” it on the screen by pressing and holding
SILENT
: When in the SILENT mode, the pager does not
give an audible alert.
: At the end of each message, pre-
09 10:30a
: When reading a message, you can
: the 09 indicates the ninth
: Press the On/Off Switch for back-
.
R
CLEANING YOUR BRAVO PLUS PAGER
To clean the exterior of the BRAVO PLUS pager, use a
soft, non-abrasive cloth moistened in a mild soap and water solution. Use a second cloth moistened in clean water
to wipe the surface clean. Do not immerse in water. Do not
use alcohol or other cleaning solutions.
REPAIR AND MAINTENANCE
The BRAVO PLUS numeric display pager, properly handled, is capable of many years of trouble-free service.
However, if service is required, Motorola's National Service
Organization, staffed with specially trained technicians, offers strategically located repair and maintenance facilities.
Consult your Motorola sales representative for service locations in your area.
9
Page 10

BATTERY INFORMATION
LOCK
BATTERY DOOR
(+)
(–)
Your BRAVO PLUS pager is designed to operate with a
single AA-size alkaline battery.
Installing/Replacing the Battery
DIAGRAM
• Locate the ribbed lock on the bottom of the pager. Slide
the lock toward the bac k co ver to expose the red marking.
• While pressing on the recess of the battery door, slide
the door in the direction of the arrow until it pops up from
the housing.
• Align the battery so the polarity markings (+ and -) match
the markings on the back cover. Insert the battery.
• Align the semicircle on the battery door with the semicircle
on the bottom of the pager near the word “LOCK”. Press
down on the end of the door nearest the battery and slide
the battery door until it is completely closed.
• After the cover is closed, slide the lock toward the front
of the pager to conceal the red marking.
Low-Battery Indicator
When the battery nears the end of its life, the standby
screen is replaced with
placed within a few days to avoid interruption of pager operation.
10
lo cell. The battery must be re-
Page 11

PATENT INFORMATION
The BRAVO PLUS and BRAVO PLUS Auto Synthesized
pagers are manufactured under one or more Motorola U .S.
patents. A partial listing of these patents can be viewed on
the back cover upon removal of the belt clip. Other U.S
patents for these products are pending.
REMOVING THE BELT CLIP
Position the pager so that the displa y faces you. Rotate the
pager until the belt clip is pointing up (
pointing toward the ground). Hold the belt clip in one hand.
Use your other hand to push down on the small black
spring-loaded tab (located between the two metallic tabs
on the pager housing) with either your finger or a coin.
With this tab held down, slide the belt clip toward you until
it is free of the housing.
R and F buttons
11
Page 12

t
, Motorola, and BRA VO PLUS are trademarks or registered
1991-1995 by Motorola, Inc., Paging Products Group
1500 Gateway Boulevard, Boynton Beach, FL 33426-8292
trademarks of Motorola Inc.
All rights reserved.
Printed in U.S.A. 3/95
@6881012B23@
6881012B23-D
 Loading...