

Motorline professional MX92 User& Installer's Manual
MX92
1 2 3 4 5 6 7 8
Mo Tu We Th Fr Sa Su
2016-04-12
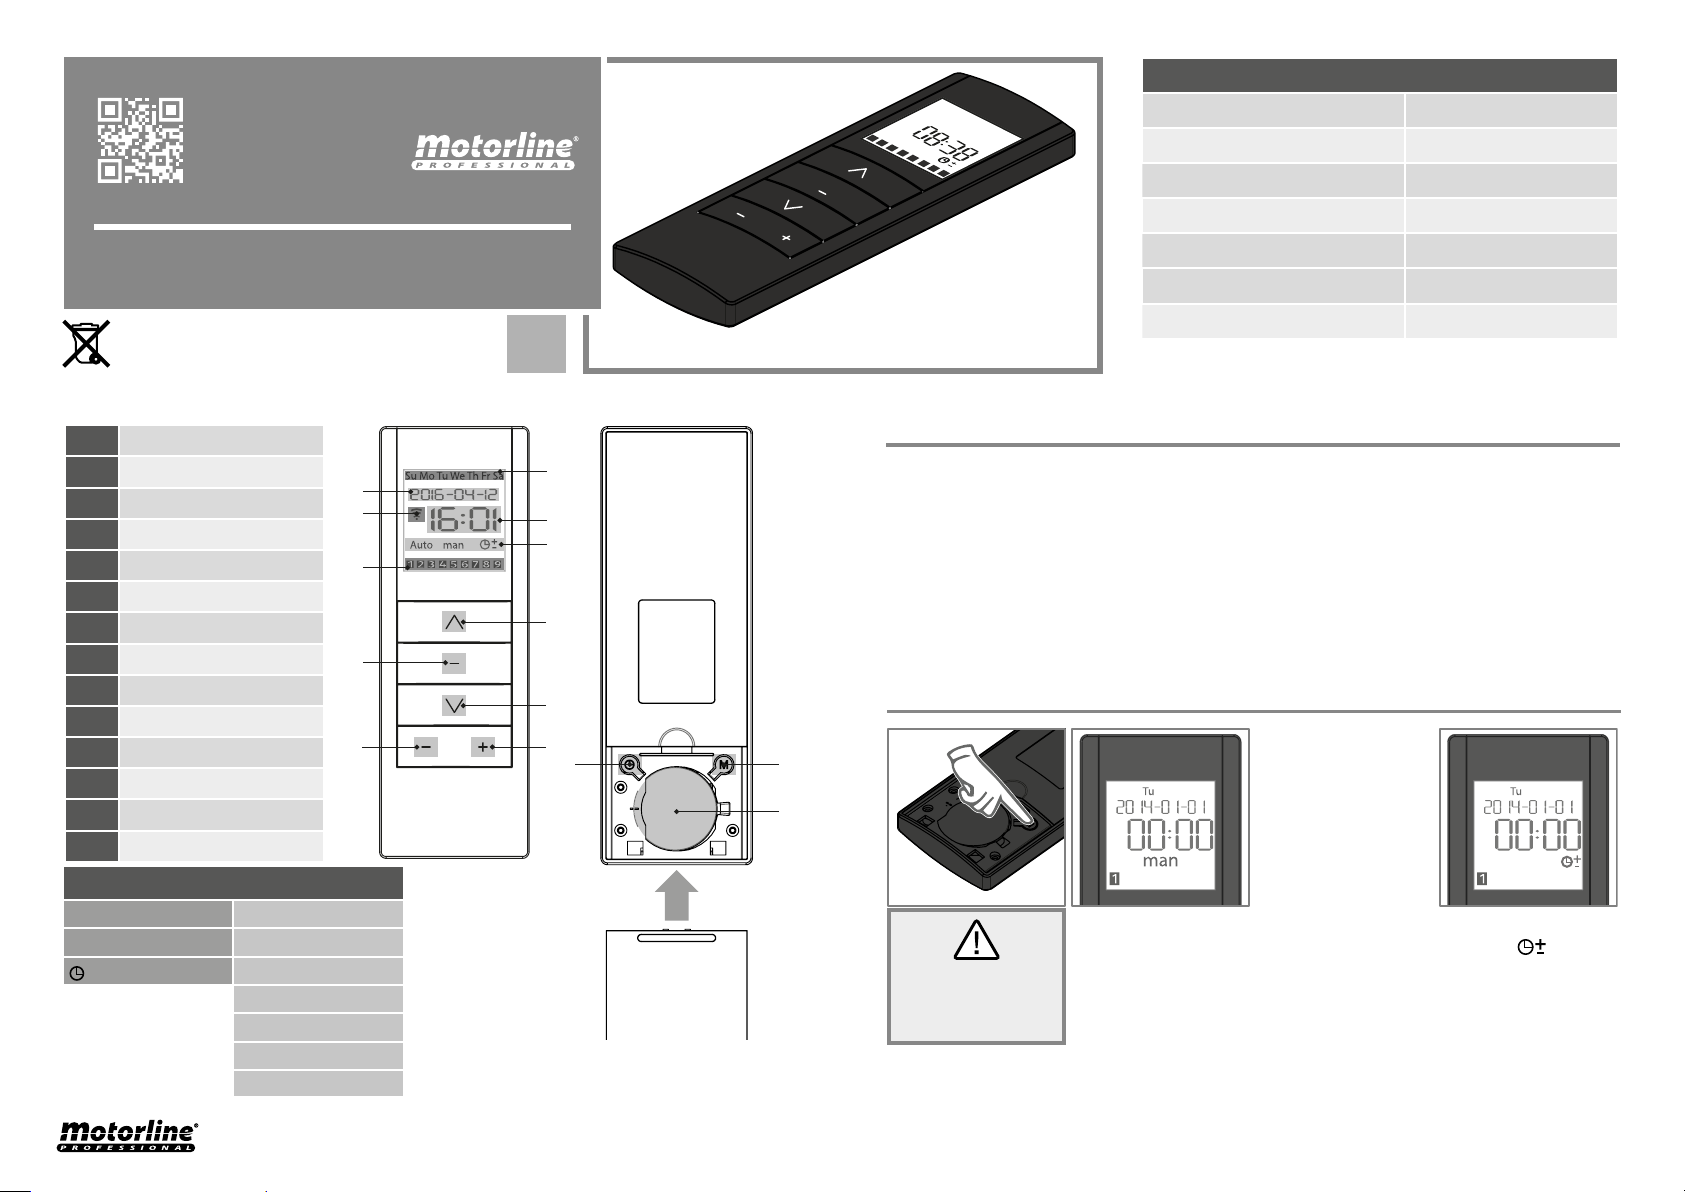
Technical characteristics
• Power Supply 3V(CR2430)
• Working temperature -20 to 55°C
• Transmission frequency 433MHz
•Range 40m
USER / INSTALLER MANUAL
Correct disposal of this product
(Electrical and electronic equipment waste).
1 Week days
2 Current date
3 Current hour
4 Signal transmission
5 Programming modes
6 Channel
7 Up
8 Confirm/Stop
9 Down
10 Return
11 Advance
12 Time
13 Select
14 Battery
10 11
• Number of channels 8
• Code type Rolling Code
• Dimensions 45x130x12mm
EN
V1. 0
REV. 06/2016
PRE-PROGRAMMING
2
4
6
8
1
3
5
7
9
12 13
14
• When a battery is placed on the transmitter, this turns on all the characters on the display for
2 seconds • If more than 10 seconds passes without pressing any key, the remote automatically
exits programming and returns to standby mode, without record any change.
• Factory values:
• the display shows initially: wednesday, 2014-01-01, 00:00h.
• manual mode active.
• Group 1 has the channels 1, 3, 5 e 7 memorized.
• Group 2 has the channels 2, 4, 6 e 8 memorized.
CONTROL OPTIONS
DESCRIPTION:
man • manual Su • Sunday
auto • automatic Mo • Monday
• random Tu • Tuesday
We • Wednesday
Th • Thursday
Fr • Friday
Sa • Saturday
• Use M to scroll
through the different
controls.
• MANUAL CONTROL
(man)
No timer function.
• CONTROL
AUTOMATIC (auto)
With timer function.
• RANDOM
CONTROL ( )
With random timing
function. The random
remote control is implemented in accordance with Standard timing (approx. 15 min.).
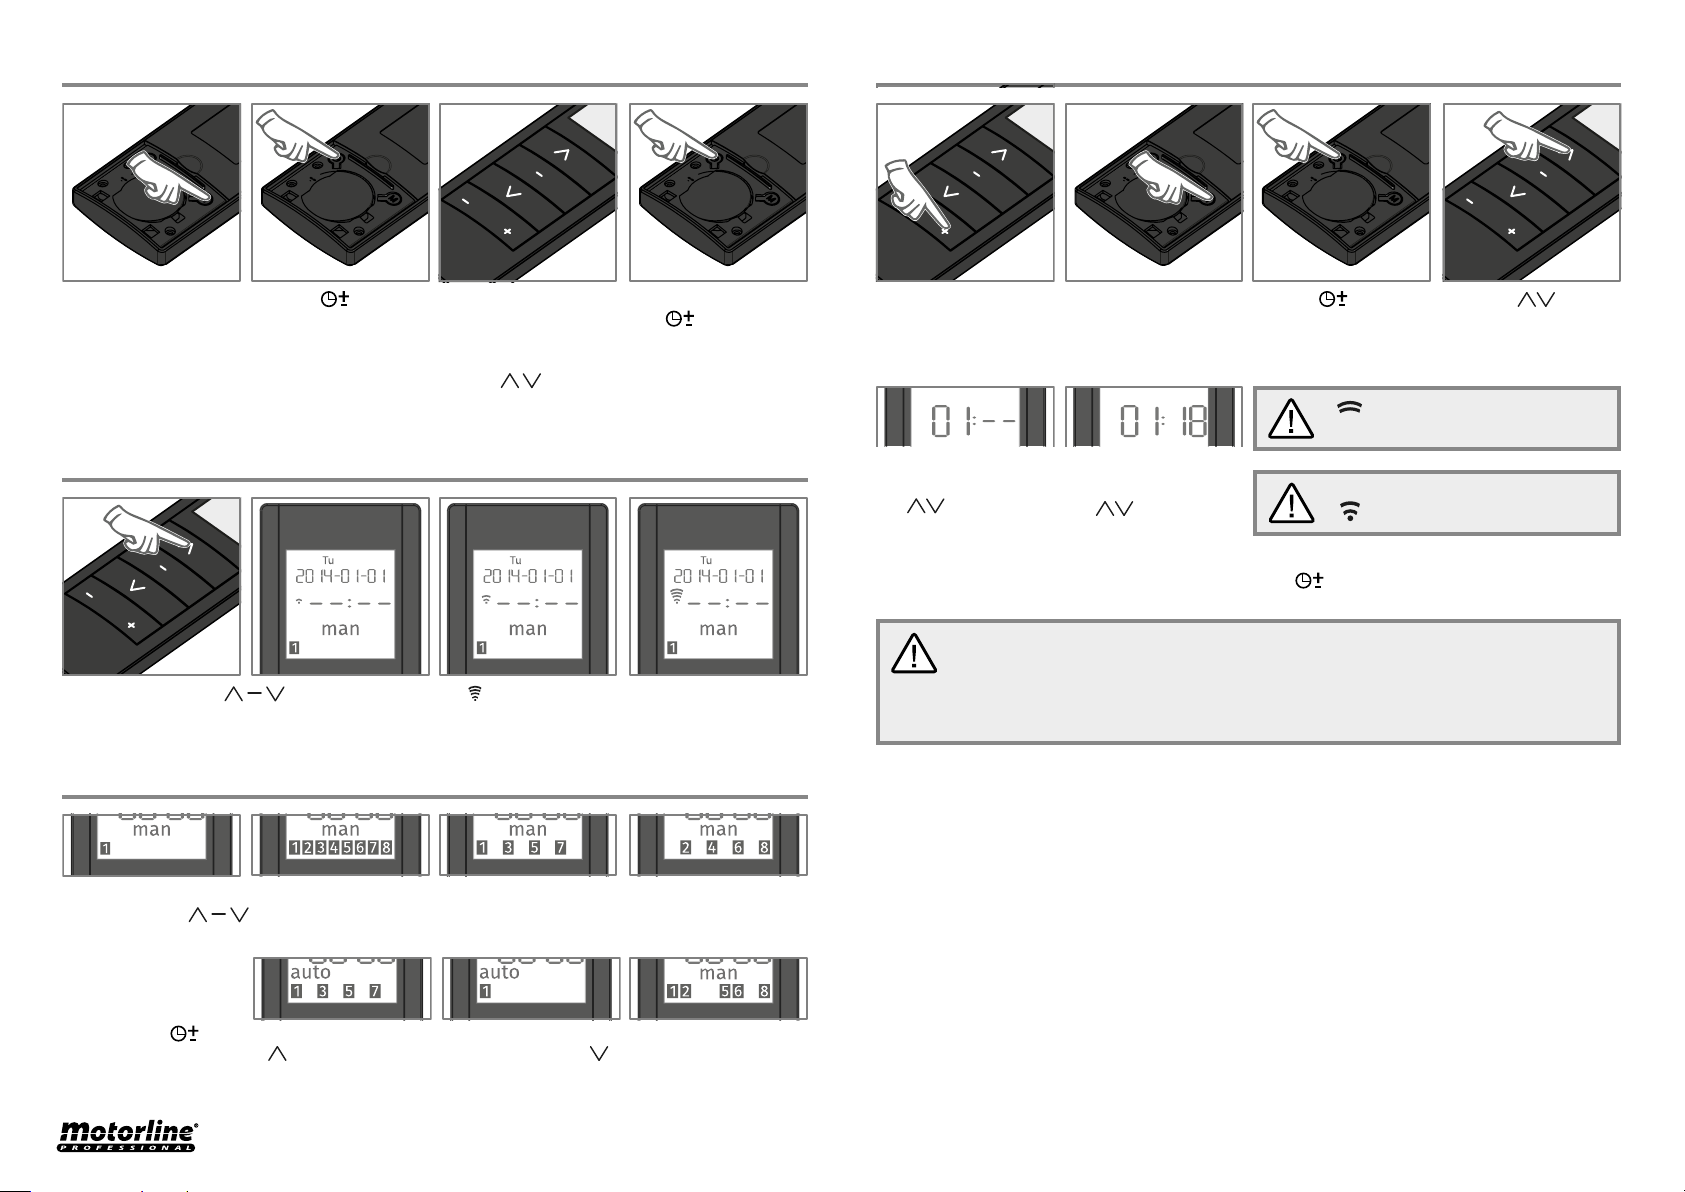
SET CURRENT DATE AND TIME PROGRAMMING TIMER
1 • Press M until the
remote control is in
manual mode.
2 • Press for 3
seconds and the year
will flash.
3 • Use the - and to
scroll through the various values that define the date / time and
the and keys to
change each value.
4 • In the end, press
the button to
confirm.
TRANSMISSION SIGNAL
Each time you press , the display will show in dynamic mode, indicating the signal
sending. The signal goes off when you stop pressing the button.
CHOOSE CHANNEL / GROUP
1 • Select the channel
you want using the
buttons - and .
5 • Press to now set
the time and
use to change it.
NOTE • When you end the ascent and descent programming, the system automatically advances
to the next day. If you want to quit programming press for seconds.
• The V lithium battery (CR) should be replaced once a year to ensure the
correct operation of the transmitter;
• To replace the dead battery remove the plastic cover, remove the battery out and
insert the new one, respecting the polarity shown on the container;
• The used battery must be placed in containers intended for this purpose.
2 • Press M until if
you put in automatic
mode (auto).
6 • Press again to set
the minutes and
use to change
them.
3 • Press for seconds. The Su will flash
and the zone of the
time will appear empty.
Will be defining the ascent.
Will be defining the descent.
4 • Using , select the day you want
to program.
The display always shows what the channel functions.
When you press an order will be transmitted by the indicated channel at the bottom of
the display.
In automatic or random
mode, use - and + to
select the group 1 or
group 2. Press for 3 seconds to enter the selected group. Use - and + to select channels. To set a
channel in the group, press once. To remove if from the group, press once. When the number
is flashing, it means that does not yet belong to the group. When the number is fixed, it belongs to
the group.
 Loading...