

Page 1
Gator Isolator Sleeve
Upgrade
8M4000305 – Gator Mount Isolator Sleeve Upgrade
8M4000306 – Gator Mount Isolator Sleeve Upgrade with Hardware
The Gator Flex 360 Mount Isolator Sleeve allows for adjustment, depending on use and personal preference. The
amount of shaft deflection can be changed with the installation of one or more, stiffer isolator halves.
Installation Instructions for the
Gator Isolator Sleeve Upgrade:
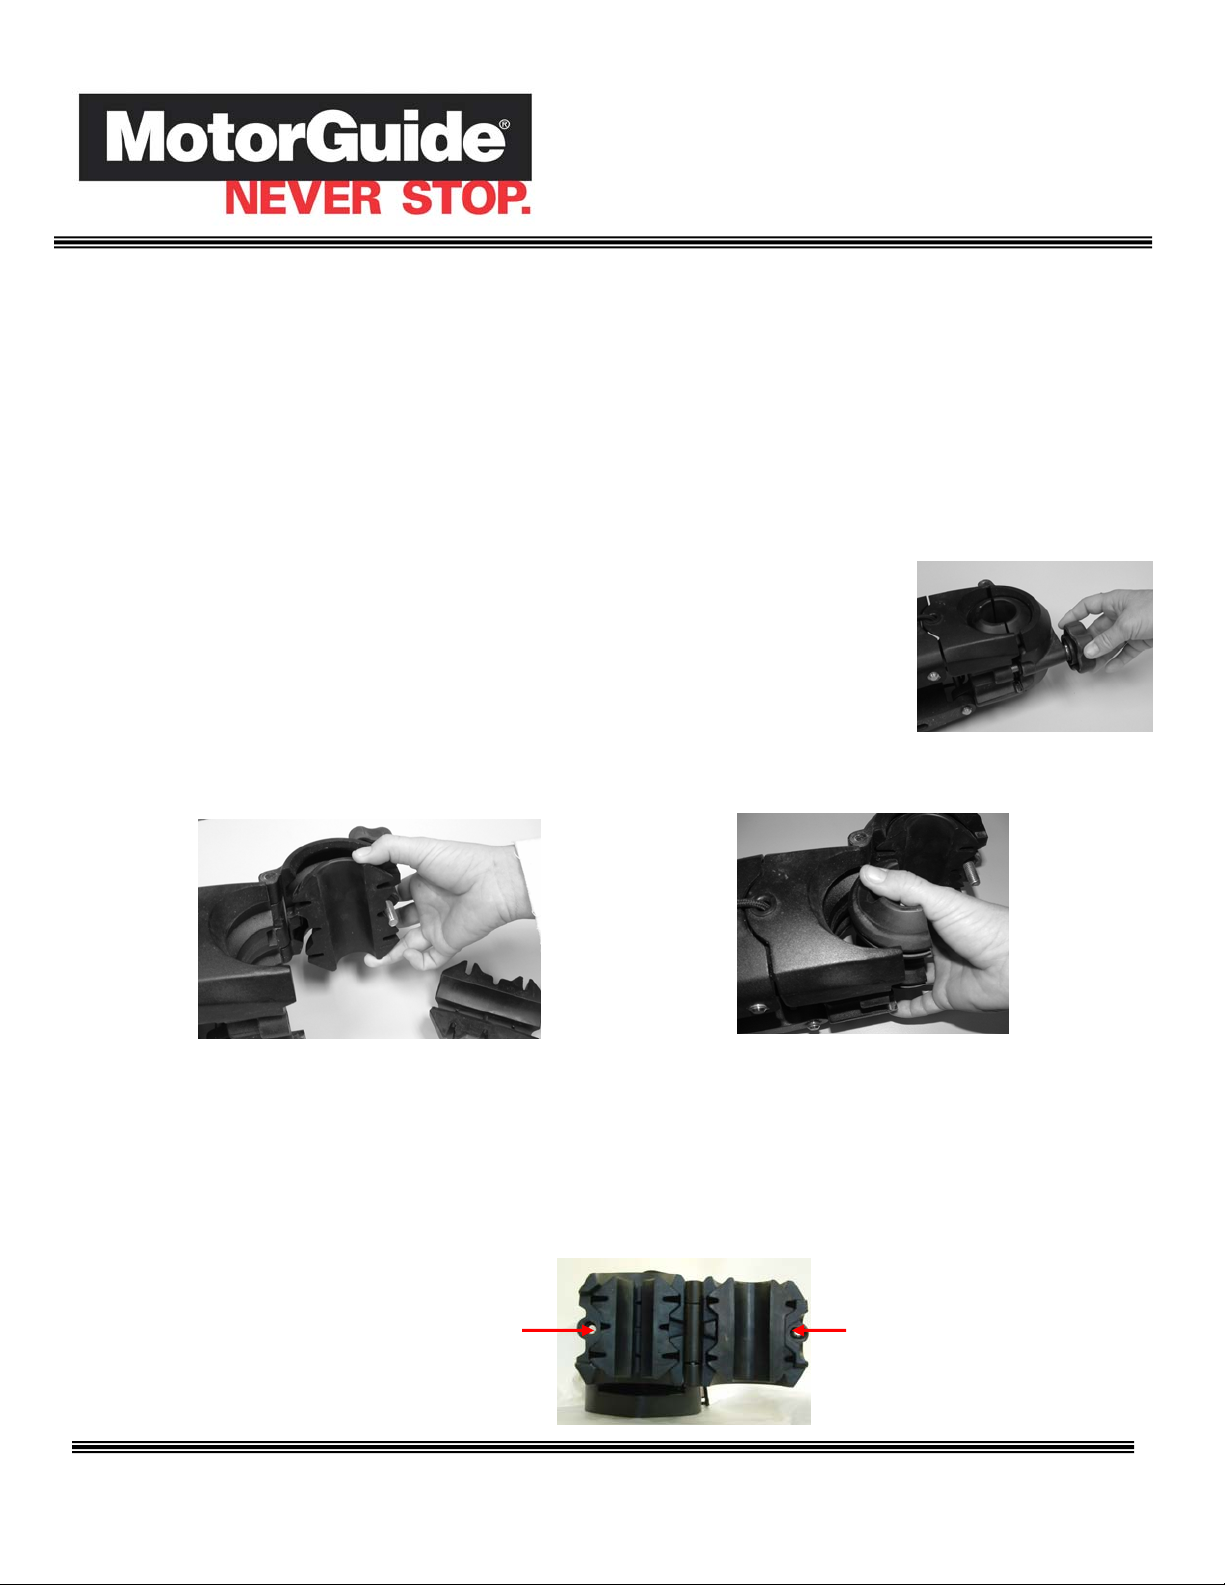
1. Place the mount in the deployed position.
2. Turn the bracket door knob to the left to open the bracket door (Figure 1).
3. Remove the two isolator sleeve pieces from the bracket and the bracket door (Figures 2 and 3).
Figure 2 Figure 3
4. Place anti seize grease on the threads of the door handle, the nut in the bracket and the knob washer located
between the handle knob and the door.
5. Install the isolator sleeves. To allow the isolators to align and properly seat, center one of the isolator sleeves in
the door and one in the mount bracket. Without the trolling motor installed, close the door and tighten. (Figure 4).
Open the door again to install your trolling motor.
© 2006, MotorGuide
For Questions, Contact Consumer Affairs at #1-920-929-5040 90-8M4000186 Rev 3
Center Isolator in
mount Bracket
Figure 4
www.MotorGuide.com
Figure 1
Center Isolator
Sleeve in mount
Page 2
Gator Isolator Sleeve
Upgrade
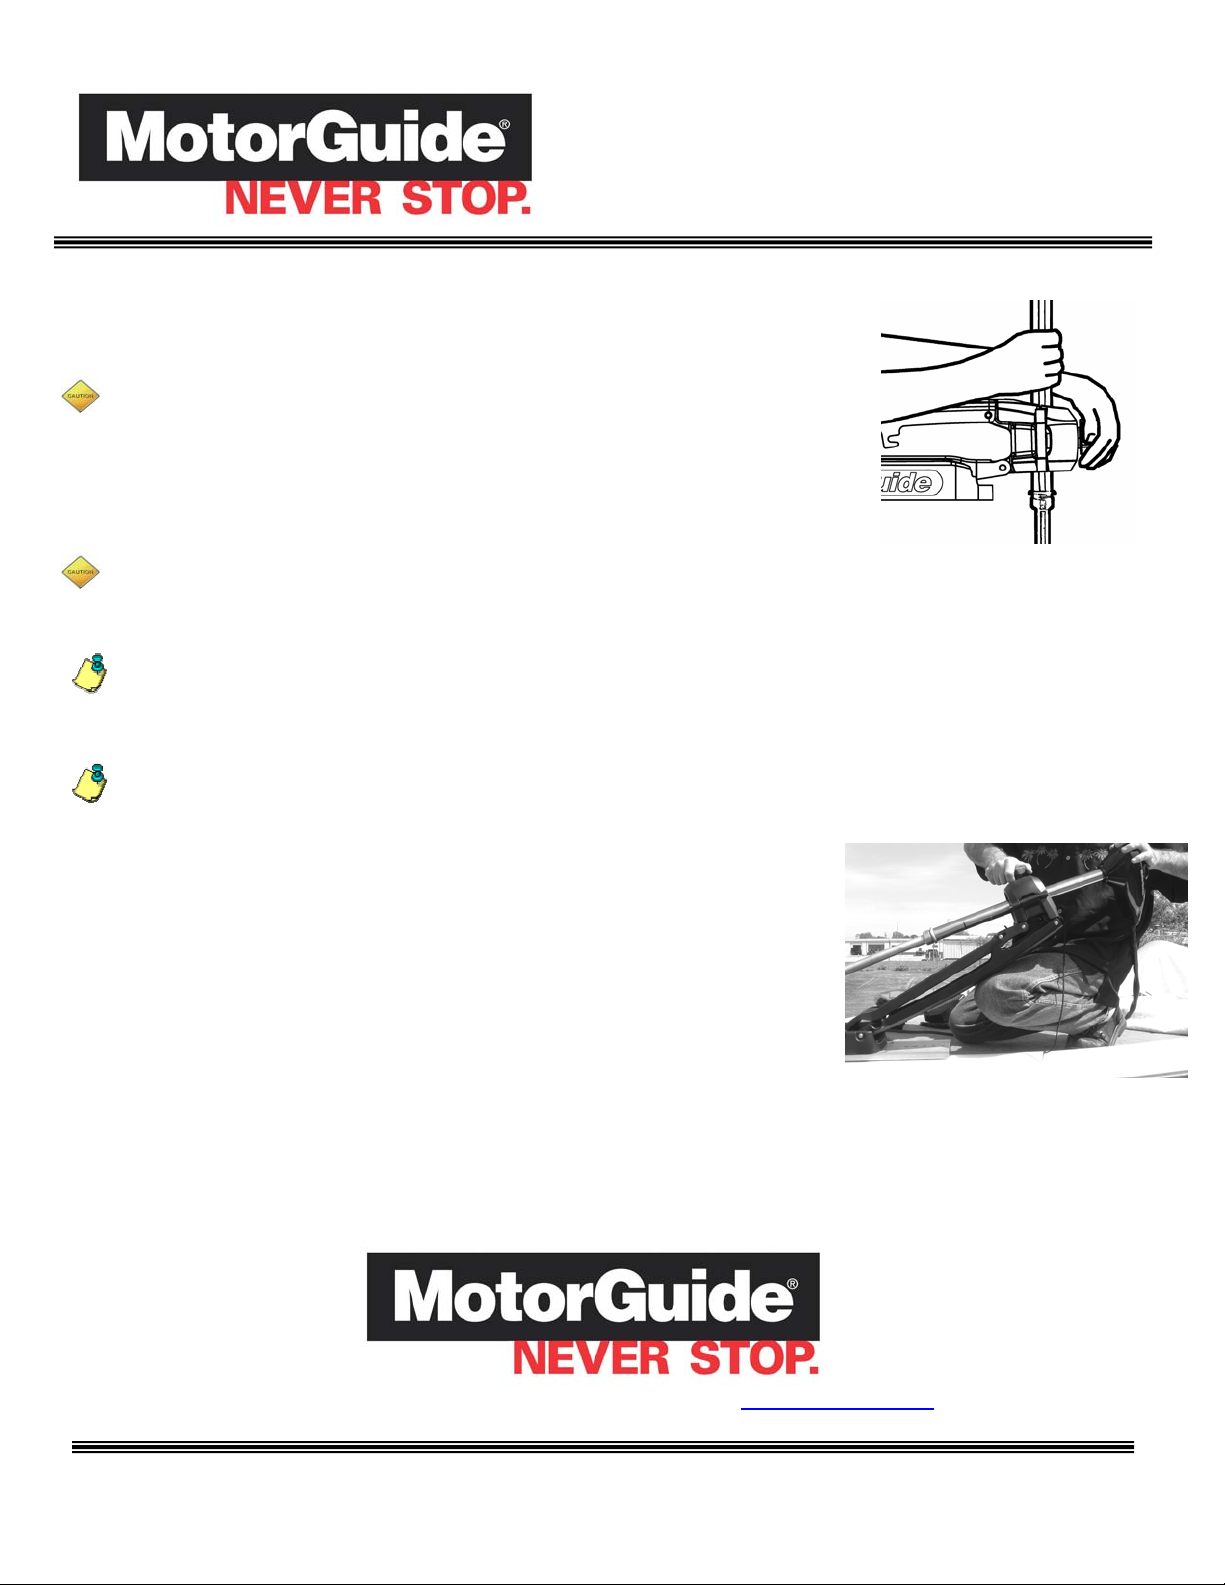
6. Place the motor shaft into the bracket and then close and tighten the bracket
door (Figure 5). To prevent cross threading, ensure that the bolt handle threads
are aligned with the nut when you close the door.
CAUTION
The shaft on the bracket door knob must be at least 3 ½ inches long. If your door knob
shaft is not this length, part number MBK08202T will be required. Replace the plastic
washer between the knob and the bracket door with the new stainless steel washer,
apply grease as needed
CAUTION
The isolator sleeve will not float. Use caution when adjusting the motor shaft length over the water.
NOTE:
The new isolators have not been “broken in” and are very stiff. Once the isolator has been “broken in”, through use of the
trolling motor, the door will become easier to close. To aid in installation be sure to follow the instructions.
NOTE:
To adjust the height of the motor, the trolling motor must be out of the water and in the stow position. To release the
tension on the trolling motor shaft, elevate the head of the motor and mount
approximately 12 to 18 inches. Open the bracket door and reposition the shaft to the
desired position. Follow step five above to close the bracket door.
8M4000305 - Upgrade Kit Includes:
2 Isolator halves
1 Instruction sheet
8M4000306 - Kit with Hardware includes:
2 Isolator halves
1 3.5” door knob
1 Stainless steel knob washer
1 SS nut for replacement in the Mount Bracket, if needed
1 Packet of grease
1 Instruction sheet
1 Plastic washer to secure door knob screw, if needed
© 2006, MotorGuide
For additional MotorGuide product information see
©MotorGuide, 2006
For Questions, Contact Consumer Affairs at #1-920-929-5040 90-8M4000186 Rev 3
www.MotorGuide.com
www.motorguide.com
Figure 5
 Loading...