

MOTO FACTORY MOTOXBIKE Quick Assembly Manual
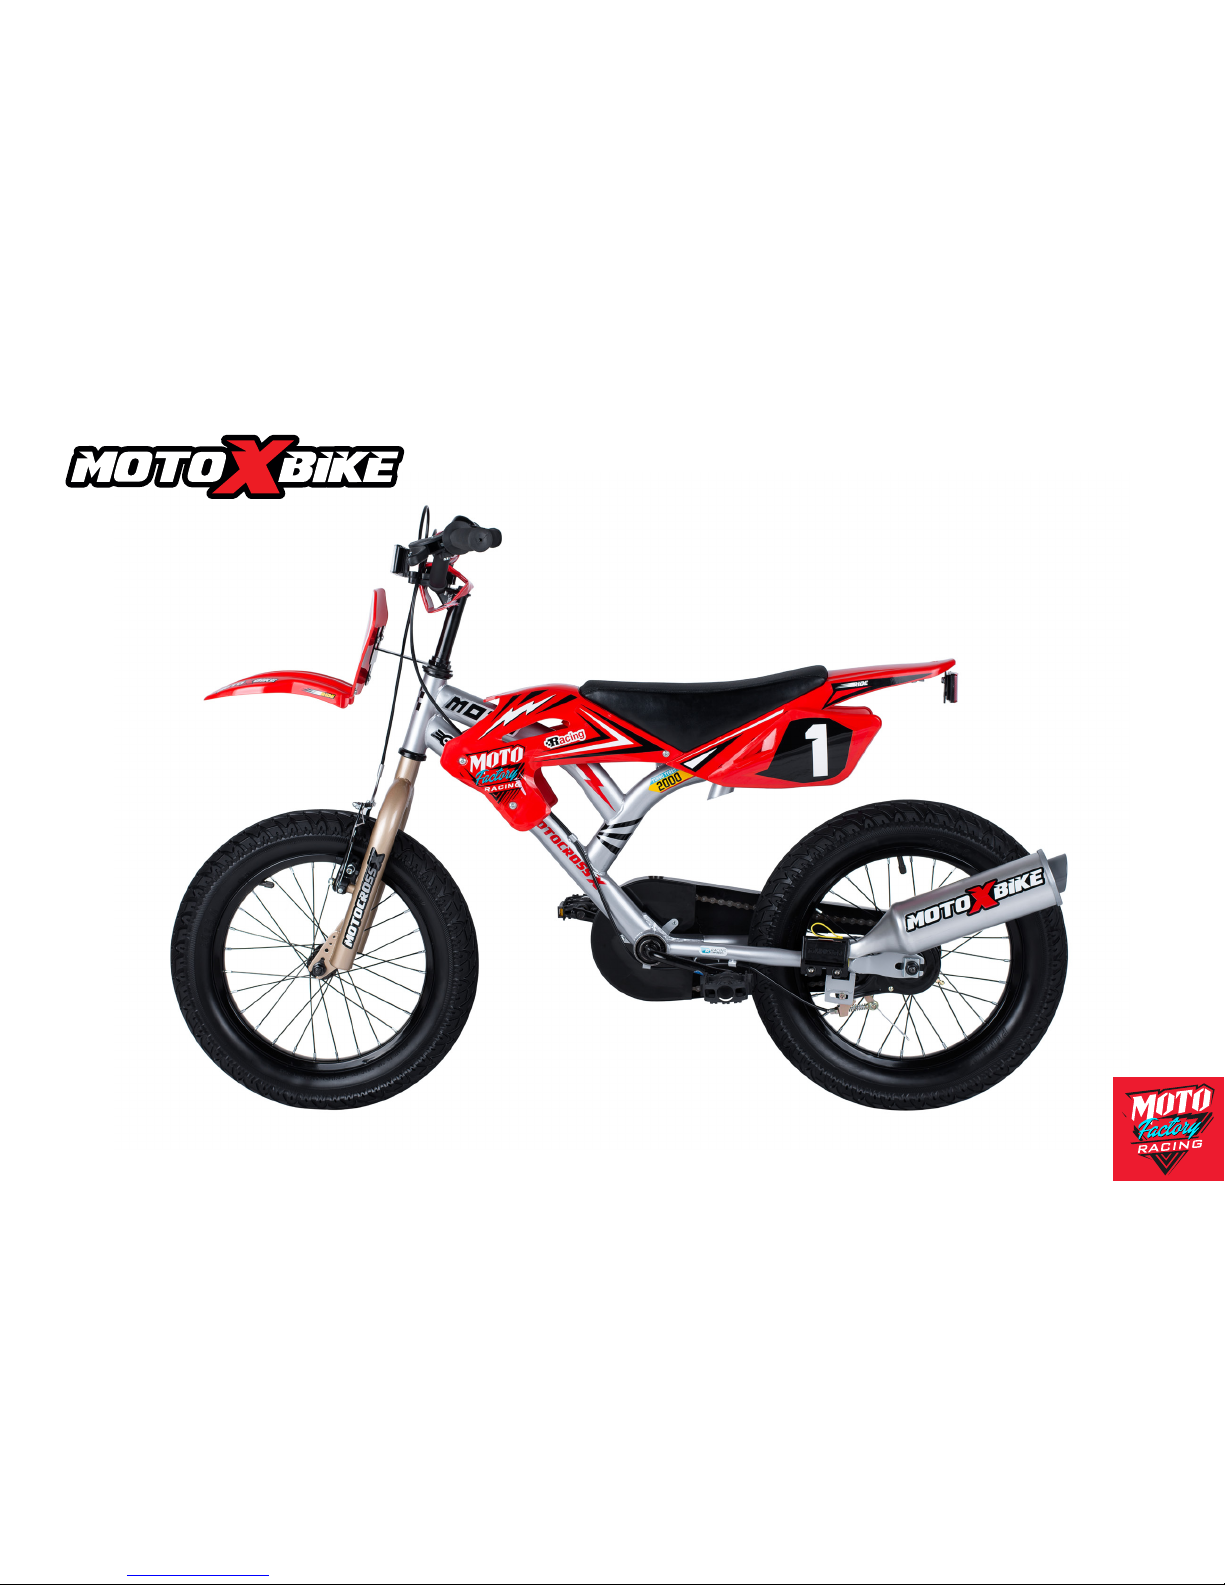
Quick Assembly Guide
QUICK ASSEMBLY GUIDE
The assembly of the bike should not take you too long but that will depend on your expertise.
There are several stages to assembly and we recommended that they are done in this order.
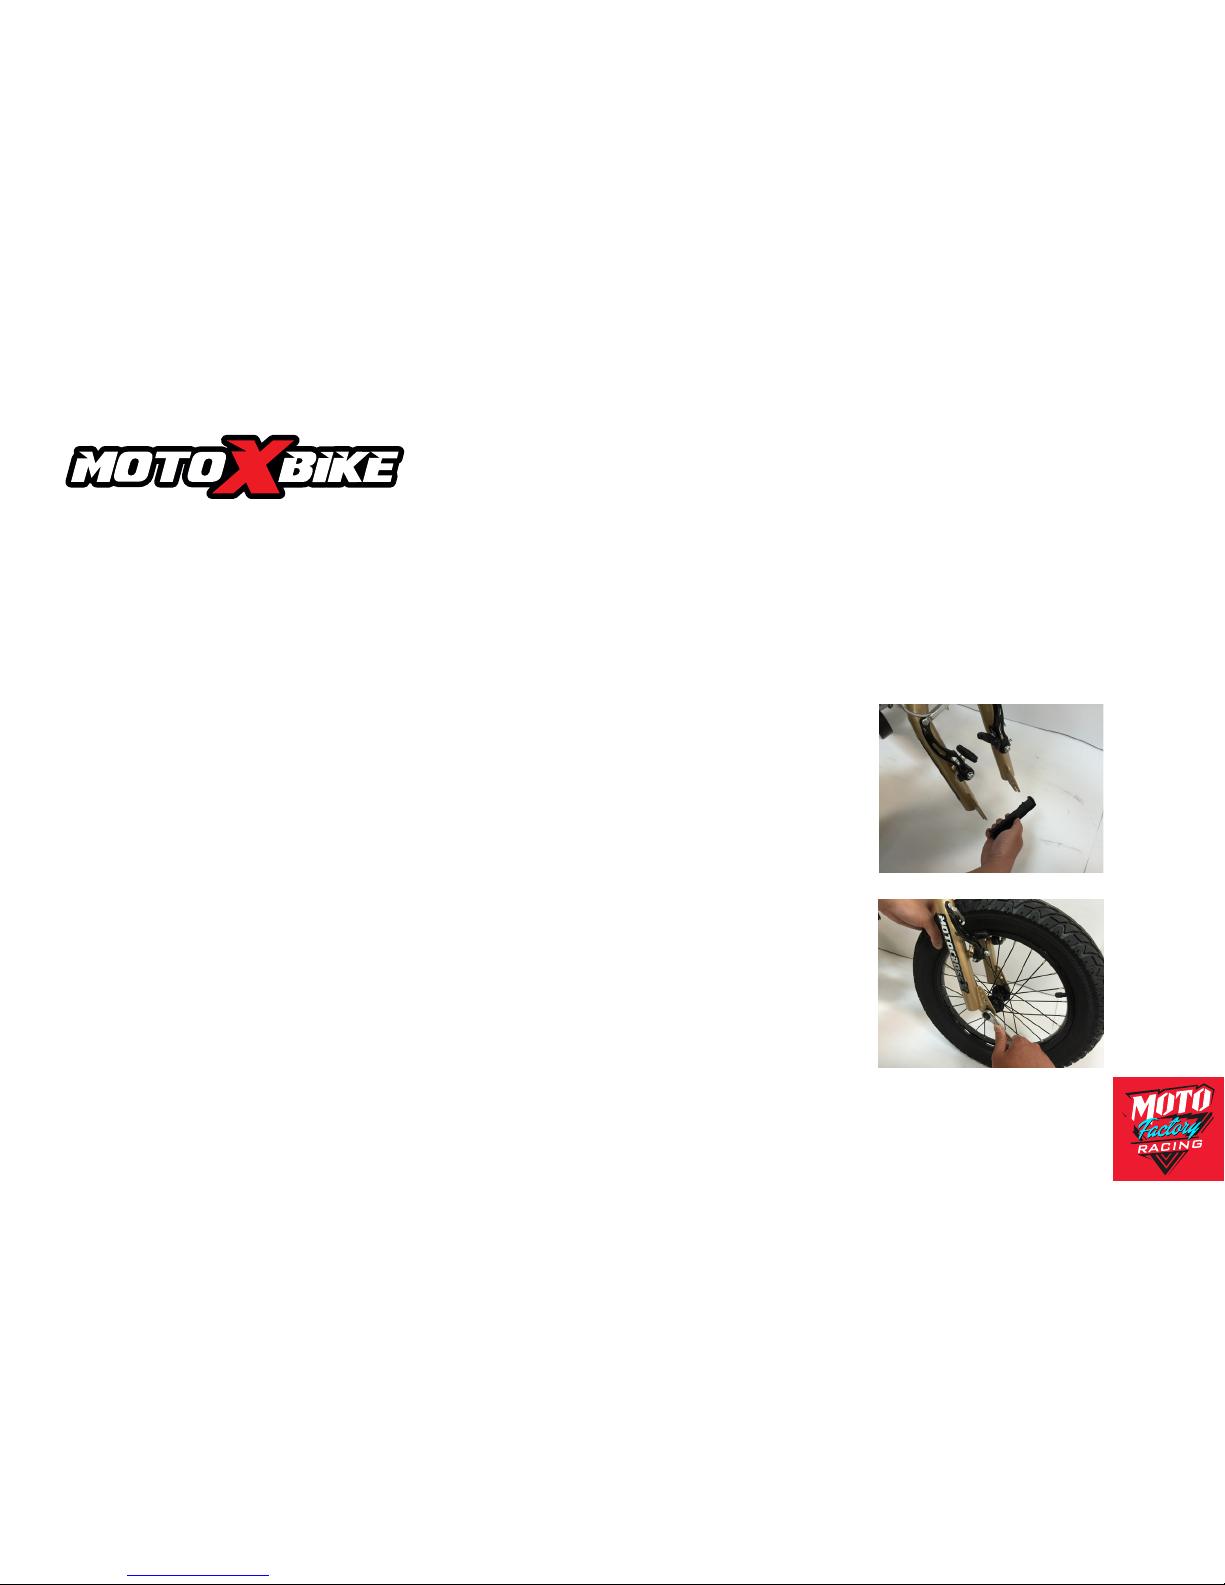
(1) Removing Packaging
(2) Attach Front Wheel
Remove all outer packaging including (1) Cardboard (2) Staples (3) Tape (4) and
dispose of in a responsible manner. Once this is done remove the partly assembled
bicycle from the carton and place on a flat surface. You will notice some parts are
attached to the frame of the bicycle with cable ties. When removing the cable ties be
careful not to scratch the paintwork or otherwise damage your bike during this
process. Remove the plastic fork brace & wheel nut protectors and dispose of in a
responsible manner.
Insert the front wheel into the forks taking care to ensure that the locating washers are
on the outside of the forks. Locate the washer into the hole in the fork leg and screw
in the wheel nut. Tighten using the multitool to 22-25nm
Quick Assembly Guide
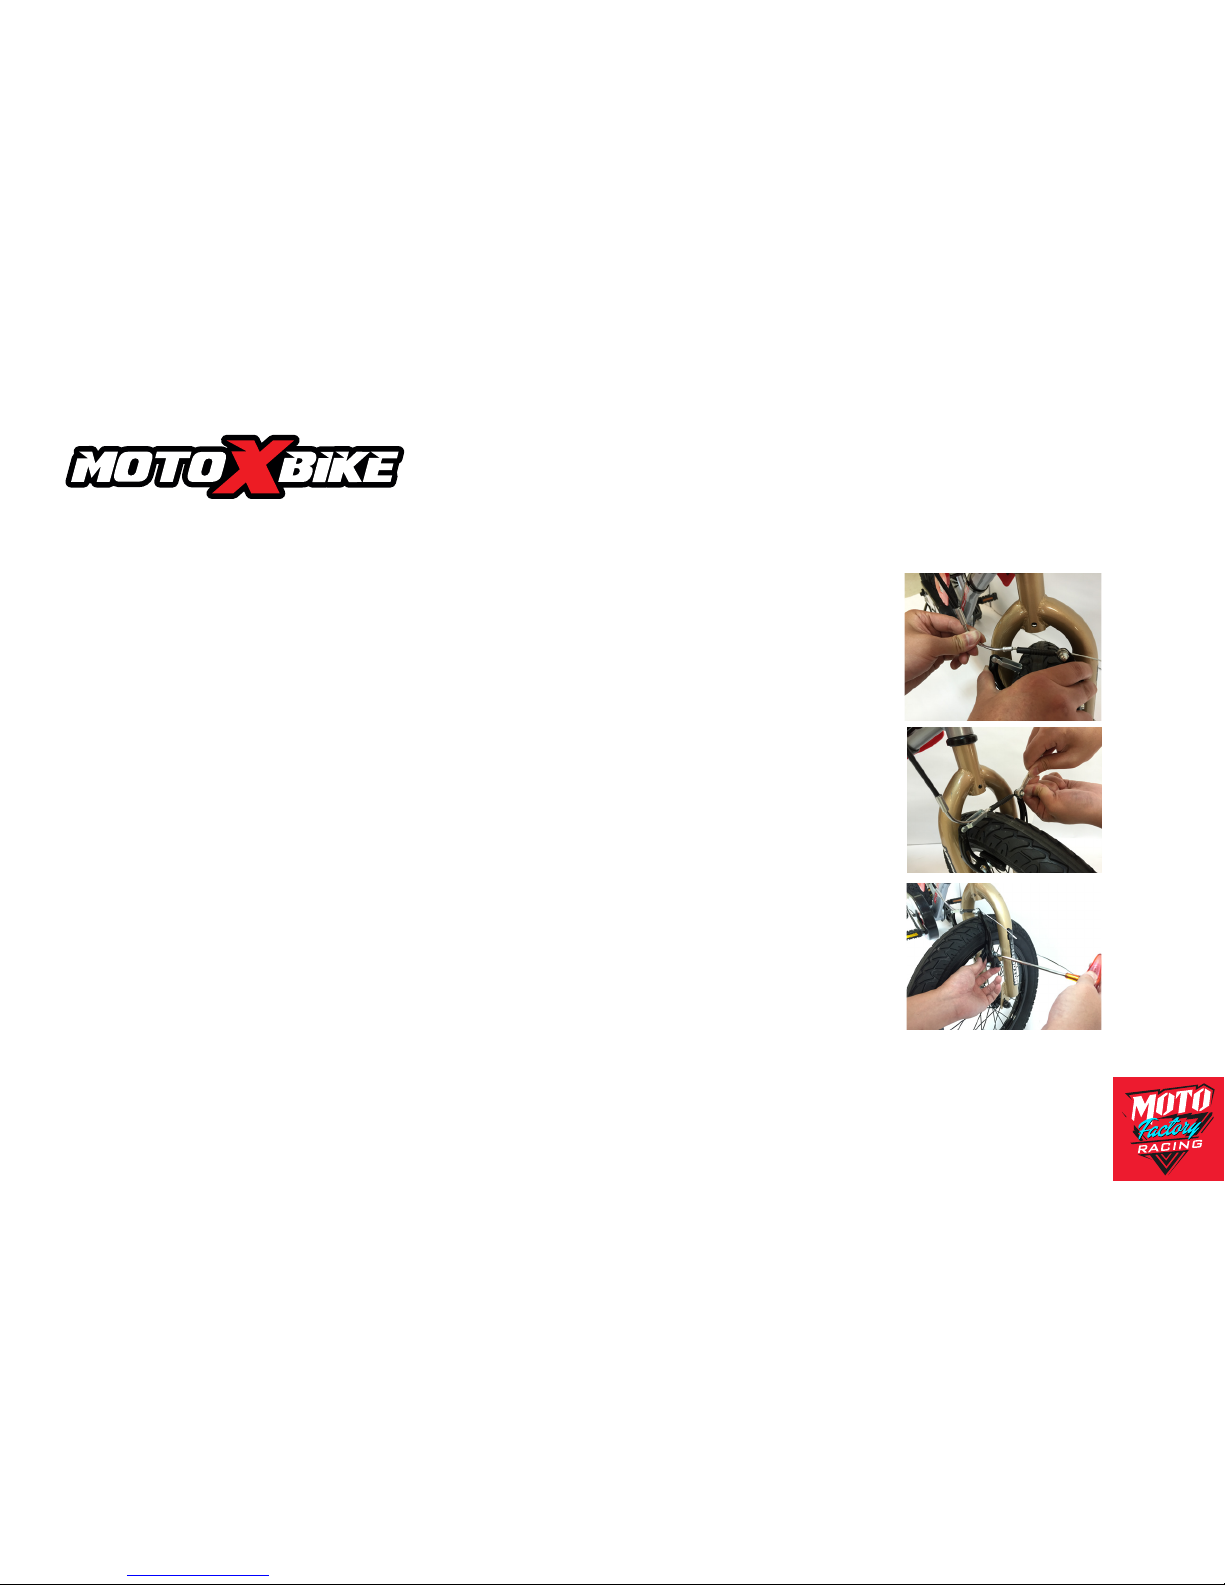
(3) Adjust Front Brake
Attach cable pipe to cable bracket
Start of by squeezing the two brake arms together and locate and attach the inner
steel cable pipe to the cable bracket.
To adjust the balance of the brakes
The “V” brake assembly should pull evenly from either side and the brake blocks
should contact the rim simultaneously. If not you should adjust the balance the spring
tension of each brake arm individually
Inner cable adjustment
Loosen the cable fixing bolt and squeeze the two brake arms together until the cable
feeds through the bolt (Pull through if necessary) Ensure that the clearances between
the left and right shoes and the rim is 2mm. Tighten the cable fixing bolt.
Quick Assembly Guide
 Loading...