

Page 1
2
A
B
1
08-0415 SyncPRO™ Manometer Fluid Refill Instructions
Thank you for purchasing Motion Pro SyncPRO™ Replacement Manometer Fluid. In the event excess
vacuum was placed on the SyncPRO™, fluid from all four chambers may be drained from the reservoir.
(NOTE: If you experience fluid loss from only one chamber, please contact Motion Pro to determine if there
is a problem with your SyncPRO™ before refilling it.) The following steps will guide you through the
procedure for replacing fluid that was lost during calibration or synchronization.
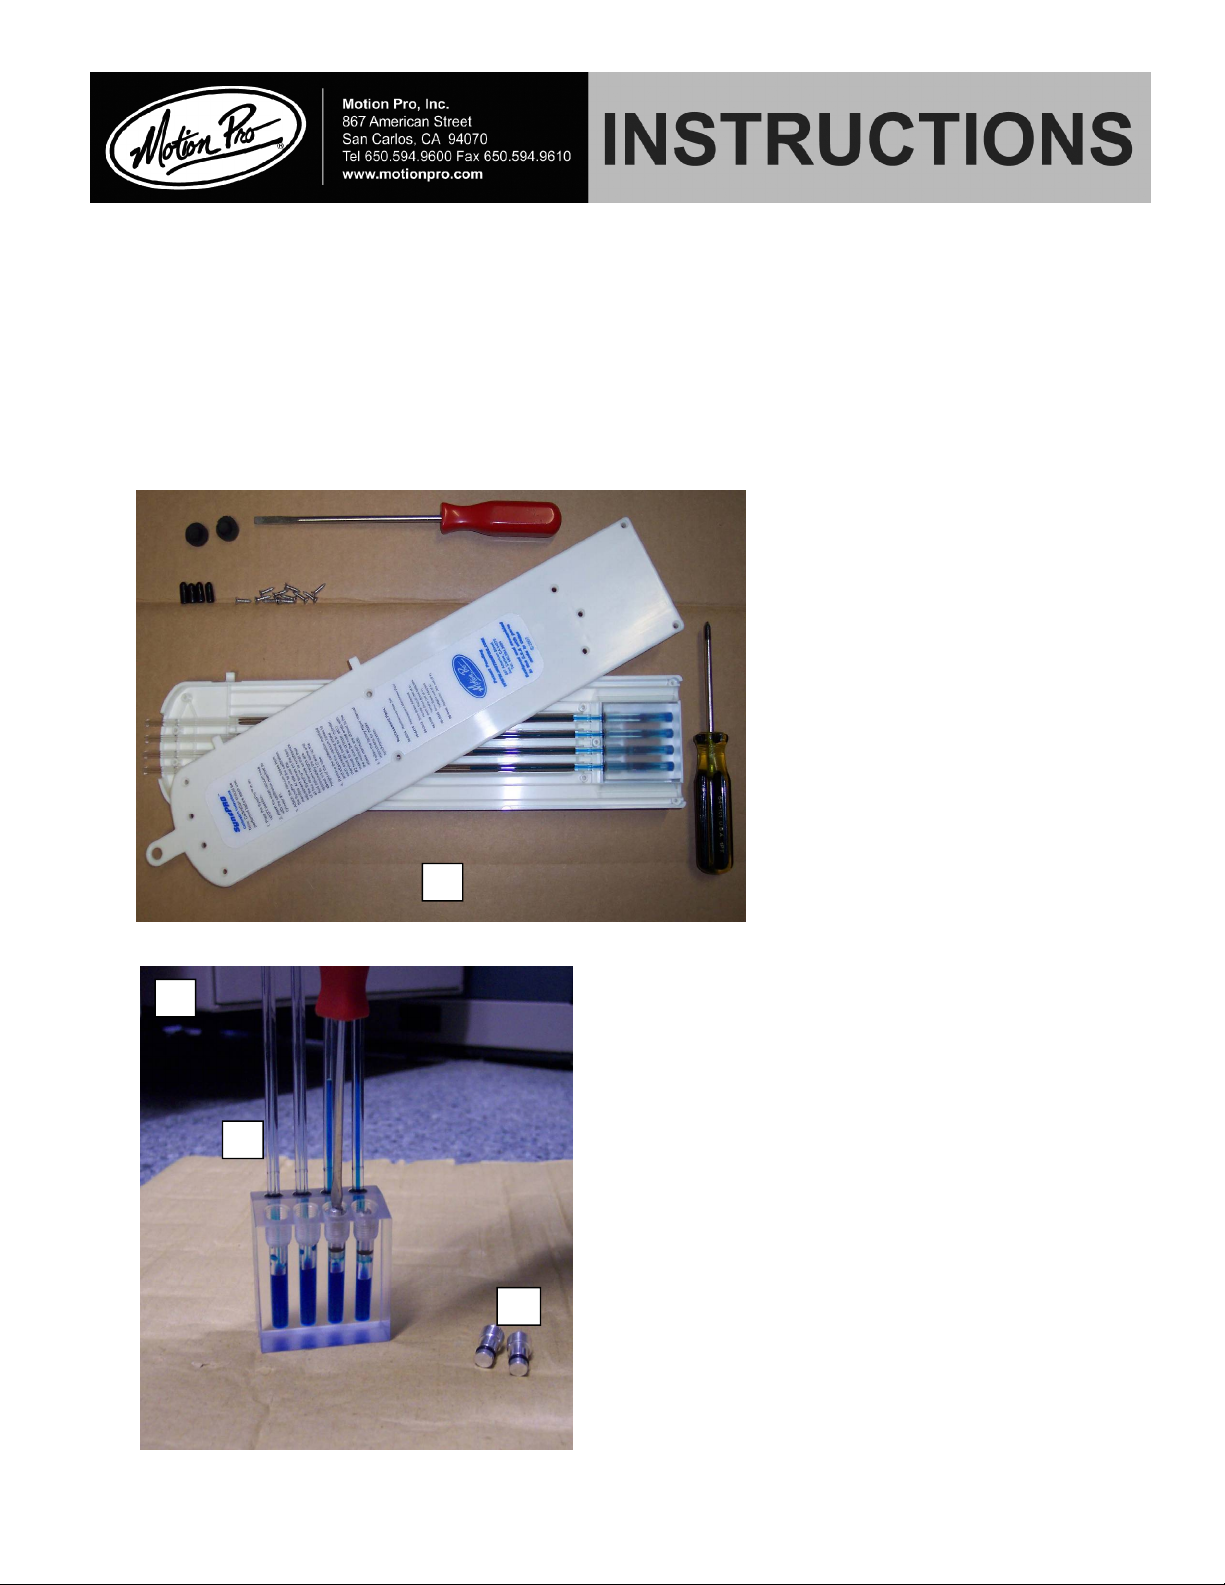
Have the following items handy before you begin: #1 Phillips screwdriver, a small flat blade
screwdriver, running water, paper towels and compressed air.
1. Place the SyncPRO™ face
.
down on a clean nonscratch surface with ample
working space. It is
important to
work area clean
don’t introduce debris into
the unit during reassembly.
Turn the four calibration
screws clockwise until they
stop turning. Remove the
rubber feet and eleven
screws that hold the twopiece housing together.
Separate the housing.
keep your
so you
2. Remove the reservoir with tubes still in
place
(A). Remove the four calibration
screws
clean area.
I08-0415 1 of 4 03/2010
(B) and place them aside in a
Page 2
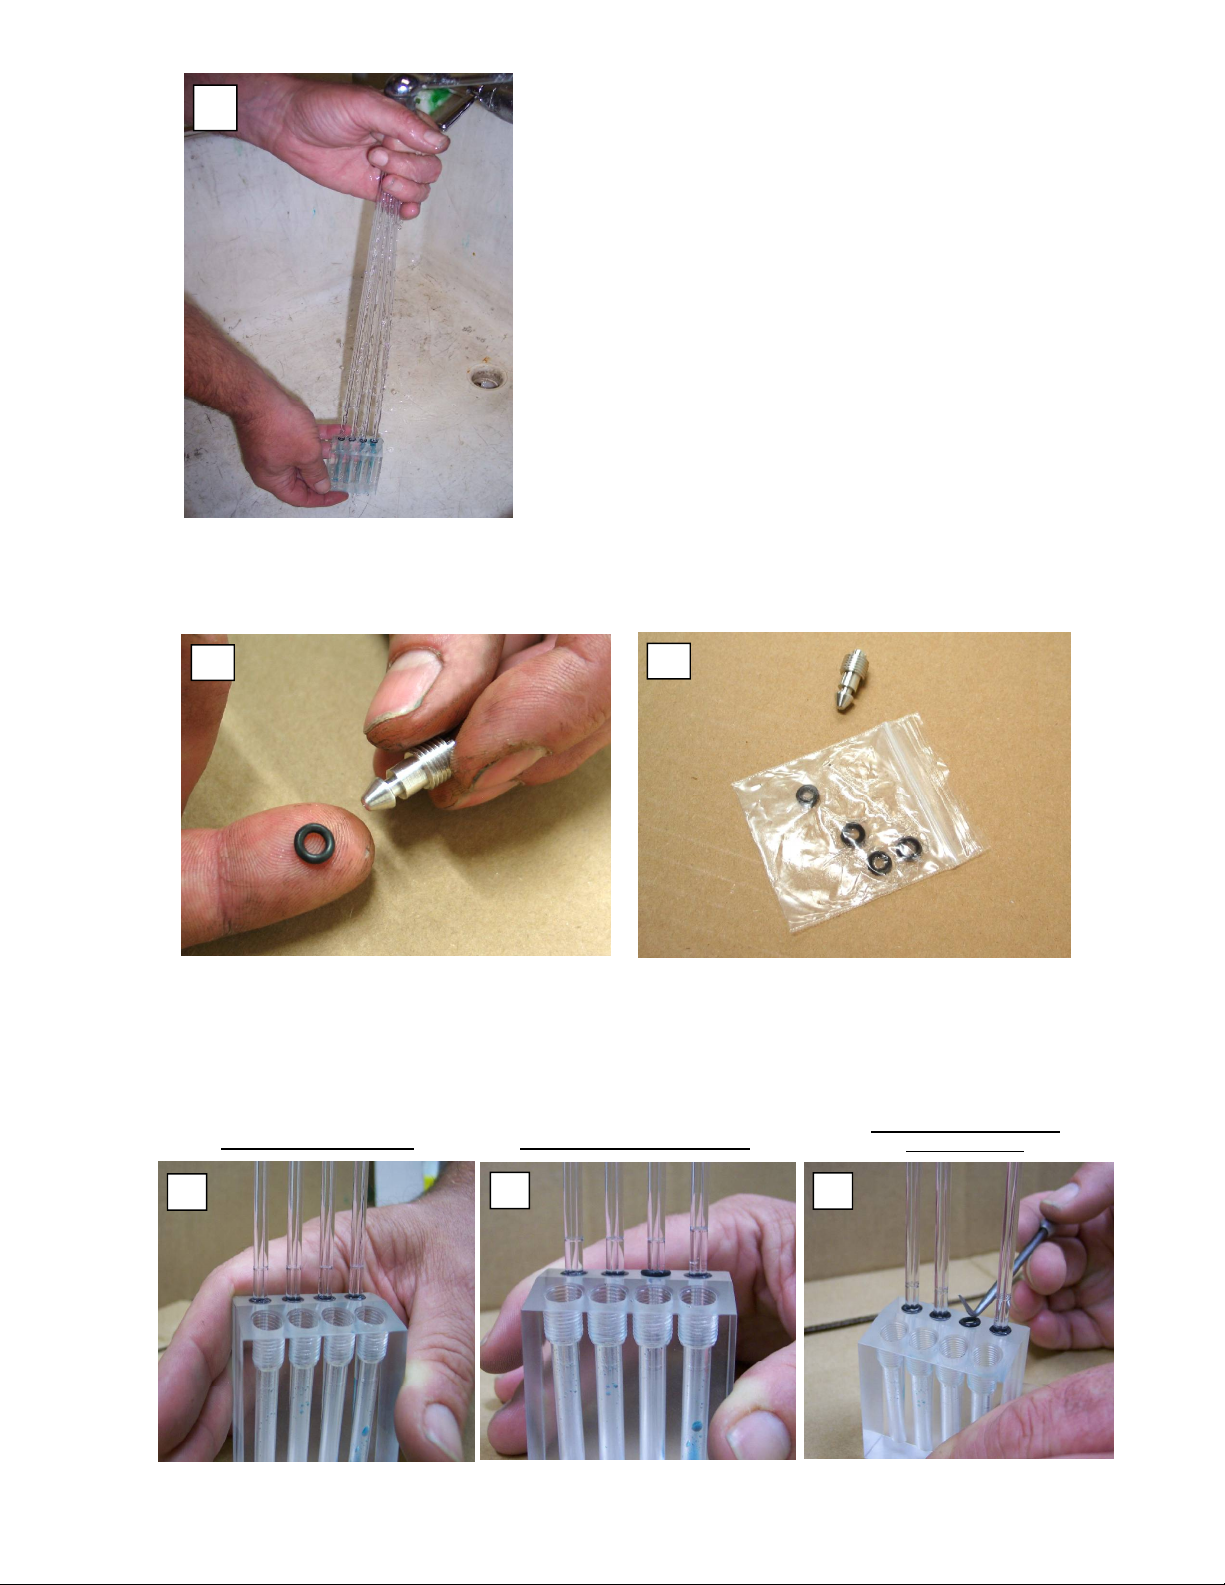
3. Hold the reservoir under running water to flush
3
Re-seating o
-
ring with
tube removed
5
5
5.
Before going to the next step, make sure that the tubes and o
-
rings are still fully seated in
the fluid from the four chambers. While
supporting the reservoir, hold the tops of the
tubes under the running water to flush the
remaining fluid down through the tubes and
out of the chambers. Repeat this process until
the water runs clear. You will get some fluid on
your hands, but it is non-toxic and easily
washes off with soap and water. Wipe off the
outside of the reservoir and tubes with a clean
paper towel and use compressed air to
gently
blow water out of the four chambers. You will
need to force air down through the tops of the
tubes to blow out any remaining water.
Repeat this process until all of the water is
removed. A very small amount of residual
moisture is acceptable if it can’t be completely
removed.
4. Remove the o-rings from the four aluminum pistons taking care not to scratch the o-ring gland.
Clean the pistons thoroughly using a clean paper towel. Install the new greased o-rings
supplied in the rebuild kit.
the reservoir. If an o-ring pops loose, remove the tube, re-seat the o-ring and re-insert the tube.
The tubes are tightly fitted, so apply some additional grease to the beveled end of the tube (as
shown in step 6) and force it through the o-ring with a twisting motion until the tube can not be
pushed in any farther. When finished, all of the notches on the tubes should line up.
O-rings seated properly
O-ring popped out of place
I08-0415 2 of 4 03/2010
Page 3

7
7
7. To refill your SyncPRO™, hold the reservoir upright so that the chambers are vertical. Insert the
tip of the refill bottle all the way in past the threads of the first chamber and place 35 drops of
manometer fluid into the chamber. This should result in a fluid level measurement of
approximately 5/8” down from the top front edge of the reservoir. (Note: It is important to keep
the fluid off the threads.)
Fill each of the remaining chambers using the same method until the fluid level is equal to the
first chamber (
be equal in height to the first chamber).
NOTE: filling of remaining chambers may take more or less than the 35 drops to
6. Install the vacuum caps about halfway down
onto the tubes to create an air seal.
When finished filling, perform a visual check to make sure the fluid levels in the four chambers
are the same height. If the fluid levels are not the same height, add a drop of fluid to the
chambers that are low until they are all approximately the same. If you overfill a chamber or
get fluid on the threads you can use a lint-free cloth to wick up or wipe away any excess fluid. If
there is fluid in the threads, make sure to wipe them dry before installing the piston.
I08-0415 3 of 4 03/2010
Page 4

9
8. Make sure the calibration screws and o-
8
rings are free of debris and then thread
them down gently by hand until they
bottom out. They do not need to be
tight.
9. Place the reservoir in the housing, and check one last time that the o-rings and tubes are still fully
seated before you put the housing back together. Starting with the innermost screws and working
outward, gently hand-tighten each screw until the housing is closed around the entire perimeter.
Replace the rubber feet. Your SyncPRO™ is now ready for use. Remember to check and set
your engine idle to the proper RPM before hooking up the SyncPRO™ for its next use.
I08-0415 4 of 4 03/2010
 Loading...