

Page 1
Process Black
White
White/Black MOTION PRO, INC. LOGO
Motion Pro, Inc.
867 American Street
San Carlos, CA 94070
Tel 650.594.9600 Fax 650.594.9610
www.motionpro.com
instructions
Belt tension GauGe P/n 08-0350
Large
O-ring
Large
O-ring
smaLL
O-ring
smaLL
O-ring
This tool is designed for use as an aid in properly adjusting belt tension on most motorcycles equipped
with a secondary drive belt; always refer to your service manual for the location to check your belt and
proper belt tension specication.
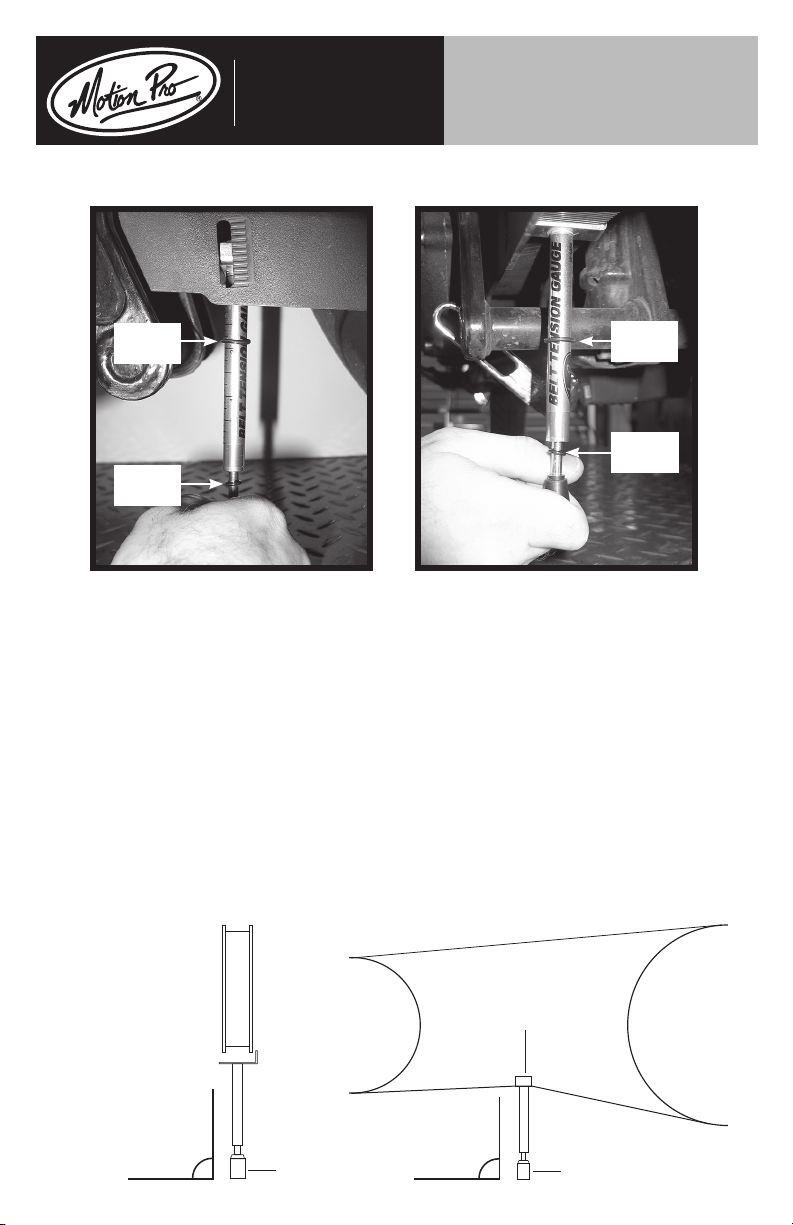
1. Position the small O-ring on the tool directly over the 10 lbs. mark on the shaft.
2. Position the U-shaped belt cradle against the lower bottom strand of the belt. Making sure the tool is
perpendicular to the belt.
3. Push upward on the rubber bumper until the small O-ring just touches the bottom of the tool body;
this means 10 lbs. has been applied to the belt, If your model does not have a method of determining the
amount of belt deection you can use the large O-ring and graduated scale on the body to calculate the
amount of belt deection. With the U-shaped belt cradle against the lower bottom strand of the belt nd a
reference point on the bike to align the large O-ring with and record the reading on the graduated scale.
After pushing upward on the rubber bumper until the small O-ring just touches the bottom of the tool body
align the large O-ring with the same reference point on the bike and record the reading on the graduated
scale. The difference between the initial reading and the nal reading is the belt deection at 10 lbs. force.
Always refer to the service manual for specic specications for the model being serviced.
note: Belt Tension
Gauge must remain
at a 90˚ angle to get
an accurate reading.
I08-0350
90˚
Rubber Bumper
90˚
Belt Cradle
Rubber Bumper
12/2011
 Loading...