

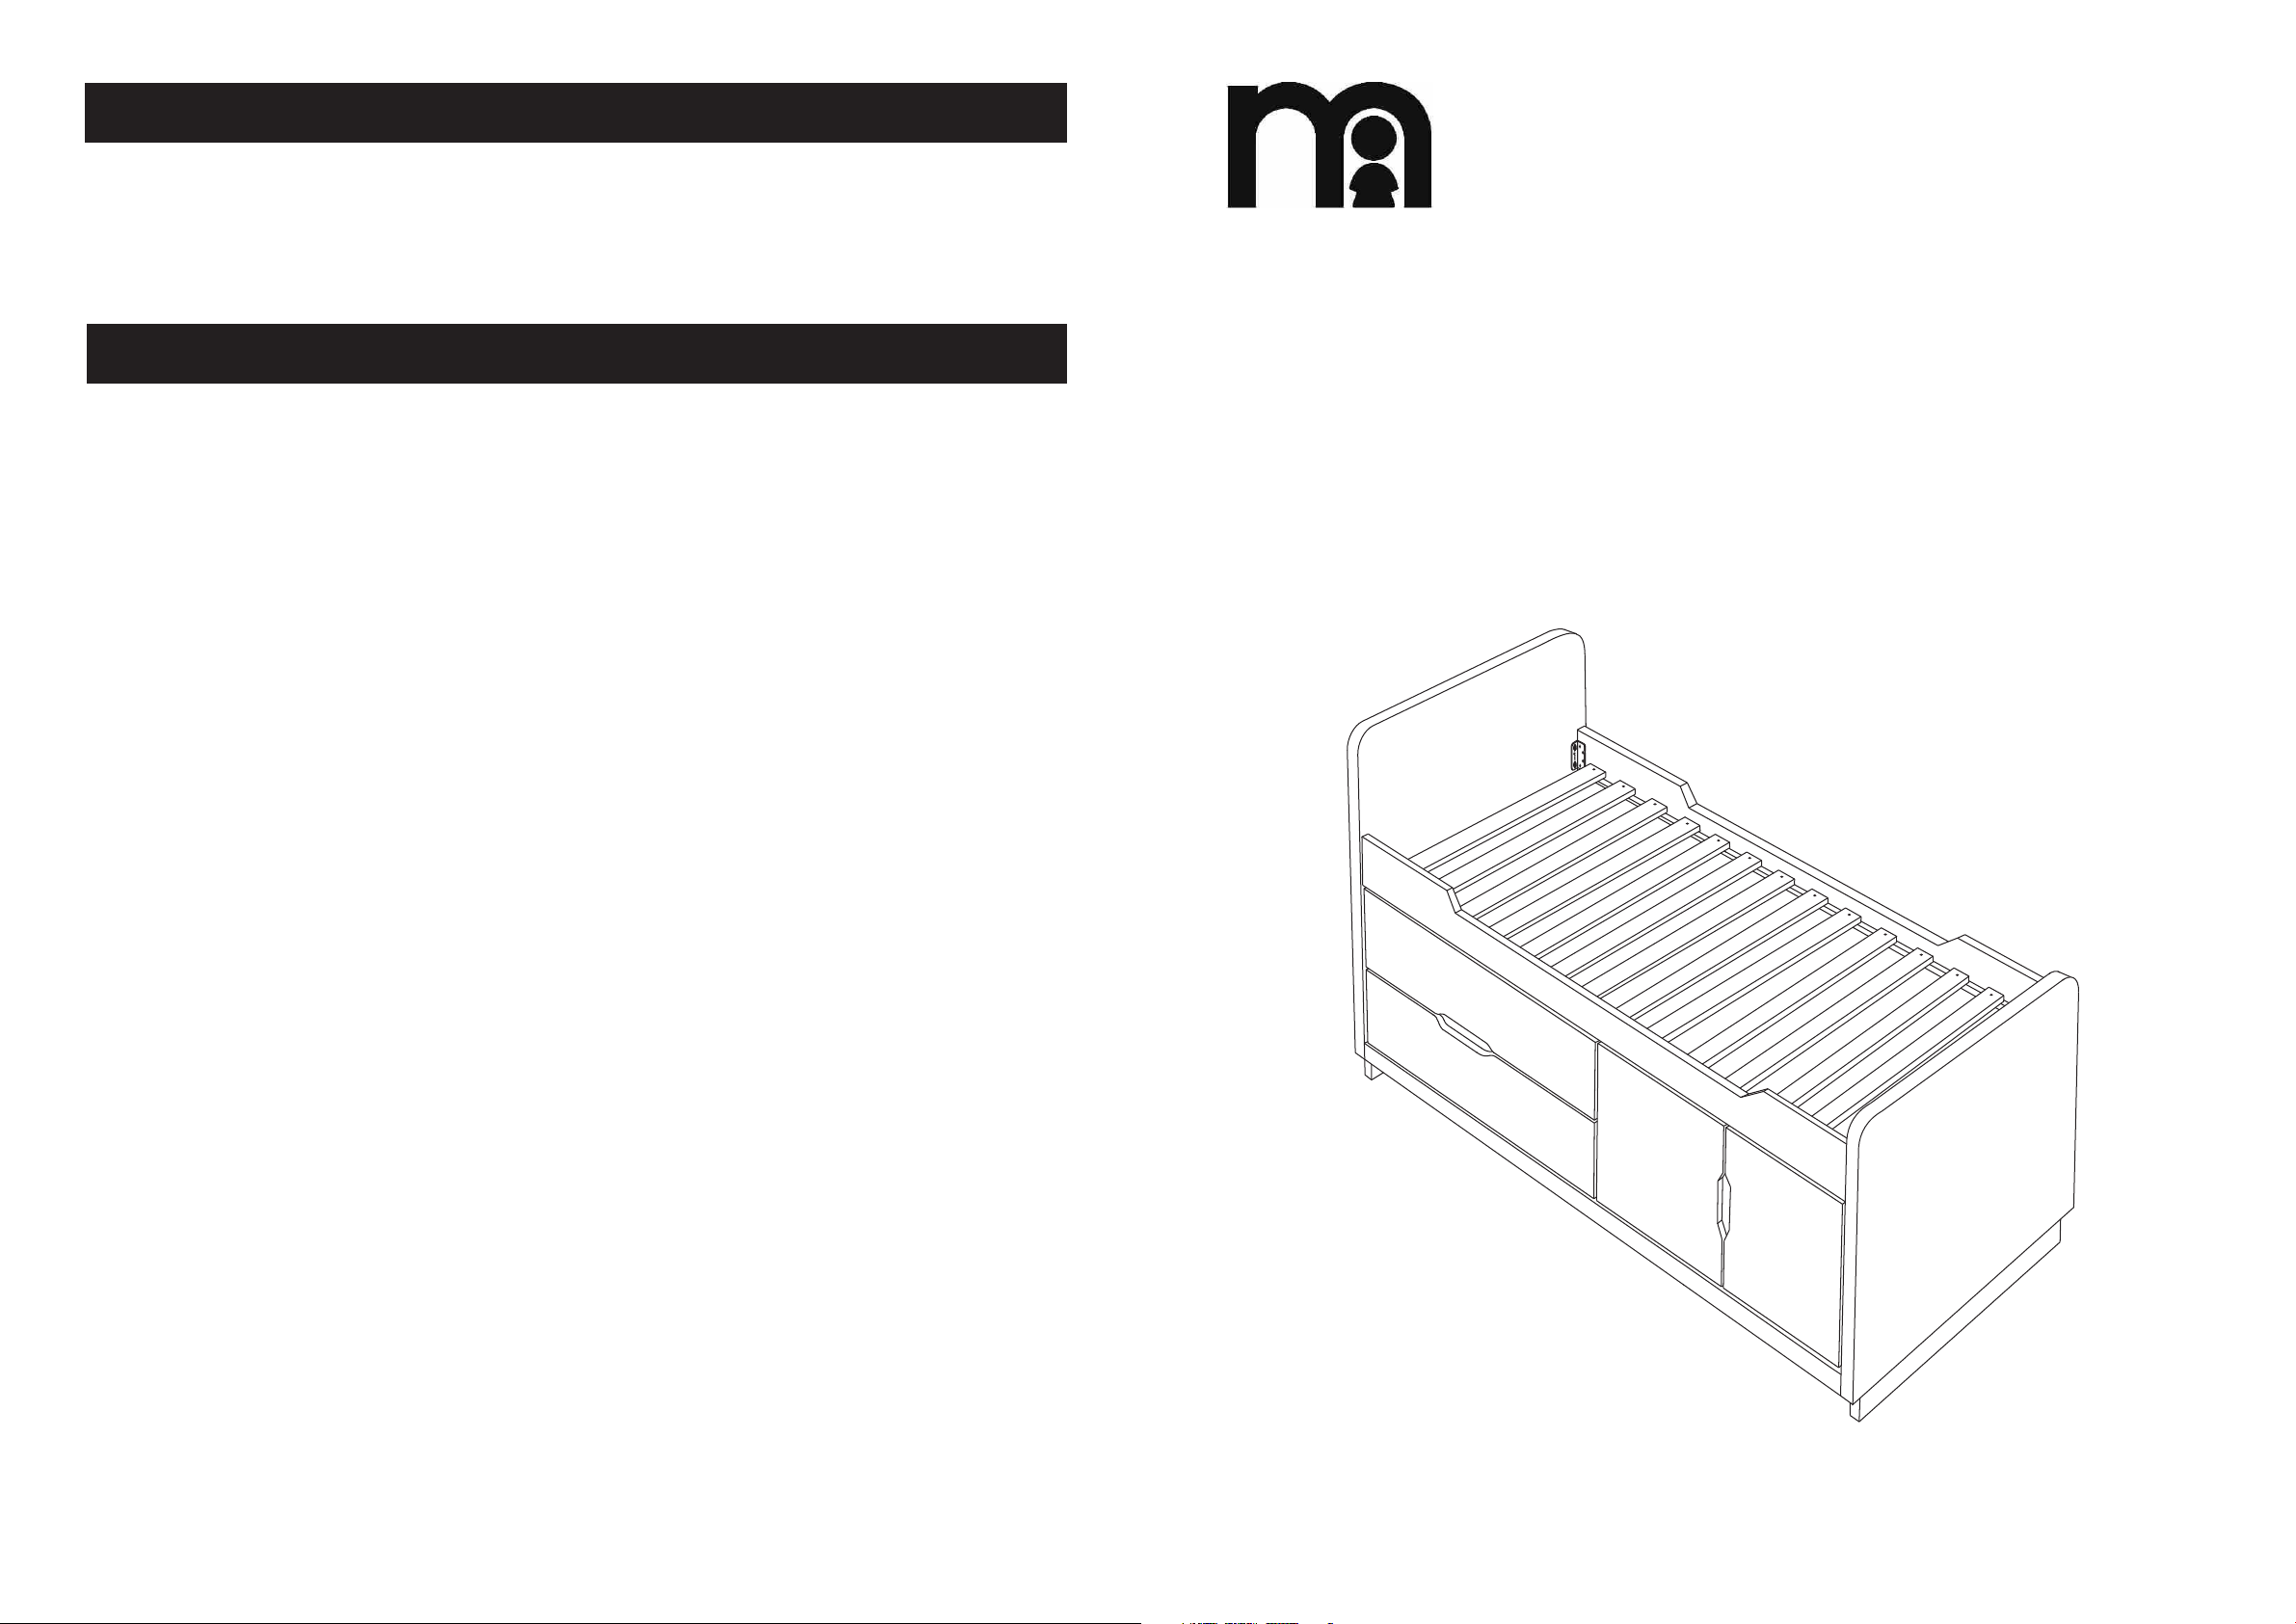
mothercare Pop Cabin Bed User Manual
care of your product
Periodically check all fittings to ensure that none have come loose.
The bed can be cleaned by wiping with a damp cloth and drying with a soft dry cloth.
Never clean with abrasive, ammonia based, bleach based, or spirit type cleaners.
Take care when handling or moving the bed.
Careless handling can damage wooden furniture.
safety notes
Pop
All Assembly fittings should be tightened properly and regularly checked for security.
Be aware of the risk of open fire and other sources of strong heat, such as electric bar fires, gas
fires, etc. in the near vicinity of the wardrobe.
your child's safety is your responsibility
If you have a problem with this product or require replacement parts,
please contact your nearest Mothercare store or telephone the
Mothercare customer care line on 08453 30 40 30
Alternatively write to:
Customer Care
Mothercare
Cabin Bed
user guide
Cherry Tree Road
Watford
Herts. WD24 6SH
www.mothercare.com
IMPORTANT - READ CAREFULLY AND KEEP FOR FUTURE REFERENCE
important notes
Please take a few minutes to read this user guide.
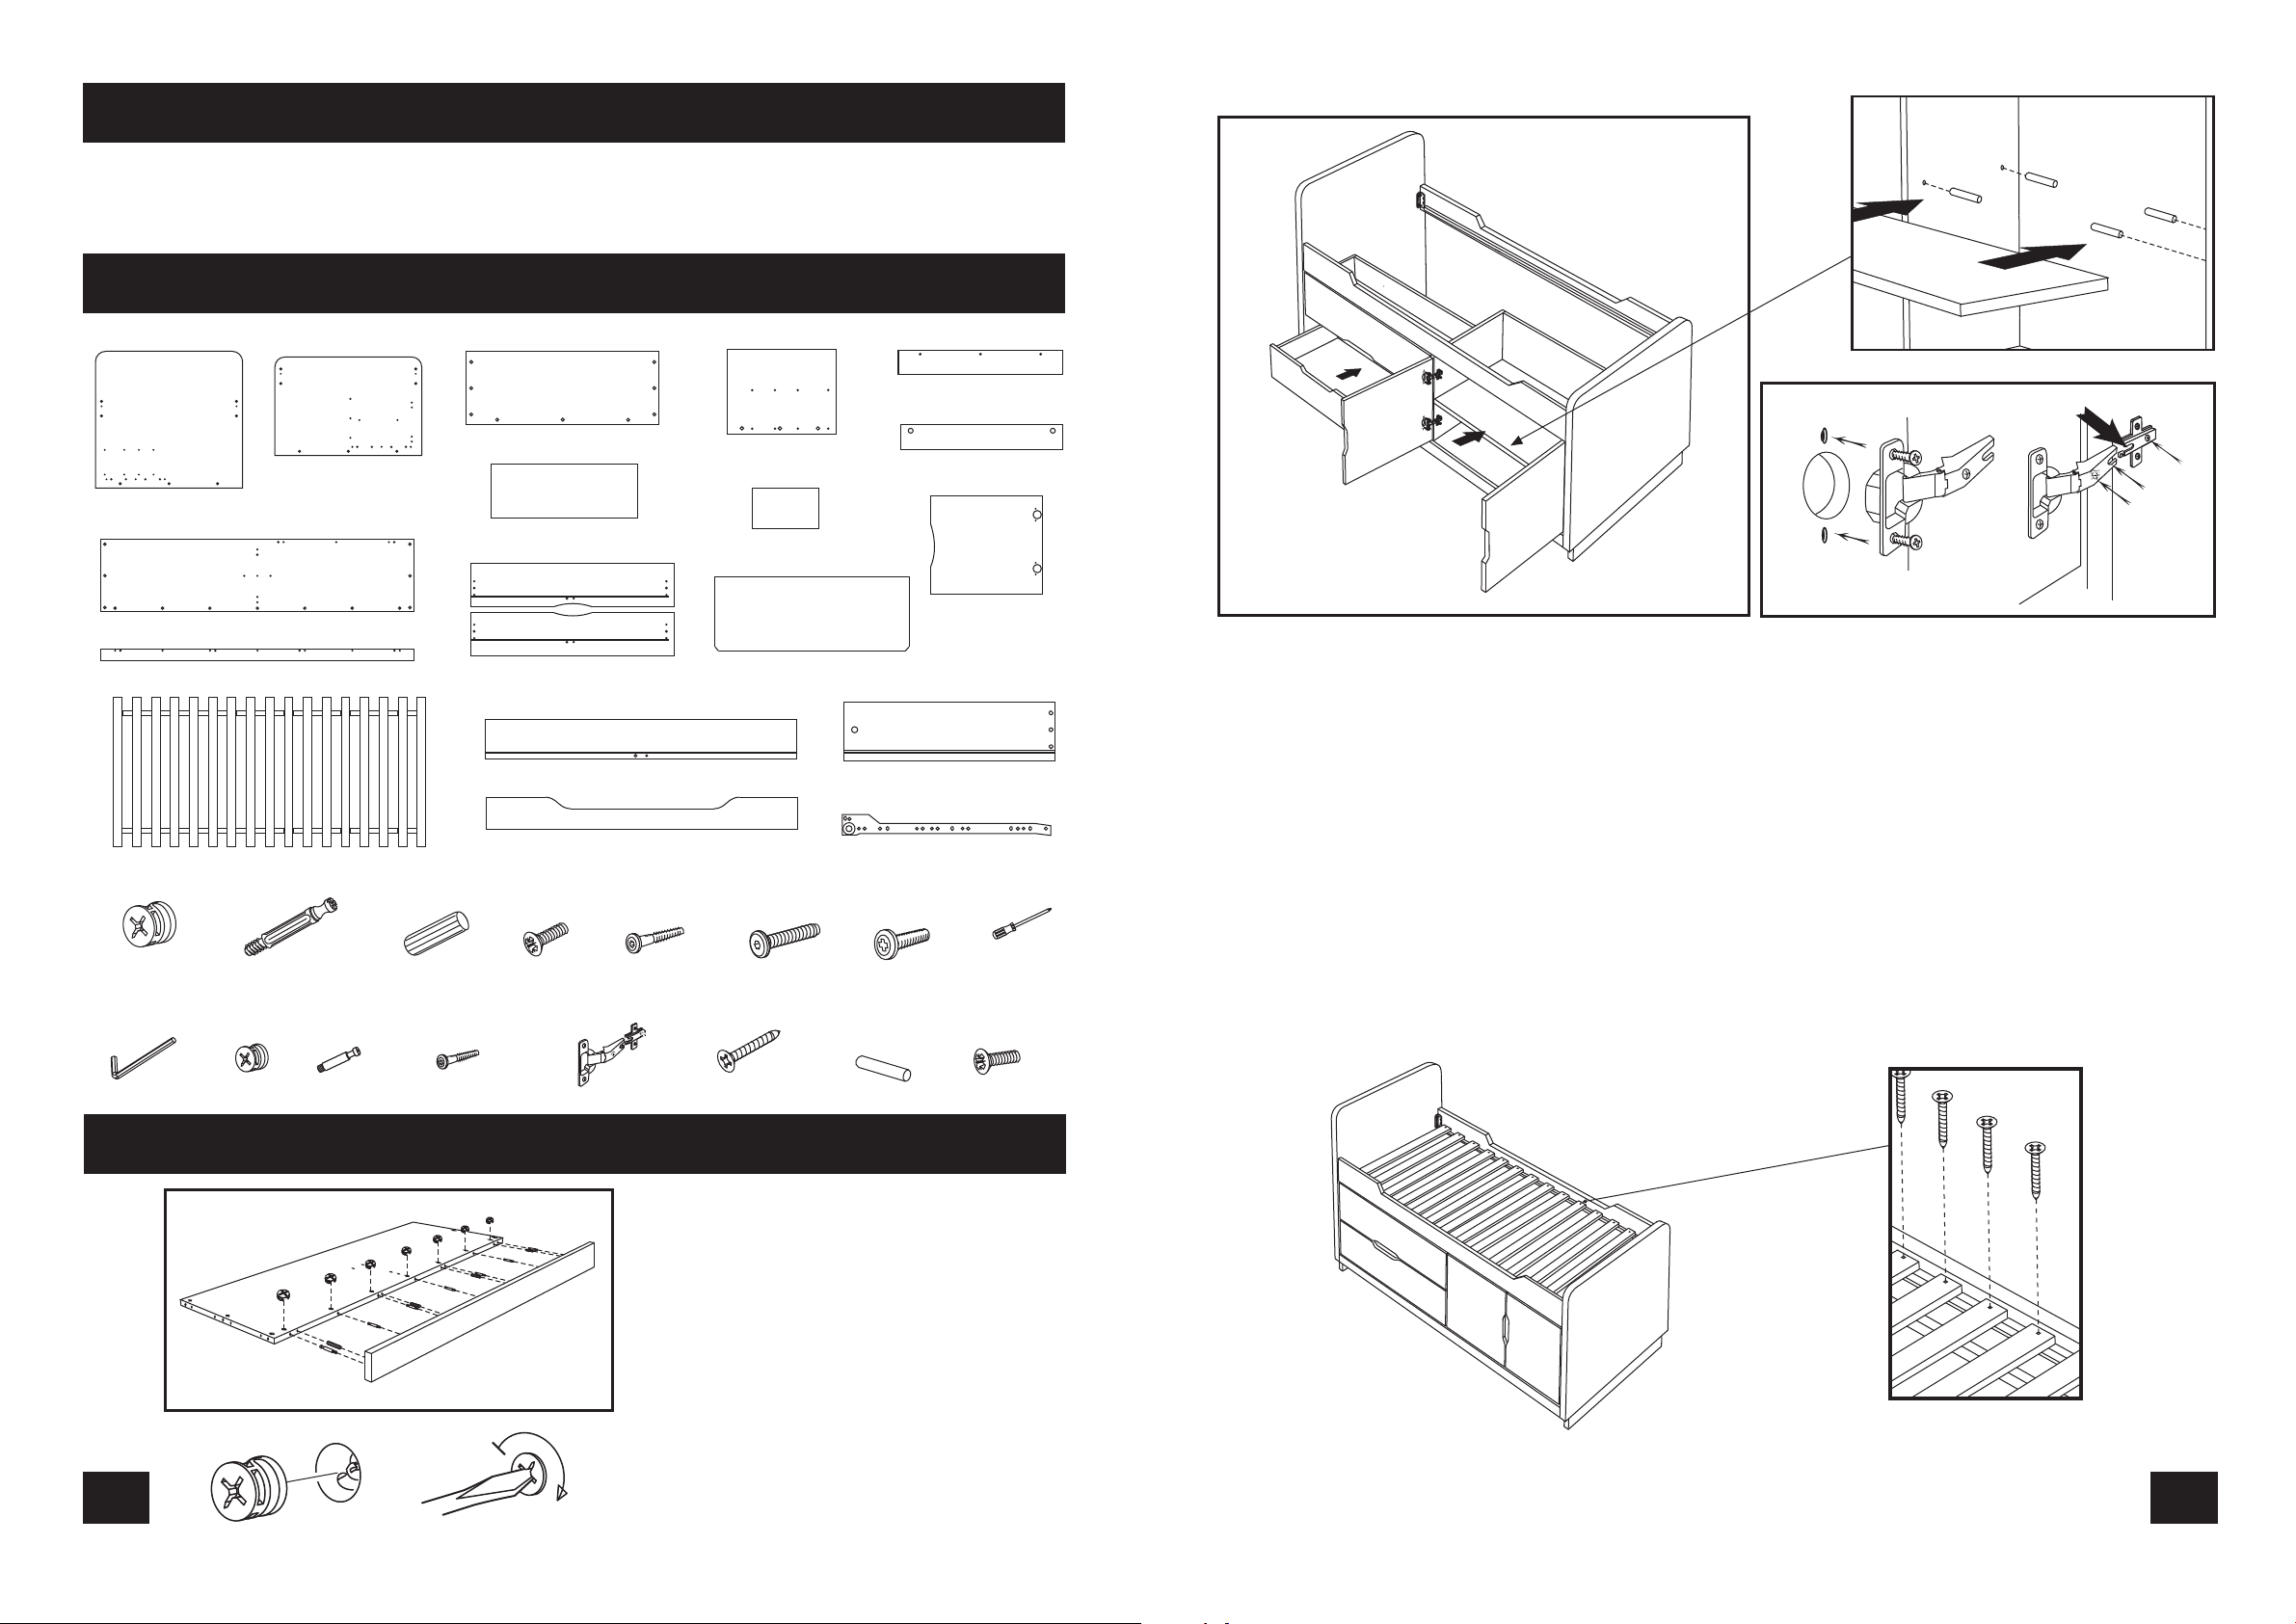
Lay the parts out on the floor and compare to the PARTS CHECK LIST (below). Do not discard any
packaging until you are sure that you have all the parts.
You will need the aid of a second person at certain stages of assembly.
fig 12
fig 12.1
Shelf
parts check list
fig 1.1
Large End
fig 1.6
fig 1.13
fig 1.14
fig 1.19
25 Large Cams
fig
1.27
1 Allen Key
fig 1.2
Small End
Base Panel
Front Plinth
Mattress Base
fig
1.20
25 Large Cam pins
fig
1.28
8 Small
cams
fig
1.29
8 Small
cam pins
fig 1.3
fig 1.7
fig 1.11
fig 1.15
fig 1.17
fig
1.21
36 Large
Dowels
fig
1.30
4 Screw
Bolts (40mm)
Back Board
Shelf
Upper & Lower Drawer Fronts
Drawer Backs
Sides
fig
1.22
16 Short
screws (10mm)
fig
1.23
2 Screw
Bolts (50mm)
fig
1.31
4 Hinge sets
fig 1.4
Middle Panel
fig 1.9
Foot
fig 1.12
Drawer Bases
fig 1.16
fig 1.18
fig
1.24
6 Bolts (35mm)
fig
1.32
34 Small
Mattress Base screws
fig 1.5
fig 1.8
fig 1.10
Drawer Sides
Drawer Runners
fig
1.25
8 Bolts (16mm)
fig
1.33
4 Shelf studs
Plinth Block
Brace
Doors
fig
1.26
You need
a cross-head
screwdriver.
fig
1.34
4 Short
screws (15mm)
CR
fig 12.2
Ensure ‘cut out’ of mounting plate is at the front
1
Door
Insert the 4 shelf studs into the holes on the inside faces of the carcass (see fig 12.1). Once the studs have
been inserted into the correct position, carefully place the shelf into the unit. The shelf may need to be
placed at an angle to ease insertion.
Attach the 4 mounting plates to the inside faces of the Carcass sides in the pre drilled pilot holes (as shown
in fig 12.2).
Please note: The mounting plates should be orientated with the long edge or cut out section at the front.
1. Insert the door hinges into the large holes in the door and secure each with the 2 pre-fitted hinge screws
(see fig 12.2).
2. To attach the door, fit hinge slot “A” under bolt “B” and tighten bolt “B”.
Door adjustment may be made by slackening bolt “B” slightly and either tightening or loosening screw “C”
as appropriate. Finally, re-tighten “B” and the screws holding the hinge mounts to the side panel.
r
r
o
o
o
o
D
D
2
B
A
C
fig 13
assembly
fig 2
1
Attach the base panel to the front plinth by
inserting 7 large cam pins and 4 dowels into
the front plinth as shown.
Also insert 7 large cams into the corresponding
larger holes on the face of the base panel.
Fit the two parts together by inserting the
exposed ends of the large cam pins and
dowels into the corresponding holes on the
front edge of the base panel. Make sure that
the arrows on the cams are pointing towards
the heads of the cam pins. Once all cam pins
and dowels are correctly engaged, tighten the
cams clockwise to secure.
Carefully lift the mattress base onto the bed, webbing faced down, pull the mattress base
up to one end, then spread that slats out evenly. Use the 34 small mattress base screws to
secure the base to the bed through the holes in all slats.
6
 Loading...