

mothercare Cooker and Hob Guard User Manual
Cooker and Hob
Protector de Cocina
Guard
User Guide
IMPORTANT. KEEP FOR
FUTURE REFERENCE.
y Placa
Guía del Usuario
IMPORTANTE, GUARDE PARA
REFERENCIA FUTURA
1 Introduction Introducción
This Cooker and Hob Guard can help prevent children touching hot burners, grasping hot pans and accidental scalding, but is no substitute for adult supervision.
El Protector de Cocina y Placa puede ayudar a evitar
que el niño toque los quemadores calientes, que agarre cazuelas calientes y que accidentalmente se
escalde, pero no es substituto de la supervisión adulta.
Adult assembly is required.
Never leave your child unattended in the kitchen, especially when the cooker is in use
Read the instructions carefully and keep for future reference.
Follow the instructions carefully to ensure that the product
has been correctly assembled and installed.
Discontinue use should the guard become damaged or
broken
When fitted, the guard must point away from the cooker
Lo debe montar un adulto.
Nunca deje a su hijo desatendido en la cocina, especialmente cuando use los quemadores.
Lea las instrucciones detenidamente y guárdelas para referencia futura.
Siga las instrucciones detenidamente comprobando que el
artículo se monta e instala correctamente.
Deje de usarlos si el protector se daña o rompe.
Una vez instalado, el protector debe estar inclinado hacia
fuera de la cocina
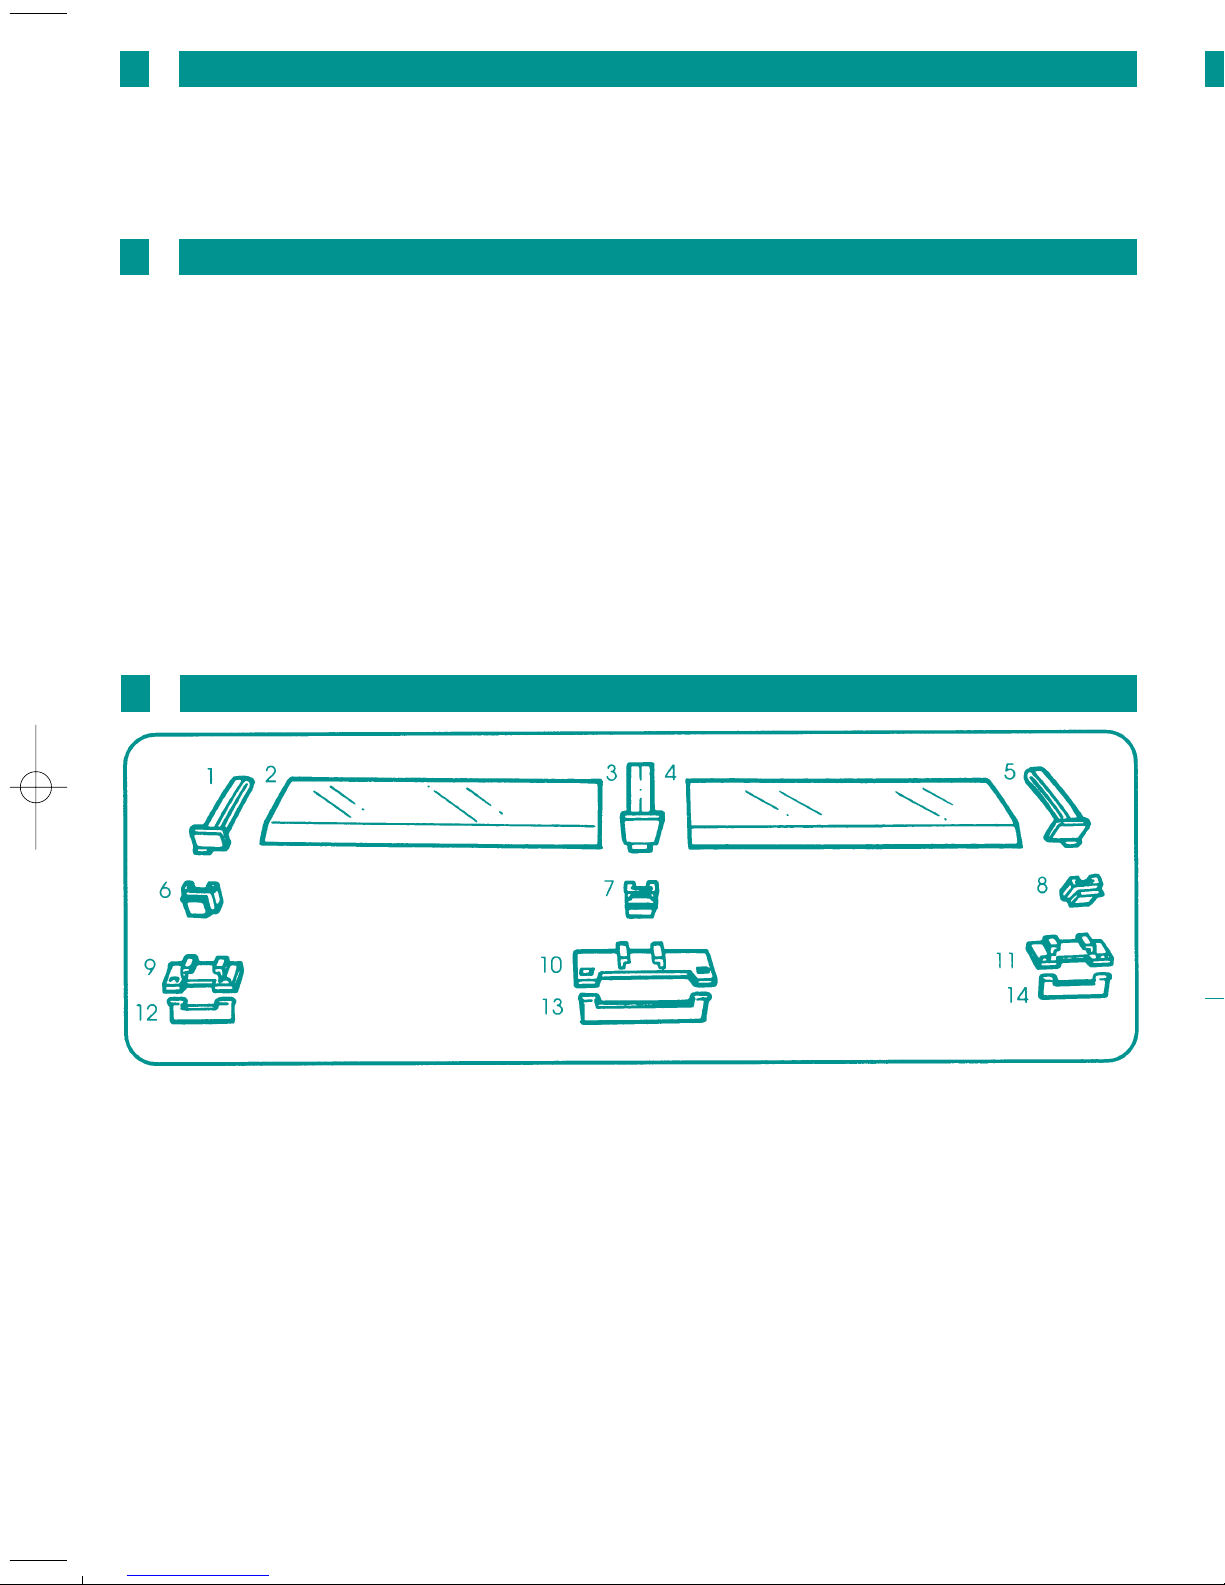
3 Parts check list Lista de piezas
2 Important Notes Notas Importantes
1 Bracket – left end
2 & 4 Shield
3 Bracket – centre
5 Bracket – right end
6,7 & 8 Riser (for use on cookers with "ridged" fronts
only)
9 & 11 Surface mount – end top
10 Surface mount – centre top
12 & 14 Surface mount – end front (for use on cookers
with "square" front surfaces only))
13 Surface mount – centre front (for use on cookers
with "square" front surfaces only)
1 Soporte - extremo izquierdo
2 y 4 protectores
3 Soporte - centro
5 Soporte - extremo derecho
6,7 y 8 Elevador (para usar sólo en cocinas con frentes “con bordes”)
9 y 11 Montura para la superficie - borde encimera
10 Montura para la superficie - centro encimera
12 y 14 Montura para la superficie extremo borde (para
usar en cocinas con bordes “cuadrados”solamente)
13 Montura para la superficie - centro delantero (para usar en cocinas con bordes “cuadrados” solamente
4 Assembly & installation Montaje e Instalación
Before proceeding, please determine
whether your cooker has a "square"
front edge (diagram a) or "ridged".
b) Cooker with "ridged" front (discard
parts 12, 13 and 14)
Refer to parts check list for part num-
bers
NOTE: Only attach when the cooker is off and the entire
front and top surface is completely cool to touch.
Clean attachment area on the front top edge of the cooker.
NOTE:some cleaners leave a film that tape will not stic k to .
For good adhesion, clean first then wipe lightly with solvent
to remove any residue, and dry thoroughly. Check that the
solvent you use will not damage enamel work. Ensure the
cooker is turned off and cool while carrying out this clea-
ning procedure.
Insert par t 12 into part 9 as shown
and part 14 into par t 11.
Peel the paper backing from both
adhesive strips.
Fix the mounts to the cooker top
and front at the same time
Square Fronted Cooker Tops Frente de Cocina Cuadrado
Step 1 Paso 1
 Loading...