

Page 1
Operating Manual
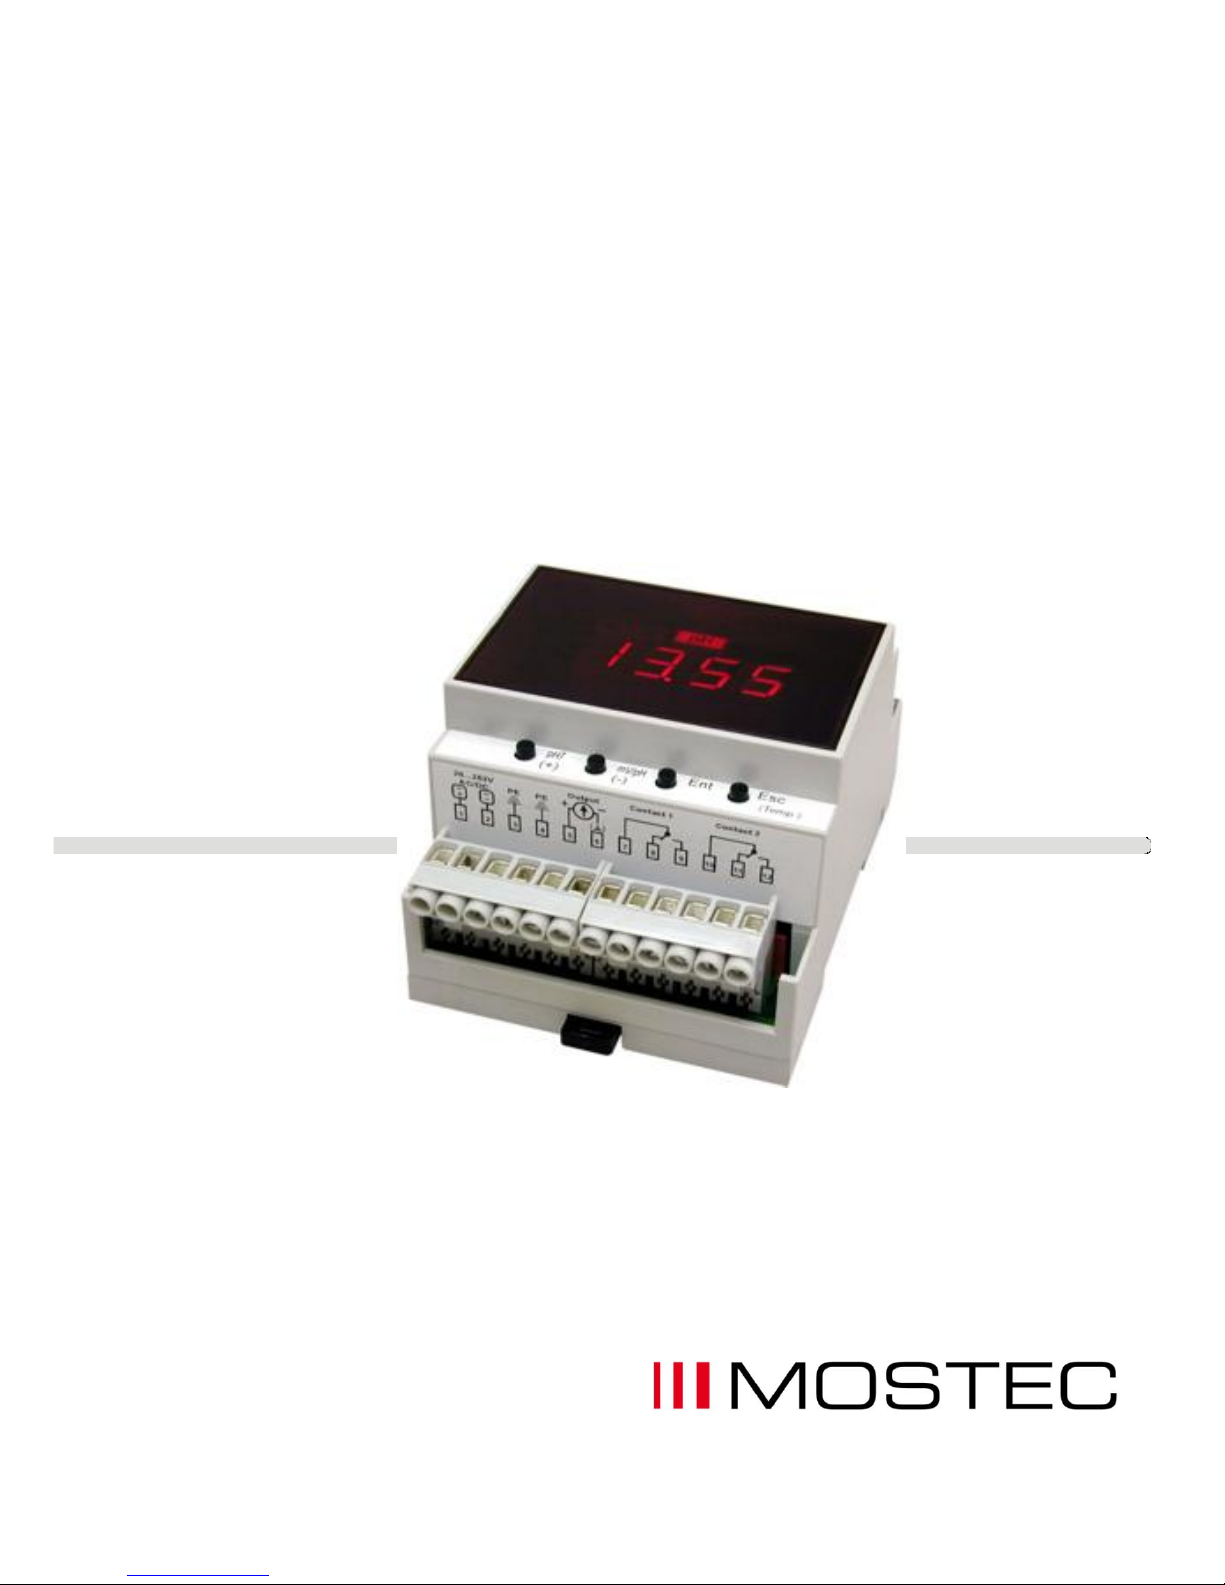
pH/mV Controller
Typ M2120
MOSTEC AG T: +41 61 921 40 90
Elektronische Mess- und Regelsysteme F: +41 61 921 40 83
Lausenerstrasse 13A www.mostec.ch
CH-4410 Liestal, Switzerland [email protected]
Page 2
V1.04 © 11.05.2017 MOSTEC AG, CH-4410 Liestal 2
Warranty
Mostec warrants this product to be free of manufacturing defects for a 2-year period after the original
date of purchase. Within this period, defective products will be repaired free of charge provided that
the defect occurred during normal operation. This warranty does not cover damage to the product
resulting from ordinary usage such as front panel scratches, broken control elements and corrosion,
etc. The customer is responsible for shipping and packing charges for products returned under
warranty to Mostec. Mostec warrants this product beyond the 2-year warranty period for an
additional 2 years in case of long term damages due to improper manufacturing. Such damages as
poorly soldered joints or other assembly problems are also covered by the warranty. Transportation
damages are not covered by the warranty and should be referred to the respective delivery service.
Technical description
The pH/rH(mV)-controller type M2120 has been developed especially for applications which, until
now, could not be monitored and controlled automatically due to cost.
The two-point controller is a basically simple de-vice, consisting of an electrometer amplifier and two
floating change-over contacts which are electronically adjustable over the entire measuring range.
The instrument is used as a simple indicator by connecting electrodes. It has automatic temperature
compensation with a Pt-100 platinum sensor and automatic pH-electrode calibration.
The galvanically isolated, programmable signal current output is connected to a remote display,
recorder, computer, or any other desirable data sampling device. By using the alarm contacts, the
controller activates dosing valves, pumps, alarm devices, etc. The switching relays withstands
currents up to 1A. Power supply: Universal supply 20 to 253VAC/DC.
Typical applications for the M2120 controller:
-Simple monitoring with alarm annunciation when the preset threshold settings are exceeded.
-Non-critical controlling in water purification and waste water systems.
-Controller for water conditioning plants or swimming pools.
-Routine monitoring for environmental and pollution control etc.
The choice of probe electrodes for the controllers is not critical, but for each application the
appropriate electrode must be chosen. Mostec is willing to evaluate and discuss any special
requirements or customizing, independent of the amount of items to be purchased. Please contact
us for any additional information or custom specific modification of the instruments.
Page 3

V1.04 © 11.05.2017 MOSTEC AG, CH-4410 Liestal 3
Index: Page
A Front panel controls 4
B Change pH/mV of the instrument 4
C Select temperature mode with/without Pt-100 sensor 4
D Calibrate the instrument 4
E Adjusting the limit contacts 5
F Change current output 5
G Keyboard lock 5
H Programming Software 6
I General references for using the programming software 6
J Technical data 7
Page 4
V1.04 © 11.05.2017 MOSTEC AG, CH-4410 Liestal 4
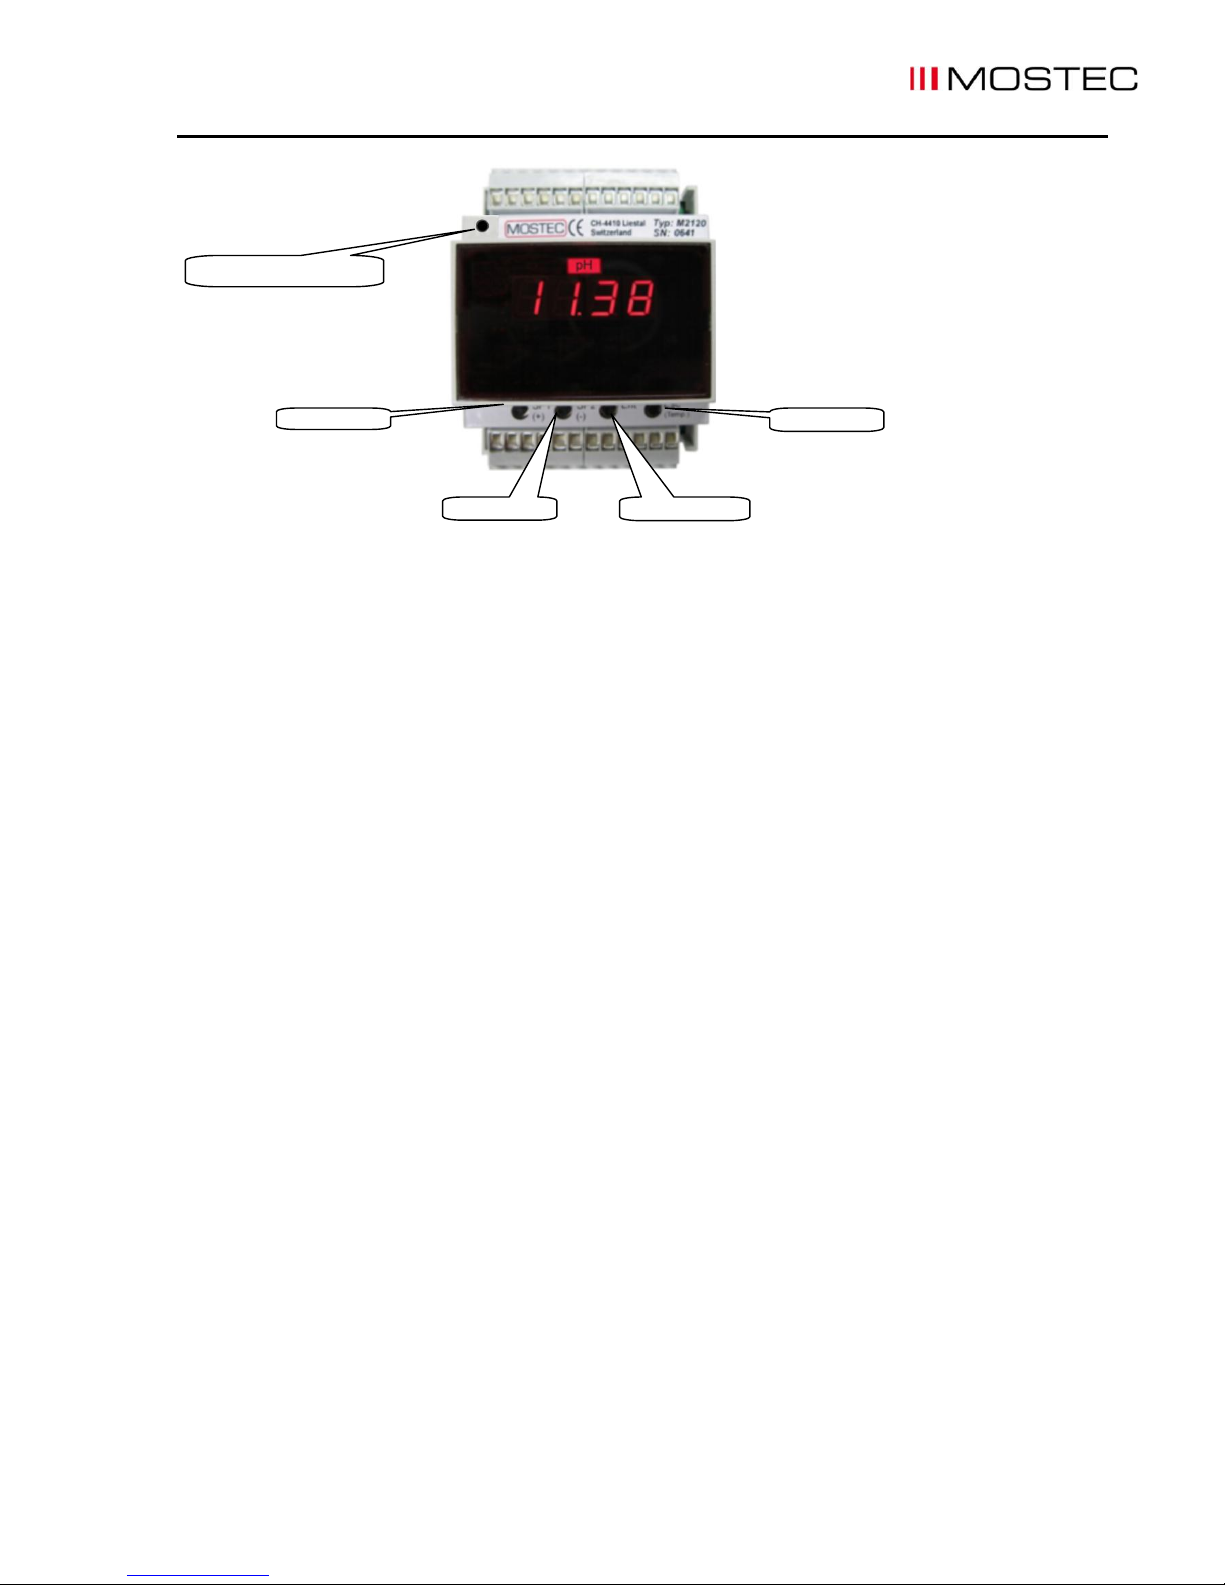
A. Font panel controls
B. Change pH/mV of the instrument
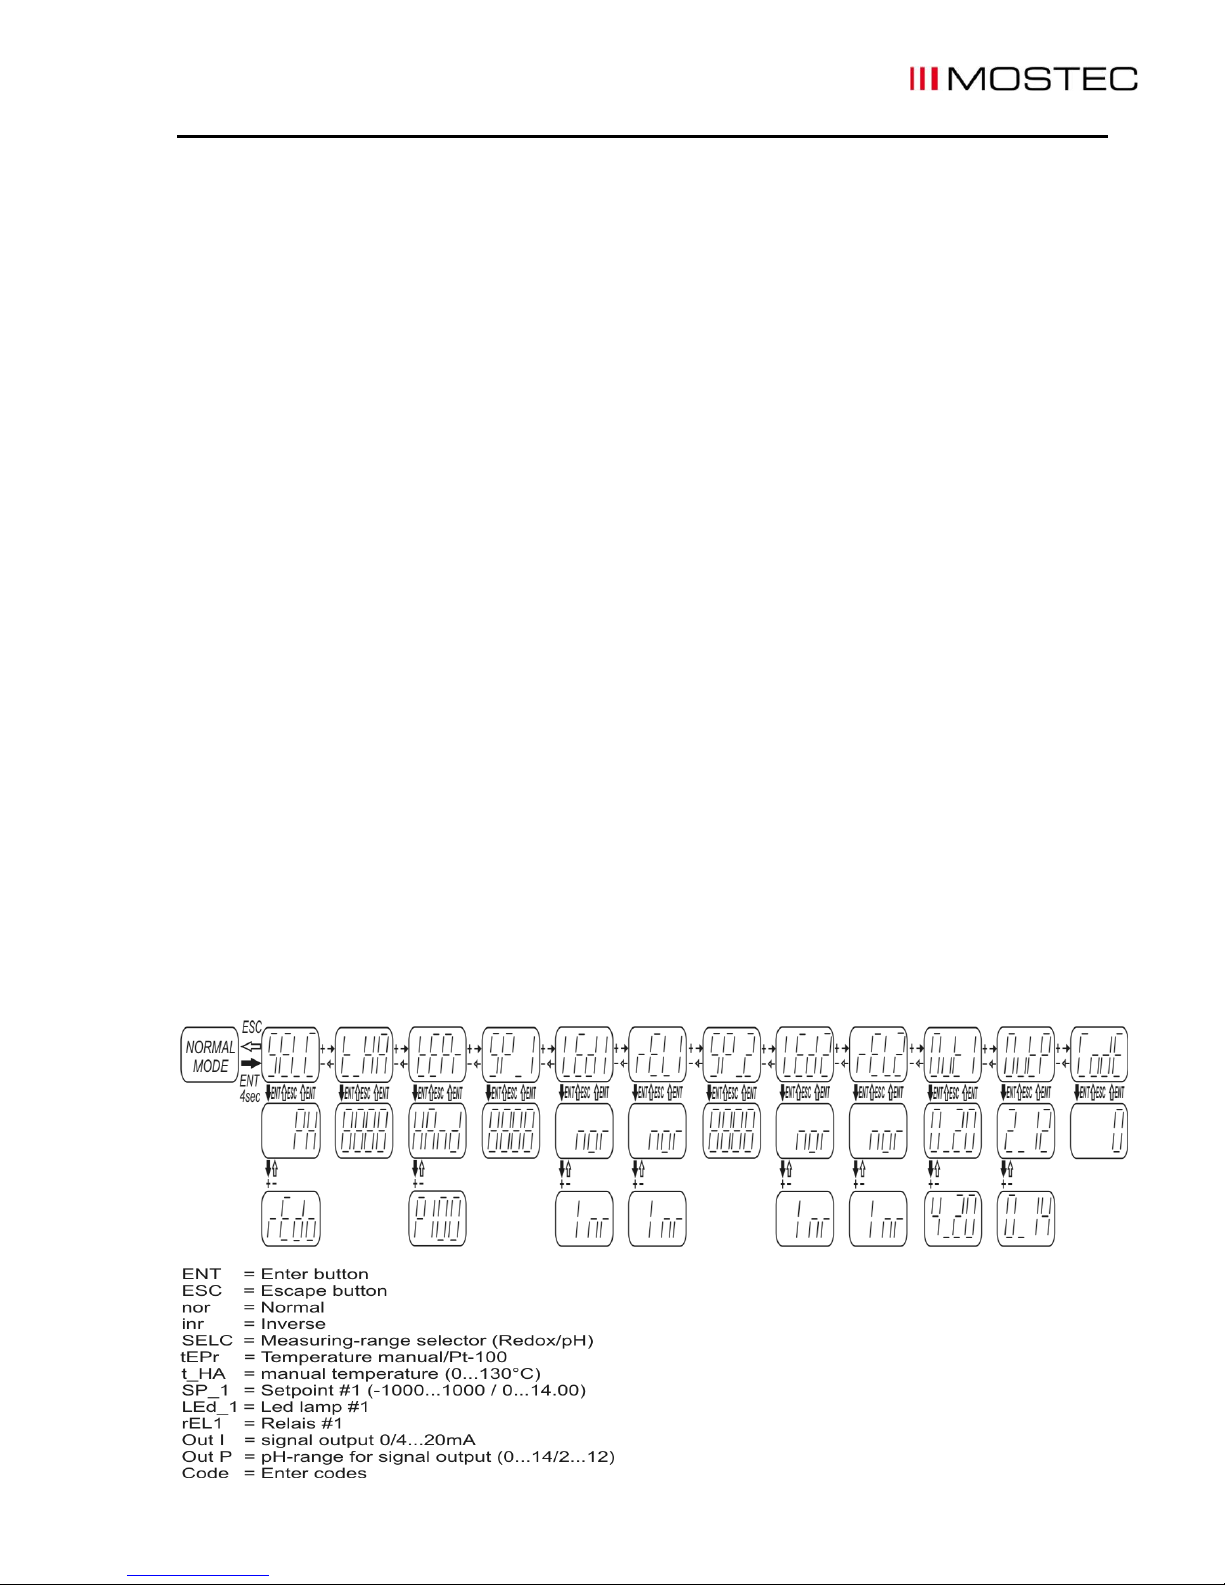
1. Push and hold the button <ENTER> for 5 seconds.
The display will show up the program menu.
2. Change to menu SELEC, by the button <+> or <->, then press <ENTER>.
The display shows the actual value.
3. Change to pH or rEdo (mV) by the button <+> or <->, then press <ENTER>.
4. Press button <ESC>
The display shows the actual value.
C. Select temperature mode with/without Pt-100 sensor
1. Push and hold the button <ENTER> for 5 seconds.
The display will show up the program menu.
2. Change to menu tEPr, by the button <+> or <->, then press <ENTER>.
The display shows the actual value.
3. Change to P100 (temperature compensation with Pt-100 sensor) or HAnd (temperature
compensation with Pt-100 sensor) by the button <+> or <->, then press <ENTER>.
4. If HAnd is selected, the temperature must be set.
Change to menu t_HA, by the button <+> or <->, then press <ENTER>.
5. Change the value for the temperature by the button <+> or <->, then press <ENTER>.
6. Press button <ESC>
The display shows the actual value.
D. Calibrate the instrument
Select the correct temperature mode (see C, page 4)
1. Immerse the pH probe into buffer with pH-value=7.
Wait until the indicated value is stable.
2. Press and hold the button pH7 (ca. 1 sec).
the display flashes with the value 7.00
3. If necessary, the suggested value can be changed with the button <+> and <->.
4. Press button pH 7.0 to confirm the value.
the adjusted value is stored.
5. Immerse the pH probe into buffer with pH value 4, 9 or others.
Wait until the indicated value is stable.
6. Press and hold the button mV/pH (ca. 1 sec).
the display flashes with the value, e.g. 4.00
7. If necessary, the suggested value can be changed with the button <+> and <->.
8. Press button pH/mV to confirm the value.
The adjusted value is stored.
progamming adapter
<+> / pH7
<-> / pH/mV
ESC /Temp
ENTER / Setup
Page 5

V1.04 © 11.05.2017 MOSTEC AG, CH-4410 Liestal 5
E. Adjusting the limit contacts
Notice: The hysteresis can only adjusted by programming software Mpro (see H and I, page 6)
1. Push and hold the button <ENTER> for 5 seconds.
The display will show up the program menu.
2. Change to menu SP_1 for limit contact #1 or SP_2 for limit contact #2,
by the button <+> or <->, then press <ENTER>.
The display shows the actual value of the limit contact.
3. Change the value for the limit contact by the button <+> or <->, then press <ENTER>.
4. Change to menu HST_1 for the hysteresis of the limit contact #1 or HST_2 for the hysteresis of the
limit contact #2, by the button <+> or <->, then press <ENTER>.
The display shows the actual value of the hysteresis.
5. Change the value for the hysteresis by the button <+> or <->, then press <ENTER>.
6. Change to menu LEd_1 for limit contact #1 or LEd_2 for limit contact #2,
by the button <+> or <->, then press <ENTER>.
7. Change the lamp status by the button <+> or <-> , then press <ENTER>.
"nor": LED lamp ON, when input > setpoint
"Inr": LED lamp ON, when input < setpoint
8. Change to menu rEL_1 for limit contact #1 or rEL_2 for limit contact #2,
by the button <+> or <->, then press <ENTER>.
9. Change relay operating mode by the button <+> or <-> , then press <ENTER>.
"nor": Relay ON, when input > setpoint (normally open contact closed)
"Inr": Relay ON, when input < setpoint (normally open contact open)
10. Press button <ESC>
The display shows the actual value.
F. Change current output
1. Push and hold the button <ENTER> for 5 seconds.
The display will show up the program menu.
2. Change to menu OutI, by the button <+> or <->, then press <ENTER>.
The display shows the actual value.
3. Change the value to 0_20 or 4_20 (for 4…20mA) by the button <+> or <->, then press <ENTER>.
4. Change to menu OutP, by the button <+> or <->, then press <ENTER>.
The display shows the actual value.
5. Change the value to 2_12 or 0_14 (for 0…14pH) by the button <+> or <->, then press <ENTER>.
6. Press button <ESC>
The display shows the actual value.
G. Keyboard lock
The values of the user menu can be protected from unintended access using an access code. After activating
the access code, menu values can be observed but no longer modified. To modify setpoints and other
parameters, the access code has to be set to the value 0000. If the code has a value different from 0000,
writing to the user menu is suppressed. Did you forget your code? Call us we have a special unlock code
available.
Set the access code:
1. Press and hold the button <ENTER> for 5 seconds.
The display show up the program menu.
2. Now navigate to the Code menu item with the button <->, then press <ENTER>.
a) A code has already been entered: The display flashes between Code und 0. Enter now the valid
access code with the buttons <+> and <-> and confirm with the <ENTER> button. If the code is wrong,
the instrument quits the user menu (in case you do not know your code any more, call MOSTEC we have
a unlock code). If the code is correct, it can be modified with the button <+> and <->, or in order to make
changes to the user menu, set to 0000.
b) No code has been entered: The display shows 0000. A code can be entered with the button <+>
and <-> then confirm with the <ENTER> button. If you do not need the user menu protection, leave the
value 0000 unchanged and quit the code menu with the <ESC> button.
Page 6
V1.04 © 11.05.2017 MOSTEC AG, CH-4410 Liestal 6
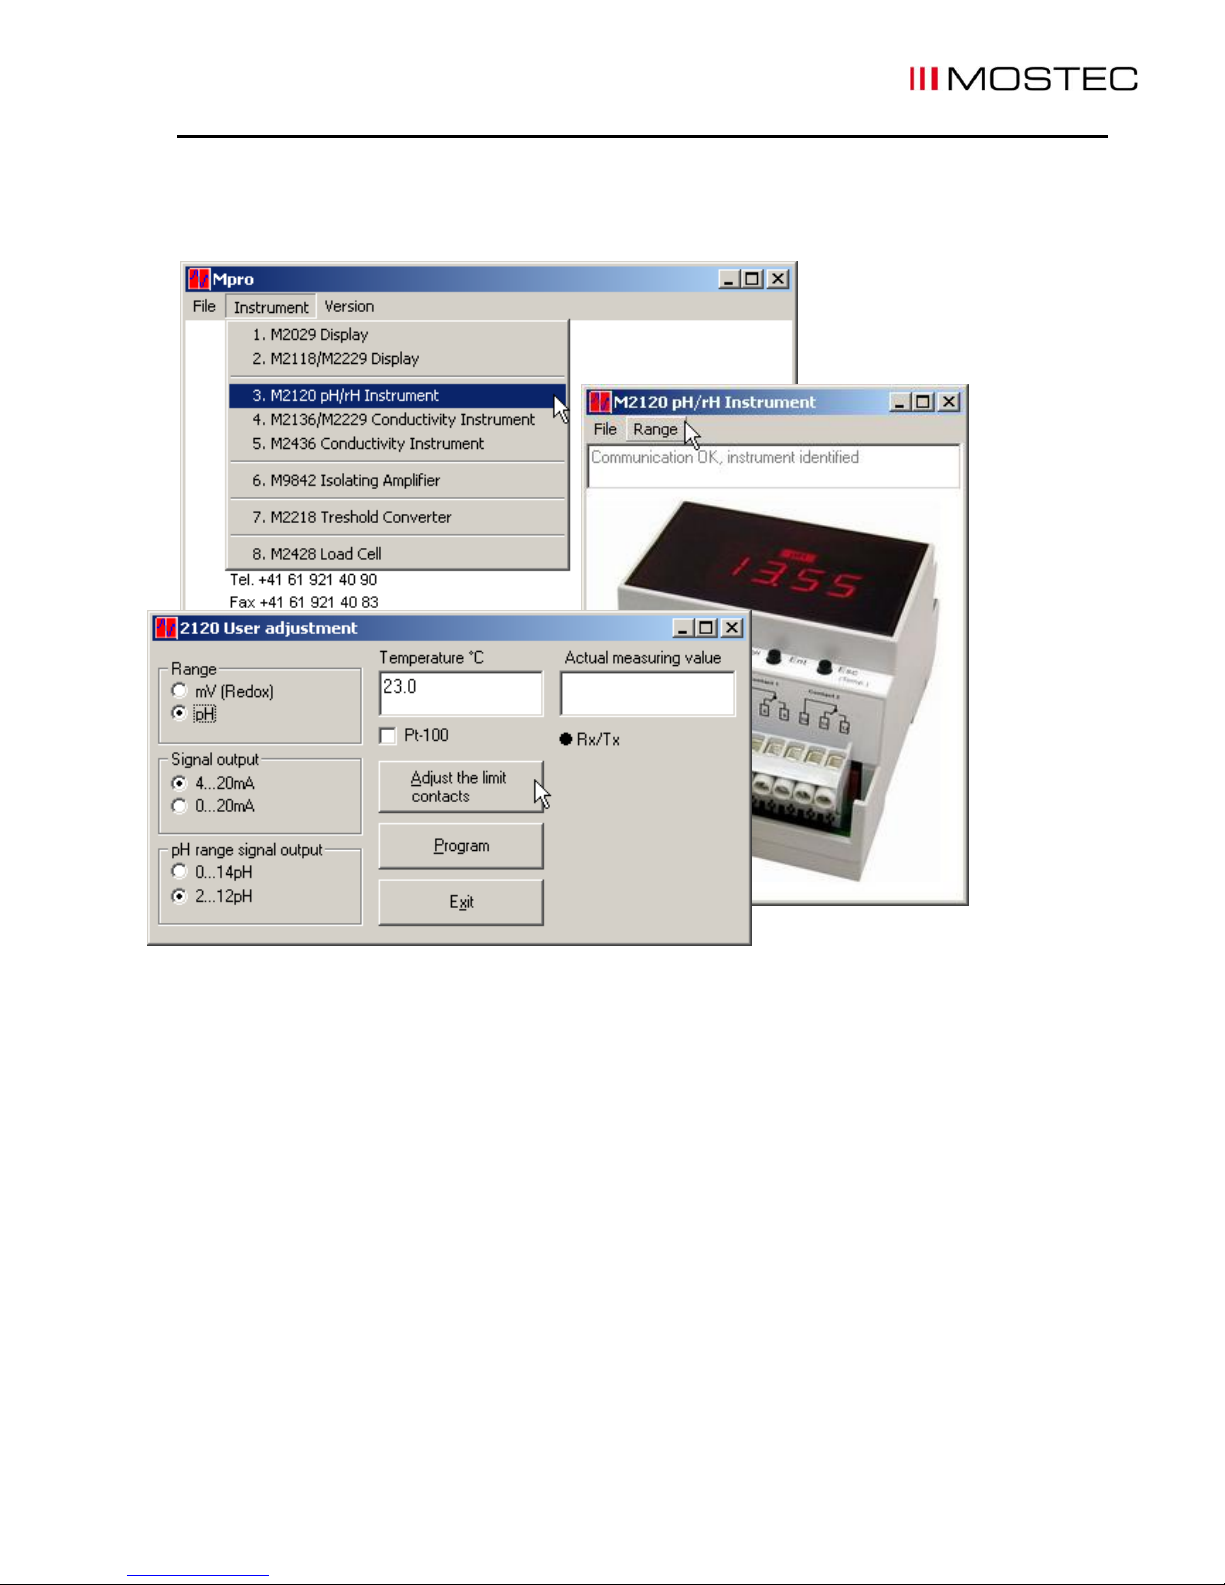
H. Programming software
All settings of the instrument can be adjusted with the programming software Mpro (see I, page 6)
I. General references for using the programming software
- The newest software may be downloaded any time and free of change at www.mostec.ch.
- Connect the M2118 to the power supply for programming
- Be sure that the connected COM-port isn`t used by any other peripherial device.
- If the PC or the corresponding COM-port is "grounded" by the power line cable or by other
cabeling, ground loops may interfere with the measuring signal. The use of a computer with
battery power is recommended to avoid such problems.
- Contact us if there are problems or questions concerning the software.
Non-liability
The company Mostec AG developed and tested the software "Mpro" with largest care. Mostec is not
responsible for any damages whatsoever, including loss of information, interruption of business,
personal injury and/or any damage or consequential damage without limitation, incurred before,
during or after the use of our products.
<B>
Page 7
V1.04 © 11.05.2017 MOSTEC AG, CH-4410 Liestal 7
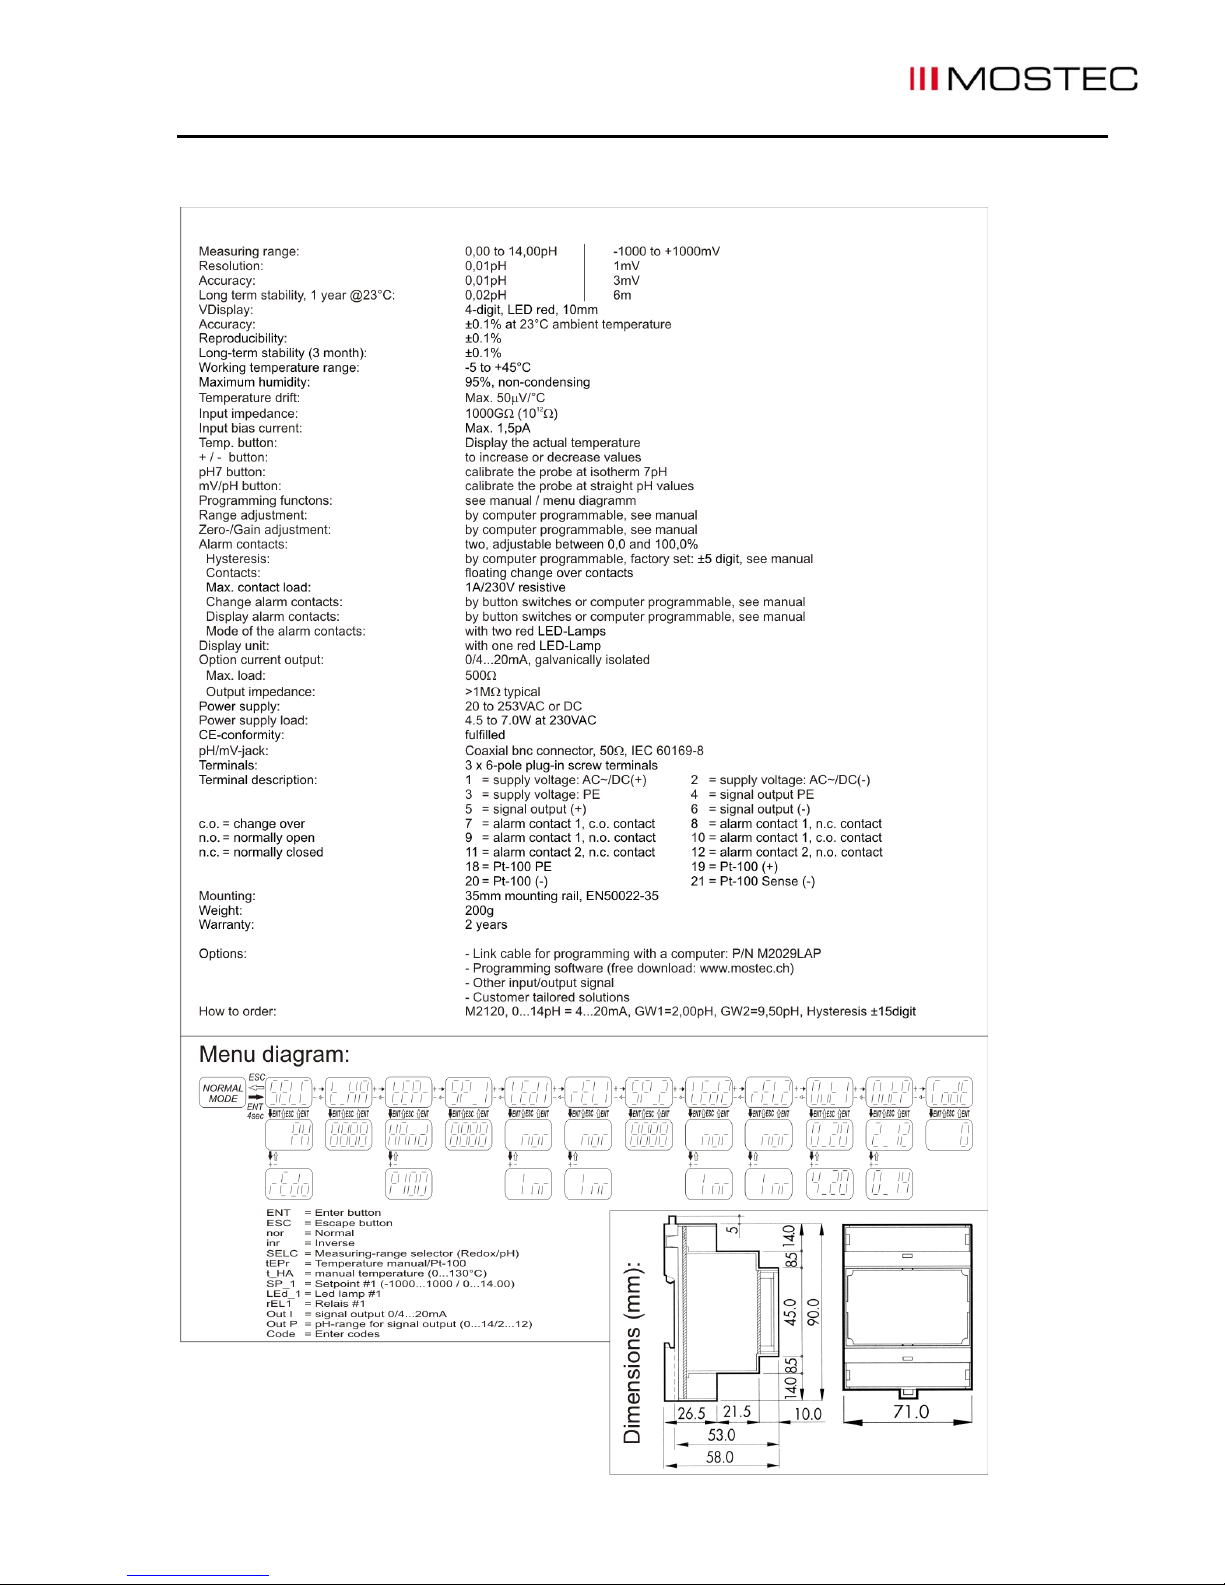
J. Technical Data
 Loading...