

MOSKO MOTO Nomad Installation Manual
Nomad Tank Bag Installation
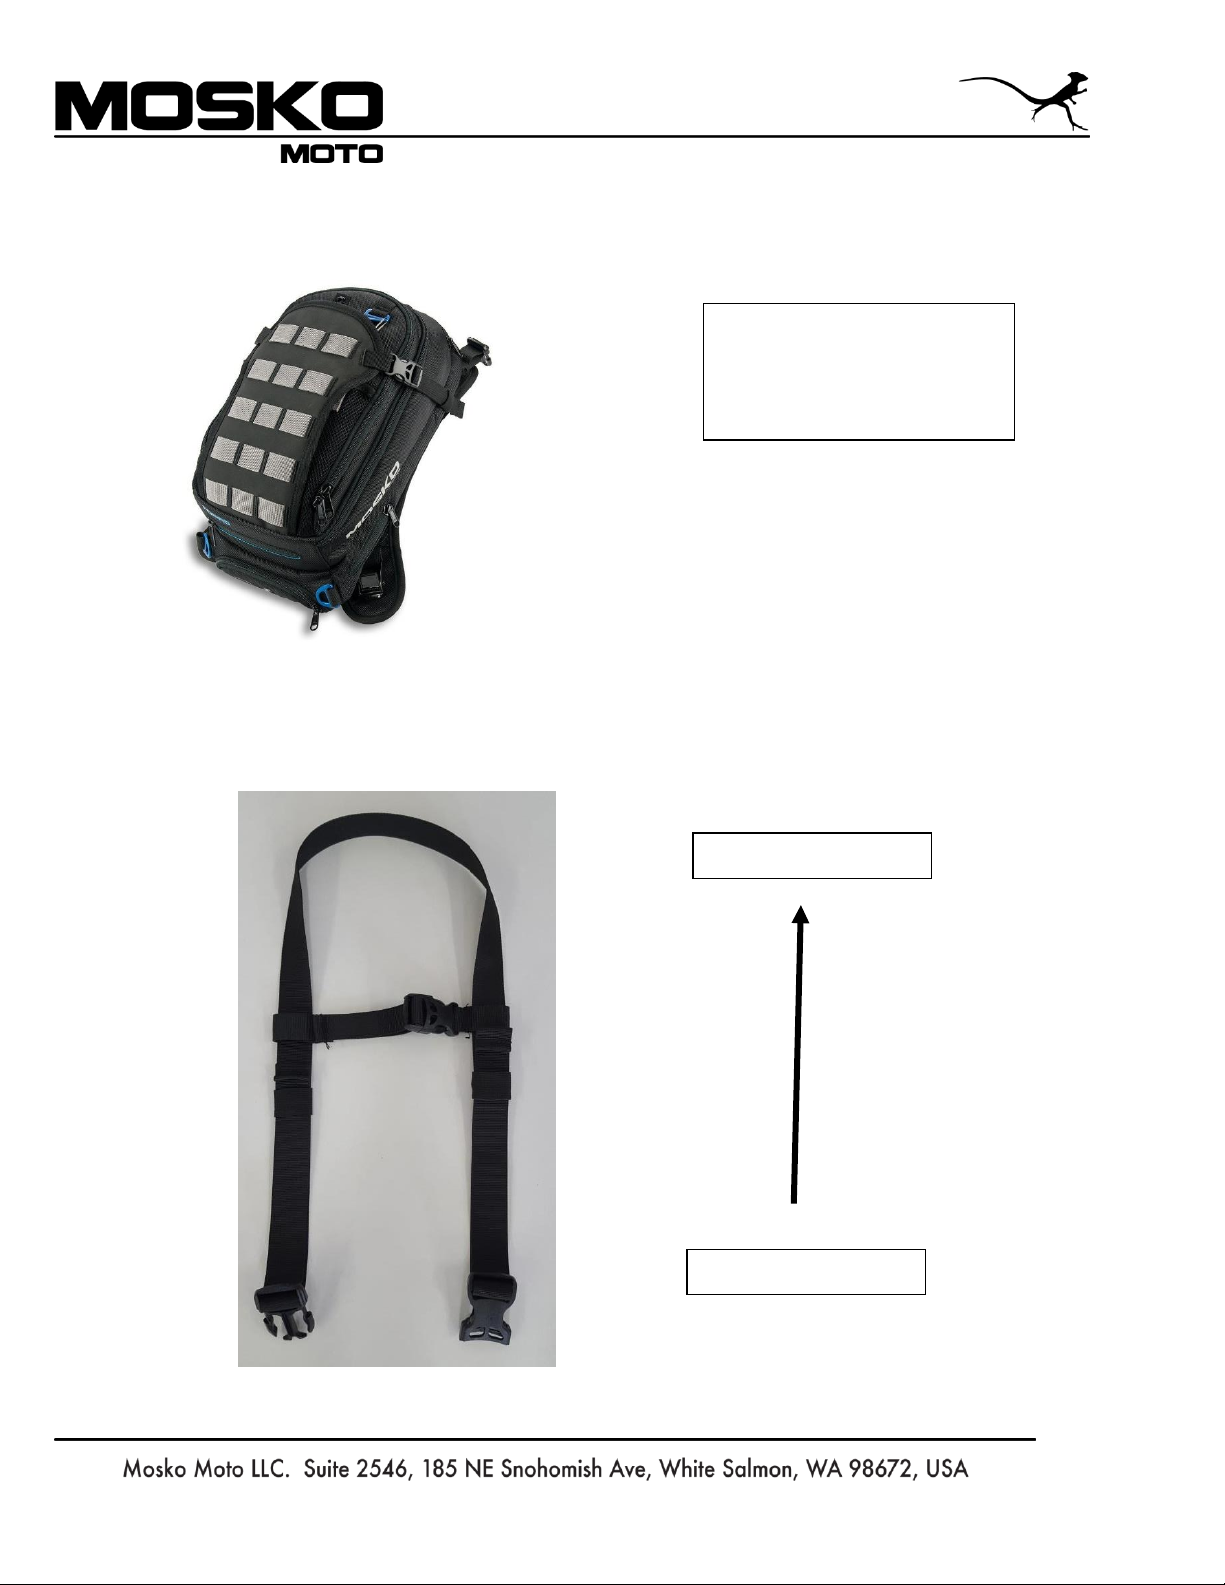
1. Remove the front harness (pictured below) from the tank bag. The harness “loop” will go
around the motorcycle steering column with the open buckles facing aft.
Front of motorcycle
Rear of motorcycle
Tools Required:
- Side cutting pliers
- Scissors
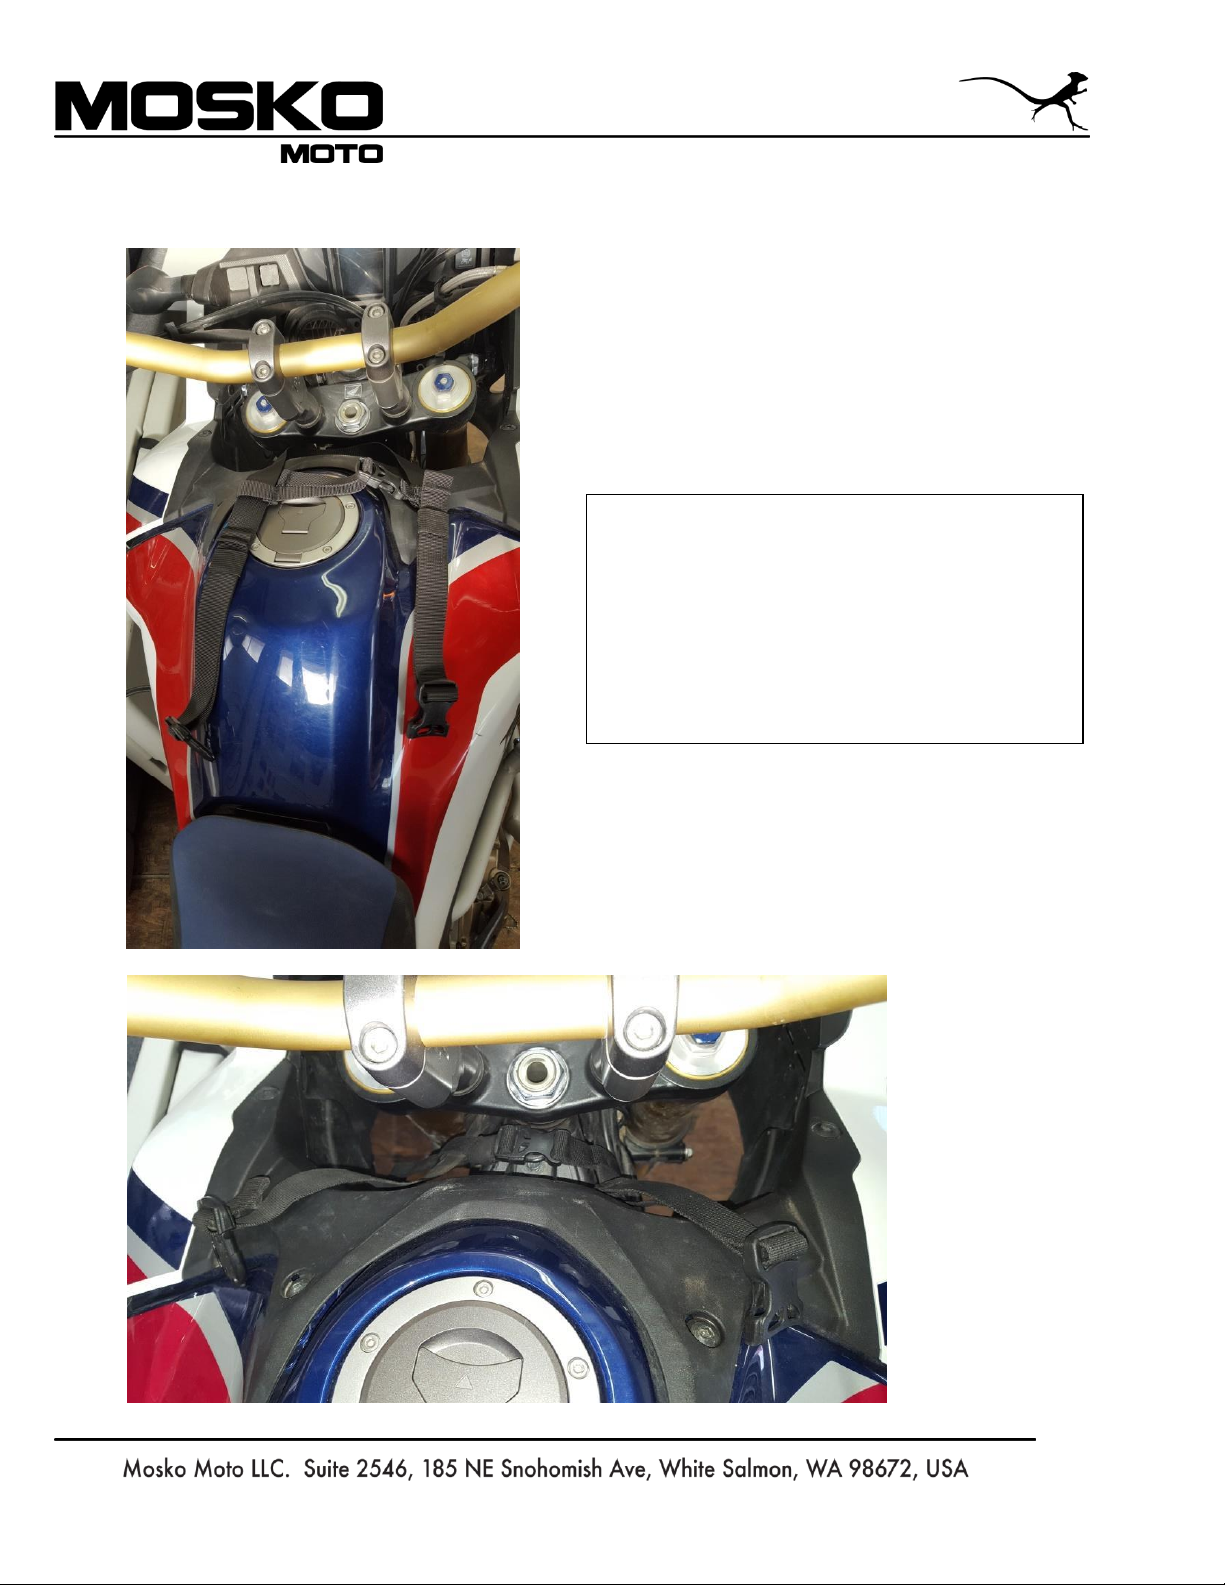
2. Route the harness around the steering column or head tube of the motorcycle.
Note: When routing the harness be sure
that it does not pinch any wires, cables or
hoses. Check that the harness does not
impede the steering by turning the handles
bars from one side to the other. Watch to
make sure that the harness does not pinch
any wires, cables or hoses as the handle
bars are turned.

3. With the straps loosened, attach the tank bag to the front harness. Tighten the straps on both
sides of the front harness and/or the front straps on the tank bag to achieve the desired
position on the tank. It is preferable to position the tank bag as far forward on the tank as
possible. On some applications the front of the tank bag may contact the handlebars which is
okay so long as it does not interfere with the motorcycle’s controls. Tighten the center strap
on the front harness.
Note: Once the front harness is adjusted for the first time it does not need to be adjusted for
subsequent rides even if the tank bag has been removed.

4. Install the rear mounting straps on the motorcycle. Once the tank bag is in the desired
position on the tank pick a mount point on the lower frame that is close to where the rear
straps fall. Route a zip tie around the mount point being sure not to pinch any wires, cables or
hoses. Be sure the zip tie is not in contact with the exhaust. Route the zip tie through the strap
end as shown.
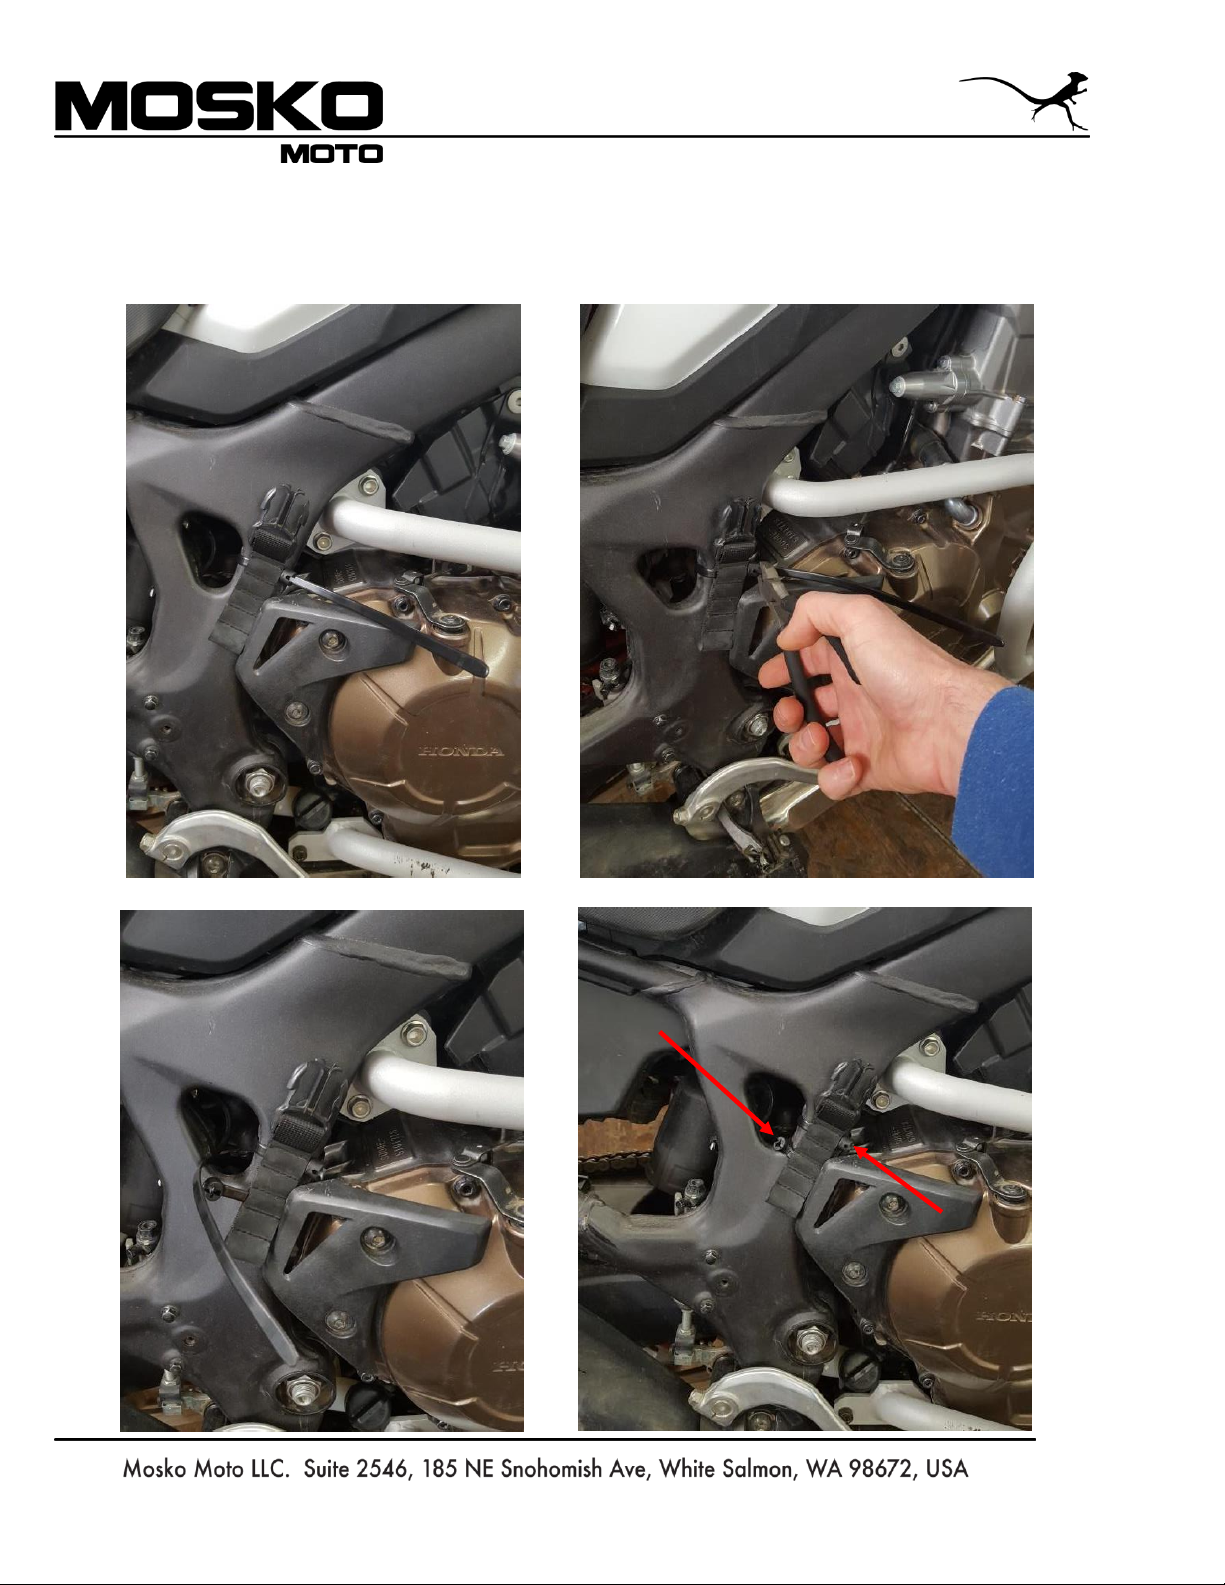
5. Tighten the zip tie and cut off the excess length as shown below. Install a second zip tie
through a different loop on the strap end as shown. Repeat this process for the other side
of the motorcycle.
 Loading...