

Assembly Instructions
& User’s Manual
6 Piece Folding Dining Set
155507
Please keep this instruction manual for future reference
Customer Service: (888) 922-2336
7:00 am to 12:00 am CST (daily)
Live Chat at: www.acade m y.com
Email: customerserv ice@ac a demy.com
(877) 579-1550 8:30am to 5:30pm Monday thru Friday , EST
----------------------OR--------------------
(Made in China)

Table of Contents
Warnings………………………………………………………………..…1
Tools, Parts and Hardware……………………………………………...2
Assembly Instructions………………………………………………….3-8
Care and Maintenance……………………………………………...…. 9
Warranty Information………………………………………..... ........ .....10
Warnings
• Weight Limit Chair: 250Lb
• Weight Limit Table: 100 Lb
• Ensure that all parts are securely fastened and that all nuts and
bolts are fully tightened before use.
Note: Before beginning assembly of product, make sure all parts
are present. Compare parts with package content list and contents
on next page. If any part is missing or damaged do not attempt to
assemble the unit. Contact customer service for replacement parts.
Sku: 113386579
Style#: 155507
Page 1 of 9
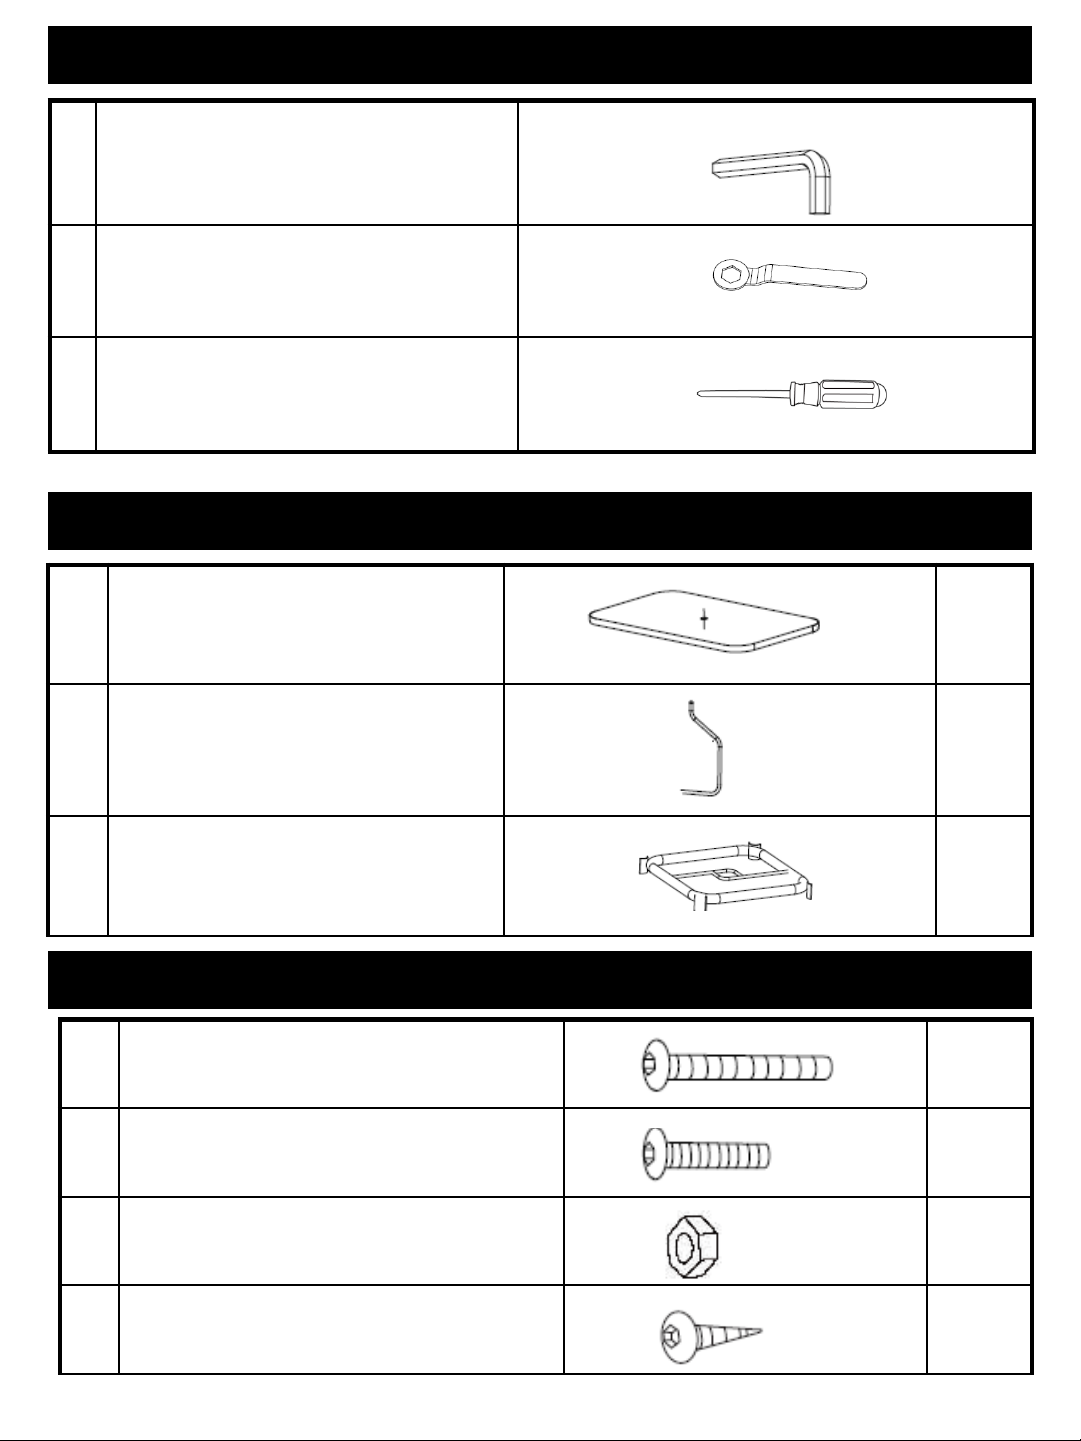
Tools Required
1 Allen Wrench ( included)
2 Wrench ( included)
3 Phillips Screwdriver
( not included)
Parts List
A Table Top 1
B Table Leg 4
C Center Ring 1
Hardware
D M 6x50 Bolt 4
E M6x35 Bolt 4
F Nut 8
H Screw 4
Page 2 of 9

Assembly Instructions
Step 1:
Place the Table Top (A) on a soft and non-abrasive
surface, remove all packing mater ial. Attach table
Legs (B) into each cor ner br ac ket on the Table Top
(A). Attac h al l t he l eg s w i th scr ews (H) using a
philips screwdr iver (3).
Step 2:
Attach the Center Ring (C) to the legs with M6 x 50
Bolts (D) and Nut (F).
Further secure the tabl e with Bolts (E) and Nut (F).
Tighten w i th Allen Wrench ( 1) and Wrench (2) after
all the bolts are in posi ti on and hand tightened ,
then turn the table upr i g ht.
Page 3 of 9

Assembly Instructions
Step 3:
Turn the table uprig ht.
Step 4:
Pull out the chair and r emove the packaging
Page 4 of 9

Assembly Instructions
Step 5:
open the chair according to the rig ht figur e.
Step 6:
Pull the back till fully open
Page 5 of 9

Assembly Instructions
Step 7:
Pull out the umbrella and remove the packag ing .
Hold the upper umbrella pole and insert into the
bottom pole.
Lock the pole according to the figure on the right.
Step 8:
Hand open the umbrella by pushing upwards until
the button locks in pl ace.
Page 6 of 9

Assembly Instructions
Step 9:
Umbrella setup finish.
Step 10:
Press the button and pul l the umbr ell a downwards,
and pull the lock upwards accordi ng to the right
figure.
Page 7 of 9

Assembly Instructions
Step 11:
Pull the up pole out of the bottom pole.
Care and Maintenance
This patio set should be cleaned on a regular basis to promote
safe use and prolonged product life.
Wipe the frame with a smooth damp cloth and air dry.
Do not use abrasive cleaners as they may damage or scratch the
surface paint. Do not leave this product in severe weather
conditions for extended periods. For extended life, the patio set
should be stored indoors or covered during prolonged periods of
non-use. Storing in a dry location will help prevent rust.
Page 8 of 9

Warranty Information
This product has been manufactured under t he highest
standards of quality and workmanship. We warrant to the
original consumer purchaser that all aspects of this product will
be free of defects in mat erial and workmanship for one year
from the date of purchase. A replacement for any defective
part will be supplied free of charge for installation by the
consumer. Defects or damage caused by the use of other than
genuine parts are not c ov ered by this warranty. This warranty
shall be effective from the date of purchase as shown i n the
purchaser receipt.
This warranty is valid for the original consumer purchaser only
and excludes industrial , commercial or business use of the
product, product damage due to shipment or failure which
results from alteration, product abuse, or product misuse,
whether performed by a contractor , servic e company , or
consumer. We will not be responsible for labor charges and/or
damage incurred in installation, repai r or replacem ent nor for
incidental or consequent i al damage.
Page 9 of 9
 Loading...