

Page 1

Mortch International Ltd
NATTY
User’s Manual
Page 2

Preface
Mortch International Ltd
http://www.mortch.com
Thank you very much for purchasing our scooters. And welcome to join the driver’s line of MORTCH motorcycle.
With its extraordinary advantages of excellent quality, smart appearance and shape of legerity, our product will surely
bring the utmost pleasure and convenience to your life.
This manual gives you information about the general structure, function, operation and maintenance methods of
NATTY. In order to enable your beloved motorcycle to render a best performance and a longer life, please read this
manual carefully, pay particular attention to the running-in part in it and follow all the operating instruction. It is of great
importance to make your riding safer and more comfortable. Experienced staffs in our sale agency and the
maintenance shop will also offer excellent service for you.
● Please take an initial examination of your motorcycle after the first 300km running in our designated maintenance
shop, and take regular examination in every 1000km thereafter.
● All the direction, illustration and specification included in this manual are based on the latest product information.
Please be noted that they may be different from the actual status of the motorcycle if there is new revision on its
specification, and no further advice will be given.
● This motorcycle was designed and manufactured which complied with e-mark, the safety standard of Europe
Union, the maximum speed is 25 km/h. Please do NOT change any parts without professional advice and use
non-original parts in case of avoiding danger to driver and the broken of traffic laws.
Page 3

CONTENTS
Mortch International Ltd
http://www.mortch.com
Guidance ………………………………………………………………………………………… 1
Position of parts ……………………………………………………………………………………… 3
Controlling parts …………………………………………………………………………………… 4
Starting pedal ……………………………………………………………………………………… 6
Fuel tank ………………………………………………………………………………………… 6
Fuel and engine oil …………………………………………………………………………………… 6
Pre-riding inspection ………………………………………………………………………………… 7
Engine starting ……………………………………………………………………………………… 8
Regular maintenance ………………………………………………………………………………… 10
Tools …………………………………………………………………………………………… 16
Technical Parameters ……………………………………………………………………………… 17
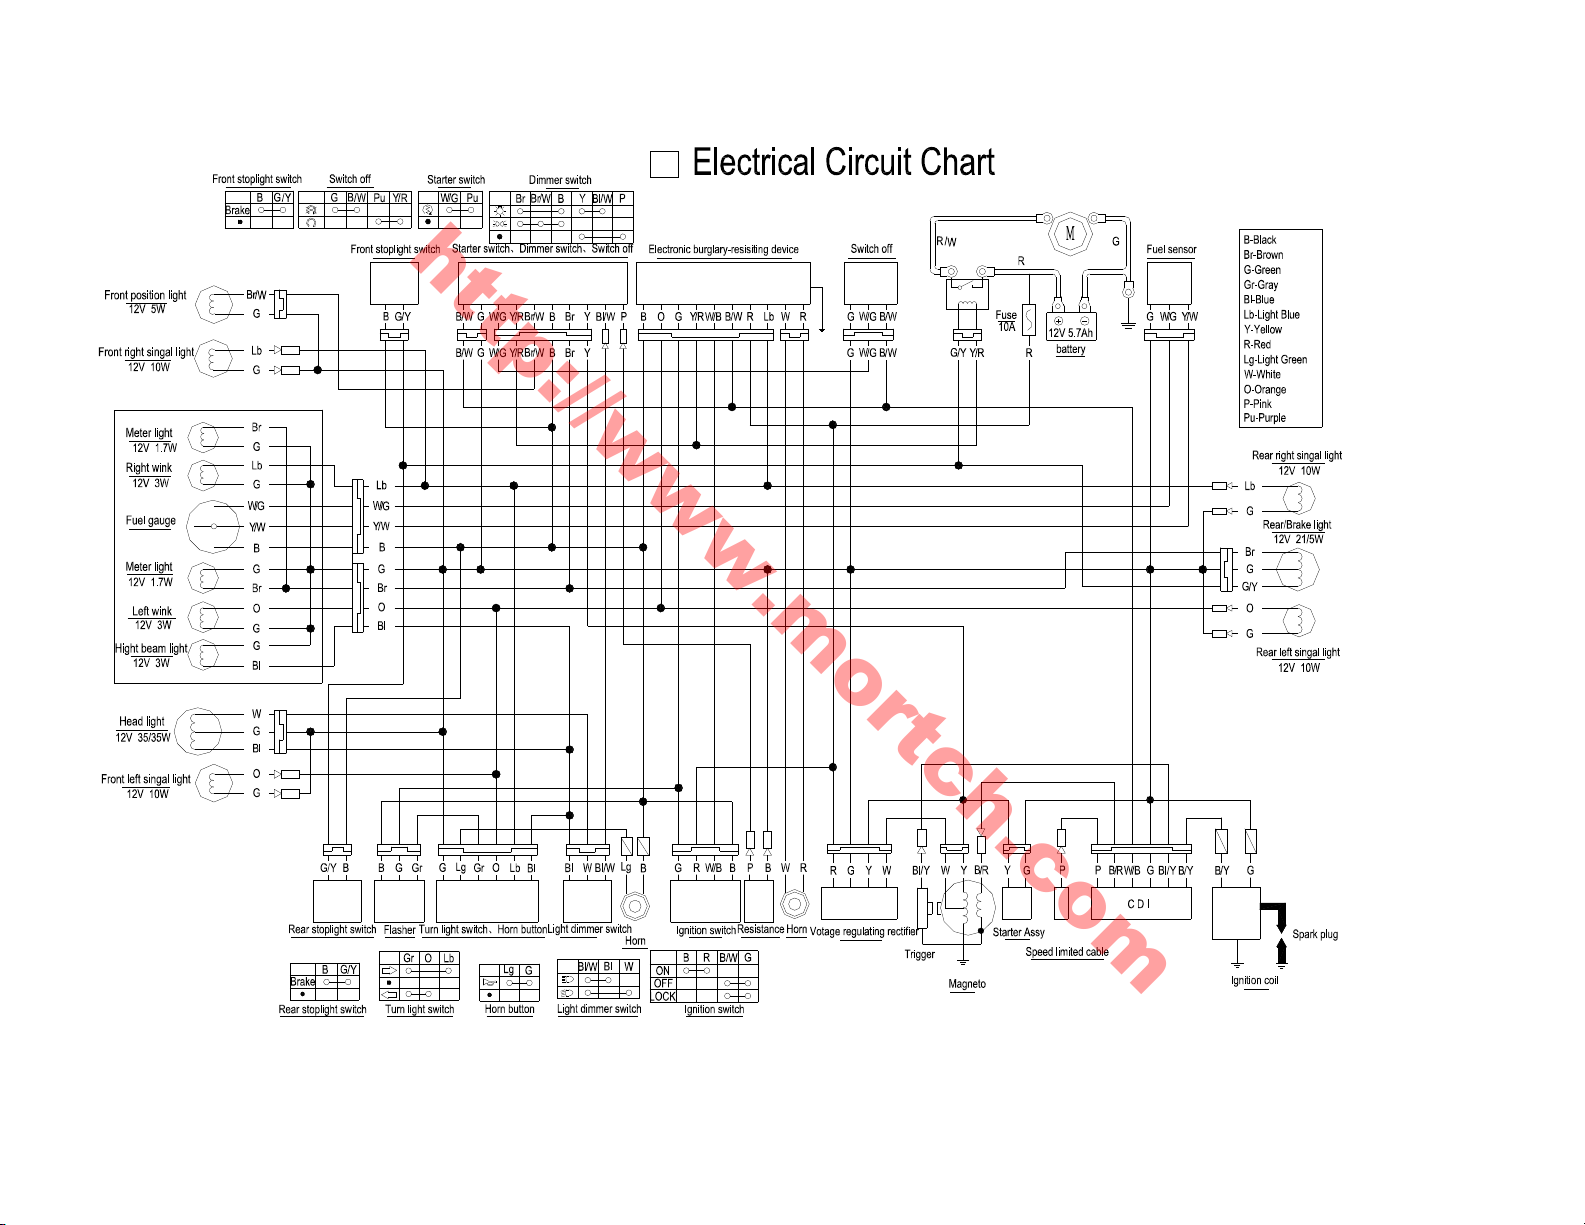
Electrical Circuit Chart ……………………………………………………………………………… 19
Page 4
Mortch International Ltd
http://www.mortch.com
□□□□Guidance
Please keep safety in your mind and observe the regulations of transportation while enjoying your riding. Pay attention to
the following rules:
1. Pre-riding inspection
Please read the details in the relevant chapter for your safety.
2. Helmet
Do remember to wear helmet while riding.
3. Being familiar with motorcycle operation
It is of great importance to ensure your safety getting
familiar with motorcycle operation.
4. Speed limitation
Drive at proper speed in accordance with the road condition,
the weather and your driving skill.
1
WARNING
It is dangerous to drive on the wet road.
Do not make an abrupt turning while
accelerating and keep proper distance
from other vehicles.
Page 5
Mortch International Ltd
http://www.mortch.com
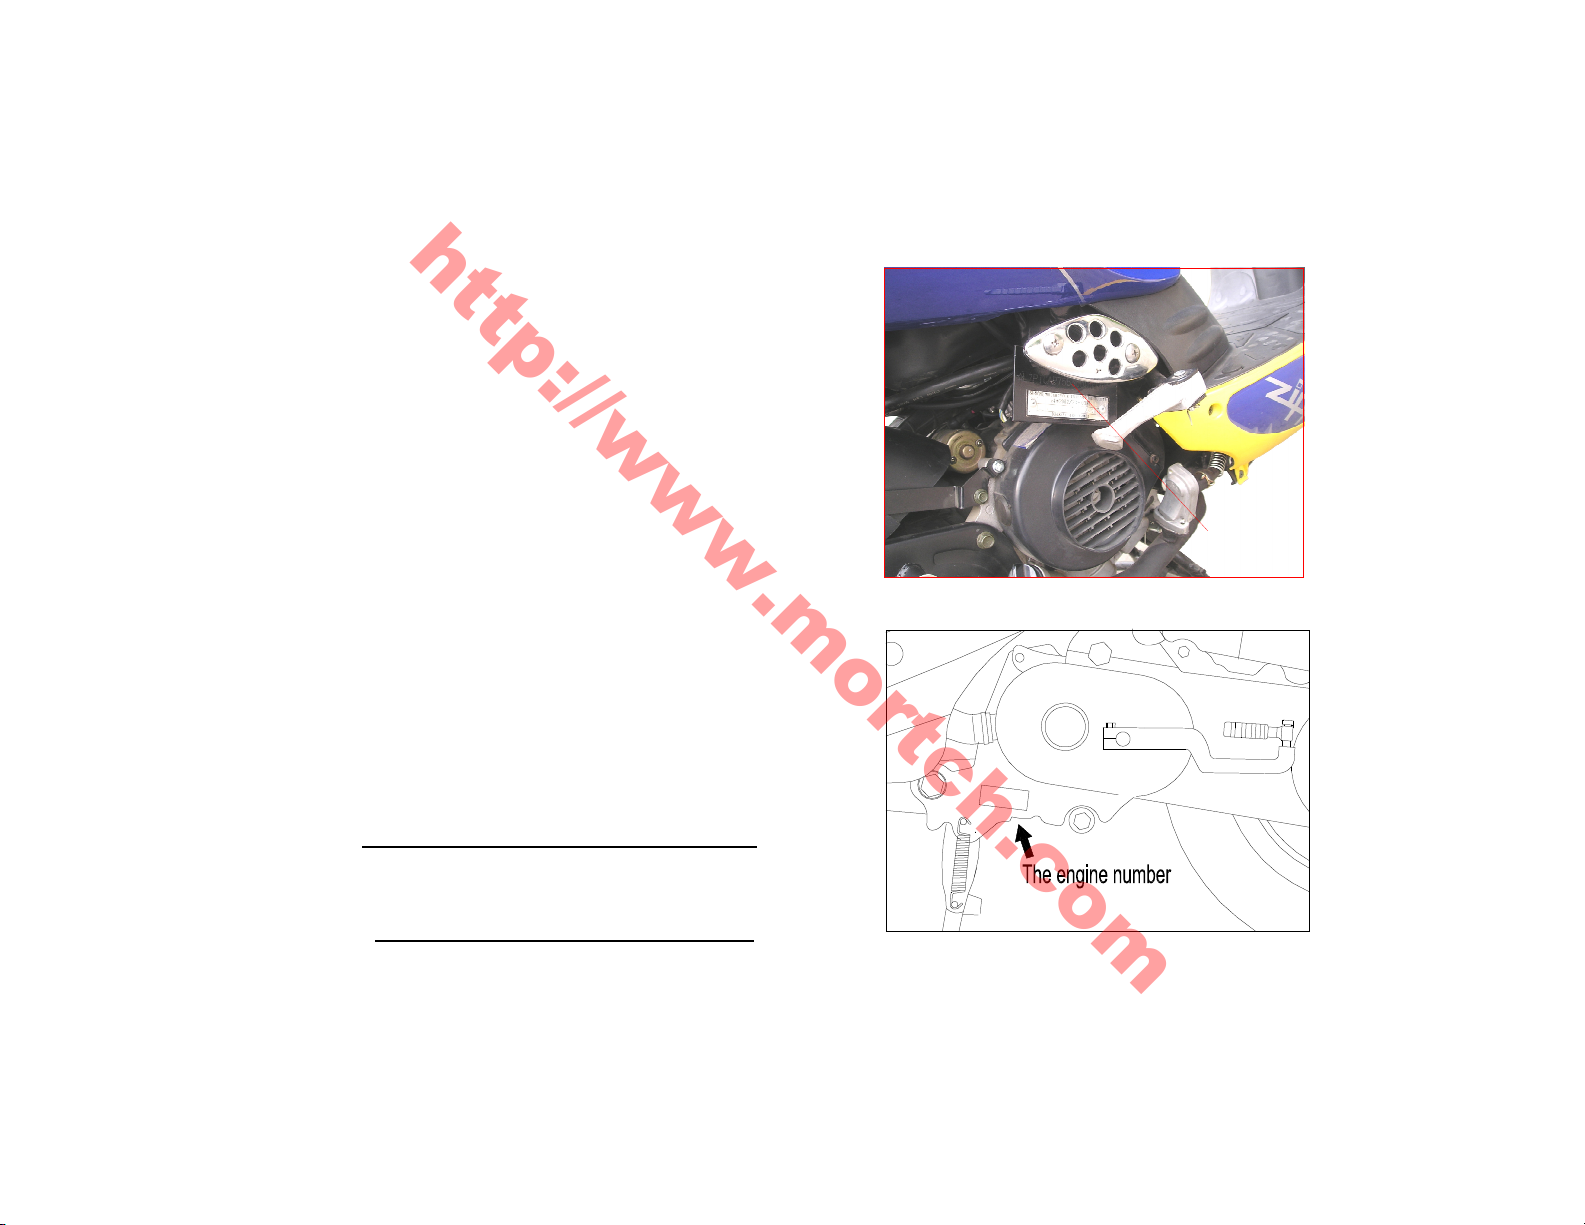
5. Positions of the numbers
The frame number and the engine number are for
the purpose of registering the motorcycle. When your
motorcycle needs inspection, repair or other special
service, the number will enable you to get good service
from our sale agency. Please note down the number
here:
□□□□ The frame number:
□□□□ The engine number:
frame number
1
3
9
Q
M
B
☆
X
X
X
X
X
X
X
X
X
☆
2
Page 6
□□□□Position of parts
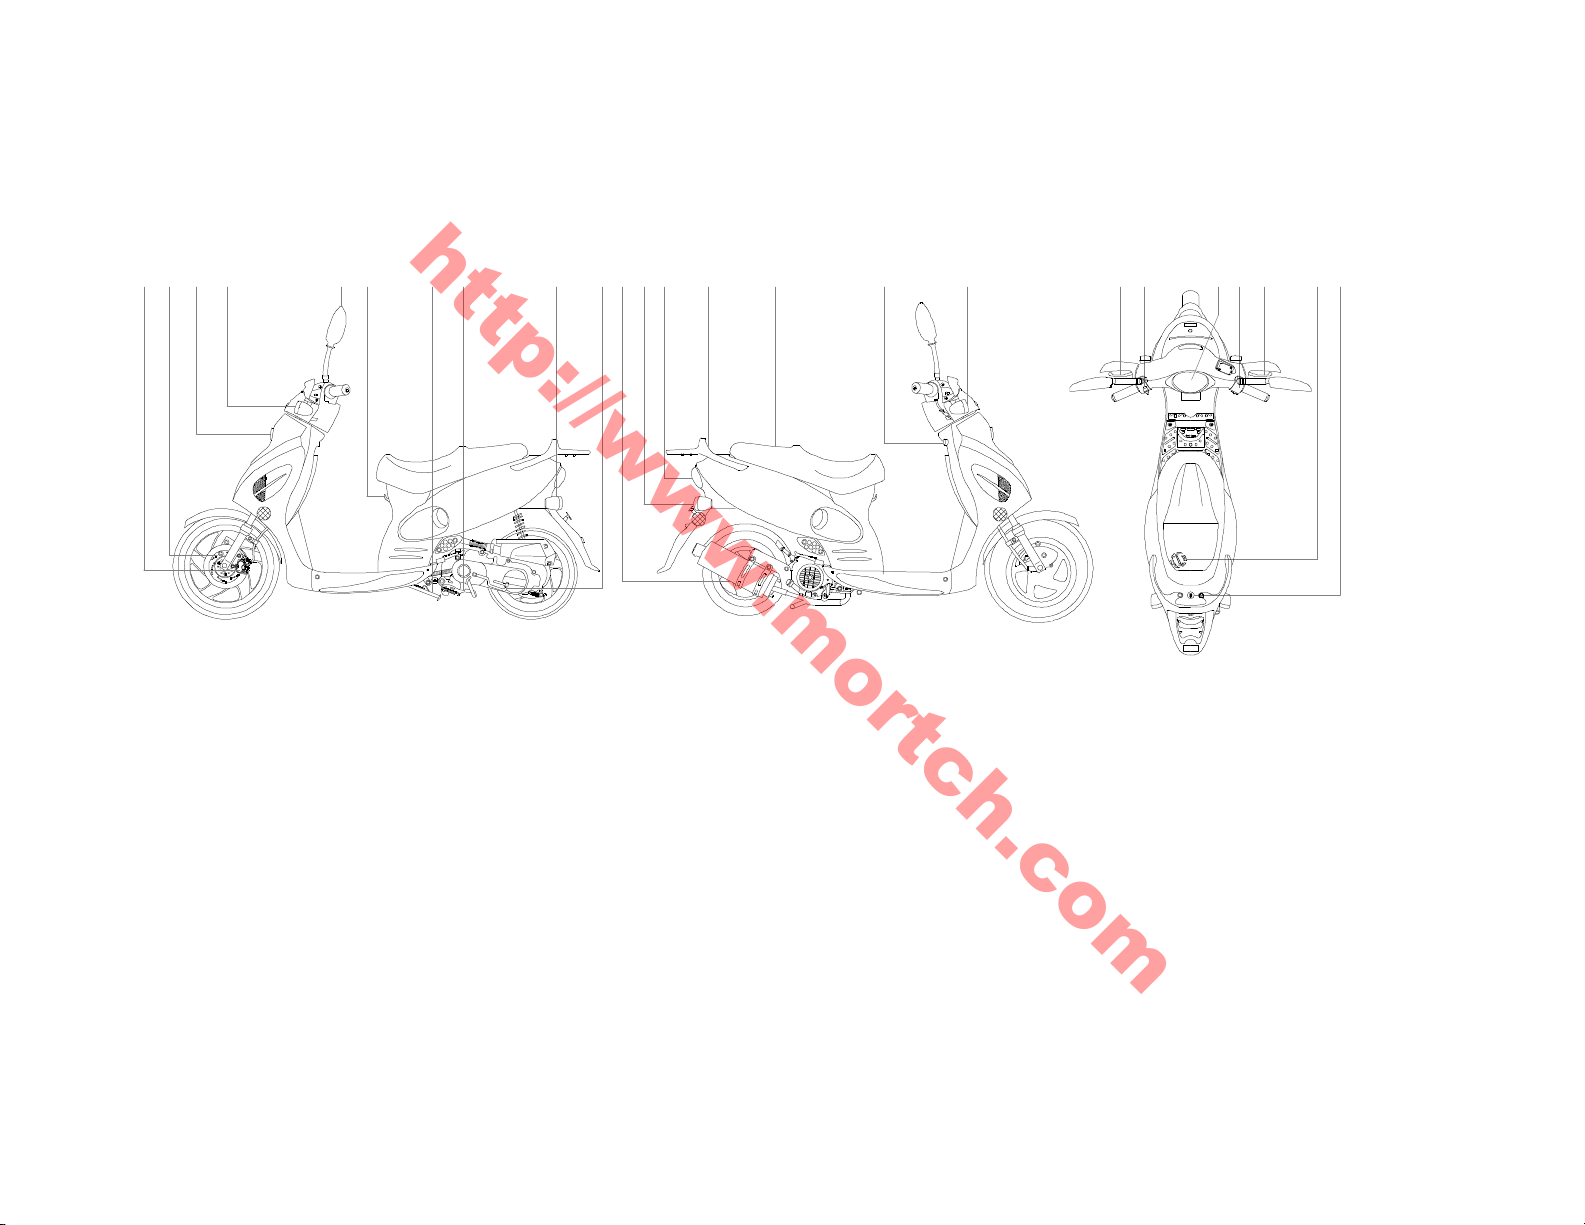
(1) Disk brake
assy.
(9)
Left rear turning ligh
t
(17) Right front turning
ligh
t
Mortch International Ltd
http://www.mortch.com
1 2 3 4 5 6 7 8 9 10111213 14 15 16 17 18 19 20 21 22 23 24
BTAOTIAN
(2) Brake disc
(3) Head light & position light
(4) Left front turning light
(5) Rear-view mirrors
(6) Helmet hook
(7) Side stand
(8) Main stand
3
(10) Starting pedal
(11) Muffler
(12) Right rear turning light
(13) Taillight
(14) Hand-hold
(15) Seat
(16) Ignition switch
(18) Rear brake lever
(19) Left switches assy.
(20) Meters
(21) Right switches assy.
(22) Front brake lever
(23) Fuel tank cap
(24) Seat lock
Page 7
□□□□Controlling parts
Mortch International Ltd
http://www.mortch.com
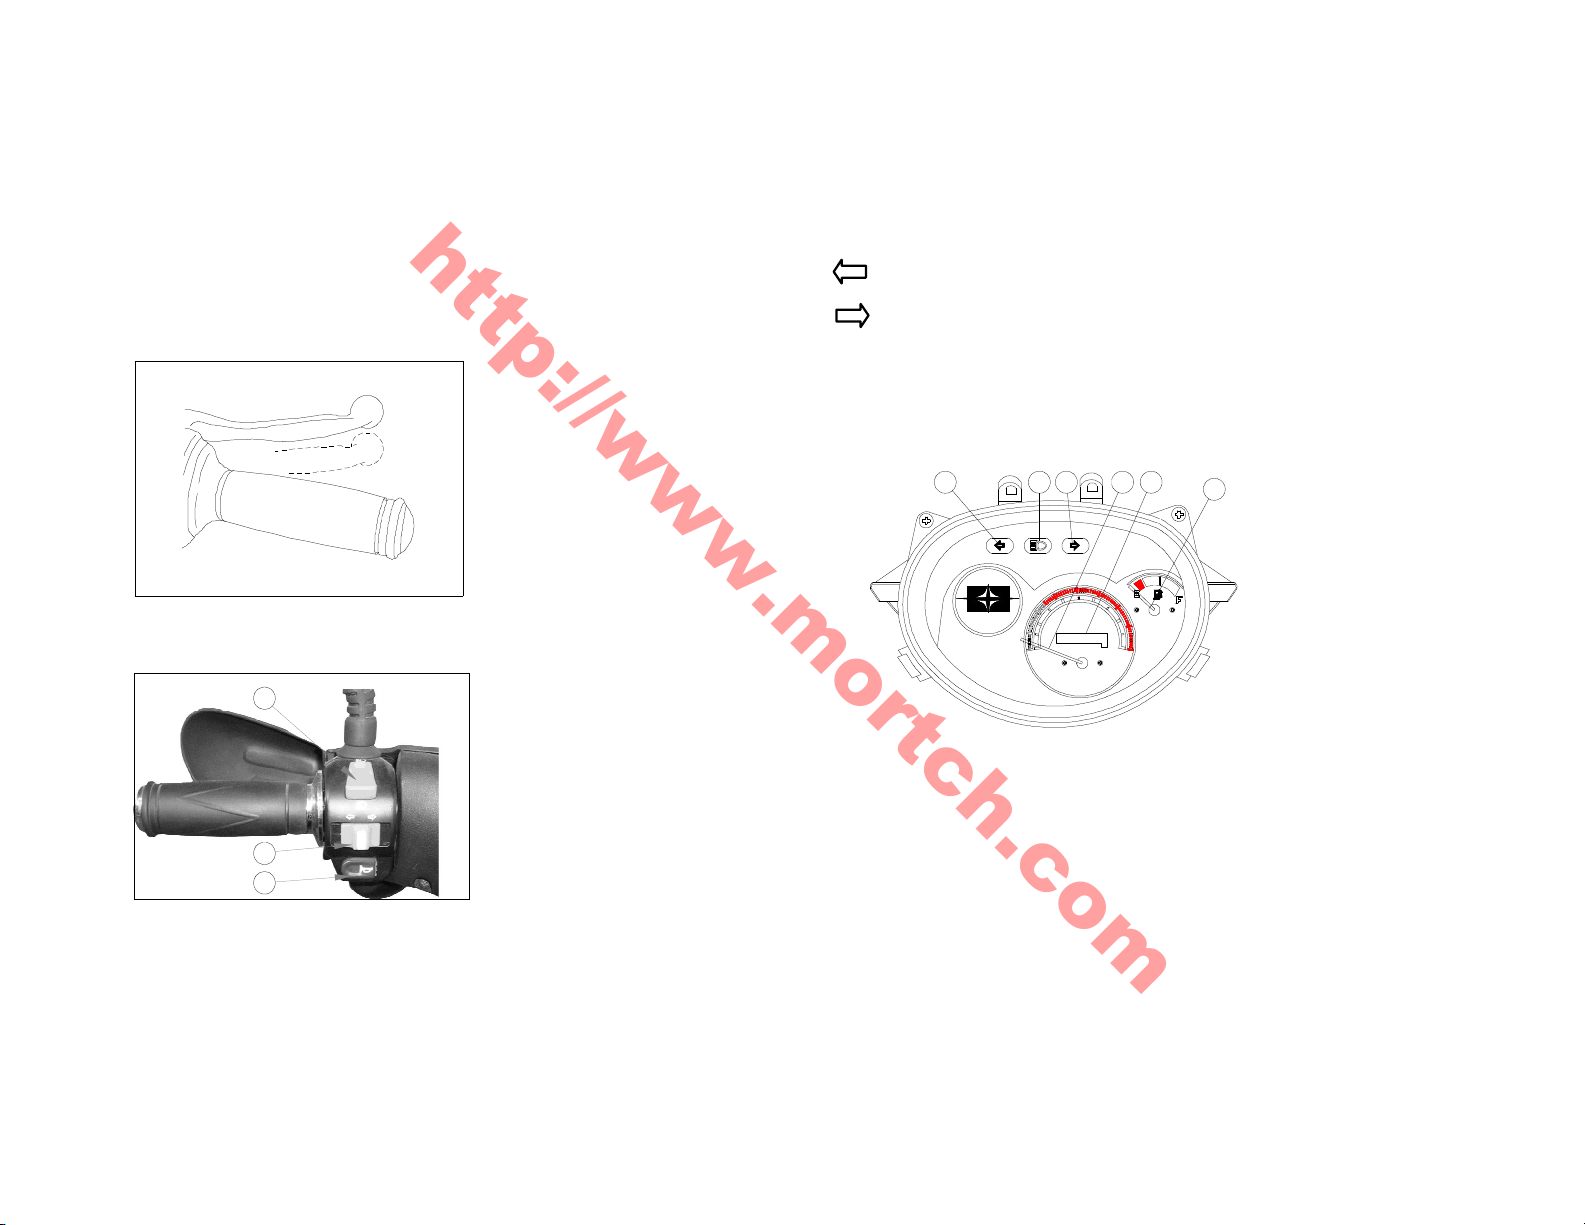
1. Rear brake lever
Ho
ld it tight and the rear brake functions
C. Switch for high/low beam lights
3. Meters and indicating lights
2. Switches on the left handle
C
Left turning light
Right turning light
A
B DCE
0
2
0
1
0
A.
Left turning lights indicator
B. High beam indicator
B
A
C. Right turning lights indicator
D. Indicates the speed in km/h and Mph
0
3
10
0
0
4
20
0 0 0 0 0
F
5
0
6
0
30
7
0
40
8
0
50
Mph
Km/h
A. Horn button
B. Turning signal switch
4
E. Indicates total distance the motorcycle has run
F. Fuel gauge.
Page 8
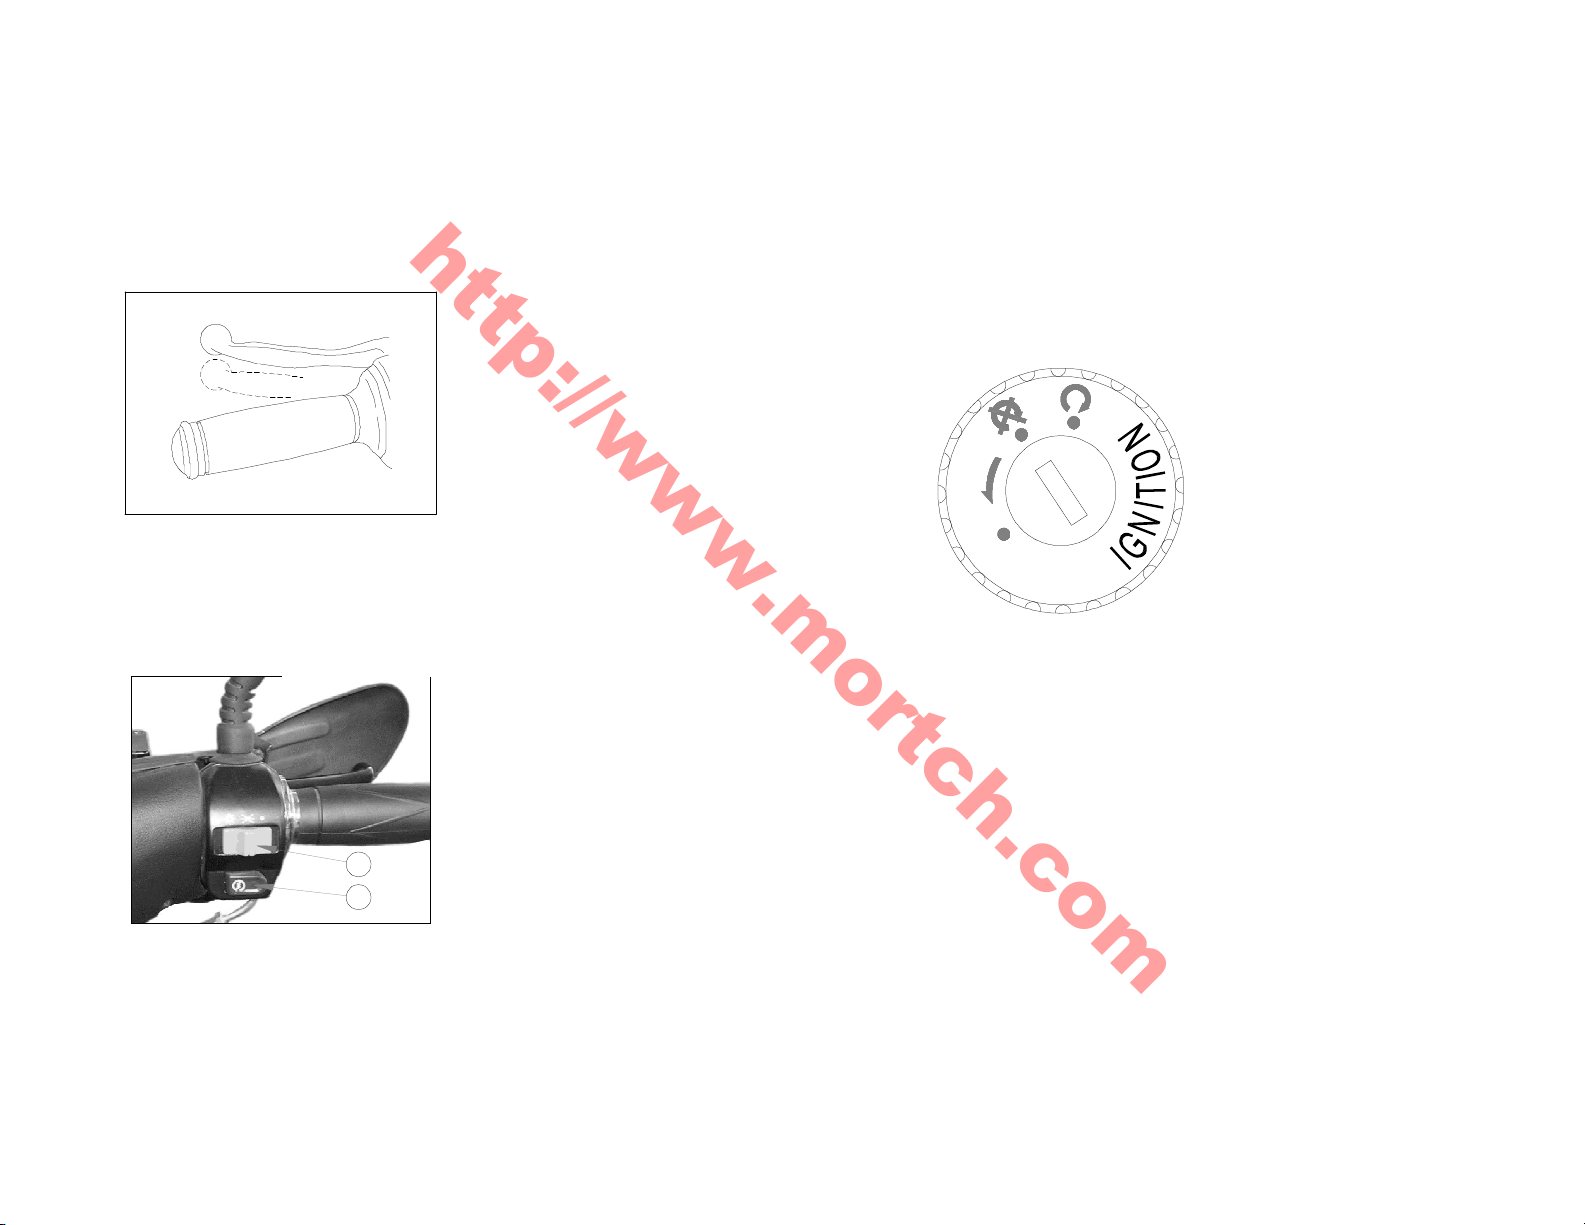
4. Front brake lever
Mortch International Ltd
http://www.mortch.com
When the ignition switch is at ON position, hold the
Hold it tightly and the front brake functions.
. Sw
5
itches on the right handle
brake and push the button and then the engine works.
6. Ignition switch
H
S
U
P
L
O
C
K
OFF:
ON: Engine can be started and all the lights can be
The whole circuit is cut. Engine and lights cannot
be
operated and the key can be withdrawn.
A
B
A. Head light switch
B. Electric starting button
5
operated. The key cannot be withdrawn.
LOCK: Turn the steering handle fully to the left, slightly
press the key and turn it to the position lock.
Then the key can be taken out.
Page 9
□□□□Starting pedal
Turn off
the engine when refilling the tank.
Mortch International Ltd
http://www.mortch.com
Starting pedal is for kicking start of the engine.
Warning
①
□Fu
□
□
□
el tank
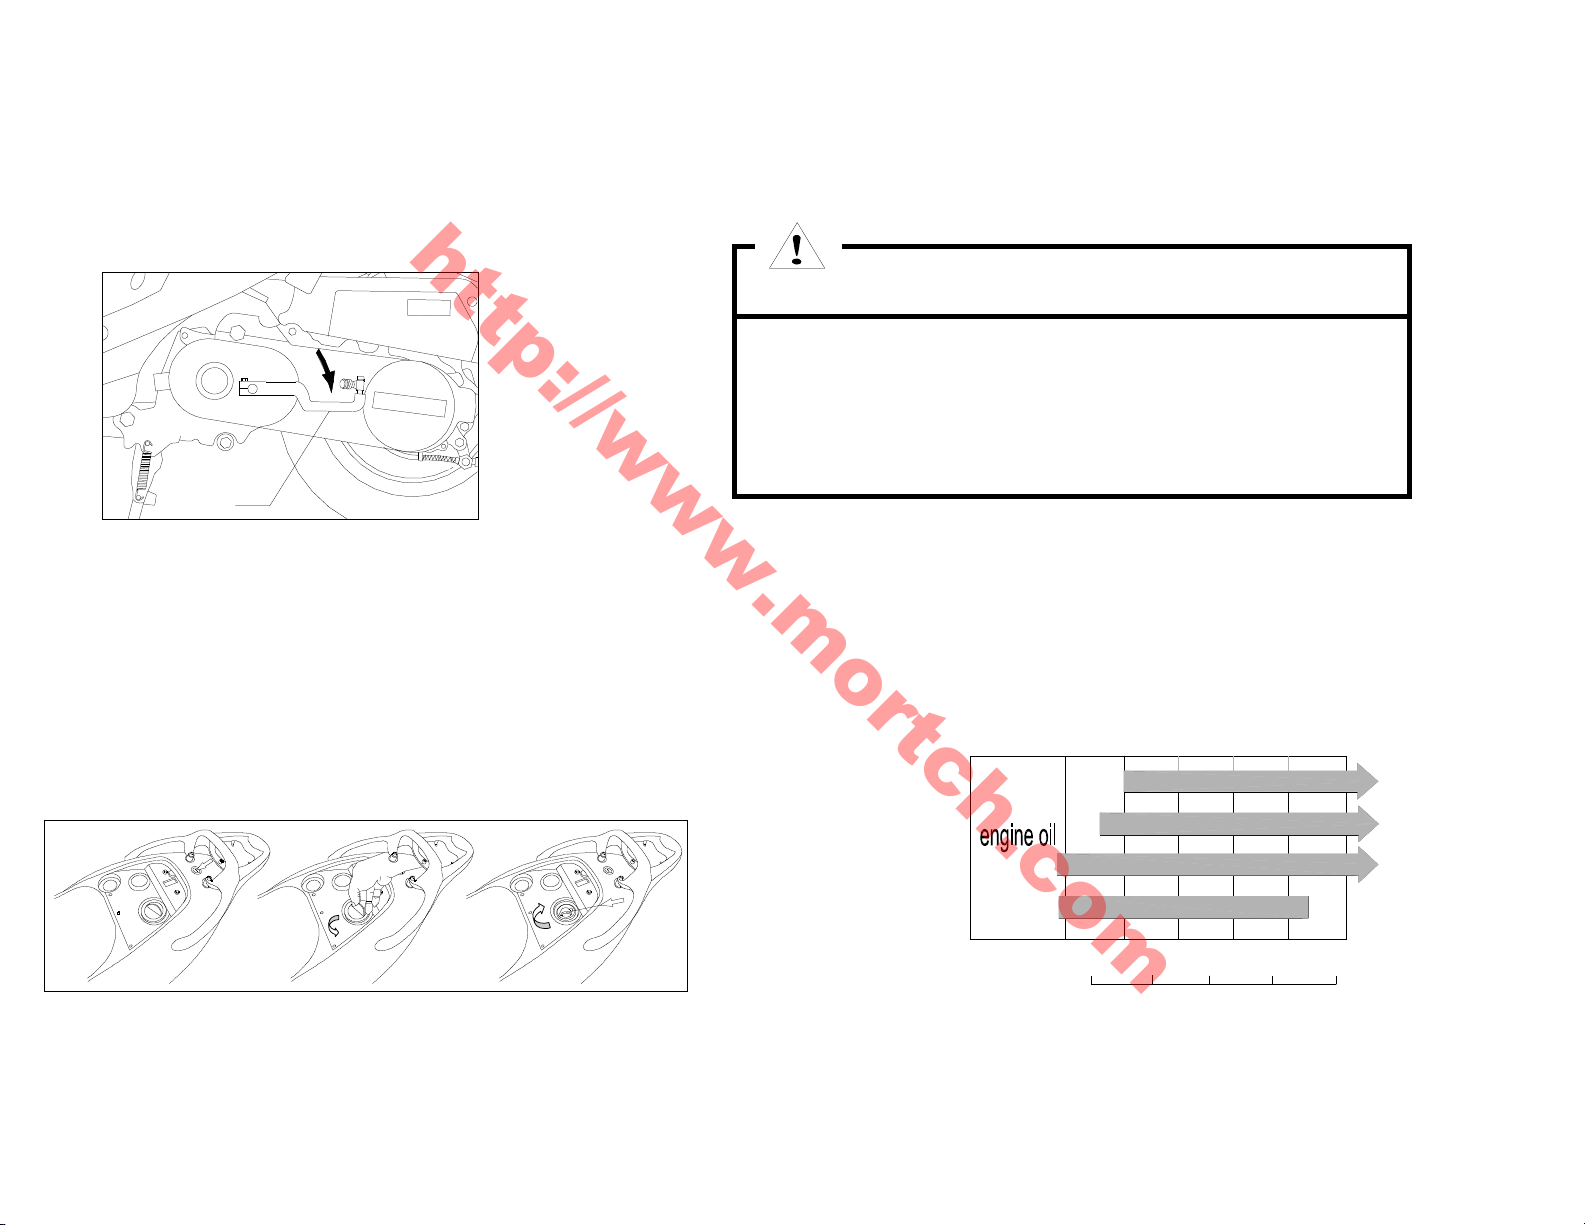
Usage of the cap:
1.Insert the key and open the seat.
2.Turn the cap counter-clockwise and take out it.
3.Align the lock tongue on cap with the notch on fuel
tank, turn the cap clockwise and tighten it.
◆
`
◆Turn off the cap slowly.
◆Don’t overfill the gasoline over the designated scale
◆Do not add anything into the gasoline.
□□□□Fuel and engine oil
A. Gasoline
igh-quality fuel is essential to the engine.
H
Any sand in the fuel is absolutely prohibited.
90# or higher quality lead-free gasoline is preferred.
B. Engine oil
AE15w/40
S
20w/40-20w/50
15w/40-15w/50
6
10w/30
10w/40
-10
0
10
T
20
40
60
20
30
80
100
40
C °
° F
Page 10
□□□□Pre-riding inspection
Mortch International Ltd
http://www.mortch.com
Ple
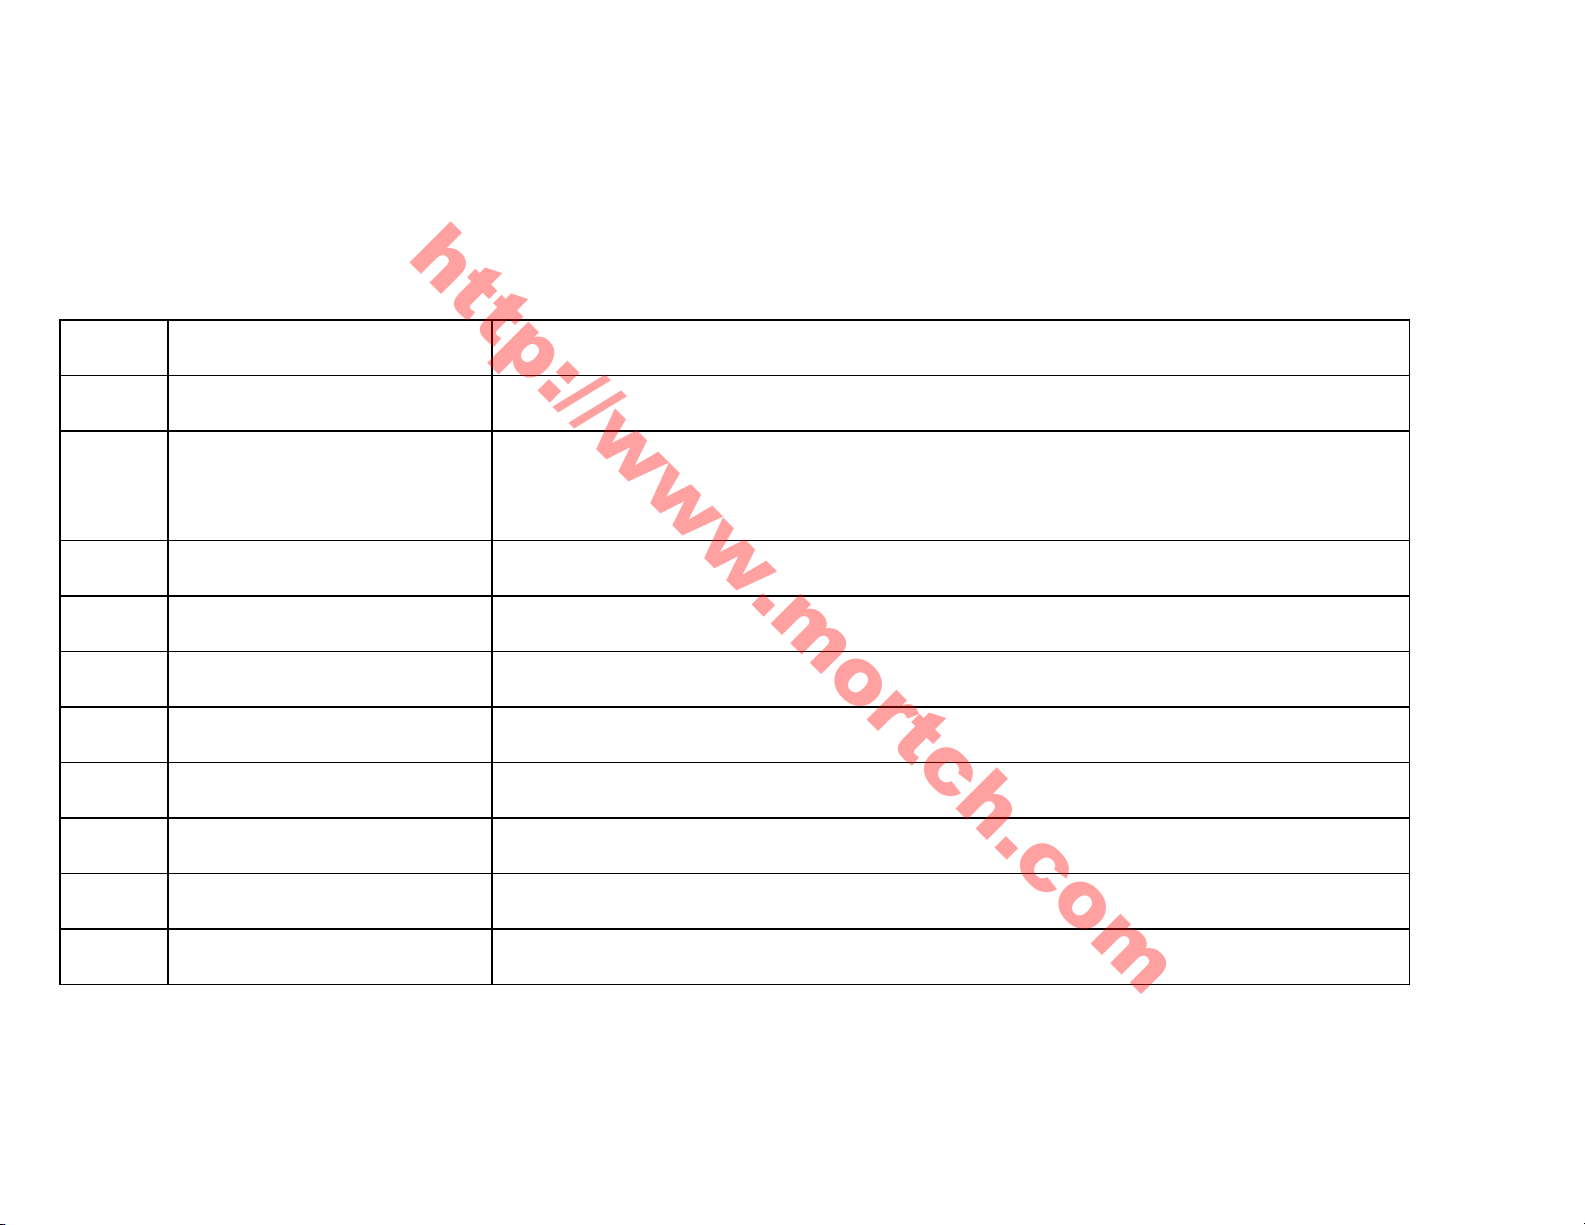
ase check the following parts before you drive:
No. Items Inspection content
1 Steering handlebar 1.Flexibility 2.No gap or loosing appearance
2 Brake system
3 Tires 1.Proper pressure 2.No crack or cutting
4 Fuel Sufficient fuel
5 Engine oil Sufficient engine oil
6 Lights Workable
7 Horn Workable
8 Gear oil With normal stock
9 Throttle 1. Proper gap 2.Flexible function 3.Proper control lever returning
10 All the bolts and nuts No loosing appearance.
1.Travel of front brake and rear brake 2.No break on the cable
3.Flexible function
7
Page 11
□□□□Engine starting
Mortch International Ltd
http://www.mortch.com
1. Please check the volume of machine oil and ga
before starting. The main stand should be stood up
while starting the engine.
2. Turn the ignition switch to the “ON” position.
soline
3. Engine Starting
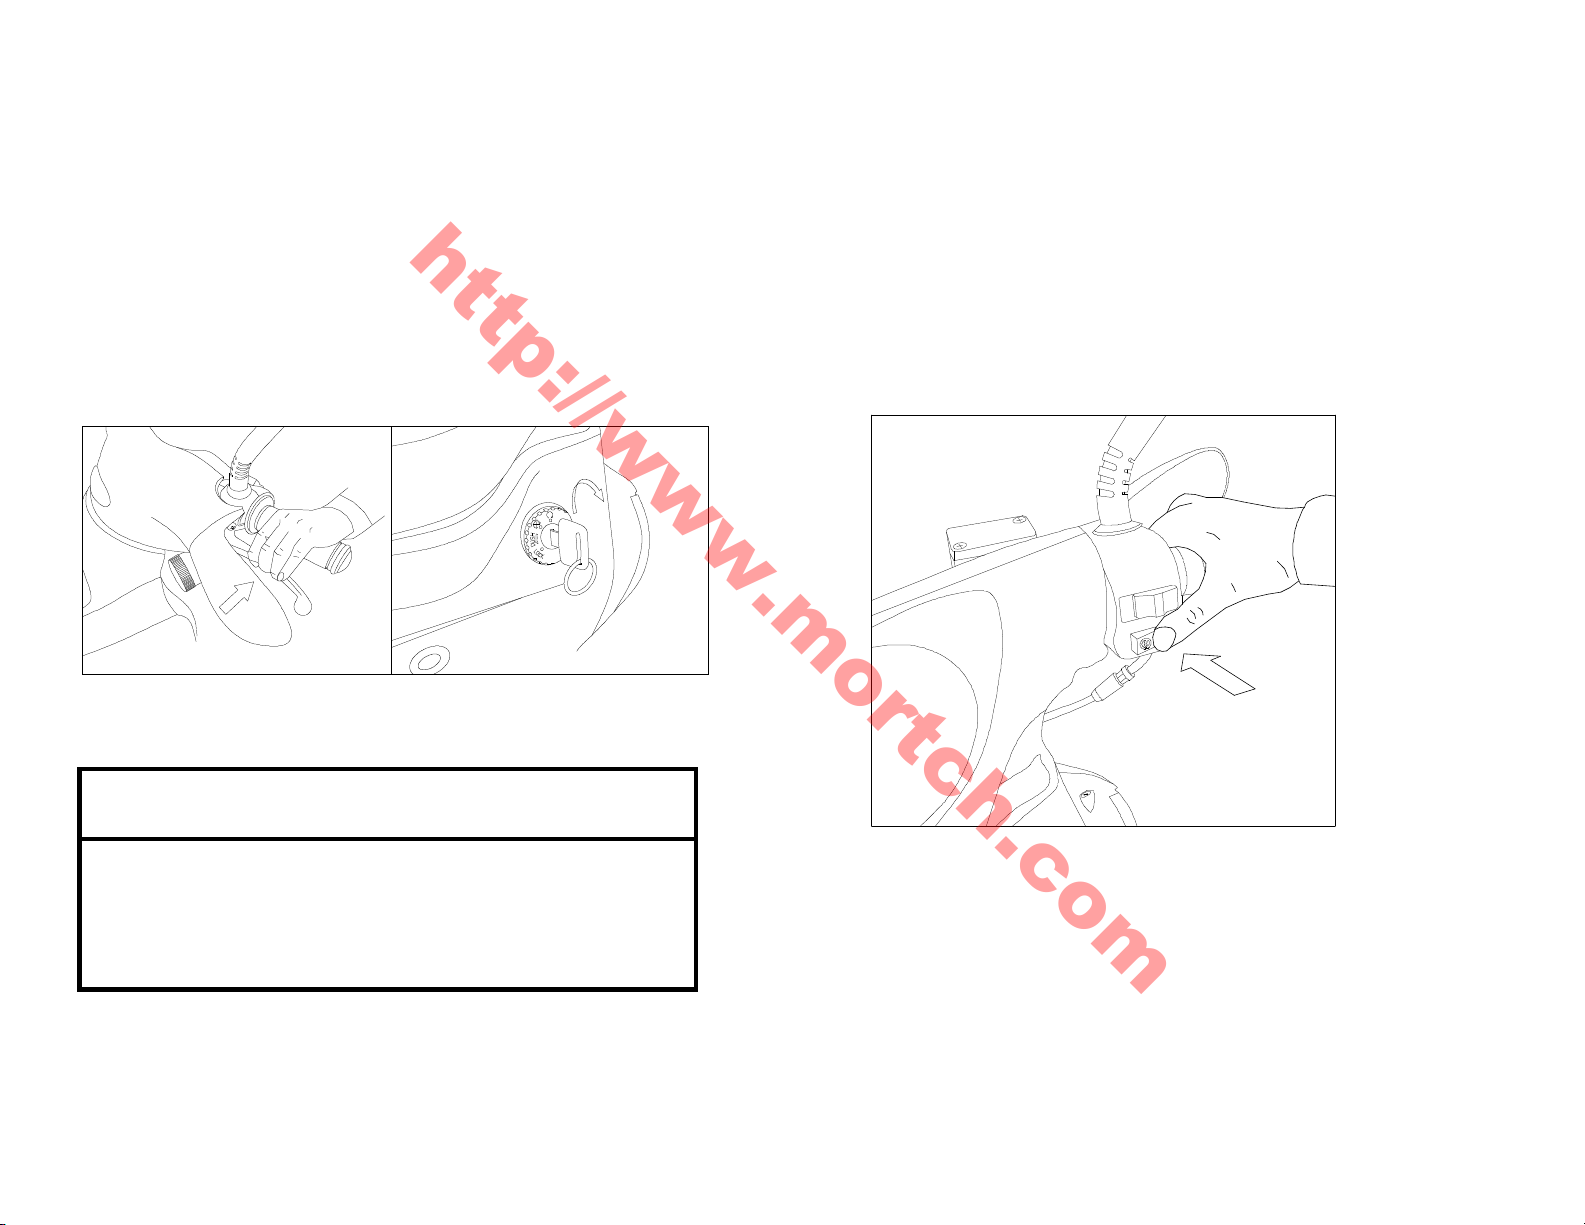
P
us
h the starting button and then the engine can be
started.
① Press the rear brake lever ② "ON" position
Warning
◆ Press the rear brake lever in case that the
motorcycle rushes forwards abruptly.
8
Page 12
5 seconds is the maximum limit for each
startin
g
g
After the engine starts, the s
tarting pedal
Mortch International Ltd
http://www.mortch.com
◆
and10 seconds is the minimum interval.
◆ Stop pressing the starting button immediately
after the engine starts.
◆ Do not press the starting button while the engine
is running, or the start motor will be damaged.
◆ When using electric starting, please press the
rear brake lever in advance to get through the
circuit and start the motor.
◆ When using electric starting, don’t operate the
starting motor continually, or it may cause
damage to the starting motor and the battery.
◆ Warm up the engine after cold starting (about 3
minutes).
Warning
Warning
◆
should be put back to its original position.
Otherwise, it will affect the driver’s driving.
◆ Please don’t start the engine in unventilated
places because the wasted gas with CO is
harmful to human being.
4.
Kick Starting
Press the brake handle, tread the starting pedal
heavily and then the engine can be started.
9
Page 13
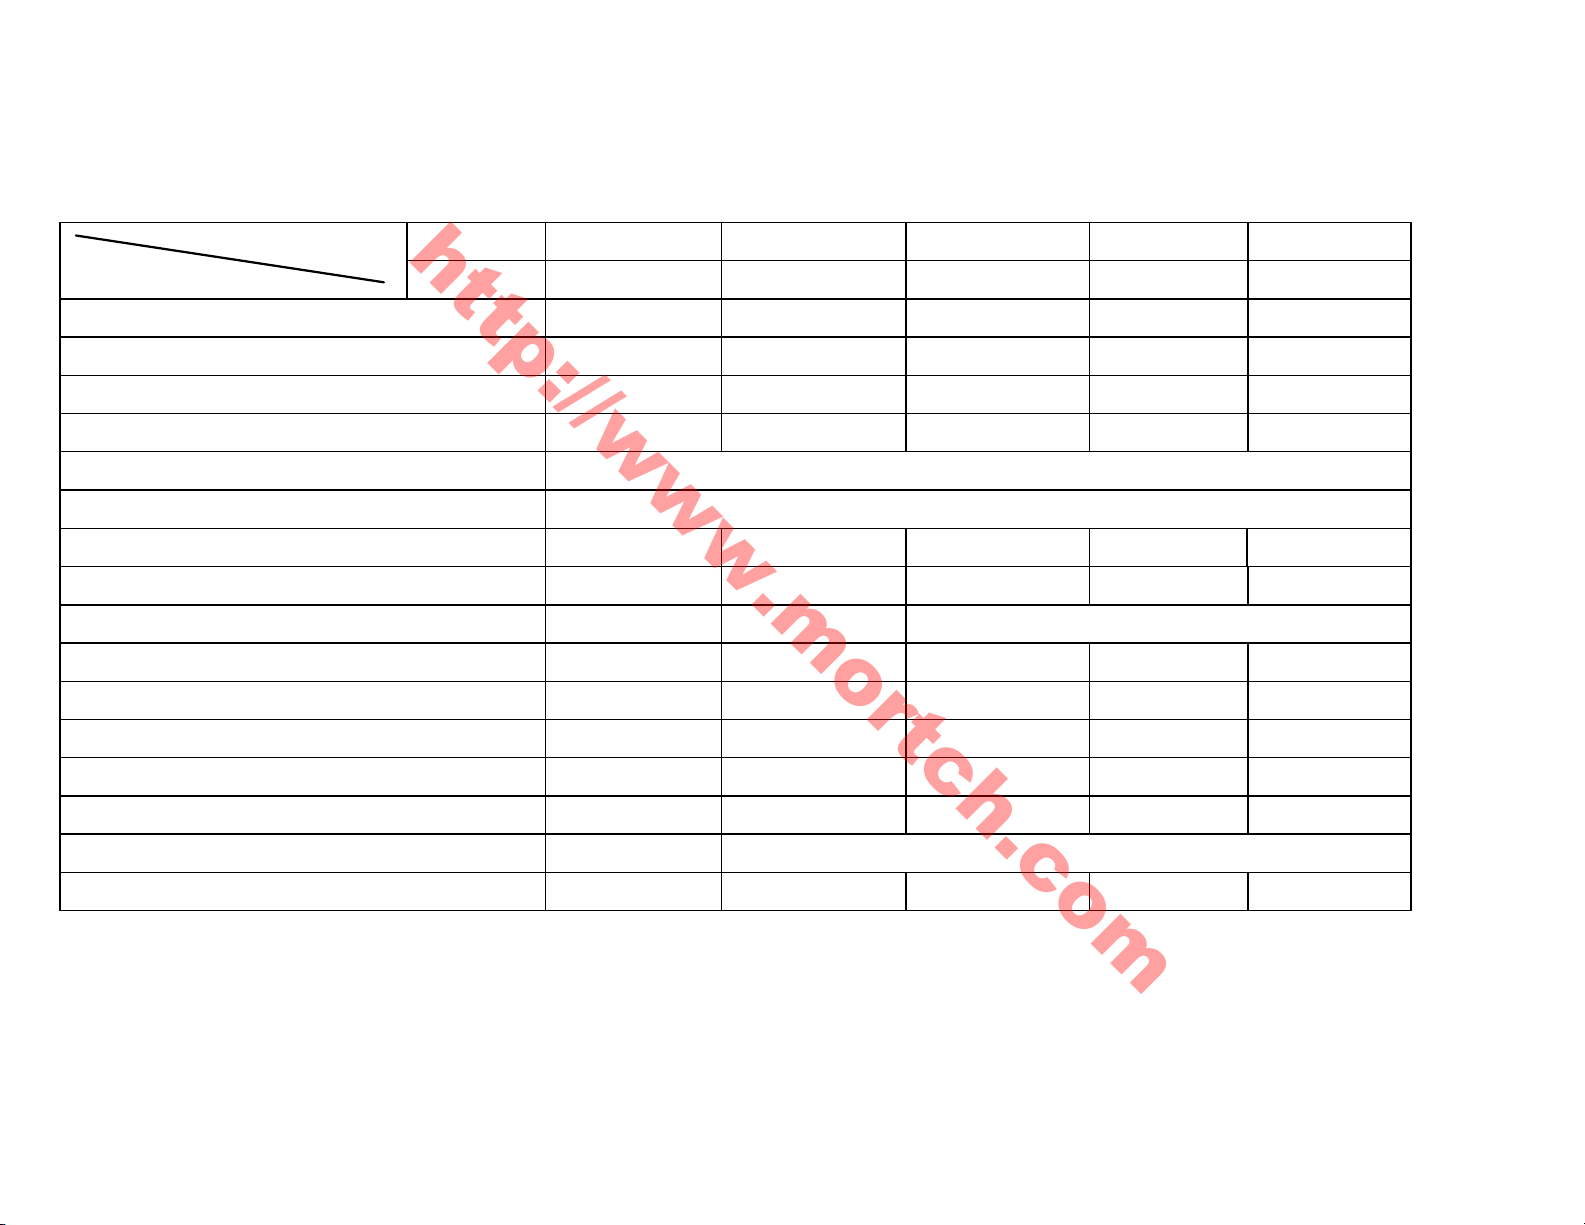
□ Regular maintenance
Interval
Km 300
1000
3000
6000
12000
Month
New motor
1 3 6 12
Battery
Engine oil strainer
Gasoline strainer
Carburetor
Air cleaner
core
Spark
plug
Fuel
throttle
Drive belt
Engine oil
Brake
system
Front fork and steering
stem bearing
S
uspension
Tires
Fastening
nuts and bolts
Gear oil
Rear brake cam
Mortch International Ltd
http://www.mortch.com
Item
I I I I I
C C
R
I I I C
A A A A
I I
R R Replace every 3000km
I I I I I
I I I I
I I I I
Clean it every 2000km and replace when necessary
Clean it every 3000km and replace when necessary
I I I I I
I F F F
R Replace every 5000km / 5Month
C
NOTE: I=Inspect and clean、adjust、replace or lubricate as necessary:C=Clear, R=Replace, F=fastened
Service more frequently when riding in dusty areas.
10
Page 14
1. Battery
Warning
Mortch International Ltd
http://www.mortch.com
12V/5.7Ah battery
① When the voltage is less than 11.5V, please use kick
starting in stead of electric starting.
② Place the ignition switch to OFF position before
◆ It has been fully adjusted to the highest
position when manufactured.
battery replacement.
③ Electrode identification: “+”—red line, “-”—green line.
④ Change a new battery every 4 years.
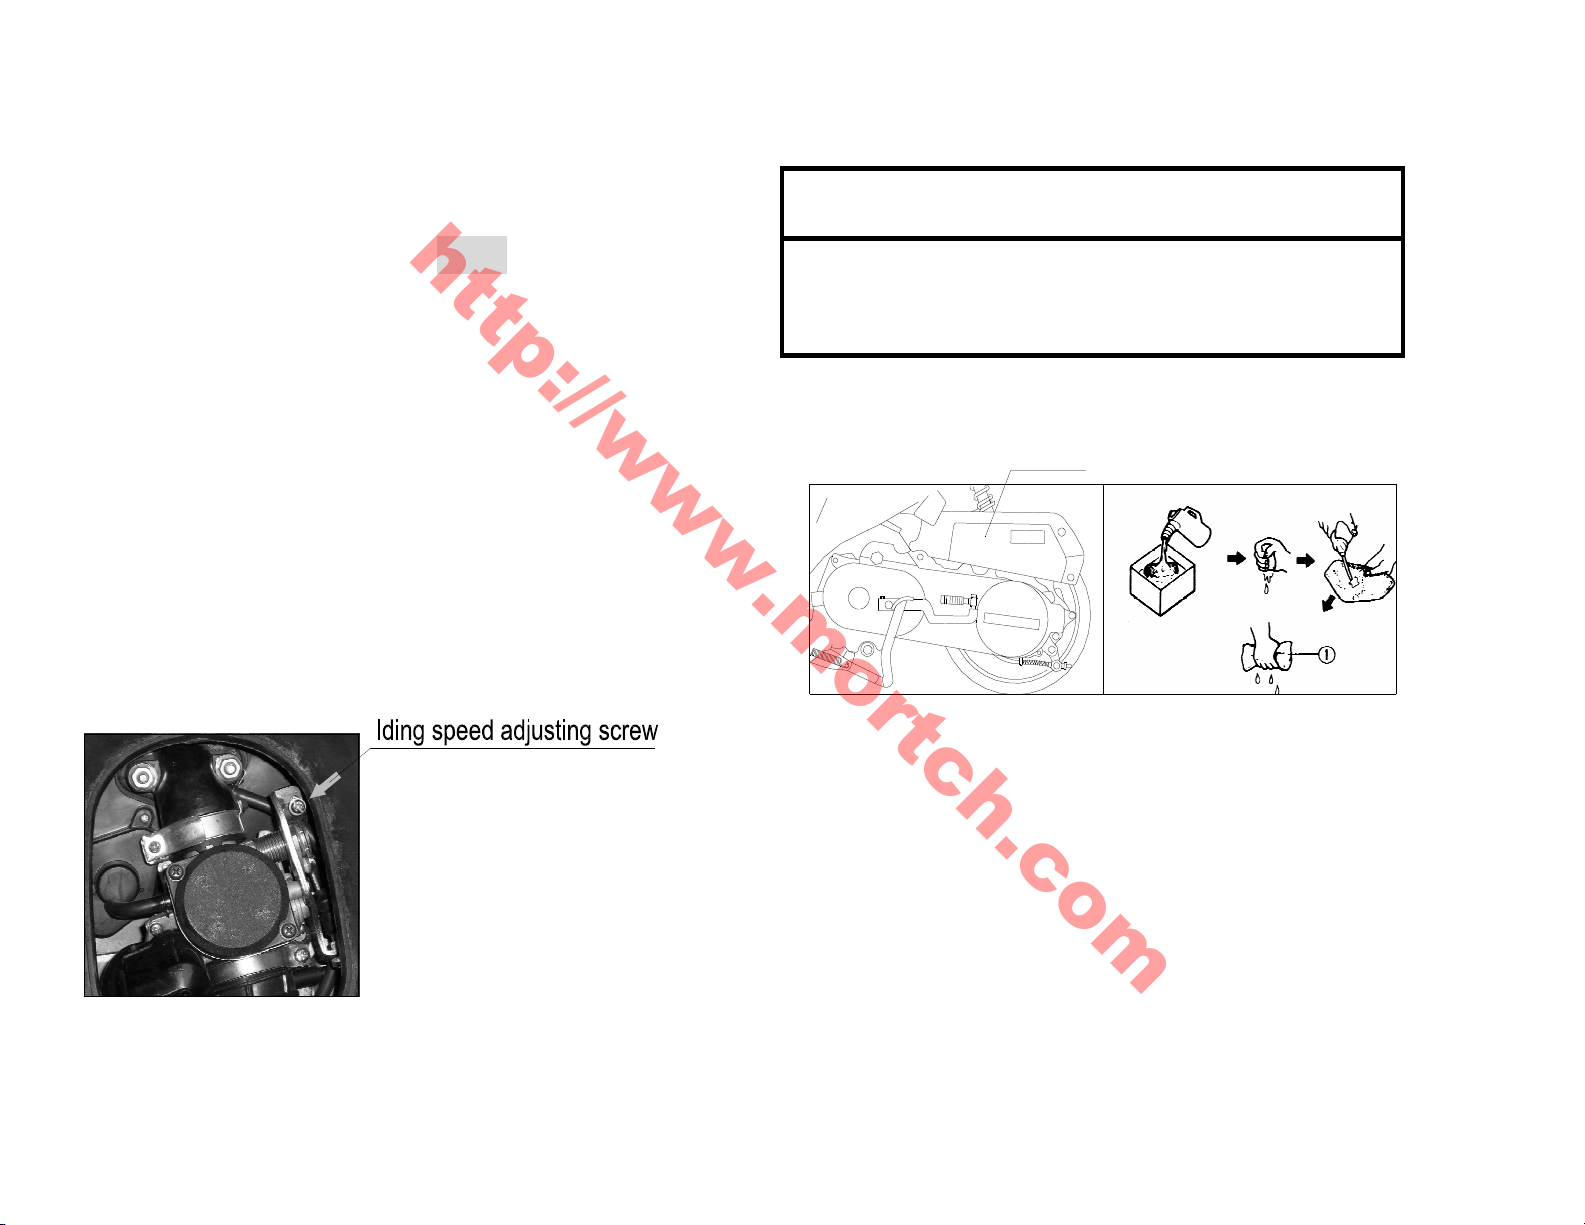
2. Carburetor and idling speed adjustment
① Keep the engine warmed up for 2-3 minutes.
② Adjust the idling speed adjusting screw to set the
engine at speed of 1900±100 r/min.
3. Air cleaner
①
Pour the non-inflammable detergent into a basin and
immerse the sponge core of air cleaner into the
detergent.
② Press the core to squeeze the detergent out of it by
palms. Never twist it in case that it is broken.
Air-cleaner
11
Page 15
③ Immerse the core into engine oil.
Mortch International Ltd
http://www.mortch.com
5.Fuel
④ Squeeze the excessive oil out but keep it lightly oil
immersed.
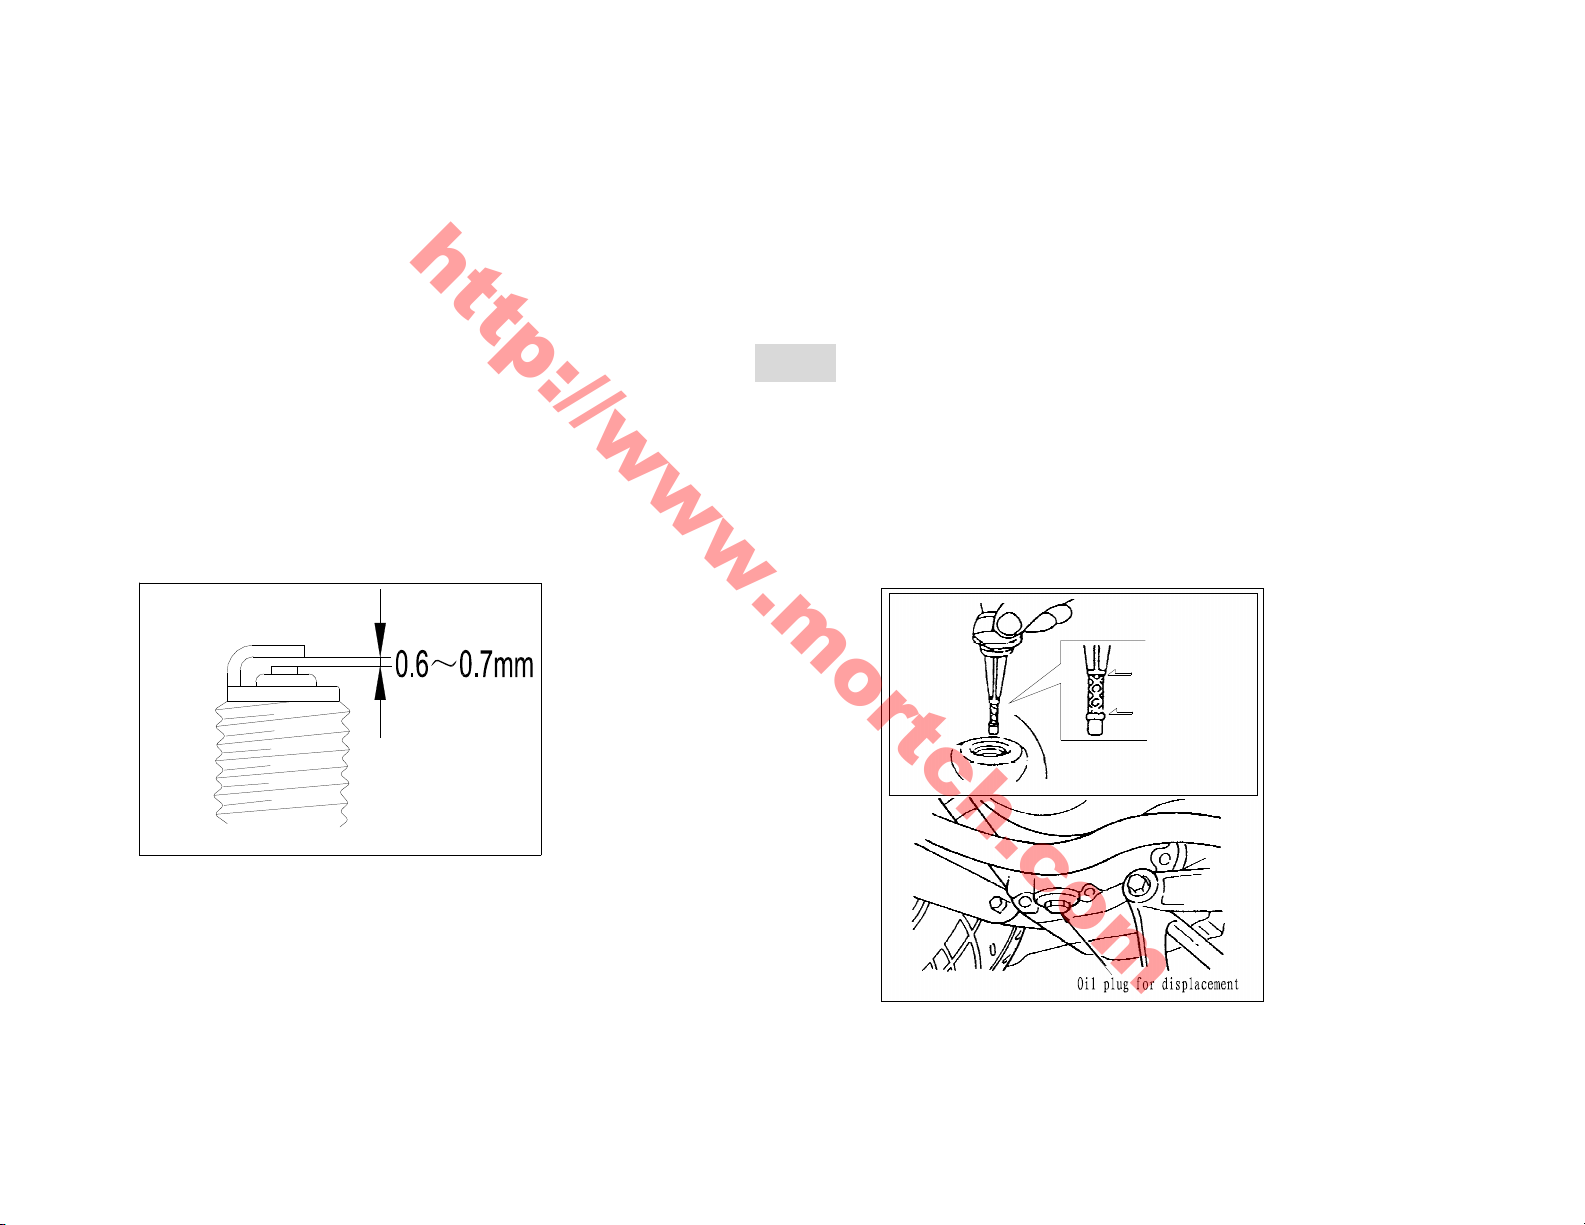
4. Spark plug
◆Clean the carbon deposit on the spark plug with a
piece of hard wire or steel needle.
◆Adjust the gap to 0.6-0.7mm with a thickness gauge.
◆Use A7RC when replacement is needed.
R
efill the recommended 90# or higher quality lead-free
gasoline when the indicating needle in the fuel gauge
points to the red area.
NOTE: Lead-free gasoline will extend the life of spark
plug and catalytic converter.
6.Engine oil
Replace the engine oil under the condition of the engine
is warm.
TOP
LOW
12
Page 16
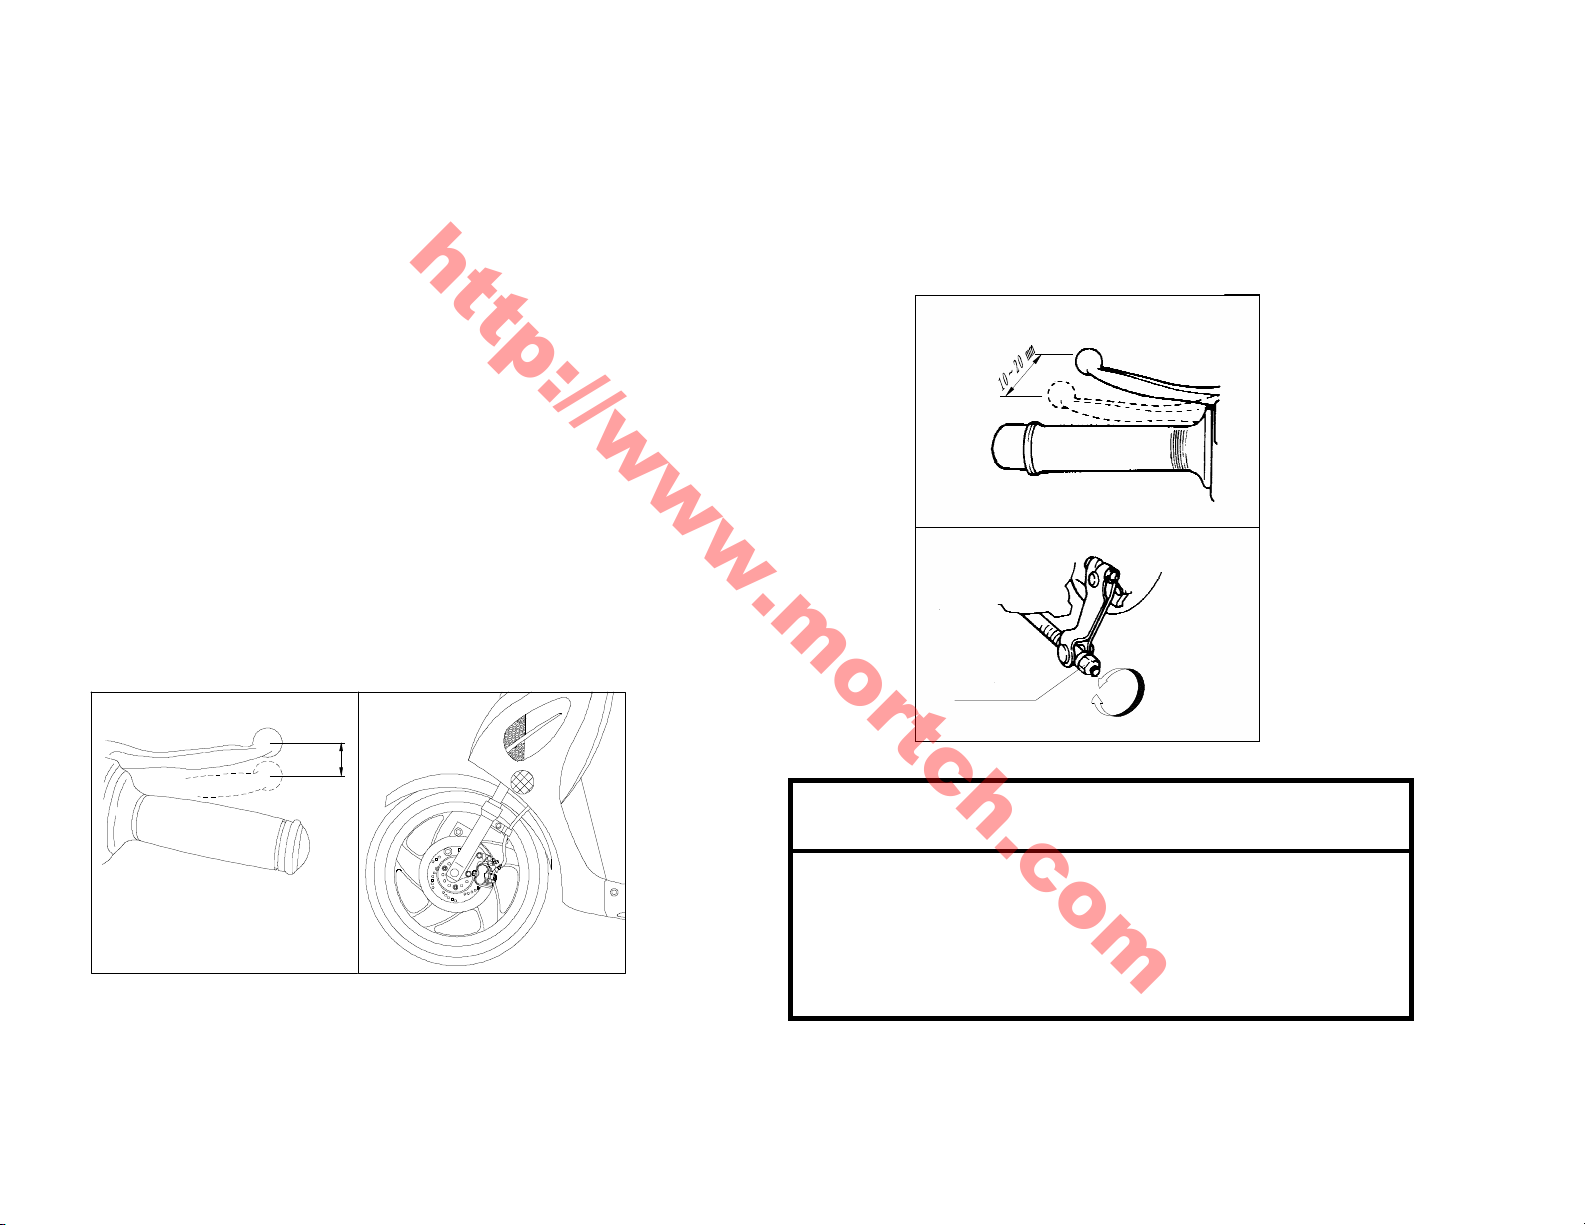
① Remove the oil dipstick.
◆
FR
EE
TRAVEL
means the distance between
Warnin
g:
Mortch International Ltd
http://www.mortch.com
② The rear brake
② Remove the oil plug for displacement to drain the
used oil.
③ Reinstall the oil plug, paying attention to be
tightened.
④ Refill 0.8 L recommended fresh oil.
⑤ Fasten all the nuts and screws.
7.Brake system
Normal free travel of the brake lever is about 10-20mm.
①The front brake
Turn the adjusting nut to get a proper travel.
Adjusting nut
a
a=10~20mm
13
the positions from free status to the
beginning performance of the brake.
◆ Pay attention to the sensitivity of the brake.
Page 17
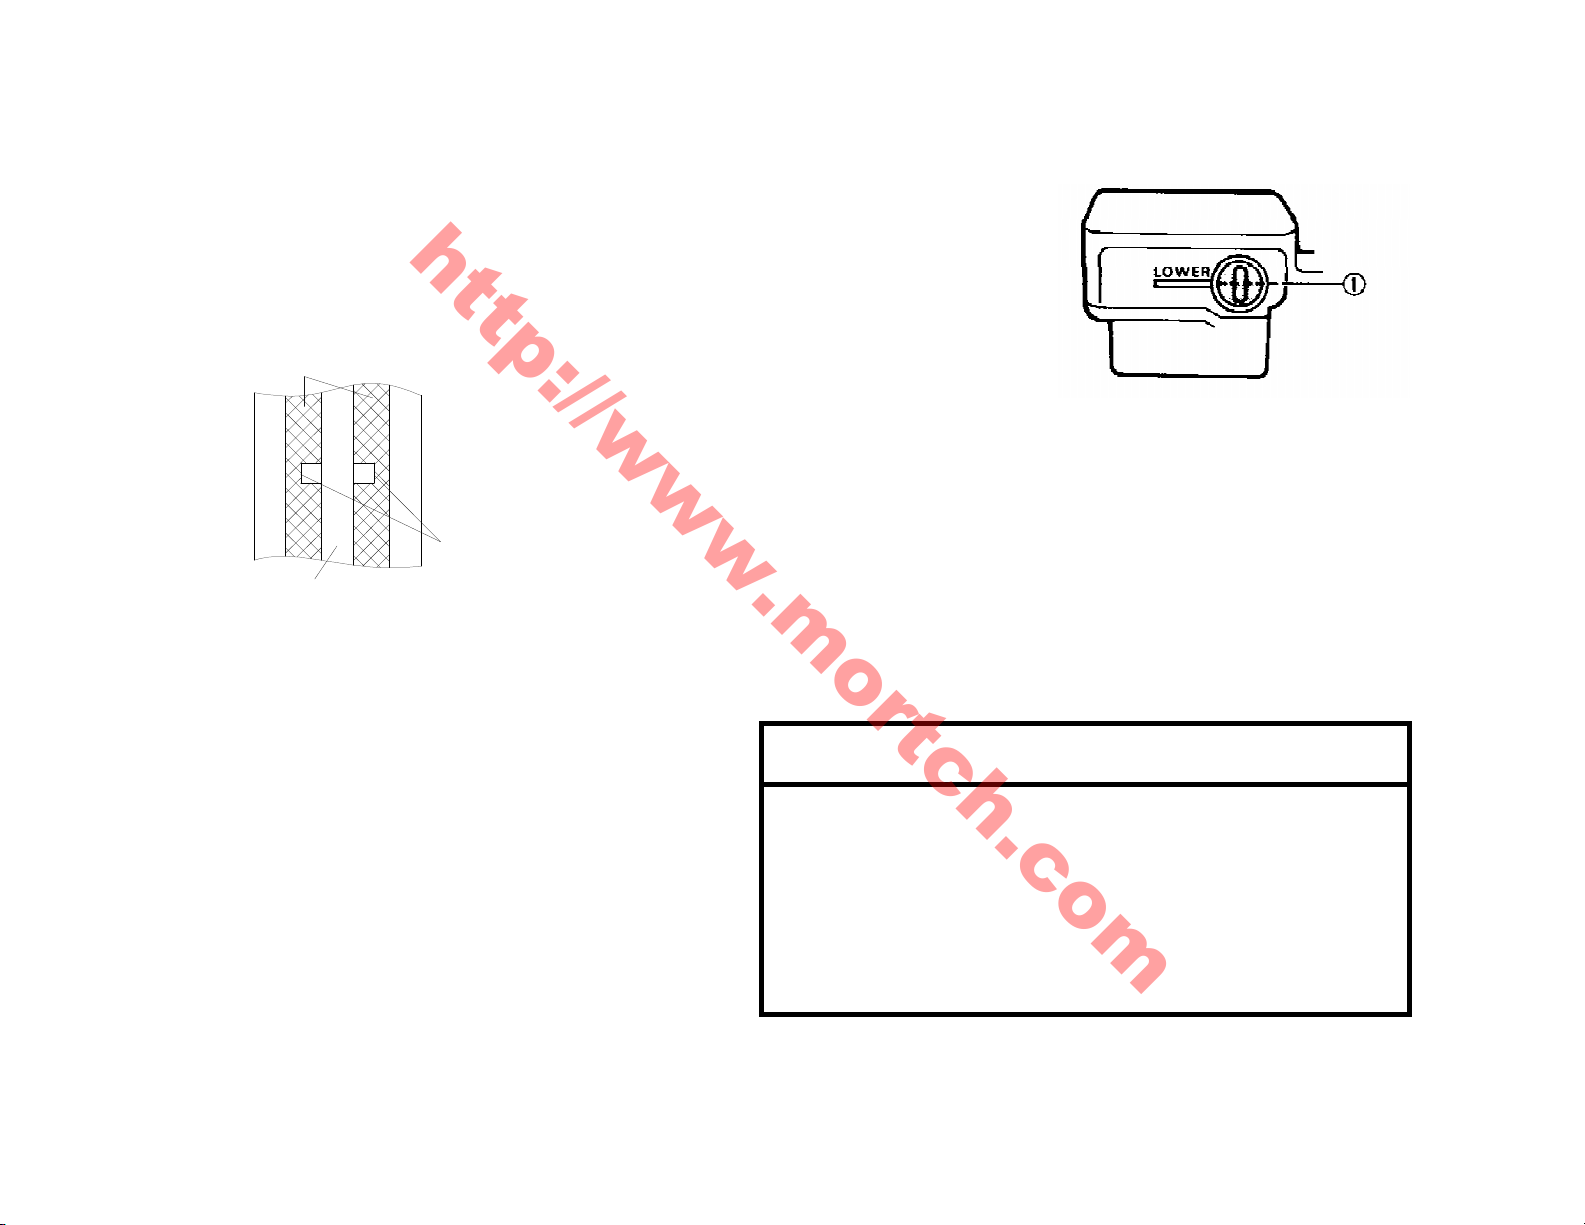
①
M inimum level
☆ Front brake
Warning
Mortch International Ltd
http://www.mortch.com
rake oil level
◆B
◆Grip the brake lever and check the wear and tear
indicator. If the indicator nearly touched the brake disc,
please ask the appointed maintainer to change the brake
blocks.
①wear and tear indicator ②b
◆Check the following items of brake system before
driving the motorcycle:
① Check if there is any leakage.
② Check if there is any leakage or crack on the oil
pressed hose.
③ The brake lever should be kept with a certain free
swing distance of 10~20mm, and kept a certain
re-grip power.
③
①
②
rake disc ③brake blocks
① It
with the special brake
oil before the
motorcycle leaves the
factory. User should fill
or replace the
recommended brake oil (such as No.DOT3 or DOT4
brake oil) from the appointed maintenance station. Never
change or mix other oil, otherwise it would damage the
brake system.
② If the brake oil is insufficient, it might be possible for
has been filled
the air to come into the brake system, and result in
the failure of the system.
◆ Brake oil is corrosive material. It would damage
and corrupt the painting of the part. It should be
cleanout if the oil splash on the part.
◆ If the oil sprayed on the skin or eyes, it should
④ Abrasion situation of the brake blocks.
14
e cleaning quickly with a lot of water.
b
Page 18
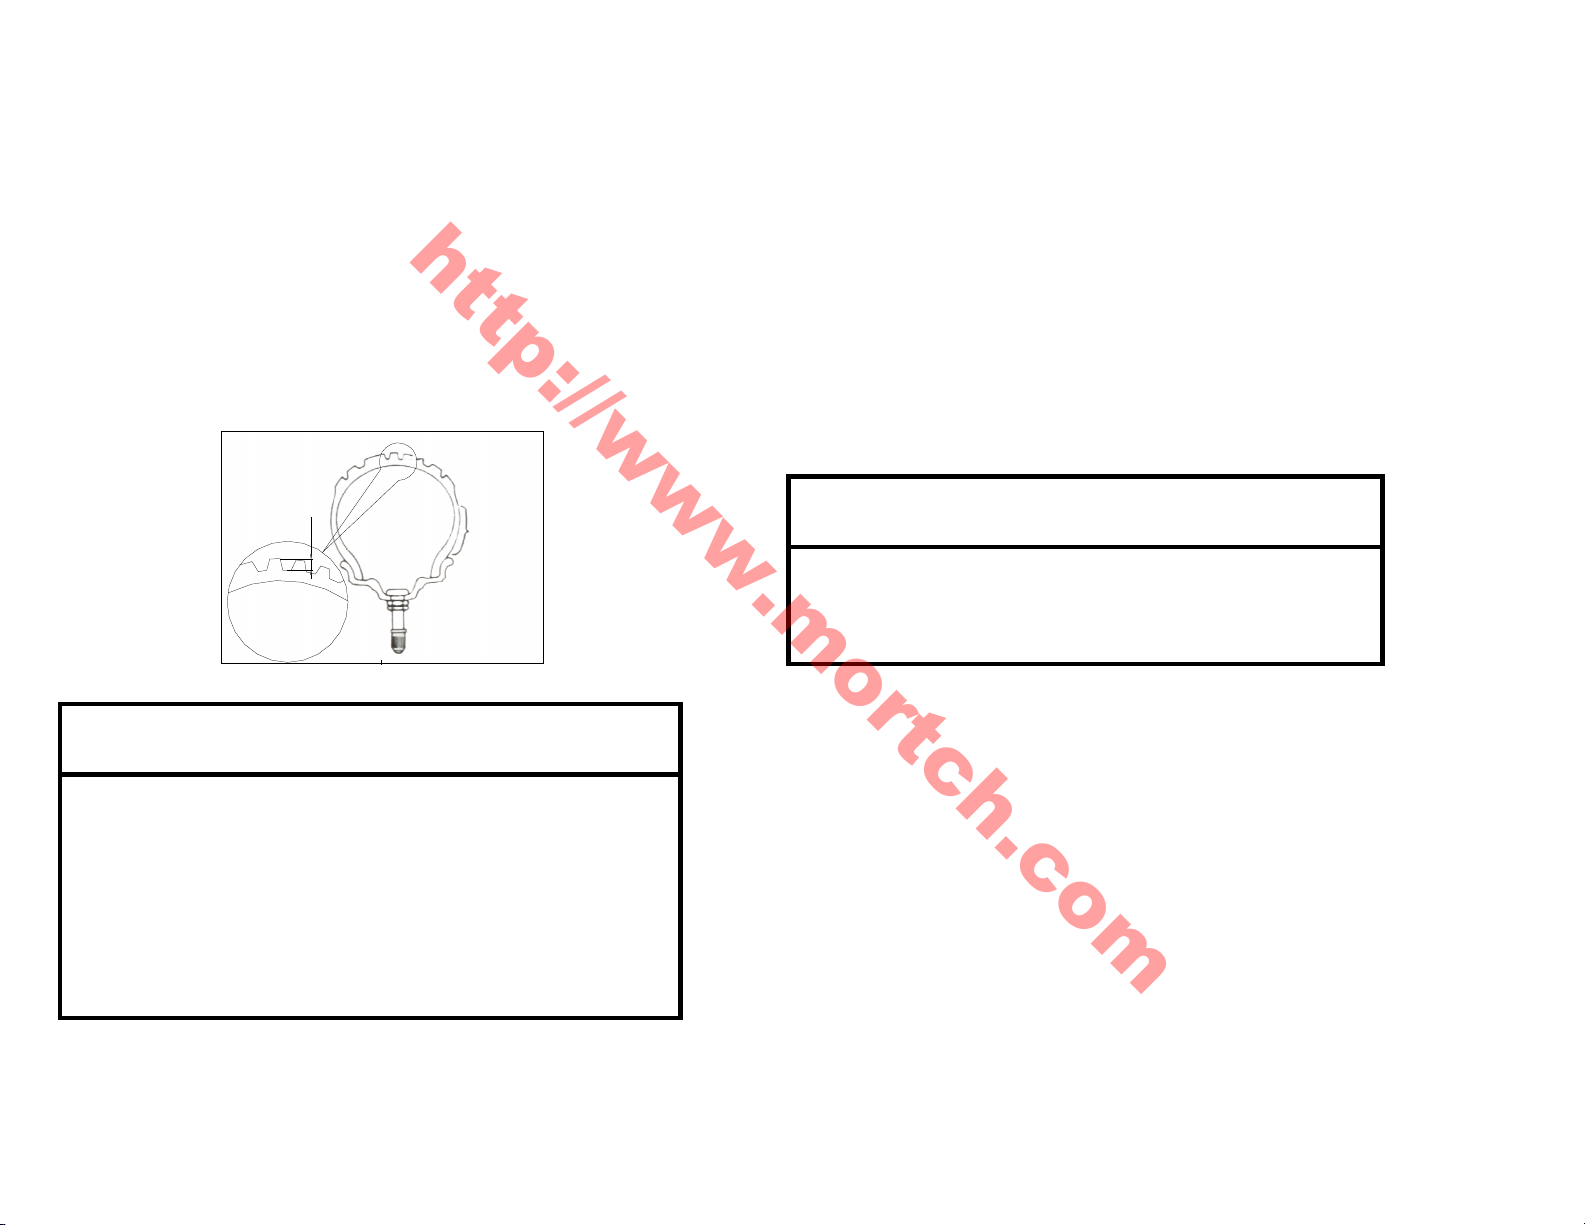
8.Tires
The standard tire is
120/70
-
12 56J for
front
Warning:
Mortch International Ltd
http://www.mortch.com
Insufficient tire pressure hastens wear of them and
affects the riding stability. Please check the tire pressure
and tread depth when applying regular maintenance.
tarting motor
9. S
C
eck the fastening bolts and the carbon brush, and
h
replace them if necessary.
①Tire pressure: front 250 kPa, rear 250 kPa.
②Tread depth: It is suggested to replace a new tire
when the tread depth is less than l mm.
1mm
10. Fuse
Fuse is linked with the outer line of the battery. When a
light or circuit fails suddenly, check the fuse first.
Warning:
◆ The fuse cannot be replaced by any iron or
aluminum wire.
11.Gear oil
◆
and 3.50-10 51J for rear. The use of tire
other than standard may cause trouble.
◆ Tire inflation pressures and the general tire
Please use the recommended gear oil: SAE85W/90
Total capacity: 110ml
Replacing capacity: 100ml
condition are extremely important to the proper performance and safety of the vehicle.
15
Page 19
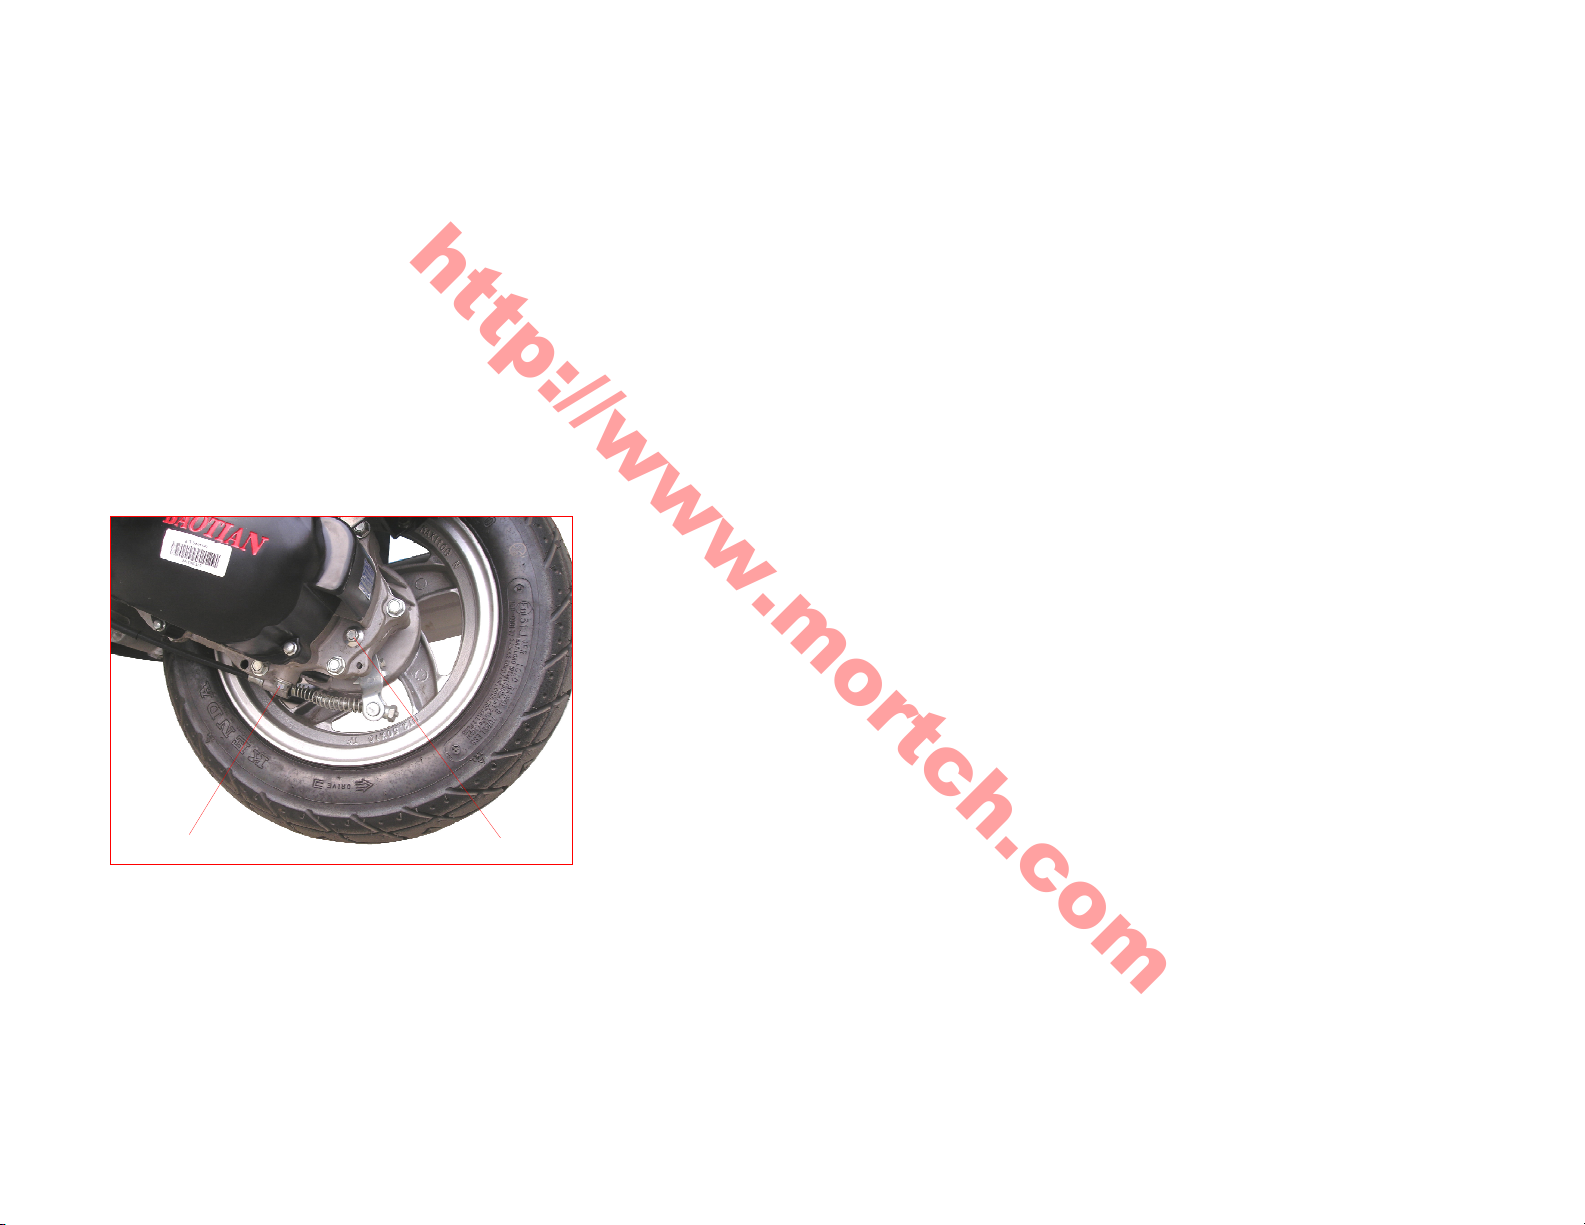
How to change gear oil
Mortch International Ltd
http://www.mortch.com
□□□□Tools
Stand up the scooter.
A full set of tools is offered for your daily use.
Take off the oil plug for refill.
Take off the oil plug for displacement, let off all the
used gear oil.
Tighten the oil plug for displacement.
Refill gear oil and tighten the oil plug after refilling.
oil plug for displacement oil plug for refill
OTE: After replacement, please make sure you have
N
locked the oil plug.
16
Page 20
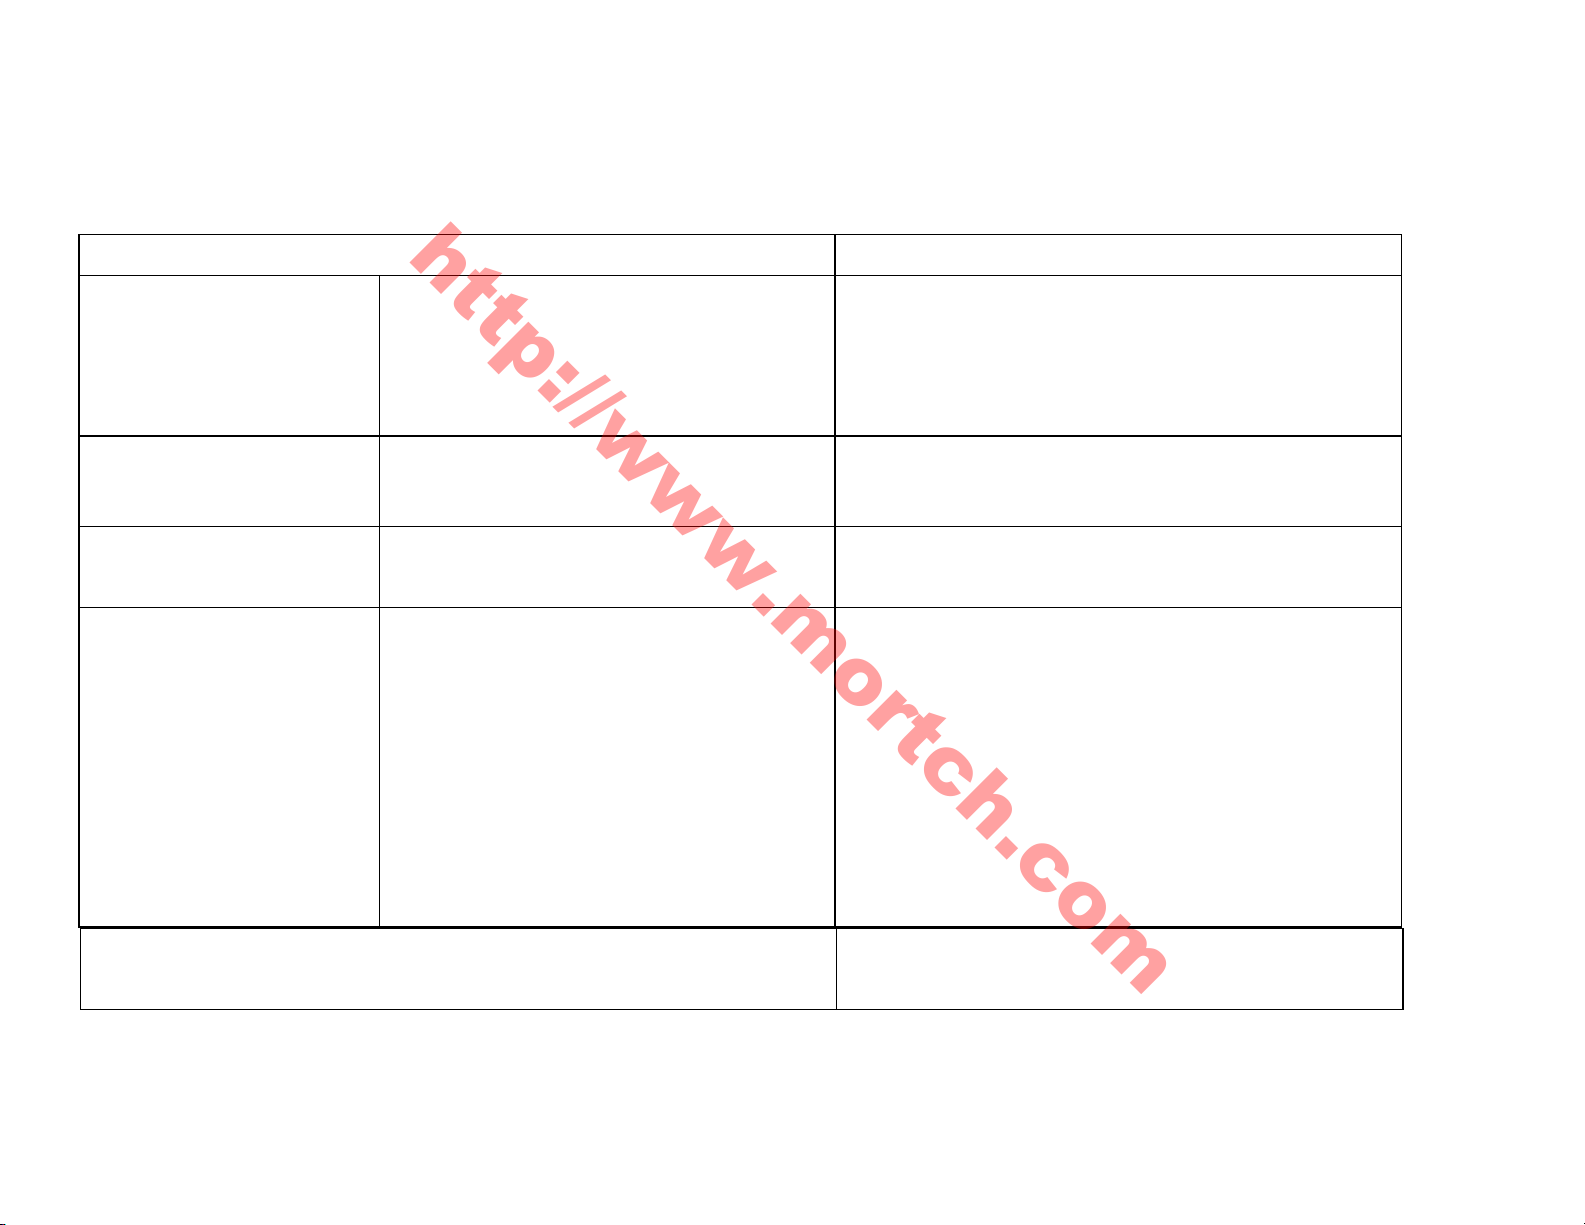
□□□□Technical Parameters
Mortch International Ltd
http://www.mortch.com
Items S
pe
cifications
Length
Size
Weight
Capacity
Circuit system
Width
Height
Wheel base
Unloaded weight
Mass weight
Max. Speed
Slope
Spark plug
Battery
Fuse
Headlight
Front turning lights
Rear turning lights
Brake light
1895mm
755mm
1045mm
1285mm
92kg±3kg
250kg
25km/h
≥16.8°
A7RC
12V/5.7AH
10A
12V 35/35W
12V 10W
12V 10W
12V 21/5W
Position lights
Volume of the fuel tank
Volume of the engine oil
17
12V 5W
4.5L±0.5L
1L
Page 21
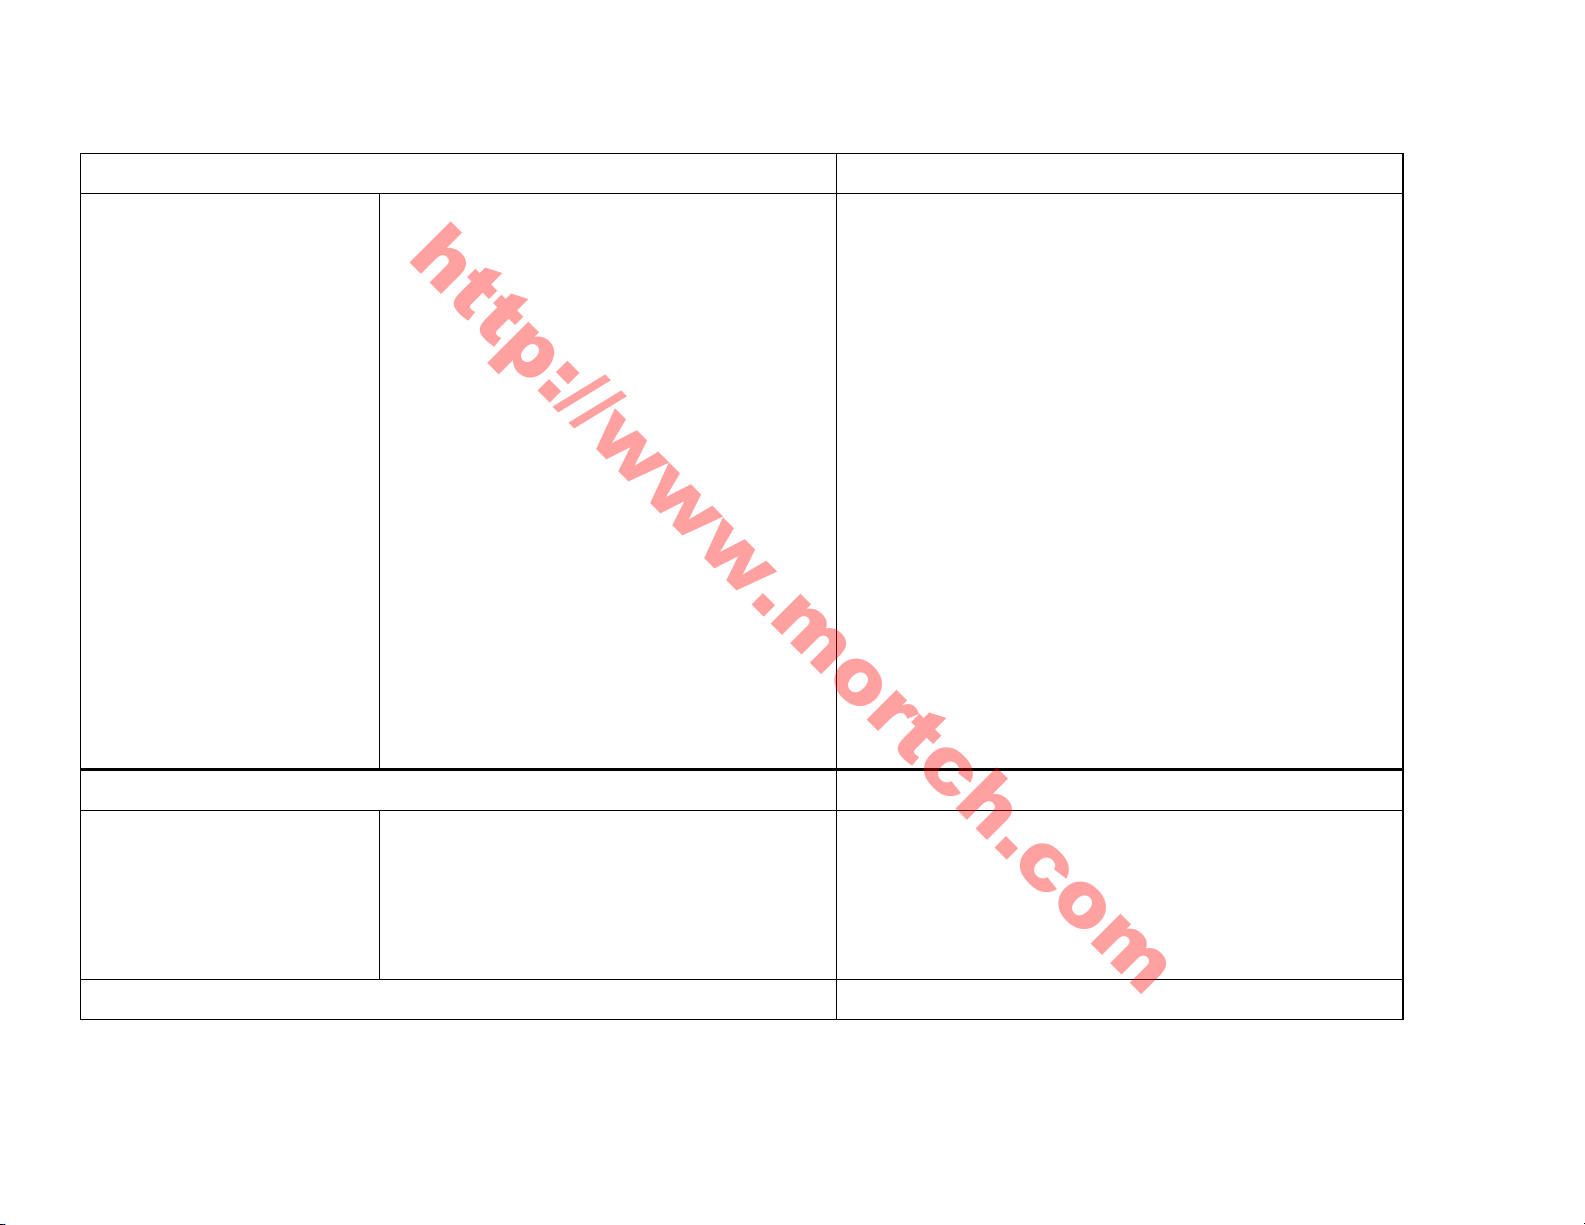
Items Specifications
Mortch International Ltd
http://www.mortch.com
139QMA
4 stroke
1
39mm×41.4mm
49cm
10.5±0
2.61kw/8000r/min
3
.1:1
Engine
Model
Type
Cylinder
Bore and stroke
Cylinder volume
Compression ratio
Max. Power
Max. Torque
Idling speed
Carburetor
Air cleaner
Ignition type
Starting mode
Cooling mode
Lubrication
Brake system Front: disk brake Rear: drum brake
3.56N·m/5500r/min
1900±100r/min
PD19
Sponge core
CDI
Electric/kicking start
Forced air-cooled
Pressure spray
Suspension
18
Front shock absorber
Rear shock absorber
Tires
Variable-pitch spring & hydraulic damping
shock absorber
Variable-pitch spring & hydraulic damping
shock absorber
Front: 120/70-12 56J Rear: 3.50-10 51J
Page 22
Mortch International Ltd
http://www.mortch.com
19
 Loading...