

MORryde TV1-006H Installation Instructions Manual

Hardware for mounting television: Refer to your television’s owners manual or select the appropriate bolt from the hardware provided.
M4
M4 Lock Washer (6)
M4x12mm Bolt (4)
M4x30mm Bolt (4)
M5 Lock Washer (6) M6 Lock Washer (6)
M4/M5 M6
#10 Washer (6)
*Spacers are for televisions with recessed mounting holes.
Hardware for securing bracket: Select the appropriate length based on the thickness of your mounting surface.
M4/M5 Spacer (4)
Optional*
M6 Spacer (4)
Optional*
M5 M6
M5x12mm Bolt (4)
M5x30mm Bolt (4)
M6x35mm Bolt (4)
M8
M8x35mm Bolt (4)
M8Lock Washer (6)
M6x12mm Bolt (4)
M8x12mm Bolt (4)
< best for wood applications >< best for metal applications >
1/4” x 1” Self-drilling Screw (8)
MORryde International ▪ 1966 Sterling Avenue ▪ PO Box 579 ▪ Elkhart ▪ IN 46516
Customer Service: 574-293-1581 ▪ www.morryde.com
1/4” x 1” Lag Bolt (8) 1/4” x 1-1/2” Lag Bolt (8) 1/4” ID Washer (8)
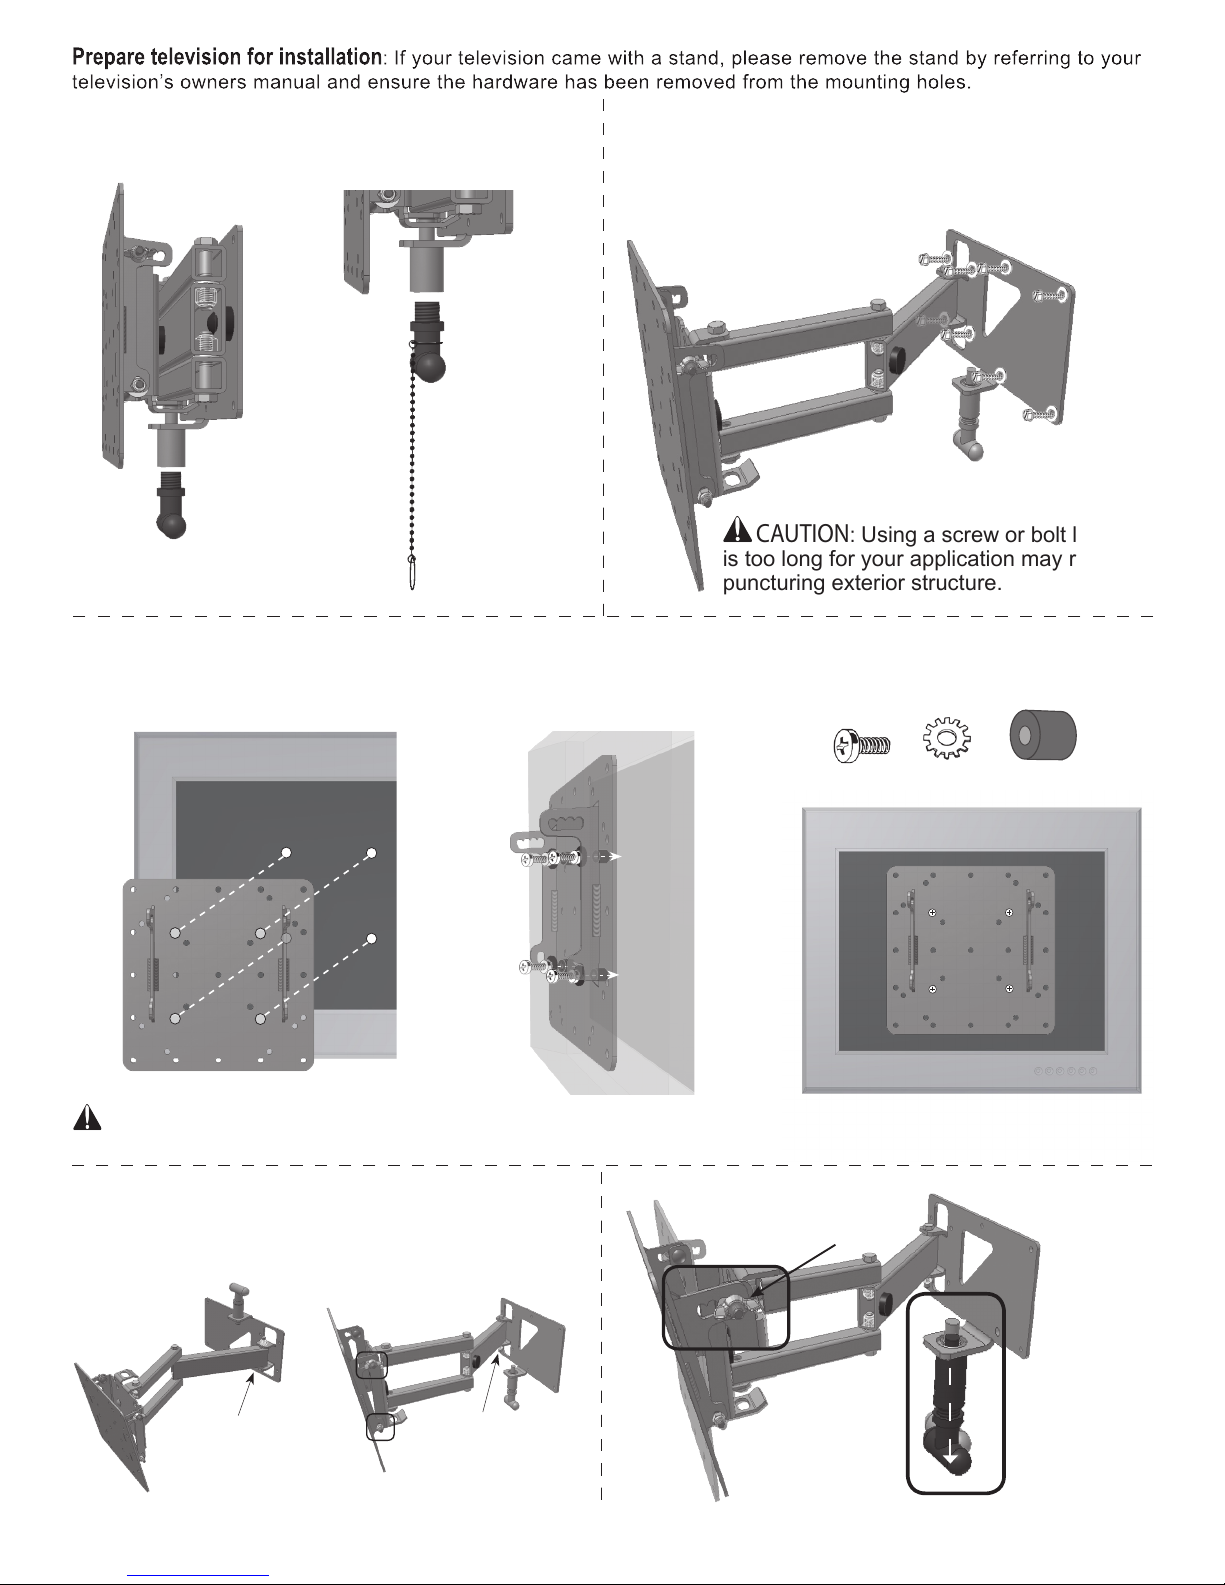
STEP 1 Assemble release handle mechanism:
Thread handle into place. Optional chain for extra length
can be added at this time.
Optional chain
for extra length
STEP 2 Secure the wall bracket to mounting surface:
Pre-drill holes using a 1/8” drill bit for use with 1/4” lag
bolts. Use lag bolts or self drilling screws (depending on
your mounting surface) with 1/4” washers to secure base
of bracket to the mounting surface.
CAUTION:
Using a screw or bolt length that
is too long for your application may result in
puncturing exterior structure.
STEP 3 Secure the television to mounting plate: Line up the hole pattern on your television with the matching hole
pattern on the universal mounting plate as close to the center as possible. Using the appropriate mounting hardware
and washers, secure the television to the mounting plate. This can be done without removing the mounting plate,
gures are shown without bracket for illustration purposes only.
Lock Washer (4)Bolt (4)
Spacer (4)
Optional
CAUTION:
This step may require two people to lift the television onto the bracket and secure. MORryde is
not responsible for property damage and/or personal injury.
If you prefer a right side orientation, the VESA
mounting plate can be reversed by disconnecting
hardware and remounting the plate upside down.
right side
orientation
PLEASE NOTE: This mount should be in the locked position during travel.
left side
orientation
Tilts 0-10.5º
Use thumbscrews to
adjust and lock tilt.
Pull handle
or chain to
release lock
and extend
or swivel.
 Loading...