

MORryde JP54-035 Installation Instructions Manual
TJ
JP54-035
Overland rack
INSTALLATION INSTRUCTIONS
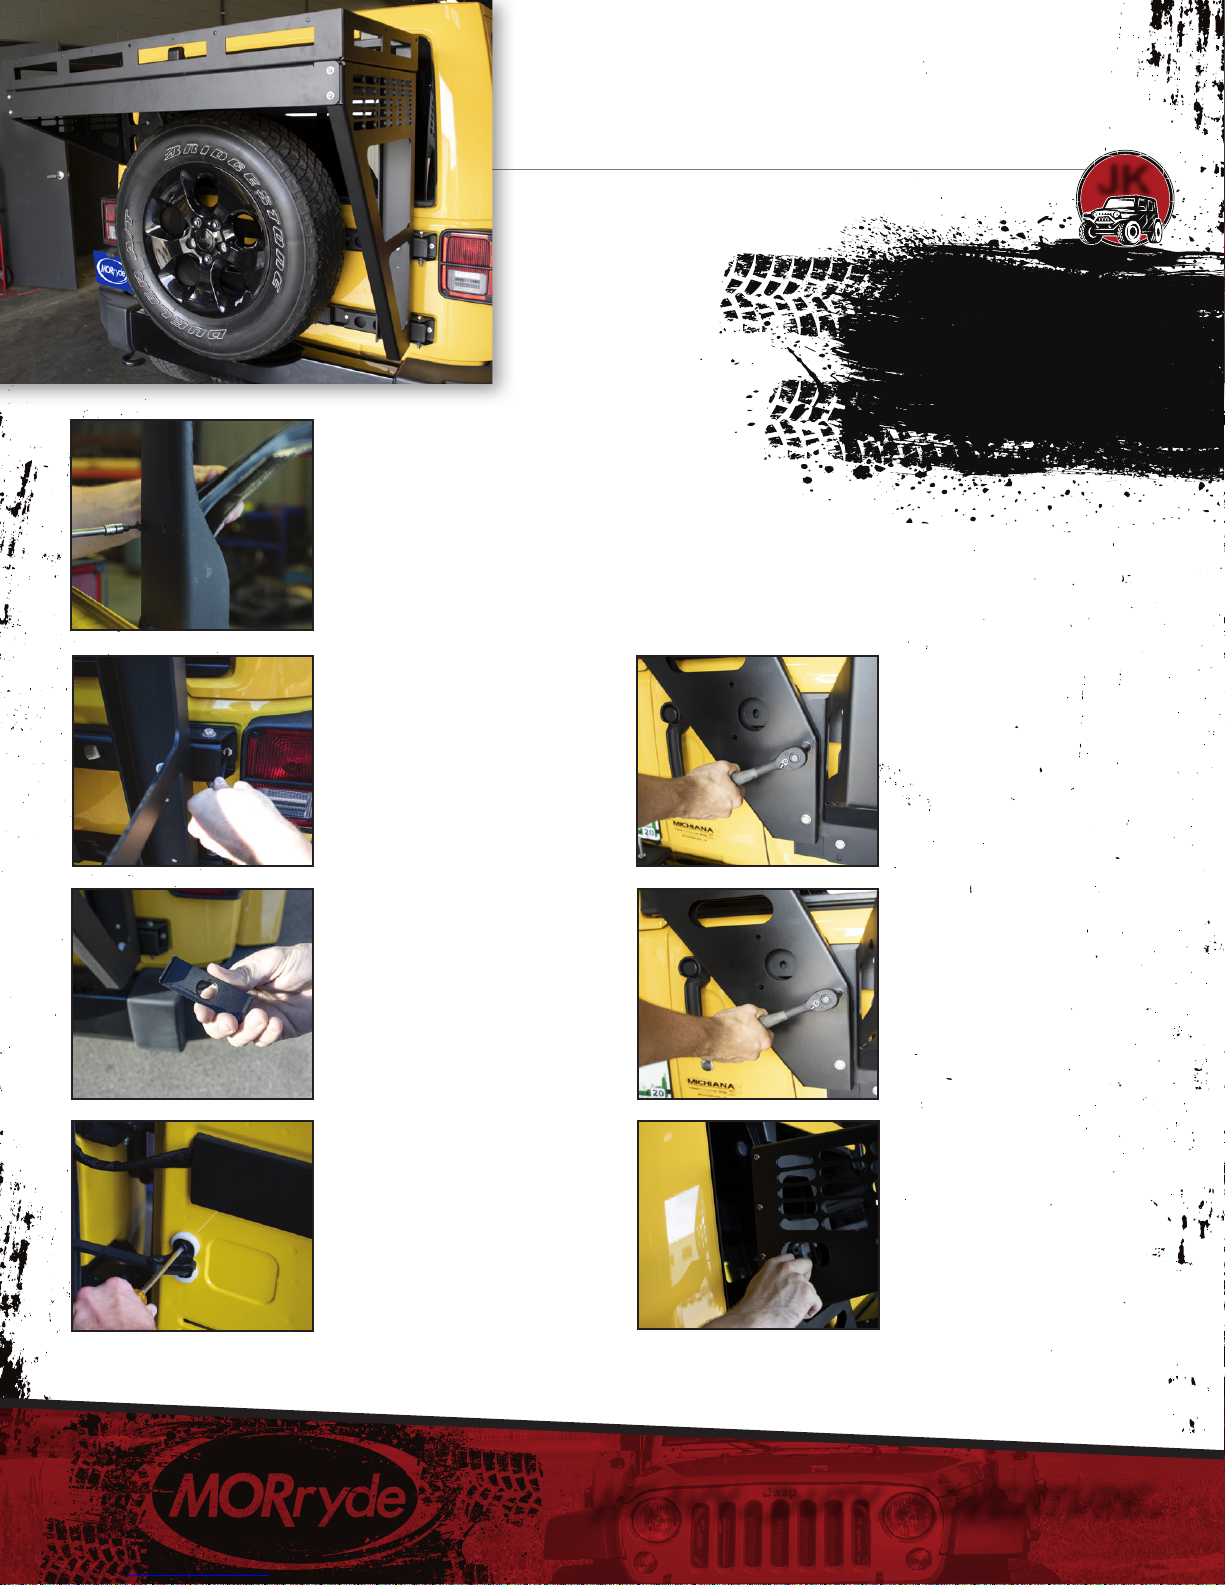
STEP 1
Before the installation of the Overland rack can proceed,
the third brake light needs to be unplugged
• To accomplish this, use a T20 Torx bit and uninstall the 4 screws
from the back side of the spare tire carrier. Once the screws are
removed, unplug the third brake light.
STEP 2
Remove Heavy-Duty Tailgate
Hinge stop bracket using 5/32"
allen wrench.
Tools Needed
• ⁄" Wrench
• ⁄" Wrench
• ⁄" Socket
STEP 5
Remove (2) driver side bolts
from Spare tire Carrier.
• ⁄" Allen Wrench
• ⁄" Socket
• T20 Torx
• T30 Torx
JK
STEP 3
Install new, low-profile stop
bracket in place of the stop
bracket that was just removed.
STEP 4
•
Unbolt tailgate guide arm from
tailgate using T30 socket and
place the provided ¼" spacers
between the tailgate guide arm
bracket and the tailgate.
• Then, bolt the tailgate guide arm
bracket back to the tailgate with
the spacers between the tailgate
and the bracket.
STEP 6
Line-up holes in driver side
support with the bolt holes in
the spare tire carrier and reinstall
using M8-2.5 x 80mm bolts.
NOTE: Don’t tighten bolts down
until assembly is complete.
STEP 7
Fasten driver side Molle grid
bracket to driver side support
using (4) supplied ¼"-20 button
head bolts to bolt through Molle
grid bracket and into rivet nuts
in driver side support.
Heavy. Duty. Adventure.
www.MORryde.com • 574.293.1581
TJ
JP54-035
Overland rack
INSTALLATION INSTRUCTIONS
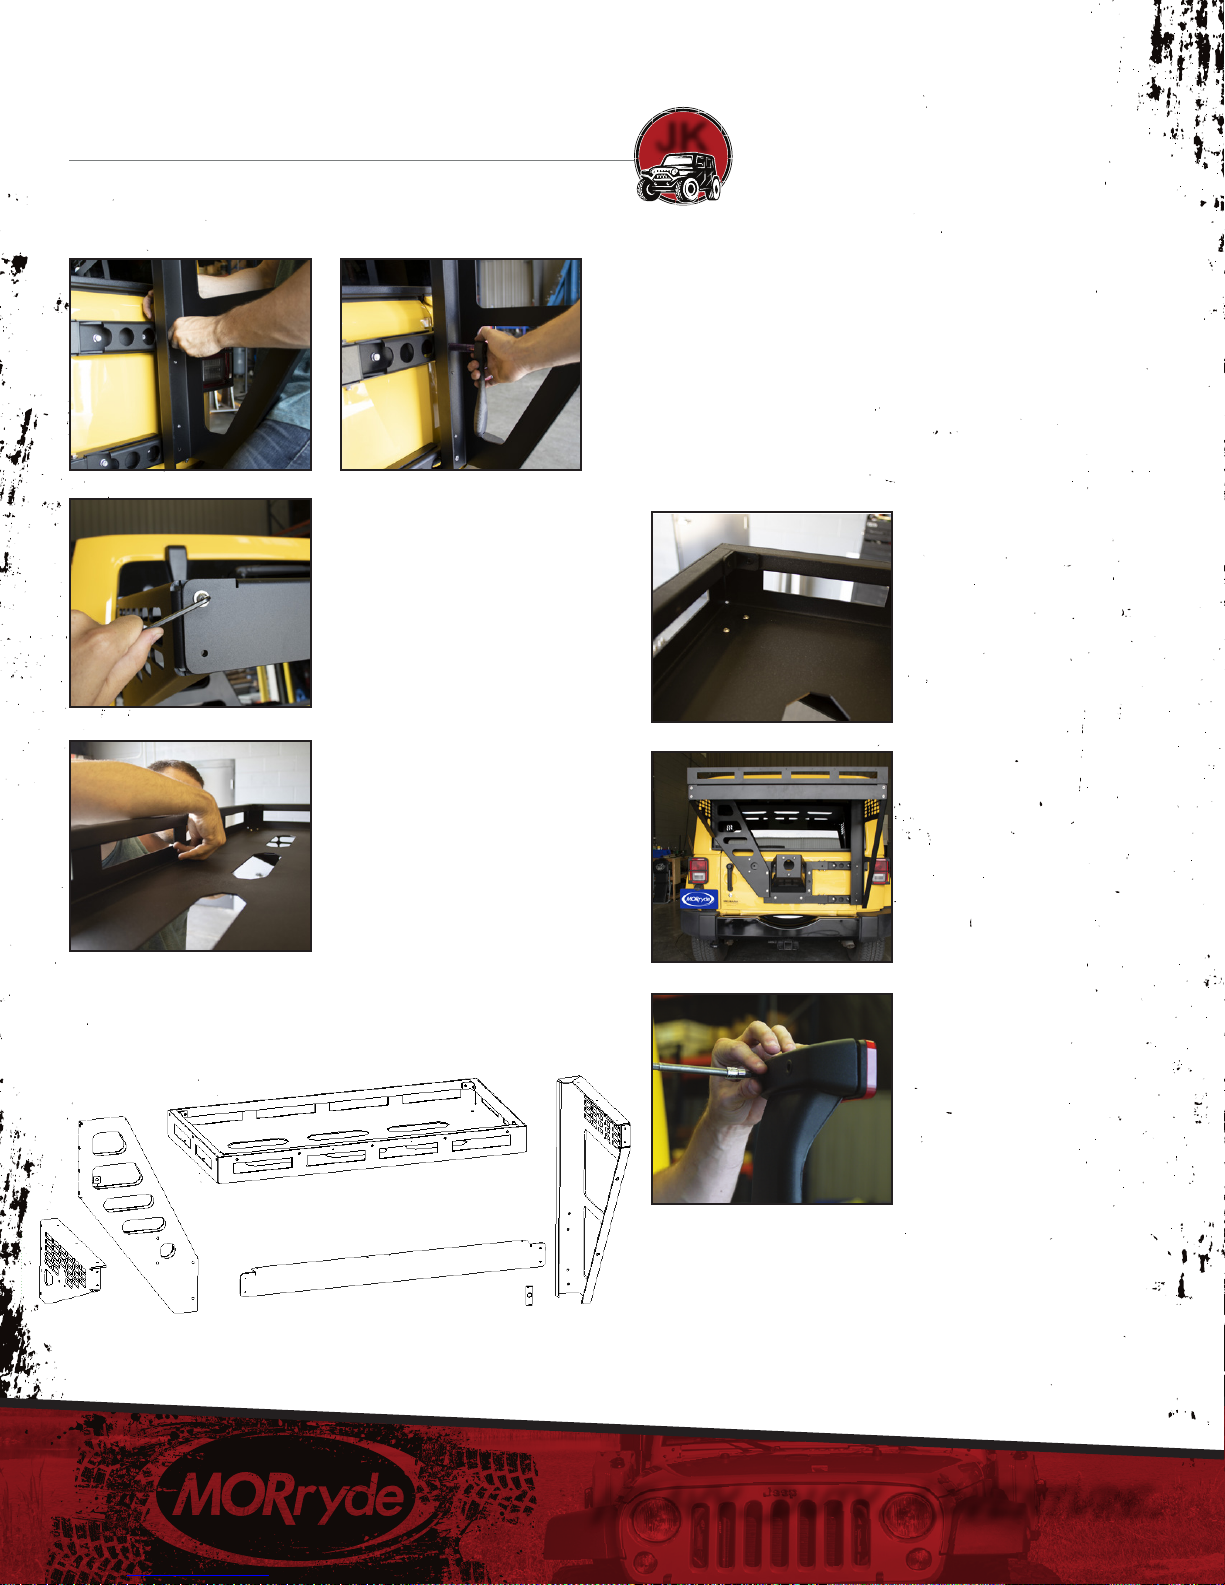
STEP
Install Cross Support bracket using
(4) supplied ¼"-20 button head
bolts and (4) supplied ¼"-20
nylock nuts.
9
JK
STEP 8
Install passenger side rack support
by inserting (2) supplied hinge clips
into the right-most holes in the
tailgate hinges and bolting through
support into the hinge clips using
(2) supplied 5/16"-18 bolts.
STEP
Fasten tray to supports using (9)
supplied ¼"-20 button head bolts
and (9) supplied nylock nuts.
11
STEP 1O
Place tray on top of supports and
line up bolt holes to ensure that tray
is oriented in the correct direction
with the provisions for a third brake
light facing away from the Jeep.
STEP
Ensure that Overland rack
tray is level to the ground and
tighten down hardware.
STEP
Reinstall third brake light.
NOTE: Depending on the size of the
spare and what spare tire carrier is
installed on the Jeep, the Overland
Rack may obscure the third brake light.
Provisions are in place on the top-most,
horizontal tube in the Overland Rack
tray to allow for the install of a third
brake light.
12
13
NOTE: Heavy Duty Hinges may need to be adjusted after loading the Overland rack to accommodate the added weight.
Heavy. Duty. Adventure.
www.MORryde.com • 574.293.1581
 Loading...