

Morrow Apollo SL40 User Manual

No part of this document may be reproduced in any form or
by any means without the express written consent of
II Morrow Inc.
II Morrow and Apollo are trademarks of II Morrow Inc.
© 1997 by II Morrow Inc. All rights reserved.
Printed in the U.S.A.
II Morrow Inc.
2345 Turner Road S.E.
Salem, OR 97302
U.S.A. Toll Free 800.525.6726
Canada Toll Free 800.654.3415
International 503.391.3411
FAX 503.364.2138
Visit our web page at http://www.iimorrow.com
Send comments about this manual by email to:
techpubs@iim.ups.com
History of Revisions
II MORROW
VISIONARY THINKING TODAY
December 1996 Original
Release
March 1997 Rev. -01
Ordering Information
To receive additional copies of the Apollo SL40 User’s Guide,
order part #560-0954-01.

Welcome ...
Welcome to a new era of aviation communication. Once
again, II Morrow Inc. has set new standards in features
and ease of use for the general aviation public. The
Apollo SL40 is a VHF Communications Transceiver for
use by the aviation pilot. Packaged in a new slim form
factor that helps you get the most out of limited panel
real estate without limiting features and performance.
The Apollo SL40 is unequaled in providing the features,
level of performance, and reliability that aviation users
expect. The Apollo slim line series of avionics sets a
precedent that will be the standard that all other avionics
will be compared to. You can be confident in knowing
that you are the owner of the state-of-the-art in aviation
communication. Our products are built to last and to
allow for upgrading as your needs change in the future.
Welcome ...
i

Table Of Contents
Table Of Contents
Welcome ... ....................................i
Introduction ......................................1
Display .......................................1
Annunciators...................................1
Controls.......................................2
Power/Volume/Squelch Knob....................2
Small and Large Knobs.........................2
Buttons .......................................2
Flip/Flop (Arrows) ............................2
EC (Emergency Channel).......................2
MON (Monitor)...............................2
RCL (Recall).................................2
MEM (Memory) ..............................2
Basic Operation ...................................3
Power On/Off ..................................3
Volume .......................................3
Selecting Frequencies ............................3
Frequency Monitoring............................4
Recalling a Frequency............................4
Remote (REM) ...............................4
Auto Stack List (LST)..........................5
User Stored Frequencies (MEM) .................6
Weather (WTH)...............................6
Intercom Function...............................7
Stuck Mike ....................................7
System Functions..................................7
Software Version................................7
RF Level (RFLVL) ..............................8
Noise Level (NOISE) ............................8
Intercom Squelch ...............................9
Headphone Level ...............................9
Intercom Audio Level............................9
Sidetone Level..................................9
Base Station Lockout ...........................10
SL40 Specifications ...............................11
ii
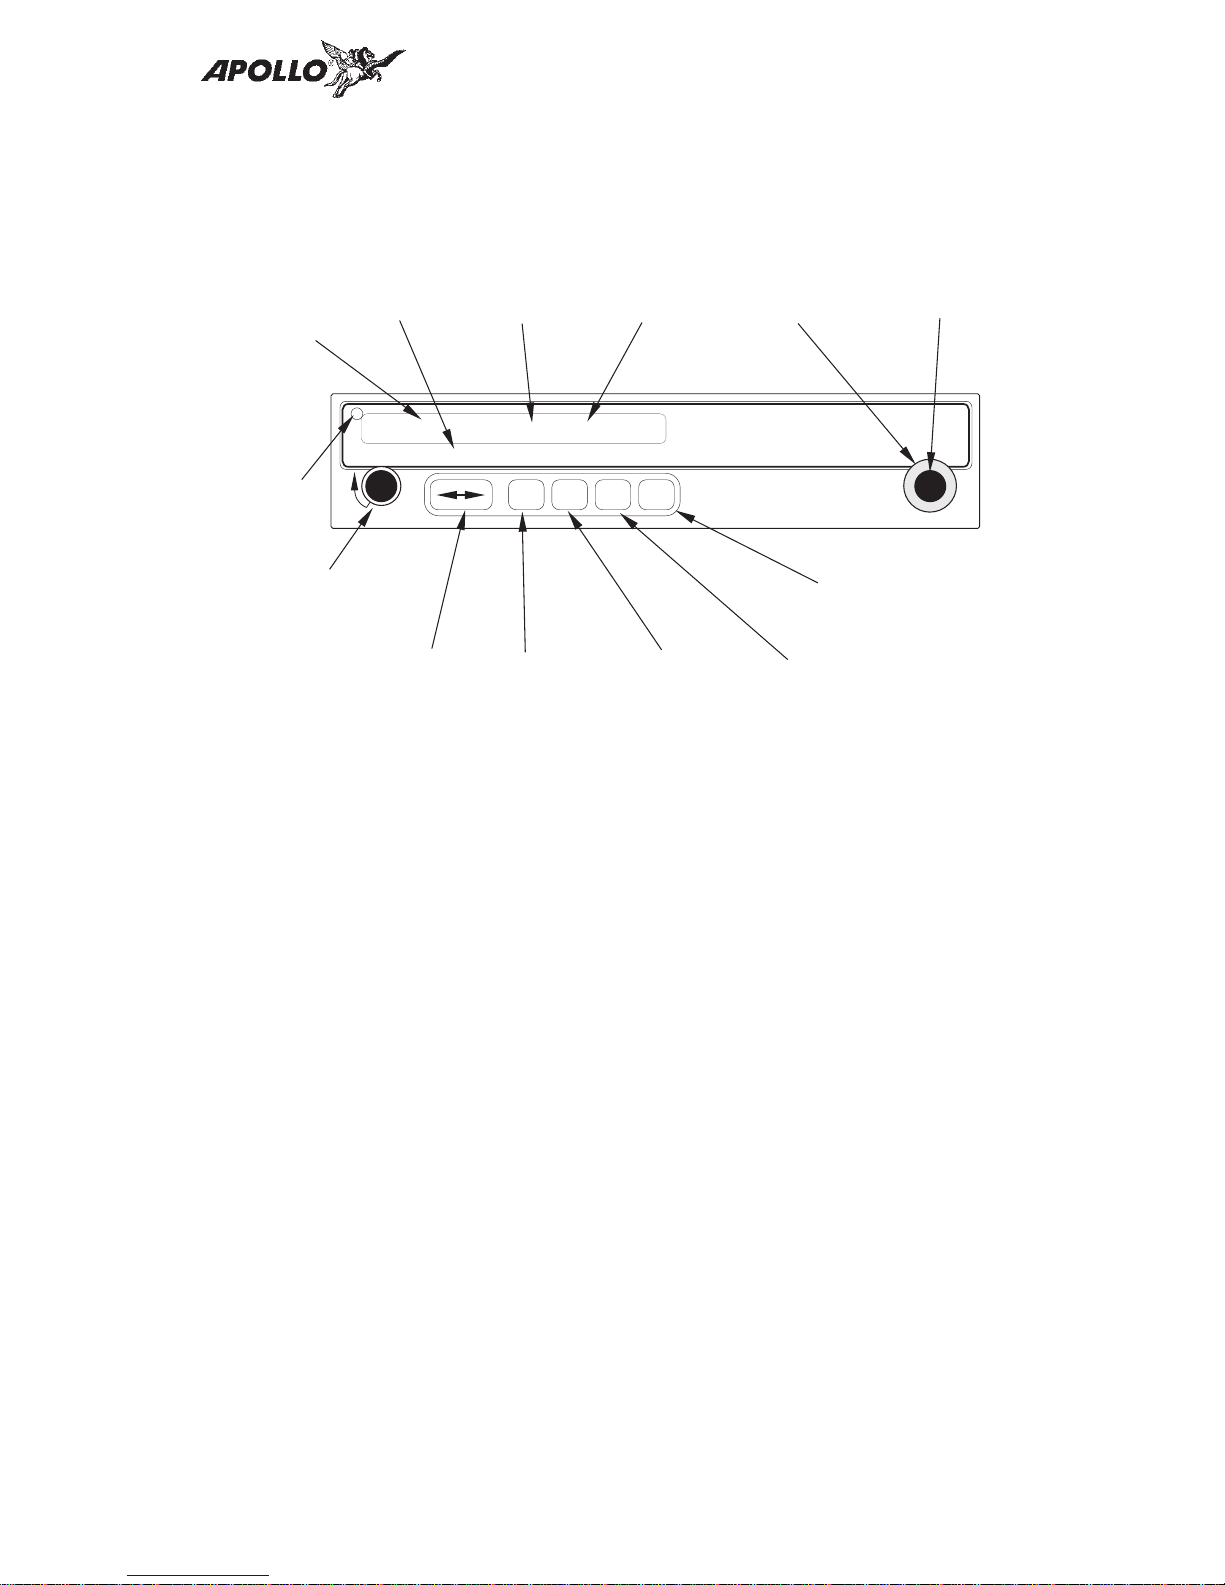
Introduction
This guide describes the operation of the Apollo SL40
VHF Communication Transceiver.
Introduction
Active
Frequency
Transmit
Annunciator
COM
Standby
Symbol
Standby
Frequency
Large, Outer
Knob
POLLOASL40
Small, Inner
Knob
119.80 s121.50
PULL SQUELCH
VOL
Photocell
OFF
Power/Volume/Squelch
Flip/Flop
Frequency
TX
Emergency
Channel
MON MEM
EC RCL
Frequency
Monitor
Store
Memory
Recall
Memory
Display The 1-line by 16-character display is composed of 5x7
dot matrix alphanumeric high intensity LEDs. A
photocell is located in the top left corner of the front
panel display. The photocell automatically controls the
intensity of the display from low brightness at night to
high brightness during daylight operation.
Annunciators Several annunciators are used to help indicate the
operating modes of your Apollo SL40. The TX
(Transmit) annunciator is lighted whenever you are
transmitting. If the avionics bus drops below 9 VDC, the
SL40 will not transmit. An LED will be lighted above
the MON and RCL buttons when these functions are
selected. An “s” will appear to the left of the Standby
frequency. An “m” will appear to the left of the Standby
frequency when you are using the Monitor function. An
“I” indicates the Intercom function is being used.
TX - Transmit
s - Standby Frequency
m - Monitor Mode
I - Intercom
1
Introduction
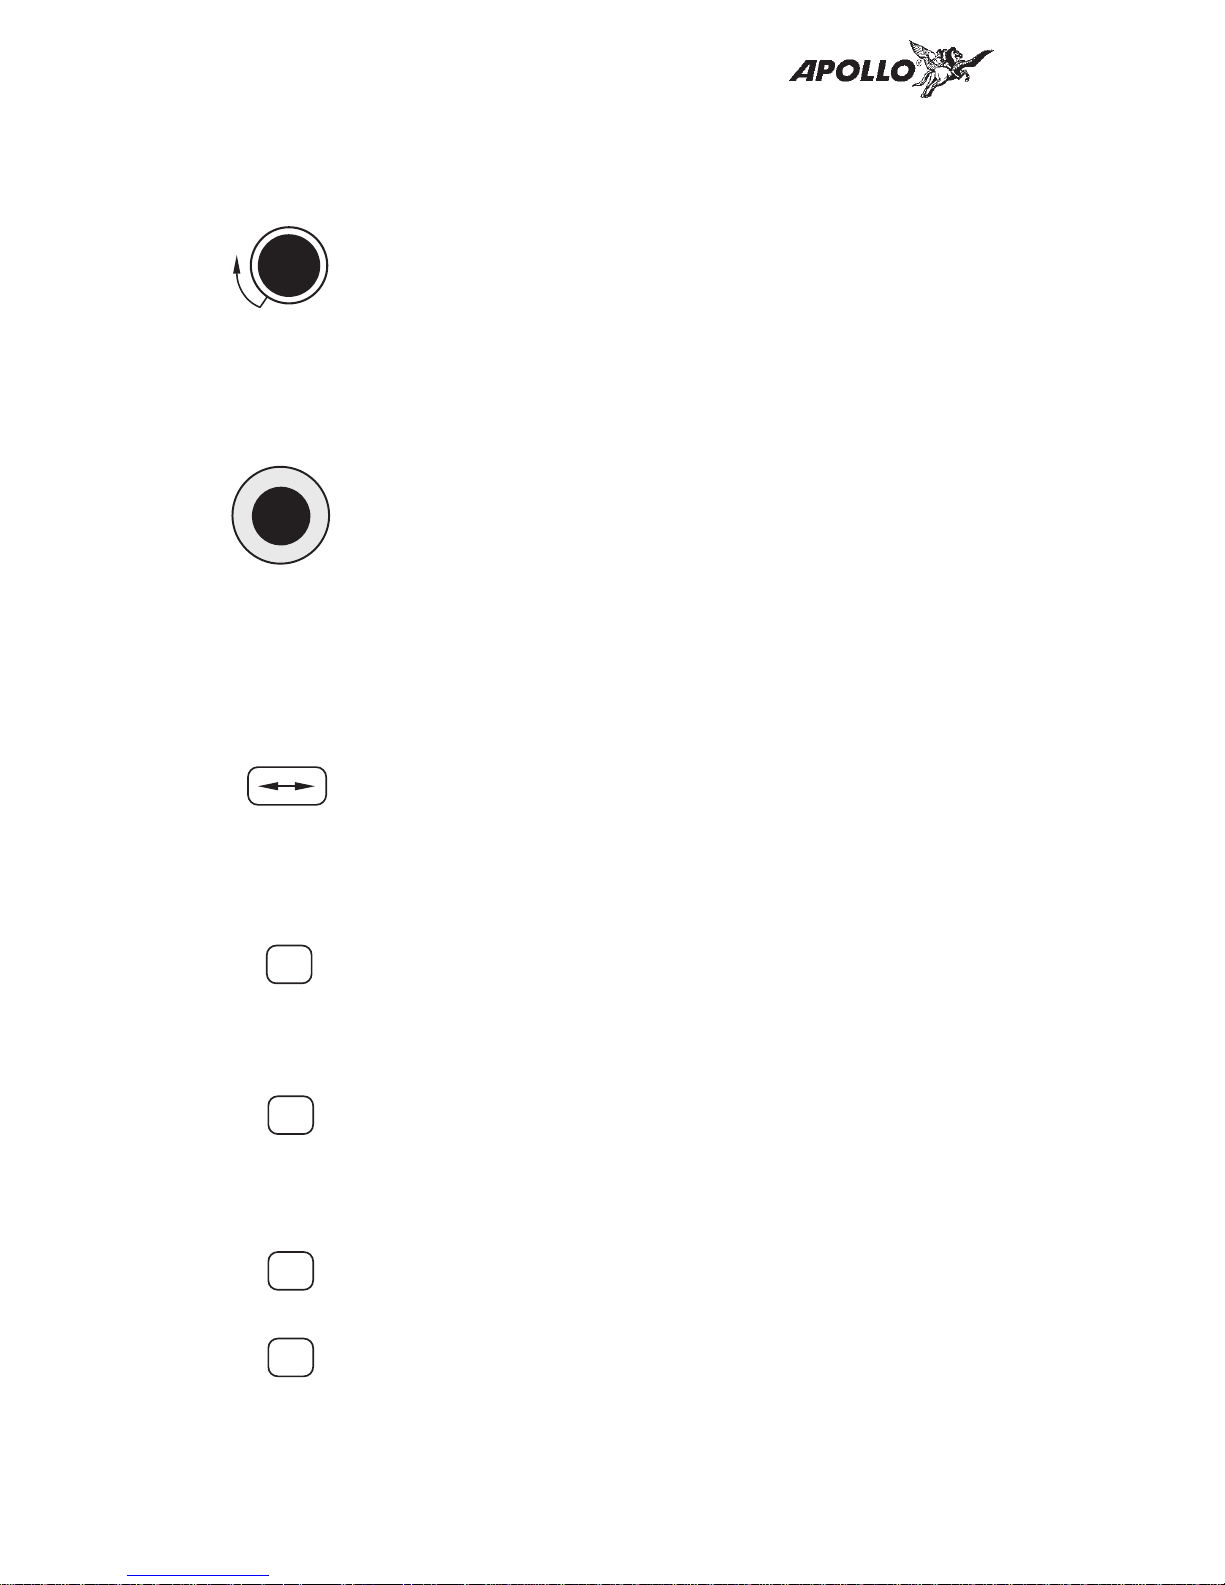
Controls Power/Volume/Squelch
The knob on the left side of the SL40 controls power
PULL SQUELCH
on/off, volume, and squelch test. Rotate the knob
VOL
clockwise (CW) past the detent to turn the power on.
Continuing to rotate the knob to the right increases
OFF
speaker and headphone amplifier volume level. Rotate
the knob to the left to reduce the volume level. Pull the
knob out to disable automatic squelch.
Large and Small Knobs
The dual concentric knobs on the right side of the SL40
are used to select frequencies or to view the features
available within a function. Details are provided in the
appropriate section.
Buttons Five backlighted buttons allow you to access the
functions in your Apollo SL40.
Flip/Flop (Arrows)
Press the Flip/Flop button to switch between the active
(left-most) and standby (right-most) frequency.
Switching between frequencies is disabled while you are
transmitting.
EC (Emergency Channel)
EC
Press the EC button to load the Emergency Channel
(121.500 MHz) as the standby frequency. The Monitor
function is automatically enabled.
MON (Monitor)
MON
Press the MON button to listen to the standby frequency.
When the active frequency receives a signal, the unit
will switch automatically to the active frequency.
RCL (Recall)
RCL
Press the RCL button to retrieve stored frequencies.
MEM
Press the MEM button to store the displayed Standby
frequency in memory.
2
MEM (Memory)
 Loading...