

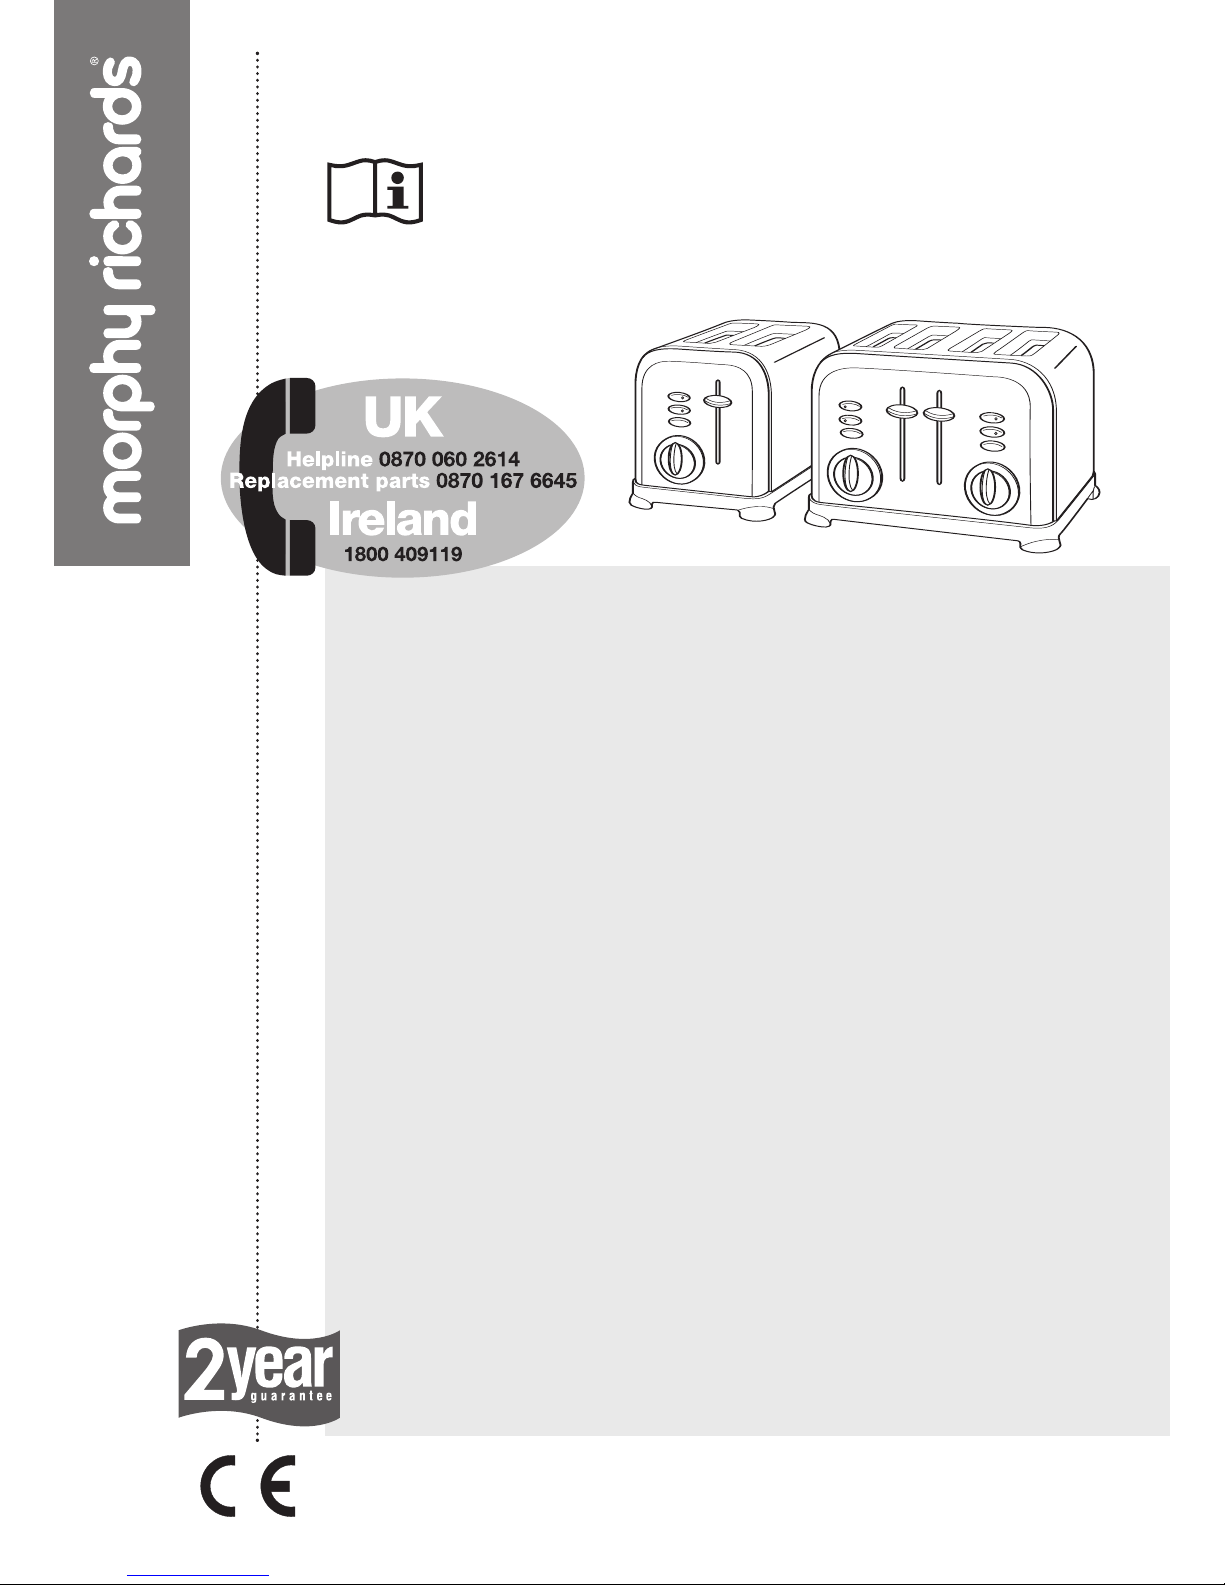
2- and 4-slice hardware toasters
w
ith bun warmer
Please read and keep these instructions
getting the best from
your new toaster...
• Safety first
Do not touch metal top of the toaster during or after use as it
gets very hot.
• Empty crumb tray regularly
To clean away any crumbs that accumulate after use.
• In order to achieve uniform browning
Wait a minimum of 30 seconds between each toasting, so that
the control can automatically set.
• Recipe book
Use the recipe book to get the best out of your sandwich cage.
www.morphyrichards.com

Important safety
instructions
The use of any electrical appliance
requires the following common sense safety
rules.
Primarily there is danger of injury or death
and secondly the danger of damage to the
appliance. These are indicated in the text by
the following two conventions:
WARNING: Danger to the person!
IMPORTANT: Damage to the appliance! In
addition we offer the following safety advice.
Location
• Always locate your toaster away from the
edge of the worktop.
• Ensure that the toaster is used on a firm,
flat, heat r
esistant surface.
• Ensure that sufficient space is left above
and around all sides of your toaster to
allow air to circulate.
• IMPORTANT: Do not use too close to
curtains, draperies, walls, cupboards and
other flammable materials.
• WARNING: Do not use underneath
cupboards.
• Do not use outdoors.
Mains lead
• The mains lead should reach from the
socket to the toaster without straining the
connections. Reduce the length of the
excess lead by using the cord storage
facility.
• Do not let the mains lead hang over the
edge of the worktop where a child could
reach it.
• Do not let the lead run across an open
space e.g. between a low socket and
table.
• Do not let the lead run across a cooker or
hot area which might damage the cable.
Personal safety
•
Do watch your toaster during use.
• WARNING: Do not immerse cord,
plug or toaster in water or other
liquid.
• WARNING: Do not touch the top of
the toaster or other hot parts during
or after use, use handles or knobs.
• WARNING: Do not insert oversize
foods, metal, foil packages or
utensils into the toaster.
• WARNING: Do not attempt to
dislodge food when the toaster is
plugged in and never insert cooking
utensils into the slots.
• IMPORTANT: Do not place bread or other
items on top of the slots as this may
damage the toaster and creates a fire
hazard.
Children
• Never allow a child to operate this
appliance.
• Children are vulnerable in the kitchen
particularly when unsupervised and if
appliances are being used or cooking is
being carried out.
• Teach children to be aware of dangers in
the kitchen, warn them of the dangers of
reaching up to areas where they cannot
see properly or should not be reaching.
Other safety considerations
• Do not operate with a damaged cord or
plug or after the appliance malfunctions
or has been damaged in any manner.
• Do not attempt repairs - the appliance
contains no user-serviceable parts. Call
our helpline for advice.
• Do not use accessories not
recommended by the manufacturer.
• Do not place on or near a hot gas electric
burner or in a heated oven.
• Only use for intended purpose.
• Unplug from outlet when not in use and
when cleaning.
•
Do not move the appliance whilst hot.
2
Electrical
requirements
Check that the voltage on the rating plate
of your appliance corresponds with your
house electricity supply which must be A.C.
(Alternating current).
If the socket outlets in your home are not
suitable for the plug supplied with this
appliance the plug should be removed and the
appropriate one fitted.
WARNING : The plug removed from
the mains lead, if severed, must be
destroyed as a plug with a bared flexible
cord is hazardous if engaged into a live
socket outlet.
Should the fuse in the 13 amp plug require
changing a 13 amp BS1362 fuse must be
fitted.
WARNING: This appliance must be
earthed.
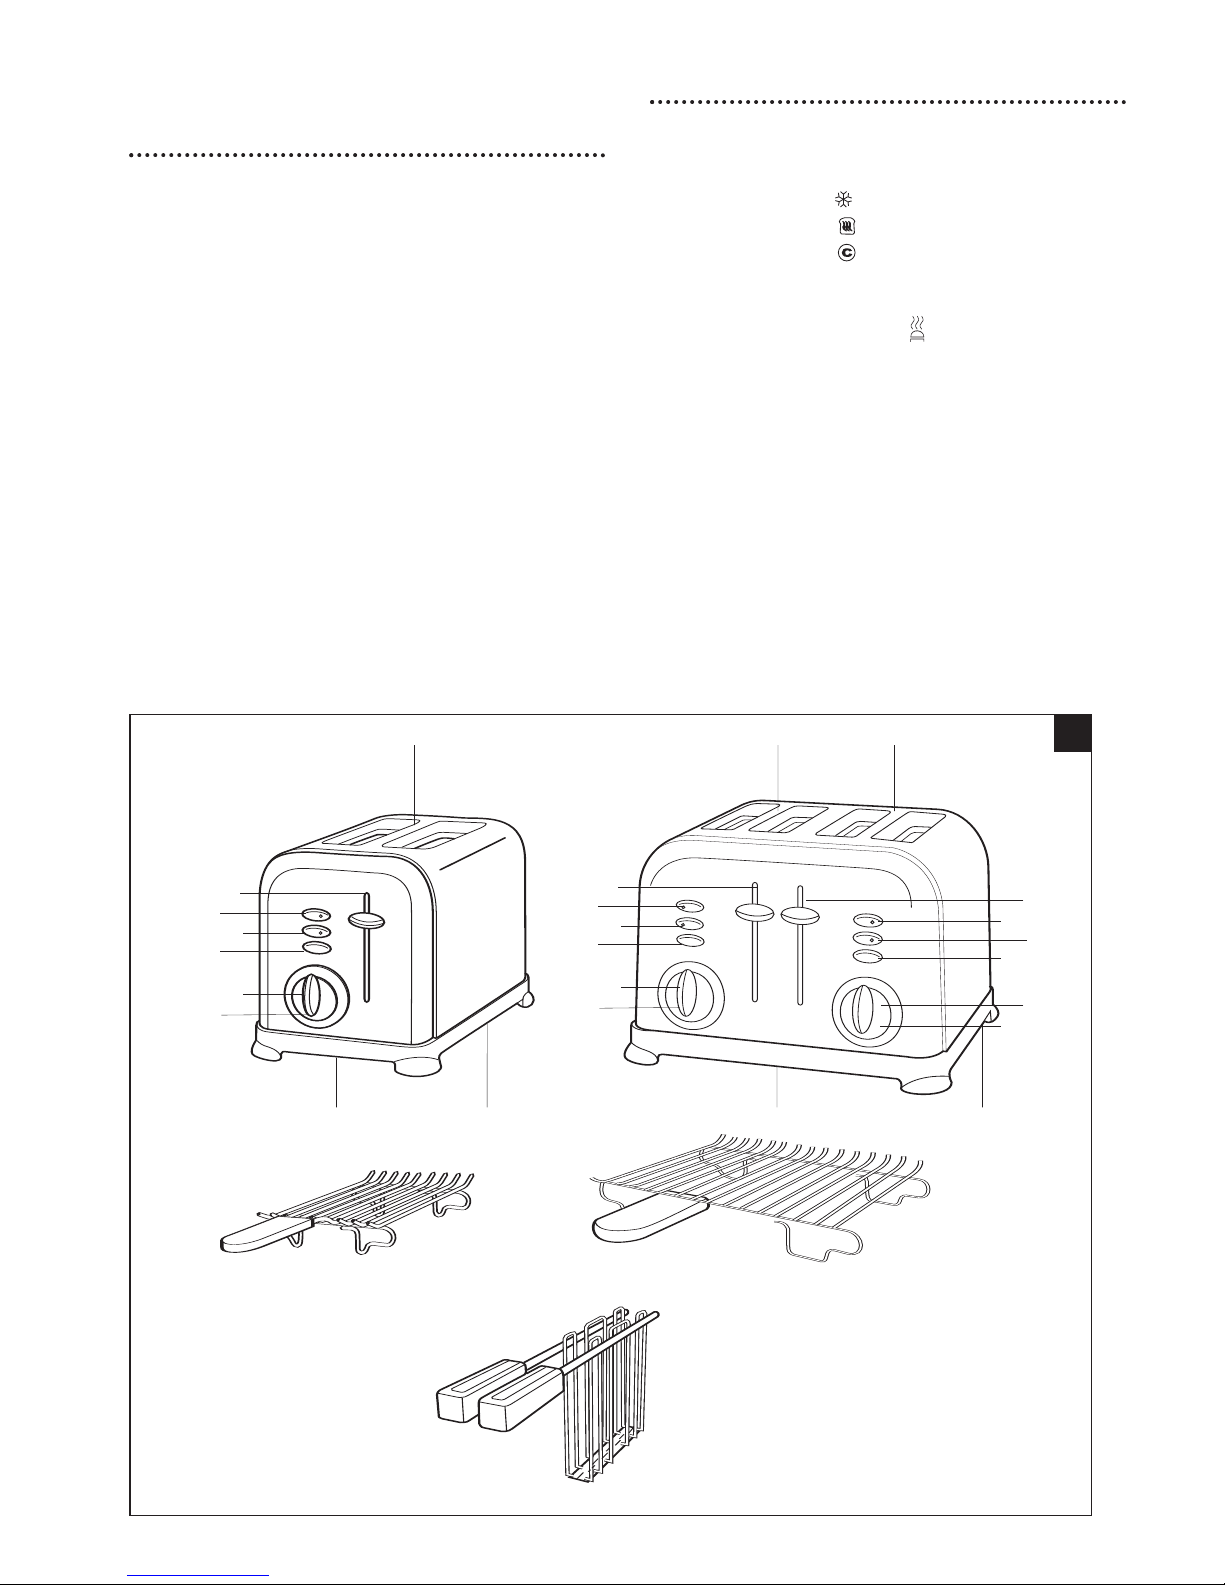
Features
A
⁄
Bread slots
¤ Bread carriage levers with high lift feature
‹ Frozen button
› Reheat button
fi Cancel button
fl Electronic variable browning control
‡ Bun warmer setting
(on browning control)
· Removable crumb trays at rear
‚ Cord storage
„ Bun rack
‰ Sandwich cage x 2 on four slice
3
A
⁄⁄⁄
¤
›
‹
‚
‚
··
fi
„„
‰
fl
‡
fl
‡
¤
›
‹
fi
fl
‡
¤
›
‹
fi

Before first use
Before using the toaster for the first time
operate the toaster without bread in a
ventilated room.
• The bread carriage levers
¤ will not stay
down unless the toaster is connected to
the mains supply.
• As with all new electric heating elements,
your toaster emits a ‘new’ smell when it
is first switched on which is quite normal.
Toasting
The 4-slice toaster has two sides with
controls repeated for each half. Each half
can be used together or independently.
1 Select the desired level of browning on
the br
owning control
fl marked 1 to 9.
The setting required will vary according to
the moisture content and thickness of the
bread.
2 After selecting the desired level, place
your bread in the slots
⁄ and depress
the bread carriage lever downwards until
it locks.
3 After the set time has been reached the
bread will pop up automatically ready for
removal from the slots. The bread
carriage lever will have returned to its
upper position and the heating element
will have switched off.
• If the bread in your toaster becomes
jammed disconnect your toaster at the
socket, allow it to cool, then remove the
bread.
• When not in use, remove the plug from
the mains socket.
• Allow the toaster to cool fully before
putting away.
WARNING: Do not wrap the cable
around the main body of the appliance
during or after use.
Using the frozen button
T
o toast fr
ozen br
ead do not adjust the
browning control from your normal preferred
setting, place the bread normally in the
bread slots, then depress the relevant bread
carriage lever and press the frozen
button
‹.
Using the re-heat button
If your toast has popped up and gone
cold, the toaster offers a re-heat facility. To
use, depress the relevant bread carriage
lever and press the re-heat button
›
immediately. The button will illuminate and
the toaster will operate for a short period reheating the bread.
Using the cancel button
If you wish to interrupt the toasting
process, press the cancel button fi.
Using the bun warmer
B
Place the bun warmer „ on top of the
toaster and clip it into place, ensuring it is
secur
e.
Place the buns or other items onto the
bun warmer. Set the browning control(s) to
the bun warmer position
‡. Depress bread
carriage lever(s) until they hold down. Wait
for the toaster to switch off automatically or
press the cancel button to switch the toaster
off before removing the buns.
WARNING: Take care not to touch
the metal of the bun warmer as it will
be hot.
Do not put more than one bun on the 2slice toaster or more than two buns on the
4-slice toaster bun warmer at any one time.
4
B1
B2

Using the sandwich holder
P
lace your sandwich in the sandwich
holder
‰ C.
Place the loaded sandwich holder into
one of the bread slots
D.
Set the browning control to the required
setting. Depress the relevant bread lever.
WARNING: Do not overfill the
sandwich as the heated contents may
leak into the toaster.
After the set time has been reached the
toasting cycle will finish. Remove the
sandwich and holder.
Hints & tips for perfect toasting
• For best results ensure the bread slices
are of even thickness, freshness and size.
• Stale bread toasts more rapidly than
fresh bread. Therefore, the browning
control should be set at a lower setting
than usual.
• Thin bread toasts quicker than thick.
• In order to achieve uniform browning, we
r
ecommend you wait a minimum of 30
seconds between each toasting so that
the control automatically resets.
• If toasting one slice only, you may need
to adjust the browning control to a
slightly lower setting.
• You may notice a slight variation in toast
colour on one side of a single slice.
•
All sorts of bread can be used as well as
teacakes, small rolls etc. Slices should
not however be so thick as to cause
burning or jamming within the bread
slots.
• When toasting more than one slice it is
recommended they are of equal size and
freshness.
Crumb trays
E
WARNING: Crumbs will accumulate
in the crumb tray and could catch fire if
not emptied regularly.
When the toaster has cooled down
completely, tap the sides of the case lightly
to dislodge any crumbs lodged in the
toasting chamber and r
emove the crumb
trays
·. Empty the tray and replace it.
Never operate the toaster without the
crumb trays fitted.
Cleaning and
maintenance
1 After use and before cleaning, remove the
plug from the wall socket and wait for the
toaster to cool.
2 Wipe the outside of the toaster with a
damp cloth only and dry with another
cloth or tissue.
• NEVER use metal polish or coarse
scouring agents and never immerse your
toaster in any sort of liquid.
• NEVER use any pointed or sharp articles
5
C
D
E

6
for cleaning the inside, otherwise the
heating element will be damaged.
•
NEVER use a brush or push your fingers
or metal objects down the slots.
Helpline
If you have any difficulty with your appliance,
do not hesitate to call us.
We are more likely to be able to help than
the store from where you bought it.
Please have the following information ready
to enable our staff to deal with your query
quickly.
• Name of the product
• Model number as shown on the
underside of the appliance.

Your two-year
guarantee
It is important to retain the retailers
receipt as proof of purchase. Staple your
receipt to this back cover for future
reference.
Please quote the following information if
the product develops a fault. These numbers
can be found on the base of the product.
Model no. Serial no.
All Morphy Richards products are
individually tested before leaving the factory.
In the unlikely event of any appliance proving
to be faulty within 28 days of purchase it
should be returned to the place of purchase
for it to be replaced.
If the fault develops after 28 days and
within 24 months of original purchase, you
should contact Morphy Richards quoting
Model number and Serial number on the
product, or write to Morphy Richards at the
address shown.
You will be asked to return the product (in
secure, adequate packaging) to the address
below along with a copy of proof of
purchase.
Subject to the exclusions set out below
(1-6) the faulty appliance will then be
repaired or replaced and dispatched usually
within 7 working days of receipt.
If for any reason this item is replaced
during the 2-year guarantee period, the
guarantee on the new item will be calculated
from original purchase date. Therefore it is
vital to retain your original till receipt or
invoice to indicate the date of initial
purchase.
T
o qualify for the 2-year guarantee the
appliance must have been used according to
the manufacturers instructions. For example,
appliances must have been descaled and
filters must have been kept clean as
instructed.
Morphy Richards shall not be liable to
replace or repair the goods under the terms
of the guarantee where:
1 The fault has been caused or is
attributable to accidental use, misuse,
negligent use or used contrary to the
manufacturers recommendations or
where the fault has been caused by
power surges or damage caused in
transit.
2 The appliance has been used on a
voltage supply other than that stamped
on the products.
3 Repairs have been attempted by persons
other than our service staff (or authorised
dealer).
4 Where the appliance has been used for
hire purposes or non domestic use.
5 Morphy Richards are not liable to carry
out any type of servicing work, under the
guarantee.
6 The guarantee excludes consumables
such as bags, filters and glass carafes.
This guarantee does not confer any rights
other than those expressly set out above
and does not cover any claims for
consequential loss or damage. This
guarantee is offered as an additional benefit
and does not affect your statutory rights as a
consumer.
• This guarantee is valid in the UK and
Ireland only.
7

TT44061/2MUK Rev 1 5/05
The After Sales Division,
Morphy Richards Ltd, Mexborough,
South Y
orkshir
e, England,
S64 8AJ
Helpline (of
fice hours)
UK 08450 777700
Republic of Ireland 1800 409119
Morphy Richards products are
intended for household use only
Morphy Richards has a policy of
continuous improvement in product
quality and design. The Company
,
therefore, reserves the right to change
the specification of its models at any
time.
 Loading...