

Page 1

DAB digital radio
27015
Operating instructions
Page 2

Illustration
1 Power on/off button
2 Telescopic aerial
3 LCD display
4 Band button
5 Info button
6 Time button
7 Autotune button
8Up button
9 Down button
10 Select button
11 Volume control
12 Power on LED
13 Preset buttons 1-7
14 Mains power connector
15 Earphone socket
16 Line out socket
17 Battery compartment
1
2
3
4
5
6
8
7
10
9
11
16
17
13
15
14
12
2
Page 3

Electrical Requirements
Installing batteries (not supplied)
Check the voltage on the rating plate of your DAB digital radio
corresponds with your house electricity supply, which must be A.C.
(alternating current).
If the socket outlets in your home are not suitable for the plug supplied
with this appliance the plug should be removed and the appropriate
one fitted.
Warning: The plug if severed from the mains lead must be
destroyed, as a plug with a bared flexible cord is hazardous if
engaged into a live socket outlet.
Should the fuse in the 13-amp plug require changing a 3-amp BS 1362
fuse must be fitted.
The DAB digital radio will work on mains or can be battery operated
for portable use. When the mains connector is fitted the batteries will
be overridden.
Power supply
Insert the figure of eight connector on the mains lead supplied into the
mains connector. Insert the plug into a mains socket and switch the
socket on.
1 Remove the battery compartment cover (located at the rear of the
unit).
2 Insert 4 x D batteries and connect to the terminals (ensure batteries
are inserted correctly). Replace the battery compartment cover.
Warning: If the unit is not to be used for a prolonged period,
remove the batteries to avoid battery leakage. In the interests of environmental safety: dispose of batteries safely.
Battery low indicator
A warning message will flash on the bottom line of the display when
the battery life is low. When this happens you will need to insert new
batteries. Do not mix old and new batteries and rechargeable with
alkaline batteries.
3
Page 4

Easy set up guide
What is DAB digital radio?
1 Fully extend the telescopic aerial.
2 Insert the mains connector or insert four ‘D’ size batteries into the
battery compartment.
3 Push the POWER button on. The display will light up and will show
Morphy Richards ordio DAB radio. The display will show autotune
full scan and then a bar chart will appear with a digit on the right
hand side.
4 The digits will increment when stations are found. The stations will
be stored in alphanumerical order and the first station will start
playing after the autotune. The station name, and DAB will
appear on the top line of the display. The bottom line will show
scrolling text (if available).
5 Adjust the VOLUME control to a suitable level.
6 Press UP or DOWN buttons to view the available stations on the
bottom line (the station that is currently being listened to will be on
the top line) and push the SELECT button within 2 seconds to tune
to the desired station.
7 Push the BAND button to switch to FM mode.
8 Press and release the POWER button to turn the unit off.
• DAB radio is a totally new way of transmission. It uses digital
signals rather than the analogue signals that FM and MW wavebands transmit on. This enables near digital quality audio and
enables more stations to be broadcast using a narrow waveband.
DAB can also transmit additional data with the audio channels.
• The stations broadcast on a single frequency network, called an
ensemble or multiplex. These can contain many different stations
and are on 1 frequency. Each multiplex is transmitted on a set
frequency range and are broadcast in the frequency band III
(174 – 240MHz), which is sub-divided into 41 blocks labelled 5A to
13F. Each can contain 1 multiplex.
• Secondary services and additional data are available in each
multiplex.
• If a secondary station is available, (not available on all stations) the
station name will be followed by ‘>’ (see diagram below). Secondary services cannot be stored as a preset.
• The number of multiplexes that you will receive will vary upon the
geographical location.
• So instead of knowing the frequency, you just need to select the
station name, making it much easier to tune to your favourite
station.
4
Page 5

Advanced operation
Tuning (DAB)
Turning the radio on and off
1 Press and release the POWER button to turn on. If the unit is
switched on for the first time, the unit will automatically select DAB
mode and an autotune will start.
2 The number on the top line will increment when stations are found
and the bottom line will change when multiplexes are found.
All stations that are found will be stored alphanumerically. When
the autotune has finished, the first station in the alphanumerical list will
start playing. This is only applicable for the first time the unit is
powered up. The stations are stored in memory when the radio is
turned back on, the previous station listened too will start playing.
It is safe to disconnect the power from the unit without losing the
settings stored.
If no stations are found, then try the following: -
• Ensure that the telescopic aerial is fully extended.
• Move the unit to a new location (see section ‘Improving reception
on your DAB radio’).
• Try fitting an external aerial (see section ‘Improving reception on
your DAB radio’).
To tune to another station, press the UP or DOWN button, the top line
will show the station name and the bottom line will show the type of
station. Each subsequent press of either the UP or DOWN button, the
station will step up or down according to the alphanumerical list.
• When a station is reached that you want to listen to, press and
release the SELECT button to tune to that station. A brief ‘tuning to
station’ may be seen. That station name will appear on the top line
and the bottom line will show information depending upon what the
info button is set to (see info button section).
• If the SELECT button is held down when selecting a station, then
the autoselect will be turned to off. When this happens, there is no
need to press select to tune to a station. When scrolling up or
down through the station list using the UP or DOWN buttons, the
radio will tune to that station after 2 seconds automatically when
the up or down button is released.
• To change back, press either the UP or DOWN button and press
and hold SELECT. The display will read ‘autoselect on’.
• Press and hold SELECT button to enter the manual tuning mode for
DAB. The display will say manual tuning and the following will be
displayed (this is an example, your display will depend upon the
tuning block selected).
5
Page 6

• Use the UP or DOWN buttons to scroll through the blocks available
to DAB. The radio will tune to that block if available. Press the
SELECT button and the radio will tune to the last station. ‘MAN’ will
appear in the left hand corner. Press SELECT button again for
automatic tuning.
Changing band
1 Press and release the BAND button to change from DAB to FM. The
radio will switch to FM. There are 2 options to tune in FM.
Manual tuning (FM)
1 Press the UP or DOWN buttons, the frequency will step up or
down by 50kHz until you reach the frequency that you desire.
Automatic tuning (FM)
1 Press and release the AUTOTUNE button, the frequency will
automatically search upwards until it finds a station.
2 Press and hold the AUTOTUNE button for 2 seconds, the
frequency will automatically search downwards until it finds a
station.
• If the station is using RDS (Radio Data System), the frequency will
change to the station name. Rolling text will appear on the second
line of the display (if available).
3 Press and release the POWER button to turn off.
• When the unit is turned back on again, the last station listened to on
either FM or DAB will start playing automatically.
Band button
1 Press and release the BAND button to change between the DAB
and FM bands. A brief message will appear when changing bands
saying switching to DAB or FM. The last station listened to on that
band will start playing.
6
Page 7

Info button - DAB
The INFO button alters the information displayed on the second line of
the display. The displays shown are an example of what can be
expected. The display on your radio will be different depending upon
the station being listened to.
The default setting is scrolling text. This is set by the station being
listened to and may contain details of the song being played, website
details, DJ etc. This scrolls on the bottom line of the display and will
change from time to time.
1 Press the INFO button and the programme type will be displayed.
The station being listened to sets this. There are various types
including rock, news, pop, other music and sport.
2 Press INFO button again and the multiplex name will be displayed
(see section entitled what is digital radio).
3 Press INFO button again and the signal quality will be displayed.
This is useful for tuning purposes.
• The empty square on the bottom line is fixed. The filled squares to
the left indicate poor reception and to the right indicate good
reception. Try to get as many filled squares on the bottom line as
possible by altering the direction of the telescopic aerial.
• Pressing the INFO button again and scrolling text will be displayed.
• Below shows cycling through the DAB info function with each
press of the button.
4 Press and hold the INFO button to display the software version
number. This cannot be altered and is needed before you ring our
helpline.
5 Press the INFO button again and the stereo information mode along
with the data rate will appear. This is set by the station and cannot
be altered.
6 Press INFO button again to display the scrolling text.
7
Page 8

Info button FM
• The displays shown are examples of what can be expected. The
display on your radio will be different depending upon the station
being listened to.
• This button alters the information displayed on the second line of
the display whilst in FM band. The default setting is rolling text. This
is set by the station being listened to and may contain details of the
song being played, website details, DJ etc. This scrolls on the
bottom line of the display and will change from time to time.
3 Press the INFO button again and the frequency will be displayed.
• Press INFO button again and the sound output will be displayed.
• Below shows cycling through the FM info function with each press
of the INFO button.
1 Press the INFO button again to display the programme type. The
station being listened to sets this. There are various types including
rock, news, pop, other music and sport.
2 Press again and the signal quality will be displayed. This is useful
for tuning purposes.
• The empty square on the bottom line is fixed. The filled squares to
the left indicate poor reception and to the right indicate good
reception. Try to get as many filled squares on the bottom line as
possible.
4 Press and hold the INFO button to display the software version
number. This cannot be altered and is needed before you ring our
helpline.
5 Press again to display the PI code.
The PI code is the programme identification code. It is used to distinguish between countries, areas in which the same programme is
transmitted and the identification of the programme itself.
8
Page 9

Time button
This is available on both DAB and FM. However not all FM stations
transmit the time signal.
1 Press the TIME button to display the current time and date on the
bottom line of the display. This is transmitted in the radio waves and
is decoded by the unit. If the time cannot be decoded the bottom
line will display ‘<Time/Date>’.
2 Press INFO button again to display the last info mode, i.e. If rolling
text was displayed before the time button was pressed then the
bottom line will go back to rolling text.
Autotune button
DAB
If the radio is moved to a new location or a new multiplex starts
transmitting then an autotune will need to be carried out.
There is no need to perform an autotune operation if a new station
starts transmitting on a multiplex that has already been tuned to as this
will be done automatically.
There are 2 options: - full and quick. A quick scan (channels 11B to
12D) will scan frequencies in the UK allocation. A full scan will scan
all frequencies available in the DAB bandwidth, (41 channels
numbered 5A to 13F) and will take longer.
1 Press and hold the AUTOTUNE button to perform the full scan.
2 Press and release the AUTOTUNE button to perform a quick scan.
The display will show:
• After the autotune has finished, the radio will return to the previous
station. The stations will be updated in the list and can be selected
by pressing the UP or DOWN buttons.
• The autotune will only add multiplexes. A System reset must be
used to remove a multiplex that cannot now be picked up, i.e. if the
radio has been moved beyond a multiplex range.
FM
To automatically search for the next station.
1 Press and release the AUTOTUNE button to search upwards.
2 Press and hold the AUTOTUNE button to search downwards.
The radio will stop searching when it finds a station of sufficient
strength.
9
Page 10

Up button
Storing a station
Use this button to search upwards - whilst in DAB you can search by
station name. Whilst in FM you search by frequency.
Down button
Use this button to search downwards - whilst in DAB you can search
by station name. Whilst in FM you search by frequency.
Select button
Use this button to select the station whilst in DAB mode. The audio
mode can be altered whilst in FM mode. Press once to display audio
mode: auto and press again to display audio mode: mono. This
changes the output sound from stereo to mono. This is useful if the
sound output is poor on FM due to reception.
Preset buttons
There are 7 preset buttons available on both DAB and FM, making a
total of 14, numbered 1-7.
If you want to store a station that you are listening to in a memory
preset location, press and hold the preset button that you wish to
store. For example preset 1.
‘Preset 1 stored’ will appear on the bottom line of the display. It
will automatically overwrite the previous station stored in that
location.
Recalling a station
1 Press and release the desired PRESET button. The radio will
tune to that station. If the preset is empty, the display will show
the following: -
• These are stored in memory, so power can be disconnected
from the unit without losing the settings.
• The station name is the station that is currently being listened to.
10
Page 11

Volume
Reset
Turn the central VOLUME knob to adjust the volume control. Turn
clockwise to increase the sound level and anti-clockwise to decrease
the sound level.
Signal quality
This is useful if the signal quality is poor.
Use the INFO button to select this option. Move the radio or alter the
direction of the aerial to try to increase the number of blocks on the
bottom line of the display (see also section entitled improving the
reception). Try moving your radio to a window to improve reception.
This is used to restore the factory default settings. It removes all
preset settings.
1 Turn the unit off and back on again. Whilst the opening message is
displayed, press and hold the SELECT button. The display will
show ‘system reset’ and then the radio will perform an autotune.
• This should solve most problems but can be used if you move the
radio to a new location or wish to restore factory default settings.
11
Page 12

Improving the reception on your DAB radio
The telescopic aerial supplied will be good enough in most locations if
the DAB signal strength is fair to good.
However, if you live in an area with poor coverage, then try the
following:
• If you have tried altering the aerial, moving the position of the radio
or have moved the radio to another location then consider an
external or loft mounted aerial to improve reception.
• There are 2 types of external or loft mounted DAB aerials. These
are dipole and 4 element aerial. Contact a professional aerial
installer if you are unsure about mounting one.
Unscrew the telescopic aerial by undoing the nut and removing the
aerial on the unit. Connect the lead from the external or loft aerial to
the unit using an F-type connector.
A TV/FM aerial will be installed to point at the nearest FM/TV transmitter, so connecting your radio to this type of aerial may not necessarily
improve reception. You will need an RF to F-type adaptor.
A signal booster will amplify the signal and may improve reception in a
marginal reception location.
Dipole aerial 4 element aerial
12
Page 13
External connectors
Technical specifications
Ensure that the radio and any external devices are turned off before
connecting.
You can connect earphones to the radio for private listening or
connect the radio to an external amplifier for quality sound.
Plug the earphone plug into the earphone connector. Ensure that the
volume is not too loud. Use earphones with a 3.5mm plug.
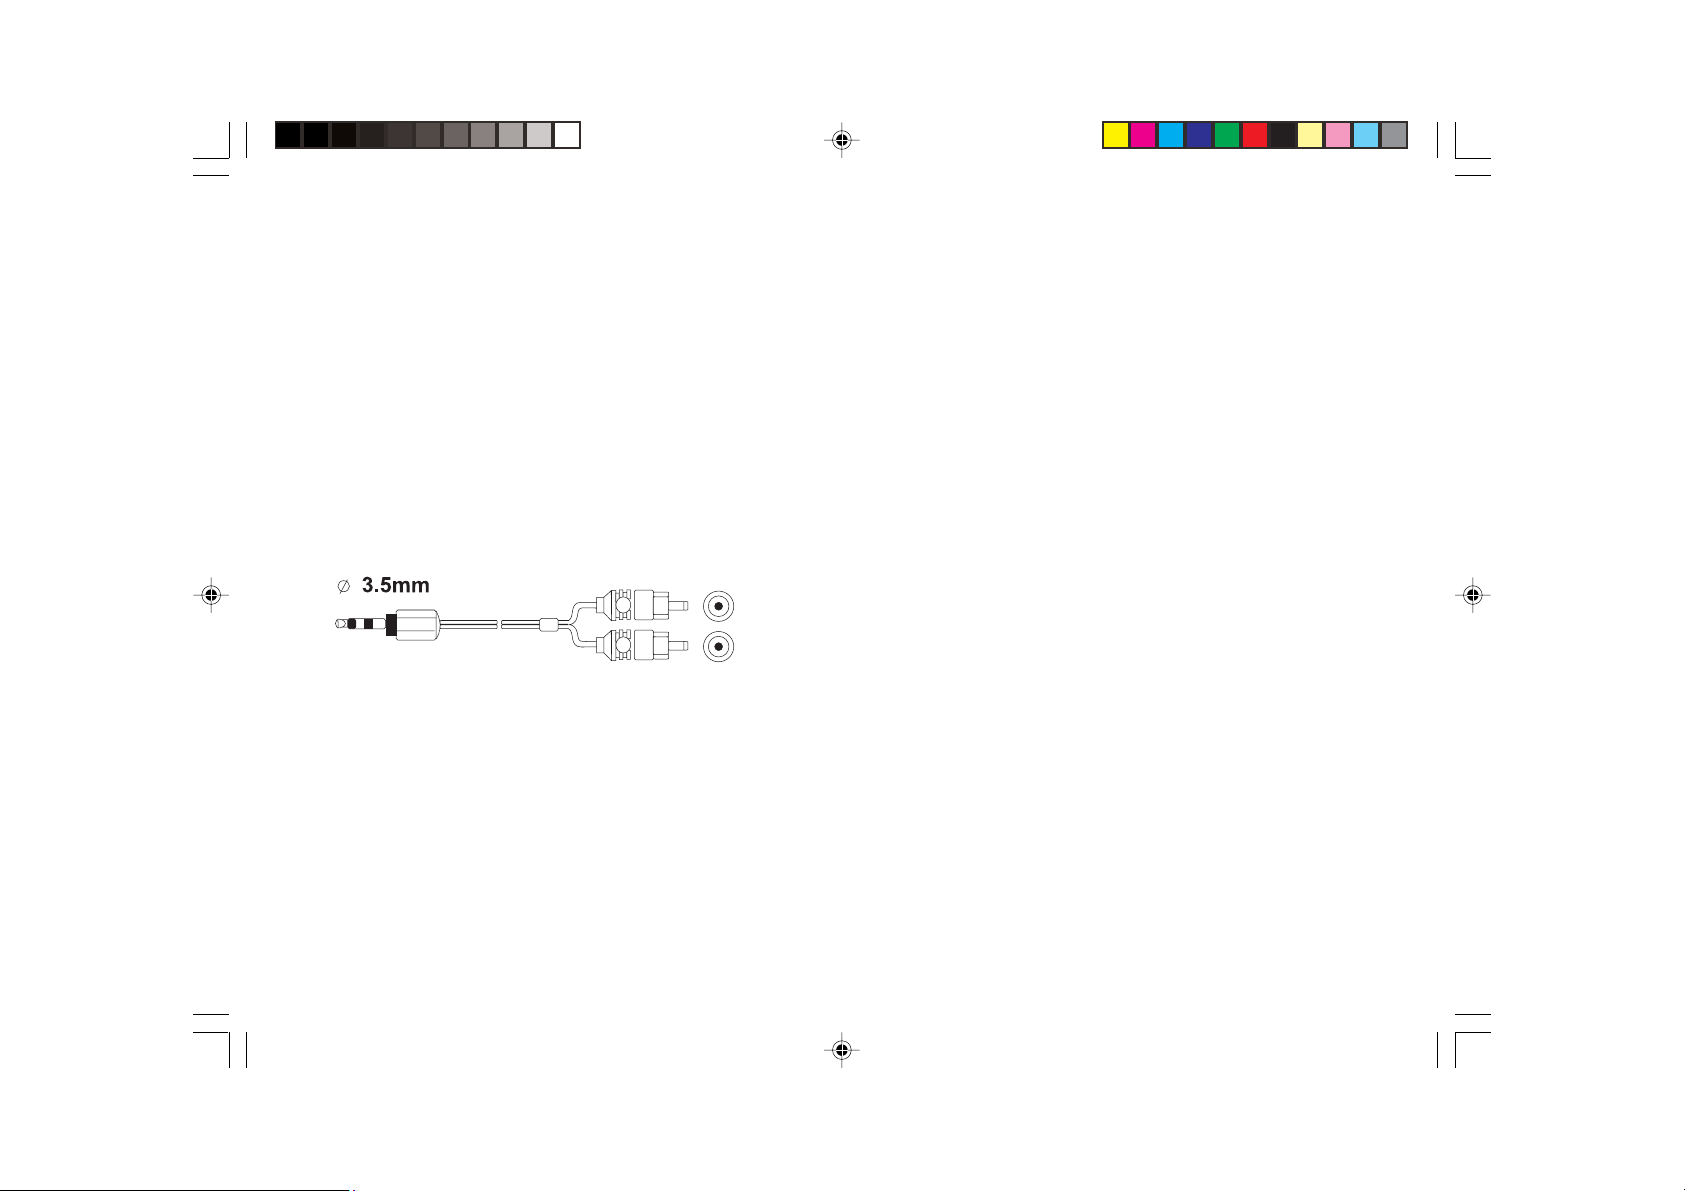
Connect the line out on the radio to the auxiliary input on your hi-fi,
external amplifier or speaker kit using a suitable cable. If your hi-fi has
twin phono sockets, then you will need a cable with a 3.5mm jack plug
and 2 male phono connectors, which can be purchased from an hi-fi
shop.
AC Power supply: 230v 50Hz
Battery: 4 x “D” size (not provided)
Compliant with ETS 300 401.
Capable of decoding all DAB transmission modes 1 – 4.
Speakers: Two 3” speakers – full stereo output.
Frequency range: DAB band III (174 – 240MHz)
FM (87.5 – 108MHz)
Earphone socket: 3.5mm diameter stereo output
Line out: 3.5mm diameter
LCD display: 16 characters, 2 lines with blue backlight.
13
Page 14

Trouble shooting guide Use this guide if you experience any problems with your DAB digital radio
Problem
No display.
No signal after
autotune (DAB).
Unable to pick up
a multiplex (DAB).
Time/Date not
showing.
No rolling text.
Low or no sound.
Sound is distorted.
Station not available.
Possible cause
No power.
Signal strength.
Signal strength.
Out of range.
New multiplex that has just
started transmitting.
Station not transmitting signal.
Poor signal strength.
FM station is not transmitting RDS
signal.
Poor signal strength.
Volume.
Signal strength.
Signal strength.
Off air.
Solution
Ensure the power cord is inserted firmly and socket is switched on. Ensure batteries
are correctly inserted. Try new batteries.
Alter direction of telescopic aerial.
Move location of radio.
Carry out another autotune after trying above points.
An external aerial might be necessary to improve reception.
See above
There are multiplexes that are local to an area. If you live beyond the range, then the
radio will not be able to pick up that particular multiplex.
The radio will not automatically add multiplexes, so an autotune needs carrying out.
Retune to another station.
The radio needs a certain amount of signal to decode the time signal.
Rolling text is only available on stations that transmit RDS.
The radio needs a certain amount of strength to decode the RDS signal.
Turn central knob clockwise to increase the volume.
DAB delivers good quality sound compared to FM but if the signal strength is poor,
then warbling will be heard. If the radio is on FM, interference might be heard.
Try switching the sound output to mono on FM.
The radio might have been moved; aerial might have been altered so the radio now
cannot pick up that station.
The station may not be transmitting at that time.
14
Page 15

Maintenance
Do not expose your DAB radio to extremes of temperature. The
product should be kept in a warm environment free from dust and
damp. For external cleaning use only a soft, clean, damp cloth. Use of
detergents may damage the finish.
Ventilation warning
The normal ventilation of the product shall not be impeded for intended
use.
WARNING: to reduce the risk of electric shock, do not expose
this appliance to rain or moisture.
15
Page 16

Guarantee
Morphy Richards products are manufactured to internationally accepted quality standards. In addition to your statutory rights, Morphy
Richards guarantee your product to be free from manufacturing and component defects for a period of TWO YEARS from date of
purchase.
If your product proves to be defective within 28 days of purchase, the Morphy Richards dealer from whom the product was purchased
will be pleased to replace it free of charge.
Should your product develop a defect within the guarantee period but after the replacement period, please return the product to the
following address, together with the proof of purchase, brief details of the symptoms and your own name and address.
After Sales Division
Registered address
Morphy Richards Limited
Talbot Road
Mexborough
South Yorkshire
S64 8AJ
Your post office will provide a certificate of posting. The product will be repaired and returned to you promptly.
Helpline (8:30-5:00 Mon-Thur/ 8:30-4:00 Fri) UK 0870 060 2614
Republic of Ireland 1800 409119
Replacement parts 0870 167 6645
Morphy Richards Website: www.morphyrichards.co.uk
446/8004/27 Rev 1
Morphy Richards Ltd, Talbot Road, Mexborough, S64 8AJ
 Loading...