

Page 1
VC70495MEE Rev4_9225 47507 MEE pump - Jon 25/01/2014 15:12 Page 1
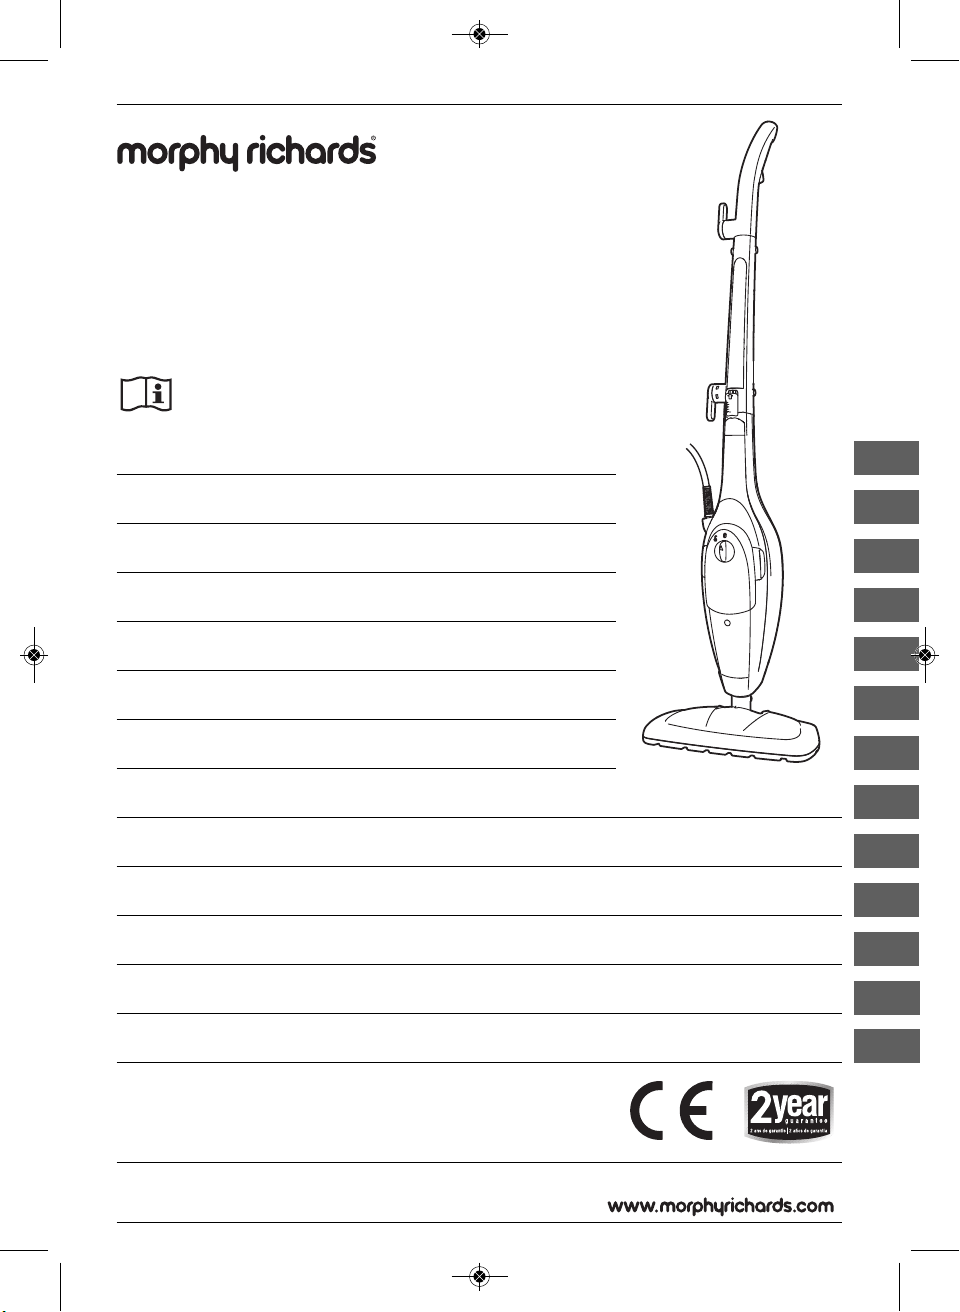
Upright steam cleaner
Please read and keep these instructions
Nettoyeur vapeur vertical
Merci de bien vouloir lire et conserver ces instructions
Standdampfreiniger
Lesen Sie diese Bedienungsanleitung, und heben Sie sie gut auf.
Robot de limpieza vapor vertical
Lea estas instrucciones atentamente y guárdelas
Limpador a vapor vertical
Leia e guarde estas instruções
Pulitore a vapore con configurazione a scopa
Leggere e conservare le presenti istruzioni
Opretstående stilling:
Læs, og gem denne vejledning
Stående ångrengörare
Läs och spara dessa anvisningar
Varrellinen höyrypuhdistin
Lue ja säilytä nämä ohjeet
Pionowy odkurzacz parowy
Należy zapoznać się z dołączoną instrukcją obsługi i zachować ją na przyszłość
Вертикальный пароочиститель
Внимательно изучите и сохраните это руководство
Parní čistič pro práci ve vzpřímené poloze
Přečtěte si tyto pokyny a uschovejte si je
Dikey buharlı temizleyici
Lütfen talimatları okuyun ve saklayın
g
f
d
e
p
i
q
s
v
}
≈
∂
t
Page 2
VC70495MEE Rev4_9225 47507 MEE pump - Jon 25/01/2014 15:12 Page 2
g
IMPORTANT SAFETY INSTRUCTIONS
The use of any electrical appliance requires the following common sense safety rules.
Please read these instructions carefully before using the product.
• WARNING: Disconnect from the mains supply before
carrying out any routine maintenance.
• This appliance can be used by children aged from 8 years
and above and persons with reduced physical, sensory or
mental capabilities, or lack of experience and knowledge, if
they have been given supervision or instruction concerning
the use of the appliance in a safe way and understand the
hazards involved.
• Children shall not play with the appliance.
• Cleaning and user maintenance shall not be undertaken by
children without supervision.
Personal safety
• WARNING: Never direct steam at electrical components or
fittings. If in doubt about the suitability of steam for cleaning
an appliance, contact the appliance manufacturer for advice
prior to cleaning.
• WARNING: Never touch the plug or cable with wet hands.
• WARNING: Nozzles and tools will be hot after use. Allow to
cool before attempting to remove.
• WARNING: Do not discharge the steam towards people or
animals. Danger of scalding.
STEAM
• WARNING: Do not use the appliance without the filler cap in
place.
• WARNING: In the event of a blockage, steam will be released
from the steam relief vents.
• To protect against fire, electric shock and personal injury, do not
immerse cord, plug or cleaner in water or other liquid.
• The plug should be removed from the wall socket after use, before
cleaning, filling or changing the accessories, or carrying out user
maintenance.
• Keep the appliance out of reach of children when it is energised or
cooling down.
Location
• Do not use or keep this product outside.
• Do not store the appliance near hot surfaces eg. ovens or heating
appliances.
Mains cable
• WARNING: A damaged or severed mains cable fitted with a
plug should never be connected to the mains supply. It must
be destroyed, as a damaged cable becomes hazardous if
connected to a power socket.
• If the supply cord is damaged, it must be replaced by the
manufacturer, its service agent, or similarly qualified person to
avoid a hazard.
• Do not allow the mains lead to become strained.
2
Page 3

1
2
3
4
5
6
7
8
10 10
11
13
14
15
18
20
22
19
25
27
23
26
28
24
29
30
9
12
13
17
21
31
32
16
VC70495MEE Rev4_9225 47507 MEE pump - Jon 25/01/2014 15:12 Page 3
Product safety
• WARNING: Always test on an inconspicuous area first. Never
use on materials that can not resist high temperature, such as
dralon, natural fur etc.
• Never modify the steam cleaner in any way.
• Never operate the steam cleaner without water in the tank. Always
top-up with water during extended periods of use.
• Never fill the steam cleaner’s tank with anything other than
deionised, demineralised or distilled water.
• The appliance is not to be used if it has been dropped, if there are
visible signs of damage or if it is leaking.
Other safety considerations
• Do not use any chemical detergents, perfumes, alcohol or
descaler etc in water.
• Repairs to electrical appliances are only to be undertaken by
trained personnel.
• Unprofessional repairs can be dangerous for users.
• Use only genuine Morphy Richards spare parts and accessories.
• The appliance must never be left running when unsupervised.
• This steam cleaner is intended for domestic use only. Misuse or
use for commercial or any other purpose will render the guarantee
invalid.
Electrical requirements
• Check that the voltage on the rating plate of your
appliance corresponds with your house electricity supply which
must be A.C. (Alternating Current).
• If the socket outlets in your home are not suitable for the plug
supplied with this appliance the plug should be removed and the
appropriate one fitted.
• WARNING: This appliance must be earthed.
• Should the fuse in the mains plug require changing, a 13 amp
BS1362 fuse must be fitted.
g
f
d
e
p
i
q
s
v
}
≈
∂
t
3
Page 4

1
A
C
E
D
B
2
4
6
3
5
7
VC70495MEE Rev4_9225 47507 MEE pump - Jon 25/01/2014 15:12 Page 4
g
Upright steaming Hand-held steaming
f
Utilisation verticale Utilisation manuelle
d
Dampfbehandlung im Stand Dampfbehandlung als Handgerät
e
Vapor vertical Vapor de mano
p
Vaporização vertical Vaporização manual
i
Utilizzo come scopa Utilizzo in modalità portatile
q
Opretstående stilling Håndholdt damprenser
s
Stående ångning Handstyrd ångning
v
Varrellinen höyrypuhdistin Käsikäyttöinen höyrypuhdistin
}
Pionowe odkurzanie parowe Ręczne urządzenie do odkurzania
≈
Вертикальная подача пара Ручная подача пара
∂
Parní čištění ve vzpřímené poloze Ruční parní čištění
t
Dikey buharlama Elde taşınabilir buharlama
parowego
4
Page 5
8
9
10
22
25
23
26
24
11
13
27
27
27
2928
30
31
12
14
15
16
VC70495MEE Rev4_9225 47507 MEE pump - Jon 25/01/2014 15:12 Page 5
g
f
d
e
p
i
q
s
v
}
≈
∂
t
5
Page 6
VC70495MEE Rev4_9225 47507 MEE pump - Jon 25/01/2014 15:12 Page 6
g
Contents
Health and safety 2
Electrical requirements 3
Product overview / Features 4
Operating the appliance 6
Dual functionality 6
Upright steaming: assembly 7
Using in upright steamer mode 7
Using the hand-held steam cleaner 7
List of attachments for use on the hand-held steamer 7
The water tank 8
After use 8
Storage 8
Maintenance 8
Contact us 8
Guarantee 9
Getting the best from your new cleaner...
IMPORTANT: To prevent limescale build-up in the water tank,
never fill the steam cleaner’s tank with anything other than
deionised, demineralised or distilled water (available from
most leading supermarkets).
Features
(1) Handle
(2) Steam trigger
(3) Cord holder
(4) Upper cord storage hook (rotatable)
(5) Lower cord storage hook (fixed)
(6) Hand-held release button
(7) Main body
(8) Hand-held steamer
(9) Steam trigger
(on underside of the handle of the hand-held steamer)
(10) Power cord
(11) Filler cap
(12) On/Off power switch
(13) Water tank release buttons
(14) Water tank
(15) Power indicator light
(16) Water tube with brass ball weight attached
(17) Floorhead release button
(18) Floorhead
(19) Carpet glider
(20) Floor cloth
(21) Floor cloth tightening toggle
(22) Accessory adaptor
(23) Angled nozzle attachment
(24) Spatula attachment
(25) Circular brush attachment
(26) Long brush attachment
(27) Utility nozzle
(28) Elasticated utility cloth (attaches to utility nozzle)
(29) Squeegee attachment (attaches to utility nozzle)
(30) Mini cleaning head (attaches to utility nozzle)
(31) Mini cleaning cloth (attaches to mini cleaning head)
(32) Accessory bag
Operating the appliance
IMPORTANT: Please remember that the steam cleaner operates
by emitting steam at an increased temperature of 115oC.
Always test on an inconspicuous area first. Never use it on
objects or surfaces which cannot resist this temperature, or on
delicate materials such as dralon, plastic, natural fur etc.
If in doubt, check carefully on a part of the material where
minor marks will not matter.
Dual functionality
Your steam cleaner can easily be configured into two different
cleaning modes:
• Upright steam cleaner for floors and carpets.
• Hand-held steam cleaner (8) for cleaning vertical or hard to reach
surfaces.
Attachments (22-31) can be used on the handheld steamer.
6
1
Page 7
VC70495MEE Rev4_9225 47507 MEE pump - Jon 25/01/2014 15:12 Page 7
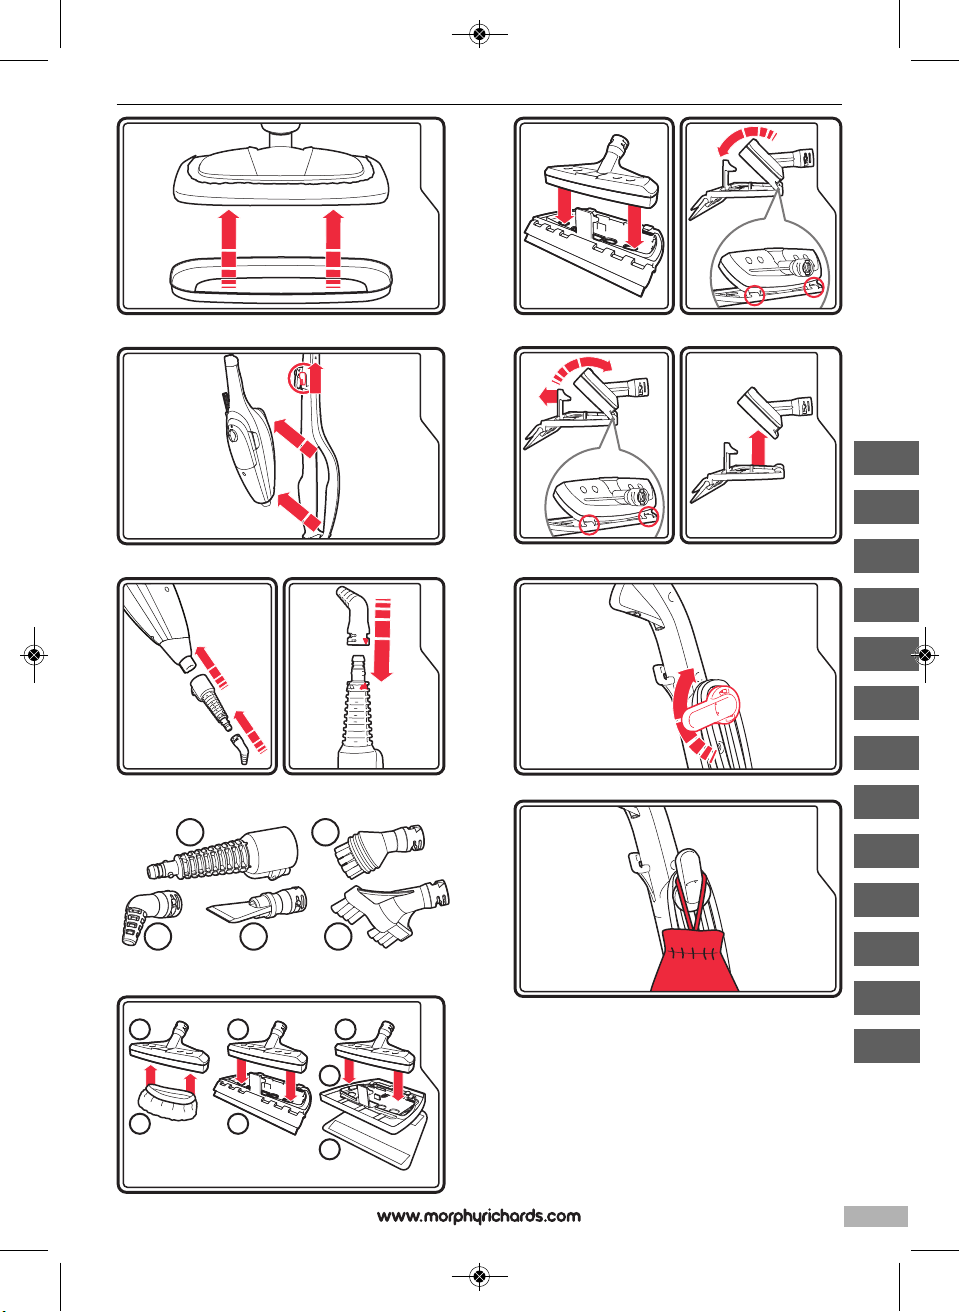
Upright steaming: Assembly
A
Insert the handle (1) onto the main body (7).
B
Insert one of the screws (supplied) into the hole in the lower cord
storage hook (5) and rotate until tight.
Insert the other screw (supplied) into the side of the handle (on the
opposite side to the lower cord storage hook) and rotate until
tight.
NOTE: Attaching the handle is necessary for first time assembly
only.
C
Lower the main body onto the floorhead (18), with the floorhead
release button (17) on the neck of the floorhead to the back of the
assembly, until it clicks into place.
D
Insert the steam outlet nozzle at the bottom end of the hand-held
steamer (8) into the adaptor at the bottom of the space in the
front of the main body.
Push the steam cleaner firmly into the space in the main body
until it clicks into place.
E
Attach the floor cloth (20) to the floorhead and tighten the toggle
at the rear.
2
Using in upright steamer mode
IMPORTANT: Before use, hardfloors should be thoroughly
swept and carpets should be thoroughly dry vacuumed.
However, we recommend that the steam cleaner is not used
on:
• bare wooden floors or any surfaces where wood is exposed
(as it will absorb moisture and may distort).
• damaged hardfloors or hardfloors with gaps present (as it will
absorb moisture and may distort).
Also, do not keep the mop in one place for an extended
period, because the continual heat may cause damage to
carpets and laminate flooring.
3
Squeeze the buttons (13) on the side of the water tank (14) to
remove it from the hand-held steam cleaner (8).
Remove the filler cap (11) by rotating it
anti-clockwise to the ‘unlock’ position, then lift it out.
Fill the water tank.
IMPORTANT: To prevent limescale build-up in the water tank,
never fill the steam cleaner’s tank with anything other than
deionised, demineralised or distilled water (available from most
leading supermarkets). Any problems arising from limescale will
invalidate the product guarantee.
Replace the filler cap and turn it clockwise to the ‘lock’ position.
Replace the water tank.
4
Attach the floor cloth (20) to the floorhead (18), securing it in place
by tightening the toggle (21).
5
Rotate the upper cord storage hook (4) to quickly release the
power cord (10).
Secure the power cord in the cord holder (3).
6
WARNING: Before switching ON, ensure the floorhead is
located safely away from persons or animals.
Plug in at the mains outlet and switch on the steamer at the
On/Off power switch (12). The power indicator light (15) will
illuminate and steam will be ready to be emitted after around 30
seconds (when the steam trigger (2) is pressed).
7
Place the floorhead (18) on the floor. Hold the floorhead to the
floor with your foot and tilt the main body (7) back.
To emit steam continually, press and hold the steam trigger (2)
whilst slowly pushing the cleaner back and forth along the floor.
But to prevent over-wetting of the floor, operate the steam trigger
intermittently (especially on hard floors).
8
If cleaning carpet, rest the floorhead (18) with floor cloth (20)
attached into the carpet glider (19) to make it easier to move the
floorhead across the carpet.
NOTE: The carpet glider is intentionally a loose fit on the floorhead.
Using the hand-held steam cleaner
9
This function is ideal for cleaning vertical surfaces and hard to reach
places.
Separate the hand-held steamer (8) from the main body (7) by sliding
the hand-held release button (6) upwards on the front of the main
body.
Pull the hand-held steamer up and out of the main body.
10
In order to use all of the accessories, the accessory adaptor (22)
must firstly be attached onto the hand-held steamer (8). This can be
done by completing the following:
1 Slide the adaptor over the nozzle of the steam cleaner with the
release catch on the adaptor facing the base of the hand-held steam
cleaner.
2 Align the keyway on the hand-held steamer with the release catch
on the adaptor. Push together and fix into place.
3 Attach the desired accessory to the end of the adaptor by aligning
the arrow on the accessory with the right-hand arrow on the adaptor
and twist the accessory until the arrow aligns with the left arrow of
the two on the adaptor.
WARNING: Switch OFF and unplug before changing nozzles.
After use, nozzles will be very hot, allow to cool before handling.
List of attachments for use on the
handheld steamer
• Accessory adaptor (22) this attachment is the base attachment for all
hand-held accessories supplied with the product.
• It can also be used alone to clean places or crevices that are not
easily accessible.
• Angled nozzle attachment (23) to clean sanitary ware such as toilet
bowls, taps or drain covers. Point it directly at non-permanent stains
on carpets or upholstery whilst holding a clean cloth near the stained
area to capture any loosened dirt.
• Spatula attachment (24) to remove stubborn deposits, or to help deice the refridgerator or freezer.
• Circular brush attachment (25) to remove stains on roomtemperature surfaces, such as tiles, wheel trims, mirrors and
windows.
• Long brush attachment (26) to remove dirt from grooves and
crevices.
11
g
7
Page 8
VC70495MEE Rev4_9225 47507 MEE pump - Jon 25/01/2014 15:12 Page 8
12
Utility nozzle (27) once attached to the accessory adaptor (22), the
utility nozzle is the base attachment for attaching all the following
accessories:
• Elasticated utility cloth (28) for covering the utility nozzle when
cleaning upholstery and bedding.
13
Squeegee attachment (29) can be attached to the utility nozzle by
inserting the hooks at the back of the squeegee nozzle into the
loops on the back of the utility nozzle, then secure the front of the
utility nozzle into the locking clip on the top of the squeegee
nozzle (as shown).
• Remove the squeegee after use by holding the locking clip
forward. The utlity nozzle should still be hooked into the loops on
the rear of the squeegee nozzle, pivot the utility nozzle up and
unhook from the loops to lift it away.
14
The squeegee nozzle is ideal for cleaning tiled or glass areas such
as windows or mirror panels. To clean windows, start at the top,
press the squeegee to the surface and drag downwards in
straight passes from top to bottom. Wipe the rubber blade and
the bottom edge of the window dry after each pass. For small
window panels, remove the squeegee tool and spray the steam
directly onto the surface. Use the squeegee separately to wipe
away the moisture.
WARNING: Do not use on very cold glass, as the sudden
temperature change may crack the glass.
• Mini cleaning head (30) with mini cleaning cloth (31) attached
attaches to the utility nozzle (using the same method as attaching
and unattaching the squeegee nozzle, as shown on the left and
above). This accessory is useful for cleaning tiled or glass
surfaces, cabinets and worktops in kitchens and bathrooms, plus
upholstery, curtains, blinds, pillows and mattresses.
The water tank
The brass ball weight (16)
The brass ball weight inside the water tank is attached to the end
of the suction hose. The ball is weighted and designed to freely
move around the water tank depending on the position of the
product. The ball must remain in the water so steam can be
generated whenever the steam trigger is pressed regardless of the
orientation of the hand-held steamer.
Rinsing the water tank
Regularly rinse the water tank to release any deposits that have
collected on the bottom of the tank. Only use de-ionised,
demineralised or distilled water (available from most large
supermarkets) and fit the filler cap to allow vigorous rinsing.
After use
Follow the two maintenance steps below after every use.
1 Switch the cleaner off and unplug from the socket. Place
immediately on a suitable surface (eg. tiled floor) where the
residual heat/moisture in the floor nozzle/cloth will not affect the
surface. Wait until the cleaner has cooled down completely.
2 Empty the water tank (14) by removing the filler cap (11) and
pouring out the water. Allow the inside of the water tank to dry out
before replacing the filler cap.
16
Storage
Wrap the cord around the two cord storage hooks (4/5), rotating
the upper storage hook (4) upwards to secure the power cord (10)
in place.
Put all accessories into the accessory bag (32) and hang the bag
from the upper cord storage hook.
Maintenance
WARNING: Always unplug the Steam cleaner from the mains
supply before undertaking any maintenance procedures.
Overall maintenance
Your cleaner is manufactured to withstand normal day-to-day use,
but an occasional wipe over with a damp cloth will help maintain
it. Abrasive cleaners should not be used.
Cleaning the cloths
The floor cloth (20) and the elasticated utility cloth (28) can all be
machine washed (30ºC max). For heavy soiling, soak the cloths in
warm water and detergent or a mild stain remover.
IMPORTANT: Do not use bleach or fabric softener.
Allow to completely dry before storing.
Contact our helpline to purchase replacement cloths.
Maintaining the attachments
Dirt and blockages should be regularly removed from the
attachments to help prolong their usage.
Contact us
Helpline
If you are having a problem with your appliance, please call our
Helpline, as we are more likely to be able to help than the store
you purchased the item from.
Please have the product name, model number and serial number
to hand when you call to help us deal with your enquiry quicker.
UK Helpline: 0844 871 0960
IRE Helpline: 1800 409 119
Spares: 0844 873 0726
Talk To Us
If you have any questions or comments, or want some great tips
to help you get the most out of your products, join us online:
Blog: www.morphyrichards.co.uk/blog
Facebook: www.facebook.com/morphyrichardsuk
Twitter: www.twitter.com/loveyourmorphy
Website: www.morphyrichards.com
8
Page 9
VC70495MEE Rev4_9225 47507 MEE pump - Jon 25/01/2014 15:12 Page 9
THIS SECTION IS ONLY APPLICABLE FOR
CUSTOMERS IN UK AND IRELAND
REGISTERING YOUR TWO YEAR GUARANTEE
Your standard one year guarantee is extended for an additional
12 months when you register the product within 28 days of
purchase with Morphy Richards. If you do not register the
product with Morphy Richards within 28 days, your product is
guaranteed for 1 year. To validate your 2 year guarantee register
with us online at www.morphyrichards.co.uk
N.B. Each qualifying product needs to be registered with
Morphy Richards individually. Please refer to the one year
guarantee for more information.
YOUR ONE YEAR GUARANTEE
It is important to retain the retailer’s receipt as proof of
purchase. Staple your receipt to this back cover for future
reference. Please quote the following information if the product
develops a fault. These numbers can be found on the base of
the product.
Model no.
Serial no.
All Morphy Richards products are individually tested before
leaving the factory. In the unlikely event of any appliance
proving to be faulty within 28 days of purchase, it should be
returned to the place of purchase for it to be replaced. If the
fault develops after 28 days and within 12 months of original
purchase, you should contact the Helpline number quoting
Model number and Serial number on the product, or write to
Morphy Richards at the address shown. You may be asked to
return a copy of proof of purchase. Subject to the exclusions
set out below (see Exclusions), the faulty appliance will then be
repaired or replaced and dispatched usually within 7 working
days of receipt. If, for any reason, this item is replaced during
the 1 year guarantee period, the guarantee on the new item will
be calculated from original purchase date. Therefore it is vital to
retain your original till receipt or invoice to indicate the date of
initial purchase. To qualify for the 1 year guarantee, the
appliance must have been used according to the instructions
supplied. For example, crumb trays should have been emptied
regularly.
EXCLUSIONS
Morphy Richards shall not be liable to replace or repair the
goods under the terms of the guarantee where:
1 The fault has been caused or is attributable to accidental use,
misuse, negligent use or used contrary to the manufacturer’s
recommendations or where the fault has been caused by power
surges or damage caused in transit.
2 The appliance has been used on a voltage supply other than that
stamped on the products.
3 Repairs have been attempted by persons other than our service
staff (or authorised dealer).
4 The appliance has been used for hire purposes or non domestic
use.
5 The appliance is second hand.
6 Morphy Richards are not liable to carry out any type of servicing
work, under the guarantee.
7 Plastic filters for all Morphy Richards kettles and coffee makers
are not covered by the guarantee.
8 Batteries and damage from leakage are not covered by the
guarantee.
9 The filters have not be cleaned and replaced as instructed.
This guarantee does not confer any rights other than those
expressly set out above and does not cover any claims for
consequential loss or damage. This guarantee is offered as an
additional benefit and does not affect your statutory rights as a
consumer.
YOUR INTERNATIONAL TWO YEAR
GUARANTEE
This appliance is covered by two-year repair or replacement
warranty.
It is important to retain the retailers receipt as proof of
purchase. Staple your receipt to this back cover for future
reference.
Please quote the following information if the product develops a
fault. These numbers can be found on the base of the product.
Model no.
Serial no.
All Morphy Richards products are individually tested before
leaving the factory. In the unlikely event of any appliance
proving to be faulty within 28 days of purchase it should be
returned to the place of purchase for it to be replaced.
If the fault develops after 28 days and within 24 months of
original purchase, you should contact your local distributor
quoting Model number and Serial number on the product, or
write to your local distributor at the addresses shown.
You will be asked to return the product (in secure, adequate
packaging) to the address below along with a copy of proof of
purchase.
Subject to the exclusions set out below (1-9) the faulty
appliance will then be repaired or replaced and dispatched
usually within 7 working days of receipt.
If for any reason this item is replaced during the 2-year
guarantee period, the guarantee on the new item will be
calculated from original purchase date. Therefore it is vital to
retain your original till receipt or invoice to indicate the date of
initial purchase.
To qualify for the 2-year guarantee the appliance must have
been used according to the manufacturers instructions. For
example, appliances must have been descaled and filters must
have been kept clean as instructed.
The local distributor shall not be liable to replace or repair the
goods under the terms of the guarantee where:
1 The fault has been caused or is attributable to accidental use,
misuse, negligent use or used contrary to the manufacturers
recommendations or where the fault has been caused by power
surges or damage caused in transit.
2 The appliance has been used on a voltage supply other than that
g
9
Page 10

VC70495MEE Rev4_9225 47507 MEE pump - Jon 25/01/2014 15:12 Page 10
stamped on the products.
3 Repairs have been attempted by persons other than our service
staff (or authorised dealer).
4 Where the appliance has been used for hire purposes or non
domestic use.
5 The appliance is second hand.
6 The local distributor are not liable to carry out any type of
servicing work, under the guarantee.
7 The guarantee excludes consumables such as bags, filters and
glass carafes.
8 Batteries and damage from leakage are not covered by the
guarantee.
9 The filters have not be cleaned and replaced as instructed.
This guarantee does not confer any rights other than those
expressly set out above and does not cover any claims for
consequential loss or damage. This guarantee is offered as an
additional benefit and does not affect your statutory rights as a
consumer.
AUSTRALIAN WARRANTY
This appliance is guaranteed for 2 years against faulty material,
components and workmanship.
This warranty is in addition and does not affect your statutory rights.
Proof of purchase must be produced for any warranty benefit.
In the unlikely event of any appliance proving to be faulty, securely
pack and return the item to the place of purchase accompanied by
the original receipt or invoice.
Our goods come with guarantees that cannot be excluded under
the Australian Consumer Law. You are entitled to a replacement or
refund for a major failure and for compensation for any other
reasonably foreseeable loss or damage. You are also entitled to have
the goods repaired or replaced if the goods fail to be of acceptable
quality and the failure does not amount to a major failure.
NOT COVERED BY THIS WARRANTY
(Australian only)
• If the appliance has not been used in accordance with the
manufacturers’ recommendations or Instructions.
• If the fault is deemed to be caused by abuse, misuse, neglect,
modifications or in proper use and or care
Eg: Kettles: Excessive build up of scale.
Toasters: Excessive build up of crumbs or foreign matter etc.
• Connection to incorrect voltage to that stamped on the product.
• Unauthorised repairs.
• Appliance used other than for domestic purposes.
• Excluding bags, filters, glass, carafes, and cutting blades.
• Freight and insurance costs.
If for any reason this item is replaced during the 2 year
guarantee period, the guarantee on the new item will be
calculated from original purchase date. Therefore it is vital to
retain your original receipt or invoice to indicate the date of
original purchase.
Morphy Richards’s policy is to continually improve quality
design and product quality. The company therefore reserves the
right to change any specifications or to carry out modifications
as deemed worthy at any time.
The Australian supplier ASKO Appliances reserves the right to
repair, modify, exchange or replace the faulty appliance with the
same or similar model or product of equivalent value.
10
Page 11
VC70495MEE Rev4_9225 47507 MEE pump - Jon 25/01/2014 15:12 Page 11
f
INSTRUCTIONS DE SÉCURITÉ IMPORTANTES
Lorsque vous utilisez un appareil électrique, vous devez respecter les règles de sécurité et de bon sens suivantes.
Veuillez lire attentivement ces instructions avant d’utiliser ce produit.
• AVERTISSEMENT : Déconnectez l’alimentation
électrique avant d’effectuer toute opération d’entretien.
• Cet appareil peut être utilisé par des enfants âgés d’au moins
8 ans et par des personnes ayant des capacités physiques,
sensorielles ou mentales réduites ou un manque
d’expérience et de connaissances, à condition d’être
g
surveillés ou d’avoir reçu des instructions concernant
l’utilisation de l’appareil en toute sécurité et de comprendre
les risques que cela implique.
• Les enfants ne doivent pas jouer avec l’appareil.
• Le nettoyage et l’entretien courant ne doivent pas être
effectués par des enfants sans surveillance.
Sécurité personnelle
• AVERTISSEMENT : Ne dirigez jamais la vapeur vers des
composants/ accessoires électriques. En cas de doute quant à
la pertinence de la vapeur pour nettoyer un appareil, contactez
le fabricant de l’appareil pour obtenir des conseils avant de le
nettoyer.
• AVERTISSEMENT : Ne touchez jamais la fiche ou le câble
lorsque vos mains sont mouillées.
• AVERTISSEMENT : Après utilisation, les embouts et les outils
sont chauds. Laissez-les refroidir avant de les démonter.
• AVERTISSEMENT : N’évacuez pas la vapeur en direction d’une
personne ou d’un animal. Risque de brûlure.
VAPEUR
• AVERTISSEMENT : N’utilisez jamais l’appareil sans avoir remis
en place le bouchon du réservoir.
• AVERTISSEMENT : En cas de blocage, la vapeur sort par les
orifices d’évacuation.
• Pour vous protéger des risques d’incendie, de choc électrique et de
blessure, ne plongez pas le cordon d’alimentation, la fiche électrique
ou l’appareil lui-même dans l’eau ou dans d’autres liquides.
• Vous devez débrancher l’appareil du secteur après utilisation,
avant de le nettoyer, de le remplir ou de changer les accessoires,
ou effectuer une opération d’entretien.
• L’appareil doit rester hors de portée des enfants tant qu’il est
branché ou en train de refroidir.
Emplacement
• N’utilisez pas et ne laissez pas cet appareil à l’extérieur.
• Ne rangez pas l’appareil près d’une surface chaude ou d’un
appareil de chauffage.
Câble d’alimentation électrique
• AVERTISSEMENT : Un câble d’alimentation endommagé ou
coupé et muni d’une fiche ne doit jamais être branché à
l’alimentation secteur. Il doit être détruit car un câble
endommagé devient dangereux s’il est branché sur une prise
de courant.
• Si le cordon d’alimentation est endommagé, il doit être remplacé
par le fabricant, son agent de service ou une personne qualifiée
afin d’éviter tout risque.
• Le câble d’alimentation ne doit jamais être étiré, coincé ou subir
une contrainte.
f
11
Page 12
VC70495MEE Rev4_9225 47507 MEE pump - Jon 25/01/2014 15:12 Page 12
Sécurité de l’appareil
• AVERTISSEMENT : Faites toujours un essai sur une zone
invisible au préalable. N’utilisez jamais la vapeur sur les
matières qui ne peuvent pas résister aux hautes
températures, telles que le dralon, la fourrure naturelle, etc.
• Ne tentez pas de modifier l’appareil.
• N’utilisez jamais l’appareil lorsque le réservoir d’eau est vide.
Ajoutez régulièrement de l’eau pendant les utilisations prolongées.
• Utilisez uniquement de l’eau déionisée, déminéralisée, ou distillée.
• N’utilisez pas l’appareil s’il a subi un choc, s’il présente des
dégâts visibles ou s’il fuit.
Autres consignes de sécurité
• Ne versez aucun détergent chimique, parfum, agent détartrant,
alcool, etc. dans l’eau du réservoir.
• Les réparations des appareils électriques doivent être réalisées
par des personnes qualifiées.
• Les réparations non-professionnelles peuvent être dangereuses
pour les utilisateurs.
• Utilisez uniquement des pièces de rechange et des accessoires
Morphy Richards d’origine.
• Ne laissez jamais l’appareil fonctionner sans surveillance.
• Ce nettoyeur vapeur est uniquement destiné à un usage
domestique. Toute utilisation abusive, utilisation commerciale ou
utilisation pour un usage non-prévu annule la garantie.
Précautions électriques
• Vérifiez que la tension indiquée sur la plaque signalétique de
l’appareil correspond à l’alimentation électrique de votre domicile,
qui doit être en courant alternatif (CA).
• Si les prises électriques de votre domicile ne correspondent pas à
la fiche fournie avec cet appareil, vous devez l’enlever et la
remplacer par une fiche conforme.
• AVERTISSEMENT : Cet appareil doit être mis à la terre.
• Si le fusible de la prise doit être remplacé, vous devez utiliser un
fusible BS1362 de 13 ampères.
Table des matières
Hygiène et sécurité 11
Précautions électriques 12
Présentation/ Caractéristiques 12
Utilisation de l’appareil 13
Double fonctionnalité 13
Utilisation verticale : Montage 13
Utilisation du nettoyeur vapeur en mode vertical 13
Utilisation du nettoyeur vapeur manuel 14
Listes des accessoires du nettoyeur vapeur manuel 14
Réservoir d’eau 14
Après l’utilisation 14
Rangement 14
Entretien 15
Nous contacter 15
Garantie 15
Pour utiliser au mieux votre nouveau
nettoyeur...
IMPORTANT : Pour prévenir l’accumulation de tartre dans le
réservoir, utilisez exclusivement de l’eau déionisée,
déminéralisée, ou distillée (disponible dans la plupart des
grandes surfaces).
Caractéristiques
(1) Poignée
(2) Bouton Vapeur
(3) Support du cordon d’alimentation
(4) Crochet supérieur pour ranger le cordon d’alimentation
(pivotant)
(5) Crochet inférieur pour ranger le cordon d’alimentation
(fixe)
(6) Bouton de libération du nettoyeur manuel
(7) Corps de l’appareil
(8) Nettoyeur vapeur manuel
(9) Bouton Vapeur
(sous la poignée du nettoyeur vapeur manuel)
(10) Cordon d’alimentation
(11) Bouchon de réservoir
(12) Bouton Marche/ Arrêt
(13) Bouton de libération du réservoir d’eau
(14) Réservoir d’eau
(15) Indicateur lumineux de mise sous tension
(16) Tube d’eau avec poids en laiton
(17) Bouton de libération du suceur pour sols
(18) Suceur pour sols
(19) Suceur pour moquettes
(20) Chiffonnette pour sols
(21) Coinceur de serrage de la chiffonnette pour sols
12
Page 13
VC70495MEE Rev4_9225 47507 MEE pump - Jon 25/01/2014 15:12 Page 13
(22) Adaptateur pour accessoire
(23) Embout angulaire
(24) Spatule
(25) Brosse circulaire
(26) Brosse longue
(27) Suceur standard
(28) Chiffonnette standard élastique (pour le suceur standard)
(29) Raclette (pour le suceur standard)
(30) Mini tête de nettoyage (pour le suceur standard)
(31) Mini chiffonnette de nettoyage (pour la mini tête de
nettoyage)
(32) Sac pour accessoires
Utilisation de l’appareil
IMPORTANT : N’oubliez pas que cet appareil produit de la
vapeur à une température maximale de 115 ºC. Faites toujours
un essai sur une zone invisible au préalable. Ne l’utilisez jamais
sur des objets ou des surfaces qui ne peuvent pas résister à
cette température, des matières délicates, du dralon, du
plastique, de la fourrure naturelle, etc.
En cas de doute, faites un essai sur une zone sans importance.
Double fonctionnalité
Votre nettoyeur vapeur peut être aisément configuré pour
fonctionner en deux modes différents :
• Nettoyeur vapeur vertical pour sols et moquettes.
• Nettoyeur vapeur manuel (8) pour surfaces verticales ou difficiles
d’accès.
Les accessoires (22-31) peuvent être utilisés avec le nettoyeur
vapeur manuel.
Utilisation verticale : Montage
A
Insérez la poignée (1) dans le corps de l’appareil (7).
B
Insérez et serrez une des vis (fournies) dans l’orifice du crochet
inférieur du cordon d’alimentation (5).
Insérez et serrez l’autre vis (fournie) dans l’orifice situé sur le côté
de la poignée (de l’autre côté du crochet inférieur du cordon
d’alimentation).
REMARQUE : Le montage de la poignée est effectué une seule
fois.
C
Introduisez le corps de l’appareil dans le suceur pour sols (18), en
appuyant sur le bouton de libération du suceur pour sols (17) situé
sur l’arrière du tube du suceur pour sols, jusqu’à ce qu’il
s’enclenche en position.
D
Insérez l’embout vapeur, à l’extrémité inférieure du nettoyeur
vapeur manuel (8), dans l’adaptateur situé à l’extrémité inférieure à
l’avant du corps de l’appareil.
Poussez le nettoyeur vapeur fermement dans le corps de
l’appareil jusqu’à ce qu’il s’enclenche en position.
E
Placez la chiffonnette pour sols (20) sur le suceur pour sols et
serrez le coinceur (21) sur l’arrière.
1
2
Utilisation du nettoyeur vapeur en mode
vertical
IMPORTANT : Avant toute utilisation, les sols durs doivent
être soigneusement balayés et les moquettes doivent être
intégralement passées à l’aspirateur. En outre, nous
conseillons de ne pas utiliser le nettoyeur vapeur sur :
• Des planchers en bois ou autres surfaces contenant des
éléments en bois (le bois absorbe l’humidité et peut donc se
déformer).
• Des sols durs endommagés ou présentant des fentes
(pouvant absorber l’humidité et provoquer des déformations).
Vous ne devez pas laisser l’appareil au même endroit pendant
parce que l’effet continu de la chaleur peut endommager la
moquette ou le plancher laminé.
3
Serrez les boutons (13) sur les côtés du réservoir d’eau (14) pour
le détacher du nettoyeur vapeur manuel (8).
Retirez le bouchon du réservoir (11) en le tournant dans le sens
anti-horaire, jusqu’à la position de déverrouillage et soulevez-le.
Remplissez le réservoir d’eau
IMPORTANT : Pour prévenir l’accumulation de tartre dans le
réservoir, utilisez exclusivement de l’eau déionisée, déminéralisée,
ou distillée (disponible dans la plupart des grandes surfaces). Tout
problème provoqué par du tartre annule la garantie du produit.
Remettez le bouchon en place et tournez-le dans le sens horaire
jusqu’à la position de verrouillage.
Remettez en place le réservoir d’eau.
E
Placez la chiffonnette pour sols (20) sur le suceur pour sols (18) et
serrez-la avec le coinceur (21).
5
Pivotez le crochet supérieur du cordon d’alimentation (4) pour
libérer rapidement le cordon (10).
Placez le cordon d’alimentation dans son support (3).
6
AVERTISSEMENT : Avant la mise sous tension, vérifiez que le
suceur pour sols n’est pas à proximité d’une personne ou
d’un animal.
Branchez le cordon au secteur, et allumez le nettoyeur vapeur en
appuyant sur le bouton Marche/ Arrêt (12). Le voyant (15) s’allume
et l’appareil peut produire de la vapeur après un délai de 30
secondes (en appuyant sur le bouton Vapeur (2).
7
Placez le suceur (18) sur le sol. Retenez le suceur sur le sol avec
votre pied et inclinez le corps de l’appareil (7) vers l’arrière.
Pour produire de la vapeur en continu, maintenez enfoncé le
bouton Vapeur (2) et déplacez lentement le nettoyeur d’avant en
arrière sur le sol. Pour éviter de mouiller excessivement le sol,
appuyez sur le bouton Vapeur de temps en temps (surtout sur les
sols durs).
8
Pour nettoyer une moquette, montez le suceur de sols (18) avec la
chiffonnette (20) dans le suceur pour moquettes (19) afin de
bénéficier d’un déplacement aisé.
REMARQUE : Le suceur pour moquettes est conçu pour être
monté souple sur le suceur de sols (18).
f
13
Page 14
VC70495MEE Rev4_9225 47507 MEE pump - Jon 25/01/2014 15:12 Page 14
14
Utilisation du nettoyeur vapeur manuel
9
Ce mode d’utilisation est idéal pour nettoyer des surfaces verticales
ou difficiles d’accès.
Séparez le nettoyeur vapeur manuel (8) du corps de l’appareil (7) en
faisant glisser vers le haut le bouton de libération (6) situé sur l’avant
de l’appareil.
Soulevez le nettoyeur vapeur manuel et sortez-le de l’appareil.
10
Pour utiliser tous les accessoires, l’adaptateur (22) doit être
fermement fixé sur le nettoyeur vapeur manuel (8). Pour cela, vous
devez :
1 Insérez l’adaptateur sur l’embout du nettoyeur vapeur. Le verrou de
l’adaptateur doit être orienté vers la base du nettoyeur vapeur
manuel.
2 Alignez l’encoche du nettoyeur vapeur manuel et le verrou de
l’adaptateur. Poussez pour les assembler et les enclencher.
3 Montez l’accessoire choisi sur l’adaptateur en alignant la flèche de
l’accessoire avec la flèche droite marquée sur l’adaptateur et faites
pivoter l’accessoire, jusqu’à ce que sa flèche soit alignée avec la
flèche la plus à gauche sur l’adaptateur.
ATTENTION : Éteignez l’appareil et débranchez sa prise avant
de changer d’embout ou d’accessoire. Après utilisation, un
embout est très chaud. Laissez-le refroidir avant de le toucher.
Listes des accessoires du nettoyeur vapeur
11
manuel
• L’adaptateur d’accessoire (22) sert à fixer tous les accessoires
fournis avec cet appareil.
• Sans accessoire, il peut aussi servir à nettoyer des endroits ou
infractuosités difficiles d’accès.
• L’embout angulaire (23) permet de nettoyer des objets sanitaires, tels
que cuvettes de wc, robinets, couvercles d’évacuation. Dirigez-le
directement sur des tâches non-permanentes sur des moquettes ou
des tissus d’ameublement tout en maintenant un chiffon propre à
proximité de la zone tâchée pour capturer de la saleté détachée par
la vapeur.
• La spatule (24) sert à éliminer des dépôts plus résistants, ou pour
dégivrer un congélateur ou réfrigérateur.
• La brosse circulaire (25) permet d’éliminer des tâches sur diverses
surfaces à la température ambiante, telles que carrelages,
enjoliveurs, miroirs, fenêtres.
• La brosse longue (26) sert à éliminer la saleté dans des rainures ou
des encastrements.
12
Une fois fixé à l’adaptateur (22), le suceur standard (27) permet
d’utiliser tous les accessoires suivants :
• La chiffonnette standard élastique (28) sert à couvrir le suceur
standard pour nettoyer les lits et les tissus d’ameublement.
13
La raclette (29) se fixe sur le suceur standard en insérant les
crochets situés sur sa partie arrière dans les boucles du suceur
standard. Puis abaissez la partie avant du suceur standard sous le
crochet vertical de la raclette (comme indiqué).
• Après usage, poussez le crochet vertical vers l’avant pour libérer
la raclette. Le suceur est encore retenu par les boucles à l’arrière
de la raclette. Pivotez le suceur standard vers le haut et dégagez
ses crochets pour le soulever.
14
La raclette est l’outil idéal pour nettoyer le carrelage, les surfaces
vitrées, les fenêtres et les grands panneaux en verre. Pour
nettoyer les vitres, commencez en haut de la vitre en appuyant la
raclette sur la surface et traînez-la vers le bas, en mouvements
réguliers et parallèles de haut en bas. Essuyez la lame en
caoutchouc et le bord inférieur de la vitre après chaque passage.
Pour les petites surfaces vitrées, retirez la raclette et projetez la
vapeur directement sur la surface. Utilisez la raclette seule pour
essuyer l’humidité.
AVERTISSEMENT : N’utilisez pas l’appareil sur une vitre très
froide car le brusque changement de température pourrait
fissurer la vitre.
• La mini tête de nettoyage (30) avec la mini chiffonnette de
nettoyage (31) se montent sur le suceur standard (la méthode est
identique à celle du montage/ démontage de la raclette, comme
indiqué à gauche et ci-dessus). Cet accessoire est très utile pour
nettoyer des carrelages ou des surfaces vitrées, le mobilier de
cuisine et de salle de bain, mais aussi des tissus d’ameublement,
rideaux, stores, oreillers et matelas.
Réservoir d’eau
Poids en laiton (16)
Le poids en laiton situé à l’intérieur du réservoir d’eau est fixé à
l’extrémité du tuyau de succion. Ce poids est conçu pour se
déplacer librement dans le réservoir d’eau selon la position de
l’appareil. Il doit rester dans l’eau pour que la vapeur puisse être
généré chaque fois que l’utilisateur appuie sur le bouton Vapeur,
quelle que soit l’orientation du nettoyeur vapeur manuel.
Rinçage du réservoir d’eau
Rincez régulièrement le réservoir d’eau pour libérer les dépôts
éventuellement présents dans le bas du réservoir. Utilisez
exclusivement de l’eau déionisée, déminéralisée, ou distillée
(disponible dans la plupart des grandes surfaces) et remettez le
bouchon du réservoir pour effectuer un rinçage vigoureux.
Après utilisation
Après chaque utilisation, effectuez les deux opérations d’entretien
indiquées ci-dessous.
1 Éteignez le nettoyeur et débranchez-le du secteur. Placez-le
immédiatement sur une surface appropriée (ex. un sol carrelé) où
la chaleur et l’humidité résiduelles du suceur/ chiffonnette ne
posent aucun risque. Attendez que le nettoyeur ait complètement
refroidi.
2 Retirez le bouchon et videz le réservoir d’eau (14). Laissez sécher
l’intérieur du réservoir d’eau avant de replacer le bouchon de
remplissage.
Rangement
Enroulez le cordon autour des deux crochets (4/5), puis pivotez le
crochet supérieur (4) vers le haut pour bloquer le cordon (10) en
position.
Rangez tous les accessoires dans le sac (32) et suspendez-le au
crochet supérieur (4).
16
Page 15
VC70495MEE Rev4_9225 47507 MEE pump - Jon 25/01/2014 15:12 Page 15
Entretien
AVERTISSEMENT : Vous devez toujours débrancher le
nettoyeur vapeur avant toute opération d’entretien.
Entretien général
Votre nettoyeur est conçu et fabriqué pour une utilisation
quotidienne normale. Pour qu’il conserve l’aspect du neuf, vous
pouvez l’essuyer de temps à autre avec un chiffon humide.
N’utilisez pas de nettoyants abrasifs.
Entretien des chiffonnettes
La chiffonnette pour sols (20) et la chiffonnette standard élastique
(28) peuvent être lavées à la machine (30ºC max). Pour éliminer les
tâches plus résistantes, faites-les tremper dans de l’eau chaude
avec un détergent ou un produit détachant peu agressif.
IMPORTANT : N’utilisez jamais de javel ou d’adoucissant
textile.
Laissez sécher complètement avant de les ranger.
Veuillez prendre contact avec notre service d’assistance pour
acheter des chiffonnettes de rechange.
Entretien des accessoires
La saleté et autres corps étrangers présents dans les accessoires
doivent être régulièrement éliminés pour bénéficier d’un usage
prolongé et efficace.
Nous contacter
Service d’assistance
Si vous rencontrez un problème avec votre appareil, veuillez
appeler notre service d’assistance. Nous pourrons certainement
vous aider plus efficacement que le magasin où vous avez acheté
l’article.
Munissez-vous du nom de produit, du numéro de modèle et du
numéro de série de l’appareil lorsque vous nous appelez. Cela
nous aidera à traiter plus rapidement votre demande.
Dialoguer avec nous
Si vous avez des questions ou des commentaires à formuler ou si
vous voulez bénéficier de conseils judicieux pour vous aider à tirer
le meilleur parti de vos appareils, retrouvez-nous en ligne :
Blog : www.morphyrichards.co.uk/blog
Facebook: www.facebook.com/morphyrichardsuk
Twitter: www.twitter.com/loveyourmorphy
Site internet : www.morphyrichards.com
VOTRE GARANTIE DE DEUX ANS
Pour la clientèle en France
Il est important de conserver le ticket de caisse comme preuve
d’achat. Agrafez votre ticket de caisse à cette notice
d'utilisation; vous pourrez ainsi l’avoir sous la main
ultérieurement.
Merci de donner les informations ci-dessous si votre appareil
tombe en panne. Vous trouverez ces références à la base de
l’appareil.
Numéro du modèle
Numéro de série
Tous les produits Morphy Richards sont testés individuellement
avant de quitter l’usine.
Si un problème survient dans les 24 mois qui suivent l’achat
d’origine, vous devez contacter le magasin où vous avez
acheté votre appareil muni de votre ticket de caisse, celui ci le
renverra à Glen Dimplex France pour expertise.
Sous réserve des exclusions indiquées ci-dessous (1 à 9),
l’appareil défectueux sera alors réparé ou remplacé et
réexpédié dans un délai de 15 jours ouvrables maximum à
compter de son arrivée.
Si, pour quelque raison que ce soit, l’article est remplacé
pendant la période de garantie de deux ans, la période de
garantie du nouvel article sera calculée à partir de la date
d’achat d’origine. Vous devez donc absolument conserver votre
ticket de caisse ou votre facture d’origine pour indiquer la date
d’achat.
Pour bénéficier de la garantie de deux ans, l’appareil doit avoir
été utilisé conformément aux instructions du fabricant. Par
exemple, les fers doivent avoir été détartrés et les filtres doivent
avoir été nettoyés selon les instructions.
Morphy Richards ne sera pas dans l’obligation de remplacer ou
réparer les articles aux termes de la garantie dans les
circonstances suivantes :
1 Si le problème provient d’une utilisation accidentelle, d’une
utilisation abusive ou négligente, ou si l’appareil a été utilisé de
manière contraire aux recommandations du fabricant, ou encore
lorsque le problème provient de sautes de puissance ou de
dégâts occasionnés en transit.
2 Si l’appareil a été utilisé sur une alimentation électrique dont la
tension est différente de celle qui est indiquée sur l’appareil.
3 Si des personnes autres que nos techniciens (ou l’un de nos
revendeurs agréés) ont tenté de faire des réparations.
4 Si l’appareil a été loué ou utilisé dans un contexte non
domestique.
5 Si l’appareil est d’occasion.
6 Morphy Richards n’est pas dans l’obligation de réaliser des
travaux d’entretien, quels qu’ils soient, aux termes de la garantie.
7 La garantie exclut les consommables tels que les sacs, les filtres
et les carafes en verre.
8 Les batteries et les dégâts provoqués par leur fuite ne sont pas
couverts par la garantie.
9 Les filtres n’ont pas été nettoyés ou remplacés suivant les
f
15
Page 16
VC70495MEE Rev4_9225 47507 MEE pump - Jon 25/01/2014 15:12 Page 16
instructions.
Cette garantie ne confère aucun droit à l’exception de ceux qui
sont expressément indiqués ci-dessus, et ne couvre aucune
réclamation pour dommages immatériels ou indirects. Cette
garantie est offerte comme avantage supplémentaire et n’a
aucune incidence sur vos droits légaux en tant que
consommateur.
Pour la clientèle en Belgique
Les produits de Morphy Richards sont produits conformément
les normes de qualité, agrée international. Au-dessus vos droits
légaux, Morphy Richards vous garantit qu’à partir d’achat ce
produit sera sans défauts de fabrication ou de matériels
pendant une période de deux ans.
Il est important de conserver votre bon d’achat comme preuve.
Agrafez votre ticket à cette notice d’installation.
Veuillez mentionner ces informations ci-dessous si votre
appareil tombe en panne. Vous trouverez ces informations sur la
base de l’appareil.
Numéro du modèle
Numéro de série
Si, pour quelque raison que ce soit, l’article est remplacé
pendant la période de garantie (deux ans), la période de
garantie du nouvel article sera calculée à partir de la date
d’achat d’origine. Il est donc très importants de conserver votre
bon d’achat original afin de connaître la date initiale d’achat.
Cette garantie vaut uniquement quand l’appareil a été utilisé
conformément aux instructions du fabricant. Par exemple, les
appareils doivent être détartrés et les filtres doivent être tenus
propre selon le mode d’emploi.
Morphy Richard ne sera pas dans l’obligation de remplacer ou
réparer les articles aux termes de la garantie dans les
circonstances suivantes
1 Si le problème, prévient d’une utilisation accidentelle, d’une
utilisation abusive ou négligente, ou si l’appareil a été utilisé de
manière contraire aux recommandations du fabricant, ou encore
lorsque le problème provient de source de puissance ou de
dégâts occasionnés en transit.
2 Si l’appareil a été utilisé sur une alimentation électrique dont la
tension est différente de celle qui est indiquée sur l’appareil.
3 Si des personnes, autres que nos techniciens (ou revendeurs
agrées) ont tenté de faire des réparations.
4 Si l’appareil a été loué ou utilisé dans un contexte non
domestique.
5 Si l’appareil est d’occasion.
6 Morphy Richards n’est pas dans l’obligation de réaliser des
travaux d’entretien, quels qu’ils soient, aux termes de la garantie.
7 La garantie ne couvre pas les sachets, filtres et brocs en verre.
8 Les batteries et les dégâts provoqués par leur fuite ne sont pas
couverts par la garantie.
9 Les filtres n’ont pas été nettoyés ou remplacés suivant les
instructions.
Cette garantie ne confère aucun droit à l’exception de ceux qui
sont expressément indiqués ci-dessus, et ne couvre aucune
réclamation pour dommages immatériels ou indirects. Cette
garantie est offerte comme avantage supplémentaire et n’a
aucune incidence sur vos droits légaux en tant que
consommateur.
16
Page 17
VC70495MEE Rev4_9225 47507 MEE pump - Jon 25/01/2014 15:13 Page 17
d
WICHTIGE HINWEISE ZUR SICHERHEIT
Für die Benutzung elektrischer Haushaltsgeräte sind folgende Regeln zur Wahrung der Sicherheit einzuhalten.
Vor der Verwendung des Geräts bitte die Bedienungsanleitung aufmerksam lesen.
• ACHTUNG: Vor einer Routinewartung den Netzstecker ziehen.
• Dieses Gerät kann von Kindern über 8 Jahren, von Personen,
deren körperliche oder geistige Unversehrtheit oder deren
Wahrnehmungsfähigkeit eingeschränkt ist, sowie von Personen mit
mangelnden Kenntnissen oder Erfahrung benutzt werden. Dies gilt
nur unter der Voraussetzung, dass sie beaufsichtigt werden oder
dass sie eine Einweisung in die sichere Nutzung des Geräts und
die damit verbundenen Gefahren erhalten haben.
• Kinder dürfen nicht mit dem Gerät spielen.
• Reinigung und Wartung dürfen ohne Beaufsichtigung nicht von
Kindern durchgeführt werden.
Eigene Sicherheit
• ACHTUNG: Den Strahl nie direkt auf elektrische
Teile/Installationen richten. Wenn Zweifel bestehen, ob ein
bestimmter Gegenstand für die Dampfreinigung geeignet ist,
sind vor dem Dampfreinigen weitere Ratschläge beim
jeweiligen Hersteller einzuholen.
• ACHTUNG: Den Stecker oder das Kabel niemals mit nassen
Händen berühren.
• ACHTUNG: Nach dem Gebrauch sind Düsen und Zubehörteile
sehr heiß. Die Teile vor dem Entfernen abkühlen lassen.
• ACHTUNG: Den Dampfausstoß nicht gegen Personen oder
Haustiere richten. Verbrühungsgefahr.
DAMPF
• ACHTUNG: Das Gerät darf nicht ohne Verschlussdeckel
benutzt werden.
• ACHTUNG: Bei einer Verstopfung wird der Dampf über die
Dampfablassöffnungen abgelassen.
• Zum Schutz vor Feuer, elektrischen Schlägen und vor
Verletzungen dürfen weder das Kabel, noch der Netzstecker oder
das Gerät in Wasser oder andere Flüssigkeiten getaucht werden.
• Nach dem Gebrauch oder einer Wartung oder vor dem Reinigen,
Nachfüllen oder Wechseln von Zubehör muss der Netzstecker
gezogen werden.
• In der Aufladephase und während das Gerät abkühlt, darf das
Gerät nicht in Reichweite von Kindern sein.
Aufstellungsort
• Dieses Produkt nicht im Freien verwenden oder aufbewahren.
• Das Gerät nicht in der Nähe heißer Flächen wie z. B. Heizöfen
oder Heizkörpern abstellen.
Netzkabel
• ACHTUNG: Ein beschädigtes oder abgetrenntes Netzkabel,
an dem sich noch ein Netzstecker befindet, darf keinesfalls
an eine Steckdose angeschlossen werden. Es muss
unbedingt unbrauchbar gemacht werden, da ein
beschädigtes Kabel bei Anschluss an eine Steckdose zu einer
Gefahrenquelle wird.
• Wenn das Netzkabel beschädigt ist, muss es vom Hersteller,
seinem Kundenservice oder einer gleichermaßen qualifizierten
Person ausgetauscht werden, um Gefahrenquellen zu vermeiden.
• Darauf achten, dass das Netzkabel nicht zugbelastet wird.
f
d
17
Page 18
VC70495MEE Rev4_9225 47507 MEE pump - Jon 25/01/2014 15:13 Page 18
Produktsicherheit
• ACHTUNG: Immer zuerst in einem unauffälligen Bereich
ausprobieren. Nie auf Stoffen anwenden, die hohen
Temperaturen nicht standhalten, wie z. B. Dralon, Naturfelle u.
ä.
• Das Gerät darf auf keinerlei Art und Weise verändert werden.
• Das Gerät darf ohne Wasser im Behälter nicht in Betrieb
genommen werden. Den Behälter bei längerem Gebrauch stets
mit Wasser auffüllen.
• Der Behälter des Dampfreinigers darf nur mit entionisiertem,
entmineralisiertem oder destilliertem Wasser befüllt werden.
• Das Gerät darf nicht mehr benutzt werden, wenn es auf den
Boden gefallen ist, wenn daran Schäden sichtbar sind oder wenn
das Gerät undicht ist.
Weitere Sicherheitshinweise
• Keine chemischen Reiniger, Duftstoffe, Alkohol oder Entkalker,
usw. im Wasser benutzen.
• Reparaturen an der Elektrik sind von ausgebildetem Fachpersonal
durchzuführen.
• Unprofessionelle Reparaturen können für den Endbenutzer
gefährlich sein.
• Ausschließlich Morphy Richards-Originalersatz- und Zubehörteile
verwenden.
• Das Gerät darf nicht unbeaufsichtigt in Betrieb zurückgelassen
werden.
• Dieser Dampfreiniger ist nur für Privathaushalte geeignet. Ein
unsachgemäßer oder gewerblicher Gebrauch oder die Benutzung
für andere Zwecke macht die Garantie nichtig.
Elektrische Anforderungen
• Prüfen Sie, ob die auf dem Typenschild angegebene Spannung
mit der Spannung in Ihrem Haushalt übereinstimmt; es muss eine
Wechselspannung (abgekürzt AC) sein.
• Wenn der Gerätestecker nicht in die Steckdosen in Ihren Räumen
hineinpasst, sollte er durch einen passenden Netzstecker
ausgetauscht werden.
• ACHTUNG: Dieses Gerät muss an eine geerdete Steckdose
angeschlossen werden.
• Falls die Sicherung in dem Sicherungshalter ausgetauscht werden
muss, ist eine Sicherung mit 13 A gemäß BS1362 zu verwenden.
Inhalt
Gesundheit und Sicherheit 17
Elektrische Anforderungen 18
Produktmerkmale / Ausstattung 19
Gebrauch des Geräts 19
Doppelfunktion 19
Dampfbehandlung im Stand: Zusammenbau 19
Gebrauch als Standdampfreiniger 19
Gebrauch als Handgerät 20
Liste von Zubehörteilen für den Gebrauch als Handgerät 20
Wasserbehälter 20
Nach der Verwendung 21
Aufbewahrung 21
Wartung 21
Ansprechpartner 21
Garantie 22
Den neuen Dampfreiniger optimal nutzen...
WICHTIG: Um Kalkablagerungen im Wasserbehälter
vorzubeugen darf der Behälter des Dampfreinigers darf nur
mit entionisiertem, entmineralisiertem oder destilliertem
Wasser befüllt werden (zu finden in den meisten größeren
Supermärkten).
18
Page 19
VC70495MEE Rev4_9225 47507 MEE pump - Jon 25/01/2014 15:13 Page 19
Ausstattung
(1) Griff
(2) Dampfauslöser
(3) Kabelhalterung
(4) Obere Kabelaufwicklung (drehbar)
(5) Untere Kabelaufwicklung (fest)
(6) Handgerät-Ausrasttaster
(7) Standgerät
(8) Dampfreiniger-Handgerät
(9) Dampfauslöser
(an der Unterseite des Handgerätegriffs zu finden)
(10) Netzkabel
(11) Verschlussdeckel
(12) Ein/Aus-Schalter
(13) Wasserbehälter-Entriegelungstasten
(14) Wasserbehälter
(15) Betriebslampe
(16) Wasserschlauch mit Zusatzgewicht aus Messing
(17) Bodenaufsatz-Entriegelungstaste
(18) Bodenaufsatz
(19) Teppichaufsatz
(20) Bodentuch
(21) Bodentuchklemme
(22) Zubehöradapter
(23) Winkelaufsatz
(24) Spachtelaufsatz
(25) Rundbürstenaufsatz
(26) Langbürstenaufsatz
(27) Multifunktionsdüse
(28) Elastisches Multifunktionstuch (für Multifunktionsdüse)
(29) Abstreiferaufsatz (für Multifunktionsdüse)
(30) Mini-Reinigungskopf (für Multifunktionsdüse)
(31) Mini-Reinigungstuch (für Multifunktionsdüse)
(32) Zubehörtasche
Gebrauch des Geräts
ACHTUNG: Denken Sie daran, dass der Dampfreiniger im
Betrieb Dampf mit einer hohen Temperatur von 115 °C ausstößt.
Immer zuerst in einem unauffälligen Bereich ausprobieren.
Benutzen Sie ihn nicht für Gegenstände oder Oberflächen, die
diesen Temperaturen nicht gewachsen sind, z. B. empfindliche
Stoffe, Dralon, Plastik, Naturfell etc.
Im Zweifelsfall auf einem Stück Stoff ausprobieren, bei dem
kleinere Flecken keine Rolle spielen.
Doppelfunktion
Der Dampfreiniger kann in zwei unterschiedlichen Betriebsarten
verwendet werden:
• Standdampfreiniger für Böden und Teppiche.
• Dampfreiniger-Handgerät 8) zur Reinigung senkrechter oder nur
schwer zugänglicher Flächen.
Die Zubehörteile (22-31) können mit dem DampfreinigerHandgerät eingesetzt werden.
1
Dampfbehandlung im Stand: Zusammenbau
A
Den Griff (1) auf das Standgerät (7) aufsetzen.
B
Eine der (mitgelieferten) Schrauben in die Öffnung der unteren
Kabelaufwicklung (5) einsetzen und handfest einschrauben.
Die andere (mitgelieferte) Schraube in die Öffnung des Griffs
(gegenüber der unteren Kabelaufwicklung) einsetzen und handfest
einschrauben.
HINWEIS: Die Vorbereitung des Griffs ist nur bei dem ersten
Zusammenbau erforderlich.
C
Das Standgerät auf dem Bodenaufsatz (18) aufsetzen und mit der
Bodenaufsatz-Entriegelungstaste (17) in den Bodenaufsatz
einschieben, bis es einrastet.
D
Das Dampfreiniger-Handgerät (8) mit der Dampfdüse zuerst in den
unteren Adapter des Standgeräts einschieben.
Den Dampfreiniger langsam in die Aussparung des Standgeräts
einschieben, bis er einrastet.
E
Das Bodentuch (20) auf dem Bodenaufsatz anbringen und mit der
Bodentuchklemme rückwärtig befestigen.
Gebrauch als Standdampfreiniger
WICHTIG: Vor dem ersten Gebrauch sollten harte
Bodenbeläge gründlich gekehrt und Teppiche gesaugt sein.
Der Dampfreiniger sollten auf folgenden Oberflächen dennoch
nicht eingesetzt werden:
• Blanke Holzböden oder Böden mit freigelegten Holzflächen
(Feuchtigkeit kann eindringen und den Boden beschädigen).
• Beschädigte Hartböden oder Hartböden mit vorhandenen
Fugen (Feuchtigkeit kann eindringen und den Boden
beschädigen).
Darüberhinaus sollte das Dampfgerät nicht für längere Zeit
auf nur einer Stelle gehalten werden, da die fortwährende
Hitzeeinwirkung Teppiche oder Laminatböden beschädigen
kann.
3
Die Tasten (13) auf beiden Seiten des Wasserbehälters (14)
drücken, um den Behälter vom Dampfreiniger-Handgerät (8)
abzunehmen.
Den Verschlussdeckel (11) durch Drehen
entgegen des Uhrzeigersinns entriegeln und danach abnehmen.
Den Wasserbehälter befüllen.
ACHTUNG: Um Kalkablagerungen im Wasserbehälter
vorzubeugen darf der Behälter des Dampfreinigers darf nur mit
entionisiertem, entmineralisiertem oder destilliertem Wasser befüllt
werden (zu finden in den meisten größeren Supermärkten). Die
Garantie wird durch etwaige Kalkablagerungen nichtig.
Verschlussdeckel wieder aufsetzen und durch Drehen im
Uhrzeigersinn verriegeln.
Wasserbehälter wieder einsetzen.
4
Das Bodentuch (20) auf dem Bodenaufsatz (18) anbringen und mit
der Bodentuchklemme (21) befestigen.
5
Die obere Kabelaufwicklung (4) drehen, um das Netzkabel (10)
abzunehmen.
Das Netzkabel in der Kabelhalterung (3) einhängen.
6
ACHTUNG: Noch vor dem EINSCHALTEN des Geräts muss
C
d
19
Page 20
VC70495MEE Rev4_9225 47507 MEE pump - Jon 25/01/2014 15:13 Page 20
sichergestellt sein, dass der Bodenaufsatz nicht auf Personen
oder Haustiere gerichtet ist.
Schließen Sie das Netzkabel an eine Steckdose an und schalten
das Gerät am Ein/Aus-Schalter (12) ein. Die Netzlampe (15)
leuchtet und das Gerät ist nach ca. 30 Sekunden einsatzbereit
(hierzu den Dampfauslöser (2) drücken).
7
Den Bodenaufsatz (18) auf den Boden stellen. Den Bodenaufsatz
mithilfe ihres Fußes leicht auf den Boden drücken und das
Standgerät (7) langsam nach hinten neigen.
Den Dampfauslöser (2) drücken und gedrückt halten, um einen
dauerhaften Dampfausstoß zu erzeugen und dabei das
Dampfgerät pendelnd über den Boden bewegen. Damit der
Boden nicht zu feucht wird den Dampfauslöser (besonders auf
Hartböden) nur stoßweise betätigen.
8
Auf Teppichböden kann der Teppichaufsatz (19) mit Bodenaufsatz
(18) und Bodentuch (20) eingesetzt werden, um den Bodenaufsatz
leichter über den Teppich bewegen zu können.
HINWEIS: Der Teppichaufsatz ist absichtlich nur leicht auf den
Bodenaufsatz aufgesteckt.
Gebrauch als Handgerät
9
Diese Gerätefunktion ist ideal zur Reinigung senkrechter oder nur
schwer zugänglicher Flächen.
Das Dampfreiniger-Handgerät (8) durch Verschieben des auf der
Vorderseite befindlichen Handgerät-Ausrasttasters (6) nach oben aus
dem Standgerät entnehmen (7).
Das Dampfreiniger-Handgerät nach oben aus dem Standgerät
herausziehen.
10
Der Zubehöradapter (22) muss zuerst am Dampfreiniger-Handgerät
(8) angebracht werden, um alle Zubehörteile verwenden zu können.
Dies wird wie folgt erledigt:
1 Den Adapter auf die Düse des Dampfreinigers mit der Entriegelung
am Adapter in Richtung des Dampfreiniger-Handgeräts zeigend
aufsetzen.
2 Die Aussparung auf dem Dampfreiniger-Handgerät muss mit der
Aussparung auf der Entriegelung des Adapters bündig verlaufen. Die
Teile zusammenschieben und in Position einrasten.
3 Das gewünschte Zubehörteil am Ende des Adapters aufsetzen und
zum Festziehen so in Position drehen, dass der auf dem Zubehörteil
befindliche Pfeil (Pfeil nach rechts) mit dem auf dem Adapter
befindlichen Pfeil (Pfeil nach links) übereinstimmt.
ACHTUNG: Vor dem Wechseln der Zubehörteile das Gerät
AUSSCHALTEN und den Netzstecker ziehen. Die Düsen der
Zubehörteile vor dem Umgang erst abkühlen lassen, da sie
nach Gebrauch sehr heiß sind.
Liste von Zubehörteilen für den
Gebrauch als Handgerät
• Der Zubehöradapter (22) ist der Hauptadapter für alle anderen
mitgelieferten Zubehörteile.
• Der Adapter kann auch ohne Zubehörteile eingesetzt werden, so
können Flächen oder Vertiefungen gereinigt werden, die nur schwer
zugänglich sind.
• Mit dem Winkelaufsatz (23) können sanitäre Flächen/Gegenstände
wie z. B. Toilettenschüsseln, Wasserhähne oder Abflüsse gereinigt
20
11
werden. Das Gerät direkt auf noch frische Teppich- oder
Polstermöbelflecke richten und den gelösten Schmutz mit einem
sauberen Tuch aufnehmen.
• Mit dem Spachtelaufsatz (24) können hartnäckige Flecke entfernt
oder z. B. das Auftauen eines Kühl-/Gefrierschranks beschleunigt
werden.
• Der Rundbürstenaufsatz (25) entfernt Flecke von Oberflächen bei
Raumtemperatur wie z. B. von Fliesen, Radzierblenden, Spiegeln
und Fenstern.
• Mit dem Langbürstenaufsatz (26) können Rückstände aus Spalten
und Vertiefungen entfernt werden.
12
Die auf den Zubehöradapter (22) aufgesteckte Multifunktionsdüse
(27) ist der Hauptadapter für folgende Zubehörteile:
• Das um die Multifunktionsdüse gespannte elastische
Multifunktionstuch (28), zur Reinigung von Möbeln und Betten.
13
Der Abstreiferaufsatz (29) wird an den Einrasthaken auf der
Rückseite der Multifunktionsdüse in den Aussparungen des
Abstreiferaufsatzes angebracht und dann über den
Verschlusshaken auf der Vorderseite der Multifunktionsdüse
eingerastet (wie abgebildet).
• Der Abstreiferaufsatz kann nach Gebrauch durch Drücken des
Verschlusshakens nach vorne abgenommen werden. Danach
muss die noch in den Aussparungen eingerastete
Multifunktionsdüse aus den Einrasthaken des Abstreiferaufsatzes
gelöst und die komplette Düse nach oben angenommen werden.
14
Der Abstreiferaufsatzes ist ideal für die Reinigung von Fliesen oder
ganzen Glasflächen wie z. B. Fenster oder Spiegel. Zum
Fensterreinigen oben am Fenster ansetzen, den Abstreifer auf die
Fläche aufdrücken geradlinig von oben nach unten führen. Die
Gummileiste und die Unterkante des Fensters nach jeder Bahn
trocken wischen. Für kleine Fenster kann der Abstreiferaufsatz
entfernt und der Dampf direkt auf die Fläche gesprüht werden.
Der Abstreifer kann jetzt separat für die Entfernung der
Feuchtigkeit verwendet werden.
ACHTUNG: Nicht auf sehr kaltem Glas benutzen, da die
plötzliche Temperaturänderungen Rissbildung im Glas
verursachen kann.
• Der Mini-Reinigungskopf (30) wird mit dem Mini-Reinigungstuch
(31) an der Multifunktionsdüse angebracht (siehe Einsetzen des
Abstreiferaufsatzes, Abbildung und Beschreibung oben). Dieses
Zubehörteil kann zur Reinigung von Fliesen bzw. Glasflächen,
Schränken und Arbeitsflächen in der Küche oder im Badezimmer
sowie Möbeln, Vorhängen, Markisen, Kissenbezügen und
Matratzen eingesetzt werden.
Wasserbehälter
Das Zusatzgewicht aus Messing (16)
Das Zusatzgewicht aus Messing ist am Ende des Saugschlauchs
innerhalb des Wasserbehälters angebracht. Die Messingkugel
kann sich frei im Wasserbehälter, je nach Position des Geräts,
bewegen. Die Messingkugel muss im Behälter verbleiben, so dass
beim Betätigen des Dampfauslösers Dampf erzeugt wird,
unabhängig von der jeweiligen Lage des DampfreinigerHandgeräts.
Page 21
VC70495MEE Rev4_9225 47507 MEE pump - Jon 25/01/2014 15:13 Page 21
Wasserbehälter ausspülen
Den Wasserbehälter regelmäßig ausspülen, um Kalkablagerungen
zu beseitigen, die sich am Behälterboden angesammelt haben.
Den Behälter nur mit entionisiertem, entmineralisiertem oder
destilliertem Wasser befüllen (zu finden in den meisten größeren
Supermärkten) und den Verschlussdeckel anbringen, um stärker
durchspülen zu können.
Nach der Verwendung
Nach jedem Gebrauch die beiden folgenden Wartungsschritte
ausführen.
1 Den Dampfreiniger ausschalten und den Netzstecker aus der
Steckdose ziehen. Den Dampfreiniger sofort auf eine geeignete
Oberfläche stellen (z. B. Fliesenboden), damit die noch in der
Düse bzw. in den Tüchern enthaltene Restwärme/-feuchtigkeit
nicht die Oberfläche beschädigen kann. Warten, bis sich der
Reiniger komplett abgekühlt hat.
2 Wasser aus dem Wasserbehälter (14) durch Entfernen des
Verschlussdeckels (11) und Ausgießen des Wassers entleeren. Den
Wassertank von innen vollständig trocknen lassen, und danach
den Verschlussdeckel wieder anbringen.
Aufbewahrung
16
Das Netzkabel um die beiden Kabelaufwicklungen (4/5) wickeln
und die obere Kabelaufwicklung (4) nach oben drehen, um das
Netzkabel zu fixieren.
Sämtliche Zubehörteile in die Zubehörtasche (32) geben und an
die untere Kabelaufwicklung hängen.
Wartung
ACHTUNG: Vor einer Wartung des Dampfreinigers stets den
Netzstecker ziehen.
Allgemeine Wartung
Ihr Gerät behält sein gutes Aussehen im normalen täglichem
Einsatz bei. Sie können durch gelegentliches Abwischen mit
einem feuchten Tuch dafür sorgen, dass es möglichst lange gut
aussieht. Verwenden Sie keinesfalls scheuernde Reinigungsmittel.
Reinigung der Tücher
Das Bodentuch (20) und das elastische Multifunktionstuch (28)
können in der Waschmaschine gewaschen werden (30 ºC max.).
Die Tücher bei starker Verschmutzung in warmem Wasser und
etwas Waschmittel oder einem milden Fleckentferner einweichen.
WICHTIG: Keine Bleichmittel oder Weichspülmittel verwenden.
Vor dem Verstauen alles vollständig trocknen lassen.
Zur Bestellung von Ersatztüchern, wenden Sie sich bitte an unsere
Helpline.
Wartung der Zubehörteile
Schmutz und Verstopfungen müssen regelmäßig aus den
Zubehörteilen entfernt werden, um die Lebensdauer dieser Teile zu
verlängern.
Ansprechpartner
Helpline
Haben Sie ein Problem mit Ihrem Gerät, rufen Sie unsere Helpline
an, da wir Ihnen wahrscheinlich besser als das Geschäft, in dem
Sie das Gerät gekauft haben, helfen können.
Halten Sie den Gerätenamen sowie die Modell- und
Seriennummer bereit, wenn Sie uns anrufen, damit Ihnen schneller
geholfen wird.
Sprechen Sie mit uns
Haben Sie Fragen oder Anregungen oder benötigen Sie großartige
Tipps, um unsere Geräte optimal zu nutzen, beteiligen Sie sich
online:
Blog: www.morphyrichards.co.uk/blog
Facebook: www.facebook.com/morphyrichardsuk
Twitter: www.twitter.com/loveyourmorphy
Website: www.morphyrichards.com
d
GARANTIEKARTE
Kauf datum Typen-Nr.
Händlerstempel und Unterschr ift Händlerstempel und Unterschr ift
Fehler / Mangel
Deutschland:
Bei Störungen oder Schäden
wenden Sie sich bitte an
unseren Kundenservice unter:
Tel.: 01805 / 398 346
(0,14 / Min. aus dem deutschen Festnetz;
max. 0,42 /Min. aus dem Mobilfunk)
Fax: 01805 / 355 467
eMail: service@glendimplex.de
Die zuständige Stelle in allen anderen Ländern ist der jeweilige Fachhändler bzw. die Bezugsquelle.
Österreich:
Bei Störungen oder Schäden
wenden Sie sich bitte an
unseren Kundendienst:
Firma Schurz
Merangasse 17
A-8010 Graz
Tel.: +43 316 32 30 41
Fax: +43 316 38 29 63
eMail: office@schurz.biz
Schweiz:
Kundendienst
SchweizBLUEPOINT
Service SaglVia Cantonale
14C.P. 46CH - 6917
BarbengoTelefon: (+41) 091 980 49 72
Telefax: (+41) 091 605 37 55
E-Mail: info@bluepoint-service.ch
21
Page 22
VC70495MEE Rev4_9225 47507 MEE pump - Jon 25/01/2014 15:13 Page 22
GESETZLICHE GEWÄHRLEISTUNG
Für dieses Gerät gilt eine Gewährleistung von 2 Jahren.
Als Kaufnachweis sollte die Quittung des Fachhändlers
aufgehoben werden. Heften Sie Ihren Beleg an die Rückseite
dieser Unterlagen.
Sollte an diesem Gerät ein Fehler auftreten, sind immer
nachfolgende Angaben mitzuteilen. Diese Angaben sind auf der
Unterseite des Geräts zu finden.
Modellnr.
Seriennr.
Vor dem Verlassen des Werks werden alle Morphy Richards
Produkte geprüft. Sollte einmal der Fall auftreten, dass sich ein
Gerät innerhalb der Gewährleistung als fehlerhaft erweist,
wenden Sie sich bitte an unsere Service-Hotline
Falls das Gerät während der 2-jährigen Gewährleistung aus
welchem Grund auch immer ausgetauscht wird, wird zur
Berechnung der Restgarantie für das neue Gerät das OriginalKaufdatum zugrunde gelegt. Aus diesem Grunde ist es
besonders wichtig, den Original-Kaufbeleg bzw. die Rechnung
aufzubewahren, um das Datum des ursprünglichen Kaufs
nachweisen zu können.
Damit die 2-jährige Gewährleistung geltend gemacht werden
kann, muss das Gerät im Einklang mit den Anweisungen des
Herstellers benutzt worden sein. Beispielsweise muss das Gerät
entkalkt worden sein und gemäß den Anweisungen gereinigt
werden.
Morphy Richards übernimmt keine Verpflichtung zur Reparatur
oder zum Austausch der Waren im Rahmen der
Garantiebedingungen, wenn:
1 der Fehler auf einen versehentlich Gebrauch, Missbrauch,
unachtsamen Gebrauch oder auf einen Gebrauch zurückzuführen
ist, der den Empfehlungen des Herstellers entgegenwirkt oder
wenn der Fehler durch Stromspitzen oder durch Transportschäden
verursacht wurde.
2 das Gerät mit einer Spannung versorgt wurde, die nicht auf dem
Typenschild abgedruckt ist.
3 von anderen Personen als unserem Reparatur- und
Wartungspersonal (oder von einem unserer Vertragshändler)
Reparaturversuche unternommen wurden.
4 wenn das Gerät für Vermietungszwecke oder nicht allein für
private Zwecke gebraucht wurde.
5 das Gerät aus zweiter Hand stammt.
6 Morphy Richards kann nicht dafür haftbar gemacht werden,
Reparaturarbeiten im Rahmen der Gewährleistung auszuführen.
7 Verbrauchsmaterialien wie Tüten, Filter und Glaskaraffen sind von
der Gewährleistung ausgeschlossen.
8 Batterien und Schäden aufgrund undichter Batterien sind von der
Gewährleistung ausgeschlossen.
9 die Filter nicht gemäß Anleitung gereinigt und ausgewechselt
wurden
Diese Gewährleistung erkennt Ihnen ausschließlich die Rechte
zu, die ausdrücklich in den oben genannten Bestimmungen
niedergelegt sind und erstreckt sich nicht auf Forderungen
infolge eines Verlustes oder einer Beschädigung. Diese
Gewährleistung wird als zusätzliche Leistung angeboten und
greift Ihre gesetzlich zuerkannten Rechte als Verbraucher nicht
an.
22
Page 23
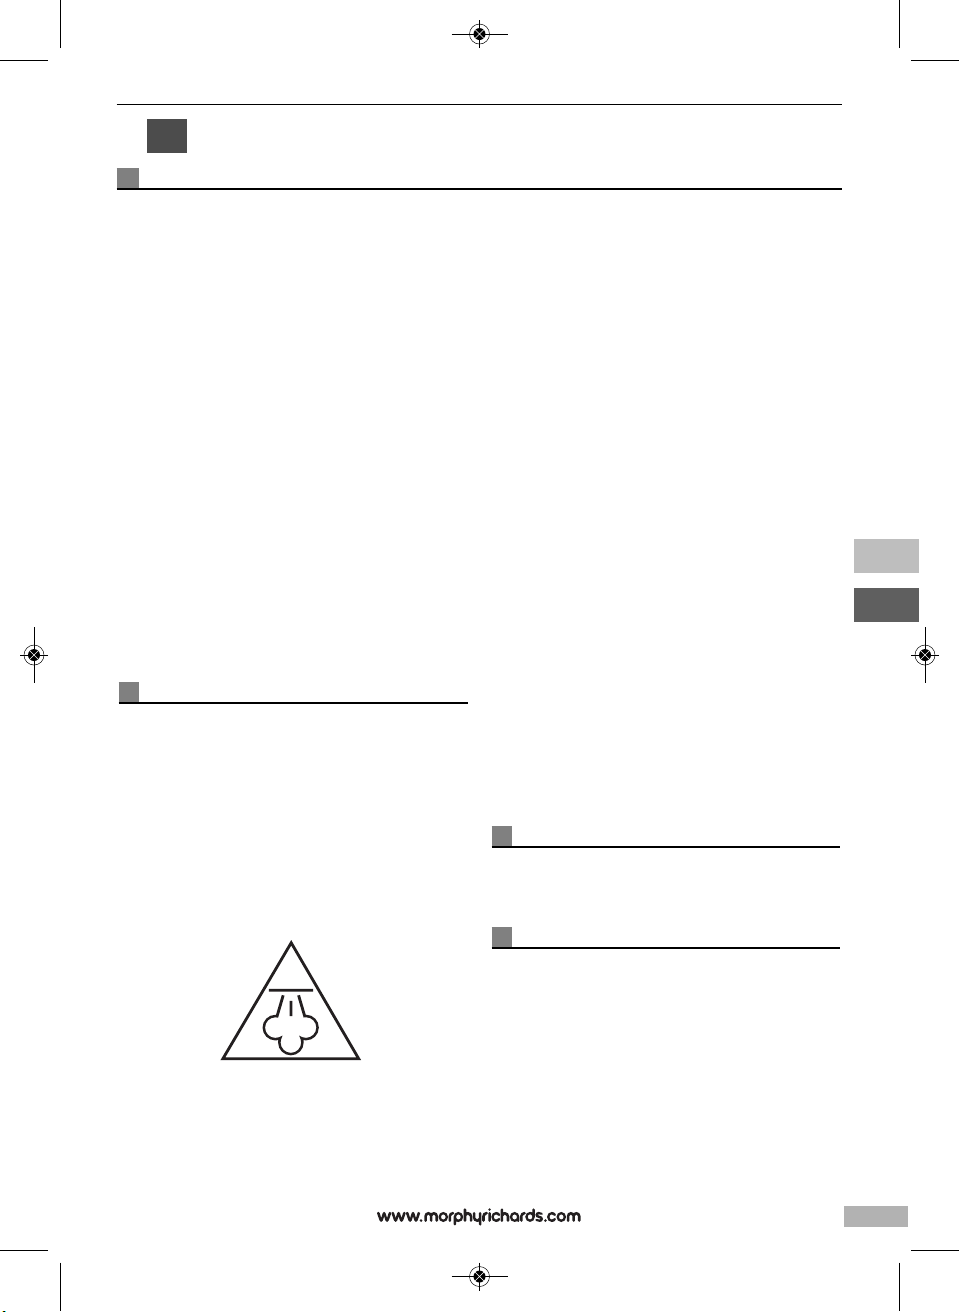
VC70495MEE Rev4_9225 47507 MEE pump - Jon 25/01/2014 15:13 Page 23
e
INSTRUCCIONES DE SEGURIDAD IMPORTANTES
El uso de cualquier aparato eléctrico requiere la aplicación de las normas lógicas de seguridad que se indican a continuación.
Lea estas instrucciones detenidamente antes de utilizar este producto.
• ADVERTENCIA: Desconectar de la red eléctrica antes de
realizar cualquier operación rutinaria de mantenimiento.
• Este aparato puede ser utilizado por niños en edades a partir
de 8 años y personas con sus capacidades físicas, mentales
o sensoriales reducidas, o con falta de experiencia y
conocimientos, si han recibido la necesaria supervisión o
instrucciones en relación con el uso del aparato y los peligros
relacionados.
• No permita a los niños jugar con este aparato.
d
• No permita a los niños limpiar o realizar el mantenimiento del
aparato sin la supervisión de un adulto.
Seguridad personal
• ADVERTENCIA: No dirija nunca el chorro de vapor hacia
componentes o elementos eléctricos. Si tiene dudas acerca
del efecto que puede tener el chorro de vapor sobre un
objeto, póngase en contacto con el fabricante del objeto
antes de limpiarlo.
• ADVERTENCIA: No toque nunca el enchufe o el cable con las
manos mojadas.
• ADVERTENCIA: Las boquillas y herramientas están calientes
después de usarlas. Deje enfriar antes de intentar retirarlas.
• ADVERTENCIA: No lance vapor contra personas o animales.
Peligro de quemaduras.
VAPOR
• ADVERTENCIA: No utilice el aparato sin el tapón del
rellenador colocado.
• ADVERTENCIA: En el caso de atasco, el vapor se libera por
las ventilaciones de alivio de vapor.
• Para evitar incendios, descargas eléctricas y daños personales,
no introduzca el cable, el enchufe o el limpiador en agua o en
cualquier otro líquido.
• Desenchufe el cable de la toma de corriente después de usar el
robot de limpieza, y antes de limpiarlo, llenarlo, cambiar los
accesorios o realizar el mantenimiento de usuario.
• Mantenga el aparato fuera del alcance de los niños cuando esté
enchufado o enfriándose.
Ubicación
• No utilice ni guarde este producto en exteriores.
• No guarde este aparato cerca de superficies calientes, tales
como hornos, ni de equipos de calefacción.
Cable
• ADVERTENCIA: Nunca debe conectarse a la red eléctrica un
cable de alimentación dañado o roto con enchufe
incorporado. Debe destruirse, ya que un cable dañado es
muy peligroso si se conecta a una toma de corriente.
• Para evitar riesgos, si observa que el cable de alimentación está
dañado, deberá ser sustituido por el fabricante, su representante
de servicio técnico u otra persona debidamente cualificada.
• Evite retorcer el cable de alimentación.
e
23
Page 24

VC70495MEE Rev4_9225 47507 MEE pump - Jon 25/01/2014 15:13 Page 24
Seguridad del producto
• ADVERTENCIA: Antes de empezar, siempre procure hacer
una prueba sobre una zona discreta. No lo utilice nunca sobre
materiales no resistentes a las altas temperaturas, tales
como el dralón, la piel natural, etc.
• No realice nunca modificaciones en robot de limpieza.
• No utilice el robot de limpieza de vapor sin agua en el depósito.
Siempre
rellene con agua cuando vaya a usarlo un periodo prolongado.
• Nunca llene el depósito del robot de limpieza con algo distinto de
agua desionizada, desmineralizada o destilada.
• No se debe utilizar el aparato en caso de que se haya caído,
muestre signos de daños o gotee.
Otras consideraciones de seguridad
• No mezcle el agua con detergentes químicos, perfumes, alcohol o
descalcificador, etc.
• Únicamente el personal cualificado debe efectuar las
reparaciones de aparatos eléctricos.
• Las reparaciones no profesionales pueden resultar peligrosas para
los usuarios.
• Utilice exclusivamente piezas de recambio y accesorios Morphy
Richards originales.
• No deje nunca el aparato funcionando sin supervisión.
• Este robot de limpieza está destinado exclusivamente al uso
doméstico. El mal uso o el uso con fines comerciales o de otro
tipo invalidará la garantía.
Requisitos eléctricos
• Compruebe que la tensión indicada en la placa de características
del
aparato corresponde con el suministro eléctrico de su casa, que
debe ser CA (corriente alterna).
• Si los enchufes de su casa no son compatibles con el enchufe de
este aparato, se debe retirar el enchufe del aparato y colocar el
adecuado.
• ADVERTENCIA: Este aparato debe estar conectado a tierra.
• Si fuese necesario cambiar el fusible del enchufe, debe utilizarse
un fusible BS1362 de 13 amperios.
Índice
Salud y seguridad 23
Requisitos eléctricos 24
Descripción / características del producto 24
Uso del aparato 25
Funcionalidad dual 25
Vapor vertical: montaje 25
Uso en modo vapor vertical 25
Uso del limpiador de mano 25
Lista de accesorios para su uso con el limpiador de mano 26
Depósito de agua 26
Después del uso 26
Almacenamiento 26
Mantenimiento 26
Contacto 27
Garantía 27
Cómo sacar el mayor partido de su nuevo
producto de limpieza...
IMPORTANTE: Para evitar la acumulación de cal en el
depósito de agua, nunca llene el depósito del robot de
limpieza con algo distinto de agua desionizada,
desmineralizada o destilada (disponibles en la mayoría de los
supermercados).
Características
(1) Asa
(2) Activador de vapor
(3) Soporte del cable
(4) Gancho superior para el cable (giratorio)
(5) Gancho inferior para el cable (fijo)
(6) Botón de liberación de unidad manual
(7) Cuerpo principal
(8) Limpiador de mano
(9) Activador de vapor
(en la parte inferior del asa del limpiador de mano)
(10) Cable de alimentación
(11) Tapa del rellenador
(12) Interruptor de encendido/apagado
(13) Botones de liberación del depósito de agua
(14) Depósito de agua
(15) Luz indicadora de funcionamiento
(16) Tubo de agua con peso de bola de latón
(17) Botón de liberación del cabezal de suelo
(18) Cabezal de suelo
(19) Deslizador para alfombras
(20) Paño para suelo
(21) Tensor del paño para suelo
(22) Adaptador de accesorios
(23) Accesorio de boquilla en ángulo
(24) Accesorio de espátula
(25) Accesorio de cepillo circular
(26) Accesorio de cepillo largo
(27) Boquilla multiusos
(28) Paño elástico (se sujeta a la boquilla multiusos)
(29) Accesorio escurridor (se sujeta a la boquilla multiusos)
(30) Cabeza de limpieza mini
(se sujeta a la boquilla multiusos)
(31) Paño de limpieza mini
(se sujeta a la cabeza de limpieza mini)
(32) Bolsa de accesorios
24
Page 25

VC70495MEE Rev4_9225 47507 MEE pump - Jon 25/01/2014 15:13 Page 25
Uso del aparato
IMPORTANTE: Por favor, recuerde que el limpiador de vapor
funciona expulsando vapor de agua a una temperatura superior
a 115 °C. Antes de empezar, siempre procure hacer una prueba
sobre una zona discreta. No lo utilice nunca sobre objetos o
superficies que no resistan esta temperatura, ni en materiales
delicados como dralón, plástico, piel natural, etc.
En caso de duda, pruebe con cuidado en una parte del
material donde no sean problema marcas de menor
importancia.
Funcionalidad dual
El limpiador de vapor puede configurarse fácilmente en dos
modos de limpieza:
• Limpiador de vapor vertical para suelo y alfombras.
• Limpiador de vapor de mano (8) para limpieza de superficies
verticales o difíciles de alcanzar.
Los accesorios (22-31) se pueden utilizar con el limpiador de
mano.
Vapor vertical: Montaje
A
Inserte el asa (1) en el cuerpo principal (7).
B
Inserte uno de los tornillos (suministrado) en el orificio de la parte
inferior del gancho para el cable (5) y gire hasta apretarlo.
Inserte el otro tornillo (suministrado) en el lado del asa (en el lado
opuesto al gancho inferior para el cable) y gire hasta apretarlo.
NOTA: La fijación del asa solo es necesaria para el primer
montaje.
C
Descienda el cuerpo principal en el cabezal de suelo (18), con el
botón de liberación del cabezal de suelo (17) del cuello del cepillo
en la parte posterior del conjunto, hasta que encaje en su lugar.
D
Inserte la boquilla de salida de vapor en el extremo inferior del
limpiador de mano (8) en el adaptador en la parte inferior del
espacio de la parte delantera del cuerpo principal.
Empuje el limpiador de vapor con fuerza dentro del espacio del
cuerpo principal hasta que encaje en su lugar.
E
Coloque el paño para suelo (20) en el cabezal de suelo y apriete
la palanca de la parte posterior.
1
2
Uso en modo vapor vertical
IMPORTANTE: Antes de usar, los suelos duros deben barrerse
bien y las alfombras aspirarse totalmente secas. Sin
embargo, se recomienda no utilizar el limpiador de vapor en:
• suelos de madera o cualquier superficie con la madera no
protegida (ya que absorbe la humedad y puede deformarse).
• suelos duros dañados o con huecos (porque absorben la
humedad y pueden deformarse).
Además, no mantenga la mopa mucho tiempo en el mismo
sitio, ya que el calor continuo puede dañar las moquetas y
suelos laminados.
3
Apriete los botones (13) del lado del depósito de agua (14) para
quitarlo del limpiador de vapor de mano (8).
Retire el tapón del rellenador (11) girándolo
hacia la izquierda a la posición de “desbloqueo” y luego levántelo.
Llene el depósito de agua.
IMPORTANTE: Para evitar la acumulación de cal en el depósito de
agua, nunca llene el depósito del robot de limpieza con algo
distinto de agua desionizada, desmineralizada o destilada
(disponibles en la mayoría de los supermercados). Cualquier
problema derivado de la cal invalida la garantía del producto.
Vuelva a colocar el tapón del rellenador y gírelo hacia la derecha
hasta la posición de “bloqueo”.
Vuelva a colocar el depósito de agua.
E
Coloque el paño para suelo (20) en el cabezal de suelo (18)
fijándolo en su lugar apretando la palanca (21).
5
Gire el gancho de cable superior (4) para liberar rápido el cable de
alimentación (10).
Asegure el cable de alimentación en el soporte del cable (3).
6
ADVERTENCIA: Antes de encender, asegúrese de que el
cabezal de suelo está alejado de personas o animales.
Enchufe el limpiador a vapor a la toma de corriente y enciéndalo
con el interruptor de encendido / apagado (12). El indicador de
funcionamiento (15) se ilumina y puede emitirse vapor después de
unos 30 segundos (cuando se presiona el activador de vapor (2)).
7
Coloque el cabezal de suelo (18) sobre el suelo. Sostenga el
cepillo de solo contra el suelo con el pie e incline el cuerpo
principal (7) hacia atrás.
Para emitir vapor continuo, mantenga presionado el activador de
vapor (2) mientras empuja lentamente el limpiador hacia adelante
y atrás sobre el suelo. Sin embargo, para evitar el exceso de
humedad del suelo, accione el activador de vapor
intermitentemente (especialmente en suelos duros).
8
Si limpia alfombras, coloque el cepillo para suelo (18) con el paño
para suelo (20) fijado en el deslizador para alfombras (19), para
que sea más fácil mover el cepillo sobre la alfombra.
NOTA: El deslizador se ha diseñado para ajustarse con holgura en
el cabezal de suelo.
Uso del limpiador de mano
9
Esta función es ideal para la limpieza de superficies verticales y
lugares de difícil acceso.
Separe el limpiador de mano (8) del cuerpo principal (7) deslizando
el botón de liberación de mano (6) hacia arriba en la parte frontal del
cuerpo principal.
Tire del limpiador de mano hacia arriba y fuera del cuerpo principal.
10
Para utilizar todos los accesorios, primero debe instalar el adaptador
de accesorios (22) en el limpiador de mano (8). Para ello, haga lo
siguiente:
1 Deslice el adaptador sobre la boquilla del limpiador de vapor con el
pestillo de liberación del adaptador frente a la base del limpiador de
vapor de mano.
2 Alinee la ranura d el limpiador de mano con el pestillo de liberación
del adaptador. Empuje para unir y fijar en su posición.
3 Coloque el accesorio deseado en el extremo del adaptador
alineando la flecha del accesorio con la flecha derecha del
adaptador y gire el accesorio hasta que la flecha se alinee con la
flecha izquierda del adaptador.
e
25
Page 26

VC70495MEE Rev4_9225 47507 MEE pump - Jon 25/01/2014 15:13 Page 26
ADVERTENCIA: Apague y desenchufe antes de cambiar las
boquillas. Después de su uso, las boquillas están muy calientes,
deje que se enfríen antes de tocarlas.
Lista de accesorios para su uso con el
limpiador de mano
• Adaptador para accesorios (22), este accesorio es la base para
todos los accesorios manuales suministrados con el producto.
• También puede usarse solo para limpiar lugares o grietas de difícil
acceso.
• Boquilla en ángulo (23) para limpiar sanitarios como inodoros, grifos
o tapas de desagüe. Apunte directamente a las manchas no
permanentes en las alfombras o tapicerías, mientras sostiene un
paño limpio cerca de la zona manchada para recoger la suciedad.
• Espátula (24) para eliminar depósitos difíciles, o para ayudar a
descongelar la nevera o el congelador.
• Cepillo circular (25) para eliminar manchas en superficies a
temperatura ambiente, como azulejos, tapacubos, espejos y
ventanas.
• Cepillo largo (26) para eliminar la suciedad de las ranuras y grietas.
12
Boquilla multiusos (27), una vez conectada al adaptador de
accesorios (22), la boquilla multiusos es la base para fijar los
siguientes accesorios:
• Paño elástico (28) para cubrir la boquilla multiusos al limpiar
tapicería y ropa de cama.
13
El escurridor (29) puede unirse a la boquilla multiusos insertando
los ganchos de la parte posterior del escurridor de la escobilla de
goma boquilla en la boquilla multiusos y, a continuación, fijando la
parte frontal de la boquilla multiusos con el clip de bloqueo de la
parte superior del escurridor (como se muestra).
• Retire el escurridor después de usarlo sujetando el clip de
bloqueo hacia adelante. La boquilla multiusos todavía sigue unida
por los ganchos de la parte trasera del escurridor, gire la boquilla
multiusos y desenganche para separarla.
14
El escurridor de goma es ideal para limpiar baldosas cerámicas o
cristales, como ventanas o paneles de espejo. Para limpiar
ventanas, empiece por la parte superior, presione el escurridor
contra la superficie y arrastre hacia abajo en movimientos rectos.
Después de cada pasada, seque la goma de la escobilla y la
ventana. Para ventanas con paneles pequeños, quite la
herramienta de escurridor y rocíe el vapor directamente sobre la
superficie. Utilice el escurridor por separado para limpiar la
humedad.
ADVERTENCIA: No lo utilice sobre cristales muy fríos, ya que
el cambio de temperatura podría resquebrajar el cristal.
• El cabezal de limpieza mini (30) con paño de limpieza mini (31)
colocado se monta en la boquilla multiusos (igual que para
montar y desmontar el escurridor, como se muestra a la izquierda
y arriba). Este accesorio es útil para la limpieza de superficies de
azulejos o vidrio, armarios y encimeras de cocinas y baños,
además de tapicería, cortinas, estores, almohadas y colchones.
26
11
Depósito de agua
Peso de bola de latón (16)
El peso de bola de latón del interior del depósito de agua está unido
al extremo de la manguera de aspiración. La bola tiene un peso y
diseño adecuados para moverse libremente por todo el depósito de
agua en función de la posición del producto. La bola debe
permanecer dentro del agua para que se pueda generar el vapor al
pulsar el activador de vapor, independientemente de la orientación
del limpiador de mano.
Enjuague del depósito de agua
Enjuague regularmente el depósito de agua para soltar los depósitos
de agua que se hayan acumulado en el fondo. Utilice únicamente
agua desionizada, desmineralizada o destilada (disponible en la
mayoría de los grandes supermercados) y coloque el tapón del
rellenador para permitir un enjuague vigoroso.
Después del uso
Después de cada uso realice los dos pasos de mantenimiento
siguientes.
1 Apague el interruptor del robot de limpieza y desenchúfelo.
Colóquelo inmediatamente sobre una superficie adecuada (por
ejemplo un suelo de baldosas), donde el calor residual o la humedad
de la boquilla / el paño no afecten a la superficie. Espere a que el
robot de limpieza se enfríe por completo.
2 Vacíe el depósito de agua (14) quitando el tapón del rellenador (11) y
vertiendo el agua. Deje que el interior del depósito de agua se seque
por completo antes de volver a colocar el tapón del rellenador.
Almacenamiento
Envuelva el cable alrededor de los dos ganchos para guardarlo
(4/5), girando hacia arriba el gancho de almacenamiento superior (4)
para asegurar el cable de alimentación (10) en su lugar.
Ponga todos los accesorios en la bolsa de accesorios (32) y
cuelgue la bolsa en el gancho para cable superior.
16
Mantenimiento
ADVERTENCIA: Desenchufe siempre el limpiador de vapor de la
red eléctrica antes de realizar cualquier procedimiento de
mantenimiento.
Mantenimiento general
Su robot de limpieza está diseñado para soportar un uso normal
diario, pero limpiarlo de vez en cuando con un trapo húmedo
ayudará a mantenerlo. No utilice soluciones de limpieza abrasivas.
Limpieza de los paños
El paño para suelo (20) y el paño elástico multiusos (28) pueden
lavarse a máquina (máximo 30 °C). Si están muy sucios, moje los
paños en agua caliente con detergente o un quitamanchas suave.
IMPORTANTE: No utilice lejía ni suavizantes.
Deje secar completamente antes de guardar.
Llame al número de atención al cliente para adquirir paños de
recambio.
Mantenimiento de los accesorios
Debe eliminar regularmente la suciedad y los atascos de los
accesorios ayudar a prolongar su vida útil.
Page 27

VC70495MEE Rev4_9225 47507 MEE pump - Jon 25/01/2014 15:13 Page 27
Contacto
Servicio de atención al cliente
Si tiene algún problema con el aparato, llame al servicio de
atención al cliente, ya que es probable que podamos prestarle
mejor ayuda que el comercio donde adquirió el producto.
Para solventar su problema con mayor rapidez, tenga a mano el
nombre del producto, el número de modelo y el número de serie
antes de llamarnos.
Haga sus comentarios
Si tiene alguna duda o quiere expresar algún comentario o recibir
excelentes consejos para sacar el máximo partido a sus
productos, únase a nosotros en Internet:
Blog: www.morphyrichards.co.uk/blog
Facebook: www.facebook.com/morphyrichardsuk
Twitter: www.twitter.com/loveyourmorphy
Sitio web: www.morphyrichards.com
SU GARANTÍA DE DOS AÑOS
Este aparato está cubierto por una garantía de reparación o
sustitución de dos años.
Es importante guardar el recibo de la tienda en la que lo
adquirió como prueba de compra. Grape el recibo a esta
contraportada para poder consultarlo en el futuro.
Indique la siguiente información si el producto tiene algún fallo.
Estos números se encuentran en la base del producto.
N.º de modelo
N.º de serie
Todos los productos de Morphy Richards se prueban
individualmente antes de salir de fábrica. En el improbable caso
de que un aparato tenga un fallo, hay que devolverlo al lugar en
el que se compró en los 28 días posteriores a la compra para
cambiarlo.
Si el fallo se produce pasados 28 días de la compra y antes de
24 meses, debe ponerse en contacto con su distribuidor local
indicando el número de modelo y de serie del producto, o
escribir a su distribuidor local a las direcciones que se indican.
Le pedirán devolver el producto (en un embalaje seguro y
adecuado) a la siguiente dirección junto con una copia de la
factura de compra.
El aparato defectuoso se reparará o se sustituirá y se enviará
en un plazo de 7 días laborables desde la recepción del mismo,
a menos que se produzca una de las siguientes excepciones (1-
9).
En caso de que reciba un artículo nuevo en el periodo de
garantía de 2 años, la garantía del nuevo artículo se calculará
desde la fecha original de compra. Por lo tanto, es esencial
guardar la factura o el recibo de caja original que indica la
fecha de compra original.
Para que la garantía de 2 años pueda aplicarse, el aparato
debe haberse utilizado siguiendo las instrucciones del
fabricante. Por ejemplo, debe eliminarse la cal de los aparatos
y mantener los filtros limpios según se indica en estas
instrucciones.
Morphy Richards o el distribuidor local no se hacen
responsables de sustituir o reparar los productos en virtud de
las condiciones de la garantía en los siguientes casos:
1 El fallo se ha producido o se puede atribuir a un uso accidental,
erróneo, negligente o contrario a las recomendaciones del
fabricante, o ha sido causado por una subida de tensión o por
daños en el transporte.
2 El aparato se ha utilizado con una tensión diferente a la indicada
en los productos.
3 Personas que no pertenecen a nuestro personal técnico (y que no
son el proveedor autorizado) han intentado reparar el aparato.
4 El aparato ha sido objeto de alquiler o de uso no doméstico.
5 El aparato es de segunda mano.
6 Ni Morphy Richards ni el distribuidor local no son responsables
de realizar ninguna revisión, en virtud de la garantía.
7 La garantía excluye los consumibles como bolsas, filtros y jarras
de vidrio.
8 La garantía no cubre las baterías ni las fugas de ácido de las
mismas.
9 Los filtros no se han limpiado ni sustituido tal y como se indica.
Esta garantía no le confiere más derechos que los
expresamente expuestos, ni incluye reclamaciones por daños o
pérdidas consiguientes. Esta garantía se ofrece como ventaja
adicional y no afecta a sus derechos legales como consumidor.
e
27
Page 28

VC70495MEE Rev4_9225 47507 MEE pump - Jon 25/01/2014 15:13 Page 28
p
INSTRUÇÕES IMPORTANTES
A utilização de qualquer aparelho eléctrico exige o cumprimento das seguintes regras de segurança de senso comum.
Leia atentamente estas instruções antes de utilizar o produto.
• AVISO: Desligue o aparelho da tomada de alimentação
antes de efectuar qualquer operação de manutenção de
rotina.
• Este aparelho pode ser utilizado por crianças com 8 ou mais
anos de idade e pessoas cujas capacidades físicas,
sensoriais ou mentais sejam reduzidas ou que não possuam
os conhecimentos e a experiência necessários, se as
mesmas forem vigiadas e instruídas acerca da utilização do
aparelho de forma segura e compreenderem os perigos
envolvidos.
• As crianças não devem brincar com o aparelho.
• As tarefas de limpeza e manutenção pelo utilizador não
devem ser realizadas por crianças sem supervisão.
Segurança pessoal
• AVISO: Nunca aponte o vapor em direcção a componentes
ou instalações eléctricas. Em caso de dúvida acerca da
adequação do vapor à limpeza de um aparelho, aconselhe-se
junto do fabricante do aparelho antes da limpeza.
• AVISO: Nunca toque na ficha nem no cabo com as mãos
molhadas.
• AVISO: Os bocais e as ferramentas estarão quentes após a
utilização. Deixe-os arrefecer antes de os tentar remover.
• AVISO: Não liberte o vapor na direcção de pessoas ou
animais. Perigo de queimaduras.
VAPOR
• AVISO: Não utilize o aparelho sem a tampa de enchimento
colocada.
• AVISO: Na eventualidade de uma obstrução, será libertado
vapor pelas aberturas de alívio do vapor.
• Para protecção contra incêndios, choques eléctricos e lesões,
não mergulhe o fio, a ficha nem o limpador na água ou noutro
tipo de líquidos.
• A ficha deve ser removida da tomada de parede após a
utilização, antes da limpeza, do enchimento ou da substituição
de acessórios, ou da execução de operações de manutenção
pelo utilizador.
• Mantenha o aparelho fora do alcance das crianças quando
estiver ligado ou a arrefecer.
Localização
• Não utilize nem mantenha este produto em espaços exteriores.
• Não guarde o aparelho junto de superfícies quentes, como fornos
ou aparelhos de aquecimento.
Cabo de alimentação
• AVISO: Um cabo de alimentação danificado ou com cortes
equipado com uma ficha nunca deve ser ligado à
alimentação eléctrica. Deve ser destruído, uma vez que pode
tornar-se perigoso se for ligado a uma tomada eléctrica.
• Caso esteja danificado, o cabo de alimentação deverá ser
substituído pelo fabricante, respectivo agente de serviço ou
técnico igualmente qualificado para evitar acidentes.
• Não permita que o cabo de alimentação fique esticado.
28
Page 29

VC70495MEE Rev4_9225 47507 MEE pump - Jon 25/01/2014 15:13 Page 29
Segurança do produto
• AVISO: Comece sempre por testar numa área mais discreta.
Nunca utilize em materiais que não resistam a temperaturas
elevadas, tais como dralon, peles, etc.
• Nunca efectue qualquer tipo de alteração no limpador a vapor.
• Nunca utilize o limpador a vapor sem água no depósito. Encha-o
sempre de água durante períodos longos de utilização.
• Nunca encha o depósito do limpador a vapor com qualquer outro
material para além de água desionizada, desmineralizada ou
destilada.
• O aparelho não deve ser utilizado se tiver caído, se houver sinais
visíveis de danos ou se apresentar fugas.
Outras considerações de segurança
• Não utilize quaisquer detergentes químicos, perfumes, álcool ou
desincrustante, etc., na água.
• As reparações em aparelhos eléctricos devem ser efectuadas
apenas por técnicos qualificados.
• As reparações efectuadas por indivíduos não qualificados podem
ser perigosas para o utilizador.
• Utilize apenas acessórios e peças sobressalentes genuínos da
Morphy Richards.
• Nunca deixe o aparelho a funcionar sem vigilância.
• Este limpador a vapor destina-se apenas a utilização doméstica.
A utilização indevida ou para fins comerciais ou para quaisquer
outros fins anula a validade da garantia.
Requisitos eléctricos
• Verifique se a voltagem na placa de características
do aparelho corresponde à alimentação existente na sua
habitação, que deve ser CA (Corrente Alterna).
• Se as tomadas da sua habitação não forem apropriadas para a
ficha fornecida com este aparelho, a mesma deve ser retirada e
instalada uma nova adequada.
• AVISO: Este aparelho deve ser ligado à massa.
• Caso seja necessário substituir o fusível na ficha de alimentação,
deve ser colocado um fusível BS1362 de 13 amperes.
Índice
Higiene e segurança 28
Requisitos eléctricos 29
Perspectiva geral / Características do produto 29
Utilizar o aparelho 30
Dupla funcionalidade 30
Vaporização vertical: montagem 30
Utilizar no modo de vaporização vertical 30
Utilizar o limpador a vapor manual 30
Lista de acessórios para utilização no limpador a vapor manual 31
O depósito de água 31
Após a utilização 31
Arrumação 31
Manutenção 31
Contacte-nos 32
Garantia 32
Tirar o melhor partido do seu novo limpador...
IMPORTANTE: Para evitar a acumulação de calcário no
depósito de água, nunca encha o depósito do limpador a
vapor com qualquer outro material para além de água
desionizada, desmineralizada ou destilada (disponível na
maioria dos principais supermercados).
Características
(1) Pega
(2) Gatilho de vapor
(3) Fixador do cabo
(4) Gancho de armazenamento do cabo superior (giratório)
(5) Gancho de armazenamento do cabo inferior (fixo)
(6) Botão de libertação manual
(7) Corpo principal
(8) Limpador manual
(9) Gatilho de vapor
(na parte inferior da pega do limpador a vapor manual)
(10) Cabo de alimentação
(11) Tampa de enchimento
(12) Interruptor ligar/desligar
(13) Botões de libertação do depósito de água
(14) Depósito de água
(15) Luz indicadora de alimentação
(16) Tubo de água com esfera de peso em latão fixada
(17) Botão de libertação da cabeça para pavimentos
(18) Cabeça para pavimentos
(19) Deslizador para alcatifas
(20) Pano para pavimentos
(21) Fecho de aperto do pano para pavimentos
(22) Adaptador de acessórios
(23) Bocal angular
p
29
Page 30

VC70495MEE Rev4_9225 47507 MEE pump - Jon 25/01/2014 15:13 Page 30
(24) Espátula
(25) Escova circular
(26) Escova comprida
(27) Bocal principal
(28) Pano elástico (é fixado ao bocal principal)
(29) Rodo (é fixado ao bocal principal)
(30) Mini cabeça de limpeza (é fixada ao bocal principal)
(31) Mini pano de limpeza (é fixado à mini cabeça de limpeza)
(32) Saco de acessórios
Utilizar o aparelho
IMPORTANTE: Não se esqueça de que o limpador a vapor
funciona com a emissão de vapor à temperatura elevada de
115 ºC. Comece sempre por testar numa área mais discreta.
Nunca utilize o aparelho sobre objectos ou superfícies que não
resistam a esta temperatura, ou em materiais delicados, tais
como dralon, plástico, peles, etc.
Em caso de dúvida, verifique cuidadosamente numa área onde
não se importe que fiquem pequenas marcas.
Dupla funcionalidade
O limpador a vapor pode ser facilmente configurado para dois
modos diferentes de limpeza:
• Limpador a vapor vertical para pavimentos e alcatifas.
• Limpador a vapor manual (8) para superfícies verticais ou de difícil
acesso.
Os acessórios (22-31) só podem ser utilizados no limpador
manual.
Vaporização vertical: Montagem
A
Introduza a pega (1) no corpo principal (7).
B
Introduza um dos parafusos (fornecidos) no orifício do gancho de
armazenamento do cabo inferior (5) e rode até estar apertado.
Introduza o outro parafuso (fornecido) na parte lateral da pega (no
lado oposto ao gancho de armazenamento do cabo inferior) e
rode até estar apertado.
NOTA: Só é necessário prender a pega na primeira montagem.
C
Baixe o corpo principal até à cabeça para pavimentos (18), com o
respectivo botão de libertação (17) no colo da cabeça para
pavimentos voltado para a parte posterior da montagem, até
encaixar no lugar.
D
Introduza o bocal de saída de vapor na extremidade inferior do
limpador manual (8) dentro do adaptador na parte inferior do
espaço à frente do corpo principal.
Empurre o limpador a vapor com firmeza contra o espaço no
corpo principal até encaixar no lugar.
E
Prenda o pano para pavimentos (20) à cabeça para pavimentos e
aperte o fecho na parte posterior.
1
2
Utilizar no modo de vaporização vertical
IMPORTANTE: Antes de utilizar, os pavimentos duros devem
ser rigorosamente varridos e as alcatifas devem ser
aspiradas. No entanto, recomendamos que o limpador a vapor
não seja utilizado em:
• pavimentos de madeira ou quaisquer superfícies com madeira
exposta (pois poderão absorver a humidade e ficar
deformadas).
• pavimentos duros danificados ou com a existência de fendas
(pois poderão absorver a humidade e ficar deformados).
Além disso, não guarde a mopa num local durante períodos
prolongados, pois o aquecimento contínuo pode causar danos
nas alcatifas e nos pavimentos laminados.
3
Aperte os botões (13) na parte lateral do depósito de água (14)
para o remover do limpador a vapor manual (8).
Para retirar a tampa de enchimento (11) rode-a
no sentido contrário ao dos ponteiros do relógio para a posição
“desbloquear” e levante-a.
Encha o depósito de água.
IMPORTANTE: Para evitar a acumulação de calcário no depósito
de água, nunca encha o depósito do limpador a vapor com
qualquer outro material para além de água desionizada,
desmineralizada ou destilada (disponível na maioria dos principais
supermercados). Quaisquer problemas provocados pelo calcário
invalidarão a garantia do produto.
Coloque novamente a tampa de enchimento e rode-a no sentido
dos ponteiros do relógio para a posição “bloqueada”.
Coloque novamente o depósito de água.
4
Prenda o pano para pavimentos (20) à cabeça para pavimentos
(18), apertando o fecho (21) para fixar no lugar.
5
Rode o gancho de armazenamento do cabo superior (4) para
soltar rapidamente o cabo de alimentação (10).
Prenda o cabo de alimentação ao fixador de cabo (3).
6
AVISO: Antes de ligar, certifique-se de que a cabeça para
pavimentos está afastada de pessoas ou animais.
Ligue o limpador a vapor à tomada de alimentação e ligue o
aparelho com o interruptor ligar/desligar (12). A luz indicadora de
alimentação (15) acende-se e a emissão de vapor ficará disponível
passados 30 segundos (quando o gatilho de vapor (2) for
premido).
7
Pouse a cabeça para pavimentos (18) no chão. Segure a cabeça
para pavimentos com o pé e incline o corpo principal (7) para trás.
Para soltar vapor continuamente, prima e mantenha premido o
gatilho de vapor (2) empurrando lentamente o limpador para trás e
para a frente pelo chão. Para evitar molhar o chão em excesso,
pressione o gatilho de vapor intermitentemente (especialmente em
pavimentos duros).
8
Se estiver limpar alcatifas, introduza a cabeça para pavimentos
(18) com o respectivo pano (20) colocado no deslizador para
alcatifas (19) para facilitar a deslocação da cabeça para
pavimentos sobre as alcatifas.
NOTA: O deslizador para alcatifas é intencionalmente um
acessório flexível na cabeça para pavimentos.
Utilizar o limpador a vapor manual
9
Esta função é ideal para limpar superfícies verticais e locais de difícil
acesso.
Separe o limpador a vapor manual (8) do corpo principal (7)
deslizando o botão de libertação manual (6) para cima na parte da
frente do corpo principal.
30
Page 31

VC70495MEE Rev4_9225 47507 MEE pump - Jon 25/01/2014 15:13 Page 31
Puxe o limpador a vapor manual para cima e para fora do corpo
principal.
10
Para poder utilizar todos os acessórios, primeiro deverá fixar o
adaptador de acessórios (22) ao limpador a vapor manual (8). Para
tal efectue o seguinte procedimento:
1 Faça deslizar o adaptador sobre o bocal do limpador a vapor com o
fecho de abertura do adaptador voltado para a base do limpador a
vapor manual.
2 Alinhe a chaveta no limpador a vapor manual com o fecho de
abertura no adaptador. Empurre a chaveta contra o fecho e encaixe
no local.
3 Fixe o acessório pretendido à extremidade do adaptador alinhando
a seta no acessório com a seta do lado direito do adaptador e rode
o acessório até a seta ficar alinhada com a seta esquerda do
adaptador.
AVISO: Desligue o limpador e retire o cabo da tomada antes de
mudar de bocais. Após a utilização, os bocais estarão muito
quentes. Deixe-os arrefecer antes de os manusear.
Lista de acessórios para utilização no
limpador a vapor manual
• Adaptador de acessórios (22). Acessório base para todos os
acessórios manuais fornecidos com o produto.
• Também pode ser utilizado sozinho para limpar locais ou fendas de
difícil acesso.
• Bocal angular (23) para limpar sanitários, tais como sanitas, torneiras
ou tampas de escoamento. Aponte-o directamente para manchas
não permanentes nas alcatifas ou nos estofos segurando num pano
limpo perto da área manchada para apanhar a sujidade solta.
• Espátula (24) para remover depósitos persistente ou para ajudar a
descongelar o frigorífico ou congelador.
• Escova circular (25) para remover manchas em superfícies à
temperatura ambiente, tais como azulejos, jantes, espelhos e
janelas.
• Escova comprida (26) para remover a sujidade das ranhuras e
fendas.
12
Bocal principal (27). Uma vez fixado ao adaptador de acessórios
(22), o bocal principal é o acessório base para fixar todos os
seguintes acessórios:
• Pano elástico (28) para cobrir o bocal principal ao limpar estofos e
roupa de cama.
13
O rodo (29) pode ser fixado ao bocal principal inserindo os
ganchos na parte posterior do bocal do rodo pelos aros na parte
posterior do bocal principal. Em seguida, fixe a parte da frente do
bocal principal à mola de bloqueio na parte superior do bocal do
rodo (conforme ilustrado).
• Retire o rodo após a utilização carregando na mola de bloqueio
para a frente. O bocal principal deve estar ainda pendurado nos
aros na parte posterior do bocal do rodo. Rode o bocal principal
para cima e desprenda-o dos aros, levantando-o para fora.
14
O bocal do rodo é ideal para a limpeza de áreas com azulejos ou
vidro, tais como janelas ou painéis espelhados. Para limpar
janelas, comece na parte superior, pressione o rodo sobre a
superfície e arraste na direcção descendente em passagens
direitas de cima para baixo. Seque a lâmina de borracha na
11
margem inferior da janela após cada passagem. Para painéis de
janela pequenos, retire o rodo e aplique o vapor directamente
sobre a superfície. Utilize o rodo separadamente para limpar a
humidade.
AVISO: Não utilizar em vidros muito frios, uma vez que a
mudança súbita da temperatura pode partir o vidro.
• A mini cabeça de limpeza (30) com o mini pano de limpeza (31)
colocado é fixada ao bocal principal (utilizando o mesmo método
aplicado ao prender e desprender o bocal do rodo, conforme é
ilustrado à esquerda e acima). Este acessório é útil para limpar
superfícies de azulejo ou vidro, armários e bancadas em cozinhas
e casas de banho, bem como estofos, cortinados, persianas,
almofadas e colchões.
O depósito de água
A esfera de peso de latão (16)
A esfera de peso de latão no interior do depósito de água está
fixada à extremidade do tubo de sucção. A esfera é pesada e
concebida para se deslocar livremente pelo depósito de água
consoante a posição do produto. A esfera deve permanecer na
água de modo a que o vapor possa ser gerado sempre que o
gatilho de vapor seja premido, independentemente da orientação
do limpador a vapor manual.
Lavar o depósito de água
Lave regularmente o depósito de água para libertar quaisquer
depósitos acumulados no fundo do depósito. Utilize apenas água
desionizada, desmineralizada ou destilada (disponível na maioria
dos grandes supermercados) e coloque a tampa de enchimento
para permitir uma lavagem vigorosa.
Após a utilização
Siga os dois passos de manutenção abaixo após cada utilização.
1 Desligue o limpador e retire a ficha da tomada. Coloque-o
imediatamente numa superfície adequada (por exemplo, chão de
mosaico) no qual o calor/humidade residual no pano/bocal para
pavimentos não afectará a superfície. Aguarde até o limpador
estar totalmente arrefecido.
2 Esvazie o depósito de água (14) retirando a tampa de enchimento
(11) e deitando fora a água. Deixe secar a parte interna do
depósito antes de voltar a colocar a tampa de enchimento.
Arrumação
Enrole o cabo à volta dos dois ganchos de armazenamento do
cabo (4/5), rodando o gancho de armazenamento superior (4)
para cima para fixar o cabo de alimentação (10) no local.
Coloque todos os acessórios no saco de acessórios (32) e
pendure o saco no gancho de armazenamento do cabo superior.
16
Manutenção
AVISO: Desligue sempre o limpador a vapor da tomada de
alimentação antes de levar a cabo procedimentos de
manutenção.
Manutenção global
O seu limpador foi fabricado para resistir à utilização diária
normal, mas se o limpar ocasionalmente com um pano húmido
ajudará a preservá-lo. Os agentes de limpeza abrasivos não
p
31
Page 32

VC70495MEE Rev4_9225 47507 MEE pump - Jon 25/01/2014 15:13 Page 32
devem ser utilizados.
Limpar os panos
O pano para pavimentos (20) e o pano elástico (28) podem ser
lavados à máquina (no máximo a 30 ºC). No caso de sujidade
intensa, mergulhe os panos em água quente e detergente ou com
um tira-nódoas suave.
IMPORTANTE: Não utilize lixívia ou amaciador de roupa.
Deixe secar completamente antes de guardar.
Contacte a nossa linha de assistência para adquirir panos de
substituição.
Manutenção dos acessórios
A sujidade e as obstruções devem ser regularmente removidas
dos acessórios para ajudar a prolongar a sua utilização.
Contacte-nos
Linha de assistência
Se tiver algum problema com o seu aparelho, contacte a nossa
Linha de assistência porque é provável que possamos ajudá-lo
mais do que a loja onde o adquiriu.
Para que possamos lidar com a sua questão mais rapidamente,
certifique-se de que dispõe do nome do produto, do número do
modelo e do número de série.
Fale connosco
Se tiver quaisquer questões ou comentários ou se pretender obter
sugestões para tirar o maior partido dos nossos produtos, visitenos online:
Blogue: www.morphyrichards.co.uk/blog
Facebook: www.facebook.com/morphyrichardsuk
Twitter: www.twitter.com/loveyourmorphy
Web site: www.morphyrichards.com
A SUA GARANTIA DE DOIS ANOS
Este aparelho tem uma garantia de reparação ou substituição
de 2 anos.
É importante guardar o talão de compra como comprovativo de
compra. Agrafe-o ao verso deste folheto para referência futura.
Mencione a seguinte informação se o produto apresentar uma
avaria. Estes números podem ser encontrados na base do
artigo.
N.º do modelo
N.º de série
Todos os artigos Morphy Richards são testados
individualmente antes de saírem da fábrica. No caso improvável
de algum produto apresentar uma avaria no prazo de 28 dias
após a compra, o mesmo deverá ser devolvido ao local de
compra, para a sua substituição.
Se a avaria surgir passados 28 dias e dentro dos 24 meses a
partir da data de aquisição do aparelho, deverá contactar o seu
distribuidor local e referir o número do modelo e de série do
produto ou escrever ao seu distribuidor local para o endereço
abaixo citado.
Ser-lhe-á solicitado que devolva o produto (numa embalagem
segura e apropriada) para o endereço apresentado, juntamente
com uma cópia do talão de compra.
Tirando as excepções abaixo referenciadas (1-9), o artigo
avariado será reparado ou substituído e enviado, normalmente
no prazo de 7 dias úteis a contar da data de recepção.
Se por qualquer razão, este artigo for substituído durante o
período de garantia de 2 anos, a garantia do novo artigo será
calculada a partir da data original de compra. Por esta razão, é
importante guardar o talão ou factura originais de modo a
indicar a data inicial de compra.
Para ser abrangido pela garantia de 2 anos, o artigo deverá ter
sido utilizado de acordo com as instruções do fabricante. Por
exemplo, os artigos têm de ter sido escamados e os filtros
mantidos limpos, tal como indicado nas instruções.
A Morphy Richards ou o distribuidor local não serão obrigados
a substituir ou reparar artigos sob os termos da garantia
quando:
1 A avaria tiver sido provocada ou for atribuída a uma utilização
inadvertida, indevida, negligente, contrária às recomendações do
fabricante ou no caso de ter sido causada por oscilações de
corrente ou danos provocados pelo transporte.
2 O aparelho tiver sido utilizado com uma voltagem diferente da
recomendada.
3 Tiverem sido efectuadas tentativas de reparação por pessoas que
não os técnicos da Morphy Richards (ou o seu representante
autorizado).
4 O aparelho tiver sido utilizado com fins de aluguer ou utilização
não doméstica.
5 O aparelho foi adquirido em segunda mão.
6 A Morphy Richards ou o distribuidor local não são responsáveis
pela execução de qualquer tipo de trabalho de manutenção, ao
abrigo da garantia.
7 A garantia não abrange consumíveis, tais como sacos, filtros e
garrafas de vidro
8 Baterias e danos causados por derrame não estão abrangidos
pela garantia.
9 Os filtros não foram limpos e substituídos de acordo com as
instruções.
Esta garantia não confere quaisquer direitos para além dos
expressamente definidos anteriormente e não abrange
quaisquer reclamações por danos ou perdas sucessivos. Esta
garantia é um benefício adicional e não afecta quaisquer
direitos estatutários do consumidor.
32
Page 33

VC70495MEE Rev4_9225 47507 MEE pump - Jon 25/01/2014 15:13 Page 33
i
IMPORTANTI ISTRUZIONI DI SICUREZZA
L’uso di ogni apparecchiatura elettrica richiede il rispetto delle regole di sicurezza seguenti dettate dal buon senso.
Leggere queste istruzioni con attenzione prima di utilizzare il prodotto.
• AVVERTENZA: Scollegare dalla presa di alimentazione
prima di eseguire qualsiasi intervento di manutenzione
ordinaria.
• L’apparecchio può essere utilizzato dai bambini a partire da
8 anni e da persone con ridotte capacità fisiche, sensoriali o
mentali, o prive di esperienza e familiarità con il prodotto,
posto che siano sempre sotto supervisione, ricevano
adeguate istruzioni su come adoperare l’elettrodomestico in
sicurezza e siano consapevoli dei rischi correlati.
• Non permettere ai bambini di giocare con l’apparecchio.
• La pulizia e gli interventi di manutenzione non devono essere
eseguiti dai bambini senza supervisione.
Sicurezza personale
• AVVERTENZA: Non dirigere mai il getto di vapore verso
accessori o componenti elettrici. In caso di dubbio circa
l’idoneità del vapore per la pulizia di un apparecchio elettrico,
rivolgersi al fabbricante del medesimo per le informazioni del
caso prima di procedere.
• AVVERTENZA: Non toccare mai la spina o il cavo con le mani
bagnate.
• AVVERTENZA: Gli ugelli e gli accessori sono roventi dopo
l’uso. Lasciarli raffreddare prima di cercare di rimuoverli.
• AVVERTENZA: Non dirigere il getto di vapore verso persone o
animali. Pericolo di ustione.
VAPORE
• AVVERTENZA: Non usare l’apparecchio se il tappo del
serbatoio non è fissato.
• AVVERTENZA: In presenza di ostruzione, il vapore viene
rilasciato attraverso le apposite feritoie di sfiato.
• Non immergere il cavo, la spina o l’elettrodomestico in acqua o in
altri liquidi per evitare incendi, scosse elettriche e lesioni
personali.
• Estrarre sempre la spina dalla presa di corrente dopo l’uso, prima
di pulire o rabboccare l’apparecchio, cambiare gli accessori o
eseguire interventi di manutenzione.
• Tenere l’apparecchio fuori dalla portata dei bambini quando è
alimentato o in fase di raffreddamento.
Destinazione per l’uso
• Non utilizzare né conservare questo prodotto all’aria aperta.
• Non conservare l’elettrodomestico in prossimità di superfici
roventi come forni o apparecchi di riscaldamento.
Cavo di alimentazione
• AVVERTENZA: Non collegare mai un cavo di rete, provvisto di
spina, danneggiato o gravemente compromesso. Si
raccomanda di distruggerlo poiché un cavo danneggiato
diventa pericoloso se collegato ad una presa di corrente.
• Se il cavo di alimentazione è danneggiato, richiederne la
sostituzione al produttore, al servizio di assistenza autorizzato o a
personale similmente qualificato per evitare rischi.
• Evitare di tirare eccessivamente il cavo di alimentazione.
p
i
33
Page 34

VC70495MEE Rev4_9225 47507 MEE pump - Jon 25/01/2014 15:13 Page 34
Uso sicuro dell’apparecchio
• AVVERTENZA: Eseguire sempre una prova in un punto
nascosto della superficie da trattare. Non adoperare mai su
materiali che non sono in grado di resistere alle alte
temperature come il dralon, la pelliccia naturale, ecc.
• Non apportare modifiche di alcun tipo all’elettrodomestico.
• Non utilizzare mai il pulitore a vapore senza acqua nel serbatoio.
Rabboccare
regolarmente l’acqua in caso di utilizzo prolungato.
• Riempire il serbatoio del pulitore a vapore esclusivamente con
acqua deionizzata, demineralizzata o distillata.
• L’apparecchio non deve essere utilizzato in caso di caduta, in
presenza di danni evidenti o perdite.
Altre informazioni di sicurezza
• Non adoperare detergenti chimici, profumi, alcol o agenti
disincrostanti, ecc. nell’acqua.
• Le riparazioni agli elettrodomestici devono essere effettuate
esclusivamente da personale qualificato.
• Le riparazioni non eseguite da personale qualificato possono
essere pericolose per gli utenti.
• Utilizzare esclusivamente ricambi e accessori originali Morphy
Richards.
• Non lasciare mai in funzione l’elettrodomestico senza
sorveglianza.
• Questo pulitore a vapore è destinato a esclusivo uso domestico. Il
cattivo utilizzo o l’uso commerciale o di qualsiasi altro tipo
rendono nulla la garanzia.
Requisiti elettrici
• Controllare che la tensione indicata sulla targhetta dei dati
dell’apparecchio corrisponda a quella dell’abitazione, che deve
essere a corrente alternata.
• Se le prese dell’abitazione non sono adatte alla spina fornita con
l’elettrodomestico, rimuovere la spina e sostituirla con una adatta.
• AVVERTENZA: L’elettrodomestico deve essere provvisto di
messa a terra.
• Qualora fosse necessario sostituire il fusibile nella spina,
installarne uno del tipo BS1362 da 13 A.
Indice
Salute e sicurezza 33
Requisiti elettrici 34
Presentazione prodotto / Componenti 34
Funzionamento dell’apparecchio 35
Doppia funzionalità 35
Utilizzo come scopa: montaggio 35
Utilizzo in modalità verticale 36
Utilizzo in modalità portatile 36
Elenco degli accessori da utilizzare con il pulitore a vapore
portatile 36
Il serbatoio dell’acqua 36
Dopo l’uso 36
Conservazione 36
Manutenzione 37
Contatti 37
Garanzia 37
Come ottenere il massimo
dall’elettrodomestico...
IMPORTANTE: Per evitare l’accumulo di calcare nel serbatoio
dell’acqua, riempire esclusivamente con acqua deionizzata,
demineralizzata o distillata (disponibile nei principali
supermercati).
Componenti
(1) Manico
(2) Comando vapore
(3) Supporto per il cavo
(4) Gancio avvolgicavo superiore (girevole)
(5) Gancio avvolgicavo inferiore (fisso)
(6) Pulsante di sgancio apparecchio portatile
(7) Corpo principale
(8) Pulitore a vapore portatile
(9) Comando vapore
(nella parte sottostante del manico del pulitore a vapore
portatile)
(10) Cavo di alimentazione
(11) Tappo del serbatoio
(12) Interruttore di accensione/spegnimento (on/off)
(13) Pulsanti di sgancio serbatoio
(14) Serbatoio dell’acqua
(15) Spia dell’alimentazione
(16) Tubo acqua con inserito peso a sfera d’ottone
(17) Pulsante di sgancio accessorio per pavimenti
(18) Accessorio per pavimenti
(19) Accessorio per tappeti
(20) Panno per pavimenti
34
Page 35

VC70495MEE Rev4_9225 47507 MEE pump - Jon 25/01/2014 15:13 Page 35
(21) Laccio di fissaggio per panno pavimenti
(22) Adattatore accessori
(23) Ugello ricurvo
(24) Spatolina
(25) Spazzolino circolare
(26) Spazzola lunga
(27) Accessorio multiuso
(28) Panno multiuso elasticizzato
(si collega all’accessorio multiuso)
(29) Tergivetro (si collega all’accessorio multiuso)
(30) Mini-testina pulente (si collega all’accessorio multiuso)
(31) Mini-panno pulente (si collega alla mini-testina pulente)
(32) Sacchetto per accessori
Funzionamento dell’apparecchio
IMPORTANTE: Si ricorda che il pulitore emette vapore a una
temperatura fino a 115°C. Eseguire sempre una prova in un
punto nascosto della superficie da trattare. Non utilizzare mai
su oggetti o superfici che non sono in grado di sopportare una
temperatura così alta o su materiali delicati come il dralon, la
plastica, la pelliccia naturale, ecc.
Nel dubbio, fare prima una prova su una parte nascosta del
materiale su cui è possibile, eventualmente, lasciare piccoli
segni.
Doppia funzionalità
Il pulitore a vapore può essere facilmente configurato in due
differenti modalità di pulizia:
• Configurazione a scopa per pavimenti e tappeti.
• Configurazione portatile (8) per la pulizia di superfici verticali o
difficili da raggiungere.
Gli accessori (22-31) possono essere utilizzati sul pulitore a
vapore portatile.
Utilizzo come scopa: Assemblaggio
A
Inserire il manico (1) sul corpo principale (7).
B
Inserire una delle viti (fornite) nel foro del gancio avvolgicavo
inferiore (5) e stringerla girandola.
Inserire l’altra vite (fornita) lateralmente nel manico (sul lato
opposto rispetto al gancio avvolgicavo inferiore) e stringerla
girandola.
NOTA: L’assemblaggio del manico è necessario unicamente la
prima volta che si utilizza l’apparecchio.
C
Abbassare il corpo principale sull’accessorio per pavimenti (18),
inserendo il pulsante di sgancio dell’accessorio (17) sul collo dello
stesso nella parte posteriore del gruppo, finché scatta in sede.
D
Fissare l’ugello di spruzzo del vapore all’estremità inferiore del
pulitore a vapore portatile (8) nell’adattatore in basso nello spazio
sulla parte anteriore del corpo principale.
Spingere il pulitore a vapore saldamente finché scatta in sede.
E
Fissare il panno per pavimenti (20) sull’accessorio per pavimenti e
stringere il laccio sul retro.
1
2
Utilizzo in modalità scopa
IMPORTANTE: Prima dell’uso, i pavimenti duri devono essere
spazzati con cura e i tappeti devono essere ripuliti con un
aspirapolvere. Tuttavia, si raccomanda di non utilizzare il
pulitore a vapore su:
• pavimenti di legno o superfici in cui il legno è esposto (per
evitare che si deformino assorbendo l’umidità).
• pavimenti duri danneggiati o pavimenti che presentano
fessure (per evitare che si deformino assorbendo l’umidità).
Inoltre, non tenere il panno nello stesso punto troppo a lungo,
in quanto il calore continuo potrebbe danneggiare i tappeti e i
pavimenti laminati.
3
Premere i pulsanti (13) sul fianco del serbatoio dell’acqua (14) per
rimuoverlo dal pulitore a vapore portatile (8).
Rimuovere il tappo del serbatoio (11) ruotandolo
in senso antiorario in posizione di “sblocco”, quindi estrarlo
sollevandolo.
Riempire il serbatoio dell’acqua.
IMPORTANTE: Per evitare l’accumulo di calcare nel serbatoio
dell’acqua, riempire il pulitore a vapore esclusivamente con acqua
deionizzata, demineralizzata o distillata (disponibile nei principali
supermercati). Qualsiasi problema dovuto alla presenza di calcare
invaliderebbe la garanzia del prodotto.
Riposizionare il tappo del serbatoio e ruotarlo in senso orario in
posizione di “blocco”.
Riposizionare il serbatoio dell’acqua.
4
Attaccare il panno (20) sull’accessorio per pavimenti (18),
fissandolo con il laccio (21).
5
Ruotare il gancio avvolgicavo superiore (4) per svolgere
rapidamente il cavo di alimentazione (10).
Fissare il cavo di alimentazione nell’apposito supporto (3).
6
AVVERTENZA: Prima dell’accensione, assicurarsi che
l’accessorio per pavimenti si trovi in una posizione sicura,
lontano da persone o animali.
Inserire la spina nella presa e accendere il pulitore a vapore con il
pulsante di accensione on/off (12). La spia di alimentazione (15) si
accende e il vapore è pronto per l’emissione dopo circa 30
secondi (quando viene premuto il comando vapore (2)).
7
Sistemare l’accessorio per pavimenti (18) a terra e tenerlo con il
piede inclinando il corpo principale (7) all’indietro.
Per emettere vapore continuo, premere e tenere premuto il
comando vapore (2) spingendo lentamente il pulitore avanti e
indietro sul pavimento. Tuttavia, per evitare di bagnare
eccessivamente il pavimento, si raccomanda di premere il
comando vapore a intermittenza (soprattutto su pavimenti duri).
8
Durante la pulizia dei tappeti, posare l’accessorio per pavimenti
(18) con il panno (20) attaccato sull’accessorio per tappeti (19) in
modo da facilitarne il movimento sul tappeto.
NOTA: L’accessorio per tappeti è intenzionalmente lasco
sull’accessorio per pavimenti.
i
35
Page 36

VC70495MEE Rev4_9225 47507 MEE pump - Jon 25/01/2014 15:13 Page 36
Utilizzo del pulitore a vapore in modalità
portatile
9
Questa funzione è ideale per la pulizia di superfici verticali e dei posti
difficili da raggiungere.
Separare il pulitore a vapore portatile (8) dal corpo principale (7)
facendo scorrere il pulsante di sgancio (6) verso l’alto nella parte
anteriore del corpo principale.
Tirare verso l’alto il pulitore a vapore portatile per estrarlo dal corpo
principale.
10
Per poter utilizzare tutti gli accessori, deve essere prima fissato sul pulitore a vapore portatile (8) l’apposito adattatore (22). A tal fine,
procedere come segue:
1 Far scorrere l’adattatore sopra l’ugello del pulitore a vapore con il
pulsante di sgancio sull’adattatore rivolto verso la base del pulitore a
vapore portatile.
2 Allineare la scanalatura sul pulitore a vapore portatile con il fermo
presente sull’adattatore. Spingere insieme e fissare in sede.
3 Attaccare l’accessorio desiderato all’estremità dell’adattatore
allineando la freccia dell’accessorio con la freccia a destra
dell’adattatore e ruotare l’accessorio finché la freccia è allineata con
la freccia a sinistra dei due sull’adattatore.
AVVERTENZA: Spegnere e disinserire l’apparecchio dalla presa
di corrente prima di cambiare gli ugelli. Dopo l’uso, gli ugelli
sono roventi. Lasciarli raffreddare prima di maneggiarli.
Elenco degli accessori da utilizzare sul
pulitore a vapore portatile
• Adattatore per accessori: è la base per collegare tutti gli accessori
portatili forniti con il prodotto.
• Può inoltre essere utilizzato da solo per pulire luoghi o interstizi non
facilmente accessibili.
• Ugello ricurvo (23): pulisce i sanitari, come le tazze dei gabinetti, i
rubinetti o i tubi di scarico. Puntarlo direttamente sulle macchie non
permanenti dei tappeti o delle tappezzerie tenendo un panno pulito
accanto all’area macchiata per catturare lo sporco rimosso.
• Accessorio a spatola (24): rimuove i depositi ostinati o aiuta a
sbrinare il frigorifero o il congelatore.
• Spazzola circolare (25): rimuove le macchie su superfici a
temperatura ambiente, come le piastrelle, i coprimozzi, gli specchi e
le finestre.
• Spazzola lunga (26): rimuove lo sporco dalle scanalature e dagli
interstizi.
12
Accessorio multiuso (27): fissato all’adattatore per accessori (22),
è la base per il collegamento di tutti gli accessori seguenti:
• Panno pulizia elasticizzato (28): ricopre l’accessorio multiuso per
la pulizia di tappezzerie e la biancheria da letto.
13
Tergivetro (29): può essere fissato all’accessorio multiuso
inserendo i ganci sul retro dell’ugello del tergivetro nei fori sul retro
dell’accessorio multiuso, quindi viene fissata la parte anteriore
dell’accessorio multiuso nella sicura sulla parte superiore
dell’ugello del tergivetro (come mostrato).
• Rimuovere il tergivetro dopo l’uso tenendo la sicura in avanti.
L’accessorio multiuso deve comunque essere agganciato nei fori
11
sulla parte posteriore dell’ugello del tergivetro, ruotare l’accessorio
verso l’alto e sganciarlo dai fori per sollevarlo ed estrarlo.
14
L’ugello del tergivetro è l’ideale per la pulizia di superfici
piastrellate o vetri, quali le finestre o i pannelli a specchio. Per
pulire le finestre, iniziare dall’alto, premere il tergivetro sulla
superficie e trascinare verso il basso con passate dritte da su a
giù. Asciugare la striscia di gomma e il bordo inferiore della
finestra dopo ogni passata. Per pannelli di finestra piccoli,
rimuovere il tergivetro e spruzzare il vapore direttamente sulla
superficie. Usare il tergivetro separatamente per asportare
l’umidità.
AVVERTENZA: Non adoperare su vetri molto freddi, poiché
l’improvviso cambiamento di temperatura potrebbe
infrangerli.
• Mini-testina pulente (30) con mini-panno pulente (31) attaccato: si
fissa all’accessorio multiuso (usando lo stesso sistema per
collegare e scollegare l’ugello del tergivetro, come mostrato a
sinistra e sopra). Questo accessorio è utile per la pulizia di
superfici piastrellate o vetri, mobiletti e ripiani della cucina e dei
bagni, tappezzerie, tende, tendine, cuscini e materassi.
Il serbatoio dell’acqua
Il peso a sfera d’ottone (16)
Il peso a sfera d’ottone all’interno del serbatoio dell’acqua è
collegato all’estremità del tubo aspirante. La sfera è ponderata e
progettata per muoversi liberamente nel serbatoio dell’acqua a
seconda della posizione del prodotto. Essa deve rimanere
nell’acqua per consentire la generazione di vapore ogni volta che
viene premuto il comando vapore, indipendentemente
dall’orientamento del pulitore a vapore portatile.
Risciacquo del serbatoio dell’acqua
Risciacquare periodicamente il serbatoio dell’acqua per eliminare
gli eventuali depositi che si raccolgono sul fondo. Usare
esclusivamente acqua deionizzata, demineralizzata o distillata
(disponibile nei principali supermercati) e inserire il tappo del
serbatoio per poter risciacquare vigorosamente.
Dopo l’uso
Seguire i due passaggi per la manutenzione riportati sotto dopo
ogni uso.
1 Spegnere il pulitore e staccare la spina dalla presa di corrente.
Sistemare immediatamente su una superficie adatta (per es. un
pavimento piastrellato) dove il calore/l’umidità residui
nell’ugello/nel panno non possono provocare danni. Attendere che
il pulitore si sia raffreddato completamente.
2 Svuotare il serbatoio dell’acqua (14) rimuovendo il tappo (11) e
facendo fuoriuscire l’acqua. Lasciare asciugare l’interno del
serbatoio prima di rimettere a posto il tappo.
Conservazione
Avvolgere il cavo intorno ai due ganci avvolgicavo (4/5) ruotando il
gancio avvolgicavo superiore (4) verso l’alto per fissare il cavo di
alimentazione (10) in sede.
Sistemare tutti gli accessori nel sacchetto (32) che andrà appeso
al gancio avvolgicavo superiore.
16
36
Page 37

VC70495MEE Rev4_9225 47507 MEE pump - Jon 25/01/2014 15:13 Page 37
Manutenzione
AVVERTENZA: Disinserire sempre la spina del pulitore a
vapore dalla presa prima di effettuare qualsiasi intervento di
manutenzione.
Manutenzione generale
L’elettrodomestico è stato realizzato per l’uso quotidiano. Tuttavia,
per far sì che sembri sempre nuovo, ripulirlo occasionalmente con
un panno umido. Non utilizzare detergenti abrasivi.
Pulizia dei panni
Il panno per pavimenti (20) e il panno multiuso elasticizzato (28)
possono essere lavati in lavatrice (max 30ºC). Per lo sporco più
ostinato, immergere i panni in acqua tiepida e detergente o uno
smacchiatore delicato.
IMPORTANTE: Non utilizzare varechina o ammorbidente.
Lasciare asciugare completamente prima di conservare.
Per acquistare panni di ricambio, contattare il nostro servizio di
assistenza telefonica.
Manutenzione degli accessori
Ripulire regolarmente gli accessori da sporco ed ostruzioni per
prolungarne la durata.
Contatti
Servizio di assistenza telefonica
In caso di problemi con l’apparecchio, contattare il servizio di
assistenza telefonica che potrà essere di aiuto più del punto
vendita in cui è stato acquistato l’elettrodomestico.
Si prega di avere a portata di mano il nome del prodotto, il
numero del modello e il numero di serie per permetterci di
risolvere il problema nel più breve tempo possibile.
Linea diretta
Per domande, commenti o suggerimenti su come sfruttare al
meglio i prodotti acquistati, visitateci online:
Blog: www.morphyrichards.co.uk/blog
Facebook: www.facebook.com/morphyrichardsuk
Twitter: www.twitter.com/loveyourmorphy
Sito web: www.morphyrichards.com
GARANZIA DI DUE ANNI
Questo elettrodomestico è coperto da una garanzia di due anni
per la riparazione o la sostituzione.
È importante conservare la ricevuta del rivenditore a titolo di
prova di acquisto. Appuntare la ricevuta sulla retrocopertina del
presente manuale per futuro riferimento.
Indicare le informazioni riportate di seguito se si verifica
un’anomalia sul prodotto. Questi numeri sono riportati sulla
base del prodotto.
N. modello
N. di serie
Tutti i prodotti Morphy Richards sono testati singolarmente
prima di lasciare lo stabilimento. Nell’improbabile eventualità
della comparsa di un difetto entro 28 giorni dall’acquisto, si
consiglia di restituire il prodotto dove è stato acquistato per
richiederne la sostituzione.
Se il problema si manifesta dopo 28 giorni ed entro 24 mesi
dall’acquisto, contattare il rivenditore più vicino, citando il
numero di modello e il numero di matricola riportati sul
prodotto oppure scrivergli all’indirizzo indicato.
Verrà richiesto di rispedire il prodotto (in un imballaggio idoneo
e sicuro) unitamente alla copia della prova d’acquisto.
Fatte salve le esclusioni sotto riportate (1-9), l’elettrodomestico
difettoso viene riparato o sostituito e spedito di solito entro 7
giorni lavorativi dal ricevimento.
Se per qualsiasi motivo questo articolo viene sostituito entro il
periodo di garanzia di 2 anni, la garanzia sul nuovo prodotto
sarà calcolata a decorrere dalla data dell’acquisto iniziale. È
pertanto importante conservare la ricevuta o fattura originale
per poter dimostrare la data dell’acquisto.
Per usufruire della garanzia di due anni, l’elettrodomestico deve
essere stato usato nel modo indicato dal produttore. Ad
esempio, è necessario disincrostare l’elettrodomestico e tenere
puliti i filtri nel modo indicato.
Morphy Richards o il rivenditore di zona non sono tenuti a
sostituire o riparare i prodotti, come indicato dalle disposizioni
di garanzia, se:
1 Il guasto è stato causato o è attribuibile a un uso accidentale,
improprio, negligente o contrario alle istruzioni del produttore
oppure il guasto è stato causato da sovratensioni momentanee o
dal trasporto.
2 L’elettrodomestico è stato utilizzato a una tensione diversa da
quella indicata su di esso.
3 Le riparazioni sono state eseguite da persone diverse dal
personale tecnico Morphy Richards (o rivenditori autorizzati).
4 L’elettrodomestico è stato noleggiato oppure non impiegato per
uso domestico.
5 L’elettrodomestico è di seconda mano.
6 Morphy Richards o il rivenditore di zona non sono tenuti ad
eseguire alcun tipo di intervento di assistenza ai sensi della
garanzia.
7 I sacchetti, i filtri e le caraffe di vetro non sono coperti dalla
garanzia.
8 Le batterie e i danni dovuti a perdite non sono coperti dalla
garanzia.
9 I filtri non sono stati puliti e sostituiti come da istruzioni.
La presente garanzia non conferisce alcun diritto diverso da
quelli sopra elencati e non copre alcuna richiesta di danni o
perdite consequenziali. La presente garanzia viene offerta a titolo
di vantaggio aggiuntivo e non incide sui diritti del consumatore
previsti dalla legge.
i
37
Page 38

VC70495MEE Rev4_9225 47507 MEE pump - Jon 25/01/2014 15:13 Page 38
q
VIGTIGE SIKKERHEDSINSTRUKSER
Brug af elektriske apparater kræver følgende sikkerhedsregler, der er sund fornuft.
Læs denne vejledning omhyggeligt, før produktet tages i brug.
• ADVARSEL: Tag stikket ud af kontakten, før der udføres
rutinemæssig vedligeholdelse.
• Dette apparat kan anvendes af børn fra 8 år og op og af
personer med nedsat fysisk, sansmæssig eller mental
kapacitet eller manglende erfaring eller viden, hvis de er
under opsyn af eller har fået instrukser om sikker anvendelse
af produktet samt forstår de involverede risici.
• Børn må ikke lege med apparatet.
• Rengøring og brugervedligeholdelse må ikke udføres af børn
uden opsyn.
Personlig sikkerhed
• ADVARSEL: Ret aldrig damp mod elektriske dele eller
armaturer. Hvis der opstår tvivl med hensyn til, om damp er
egnet til rengøring af udstyr, skal man kontakte fabrikanten af
udstyret, før der rengøres.
• ADVARSEL: Rør aldrig stik eller kabel med våde hænder.
• ADVARSEL: Dyser og værktøjer vil være varme efter brug.
Lad dem køle af, før du forsøger at fjerne dem.
• ADVARSEL: Ret ikke dampstrømmen mod mennesker eller
dyr. Skoldningsfare.
DAMP
• ADVARSEL: Brug ikke apparatet uden, at fyldhætten er sat på
plads.
• ADVARSEL: I tilfælde af en blokering frigøres dampen fra
ventilationskanalerne.
• For at beskytte mod brand, elektrisk stød og personskade må
man ikke dyppe ledningen, stikket eller fejemaskinen i vand eller
andre væsker.
• Stikket bør tages ud af stikkontakten på væggen efter brug, før
rengøring, påfyldning eller udskiftning af tilbehør og før
brugervedligeholdelse udføres.
• Hold apparatet uden for børns rækkevidde, når det er aktiveret
eller køler ned.
Placering
• Apparatet må ikke bruges eller opbevares udendørs.
• Opbevar ikke apparatet i nærheden af varme overflader. f.eks.
ovne eller varmeapparater.
Ledning
• ADVARSEL: En beskadiget ledning med et stik må aldrig
tilsluttes en stikkontakt. Den skal skal bortskaffes, da en
beskadiget ledning kan udgøre en fare, hvis den sluttes til en
stikkontakt.
• Hvis ledningen er beskadiget, skal den udskiftes af producenten
eller dennes reparatør eller lignende kvalificerede personer for at
undgå farer.
• Træk ikke i ledningen.
38
Page 39

VC70495MEE Rev4_9225 47507 MEE pump - Jon 25/01/2014 15:13 Page 39
Produktsikkerhed
• ADVARSEL: Test altid først på et mindre iøjnefaldende sted.
Må aldrig benyttes på materialer, der ikke tåler høj
temperatur, såsom dralon, naturpels mv.
• Foretag ikke ændringer af damprenseren på nogen måde.
• Betjen aldrig damprenseren uden vand i beholderen. Fyld altid
op med vand over længere perioder i brug.
• Fyld aldrig damprenserens beholder med andet end deioniseret,
demineraliseret eller destilleret vand.
• Brug ikke apparatet, hvis det har været tabt på gulvet, hvis der er
tydelige tegn på beskadigelse, eller hvis det lækker.
Andre sikkerhedsovervejelser
• Hæld ikke kemiske rengøringsmidler, duftstoffer, sprit eller
kalkfjerner mv. i vandet.
• Reparation af elektriske apparater må kun foretages af uddannet
personale.
• Reparationer foretaget af personer uden den korrekte uddannelse
kan være farlige for brugeren.
• Brug kun originale reservedele og originalt tilbehør fra Morphy
Richards.
• Apparatet bør aldrig køre uden opsyn.
• Denne damprenser er kun beregnet til brug i hjemmet. Misbrug
eller brug i erhvervsmæssigt eller andet øjemed vil gøre garantien
ugyldig.
Elektriske krav
• Kontroller, at den spænding, der er angivet på
apparatets typeskilt, svarer til husholdningens strømforsyning,
som skal være vekselstrøm.
• Hvis stikkontakterne i dit hjem ikke svarer til stikket, der sidder på
enhedens ledning, skal stikket udskiftes med det korrekte stik.
• ADVARSEL: Dette apparat skal tilsluttes en kontakt med
jordforbindelse.
• Hvis sikringen i stikket skal udskiftes, skal den udskiftes med en
13 A BS1362-sikring.
Indholdsfortegnelse
Helbred og sikkerhed 38
Elektriske krav 39
Produktoversigt / funktioner 39
Betjening af damprenseren 40
Dobbelt funktionalitet 40
Opretstående stilling: samling 40
Betjening i opretstående stilling 40
Betjening af håndholdt damprenser 40
Liste over tilbehør til brug på håndholdte damprensere 41
Vandbeholderen 41
Efter brug 41
Opbevaring 41
Vedligeholdelse 41
Kontakt os 42
Garanti 42
Få mest muligt ud af din nye damprenser...
VIGTIGT: Fyld aldrig damprenserens beholder med andet end
deioniseret, demineraliseret eller destilleret vand (fås i de
fleste førende supermarkeder) for at forhindre kalkaflejringer i
vandbeholderen.
Oversigt
(1) Greb
(2) Dampudløser
(3) Ledningsholder
(4) Øverste ledningskrog (drejelig)
(5) Nederste ledningskrog (drejelig)
(6) Udløserknap til håndholdt betjening
(7) Hoveddelen
(8) Håndholdt damprenser
(9) Dampudløser
(på undersiden af grebet på håndholdt damprenser)
(10) Ledning
(11) Fyldhætte
(12) Tænd/sluk-kontakt
(13) Udløserknap til vandbeholder
(14) Vandbeholder
(15) Tænd/sluk-lampe
(16) Vandslange med messingkugle
(17) Udløserknap til gulvmundstykke
(18) Gulvmundstykke
(19) Tæppeglider
(20) Gulvklud
(21) Strammer til gulvklud
(22) Tilbehørsadaptor
(23) Vinklet dyse
(24) Spateldyse
q
39
Page 40

VC70495MEE Rev4_9225 47507 MEE pump - Jon 25/01/2014 15:13 Page 40
(25) Rund børste
(26) Lang børste
(27) Dampmundstykke
(28) Elastisk dække (påsættes dampmundstykket)
(29) Gummiskraber (påsættes dampmundstykket)
(30) Rengøringshoved (påsættes dampmundstykket)
(31) Rengøringsklud (påsættes rengøringshovedet)
(32) Tilbehørspose
Betjening af damprenseren
VIGTIGT: Husk, at damprenseren fungerer ved at udsende
damp ved høj temperatur, 115oC. Test altid først på et mindre
iøjnefaldende sted. Brug den aldrig på genstande eller
overflader, der ikke tåler denne temperatur, eller sarte
materialer, som f.eks. dralon, plast, naturpels mv.
Ved tvivl prøver man forsigtigt på et sted på materialet, hvor et
lille mærke ikke betyder noget.
Dobbelt funktionalitet
Din damprenser kan let konfigureres i to forskellige
rengøringstilstande:
• Opretstående damprenser til gulve og tæpper.
• Håndholdt damprenser (8) til lodret rengøring eller overflader, der
er svære at nå.
Tilbehør (22-31) kan anvendes på den håndholdte damprenser.
Opretstående stilling: Samling
A
Sæt håndtaget (1) på hoveddelen (7).
B
Sæt en af skruerne (medfølger) ind i hullet på den nederste
ledningskrog (5), og drej, indtil den er stram.
Sæt den anden skrue (medfølger) ind i siden af håndtaget (på den
modsatte side til den nederste ledningskrog), og drej, indtil den er
stram.
BEMÆRK: Montering af håndtaget er kun nødvendig ved samling
for første gang.
C
Sænk hoveddelen ned på gulvmundstykket (18) med
udløserknappen til gulvmundstykket (17) på bagsiden af
samlingen, indtil den klikker på plads.
D
Sæt mundstykket i den nederste ende af den håndholdte
damprenser (8) ind i adapteren i den forreste del af hoveddelen.
Skub damprenseren helt ind i hoveddelen, indtil den klikker på
plads.
E
Sæt gulvkluden (20) på gulvmundstykket og fastgør ved hjælp af
strammeren på bagsiden.
1
2
Betjening i opretstående stilling
VIGTIGT: Før brug, skal alle hårde gulve fejes grundigt og
tæpper støvsuges helt tørre. Vi anbefaler dog, at
damprenseren ikke bruges på:
• trægulve eller overflader af træ (da det vil absorbere fugt og
kan blive ødelagt).
• beskadigede gulve eller gulve med huller (da det vil absorbere
fugt og kan blive ødelagt).
Desuden bør damprenseren ikke holdes på ét sted i en
længere periode, eftersom den kontinuerlige varme kan
medføre skader på tæpper og laminatgulve.
3
Klem på udløserknapperne (13) på siden af vandbeholderen (14)
for at fjerne den fra den håndholdte damprenser (8).
Fjern fyldhætten (11) ved at dreje den
mod uret til ‘ulåst’ stilling, og løft den ud.
Fyld vandbeholderen.
VIGTIGT: Fyld aldrig damprenserens beholder med andet end
deioniseret, demineraliseret eller destilleret vand (fås i de fleste
førende supermarkeder) for at forhindre kalkaflejringer i
vandbeholderen. Eventuelle problemer, som skyldes
kalkaflejringer, vil gøre produktgarantien ugyldig.
Sæt fyldhætten tilbage på plads og drej den med uret til ‘låst’
stilling.
Sæt vandbeholderen tilbage på plads.
4
Sæt gulvkluden (20) på gulvmundstykket (18) og fastgør ved hjælp
af strammeren (21).
5
Drej den øverste ledningskrog (4) for hurtigt at frigive ledningen
(10).
Fastgør ledningen i ledningsholderen (3).
6
ADVARSEL: Sørg for, at mundstykket er vendt væk fra
personer eller dyr, før damprenseren tændes.
Sæt stikket i stikkontakten og tænd for damprenseren på
tænd/sluk-kontakten (12). Tænd/sluk-lampen (15) lyser og der kan
udsendes damp efter ca. 30 sekunder (når der trykkes på
dampudløseren (2)).
7
Placér gulvmundstykket (18) på gulvet. Hold gulvmundstykket på
gulvet med foden og vip hoveddelen (7) tilbage.
Tryk og hold på dampudløseren (2) for kontinuerligt at udsende
damp, mens damprenseren skubbes frem og tilbage over gulvet.
Det anbefales dog ikke, at overbefugte gulvet ved at betjene
dampudløseren intermitterende (især på hårde gulve).
8
Ved tæpperengøring skal gulvmundstykket (18) med gulvkluden
(20) fastgøres til tæppeglideren (19) for at gøre det lettere at
skubbe gulvmundstykket henover tæppet.
BEMÆRK: Tæppeglideren passer med vilje løst på mundstykket.
Betjening af håndholdt damprenser
9
Den håndholdte damprenser er ideel til lodret rengøring eller
overflader, der er svære at nå.
Tag den håndholdte damprenser (8) ud af hoveddelen (7) ved at
skubbe udløserknappen til håndholdt betjening (6) på forsiden af
hoveddelen opad.
Træk den håndholdte damprenser op og ud af hoveddelen.
10
For at kunne bruge tilbehør skal tilbehørsadapteren (22) først sættes
på den håndholdte damprenser (8). Dette gøres på følgende måde:
1 Skub adapteren over dysen på damprenseren med udløseren på
adapteren vendende nedad mod bunden af den håndholdte
damprenser.
2 Lad tuden på den håndholdte damprenser flugte med udløseren på
adapteren. Skub sammen, indtil de klikker på plads.
3 Fastgør det ønskede tilbehør til enden af adapteren ved at justere
pilen på tilbehøret med højre pil på adapteren og drej tilbehøret, indtil
40
Page 41

VC70495MEE Rev4_9225 47507 MEE pump - Jon 25/01/2014 15:13 Page 41
pilen flugter med venstre pil på adapteren.
ADVARSEL: SLUK og tag stikket ud af kontakten, inden der
skiftes tilbehør. Efter brug vil tilbehøret være meget varmt. Lad
det køle af før håndtering.
Liste over tilbehør til brug på
håndholdt damprenser
• Tilbehørsadapteren (22) er basen for alt tilbehør til den håndholdte
damprenser, der leveres med produktet.
• Den kan også anvendes alene til rene steder eller sprækker, som
ikke er let tilgængelige.
• Vinklet dyse (23) anvendes til at rense sanitetsprodukter, såsom
toiletkummer, haner eller kloakdæksler. Ret den direkte mod ikkepermanente pletter på tæpper eller møbler, mens du holder en ren
klud nær det plettede område for at opfange løsnet snavs.
• Spateldysen (24) anvendes til at fjerne genstridige aflejringer og til
afrimning af køleskab eller fryser.
• Den runde børste (25) anvendes til at fjerne pletter på overflader ved
stuetemperatur, såsom fliser, spejle og vinduer.
• Den lange børste (26) anvendes til at fjerne snavs fra riller og
sprækker.
12
Når dampmundstykket (27) er fastgjort til tilbehørsadapteren (22),
er den basen for påsætning af følgende tilbehør:
• Elastisk dække (28), som anvendes til at dække
dampmundstykket ved rengøring af polstrede møbler og sengetøj.
13
Gummiskraberen (29) fastgøres til dampmundstykket ved at sætte
krogene på bagsiden af gummiskraberen ind i løkkerne på
bagsiden af dampmundstykket. Fastgør derefter den forreste del
af dampmundstykket i låseclipsen forrest foroven på
gummiskraberen (som vist).
• Fjern gummiskraberen efter brug ved at skubbe låseclipsen
fremad. Dampmundstykket sidder stadig fast i løkkerne på
bagsiden af gummiskraberen. Drej dampmundstykket op, frigør
det fra løkkerne og løft det væk.
14
Gummiskraberen er ideel til rengøring af fliser, spejlpaneler eller
glas, såsom vinduer. Ved rengøring af vinduer skal du starte fra
oven, trykke gummiskraberen på overfladen og trække den nedad
i lige bevægelser fra top til bund. Tør gummibladet og den
nederste vindueskarm efter hver tur. For små vinduespartier skal
du fjerne gummiskraberen og sprøjte damp direkte på overfladen.
Brug gummiskraberen separat til at tørre al fugt af.
ADVARSEL: Må ikke bruges på meget koldt glas, da det
pludselige temperaturskift kan sprænge glasset.
• Rengøringshovedet (30) med rengøringskluden (31) påsættes
gulvmundstykket (på samme måde som ved påsættelse og
fjernelse af gummiskraberen, som vist til venstre og ovenfor).
Dette tilbehør er nyttigt til rengøring af flise- eller glasflader,
kabinetter og bordplader i køkkener og badeværelser, plus
polstring, gardiner, persienner, puder og madrasser.
11
Vandbeholderen
Messingkugle (16)
Messingkuglen inde i vandbeholderen er fastgjort til enden af
sugeslangen. Kuglens vægt er designet til frit at bevæge sig rundt
i vandbeholderen afhængig af positionen af produktet. Kuglen skal
forblive i vandet for at generere damp, når der trykkes på
dampudløseren uanset positionen af den håndholdte damprenser.
Skylning af vandbeholderen
Skyl vandbeholderen jævnligt for at løsne aflejringer, der har
samlet sig i bunden af beholderen. Brug kun deioniseret,
demineraliseret eller destilleret vand (fås i de fleste store
supermarkeder), og sæt fyldhætten på for at tillade kraftig
skylning.
Efter brug
Udfør de to vedligeholdelsestrin herunder efter hver brug.
1 Sluk for renseren, og tag stikket ud af stikkontakten. Placér den
øjeblikkeligt på en egnet overflade (f.eks. flisebelagt gulv), hvor
restvarme/fugt i mundstykket ikke vil ødelægge overfladen. Vent til
renseren er kølet helt af.
2 Tøm vandbeholderen (14) ved at fjerne fyldhætten (11) og hælde
vandet ud. Lad vandbeholderen tørre indvendigt, før fyldhætten
sættes på igen.
Opbevaring
Vikl ledningen omkring de to ledningskroge (4/5) ved at dreje den
øverste krog (4) opad for at fastgøre ledningen (10) på plads.
Put alt tilbehøret i tilbehørsposen (32) og hæng posen på den
øverste ledningskrog.
16
Vedligeholdelse
ADVARSEL: Tag altid damprenserens stik ud af kontakten, før
der foretages vedligeholdelse.
Generel vedligeholdelse
Damprenseren er fremstillet, således at den kan holde til
almindelig dagligdags brug, men overtørring med en fugtig klud
fra tid til anden er med til at bevare dens pæne udseende. Der må
ikke bruges skuremidler.
Rengøring af klude og dække
Gulvkluden (20) og det elastiske dække (28) kan alle
maskinvaskes (maks. 30º C). For kraftig tilsmudsning lægges
klude og dække i blød i varmt vand og opvaskemiddel eller et
mildt pletfjerningsmiddel.
VIGTIGT: Brug ikke blegemiddel eller skyllemiddel.
Lad dem tørre helt før opbevaring.
Kontakt vores hjælpelinje ved køb af udskiftningsklude eller
dække.
Vedligeholdelse af tilbehør
Fjern regelmæssigt snavs og blokeringer fra tilbehør for at
forlænge deres levetid.
q
41
Page 42

VC70495MEE Rev4_9225 47507 MEE pump - Jon 25/01/2014 15:13 Page 42
Kontakt os
Hjælpelinje
Hvis du har et problem med dit apparat, bedes du ringe til vores
hjælpelinje, da vi muligvis kan hjælpe dig bedre end den
forretning, hvor du købte varen.
Hav produktnavn, modelnummer og serienummer parat, når du
ringer til os, så vi kan ekspedere din forespørgsel hurtigere.
Tal med os
Hvis du har spørgsmål eller kommentarer, eller ønsker gode tip, så
du får det bedst mulige ud af dine produkter, kan du besøge os
online:
Blog: www.morphyrichards.co.uk/blog
Facebook: www.facebook.com/morphyrichardsuk
Twitter: www.twitter.com/loveyourmorphy
Hjemmeside: www.morphyrichards.com
DIN TOÅRIGE GARANTI
Apparatet er dækket af en toårig reparations- eller
ombytningsgaranti.
Det er vigtigt, at du gemmer kvitteringen som dokumentation for
købet. Du kan hæfte kvitteringen til bagsiden af denne vejledning
for fremtidig reference.
Opgiv venligst følgende numre, hvis der opstår fejl ved produktet.
Du finder numrene på produktets underside.
Modelnr.
Serienr.
Alle produkter fra Morphy Richards testes individuelt, før de
forlader fabrikken. Hvis det usandsynlige skulle ske, at der opstår
fejl ved enheden inden for 28 dage efter købsdatoen, skal
enheden returneres til den forretning, hvor den er købt, og
ombyttes med en anden.
Hvis der opstår en fejl efter de første 28 dage efter købsdatoen
og inden for 24 måneder fra købsdatoen, skal du kontakte den
lokale distributør og give dem produktets modelnummer og
serienummer eller skrive til den lokale distributør på de anførte
adresser.
Du bliver bedt om at returnere produktet (forsvarligt indpakket) til
nedenstående adresse sammen med en kopi af kvitteringen.
Det defekte apparat repareres eller ombyttes derefter,
sædvanligvis inden for 7 arbejdsdage efter modtagelse, dog med
forbehold for undtagelserne som beskrevet nedenfor (1-9).
Hvis enheden af en eller anden grund ombyttes inden for
garantiperioden på to år, beregnes garantien på den nye enhed
fra den oprindelige købsdato. Derfor er det vigtigt at gemme den
originale kvittering eller faktura, så du kan dokumentere
købsdatoen.
For at være dækket af garantiperioden på to år skal enheden
have været brugt i overensstemmelse med fabrikantens
anvisninger. For eksempel skal enhederne have været afkalket,
ligesom filtrene skal have været holdt rene i henhold til
anvisningerne.
Det er ikke Morphy Richards eller den lokale distributørs ansvar
at ombytte eller reparere enheden under garantiens betingelser,
hvis:
1 Defekten er forårsaget af eller kan tilskrives uforsætlig brug,
misbrug, forsømmelig brug eller brug uden at følge fabrikantens
anbefalinger, eller hvis defekten er forårsaget af elektriske
spændingsbølger eller er opstået under transport.
2 Enheden er anvendt med en anden strømspænding end den, der
er påtrykt produktet.
3 Andre personer (ud over vores serviceafdeling eller en autoriseret
forhandler) har forsøgt at reparere enheden.
4 Enheden har været brugt til udlejningsformål eller har været
anvendt til andre formål end husholdningsbrug.
5 Enheden er købt brugt.
6 Morphy Richards eller den lokale distributør er ikke ansvarlig for
at udføre nogen form for servicearbejde under garantien.
7 Garantien omfatter ikke forbrugsvarer som poser, filtre og
glaskarafler.
8 Batterier og skade fra lækage er ikke dækket af garantien.
9 Filtrene ikke er blevet rengjorte og udskiftet som specificeret.
Denne garanti overdrager ikke nogen rettigheder ud over dem,
der udtrykkeligt er beskrevet ovenfor, og dækker ikke krav i
forbindelse med følgetab eller -skader. Denne garanti tilbydes
som en ekstra fordel og påvirker ikke dine lovbestemte
rettigheder som forbruger.
42
Page 43

VC70495MEE Rev4_9225 47507 MEE pump - Jon 25/01/2014 15:13 Page 43
s
VIKTIGA SÄKERHETSANVISNINGAR
Användning av elektriska apparater kräver att följande säkerhetsregler följs.
Läs de här instruktionerna noga innan du använder produkten.
• VARNING: Koppla från elförsörjningen innan du utför
rutinmässiga underhållsarbeten.
• Denna hushållsapparat kan användas av barn över 8 år och
personer med reducerad fysisk, sensorisk eller mental
förmåga eller som saknar erfarenhet och kunskap, om de får
tillsyn eller instruktioner om hur man använder apparaten på
ett säkert sätt och förstår riskerna.
• Låt inte barn leka med apparaten.
• Rengöring och användarunderhåll ska inte utföras av barn
utan tillsyn.
Personsäkerhet
• VARNING: Rikta aldrig ånga mot elektroniska komponenter
eller maskindelar. Om du funderar över vad som kan rengöras
med ånga i en apparat, kontakta tillverkaren av den
apparaten före rengöring.
• VARNING: Rör aldrig kontakten eller sladden med blöta
händer.
• VARNING: Munstycken och redskap kommer att vara varma
efter användning. Vänta tills de svalnat innan du tar bort dem.
• VARNING: Rikta aldrig ångan mot personer eller djur. Fara för
skållhett vatten.
ÅNGA
• VARNING: Använd inte apparaten utan att påfyllningslocket är
korrekt monterat.
• VARNING: Om det blir stopp i apparaten så släpps ånga ut
genom ångutsläppsöppningarna.
• Skydda mot brand, elektriska stötar och personskador genom att
inte sänka ner sladden, kontakten eller apparaten i vatten eller
någon annan vätska.
• Kontakten ska tas bort från vägguttaget efter användning och före
rengöring, påfyllning eller byte av tillbehör samt innan
underhållsarbeten utförs.
• Håll apparaten utom räckhåll för barn när den är ansluten till en
strömkälla eller håller på att svalna.
Plats
• Använd eller förvara inte apparaten utomhus.
• Förvara inte apparaten nära varma ytor som ugnar eller
värmeapparater.
Elsladd
• VARNING: En skadad eller avklippt sladd med stickkontakt
får aldrig sättas in i ett eluttag. Den måste kasseras eftersom
en skadad kabel kan vara livsfarlig om den sätts in i ett
eluttag.
• Om sladden är skadad måste den bytas ut av tillverkaren eller
dennes serviceagent, eller av annan kvalificerad person för att
undvika fara.
• Se till att elsladden inte sträcks.
q
s
43
Page 44

VC70495MEE Rev4_9225 47507 MEE pump - Jon 25/01/2014 15:13 Page 44
Produktsäkerhet
• VARNING: Testa alltid på en liten dold yta först. Använd aldrig
på material som inte tål höga temperaturer, som t.ex. dralon,
päls o.s.v.
• Modifiera inte ångrengöraren på något sätt.
• Använd aldrig ångrengöraren med tom vattentank. Fyll alltid
på vatten när du använder apparaten under lång tid.
• Fyll aldrig ångrengörarens tank med något annat än avjoniserat,
avsaltat eller destillerat vatten.
• Apparaten får inte användas om den har tappats, om det finns
synliga tecken på att den är skadad eller om den läcker.
Övriga säkerhetsanvisningar
• Använd inga kemikaliebaserade rengöringsmedel, parfymer,
alkoholer eller avkalkningsmedel o.s.v. i vattnet.
• Endast utbildad personal får reparera elektriska apparater.
• Ej professionellt utförda reparationer kan innebära fara för
användaren.
• Använd endast Morphy Richards originaldelar och tillbehör.
• Lämna aldrig apparaten på utan övervakning.
• Den här ångrengöraren är endast avsedd för hemmabruk. Felaktig
användning eller användning i affärssyfte eller något annat syfte
gör garantin ogiltig.
Elektriska krav
• Kontrollera att spänningen på apparatens märkskylt
stämmer överens med spänningen i husets elsystem, som måste
vara ett växelströmssystem (AC).
• Om eluttagen i ditt hem inte passar för den kontakt som medföljer
denna apparat ska den felaktiga kontakten avlägsnas och ersättas
med en korrekt kontakt.
• VARNING: Denna apparat måste jordas.
• Om någon säkring behöver bytas ut i själva elkontakten ska en
säkring av typ BS1362 på 13 ampere monteras.
Innehåll
Hälsa och säkerhet 43
Elektriska krav 44
Produktöversikt/funktioner 45
Använda apparaten 45
Dubbla användningsområden 45
Stående ångning: montering 45
Använda i stående ångläge 45
Använda handångrengöraren 46
Tillbehörslista för handångrengöraren 46
Vattentank 46
Efter användning 46
Förvaring 46
Underhåll 47
Kontakta oss 47
Garanti 47
Få ut mesta möjliga av din nya rengörare...
VIKTIGT! För att förebygga kalkavlagringar i vattentanken, fyll
aldrig ångrengörarens tank med något annat än avjoniserat,
avsaltat eller destillerat vatten (tillgängligt på de flesta
stormarknader).
44
Page 45

VC70495MEE Rev4_9225 47507 MEE pump - Jon 25/01/2014 15:13 Page 45
Funktioner
(1) Handtag
(2) Ångutlösare
(3) Sladdhållare
(4) Övre sladdupphängningskrok (roterbar)
(5) Nedre sladdupphängningskrok (fast)
(6) Handstyrd utlösningsknapp
(7) Huvuddel
(8) Handångare
(9) Ångutlösare
(på undersidan av handångarens handtag)
(10) Strömsladd
(11) Påfyllningslock
(12) On/Off-knapp
(13) Utlösningsknappar för vattentank
(14) Vattentank
(15) Strömindikatorlampa
(16) Vattenrör med kulformad mässingsvikt
(17) Utlösningsknapp på golvhuvud
(18) Golvhuvud
(19) Mattglidare
(20) Golvtrasa
(21) Spänningsanordning för golvtrasa
(22) Tillbehörsadapter
(23) Vinklat tillsatsmunstycke
(24) Tillbehörsskrapa
(25) Rund tillsatsborste
(26) Bred tillsatsborste
(27) Universalmunstycke
(28) Elastisk universaltrasa (fästs på universalmunstycket)
(29) Tillsatsgummiskrapa (fästs på universalmunstycket)
(30) Tunt rengöringshuvud (fästs på universalmunstycket)
(31) Tunn rengöringsduk (fästs på det tunna
rengöringshuvudet)
(32) Tillbehörspåse
Använda apparaten
VIKTIGT! Kom ihåg att ångrengöraren arbetar genom att avge
ånga med förhöjd temperatur på 115° C. Testa alltid på en liten
dold yta först. Använd aldrig apparaten på föremål eller ytor
som inte tål den temperaturen, eller på ömtåliga material som
dralon, plast, päls o.s.v.
Om du är tveksam bör du testa på en liten del av materialet där
mindre fläckar inte gör någon skada.
Dubbla användningsområden
Din ångrengörare kan enkelt konfigureras till två olika
rengöringslägen:
• Stående ångrengörare för golv och mattor.
• Handångrengörare (8) för rengöring av vertikala ytor eller för ytor
som är svåra att komma åt.
Tillbehören (22–31) kan användas på handångaren.
1
Stående ångning: Enhet
A
För in handtaget (1) i huvuddelen (7).
B
För in en av skruvarna (medföljer) i hålet på den lägre
sladdlagringskroken (5) och skruva tills den sitter fast.
För in den andra skruven (medföljer) i sidan av handtaget (på
motsatt sida från den lägre sladdlagringskroken) och skruva tills
den sitter fast.
OBS! Fastsättning av handtaget är endast nödvändigt vid den
första monteringen.
C
Sänk huvuddelen till golvhuvudet (18), med golvhuvudets
utlösningsknapp (17) på golvhuvudets hals till baksidan av
enheten, tills den klickar i.
D
För in ångutloppsmunstycket på botten av handångaren (8) i
adaptern längst ner i utrymmet på huvuddelens framsida.
Tryck in ångrengöraren ordentligt i utrymmet i huvuddelen tills den
klickar i.
E
Sätt fast golvtrasan (20) i golvhuvudet och dra åt växlaren på
baksidan.
2
Användning i stående ångläge
VIKTIGT! Innan användning bör hårda golv sopas och mattor
torrdammsugas ordentligt. Dock rekommenderar vi att
ångrengöraren inte används på:
• bara trägolv eller någon yta där trä exponeras (eftersom det
absorberar fukt och kan förvanskas).
• skadade hårda golv eller hårda golv med synliga skåror
(eftersom det absorberar fukt och kan förvanskas).
Dessutom, förvara inte moppen på en och samma plats under
en längre period, eftersom den ihållande värmen kan orsaka
skada på mattor och laminerade golv.
3
Pressa på knapparna (13) på sidan av vattentanken (14) för att ta
bort det från handångrengöraren (8).
Ta bort påfyllningslocket (11) genom att vrida det
moturs till upplåsningspositionen och lyft sedan bort det.
Fyll vattentanken.
VIKTIGT! För att förebygga kalkavlagringar i vattentanken, fyll
aldrig ångrengörarens tank med något annat än avjoniserat,
avsaltat eller destillerat vatten (tillgängligt på de flesta
stormarknader). Problem orsakade av kalkavlagringar gör
produktgarantin ogiltig.
Ersätt påfyllningslocket och vrid det medurs till låsningspositionen.
Ersätt vattentanken.
4
Sätt fast golvtrasan (20) i golvhuvudet (18) och säkra den genom
att dra åt växlaren (21).
5
Rotera den övre sladdlagringskroken (4) för att snabbt frigöra
strömkabeln (10).
Säkra strömkabeln i sladdhållaren (3).
6
VARNING: Innan du vrider på ON, säkerställ att golvhuvudet
befinner sig på säkert avstånd från personer eller djur.
Koppla in i eluttaget och slå på ångaren med On/Off-knappen
(12). Strömindikatorlampan (15) lyser upp och ångan är redo att
släppas ut efter ca 30 sekunder (när ångutlösaren (2) trycks ner).
s
45
Page 46

VC70495MEE Rev4_9225 47507 MEE pump - Jon 25/01/2014 15:13 Page 46
7
Placera golvhuvudet (18) på golvet. Håll golvhuvudet mot golvet
med din fot och luta huvuddelen (7) bakåt.
För att kontinuerligt släppa ut ånga, tryck och håll in ångutlösaren
(2) medan du långsamt trycker rengöraren fram och tillbaka längs
golvet. Men för att hindra att golvet blir för blött, använd
ångutlösaren stötvis (särskilt på hårda golv).
8
Om du rengör mattor, vila golvhuvudet (18) med golvtrasan (20)
fastsatt på mattglidaren (19) för att underlätta för golvhuvudet att
röra sig på mattan.
OBS! Mattglidaren sitter avsiktligt löst på golvhuvudet.
Användning av handångrengöraren
9
Denna funktion är ideal för att rengöra vertikala ytor och ytor som är
svåra att komma åt.
Separera handångaren (8) från huvuddelen (7) genom att dra
handutlösningsknappen (6) uppåt på huvuddelens kropp.
Dra handångaren uppåt och ut från huvuddelen.
10
För att använda alla tillbehör måste tillbehörsadaptern (22) först
sättas fast på handångaren (8). Detta kan göras genom att slutföra
följande:
1 Dra adaptern över ångrengörarens munstycke med adapterns
utlösningsspärr vänd mot basen på handångrengöraren.
2 Rikta in kilspåret på handångaren med adapterns utlösningsspärr.
Tryck ihop och fixera på plats.
3 Sätt fast önskat tillbehör på adapteränden genom att rikta in pilen på
tillbehöret med högerpilen på adaptern och vrid tillbehöret tills pilen
är i linje med den vänstra pilen av de två på adaptern.
VARNING: Slå AV och koppla ur innan du byter munstycke. Efter
användning kommer munstyckena att vara mycket heta, låt dem
kylas ner innan hantering.
Lista på tillbehör för användning med
handångaren
• Tillbehörsadapter (22) detta tillbehör är bastillbehöret för alla
handtillbehör som medföljer produkten.
• Det kan också användas enskilt för att rengöra svåråtkomliga platser
eller springor.
• Vinklat munstyckestillbehör (23) för att rengöra sanitetsgods såsom
toaletter, skålar, kranar eller avloppsskydd. Rikta det direkt mot ej
permanenta fläckar på mattor eller möbeltyger medan du håller en
ren trasa nära fläckområdet för att fånga upp lösgjord smuts.
• Spateltillbehör (24) för att ta bort envisa avlagringar, eller för att
underlätta avfrostning av kyl eller frys.
• Cirkelformigt borsttillbehör (25) för att ta bort fläckar på ytor i
rumstemperatur, såsom kakel, navkapslar, speglar och fönster.
• Långt borsttillbehör (26) för att ta bort smuts från fogar och springor.
12
Hjälpmunstycke (27) när den är fastsatt i tillbehörsadaptern (22),
så är hjälpmunstycket bastillbehöret för att sätta fast alla följande
tillbehör:
• Elastisk universaltrasa (28) för universalmunstycket vid rengöring
av möbeltyger och sängutrustning.
13
Tillsatsgummiskrapan (29) fäster du på universalmunstycket
genom att föra in hakarna på baksidan av gummiskrapmunstycket
11
i öglorna på baksidan av universalmunstycket och sedan sätta
fast den främre delen av universalmunstycket i låsfästet uppe på
gummiskrapmunstycket (som bilden visar).
• Montera loss gummiskrapan efter användning genom att vinkla
låsfästet framåt. Universalmunstycket är fortfarande fasthakat i
öglorna på baksidan av gummiskrapmunstycket. Vrid
universalmunstycket uppåt och haka loss det från öglorna för att
lyfta av det.
14
Gummiskrapans munstycke är idealt för att rengöra områden med
kakel eller glas, såsom fönster eller speglar. När du ska putsa
fönster börjar du högst upp, trycker gummiskrapan mot rutan och
drar den nedåt i raka svep uppifrån och ner. Torka fönstrets nedre
kant torr efter varje drag. För att rengöra små fönsterpaneler tar
du bort gummiskrapverktyget och sprejar ångan direkt på rutan.
Använd gummiskrapan separat för att torka av fukten.
VARNING: Använd aldrig på mycket kalla glasrutor, eftersom
hastiga temperaturväxlingar kan göra att glaset spricker.
• Tunt rengöringshuvud (30) med tunn rengöringsduk (31) kan fästas
på universalmunstycket (använd samma metod som för att fästa
och montera loss gummiskrapmunstycket, enligt instruktionerna
till vänster och ovan). Detta tillbehör kan användas för rengöring
av kaklade ytor eller glasytor, skåp och arbetsytor i kök och
badrum samt sängutrustning, gardiner, persienner, kuddar och
madrasser.
Vattentanken
Kulformad mässingsvikt (16)
Den kulformade mässingsvikten inne i vattentanken är fäst i änden
på sugslangen. Kulans vikt och utformning är anpassade så att
kulan ska kunna röra sig fritt inne i vattentanken beroende på
apparatens position. Kulan måste finnas kvar i vattnet så att ånga
kan skapas när ångutlösaren trycks in oavsett åt vilket håll
handångaren är vänd.
Sköljning av vattentanken
Skölj ur vattentanken regelbundet för att ta bort eventuella
avlagringar som ansamlats i tankens botten. Använd bara
avjoniserat, avhärdat eller destillerat vatten (finns på de flesta
stormarknader) och sätt dit påfyllningslocket så att ordentlig
sköljning medges.
Efter användning
Följ de två underhållsstegen nedan efter varje användning.
1 Stäng av ångrengöraren och koppla ur den ur vägguttaget.
Placera den genast på ett passande underlag (t.ex. kaklat golv)
som inte påverkas av den kvardröjande värmen/fukten i
golvmunstycket/trasan. Vänta tills den har svalnat helt.
2 Töm vattentanken (14) genom att avlägsna påfyllningslocket (11)
och hälla ut vattnet. Låt vattentankens insida torka helt innan du
sätter tillbaka påfyllningslocket.
Förvaring
Linda sladden runt de två sladdupphängningskrokarna (4/5). Vrid
den övre sladdupphängningskroken (4) uppåt så att strömsladden
(10) hålls på plats.
Lägg alla tillbehör i tillbehörspåsen (32) och häng påsen i den övre
sladdupphängningskroken.
16
46
Page 47

VC70495MEE Rev4_9225 47507 MEE pump - Jon 25/01/2014 15:13 Page 47
Underhåll
VARNING: Koppla alltid från ångrengöraren från elnätet innan
du åtar dig några underhållsprocedurer.
Övergripande underhåll
Ångrengöraren är tillverkad för att klara dagligt slitage, men om du
då och då torkar av den med en fuktig trasa så håller den längre.
Slipande rengöringsmedel bör inte användas.
Rengöring av trasorna
Golvtrasan (20) och den elastiska hjälptrasan (28) kan
maskintvättas (i max 30 ºC). För stark nedjordning, dränk trasorna
i varmt vatten och rengöringsmedel eller en mild fläckborttagare.
VIKTIGT! Använd inte blekmedel eller sköljmedel.
Låt torka helt och hållet innan lagring.
Kontakta vår hjälplinje för inköp av ersättningstrasor.
Underhåll av tillbehören
Smuts och stopp ska avlägsnas regelbundet från tillbehören för
ökad livslängd.
Kontakta oss
Hjälplinje
Om du har problem med apparaten ber vi dig ringa till vår
hjälplinje, eftersom sannolikheten är större att vi kan hjälpa dig än
butiken där du köpte apparaten.
Ha produktnamn, modellnummer och serienummer till hands när
du ringer så kan vi hjälpa dig snabbare med din fråga.
Tala med oss
Om du har frågor eller kommentarer eller vill ha bra tips så att du
kan utnyttja dina produkter fullt ut kan du besöka oss på nätet:
Blogg: www.morphyrichards.co.uk/blog
Facebook: www.facebook.com/morphyrichardsuk
Twitter: www.twitter.com/loveyourmorphy
Webbplats: www.morphyrichards.com
DIN TVÅÅRIGA GARANTI
Den här apparaten omfattas av en tvåårig reparations- eller
utbytesgaranti.
Det är viktigt att behålla köpkvittot från återförsäljaren som
inköpsbevis. Häfta fast ditt kvitto på denna baksida för framtida
referens.
Uppge följande information om det uppstår fel i produkten. Dessa
nummer finns på produktens undersida.
Modellnr
Serienr
Alla produkter från Morphy Richards testas individuellt innan de
lämnar fabriken. Om någon hushållsapparat mot förmodan skulle
visa sig ha fel inom 28 dagar från inköpsdatum skall den
returneras till inköpsstället för utbyte.
Kontakta din lokala distributör och ange produktens
modellnummer och serienummer, eller skriv till din lokala
distributör på den angivna adressen om felet uppstår efter 28
dagar, men inom 24 månader från det ursprungliga
inköpsdatumet.
Du ombeds att returnera produkten (i säker, fullgod förpackning)
till nedanstående adress med en kopia av inköpsbeviset.
Med förbehåll för de undantag som beskrivs nedan (1-9), kommer
den felaktiga produkten att repareras eller att bytas ut och
skickas tillbaka, vanligtvis inom 7 arbetsdagar från mottagandet.
Om denna artikel av någon anledning ersätts inom den 2-åriga
garantiperioden kommer garantin på den nya artikeln att
beräknas från det ursprungliga inköpsdatumet. Det är därför
mycket viktigt att du behåller ditt ursprungliga kassakvitto eller
din faktura för att indikera datum för det ursprungliga inköpet.
För att kvalificeras för den 2-åriga garantin måste
hushållsapparaten ha använts i enlighet med tillverkarens
anvisningar. Hushållsapparater måste exempelvis ha avkalkats
och filter måste ha hållits rena enligt anvisningarna.
Morphy Richards eller den lokala distributören skall inte vara
ansvarigt för att byta ut eller reparera varorna under villkoren i
garantin där:
1 Felet har orsakats av eller kan tillskrivas oavsiktlig användning,
felaktig användning, försumlig användning eller användning som
strider mot tillverkarens rekommendationer, eller om felet har
orsakats av överspänning eller uppkommit under transport.
2 Hushållsapparaten har använts med en annan spänning än vad
som markerats på produkterna.
3 Reparationer har provats av andra personer än vår
servicepersonal (eller auktoriserad återförsäljare).
4 Hushållsapparaten har använts för uthyrningssyften eller för icke-
hushållsanvändning.
5 Apparaten är begagnad.
6 Morphy Richards eller den lokala distributörenär inte ansvarigt för
att utföra någon typ av servicearbete under garantin.
7 Garantin exkluderar förbrukningsvaror såsom påsar, filter och
glaskaraffer.
8 Batterier och skador från läckage omfattas inte av garantin.
9 Filtren har inte rengjorts eller bytts enligt instruktionerna.
Denna garanti ger inte några andra rättigheter än de som
uttryckligen beskrivs ovan och omfattar inte något anspråk på
därav följande förlust eller skada. Denna garanti erbjuds som
ytterligare förmån och påverkar inte dina lagstadgade rättigheter
som konsument.
s
47
Page 48

VC70495MEE Rev4_9225 47507 MEE pump - Jon 25/01/2014 15:13 Page 48
v
TÄRKEITÄ TURVALLISUUSOHJEITA
Kaikkien sähkölaitteiden käytössä on noudatettava seuraavia yleisiä turvallisuusohjeita.
Lue nämä ohjeet huolellisesti, ennen kuin aloitat laitteen käytön.
• VAROITUS: Irrota laite sähköverkosta ennen säännöllisten
huoltotoimenpiteiden suorittamista.
• Vähintään 8 vuotta täyttäneet lapset ja sellaiset henkilöt,
joiden fyysiset, sensoriset tai henkiset kyvyt eivät ole tähän
riittäviä tai joilla ei ole laitteen tuntemusta tai kokemusta sen
käytöstä, saavat käyttää tätä laitetta ainoastaan silloin, kun
heidän turvallisuudestaan vastaava henkilö valvoo ja ohjaa
heitä käyttämään laitetta turvallisesti ja ymmärtämään sen
käyttöön liittyvät vaarat.
• Lapset eivät saa leikkiä laitteella.
• Lapset eivät saa suorittaa puhdistusta tai huoltoa ilman
valvontaa.
Henkilöturvallisuus
• VAROITUS: Älä koskaan kohdista höyryä sähköosiin tai
varusteisiin. Mikäli et ole varma höyrypuhdistuksen
sopivuudesta laitteeseen, kysy lisäohjeita laitteen
valmistajalta ennen puhdistusta.
• VAROITUS: Älä koskaan kosketa pistokkeeseen tai johtoon
märillä käsillä.
• VAROITUS: Suulakkeet ja välineet ovat kuumia käytön
jälkeen. Anna osien jäähtyä ennen niiden irrottamista.
• VAROITUS: Älä kohdista höyryä ihmisiin tai eläimiin.
Palovammojen vaara.
HÖYRY
• VAROITUS: Älä käytä laitetta, jos täyttökorkki ei ole
paikoillaan.
• VAROITUS: Jos laite tukkiutuu, höyryä tulee ulos
höyrynpoistoaukoista.
48
• Tulipalojen, sähköiskujen ja henkilövahinkojen välttämiseksi
johtoa, pistoketta tai puhdistinta ei saa upottaa veteen tai muuhun
nesteeseen.
• Pistoke tulee irrottaa pistorasiasta käytön jälkeen, ennen laitteen
puhdistusta, täyttöä, lisävarusteiden vaihtoa tai ylläpitotoimien
suorittamista.
• Pidä laite lasten ulottumattomissa, kun se on päällä tai jäähtyy.
Sijainti
• Älä säilytä tai käytä tätä laitetta ulkona.
• Älä säilytä laitetta kuumien pintojen lähellä, esim. uunien tai
lämmityslaitteiden lähellä.
Virtajohto
• VAROITUS: Pistokkeella varustettua vaurioitunutta tai
katkennutta virtajohtoa ei saa liittää sähköverkkoon. Se on
hävitettävä, sillä pistorasiaan liitetyt vaurioituneet johdot ovat
vaarallisia.
• Jos virtajohto vaurioituu, sen saa vaaratilanteiden välttämiseksi
vaihtaa vain valmistaja, huoltoliike tai vastaava ammattitaitoinen
henkilö.
• Älä anna virtajohdon kiristyä liikaa.
Page 49

VC70495MEE Rev4_9225 47507 MEE pump - Jon 25/01/2014 15:13 Page 49
Tuoteturvallisuus
• VAROITUS: Testaa laitetta aina ensin huomaamattomaan
kohtaan. Älä koskaan käytä laitetta materiaaleihin (mm.
dralon-kangas, aito turkki), jotka eivät kestä korkeaa
lämpötilaa.
• Älä koskaan muuta höyrypuhdistinta millään tavalla.
• Älä koskaan käytä höyrypuhdistinta sen vesisäiliön ollessa tyhjä.
Täytä
aina vesisäiliö pitkäaikaisen käytön aikana.
• Älä koskaan täytä höyrypuhdistimen säiliötä muulla kuin
deionisoidulla, demineralisoidulla tai tislatulla vedellä.
• Laitetta ei saa käyttää, jos se on pudonnut, jos siinä on vaurion
merkkejä tai jos se vuotaa.
Muut turvatoimet
• Veteen ei saa lisätä kemiallisia pesuaineita, hajusteita, alkoholia tai
kalkinpoistoainetta jne.
• Ainoastaan asianmukaisen koulutuksen saaneet henkilöt saavat
korjata sähkölaitteita.
• Käyttäjät voivat altistua vaaratilanteille, jos laitetta korjaavat muut
kuin alan ammattilaiset.
• Käytä ainoastaan alkuperäisiä Morphy Richardsin varaosia ja
lisävarusteita.
• Älä jätä laitetta ilman valvontaa käytön aikana.
• Tämä höyrypuhdistin on tarkoitettu ainoastaan kotitalouskäyttöön.
Laitteen väärinkäyttö, kaupallinen käyttö tai käyttö muuhun
tarkoitukseen mitätöi takuun.
Sähkövaatimukset
• Tarkista, että laitteessa
olevan tyyppikilven jännite vastaa kotitalouden vaihtovirtalähteen
jännitettä (AC, vaihtovirta).
• Jos kotisi pistorasiat eivät sovi tämän laitteen pistokkeeseen,
laitteen pistoke tulee poistaa ja sen tilalle on asennettava sopiva
pistoke.
• VAROITUS: Laite on kytkettävä maadoitettuun pistorasiaan
• Jos pistorasian sulake on vaihdettava, vaihda se 13 ampeerin
BS1362-sulakkeeseen.
Sisällysluettelo
Terveys ja turvallisuus 49
Sähkövaatimukset 49
Laitteen kuvaus / ominaisuudet 50
Laitteen käyttö 50
Kaksi toimintatilaa 50
Varrellinen höyrypuhdistin: asennus 50
Varrellisen höyrypuhdistimen käyttö 50
Käsikäyttöisen höyrypuhdistimen käyttö 50
Käsikäyttöisen höyrypuhdistimen lisävarusteluettelo 51
Vesisäiliö 51
Käytön jälkeen 51
Säilytys 52
Ylläpito 52
Ota yhteyttä 52
Takuu 52
Uuden puhdistuslaitteen tehokkuuden
optimoiminen...
TÄRKEÄÄ: Jotta kalkkia ei kertyisi vesisäiliöön,
höyrypuhdistimen säiliöön ei saa koskaan lisätä mitään
muuta kuin deionisoitua, demineralisoitua tai tislattua vettä
(saatavilla yleisimmistä valintamyymälöistä).
v
49
Page 50

VC70495MEE Rev4_9225 47507 MEE pump - Jon 25/01/2014 15:13 Page 50
Ominaisuudet
(1) Kahva
(2) Höyrytyspainike
(3) Johdon pidike
(4) Ylempi johdon säilytyskoukku (kierrettävä)
(5) Alempi johdon säilytyskoukku (pysyvä)
(6) Käsikäyttöisen laitteen vapautuspainike
(7) Runko
(8) Käsikäyttöinen höyrypuhdistin
(9) Höyrytyspainike
(käsikäyttöisen höyrypuhdistimen kahvan alla)
(10) Virtajohto
(11) Täyttökorkki
(12) Virtakytkin
(13) Vesisäiliön vapautuspainikkeet
(14) Vesisäiliö
(15) Virran merkkivalo
(16) Vesiputki messinkisellä pallopainolla
(17) Lattiasuulakkeen vapautuspainike
(18) Lattiasuulake
(19) Mattosuulake
(20) Lattialiina
(21) Lattialiinan kiristin
(22) Lisävarusteiden sovitin
(23) Kulmasuulake
(24) Lastasuulake
(25) Pyöreä harjasuulake
(26) Pitkä harjasuulake
(27) Monitoimisuulake
(28) Venyvä monitoimiliina (liitetään monitoimisuulakkeeseen)
(29) Lastasuulake (liitetään monitoimisuulakkeeseen)
(30) Pieni puhdistuspää (liitetään monitoimisuulakkeeseen)
(31) Pieni puhdistusliina (liitetään pieneen puhdistuspäähän)
(32) Lisävarustepussi
Laitteen käyttö
TÄRKEÄÄ: Huomaa, että höyrypuhdistin toimii vapauttamalla
höyryä korkealla 115 oC lämpötilalla. Testaa laitetta aina ensin
huomaamattomaan kohtaan. Älä koskaan käytä laitetta
kohteisiin tai pintoihin, jotka eivät kestä yllä mainittua
lämpötilaa, tai arkalaatuisiin materiaaleihin (mm. dralon-kangas,
muovi, aito turkki jne.).
Jos et ole varma kohteen sopivuudesta, tarkista varoen
materiaalin osaan, jossa pienet jäljet eivät haittaa.
Kaksi toimintatilaa
Höyrypuhdistin voidaan muuttaa helposti kahteen eri
kokoonpanoon:
• Varrellinen höyrypuhdistin lattioiden ja mattojen puhdistamiseen.
• Käsikäyttöinen höyrypuhdistin (8) pystysuuntaisten tai vaikeasti
saavutettavien pintojen puhdistamiseen.
Lisävarusteita (22-31) voidaan käyttää käsikäyttöisessä
höyrypuhdistimessa.
1
Varrellinen höyrypuhdistin: Asennus
A
Aseta kahva (1) runkoon (7).
B
Aseta yksi ruuvi (kuuluu pakkaukseen) alempaan johdon
säilytyskoukkuun (5) ja kierrä se tiukalle.
Aseta toinen ruuvi (kuuluu pakkaukseen) kahvan sivuun (alemman
johdon säilytyskoukun vastakkaiselle puolelle) ja kiristä se tiukalle.
HUOMAA: Kahva tulee asentaa ainoastaan ensimmäisellä
asennuskerralla.
C
Laske runko lattiasuulakkeeseen (18) kokoonpanon takaosan
lattiasuulakkeen varressa olevalla lattiasuulakkeen
vapautuspainikkeella (17), kunnes se napsahtaa paikoilleen.
D
Aseta käsikäyttöisen höyrypuhdistimen (8) höyrytyssuulake rungon
etupuolen alaosassa olevaan sovittimeen.
Paina höyrypuhdistin tiukasti runkoon, kunnes se napsahtaa
paikoilleen.
E
Kiinnitä lattialiina (20) lattiasuulakkeeseen ja kiristä takaosan
kiristin.
2
Varrellisen höyrypuhdistimen käyttö
TÄRKEÄÄ: Kovat lattiat tulee pyyhkiä huolellisesti ja matot
tulee imuroida huolellisesti ennen höyrypuhdistimen käyttöä.
Höyrypuhdistinta ei ole suositeltavaa käyttää:
• paljailla puulattioilla tai pinnoilla, joissa on paljasta puuta
(lattia voi imeä kosteutta ja muuttaa sen seurauksena
muotoa)
• vaurioituneilla kovilla lattioilla tai kovilla lattioilla, joissa on
aukkoja (lattia voi imeä kosteutta ja muuttaa sen seurauksena
muotoa).
Moppia ei saa pitää pitkään paikoillaan yhdessä kohtaa, sillä
jatkuva lämpö voi vahingoittaa mattoja ja laminaattilattiaa.
3
Paina vesisäiliön (14) sivussa olevia painikkeita (13) säiliön
poistamiseksi käsikäyttöisestä höyrypuhdistimesta (8).
Poista täyttökorkki (11) kiertämällä sitä
vastapäivään ‘auki’-asentoon ja nostamalla se pois.
Täytä vesisäiliö.
TÄRKEÄÄ: Jotta kalkkia ei kertyisi vesisäiliöön, höyrypuhdistimen
säiliöön ei saa koskaan lisätä mitään muuta kuin deionisoitua,
demineralisoitua tai tislattua vettä (saatavilla yleisimmistä
valintamyymälöistä). Kaikki kalkista aiheutuvat ongelmat mitätöivät
laitteen takuun.
Asenna täyttökorkki paikoilleen ja käännä sitä myötäpäivään
‘lukitus’-asentoon.
Asenna vesisäiliö takaisin paikoilleen.
4
Kiinnitä lattialiina (20) lattiasuulakkeeseen (18) ja kiristä kiristin (21).
5
Kierrä ylempää johdon säilytyskoukkua (4) virtajohdon (10)
vapauttamiseksi nopeasti.
Kiinnitä virtajohto johdon pidikkeeseen (3).
6
VAROITUS: Ennen laitteen käynnistämistä on varmistettava,
että lattiasuulake on turvallisen välimatkan päässä henkilöistä
ja eläimistä.
Liitä pistoke pistorasiaan ja kytke höyrypuhdistin päälle
virtakytkimestä (12). Virran merkkivalo (15) syttyy ja höyryä tulee
50
Page 51

VC70495MEE Rev4_9225 47507 MEE pump - Jon 25/01/2014 15:13 Page 51
noin 30 sekunnin kuluttua (kun höyrytyspainiketta (2) painetaan).
7
Aseta lattiasuulake (18) lattialle. Paina lattiasuulaketta lattiaan
jalalla ja kallista runkoa (7) taaksepäin.
Syötä höyryä jatkuvasti painamalla ja pitämällä alhaalla
höyrytyspainiketta (2), paina samalla höyrypuhdistinta lattiassa
hitaasti edestakaisin. Estä lattian liian suuri kosteus käyttämällä
höyrypainiketta jaksoittain (erityisesti kovan lattian kohdalla).
8
Mattoa puhdistaessa lattiasuulakkeeseen (18) tulee kiinnittää
lattialiinalla (20) varustettu mattosuulake (19), jotta lattiasuulaketta
voitaisiin liikuttaa helposti maton yli.
HUOMAA: Mattosuulake on tarkoituksellisesti kiinnitetty löysästi
lattiasuulakkeeseen.
Käsikäyttöisen höyrypuhdistimen käyttö
9
Kyseinen toiminto on ihanteellinen pystysuuntaisten ja vaikeasti
saavutettavien pintojen puhdistamiseen.
Erota käsikäyttöinen höyrypuhdistin (8) rungosta (7) liu’uttamalla
rungon etuosassa olevaa käsikäyttöisen laitteen vapautuspainiketta
(6) ylöspäin.
Vedä käsikäyttöinen höyrypuhdistin ylös ja pois rungosta.
10
Kaikkien lisävarusteiden käyttö edellyttää, että lisävarusteiden sovitin
(22) kiinnitetään käsikäyttöiseen höyrypuhdistimeen (8). Tämä
voidaan suorittaa seuraavasti:
1 Liu’uta sovitin höyrypuhdistimen suulakkeen päälle sovittimen
vapautuskytkimen osoittaessa käsikäyttöisen höyrypuhdistimen
pohjaan päin.
2 Kohdista käsikäyttöisen höyrypuhdistimen kiilaura sovittimessa
olevaan vapautuskytkimeen. Kiinnitä osat yhteen painamalla.
3 Kiinnitä haluamasi lisävaruste sovittimen päähän kohdistamalla
lisävarusteen nuoli sovittimen oikeaan sovittimeen ja kiertämällä
lisävarustetta, kunnes nuoli kohdistuu sovittimen vasempaan
nuoleen.
VAROITUS: Kytke pois päältä ja irrota pistoke ennen suulakkeen
vaihtamista. Suulakkeet ovat erittäin kuumia käytön jälkeen.
Anna suulakkeiden jäähtyä ennen niiden käsittelemistä.
Käsikäyttöisen
höyrypuhdistimen lisävarusteluettelo
• Lisävarusteiden sovitin (22) on kaikkien käsikäyttöisen laitteen
mukana toimitettujen lisävarusteiden kantaosa.
• Sitä voidaan myös käyttää yksistään vaikeasti saavutettavissa olevien
paikkojen tai nurkkien puhdistamiseksi.
• Kulmasuulake (23) on tarkoitettu saniteettikeramiikan (esim. WCpöntöt, hanat ja viemärien kannet) puhdistamiseen. Suuntaa se
suoraan mattojen tai tekstiilien poistettaviin tahroihin ja pidä
puhdasta liinaa tahratulla alueella irtonaisen lian poistamiseksi.
• Lastasuulakkeella (24) voidaan poistaa vaikeat liat tai jää jääkaapista
tai pakastimesta.
• Pyöreällä harjasuulakkeella (25) voidaan poistaa tahrat
huoneenlämpötilassa olevilta pinnoilta, kuten laatoista,
pölykapseleista, peileistä ja ikkunoista.
• Pitkällä harjasuulakkeella (26) poistetaan lika urista ja aukoista.
11
12
Monitoimisuulake (27) kiinnitettynä lisävarusteiden sovittimeen (22)
toimii kaikkien seuraavien lisävarusteiden kantaosana:
• Venyvä monitoimiliina (28) monitoimisuulakkeen peittämiseksi
tekstiilejä ja vuodevaatteita puhdistaessa.
13
Lastasuulake (29) voidaan kiinnittää monitoimisuulakkeeseen
asettamalla lastasuulakkeen takaosassa olevat koukut
monitoimisuulakkeen takana oleviin silmukoihin, kiinnitä sitten
monitoimisuulakkeen etuosa lastasuulakkeen yläosassa olevaan
lukituskytkimeen (kuvan mukaisesti).
• Poista lastasuulake käytön jälkeen pitämällä lukituskytkintä
eteenpäin. Monitoimisuulake tulee kiinnittää lastasuulakkeen
takaosassa oleviin silmukoihin, ohjaa monitoimisuulaketta ylöspäin
ja irrota se silmukoista sen nostamiseksi pois.
14
Lastasuulake on ihanteellinen laatta- ja lasipintojen (esim. ikkunat
tai peilit) puhdistamiseen. Pese ikkunat aloittaen ylhäältä,
painamalla lastaa pintaan ja vetämällä sitä alaspäin suorilla
vedoilla ylhäältä alaspäin. Pyyhi kumiterä ja ikkunan alareuna
kuivaksi kunkin vedon jälkeen. Poista lastasuulake pienien
ikkunoiden kohdalla ja suihkuta höyryä suoraan pintaan. Pyyhi
kosteus pois käyttämällä lastasuulaketta erikseen.
VAROITUS: Älä käytä erittäin kylmään lasiin, sillä äkkinäinen
lämpötilamuutos voi aiheuttaa lasin rikkoutumisen.
• Pieni puhdistuspää (30) pienellä puhdistusliinalla (31) tulee
kiinnittää monitoimisuulakkeeseen (käyttämällä samaa
menetelmää kuin lastasuulakkeen kiinnittämisessä ja
irrottamisessa, katso kuvat vasemmalla ja ylhäällä). Kyseinen
lisävaruste on hyödyllinen laatta- ja lasipintojen, kaappien ja
keittiön ja kylpyhuoneen työtasojen, tekstiilien, verhojen,
sälekaihtimien, tyynyjen ja patjojen puhdistamisessa.
Vesisäiliö
Messinkinen pallopaino (16)
Vesisäiliön sisällä oleva messinkinen pallopaino on kiinnitetty
imuletkun päähän. Pallo on painotettu ja suunniteltu liikkumaan
vapaasti vesisäiliössä tuotteen asennosta riippuen. Pallon on
oltava vedessä niin, että höyryä tuotetaan aina höyrytyspainiketta
painaessa riippumatta käsikäyttöisen höyrypuhdistimen
asennosta.
Vesisäiliön huuhteleminen
Huuhtele vesisäiliö säännöllisesti säiliön pohjalle kertyneiden
jäämien poistamiseksi. Käytä ainoastaan deionisoitua,
demineralisoitua tai tislattua vettä (saatavilla yleisimmistä
valintamyymälöistä) ja asenna täyttökorkki paikoilleen tehokkaan
huuhtelun takaamiseksi.
Käytön jälkeen
Noudata seuraavia ylläpito-ohjeita jokaisen käyttökerran jälkeen.
1 Kytke höyrypuhdistin pois päältä ja irrota se pistorasiasta. Aseta
laite asianmukaiselle pinnalle (esim. laattalattia), jossa
lattiasuulakkeen/-liinan lämpö/kosteus ei vaikuta pintaan. Odota,
kunnes höyrypuhdistin on jäähtynyt kokonaan.
2 Tyhjennä vesisäiliö (14) poistamalla täyttökorkki (11) ja kaatamalla
vesi pois. Anna vesisäiliön sisäosan kuivua ennen kuin asennat
täyttökorkin takaisin paikoilleen.
v
51
Page 52

VC70495MEE Rev4_9225 47507 MEE pump - Jon 25/01/2014 15:13 Page 52
16
Säilytys
Kääri johto kahden johdon säilytyskoukun (4/5) ympärille
kiertämällä ylempää johdon säilytyskoukkua (4) ylöspäin
virtajohdon (10) kiinnittämiseksi paikoilleen.
Aseta kaikki lisävarusteet lisävarustepussiin (32) ja ripusta pussi
ylempään johdon säilytyskoukkuun.
Ylläpito
VAROITUS: Irrota höyrypuhdistin aina verkkovirrasta ennen
ylläpitotoimien aloittamista.
Yleinen ylläpito
Höyrypuhdistin on suunniteltu kestämään normaali päivittäinen
käyttö, se on kuitenkin hyvä pyyhkiä satunnaisesti kostealla liinalla
parhaan säilyvyyden takaamiseksi. Älä käytä voimakkaita
puhdistusaineita.
Liinojen puhdistaminen
Lattialiina (20) ja venyvä monitoimiliina (28) voidaan pestä
pesukoneessa (maks. 30 ºC). Jos liinat ovat erittäin likaisia, liota
liinoja lämpimässä vedessä ja pesuaineessa tai miedossa
tahranpoistoaineessa.
TÄRKEÄÄ: Älä käytä valkaisuainetta tai huuhteluainetta.
Anna liinojen kuivua kokonaan ennen niiden asettamista säilöön.
Voit tilata uusia liinoja ottamalla yhteyttä puhelinpalveluumme.
Lisävarusteiden ylläpito
Epäpuhtaudet ja tukokset tulee poistaa säännöllisesti
lisävarusteista niiden käyttöiän pidentämiseksi.
Ota yhteyttä
Puhelinpalvelu
Mikäli sinulla on laitteen käyttöön liittyviä ongelmia, soita
puhelinpalveluumme. Osaamme todennäköisesti auttaa
ratkaisemaan ongelmat jälleenmyyjiä paremmin.
Pidä tuotteen nimi, malli- ja sarjanumero saatavilla soiton aikana,
jotta voimme käsitellä pyyntösi nopeammin.
Ota meihin yhteyttä
Jos sinulla on kysyttävää tai huomioitavaa, tai jos haluat
hyödyllisiä vinkkejä tuotteiden parhaan tehon saavuttamiseksi, ota
meihin yhteyttä verkossa:
Blogi: www.morphyrichards.co.uk/blog
Facebook: www.facebook.com/morphyrichardsuk
Twitter: www.twitter.com/loveyourmorphy
Verkkosivusto: www.morphyrichards.com
KANSAINVÄLINEN KAHDEN VUODEN TAKUU
Laitteella on kahden vuoden korjaus- ja vaihtotakuu.
On tärkeää säilyttää ostokuitti todisteena ostosta. Niittaa kuitti
tämän käyttöohjeen takakanteen mahdollista myöhempää tarvetta
varten.
Jos laitteeseen tulee vika, huomioi myös seuraavat laitetta
koskevat tiedot. Nämä numerot löytyvät tuotteen pohjasta.
Mallinro.
Sarjanro.
Jokainen Morphy Richards -tuote testataan yksilöllisesti ennen
kuin ne lähtevät tehtaalta. Mikäli laite osoittautuu vialliseksi 28
päivän kuluessa ostosta, laite on palautettava vaihtoa varten
siihen myymälään, josta se on ostettu.
Jos vika ilmenee laitteessa 28 päivän jälkeen 24 kuukauden
kuluessa laitteen ostosta, ota yhteyttä paikalliseen jakelijaan ja
ilmoita tuotteen mallinumero ja sarjanumero tai ilmoita viasta
paikalliselle jakelijalle kirjallisesti johonkin annetuista osoitteista.
Sinua pyydetään palauttamaan tuote (hyvin pakattuna) alla
ilmoitettuun osoitteeseen ostokuitin kopion kera.
Alla mainittuja poikkeuksia lukuun ottamatta (1–9), viallinen laite
korjataan tai vaihdetaan uuteen ja toimitetaan asiakkaalle
tavallisesti 7 työpäivän sisällä sen vastaanottamisesta.
Jos laite jostain syystä joudutaan vaihtamaan uuteen kahden
vuoden takuun aikana, uuden laitteen takuuaika lasketaan laitteen
alkuperäisestä ostopäivästä. Siksi on erittäin tärkeää säilyttää
alkuperäinen ostokuitti tai lasku todisteena laitteen alkuperäisestä
ostopäivästä.
Kahden vuoden takuu pätee vain, jos laitteen käytössä on
noudatettu annettuja ohjeita. Laitteista on esimerkiksi poistettava
niihin kertynyt kalkki, ja suodattimet on puhdistettava ohjeiden
mukaisesti.
Paikallinen jakelija ei takuuehtojen mukaisesti ole velvollinen
korjaamaan tai vaihtamaan tuotteita, jos:
1 Vika on aiheutettu tahallisesti tai se on aiheutunut vääränlaisesta,
huolimattomasta tai valmistajan suositusten vastaisesta käytöstä,
virtapiikeistä, tai vika on syntynyt kuljetuksen aikana.
2 Laitetta on käytetty muulla kuin tuotteen arvokilpeen merkityllä
jännitteellä.
3 Korjaukset on suoritettu muissa kuin valmistajan huoltoliikkeissä tai
valtuutetuissa huoltopisteissä.
4 Laitetta on vuokrattu tai käytetty muussa kuin kotitalouskäytössä.
5 Laite ei ole alkuperäisen ostajan käytössä.
6 Paikallinen jakelija ei ole velvollinen suorittamaan mitä tahansa
huoltoa takuuaikana.
7 Takuu ei kata kulutushyödykkeitä kuten pusseja, suodattimia ja
lasikannuja.
8 Takuu ei kata paristoja ja paristojen vuotamisesta aiheutuneita vikoja.
9 Suodattimia ei ole puhdistettu ja vaihdettu ohjeiden mukaan.
Tämä takuu ei sisällä yllä mainittujen oikeuksien ohella mitään
muita oikeuksia eikä kata välillisiä vahinkoja koskevia vaateita.
Tämä takuu on ylimääräinen etu. Se ei vaikuta lakisääteisiin
oikeuksiisi kuluttajana.
52
Page 53

VC70495MEE Rev4_9225 47507 MEE pump - Jon 25/01/2014 15:13 Page 53
}
WAŻNE INSTRUKCJE DOTYCZĄCE BEZPIECZEŃSTWA
Użytkowanie każdego urządzenia elektrycznego wymaga przestrzegania następujących podstawowych zasad bezpieczeństwa.
Przed rozpoczęciem używania tego urządzenia należy uważnie przeczytać te instrukcje.
• OSTRZEŻENIE: Przed rozpoczęciem wszelkich prac
konserwacyjnych należy odłączyć urządzenie od źródła
zasilania.
• To urządzenie może być używane przez dzieci w wieku od 8 lat oraz
przez osoby o ograniczonych zdolnościach fizycznych,
sensorycznych lub umysłowych bądź nieposiadające
odpowiedniego doświadczenia i wiedzy, pod warunkiem że osoby te
są nadzorowane lub zostały poinstruowane w zakresie bezpiecznej
obsługi urządzenia i rozumieją grożące niebezpieczeństwa.
• Należy dopilnować, aby dzieci nie używały tego urządzenia do
zabawy.
• Dzieci bez nadzoru nie mogą wykonywać czyszczenia i konserwacji
tego urządzenia
Bezpieczeństwo osób
• OSTRZEŻENIE: Nigdy nie należy kierować strumienia pary na
elementy/urządzenia elektryczne. W przypadku wątpliwości,
czy dane urządzenia można czyścić parą, przed rozpoczęciem
odkurzania należy skontaktować się z producentem
urządzeniem w celu uzyskania wskazówek.
• OSTRZEŻENIE: Wtyczki ani przewodu nie wolno dotykać
mokrymi rękami.
• OSTRZEŻENIE: Dysze i narzędzia będą gorące po użyciu.
Przed demontażem należy odczekać, aby części ostygły.
• OSTRZEŻENIE: Nie należy kierować strumienia pary na ludzi
lub zwierzęta. Istnieje niebezpieczeństwo oparzenia.
• OSTRZEŻENIE: Nie wolno używać urządzenia bez założonej
pokrywy wlewu.
• OSTRZEŻENIE: W przypadku zablokowania para będzie
wydostawać się otworami wylotowymi pary.
• Aby uniknąć pożaru, porażenia prądem oraz obrażeń ciała, nie
.
PARA
należy zanurzać przewodu zasilającego, wtyczki ani samego
odkurzacza w wodzie ani w żadnej innej cieczy.
• Po zakończeniu korzystania z urządzenia oraz przed czyszczeniem,
napełnianiem wodą, zmianą akcesoriów lub konserwacją należy
wyjąć wtyczkę z gniazda elektrycznego.
• Jeśli urządzenie jest podłączone do zasilania lub jest gorące, należy
przechowywać je poza zasięgiem dzieci.
Lokalizacja
• Nie należy używać ani przechowywać tego urządzenia na zewnątrz.
• Nie przechowywać urządzenia w pobliżu gorących powierzchni, np.
piekarników ani urządzeń grzewczych.
Przewód zasilający
• OSTRZEŻENIE: W żadnym wypadku nie wolno podłączać do
źródła zasilania uszkodzonego przewodu lub wtyczki. Taki
przewód należy zniszczyć, ponieważ w przypadku podłączenia
do gniazda elektrycznego może stwarzać poważne
zagrożenie.
• Jeśli przewód zasilający ulegnie uszkodzeniu, musi on zostać
wymieniony w autoryzowanym punkcie serwisowym producenta,
co pozwoli uniknąć ewentualnego niebezpieczeństwa.
• Przewód zasilający nie może być naprężony.
v
}
53
Page 54

VC70495MEE Rev4_9225 47507 MEE pump - Jon 25/01/2014 15:13 Page 54
Bezpieczeństwo urządzenia
• OSTRZEŻENIE: Zawsze należy przeprowadzić próbne
czyszczenia w niewidocznym miejscu. Nigdy nie należy
stosować na materiałach nieodpornych na wysoką
temperaturę, takich jak nylon, futro naturalne itp.
• W żaden sposób nie należy modyfikować urządzenia.
• Nigdy nie wolno używać odkurzacza parowego bez wody w
zbiorniku. Zawsze
należy dolewać wody w przypadku dłuższego użytkowania.
• Zbiornik odkurzacza parowego można napełniać wyłącznie
zdejonizowaną, zdemineralizowaną lub destylowaną wodą.
• Urządzenia nie wolno używać, jeśli spadnie, pojawią się widoczne
znaki uszkodzenia lub jeśli przecieka.
Pozostałe uwagi dotyczące bezpieczeństwa
• Woda nie może zawierać żadnych detergentów chemicznych,
perfum, alkoholu, odkamieniacza itp.
• Naprawy urządzeń elektrycznych mogą być dokonywane jedynie
przez wyszkolony personel.
• Naprawy dokonywane przez osoby nieuprawnione mogą
spowodować zagrożenie dla użytkowników.
• Należy używać wyłącznie oryginalnych części zamiennych i
akcesoriów firmy Morphy Richards.
• Nie wolno zostawiać włączonego urządzenia bez nadzoru.
• Ten odkurzacz parowy jest przeznaczony wyłącznie do użytku
domowego. Niewłaściwe użytkowanie lub eksploatacja o
charakterze komercyjnym itp. spowodują utratę gwarancji.
Wymagania elektryczne
• Należy upewnić się, że napięcie podane na tabliczce znamionowej
urządzenia odpowiada napięciu gniazda elektrycznego
zapewniającego prąd przemienny (AC).
• Jeśli wtyczka urządzenia nie pasuje do gniazd elektrycznych w
danym miejscu użytkowania urządzenia, należy wymienić ją na
inną.
• OSTRZEŻENIE: To urządzenie musi być uziemione.
• Jeśli wystąpi konieczność wymiany bezpiecznika 13 A we
wtyczce, należy go wymienić na bezpiecznik 13 A o oznaczeniu
BS1362.
Spis treści
Bezpieczeństwo i ochrona zdrowia 53
Wymagania elektryczne 54
Przegląd produktów/opcje 54
Obsługa urządzenia 55
Podwójna funkcjonalność 55
Pionowe odkurzanie parowe: montaż 55
Używanie w trybie pionowego odkurzania parowego 55
Korzystanie z ręcznego odkurzacza parowego 55
Lista osprzętu do stosowania z ręcznym odkurzaczem parowym 56
Zbiornik na wodę 56
Po użyciu 56
Przechowywanie 56
Konserwacja 56
Kontakt 57
Gwarancja 57
Jak najlepiej wykorzystać zalety nowego
odkurzacza...
WAŻNE: Aby zapobiec powstawaniu kamienia w zbiorniku na
wodę, zbiornik odkurzacza parowego należy napełniać
wyłącznie zdejonizowaną, zdemineralizowaną lub
destylowaną wodą (dostępną w większości uznanych
supermarketów).
Wyposażenie
(1) Uchwyt
(2) Przycisk wytwarzania pary
(3) Uchwyt na przewód
(4) Górny hak przewodu (odwracany)
(5) Dolny hak przewodu (odwracany)
(6) Ręczny przycisk zwalniania
(7) Korpus
(8) Ręczne urządzenie do odkurzania parowego
(9) Przycisk wytwarzania pary
(pod spodem uchwytu ręcznego odkurzacza parowego)
(10) Przewód zasilający
(11) Nakrywka wlewu
(12) Przełącznik zasilania Wł./Wył.
(13) Przyciski zwalniające zbiornika na wodę
(14) Zbiornik na wodę
(15) Kontrolka zasilania
(16) Rura wodna z zamocowaną mosiężną kulką blokującą
(17) Przycisk zwalniający podstawy
(18) Podstawa
(19) Ślizgacz dywanowy
(20) Szmatka do podłogi
(21) Żabka do mocowania szmatki do podłogi
(22) Adapter do akcesoriów
(23) Kątowa złączka do dyszy
(24) Złączka łopatkowa
(25) Złączka okrągłej szczotki
(26) Złączka długiej szczotki
(27) Dysza robocza
(28) Nakładka elastyczna (mocowana do dyszy roboczej)
(29) Przystawka zgarniająca (mocowana do dyszy roboczej)
(30) Minigłowica czyszcząca (mocowana do dyszy roboczej)
(31) Miniszmatka czyszcząca (mocowania do minigłowicy
czyszczącej)
(32) Torba na akcesoria
54
Page 55

VC70495MEE Rev4_9225 47507 MEE pump - Jon 25/01/2014 15:13 Page 55
3
Obsługa urządzenia
WAŻNE: Uwaga: odkurzacz parowy działa na zasadzie
wytwarzania party o podwyższonej temperaturze 115°C. Zawsze
należy przeprowadzić próbne czyszczenia w niewidocznym
miejscu. Nigdy nie należy stosować na obiektach lub
powierzchniach, które nie są odporne na działanie takiej
temperatury ani na delikatnych materiałach takich jak nylon,
tworzywo sztuczne, futro naturalne itp.
W razie wątpliwości należy ostrożnie przeprowadzić próbę na
części materiału, która jest niewidoczna.
Podwójna funkcjonalność
Odkurzacz parowy może z łatwością pracować w dwóch różnych
trybach czyszczenia:
• Pionowy odkurzacz parowy do podłóg i dywanów.
• Ręczny odkurzacz parowy (8) do czyszczenia powierzchni
pionowych lub trudnodostępnych.
Złączki (22-31) można stosować wraz z ręcznym odkurzaczem
parowym.
Pionowe odkurzanie parowe: Montaż
A
Podłączyć uchwyt (1) do korpusu (7).
B
Wkręcić jedną z dostarczonych śrub w otwór w dolnym haku
przewodu (5) i obrócić go aż będzie dobrze zamocowany.
Wkręcić drugą dostarczoną śrubę w boczną krawędź uchwytu (po
przeciwnej stronie dolnego haku przewodu) i obrócić aż będzie
dobrze zamocowany.
UWAGA: Montaż uchwytu jest konieczny jedynie w przypadku
pierwszego montażu urządzenia.
C
Opuścić korpus na podstawę (18) przy użyciu przycisku
zwalniającego podstawy (17) na szyjce podstawy z tyłu elementu, aż
podstawa zatrzaśnie się na swoim miejscu.
D
Włożyć dyszę wylotu pary na dole ręcznego odkurzacza parowego
(8) do adaptera na dole przestrzeni z przodu korpusu.
Dopchnąć mocno odkurzacz parowy do przestrzeni w korpusie, aż
zatrzaśnie się na swoim miejscu.
E
Nałożyć szmatkę podłogową (20) na podstawę i zacisnąć tylną
żabkę.
1
2
Używanie w trybie pionowego odkurzania
parowego
WAŻNE: Przed użyciem należy starannie zamieść twarde
podłogi oraz odkurzyć podłogi pokryte dywanem lub
wykładziną. Jednak zalecamy, aby nie używać odkurzacza
parowego w następujących sytuacjach:
• na twardych drewnianych podłogach lub na odkrytych
drewnianych powierzchniach (drewno może wchłaniać wilgoć i
może dojść do zniekształcenia podłogi).
• na uszkodzonych twardych podłogach lub na podłogach z
widocznymi szczelinami (może dojść do wchłaniania wilgoci i
zniekształcenia podłogi).
Nie należy również pozostawiać mopa zbyt długo w jednym
miejscu, ponieważ zbyt długie działanie wysokiej temperatury
może spowodować uszkodzenie dywanu lub podłogi z laminatu.
Ścisnąć przycisk (13) na boku zbiornika na wodę (14), aby odłączyć
go od ręcznego odkurzacza parowego (8).
Zdjąć pokrywę wlewu (11), przekręcając ją
w lewo do położenia odblokowania, a następnie usunąć ją.
Napełnić zbiornik na wodę.
WAŻNE: Aby zapobiec powstawaniu kamienia w zbiorniku na wodę,
zbiornik odkurzacza parowego należy napełniać wyłącznie
zdejonizowaną, zdemineralizowaną lub destylowaną wodą (dostępną
w większości uznanych supermarketów). Wszelkie problemy
spowodowane kamieniem spowodują unieważnienie gwarancji.
Założyć pokrywę wlewu i obrócić ją w prawo do położenia
zablokowania.
Zamontować zbiornik na wodę.
4
Założyć szmatkę podłogową (20) na podstawę (18), zabezpieczając
ją poprzez zaciśnięcie żabki (21).
5
Obrócić górny hak przewodu (4), aby szybko zwolnić przewód
zasilający (10).
Zamocować przewód zasilający w uchwycie przewodu (3).
6
OSTRZEŻENIE: Przed włączeniem należy upewnić się, że
podstawa znajduje się w bezpiecznej odległości od ludzi i
zwierząt.
Podłączyć odkurzacz parowy do gniazda zasilającego i włączyć
przełącznik zasilania Wł./Wył. (12). Zaświeci się kontrolka zasilania
(15) i w ciągu około 30 sekund para będzie gotowa do użycia (po
naciśnięciu przycisku pary (2)).
7
Ustawić podstawę (18) na podłodze. Docisnąć stopą podstawę i
odchylić korpus (7) do tyłu.
Aby zapewnić ciągłe generowanie pary, należy nacisnąć i
przytrzymać przycisk pary (2) i jednocześnie przesuwać odkurzacz
na podłodze do przodu i do tyłu. Aby nie dopuścić do nadmiernego
zwilżenia podłogi, należy naciskać przycisk pary w sposób
przerywany (szczególnie na twardych podłogach).
8
W przypadku czyszczenia dywanu należy umieścić podstawę (18) ze
szmatką do podłogi (20) umieszczoną na ślizgaczu dywanowym (19),
aby ułatwić przesuwanie podstawy po dywanie.
UWAGA: Ślizgacz dywanowy celowo jest luźno zamocowany na
podstawie.
Korzystanie z ręcznego odkurzacza parowego
9
Ta funkcja idealnie nadaje się do czyszczenia pionowych oraz
trudnodostępnych powierzchni.
Odłączyć ręczny odkurzacz parowy (8) od korpusu (7), przesuwając
ręczny przycisk zwalniania w górę (6) z przodu korpusu.
Pociągnąć ręczny odkurzacz do góry i odłączyć go od korpusu.
10
Aby móc skorzystać z wszystkich akcesoriów, najpierw adapter
akcesoriów (22) należy zamocować do ręcznego odkurzacza parowego
(8). Należy to zrobić w następujący sposób:
1 Nasunąć adapter na dyszę odkurzacza parowego, tak aby zatrzask
zwalniający na adapterze był skierowany w stronę podstawy ręcznego
odkurzacza parowego.
2 Wyrównać rowek na ręcznym odkurzaczu parowym z zatrzaskiem
zwalniającym na adapterze. Docisnąć te elementy ze sobą i zatrzasnąć.
3 Przymocować wymaganą nakładkę do adaptera, dopasowując
}
55
Page 56

VC70495MEE Rev4_9225 47507 MEE pump - Jon 25/01/2014 15:13 Page 56
strzałkę na nakładce ze strzałką po prawej stronie na adapterze i
skręcając nakładkę, tak aby strzałka wyrównała się ze strzałką po
lewej stronie adaptera.
OSTRZEŻENIE: Wyłączyć urządzenie i odłączyć od źródła
zasilania przez wymianą dysz. Dysze po użyciu będą bardzo
gorące. Przed rozpoczęciem czynności obsługowych należy
odczekać, aż dysze ostygną.
Lista nasadek do użycia z ręcznym
odkurzaczem parowym
• Adapter akcesoriów (22) – ta nasadka jest podstawową złączką
umożliwiającą zamocowanie wszystkich ręcznych akcesoriów
dostarczonych z tym produktem.
• Może być ona również stosowana samodzielnie do czyszczenia
trudnodostępnych miejsc lub szczelin.
• Kątowa złączka do dyszy (23) umożliwia czyszczenie muszli
klozetowych, kranów lub kratek odpływowych. Należy skierować ją
bezpośrednio na plamy na dywanie lub tapicerce, jednocześnie
przytrzymując czystą szmatkę przy zabrudzonym miejscu w celu
usunięcia luźnych zabrudzeń.
• Złączka łopatkowa (24) umożliwia usuwanie uporczywych zabrudzeń
lub pomaga rozmrozić chłodziarkę lub zamrażarkę.
• Złączka okrągłej szczotki (25) umożliwia usuwanie plam na
powierzchniach o temperaturze pokojowej, np. na płytkach,
obręczach kół, lusterkach oraz oknach.
• Złączka długiej szczotki (26) umożliwia usuwanie zabrudzeń z
zagłębień i szczelin.
12
Dysza robocza (27) po zamocowaniu do adaptera akcesoriów (22)
jest podstawową nasadką do zamocowania wszystkich
następujących akcesoriów:
Nakładki elastycznej (28) do zabezpieczania dyszy roboczej
podczas czyszczenia tapicerki i pościeli.
13
Przystawkę zgarniającą (29) można przymocować do dyszy
roboczej, umieszczając haki z tyłu dyszy przystawki zgarniającej w
otworach znajdujących się z tyłu dyszy roboczej, a następnie
mocując przód dyszy roboczej w zacisku na górze dyszy
zgarniającej (patrz ilustracja).
• Zdjąć po użyciu przystawkę zgarniającą, przytrzymując zacisk z
przodu. Dysza robocza nadal powinna być zamocowana do
otworów z tyłu dyszy zgarniającej. Następnie należy odchylić
dyszę roboczą do góry i odczepić ją od otworów.
14
Dysza zgarniająca idealnie nadaje się do czyszczenia obszarów
pokrytych płytkami ceramicznymi lub szklanymi lub panelami
lustrzanymi. Aby wyczyścić okna, należy rozpocząć czyszczenie
od góry, docisnąć przystawkę zgarniającą i pociągnąć płynnym,
prostym ruchem w dół. Po każdym ruchu wytrzyj do sucha
gumowe pióro i dolną krawędź okna. W przypadku małych paneli
okiennych należy zdjąć przystawkę zgarniającą i nakierować parę
bezpośrednio na powierzchnię. Przystawkę zgarniającą należy
użyć oddzielnie do usunięcia wilgoci.
OSTRZEŻENIE: Nie należy tego stosować na bardzo zimnych
szybach, ponieważ nagła zmiana temperatury może
spowodować ich pęknięcie.
• Minigłowica czyszcząca (30) z założoną na dyszy roboczej
miniszmatką czyszczącą (31) (przy użyciu tej samej metody jak w
przypadku mocowania i zdejmowania dyszy zgarniającej, jak
56
11
pokazano u góry po lewej stronie). Ten element jest przydatny do
czyszczenia powierzchni pokrytych płytkami lub szkłem, szafek
oraz blatów w kuchniach i łazienkach, jak również do czyszczenia
tapicerki, zasłon, firan, poduszek i materacy.
Zbiornik na wodę
Mosiężna kulka blokująca (16)
Mosiężna kulka blokująca w zbiorniku na wodę jest
przymocowana do końca wężyka ssącego. Kulka jest
odpowiednio wyważona i jej zadaniem jest swobodne
przemieszczanie się w zbiorniku na wodę, w zależności od
położenia produktu. Kulka musi znajdować się w wodzie, aby
możliwe było wytwarzanie pary po naciśnięciu przycisku pary, bez
względu na położenie ręcznego odkurzacza parowego.
Płukanie zbiornika na wodę
Należy regularnie przepłukiwać zbiornik na wodę, aby usunąć z
niego osady gromadzące się na dnie. Należy używać wyłącznie
zdejonizowanej, zdemineralizowanej lub destylowanej wody
(dostępnej w większości dużych supermarketów) oraz założyć
pokrywę wlewu, a następnie mocno potrząsnąć zbiornikiem, aby
go wypłukać.
Po użyciu
Po każdym korzystaniu z produktu należy wykonać dwie niżej
opisane czynności konserwacyjne.
1 Wyłączyć odkurzacz i odłączyć go od gniazda elektrycznego.
Należy ustawić go na odpowiedniej powierzchni (np. na posadzce
z płytek), gdzie ciepło/wilgoć dyszy podłogowej/szmatki nie
spowodują uszkodzenia powierzchni. Należy odczekać, aż
odkurzacz całkowicie ostygnie.
2 Opróżnić zbiornik na wodę (14), odkręcając korek wlewu (11) i
wylać wodę. Przed założeniem pokrywy wlewu należy odczekać,
aż wnętrze zbiornika wyschnie.
Przechowywanie
Owinąć przewód wokół dwóch haków przewodu (4/5), ustawiając
górny hak (4) w górnym położeniu, aby odpowiednio zabezpieczyć
przewód zasilania (10).
Umieścić wszystkie akcesoria w torbie na akcesoria (32) i
powiesić torbę na górnym haku przewodu.
16
Konserwacja
OSTRZEŻENIE: Przed wszelkimi procedurami
konserwacyjnymi zawsze należy odłączać odkurzacz parowy
od źródła zasilania.
Ogólne czynności konserwacyjne
Odkurzacz został zaprojektowany tak, aby wytrzymał codzienne
użytkowanie, ale przetarcie go od czasu do czasu wilgotną
szmatką pozwoli utrzymać go we właściwym stanie. Nie należy
używać ściernych środków czyszczących.
Czyszczenie szmatki
Szmatka do podłogi (20) oraz nakładka elastyczna (28) mogą być
myte wyłącznie mechanicznie (maks. 30°C). W przypadku
mocnego zabrudzenia należy namoczyć szmatki w ciepłej wodzie
z detergentem lub łagodnym odplamiaczem.
WAŻNE: Nie należy używać wybielacza ani płynu
Page 57

VC70495MEE Rev4_9225 47507 MEE pump - Jon 25/01/2014 15:13 Page 57
zmiękczającego do tkanin.
Przez schowaniem należy odczekać aż materiał całkowicie
wyschnie.
Aby zakupić dodatkowym materiał, należy skontaktować się z
naszą infolinią.
Konserwacja przystawek
Aby zapewnić długotrwałą eksploatację przystawek, należy
regularnie usuwać z nich brud i wszelkie zanieczyszczenia.
Kontakt
Infolinia
W przypadku problemów z urządzeniem prosimy o kontakt z
naszą infolinią. Będziemy w stanie zapewnić lepszą pomoc i
doradztwo niż sklep, w którym zakupiono produkt.
Należy przygotować nazwę produktu, numer modelu oraz numer
seryjny — podanie tych danych podczas rozmowy pomoże nam
szybciej rozwiązać problem.
Porozmawiaj z nami
W przypadku jakichkolwiek pytań lub komentarzy lub w celu
uzyskania wspaniałych porad umożliwiających pełne
wykorzystanie urządzenia, zapraszamy do kontaktu online:
Blog: www.morphyrichards.co.uk/blog
Facebook: www.facebook.com/morphyrichardsuk
Twitter: www.twitter.com/loveyourmorphy
Witryna internetowa: www.morphyrichards.com
DWULETNIA GWARANCJA
Niniejsze urządzenie jest objęte dwuletnią gwarancją,
upoważniającą do naprawy lub wymiany.
Zachowaj paragon ze sklepu jako dowód zakupu. Aby móc
skorzystaç z niego w przyszłości, przymocuj swój paragon do
tylnej okładki tej instrukcji za pomocą zszywacza.
Jeśli urządzenie okaże się wadliwe, prosimy podaç następujące
informacje. Informacje umieszczone poniżej znajdują się na
podstawie obudowy urządzenia.
Model
Numer seryjny
Przed opuszczeniem fabryki wszystkie produkty Morphy
Richards są indywidualnie testowane. Jeżeli urządzenie okaże
się wadliwe, należy je zwróciç do punktu sprzedaży w ciągu 28
dni od daty zakupu, w celu wymiany.
Jeśli urządzenie okaże się wadliwe po 28 dniach, lecz przed
upływem 24 miesięcy od daty zakupu, należy skontaktowaç się
z lokalnym dystrybutorem, podając model i numer seryjny
urządzenia, lub napisaç do lokalnego dystrybutora, wysyłając
list na podany adres.
Zostaniesz poproszony o dostarczenie, na poniższy adres,
urządzenia (w odpowiednim opakowaniu zabezpieczającym)
wraz z kopią dowodu zakupu.
Jeśli powód wystąpienia wady urządzenia jest inny niż podane
poniżej (1-9), zostanie ono naprawione lub wymienione oraz
odesłane w ciągu 7 dni roboczych od daty otrzymania.
Jeśli z jakiegoś powodu urządzenie zostanie wymienione w
ciągu 2 lat gwarancji, gwarancja nowego urządzenia będzie
liczona od momentu nabycia oryginalnego produktu. Dlatego
też należy zachowaç oryginalny paragon lub fakturę z
umieszczoną datą zakupu urządzenia.
Aby dwuletnia gwarancja obowiązywała, urządzenie musi byç
użytkowane zgodnie z instrukcją eksploatacji wydaną przez
producenta. Na przykład niektóre urządzenia muszą byç
regularnie odkamieniane, a filtry należy utrzymywaç w czystości
według zaleceƒ producenta.
Morphy Richards lub lokalny dystrybutor nie dokona naprawy
ani wymiany urządzenia w ramach gwarancji, jeśli:
1 Wada została spowodowana lub jest związana z przypadkową,
niewłaściwą, niedbałą lub niezgodną z zaleceniami producenta
eksploatacją urządzenia albo jest wynikiem skoków napięcia lub
niewłaściwego transportu.
2 Urządzenie zostało podłączone do źródła zasilania o innym
napięciu niż oznaczono na urządzeniu.
3 Dokonano prób naprawy urządzenia przez osoby nienależące do
personelu serwisowego firmy Morphy Richards (lub
autoryzowanego sprzedawcy urządzenia).
4 Urządzenie było przedmiotem wypożyczania lub było użytkowane
w celach innych niż przewidziane w gospodarstwie domowym.
5 Urządzenie pochodzi z wtórnego rynku.
6 Firma Morphy Richards lub lokalny dystrybutor nie wykonuje, w
ramach niniejszej gwarancji, żadnych czynności serwisowych.
7 Gwarancja nie obejmuje materiałów eksploatacyjnych, np.
worków, filtrów czy szklanych karafek.
8 Baterie oraz szkody powstałe w wyniku ich wycieku nie podlegają
gwarancji.
9 Baterie oraz szkody powstałe w wyniku ich wycieku nie podlegają
gwarancji.
Niniejsza gwarancja nie nadaje żadnych praw innych niż te
wyraźnie określone powyżej oraz nie pokrywa roszczeƒ
związanych ze stratami lub uszkodzeniami wynikającymi z
eksploatacji urządzenia. Niniejsza gwarancja stanowi
dodatkową korzyśç i nie narusza praw konsumenckich
użytkownika.
}
57
Page 58

VC70495MEE Rev4_9225 47507 MEE pump - Jon 25/01/2014 15:13 Page 58
≈
ВАЖНЫЕ ИНСТРУКЦИИ ПО ОБЕСПЕЧЕНИЮ БЕЗОПАСНОСТИ
При пользовании любым электроприбором необходимо соблюдать элементарную осторожность.
Внимательно прочитайте следующие правила перед использованием прибора.
• ПРЕДУПРЕЖДЕНИЕ: Отключайте прибор от сети
перед проведением какого-либо обслуживания.
• Этот прибор может использоваться детьми старше 8 лет,
а также лицами с ограниченными физическими,
сенсорными и умственными способностями либо
недостаточным опытом и знаниями при условии, что они
находятся под присмотром или получили указания
относительно безопасного использования прибора и
осознают сопутствующие опасности.
• Не позволяйте детям играть с прибором.
• Не позволяйте детям без присмотра выполнять очистку и
обслуживание прибора.
Личная безопасность
• ПРЕДУПРЕЖДЕНИЕ. Никогда не направляйте пар на
электрические компоненты и (или) фитинги. Если вы
сомневаетесь, подходит ли пар для очистки прибора, перед
его очисткой свяжитесь с производителем прибора для
получения рекомендаций.
• ПРЕДУПРЕЖДЕНИЕ. Не прикасайтесь к вилке или
кабелю мокрыми руками.
• ПРЕДУПРЕЖДЕНИЕ. Во время работы насадки и
инструменты нагреваются. Перед снятием дайте им
остыть.
• ПРЕДУПРЕЖДЕНИЕ. Не направляйте струю пара на
людей или животных. Опасность ошпаривания.
ОТПАРИВАНИЕ
• ПРЕДУПРЕЖДЕНИЕ. Не используйте прибор без пробки
загрузочного отверстия.
• ПРЕДУПРЕЖДЕНИЕ. В случае блокирования пар будет
выходить из паровых вентиляционных отверстий.
• Во избежание пожара, поражения электрическим током и
получения травм не погружайте провод, штепсельную вилку
и сам прибор в воду или другие жидкости.
• После использования, перед чисткой или обслуживанием
прибора, заправкой или заменой вспомогательных
компонентов, он должен быть выключен из розетки.
• Храните прибор в недоступном для детей месте, если он
остывает или находится под напряжением.
Размещение
• Нельзя использовать или хранить данный прибор вне
помещений.
• Не храните прибор вблизи горячих поверхностей, таких как
духовки и нагревательные приборы.
Шнур питания
• ПРЕДУПРЕЖДЕНИЕ. Запрещается подключать к розетке
поврежденный шнур питания или отрезанный кусок
шнура питания с вилкой. Необходимо привести шнур в
полную негодность, так как поврежденный шнур
представляет опасность при подключении к розетке.
• Если поврежден шнур питания, то, во избежание опасности,
для его замены следует обратиться к производителю, в его
сервисный центр или к квалифицированному специалисту.
• Не допускайте натяжения шнура питания.
58
Page 59

VC70495MEE Rev4_9225 47507 MEE pump - Jon 25/01/2014 15:13 Page 59
Меры безопасности
• ПРЕДУПРЕЖДЕНИЕ. Сначала всегда проверяйте
результат на небольшом незаметном участке обивки.
Никогда не используйте для очистки материалов,
которые не могут выдержать воздействия высоких
температур, например, дралона, натурального меха и т. п.
• Запрещается вносить изменения в конструкцию
пароочистителя.
• Никогда не используйте пароочиститель без воды в
резервуаре. Всегда
заполняйте водой при длительном использовании.
• Резервуар пароочистителя можно заполнять только
деионизированной, деминерализованной или
дистиллированной водой.
• Нельзя использовать прибор, если он падал, если на нем
есть видимые признаки повреждения, или если он протекает.
Другие меры предосторожности
• Не используйте в воде чистящие средства, средства для
удаления накипи, парфюмерные товары, спиртосодержащие
жидкости и т. п.
• Ремонт электроприборов должен производиться только
специалистами.
• Эксплуатация прибора, отремонтированного
неквалифицированным персоналом, может представлять
опасность для пользователей.
• Используйте только оригинальные запасные части и
принадлежности Morphy Richards.
• Запрещается оставлять прибор во включенном состоянии
без присмотра.
• Данный пароочиститель предназначен только для домашнего
пользования. Неправильное применение, использование в
коммерческих или иных целях аннулирует гарантию.
Электротехнические требования
• Убедитесь в том, что тип электроснабжения, указанный на
табличке с паспортными данными
прибора соответствует типу электроснабжения в вашем
доме (переменный ток).
• Если вилка сетевого провода прибора не подходит к
домашним электрическим розеткам, необходимо ее заменить
вилкой соответствующего образца.
• ПРЕДУПРЕЖДЕНИЕ. Данный прибор должен быть
заземлён.
• Если необходимо заменить предохранитель в вилке,
используйте предохранитель BS1362 на 13 А.
Содержание
Меры безопасности 58
Электротехнические требования 59
Обзор прибора/компоненты прибора 59
Эксплуатация прибора 60
Два режима эксплуатации 60
Вертикальная подача пара: сборка 60
Использование в режиме вертикального пароочистителя 60
Использование в режиме ручного пароочистителя 61
Список насадок для ручного пароочистителя 61
Резервуар для воды 61
После использования 62
Хранение 62
Уход 62
Контакты 62
Гарантия 62
Советы по оптимальной работе вашего
нового прибора для уборки...
ВНИМАНИЕ: Для предотвращения образования накипи в
резервуаре для водой заполняйте его только
деионизированной, деминерализованной или
дистиллированной водой (продается в большинстве
крупных магазинов).
Компоненты прибора
(1) Ручка
(2) Кнопка подачи пара
(3) Держатель шнура
(4) Верхний крюк для фиксации шнура (вращающийся)
(5) Нижний крюк для фиксации шнура
(афиксированный)
(6) Кнопка снятия ручного пароочистителя
(7) Корпус
(8) Ручной пароочиститель
(9) Кнопка подачи пара
(на нижней стороне ручки ручного пароочистителя)
(10) Шнур питания
(11) Пробка загрузочного отверстия
(12) Выключатель питания
(13) Кнопки снятия резервуара для воды
(14) Резервуар для воды
(15) Световой индикатор питания
(16) Водогрейная трубка с латунным шаровым грузилом
(17) Кнопка снятия напольного блока
(18) Напольный блок
(19) Ковровый глиссер
(20) Ткань для мытья пола
≈
59
Page 60

VC70495MEE Rev4_9225 47507 MEE pump - Jon 25/01/2014 15:13 Page 60
(21) Затяжной захват для крепления ткани
для мытья пола
(22) Адаптер для насадок
(23) Угловая насадка
(24) Насадка-шпатель
(25) Круглая щетка-насадка
(26) Длинная щетка-насадка
(27) Многоцелевая насадка
(28) Эластичная многоцелевая ткань (крепится к
многоцелевой насадке)
(29) Резиновая щетка-насадка (крепится к многоцелевой
насадке)
(30) Малая очищающая головка (крепится к
многоцелевой насадке)
(31) Малая очищающая ткань (крепится к малой
очищающей головке)
(32) Мешок для насадок
Эксплуатация прибора
ВНИМАНИЕ! Пожалуйста, запомните, что принцип работы
пароочистителя состоит в выбрасывании пара при
повышенной температуре 115oC. Сначала всегда проверяйте
результат на небольшом незаметном участке обивки. Никогда
не используйте его для предметов или поверхностей,
которые не смогут выдержать воздействия такой
температуры: тонких материалов, дралона, пластика,
натурального меха и т.п.
В случае сомнений внимательно проверьте на кусочке
материала, где небольшие отметины будут незаметны.
Два режима эксплуатации
Ваш пароочиститель можно использовать в двух различных
режимах:
• Вертикальный пароочиститель для пола и ковров.
• Ручной пароочиститель (8) для очистки вертикальных или
труднодоступных поверхностей.
Насадки (22-31) можно использовать на ручном
пароочистителе.
Вертикальная подача пара: Сборка
A
Вставьте ручку (1) в корпус (7).
B
Вставьте один из винтов (в комплекте) в отверстие в нижнем
крюке для фиксации шнура (5) и заверните его до упора.
Вставьте другой винт (в комплекте) в боковую часть ручки
(на противоположной стороне от нижнего крюка для
фиксации шнура) и заверните его до упора.
ПРИМЕЧАНИЕ. Ручку нужно устанавливать только при
первой сборке.
C
Опустите корпус на напольный блок (18) (кнопка снятия
напольного блока (17) на шейке напольного блока должна
быть обращена к задней части собранного прибора) до
щелчка.
D
Вставьте насадку для вывода пара в нижней части ручного
пароочистителя (8) в адаптер в нижней части углубления в
передней части корпуса.
1
2
Установите пароочиститель в углубление в корпусе, нажав до
щелчка.
E
Закрепите ткань для мытья пола (20) на напольном блоке и
затяните захват в задней части.
Использование в режиме вертикального
пароочистителя
ВНИМАНИЕ: Перед использованием полы следует
тщательно подмести, а ковры следует очистить
пылесосом в сухом режиме. Мы не рекомендуем
использовать пароочиститель на следующих
поверхностях:
• деревянные полы или любые открытые деревянные
поверхности (дерево впитывает влагу, что может стать
результатом деформации поверхности).
• поврежденные полы или неплотно подогнанные полы
(они могут впитывать влагу, что может стать результатом
деформации поверхности).
Кроме того, не держите швабру в одном месте в течение
длительного периода, так как постоянное воздействие
тепла может привести к повреждению ковров и
ламината.
3
Зажмите кнопки (13) на боковой части резервуара для воды
(14), чтобы снять его с ручного пароочистителя (8).
Снимите пробку загрузочного отверстия (11), повернув ее
против часовой стрелки в положение «unlock», затем снимите
ее.
Заполните резервуар для воды.
ВНИМАНИЕ! Для предотвращения образования накипи в
резервуаре для водой заполняйте его только
деионизированной, деминерализованной или
дистиллированной водой (продается в большинстве крупных
магазинов). Любые проблемы, связанные с накипью,
аннулируют гарантию на продукт.
Установите пробку загрузочного отверстия и поверните ее по
часовой стрелке в положение «lock».
Снова присоедините резервуар для воды.
4
Закрепите ткань для мытья пола (20) на напольном блоке
(18), затянув захват в задней части (21).
5
Поверните верхний крюк для фиксации шнура (4), чтобы
быстро снять шнур питания (10).
Закрепите шнур питания в держателе шнура (3).
6
ПРЕДУПРЕЖДЕНИЕ: Перед включением убедитесь, что
напольный блок расположен на безопасном расстоянии
от людей или животных.
Подключите шнур питания к розетке электропитания и
включите пароочиститель с помощью переключателя
питания (12). Индикатор питания (15) загорится, спустя
примерно 30 секунд пар будет подготовлен к подаче (при
нажатии кнопки подачи пара (2)).
7
Поместите напольный блок (18) на пол. Прижмите напольный
блок к полу ногой и наклоните корпус (7) назад.
Для непрерывной подачи пара нажмите и удерживайте
кнопку подачи пара (2), медленно перемещая очиститель
60
Page 61

VC70495MEE Rev4_9225 47507 MEE pump - Jon 25/01/2014 15:13 Page 61
взад и вперед по полу. Чтобы предотвратить переувлажнение
пола, используйте кнопку подачи пара с перерывами
(особенно при обработке твердых полов).
8
При очистке ковров поместите напольный блок (18) с
закрепленной тканью для мытья пола (20) в ковровый
глиссер (19) — это упростит перемещение напольного блока
по ковру.
ПРИМЕЧАНИЕ. Ковровый глиссер крепится на напольном
блоке свободно, без жесткой фиксации.
Использование в режиме ручного
пароочистителя
9
Данный режим идеально подходит для очистки вертикальных
или труднодоступных поверхностей.
Отделите ручной пароочиститель (8) от корпуса (7), сдвинув
кнопку снятия ручного пароочистителя (6) на передней части
корпуса в верхнем направлении.
Извлеките ручной пароочиститель из корпуса в верхнем
направлении.
10
Перед использованием насадок необходимо установить
адаптер для насадок (22) на ручной пароочиститель (8). Для
этого выполните следующие действия:
1 Установите адаптер на сопло пароочистителя, защелка
адаптера должна быть при этом ориентирована на основание
ручного пароочистителя.
2 Совместите паз на ручном пароочистителе с защелкой
адаптера. Установите и зафиксируйте адаптер.
3 Прикрепите нужную насадку к концу адаптера, совместив
стрелку на насадке с правой стрелкой на адаптере, поверните
насадку так, чтобы стрелка совпала с левой стрелкой на
адаптере.
ПРЕДУПРЕЖДЕНИЕ. Выключайте прибор и отключайте его
от сети перед сменой насадок. В процессе использования
насадки сильно нагреваются. После окончания работы
дайте им остыть.
Список насадок для ручного
пароочистителя
• Адаптер для насадок (22) — данная насадка является
основной насадкой для всех входящих в комплект насадок для
использования в ручном режиме.
• Также ее можно использовать отдельно для очистки
труднодоступных или узких мест.
• Угловая насадка (23) для очистки сантехники, например
унитазов, кранов или канализационных люков. Направьте ее
непосредственно на удаляемые пятна на ковре или обивке,
захватывая отсоединившуюся грязь возле обрабатываемой
области чистой тканью.
• Насадка-шпатель (24) для удаления твердых отложений или
ускорения разморозки холодильника или морозильника.
• Круглая щетка-насадка (25) для удаления пятен с поверхностей
при комнатной температуре (например, с плитки, колесных
колпаков, зеркал и окон).
• Длинная щетка-насадка (26) для удаления грязи из пазов и
щелей.
11
12
Многоцелевая насадка (27) крепится на адаптер для насадок
(22) и служит основой для крепления следующих насадок:
• Эластичная многоцелевая ткань (28) закрывает
многоцелевую насадку при чистке мягкой мебели и
постельных принадлежностей.
13
Резиновая щетка-насадка (29) крепится к многоцелевой
насадке путем вставки крюков в задней части сопла насадки
в петли на задней части многоцелевой насадки, после чего
передняя часть многоцелевой насадки крепится в
фиксирующей скобе на верхней части сопла насадки (см.
изображение).
• Снимите резиновую щетку-насадку после использования,
нажав фиксирующую скобу вперед. Многоцелевая насадка
по-прежнему должна быть закреплена в петлях на задней
части сопла насадки. Поверните многоцелевую насадку
вверх и снимите ее с петель.
14
Резиновая щетка-насадка идеально подходит для чистки
кафельной плитки или стеклянных поверхностей, например
окон или зеркальных панелей. Чистку окон следует начинать
с самого верха, прижимая резиновую щетку-насадку к
поверхности и сдвигая ее прямыми движениями сверху вниз.
Вытирайте резиновую лопатку и нижний край окна насухо
после каждого прохода. При чистке небольших оконных
панелей снимите резиновую щетку-насадку и выпустите пар
непосредственно на поверхность. Используйте резиновую
щетку-насадку отдельно, чтобы удалить влагу.
ПРЕДУПРЕЖДЕНИЕ. не используйте для мытья очень
холодного стекла, поскольку от внезапного
температурного перепада стекло может лопнуть.
• Малая очищающая головка (30) с малой очищающей тканью
(31) крепится к многоцелевой насадке (идентично резиновой
щетке-насадке, см. схемы выше и слева). Эта насадка
используется для чистки кафельной плитки или стеклянных
поверхностей, шкафов и столешниц на кухнях и в ванных
комнатах, а также для чистки обивки, штор, жалюзи,
подушек и матрасов.
Резервуар для воды
Латунное шаровое грузило (16)
Латунное шаровое грузило внутри резервуара для воды
закреплено на конце всасывающего шланга. Вес и
конструкция грузила позволяют ему свободно перемещаться
внутри резервуара для воды в зависимости от положения
продукта. Грузило должно оставаться в воде — это позволит
генерировать пар при нажатии кнопки подачи пара
независимо от положения ручного пароочистителя.
Ополаскивание резервуара для воды
Регулярно промывайте резервуар для воды, чтобы удалить
отложения, скопившиеся в нижней части резервуара. Для
эффективного ополаскивания установите пробку
загрузочного отверстия и используйте только
деионизированную, деминерализованную или
дистиллированную воду (продается в большинстве крупных
магазинов).
≈
61
Page 62

VC70495MEE Rev4_9225 47507 MEE pump - Jon 25/01/2014 15:13 Page 62
После использования
После каждого использования следует выполнить следующие
действия.
1 Выключите очиститель и отсоедините от электрической
розетки. Немедленно разместите его на поверхности,
устойчивой к остаточному теплу и влаге на насадках/ткани
(например, на кафельном полу). Подождите, пока очиститель
полностью остынет.
2 Слейте воду из резервуара для воды (14), сняв пробку
загрузочного отверстия (11). Перед установкой пробки
загрузочного отверстия на место просушите резервуар для
воды.
Хранение
Намотайте шнур на крюки для фиксации шнура (4/5), вращая
верхний крюк (4) в верхнем направлении, чтобы
зафиксировать шнур питания (10).
Поместите все насадки в мешок (32) и подвесьте мешок на
верхний крюк для фиксации шнура.@09-HeaderStyle-CE:
Уход
ПРЕДУПРЕЖДЕНИЕ. Всегда отключайте пароочиститель
от сети до проведения обслуживания.
Общее обслуживание
Ваш пароочиститель предназначен для нормальной
ежедневной эксплуатации. Время от времени протирайте
поверхность пароочистителя влажной тканью, чтобы он
сохранял хороший внешний вид. Запрещается использовать
для очистки абразивные чистящие средства.
Очистка ткани
Ткань для пола (20) и эластичную многоцелевую ткань (28)
можно стирать в машине (при температуре не выше 30 C). В
случае сильного загрязнения замочите ткань в теплой воде с
моющим средством или мягким пятновыводителем.
ВНИМАНИЕ: Не используйте отбеливатель или
кондиционер для белья.
Ткани должны полностью высохнуть — только после этого их
можно убрать на хранение.
Чтобы приобрести новые ткани, обратитесь в нашу службу
поддержки.
Обслуживание насадок
Грязь и отложения на насадках следует регулярно удалять —
это позволит продлить срок эксплуатации насадок.
62
16
Контакты
Служба поддержки
При возникновении проблем с прибором звоните в службу
поддержки, поскольку мы, скорее всего, сможем оказать вам
более эффективную помощь, нежели магазин, где вы
приобрели прибор.
При обращении в службу поддержки нужно указать название
изделия, номер модели и серийный номер. Эта информация
позволит нам быстрее обработать ваш запрос.
Поговорите с нами
Если у вас возникли вопросы и комментарии или вы хотите
получить развернутые советы, позволяющие с максимальной
эффективностью использовать приобретенные вами
приборы, обращайтесь к нам через Интернет:
Блог: www.morphyrichards.co.uk/blog
Facebook: www.facebook.com/morphyrichardsuk
Twitter: www.twitter.com/loveyourmorphy
Веб-сайт: www.morphyrichards.com
ПРЕДОСТАВЛЯЕМАЯ ДВУХЛЕТНЯЯ
ГАРАНТИЯ
Очень важно сохранять товарный чек,который является
подтверждением покупки.Cоветуем прикрепить
стэплеромтоварный чек к задней обложке данного
руководства (к гарантийному талону).
Все изделия MorphyRichards перед отправкой с завода
проходят индивидуальную проверку.
Гарантийный срок начинается со дня покупки и действует в
течение 24 месяцев (2 года). Подтверждением права на
гарантийное обслуживание является предоставление
покупателем чека на покупку и гарантийного талона,
заполненного и подписанного продавцом. Серийный номер
прибора должен соответствовать номеру, указанному в
гарантийном талоне.
В течение гарантийного срока осуществляется гарантийная
замена (если неисправность допущена по вине заводаизготовителя).
Если по каким-либо причинам в течение двухлетнего
гарантийногопериода данное изделие было заменено новым,
гарантия на новое изделие будет исчисляться с момента
первоначальнойпокупки прибора. В связи с этим, очень
важно сохранять квитанцию или счет-фактуру,
подтверждающие дату первоначальной покупки.
Двухлетняя гарантия распространяется только на те изделия,
которые эксплуатируются в соответствии с указаниями
производителя. Например, изделия должны очищаться от
накипи,фильтры должны поддерживаться в чистом
состоянии.
КомпанияMorphyRichardsвправе отказать в гарантийной
замене в следующих случаях:
1 Поломка была вызвана или связана с использованием
прибора не по назначению, неправильнымприменением,
неаккуратным использованием или использованием с
несоблюдением рекомендацийпроизводителя, поломка
явилась следствием перепадов напряжения в электросети
Page 63

VC70495MEE Rev4_9225 47507 MEE pump - Jon 25/01/2014 15:13 Page 63
или нарушений правил транспортировке.
2 Изделие использовалось поднапряжением, отличающимся от
указанного на изделии.
Предпринимались попытки ремонта изделия лицами, которые
не являются нашим обслуживающим персоналом
(или персоналом официальногодилера).
3 Прибор использовался на условиях аренды или применялся
дляне бытовых целей.
4 Отсутствуют основания для проведения какого-либо
гарантийного ремонта компаниейMorphyRichards.
5 Прибор приобретён подержанным.
6 Отсутствуют основания для проведения какого-либо
гарантийного ремонта компанией Morphy Richards.
7 Гарантия не распространяется на расходные материалы,
такие как пакеты, фильтры и стеклянные сосуды.
8 Гарантия не распространяется на батарейки и повреждения
от утечки электролита.
9 Очистка и замена фильтров проводились с нарушением
инструкции.
Гарантия не распространяется на расходные материалы,
такие какпакеты, фильтры и стеклянные сосуды.
Данная гарантия не предоставляет каких-либо других прав,
кроме тех, которые четко изложены выше, при этом
изготовитель не принимает каких-либо претензий, связанных
с косвенными ущербами и убытками. Данная гарантия
предлагается в качестве дополнительной льготы и не
ограничивает ваших правпотребителя.
≈
63
Page 64

VC70495MEE Rev4_9225 47507 MEE pump - Jon 25/01/2014 15:13 Page 64
∂
DŮLEŽITÉ BEZPEČNOSTNÍ POKYNY
Použití jakéhokoliv elektrického spotřebiče vyžaduje dodržování následujících bezpečnostních opatření.
Před použitím tohoto spotřebiče si pozorně přečtěte tyto pokyny.
• VAROVÁNÍ: Před prováděním jakékoli rutinní údržby
odpojte spotřebič od zdroje napájení.
• Tento spotřebič mohou používat děti starší 8 let a osoby se
sníženými fyzickými, senzorickými či mentálními schopnostmi
nebo nedostatkem zkušeností a znalostí pouze pod
dohledem nebo pokud byli poučeni o bezpečném použití
spotřebiče a rozumí případným rizikům.
• Děti si nesmí se spotřebičem hrát.
• Čištění a uživatelská údržba spotřebiče nesmí být prováděna
dětmi bez dozoru.
Bezpečnost osob
• VAROVÁNÍ: Nikdy nesměřujte páru na elektrické součásti
nebo vybavení. Jste-li na pochybách, zda je pro čištění
určitého spotřebiče vhodná pára, před čištěním se obraťte na
výrobce daného spotřebiče.
• VAROVÁNÍ: Nedotýkejte se zástrčky nebo kabelu mokrýma
rukama.
• VAROVÁNÍ: Hubice a nástroje budou po použití horké. Než je
odejmete, nechte je vychladnout.
• VAROVÁNÍ: Nevypouštějte páru směrem k lidem či zvířatům.
Nebezpečí opaření.
PÁRA
• VAROVÁNÍ: Spotřebič nepoužívejte, není-li na místě plnicí
hrdlo.
• VAROVÁNÍ: V případě zanesení hlavního kanálu se pára
vypouští odpouštěcími otvory.
• Neponořujte kabel, zástrčku nebo vysavač do vody ani jiných
tekutin, abyste zabránili požáru, úrazu elektrickým proudem a
zranění.
• Po použití spotřebiče, před čištěním, naplněním nebo výměnou
příslušenství či uživatelskou údržbou je nutné vyjmout zástrčku z
napájecí zásuvky.
• Je-li spotřebič zapojen do napájecí sítě nebo se ochlazuje,
udržujte jej mimo dosah dětí.
Umístění
• Nepoužívejte ani neskladujte tento produkt venku.
• Neskladujte spotřebič v blízkosti horkých povrchů, např. trub nebo
tepelných spotřebičů.
Síťový kabel
• VAROVÁNÍ: Poškozený nebo přerušený napájecí kabel
vybavený zástrčkou nesmí být nikdy připojen k síti. Musí být
zlikvidován, protože poškozený kabel je po připojení do
elektrické zásuvky velmi nebezpečný.
• Je-li napájecí kabel poškozený, musí být vyměněn výrobcem,
servisním zastoupením nebo osobou s podobnou kvalifikací, aby
se předešlo riziku.
• Napájecí kabel nesmí být nadměrně napínán.
64
Page 65

VC70495MEE Rev4_9225 47507 MEE pump - Jon 25/01/2014 15:13 Page 65
Bezpečnost výrobku
• VAROVÁNÍ: Zkoušku spotřebiče provádějte vždy v prostoru,
který není náchylný k poškození. Spotřebič nikdy
nepoužívejte na materiálech, které nejsou odolné vůči vysoké
teplotě, jako např. dralon, přírodní kožešiny atd.
• Parní čistič nikdy žádným způsobem neupravujte.
• Parní čistič nikdy nepoužívejte, není-li v nádržce voda. Při delším
používání vždy doplňte
vodu do nádržky.
• Nádržku parního čističe plňte vždy pouze deionizovanou,
demineralizovanou nebo destilovanou vodou.
• Pokud byl spotřebič upuštěn, vykazuje viditelné známky
poškození nebo netěsní, nesmí se používat.
Další bezpečnostní pokyny
• Nepřidávejte do vody žádné chemické čisticí prostředky, vůně,
alkohol nebo odstraňovač vodního kamene.
• Opravy elektrických spotřebičů může provádět pouze školený
personál.
• Neprofesionální opravy mohou být nebezpečné uživatelům.
• Používejte pouze originální náhradní díly a příslušenství Morphy
Richards.
• Spotřebič nesmí nikdy běžet bez dozoru.
• Tento parní čistič je určen pouze k domácímu používání. V případě
nesprávného používání nebo používání ke komerčním či jiným
účelům dojde ke zrušení záruky.
Požadavky na napájení
• Zkontrolujte, zda napětí na výkonovém štítku
spotřebiče odpovídá síťovému napětí v domácnosti, které musí
být střídavé.
• Pokud elektrické zásuvky ve vaší domácnosti nejsou vhodné pro
zástrčku dodávanou s tímto spotřebičem, je nutné zástrčku
nahradit vhodnou zástrčkou.
• VAROVÁNÍ: Tento spotřebič musí být uzemněn.
• Když je třeba vyměnit hlavní pojistku, použijte 13A pojistku
BS1362.
Obsah
Ochrana zdraví a bezpečnost 64
Požadavky na napájení 65
Přehled výrobku / vybavení 65
Použití spotřebiče 66
Dvojí funkčnost 66
Parní čištění ve vzpřímené poloze: sestavení 66
Použití v režimu vzpřímené polohy 66
Použití ručního parního čističe 67
Seznam příslušenství pro ruční parní čistič 67
Nádržka na vodu 67
Po použití 67
Skladování 67
Údržba 67
Kontaktujte nás 68
Záruka 68
Jak nejlépe využít váš nový čistič...
DŮLEŽITÉ: Abyste předešli nárůstu vodního kamene v
nádržce na vodu, plňte ji vždy pouze deionizovanou,
demineralizovanou nebo destilovanou vodou (v prodeji ve
většině supermarketů).
Vybavení
(1) Držadlo
(2) Spouštěč páry
(3) Držák kabelu
(4) Horní háček pro uchycení kabelu (otočný)
(5) Dolní háček pro uchycení kabelu (fixní)
(6) Tlačítko uvolnění ručního čističe
(7) Hlavní těleso
(8) Ruční parní čistič
(9) Spouštěč páry
(na spodní straně držadla ručního parního čističe)
(10) Napájecí kabel
(11) Plnicí hrdlo
(12) Spínač Zap/Vyp
(13) Tlačítka uvolnění nádržky na vodu
(14) Nádržka na vodu
(15) Kontrolka napájení
(16) Vodní trubice s mosazným kuličkovým závažím
(17) Tlačítko uvolnění podlahové hlavice
(18) Podlahová hlavice
(19) Lamela pro koberce
(20) Podlahový hadřík
(21) Upevňovací páčka podlahového hadříku
(22) Adaptér na příslušenství
(23) Zahnutá hubice
(24) Špachtle
∂
65
Page 66

VC70495MEE Rev4_9225 47507 MEE pump - Jon 25/01/2014 15:13 Page 66
(25) Kulatý kartáč
(26) Dlouhý kartáč
(27) Pracovní hubice
(28) Elastický pracovní hadřík (nasazuje se na pracovní hubici)
(29) Stíradlo (nasazuje se na pracovní hubici)
(30) Čisticí hlavice mini (nasazuje se na pracovní hubici)
(31) Čisticí hadřík mini (nasazuje se na čisticí hlavici mini)
(32) Sáček na příslušenství
Použití spotřebiče
DŮLEŽITÉ: Mějte na paměti, že parní čistič pracuje tak, že
vypouští páru při zvýšené teplotě 115 °C. Zkoušku spotřebiče
provádějte vždy v prostoru, který není náchylný k poškození.
Spotřebič nikdy nepoužívejte na předmětech nebo površích,
které nejsou odolné vůči takové teplotě, nebo na náchylných
materiálech jako např. dralon, plast, přírodní kožešiny atd.
Jste-li na pochybách, vyzkoušejte spotřebič na takové části
materiálu, kde eventuální stopy nebudou vadit.
Dvojí funkčnost
Váš parní čistič lze snadno nakonfigurovat do jednoho ze dvou
režimů čištění:
• Parní čistič pro práci na podlahách a kobercích ve vzpřímené
poloze.
• Ruční parní čistič (8) pro čištění vertikálních nebo obtížně
přístupných povrchů.
S ručním parním čističem lze použít řadu příslušenství (22-31).
1
Parní čištění ve vzpřímené poloze: sestavení
A
Nasaďte rukojeť (1) na hlavní těleso (7).
B
Jeden ze šroubů (součást dodávky) vložte do otvoru v dolním
háčku pro uchycení kabelu (5) a utáhněte.
Druhý šroub (součást dodávky) vložte otvoru v boční straně
rukojeti (naproti dolnímu háčku pro uchycení kabelu) a utáhněte.
POZNÁMKA: Připevnění rukojeti je nutné pouze při prvním
sestavení.
C
Hlavní těleso nasuňte na podlahovou hlavici (18) tak, aby tlačítko
uvolnění na krku podlahové hlavice (17) bylo orientováno k zadní
straně sestavy a těleso zaklaplo na místo.
D
Parní trysku na dolním konci ručního parního čističe (8) zasuňte do
adaptéru v dolní části hlavního tělesa vepředu.
Parní čistič pevně zatlačte do prostoru v hlavním tělese, dokud
nezaklapne na místo.
E
Na podlahovou hlavici nasaďte podlahový hadřík (20) a zajistěte
páčku v zadní části.
Použití v režimu vzpřímené polohy
DŮLEŽITÉ: Před použitím spotřebiče by měly být všechny
tvrdé podlahy důkladně zameteny a koberce nasucho vysáty.
Parní čistič však nedoporučujeme používat na:
• holých dřevěných podlahách nebo površích, kde je dřevo
vystaveno působení (nasákne vlhkost a může se deformovat).
• poškozených tvrdých podlahách nebo tvrdých podlahách s
mezerami (nasáknou vlhkost a mohou se deformovat).
Nestůjte rovněž s mopem na jednom místě po delší dobu,
protože stálé horko může poškodit koberce a laminové
podlahy.
3
Stisknutím tlačítek (13) po stranách nádržky na vodu (14) ji vyjmete
z ručního parního čističe (8).
Uzávěr plnicího hrdla (11) vyjmete otočením
proti směru hodinových ručiček do polohy „uvolněno“ a
následným vytažením.
Naplňte nádržku na vodu.
DŮLEŽITÉ: Abyste předešli nárůstu vodního kamene v nádržce na
vodu, plňte ji vždy pouze deionizovanou, demineralizovanou nebo
destilovanou vodou (v prodeji ve většině supermarketů). Jakékoli
problémy plynoucí z výskytu vodního kamene ruší záruku na
výrobek.
Vložte zpět uzávěr plnicího hrdla a zajistěte ho otočením ve směru
hodinových ručiček.
Nasaďte zpět nádržku na vodu.
4
2
Na podlahovou hlavici (18) nasaďte podlahový hadřík (20) a
zajistěte upevňovací páčku (21).
5
Otočte horní háček na uchycení kabelu (4) a rychle uvolněte
napájecí kabel (10).
Uchyťte kabel do držáku (3).
6
VAROVÁNÍ: Před ZAPNUTÍM spotřebiče se ujistěte, že
podlahová hlavice je bezpečně stranou od osob či zvířat.
Zapojte kabel do napájecí zásuvky a spínačem Zap/Vyp parní
čistič zapněte (12). Rozsvítí se kontrolka napájení (15) a po asi 30
sekundách bude spotřebič připraven vypouštět páru (při stisknutí
spouštěče páry (2)).
7
Položte podlahovou hlavici (18) na podlahu. Nohou přidržte hlavici
na podlaze a nakloňte hlavní těleso (7) dozadu.
Pro plynulé vypouštění páry stiskněte a držte spouštěč páry (2) a
pomalu posouvejte čistič po podlaze dopředu a dozadu. Abyste
však předešli nadměrnému navlhčení podlahy, používejte
spouštěč páry přerušovaně (zejména na tvrdých podlahách).
8
Pokud čistíte koberec, osaďte podlahovou hlavici (18) podlahovým
hadříkem (20) a lamelou na koberce (19). Pohyb hlavice po koberci
tak bude snadnější.
POZNÁMKA: Lamela na koberce se záměrně nasazuje na
podlahovou hubici volně.
66
Page 67

VC70495MEE Rev4_9225 47507 MEE pump - Jon 25/01/2014 15:13 Page 67
Použití ručního parního čističe
9
Tato funkce je ideální pro čištění vertikálních povrchů a obtížně
dosažitelných míst.
Vyjměte ruční parní čistič (8) z hlavního tělesa (7) posunutím
uvolňovacího tlačítka (6) na přední straně hlavního tělesa směrem
nahoru.
Vytáhněte ruční parní čistič nahoru a ven z hlavního tělesa.
10
Chcete-li použít všechna příslušenství, nejprve je nutné nasadit na ruční parní čistič (8) adaptér na příslušenství (22). To lze provést takto:
1 Nasuňte adaptér na trysku parního čističe tak, aby uvolňovací
západka na adaptéru byla orientována směrem k ručnímu parnímu
čističi.
2 Drážku na ručním parním čističi vyrovnejte s uvolňovací západkou na
adaptéru. Zatlačením je zajistíte na místo.
3 Nasaďte požadované příslušenství na konec adaptéru tak, aby šipka
na příslušenství byla v rovině s pravou šipkou na adaptéru, a otočte
příslušenstvím tak, aby jeho šipka byla v rovině s levou (tedy druhou)
šipkou na adaptéru.
VAROVÁNÍ: Před výměnou hubic spotřebič VYPNĚTE a vypojte z
napájecí sítě. Po použití budou hubice velmi horké, nechte je
proto před další manipulací vychladnout.
Seznam příslušenství pro
ruční parní čistič
• Adaptér na příslušenství (22) je základním prvkem pro všechna
příslušenství ručního parního čističe, která se s výrobkem dodávají.
• Lze jej použít také samostatně k čištění obtížně dostupných míst
nebo štěrbin.
• Zahnutá hubice (23) slouží k čištění sanitární keramiky, jako např.
toaletních mís, kohoutků nebo dřezů. Namiřte ji přímo na nestálé
skvrny na kobercích nebo čalounění a u znečištěného místa přidržte
čistý hadřík, abyste zachytili uvolněné nečistoty.
• Špachtle (24) slouží k odstraňování odolných usazenin nebo k
odmrazení chladničky či mrazničky.
• Kulatý kartáč (25) slouží k odstraňování skvrn z povrchů při pokojové
teplotě, jako jsou dlaždice, obložení kol, zrcadla a okna.
• Dlouhý kartáč (26) slouží k odstraňování nečistot z drážek a štěrbin.
12
Pracovní hubice (27). Je-li nasazena na adaptér pro příslušenství
(22), pracovní hubice se stává základním prvkem pro připojení
všech těchto příslušenství:
• Elastický pracovní hadřík (28) pro zakrytí pracovní hubice při
čištění čalounění a ložního prádla.
13
Stíradlo (29) lze k pracovní hubici připevnit tak, že jazýčky na
zadní straně hubice stíradla se zasunou do otvorů na zadní straně
pracovní hubice a přední část pracovní hubice se zaklapne do
úchytu v horní části hubice stíradla (podle obrázku).
• Po použití lze stíradlo vyjmout podržením západky směrem
dopředu. Pracovní hubice je stále zaháknuta v otvorech na zadní
straně hubice stíradla; pracovní hubici nakloňte nahoru a
vyhákněte ji z otvorů.
14
Stíradlo je ideální pro čištění dlaždicových nebo skleněných
povrchů jako jsou okna či zrcadlové panely. Při čištění oken
začněte nahoře, zatlačte stíradlo na povrch a táhněte rovnými
11
tahy, vždy shora dolů. Po každém tahu otřete dosucha pryžovou
čepel i dolní hranu okna. U malých okenních panelů vyjměte
stíradlo a aplikujte páru přímo na povrch. Stíradlo použijte
samostatně pro setření vlhkosti.
VAROVÁNÍ: Nepoužívejte na velmi studené sklo, protože náhlá
změna teploty by mohla způsobit jeho prasknutí.
• Čisticí hlavice mini (30) s čisticím hadříkem mini (31) se upevňuje k
pracovní hubici (stejným způsobem jako stíradlo, podle vyobrazení
vlevo a nahoře). Toto příslušenství se hodí k čištění dlaždicových
nebo skleněných povrchů, skříní a pracovních ploch v kuchyních a
koupelnách, a také k čištění čalounění, záclon, žaluzií, polštářů a
matrací.
Nádržka na vodu
Mosazné kuličkové závaží (16)
Mosazné kuličkové závaží v nádržce na vodu je uchyceno ke konci
sací trubice. Kulička je zatížená a pohybuje se volně po nádržce
na vodu v závislosti na poloze spotřebiče. Kulička musí zůstávat
ve vodě, aby bylo možné při každém stisknutí spouštěče páry
vytvářet páru bez ohledu na polohu ručního parního čističe.
Vymývání nádržky na vodu
Nádržku na vodu pravidelně vymývejte, aby se uvolnily jakékoli
usazeniny na dně nádržky. Používejte pouze deionizovanou,
demineralizovanou nebo destilovanou vodu (v prodeji ve většině
supermarketů) a pro důrazné vypláchnutí nádržku uzavřete.
Po použití
Po každém použití se řiďte těmito dvěma pokyny k údržbě.
1 Vypněte čistič a odpojte ho z napájecí zásuvky. Ihned jej umístěte
na vhodný povrch (např. dlážděnou podlahu), na nějž nebude mít
zbytkové teplo/vlhko v pracovní hubici či hadříku nepříznivý vliv.
Vyčkejte, dokud čistič úplně nevychladne.
2 Vyjměte uzávěr plnicího hrdla (11) a vylijte vodu z nádržky (14).
Než uzávěr opět nasadíte, nechte vnitřek nádržky na vodu
vyschnout.
Uskladnění
Naviňte kabel kolem dvou háčků pro jeho uchycení (4/5) a
zajistěte napájecí kabel (10) na místě otočením horního háčku (4)
směrem nahoru.
Vložte veškeré příslušenství do sáčku (32) a zavěste jej na horní
háček pro uchycení kabelu.
16
Údržba
VAROVÁNÍ: Před prováděním jakýchkoli úkonů údržby vždy
odpojte parní čistič od zdroje napájení.
Všeobecná údržba
Spotřebič je vyroben tak, aby vydržel normální, každodenní
používání, ale občas ho otřete vlhkou látkou, abyste pomohli jej
lépe uchovat. Nesmí se používat brusné čisticí prostředky.
Čištění hadříků
Podlahový hadřík (20) a elastický pracovní hadřík (28) lze prát v
pračce (při max. teplotě 30 °C). Při výrazném zašpinění namočte
hadříky do teplé vody s čisticím prostředkem nebo šetrným
odstraňovačem skvrn.
∂
67
Page 68

VC70495MEE Rev4_9225 47507 MEE pump - Jon 25/01/2014 15:13 Page 68
DŮLEŽITÉ: Nepoužívejte bělicí prostředek ani změkčovač
prádla.
Před uskladněním nechte úplně vyschnout.
Chcete-li zakoupit náhradní hadříky, obraťte se na naši linku
podpory.
Údržba příslušenství
K prodloužení doby životnosti příslušenství je nutné z něj
pravidelně odstraňovat nečistoty a zanesení.
Kontaktujte nás
Linka podpory
Pokud máte se svým spotřebičem problémy, kontaktujte nás na
lince podpory, budeme vám patrně schopni pomoci lépe než v
obchodu, kde jste přístroj zakoupili.
Před telefonátem si připravte název výrobku, modelové číslo a
sériové číslo, urychlíte tak vyřízení svého dotazu.
Promluvte si s námi
Pokud máte nějaké dotazy nebo komentáře, nebo chcete získat
některé vhodné tipy, abyste svůj produkt mohli využívat co
nejlépe, spojte se s námi online:
Blog: www.morphyrichards.co.uk/blog
Facebook: www.facebook.com/morphyrichardsuk
Twitter: www.twitter.com/loveyourmorphy
Webová stránka: www.morphyrichards.com
DVOULETÁ ZÁRUKA
Na tento spotřebič se vztahuje dvouletá záruka opravy nebo
výměny.
Musíte si uschovat stvrzenku od prodejce jako doklad o
nákupu. Stvrzenku připevněte sešívačkou na zadní obal pro
budoucí referenční účely.
Pokud se výrobek porouchá, poznamenejte si následující
informace. Tato čísla najdete na základně výrobku.
Č. modelu
Sériové číslo
Všechny výrobky Morphy Richards procházejí před opuštěním
továrny individuální kontrolou. V nepravděpodobném případě,
že se prokáže závada, se musí výrobek do 28 dnů od data
koupě vrátit do místa, kde byl zakoupen, aby se mohl vyměnit.
Pokud dojde k závadě po 28 dnech a do 24 měsíců od data
původní koupě, musíte kontaktovat místního prodejce a uvést
číslo modelu a sériové číslo výrobku nebo napsat místnímu
prodejci na uvedené adresy.
Budete požádáni, abyste vrátili výrobek (v náležitém,
bezpečném balení) společně s kopií dokladu o nákupu na níže
uvedenou adresu.
S výjimkou níže uvedených případů (1-9) bude vadný výrobek
obvykle během sedmi pracovních dnů od data přijetí opraven
nebo vyměněn a odeslán zpět.
Pokud bude výrobek z jakéhokoliv důvodu během dvouleté
záruční lhůty vyměněn, záruka na nový výrobek se bude počítat
od data původní koupě. Proto je velmi důležité, abyste
uschovali původní stvrzenku nebo fakturu s vyznačeným datem
původní koupě.
∂
Platnost dvouleté záruky na spotřebič je podmíněna používáním
podle pokynů výrobce. Například spotřebiče se musí zbavovat
vodního kamene a filtry se musí udržovat v čistém stavu podle
pokynů.
Společnost Morphy Richards nebo místní prodejce nebudou
povinni opravit nebo vyměnit výrobek podle záručních
podmínek v následujících případech:
1 Závada byla způsobena nebo zaviněna nevhodným, chybným
nebo nedbalým používáním nebo používáním způsobem, který je
v rozporu s doporučeními výrobce, nebo proudovými nárazy v
síti či poškozením při přepravě.
2 Spotřebič byl napájen jiným napětím, než jaké je uvedeno na
výrobku.
3 Došlo k pokusu o opravu jinými osobami než naším servisním
personálem (nebo autorizovaným prodejcem).
4 Spotřebič se pronajímal nebo používal k jiným účelům než v
domácnosti.
5 Spotřebič je z druhé ruky.
6 Společnost Morphy Richards ani místní prodejce neodpovídají za
žádné opravy prováděné v záruční lhůtě.
7 Záruka se nevztahuje na spotřební zboží jako sáčky, filtry a
skleněné karafy.
8 Baterie a poškození způsobené jejich vytečením není zárukou
pokryto.
9 Filtry nebyly čištěny a měněny podle pokynů.
Tato záruka nepropůjčuje žádná jiná než výše uvedená práva a
nevztahuje se na žádné reklamace týkající se následných ztrát
nebo škod. Tato záruka je nabízena jako další výhoda a nemá
vliv na vaše zákonná práva spotřebitele.
68
Page 69

VC70495MEE Rev4_9225 47507 MEE pump - Jon 25/01/2014 15:13 Page 69
t
ÖNEMLİ GÜVENLİK TALİMATLARI
Herhangi bir elektrikli cihazın kullanımı, aşağıdaki genel emniyet kurallarına uyulmasını gerektirir.
Bu ürünü kullanmadan önce lütfen bu talimatları dikkatlice okuyun.
• UYARI: Her türlü rutin bakım öncesinde elektrik prizinden
fişi çekin.
• Bu cihaz, gözetim altında tutulmaları veya güvenli bir şekilde
kullanımla ilgili bilgilerin verilmesi ve mevcut tehlikeleri
anlamaları koşuluyla 8 yaşından büyük çocuklar tarafından ve
düşük fiziksel, duyusal ve zihinsel kabiliyetleri olan veya
deneyim ve bilgi eksikliği bulunan kişilerce kullanılabilir.
• Çocuklar cihazla oynamamalıdır.
• Gözetim altında bulunmadıkları sürece temizlik ve kullanıcı
bakımı çocuklar tarafından yapılamaz.
Kişisel emniyet
• UYARI: Buharı asla elektrikli parçalara veya bağlantı
elemanlarına doğrultmayın. Bir cihazın temizlenmesi için
buharın uygunluğu konusunda şüpheniz varsa, temizleme
öncesinde cihaz üreticisine öneri için başvurun.
• UYARI: Fiş veya kabloya asla ıslak ellerle dokunmayın.
• UYARI: Kullanım sonrasında başlıklar ve aletler sıcak hale
gelir. Çıkartmadan önce soğumasını bekleyin.
• UYARI: Buharı kişilere veya hayvanlara doğru tutarak tahliye
etmeyin. Yaralanma tehlikesi vardır.
BUHAR
• UYARI: Doldurma kapağı yerinde olmadan cihazı kullanmayın.
• UYARI: Bir tıkanma durumunda, buhar emniyet çıkışlarından
buhar tahliye edilecektir.
• Yangına, elektrik çarpmasına ve kişisel yaralanmaya engel olmak
için, kabloyu, fişi veya süpürgeyi suya veya başka bir sıvıya
batırmayın.
• Kullanım sonrasında, aksesuarların temizlenmesi, doldurulması
veya değiştirilmesi öncesinde veya kullanıcı bakımını yaparken fiş
duvar prizinden çıkartılmalıdır.
• Elektrik şebekesine bağlıyken ya da soğurken cihazı çocukların
erişemeyeceği yerde bulundurun.
Konum
• Bu ürünü asla ev dışında kullanmayın.
• Cihazı fırın veya ısıtıcı cihazlar gibi sıcak yüzeylerin yakınında
muhafaza etmeyin.
Elektrik kablosu
• UYARI: Fiş takılı olan zarar görmüş veya yarılmış bir elektrik
kablosu elektrik hattına asla bağlanmamalıdır. Bir elektrik
prizine bağlanması durumunda tehlikeli hale geleceğinden
imha edilmelidir.
• Elektrik kablosu hasar görürse, tehlike arz etmemesi için üretici,
servis temsilcisi veya benzer nitelikte kişiler tarafından
değiştirilmelidir.
• Elektrik kablosunun gerilmesine izin vermeyin.
Ürün güvenliği
• UYARI: Daima ilk olarak önemsiz bir alanda test edin. Dralon,
doğal kürk vb. gibi yüksek sıcaklığa dayanıksız materyallerin
üzerinde asla kullanmayın.
• Buharlı temizleyicide hiçbir değişiklik yapmayın.
• Buharlı temizleyiciyi asla depoda su yokken çalıştırmayın. Uzun
süreli kullanımlarda daima su ilave edin.
• Deiyonize, demineralize veya saf su dışındaki herhangi bir şeyle
buharlı temizleyicinin deposunu asla doldurmayın.
• Yere düşürülmüşse, görülebilir hasar belirtileri varsa veya sızıntı
yapıyorsa cihaz kullanılmamalıdır.
∂
t
69
Page 70

VC70495MEE Rev4_9225 47507 MEE pump - Jon 25/01/2014 15:13 Page 70
Diğer emniyet önlemleri
• Su içinde kimyasal deterjan, parfüm, alkol veya kireç çözücü vb.
kullanmayın.
• Elektrikli cihazların onarımları sadece eğitimli personelce
yapılmalıdır.
• Profesyonel olmayan onarımlar kullanıcılar için tehlike arz edebilir.
• Sadece orijinal Morphy Richards yedek parçalarını ve
aksesuarlarını kullanın.
• Cihaz çalışırken asla başı boş bırakılmamalıdır.
• Bu buharlı temizleyici sadece ev içi kullanım amaçlıdır. Yanlış
kullanım veya ticari veya başka amaçlarla kullanım garantiyi
geçersiz kılacaktır.
Elektrik gereksinimleri
• Cihaz üzerindeki plakada belirtilen voltaj seviyesinin
evinizdeki A.C. (Alternatif Akım) voltaj seviyesiyle uyumlu olduğunu
kontrol edin.
• Evinizdeki prizler bu cihazla birlikte gelen fişe uygun değilse, fiş
sökülmeli ve uygun bir fiş takılmalıdır.
• UYARI: Bu cihaz topraklanmalıdır.
• Fişte bulunan sigortanın değiştirilmesi gerektiğinde, 13 amper
BS1362 sigorta takılmalıdır.
İçindekiler
Sağlık ve emniyet 69
Elektrik gereksinimleri 70
Ürüne genel bakış / Özellikler 70
Cihazın çalıştırılması 70
Çift işlevsellik 71
Dikey buharlama: montaj 71
Dikey buharlı temizleyici modunda kullanım 71
Elde taşınabilir buharlı temizleyici kullanımı 71
Elde taşınabilir buharlı temizleyicide kullanılan eklentiler 72
Su deposu 72
Kullanımın ardından 72
Saklama 72
Bakım 72
Bizimle irtibata geçin 73
Garanti 73
Yeni temizleyicinizden en iyi performansı elde
etmenin yolları...
ÖNEMLİ: Su deposunda kireç birikmesini önlemek için,
buharlı temizleyicinizin deposunu deiyonize, demineralize
veya saf su (çoğu büyük süpermarkette mevcut) dışındaki
herhangi bir şeyle asla doldurmayın.
Özellikler
(1) Sap
(2) Buhar tetiği
(3) Kablo tutucu
(4) Üst kablo saklama kancası (döndürülebilir)
(5) Alt kablo saklama kancası (sabit)
(6) Elde taşınabilir ayırma düğmesi
(7) Ana gövde
(8) Elde taşınabilir buharlı temizleyici
(9) Buhar tetiği
(elde taşınabilir buharlı temizleyici sapının alt tarafında)
(10) Elektrik kablosu
(11) Doldurma kapağı
(12) Açma/Kapatma düğmesi
(13) Su deposu ayırma düğmeleri
(14) Su deposu
(15) Güç gösterge ışığı
(16) Pirinç bilya ağırlık bağlı su borusu
(17) Zemin başlığı ayırma düğmesi
(18) Zemin başlığı
(19) Halı kaydırıcı
(20) Zemin örtüsü
(21) Zemin örtüsü sıkma parçası
(22) Aksesuar adaptörü
(23) Açılı başlık eklentisi
(24) Spatül eklentisi
(25) Dairesel fırça eklentisi
(26) Uzun fırça eklentisi
(27) Yardımcı başlık
(28) Lastikli yardımcı örtü (yardımcı başlığa bağlanır)
(29) Çekpas eklentisi (yardımcı başlığa bağlanır)
(30) Mini temizleme kafası (yardımcı başlığa bağlanır)
(31) Mini temizleme örtüsü (mini temizleme kafasına bağlanır)
(32) Aksesuar torbası
Cihazın çalıştırılması
ÖNEMLİ: Buharlı temizleyicinin 115oC’lik yüksek bir sıcaklıktaki
buharı püskürterek çalıştığını lütfen unutmayın. Daima ilk olarak
önemsiz bir alanda test edin. Bu sıcaklığa dayanıklı olmayan
cisimlerin veya yüzeylerin üzerinde ya da dralon, plastik, doğal
kürk vb. gibi hassas materyallerin üzerinde asla kullanmayın.
Kuşkunuz varsa, küçük işaretlerin önem arz etmeyeceği bir
materyal parçası üzerinde dikkatlice kontrol edin.
70
Page 71

VC70495MEE Rev4_9225 47507 MEE pump - Jon 25/01/2014 15:13 Page 71
5
Çift işlevsellik
Buharlı temizleyiciniz iki farklı temizleme moduna kolayca
yapılandırılabilir:
• Zeminler ve halılar için dikey buharlı temizleyici.
• Dikey veya erişmesi zor yüzeyleri temizlemek için elde taşınabilir
buharlı temizleyici (8).
Elde taşınabilir buharlı temizleyicide eklentiler (22-31) kullanılabilir.
Dikey buharlama: Montaj
A
Sapı (1) ana gövde (7) üzerine yerleştirin.
B
Vidaların (verilen) bir tanesini alt kablo saklama kancasındaki (5)
deliğe takın ve sıkılana kadar çevirin.
Diğer vidayı (verilen) sapın yan tarafına takın (karşı taraftan alt kablo
saklama kancasına) ve sıkılana kadar çevirin.
NOT: Sapın takılması sadece ilk montaj için gereklidir.
C
Yerine oturana kadar, zemin başlığı boynundaki zemin başlığı
ayırma düğmesi (17) tertibatın arkasına gelecek şekilde ana gövdeyi
zemin başlığına (18) indirin.
D
Elde taşınabilir buharlı temizleyicinin (8) buhar çıkış nozülünü ana
gövdenin ön tarafındaki boşluğun altında yer alan adaptörün içine
yerleştirin.
Yerine oturana kadar buharlı temizleyiciyi ana gövdedeki boşluğun
içine bastırın.
E
Zemin örtüsünü (20) takın ve arkadaki parçayı sıkın.
1
2
Dikey buharlı temizleyici modunda kullanım
ÖNEMLİ: Kullanım öncesinde, sert zeminler iyice silinmeli ve
halılar iyice kuru vakumlanmalıdır. Bununla birlikte, buharlı
temizleyicinin aşağıdaki yerlerde kullanılmamasını öneririz:
• çıplak ahşap zeminler veya ahşabın açıkta kaldığı her türlü
yüzey (nemi emeceğinden ve şekli bozulabileceğinden).
• hasarlı sert zeminler veya boşlukların bulunduğu sert zeminler
(nemi emeceğinden veya şekli bozulabileceğinden).
Ayrıca, sürekli ısı halılara veya lamine zemin kaplamasına zarar
verebileceğinden çekpası bir yerde uzun bir süreyle tutmayın.
3
Su deposunun (14) yan tarafındaki düğmeleri (13) sıkıştırarak elde
taşınabilir buharlı temizleyiciden (8) çıkartın.
Saatin ters yönünde ‘kilit açık’ konumuna
çevirerek doldurma kapağını (11) sökün ve ardından dışarı çıkartın.
Su deposunu doldurun.
ÖNEMLİ: Su deposunda kireç birikmesini önlemek için, buharlı
temizleyicinizin deposunu deiyonize, demineralize veya saf su
(çoğu büyük süpermarkette mevcut) dışındaki herhangi bir şeyle
asla doldurmayın. Kireç birikintisinden kaynaklanan her türlü sorun
ürün garantisini geçersiz kılacaktır.
Doldurma kapağını yerine takın ve ‘kilitli’ konumuna doğru saat
yönünde çevirin.
Su deposunu yerine takın.
4
Zemin örtüsünü (20) zemin başlığına (18) takın, parçayı (21) sıkarak
yerine sabitleyin.
Üst kablo saklama kancasını (4) çevirerek elektrik kablosunu (10)
hızlıca ayırın.
Elektrik kablosunu kablo tutucuya (3) yerleştirin.
6
UYARI: Cihazı çalıştırmadan önce, zemin başlığının kişilerden
ve hayvanlardan güvenli bir uzaklıkta bulunduğundan emin
olun.
Elektrik prizine fişi takın ve Açma/Kapatma düğmesi (12) ile buharlı
temizleyiciyi çalıştırın. Güç gösterge ışığı (15) yanacak ve buhar
yaklaşık 30 saniye sonra püskürtülmeye hazır hale gelecektir
(buhar tetiğine (2) basıldığında).
7
Zemin başlığını (18) zemine yerleştirin. Zemin başlığını zemine
ayağınızla bastırın ve ana gövdeyi (7) geriye yatırın.
Buharı sürekli olarak püskürtmek için, temizleyiciyi zemin boyunca
yavaşça arkaya ve öne doğru yatırırken buhar tetiğini (2) basılı
tutun. Ancak zeminin aşırı ıslanmasını önlemek için, buhar tetiğini
kesintili kullanın (özellikle sert zeminlerde).
8
Halı temizlerken, zemin başlığını halı boyunca kolayca hareket
ettirmek için zemin başlığını (18) zemin örtüsüyle (20) birlikte halı
kaydırıcıya (19) yerleştirin.
NOT: Halı kaydırıcı kasıtlı bir şekilde zemin başlığına gevşek bir
şekilde takılır.
Elde taşınabilir buharlı temizleyici kullanımı
9
Bu işlev dikey yüzeyleri ve erişmesi zor yerleri temizlemek için
idealdir.
Elde taşınabilir buharlı temizleyiciyi (8) ana gövdeden (7), elde
taşınabilir ayırma düğmesini (6) ana gövdenin ön tarafından yukarı
doğru kaydırarak ayırın.
Elde taşınabilir buharlı temizleyiciyi ana gövdenin yukarısına ve dışına
doğru çekin.
10
Aksesuarların tamamını kullanmak için, aksesuar adaptörü (22) ilk
olarak elde taşınabilir buharlı temizleyiciye (8) takılmalıdır. Bu işlem
aşağıdakilerin yerine getirilmesiyle yapılabilir:
1 Adaptör üzerindeki ayırma tutamağı elde taşınabilir buharlı
temizleyicinin tabanına bakar halde adaptörü buharlı temizleyici
başlığı üzerinde kaydırın.
2 Elde taşınabilir buharlı temizleyici üzerindeki kama yuvasını adaptör
üzerindeki ayırma tutamağı ile hizalayın. Birlikte bastırın ve yerine
sabitleyin.
3 İstenilen aksesuarı adaptörün ucuna aksesuar üzerindeki oku
adaptör üzerindeki sağ ok ile hizalayarak takın ve ok adaptör
üzerindeki sol ok ile hizalanana kadar aksesuarı çevirin.
UYARI: Başlıkları değiştirmeden önce cihazı kapatın ve fişi
çekin. Kullanım sonrasında başlıklar çok sıcak olur,
dokunmadan önce soğumasını bekleyin.
t
71
Page 72

VC70495MEE Rev4_9225 47507 MEE pump - Jon 25/01/2014 15:13 Page 72
Elde taşınabilir temizleyicide
kullanılacak eklentilerin listesi
• Aksesuar adaptörü (22); bu eklenti ürünle birlikte verilen tüm elde
taşınabilir aksesuarlar için temel eklentidir.
• Kolay erişilebilir olmayan yerleri veya yarık zeminleri temizlemek için
tek başına da kullanılabilir.
• Klozet, musluk veya drenaj kapakları gibi banyo malzemelerini
temizlemek için açılı başlık eklentisi (23). Gevşetilmiş kirleri almak için
lekeli bölgenin yakınında temiz bir bezi bulundururken halıların veya
döşemelerin üzerindeki kalıcı olmayan lekelere doğrultun.
• İnatçı birikintileri almak veya buzdolabının veya dondurucunun
buzdan arındırılmasına yardımcı olmak için spatül eklentisi (24).
• Karolar, jantlar, aynalar ve pencereler gibi oda sıcaklığındaki
yüzeylerde bulunan lekeleri gidermek için dairesel fırça eklentisi (25).
• Oluklardan veya yarık zeminlerden kirleri almak için uzun fırça
eklentisi (26).
12
Yardımcı başlık (27) aksesuar adaptörüne (22) bağlanır; yardımcı
başlık aşağıdaki tüm aksesuarların takılması için temel eklentidir:
• Döşemeleri ve yatak takımını temizlerken yardımcı başlığın
örtülmesi için lastikli yardımcı örtü (28).
13
Çekpas eklentisi (29) çekpas başlığının arkasındaki kancalar
yardımcı başlığın arkasındaki halkalara yerleştirilerek yardımcı
başlığa takılabilir, ardından yardımcı başlığın ön tarafını çekpas
başlığının üst kısmındaki kilitleme klipsine sabitleyin (gösterildiği
gibi).
• Kullanım sonrasında kilitleme klipsini öne doğru tutarak çekpası
çıkartın. Yardımcı başlık yine de çekpas başlığının arkasındaki
halkalara takılmalıdır, yardımcı başlığı yukarı bastırın ve kaldırarak
ayırmak için halkalardan çıkartın.
14
Çekpas başlığı pencereler veya ayna panelleri gibi karo kaplı veya
cam bölgelerin temizlenmesi için idealdir. Pencereleri temizlemek
için, üstten başlayın, çekpası yüzeye bastırın ve üstten alta düz
geçişlerle aşağı doğru çekin. Her geçiş sonrasında lastiği ve
pencerenin alt kenarını silerek kurulayın. Küçük pencere panelleri
için, çekpas aletini sökün ve buharı doğrudan yüzeye püskürtün.
Nemi silmek için çekpası ayrı olarak kullanın.
UYARI: Ani sıcaklık değişimi camı kırabileceğinden çok soğuk
cam üzerinde kullanmayın.
• Mini temizleme örtüsü (31) takılı mini temizleme kafası (30)
yardımcı başlığa takılır (solda ve yukarıda gösterildiği gibi çekpas
başlığının takılması ve sökülmesi ile aynı yöntem kullanılarak). Bu
aksesuar karo kaplı veya cam yüzeylerin, mutfaklardaki ve
banyolardaki kabinlerin ve tezgahların ve ayrıca döşemelerin,
perdelerin, panjurların, yastıkların ve minderlerin temizlenmesi için
yararlıdır.
11
Su deposu
Pirinç bilya ağırlık (16)
Su deposu içindeki pirinç bilya ağırlık emme hortumunun ucuna
takılır. Bilya ürünün konumuna bağlı olarak su deposu çevresinde
serbestçe hareket edecek şekilde bir ağırlığa ve tasarıma sahiptir.
Elde taşınabilir buharlı temizleyicinin konumundan bağımsız olarak
buhar tetiğine basıldığında buharın üretilebilmesi için bilya su
içinde kalmalıdır.
Su deposunun yıkanması
Deponun altında birikmiş olabilecek kalıntıları temizlemek için su
deposunu düzenli olarak yıkayın. Sadece deiyonize, demineralize
veya saf su (çoğu büyük süpermarkette mevcut) kullanın ve tazyikli
yıkamaya olanak sağlamak için doldurma kapağını takın.
Kullanımın ardından
Her kullanım sonrasında aşağıdaki iki bakım işlemini uygulayın.
1 Temizleyiciyi kapatın ve fişini prizden çekin. Zemin
başlığındaki/örtüsündeki mevcut ısının/nemin yüzeyi etkilememesi
için derhal uygun bir yüzey (ör. karo kaplı zemin) üzerine koyun.
Temizleyici tamamen soğuyana kadar bekleyin.
2 Doldurma kapağını (11) sökerek ve suyu dışarı dökerek su
deposunu (14) boşaltın. Doldurma kapağını takmadan önce su
deposunun içinin kurumasını bekleyin.
Saklama
Elektrik kablosunu (10) yerine sabitlemek için üst saklama
kancasını (4) yukarı doğru çevirerek iki kablo saklama kancası (4/5)
etrafına kabloyu sarın.
Tüm aksesuarları aksesuar torbasına (32) koyun ve torbayı üst
kablo saklama kancasından asın.
16
Bakım
UYARI: Herhangi bir bakım işlemini yapmadan önce Buharlı
temizleyici fişini elektrik prizinden daima çıkartın.
Genel bakım
Temizleyiciniz normal gündelik kullanıma uygun şekilde üretilmiş
olmakla birlikte, arada bir ıslak bir bezle üzerini silmek
korunmasına yardımcı olacaktır. Aşındırıcı temizlik maddeleri
kullanılmamalıdır.
Örtülerin temizlenmesi
Zemin örtüsü (20) ve lastikli yardımcı örtü (28) makinede yıkanabilir
(azami 30ºC). Çok kirlenmesi durumunda, örtüleri ılık suya ve
deterjana veya yumuşak bir leke çıkarıcıya bastırın.
ÖNEMLİ: Çamaşır suyu veya yumuşatıcı kullanmayın.
Saklamadan önce tamamen kurumasını bekleyin.
Yedek örtüleri satın almak için yardım hattımızı arayın.
Eklentilerin bakımı
Kullanım ömürlerini uzatmak için kirler ve tıkanıklıklar düzenli
olarak eklentilerden giderilmelidir.
72
Page 73

VC70495MEE Rev4_9225 47507 MEE pump - Jon 25/01/2014 15:13 Page 73
Bizimle irtibata geçin
Yardım hattı
Cihazınızla sorun yaşıyorsanız, lütfen Yardım Hattımızı arayın; size
ürünü satın aldığınız mağazadan daha fazla yardımcı olabiliriz.
Sorularınıza daha hızlı yanıt verebilmemize yardımcı olmak için bizi
aradığınızda, lütfen ürün adı, model numarası ve seri numarasını
hazır bulundurun.
Bize Danışın
Sorularınız ve yorumlarınız veya ürünlerinizden etkili şekilde
yararlanmanızı sağlayacak ilginç ipuçları için bize çevrimiçi ulaşın:
Blog: www.morphyrichards.co.uk/blog
Facebook: www.facebook.com/morphyrichardsuk
Twitter: www.twitter.com/loveyourmorphy
Web sitesi: www.morphyrichards.com
İKİ YILLIK GARANTİNİZ
Bu cihaz, iki yıllık onarım ya da de ifltirme garantisi kapsamı
altındadır.
Satın alma kanıtı olarak perakende fiflinin saklanması önemlidir.
Fiflinizi ileride kullanmak için bu arka kısma zımbalayın.
Üründe bir arıza oluflursa lütfen afla ıdaki bilgileri belirtin. Bu
numaralar ürünün tabanında bulunabilir.
Model no.
Seri no.
Tüm Morphy Richards ürünleri fabrikadan çıkmadan önce tek tek
test edilmektedir. Cihazın satın alındıktan sonraki 28 gün içinde
arızalı oldu u belirlenmesi durumunda, de ifltirilmesi için satın
alındı ı yere iade edilmelidir.
28 gün sonra veya satın alma iflleminden sonraki 24 ay içinde
arıza oluflursa, ürünün üzerindeki Model numarası ve Seri
numarasını belirterek bölgenizdeki distribütör ile iletiflim kurmalı ya
da afla ıda verilen adresten bölgenizdeki distribütöre yazmalısınız.
Ürünü, satın alma kanıtının bir kopyasıyla birlikte afla ıdaki adrese
geri göndermeniz (güvenli, yeterli düzeyde paketlenmifl olarak)
istenecektir.
Afla ıda belirtilen garanti harici durumlara (1-9) tabi olarak, arızalı
cihaz tamir edilecek veya de ifltirilecek ve genellikle alındıktan
sonra 7 ifl günü içinde gönderilecektir.
Herhangi bir nedenle bu ürün 2 yıllık garanti döneminde
de ifltirilirse, yeni ürünün garantisi orijinal satın alma tarihinden
itibaren hesaplanacaktır. Bu nedenle ilk satın alma tarihini
belirtmek için faturanızı saklamanız önemlidir.
2 yıllık garantinin geçerli olması içifln cihazın, üreticinin
talimatlarına uygun olarak kullanılmıfl olması gerekmektedir.
Örne in, cihazda kireç çözücü ifllemlerinin uygulanması ve
filtrelerin belirtildi i gibi temiz tutulması gerekmektedir.
Morphy Richards ya da yerel distribütörünüz afla ıdaki durumlarda
cihazı garanti kapsamında de ifltirmek veya tamir etmek zorunda
olmayacaktır:
1 Arıza yanlıfl kullanım, ihmal veya üretici tavsiyelerine ters
kullanımdan kaynaklanıyorsa veya arıza güç yüklenmeleri ya da
taflıma sırasında oluflan hasardan kaynaklanıyorsa.
2 Cihaz, ürüne belirtilen dıflında bir besleme voltajıyla kullanıldıysa.
3 Servis personeli (veya yetkili bayi) dıflında kifliler tarafından tamir
yapılmaya çalıflılmıflsa.
4 Cihaz kiralama amacıyla veya ev dıflında kullanıldıysa.
5 Cihaz ikinci eldir.
6 Morphy Richards ya da bölgenizdeki distribütör, garanti
kapsamında herhangi bir tür servis ifllemi gerçeklefltirmek zorunda
de ildir.
7 Garanti çantalar, filtreler ve cam sürahiler gibi sarf malzemelerini
kapsamaz.
8 Piller ve sızıntı hasarı garanti kapsamında de ildir.
9 Filtrelerin belirtildiği şekilde temizlenmemesi ve değiştirilmemesi.
Bu garanti yukarıda açık olarak belirtilen dıflında herhangi bir hak
vermemektedir ve nihai hasardan dolayı tazminat taleplerini
kapsamamaktadır. Bu garanti ek bir fayda olarak sunulmaktadır ve
tüketici olarak yasal haklarınızı etkilememektedir.
t
73
Page 74

VC70495MEE Rev4_9225 47507 MEE pump - Jon 25/01/2014 15:13 Page 74
g Morphy Richards products are intended for household use only.
Morphy Richards has a policy of continuous improvement in product quality and design.
The Company, therefore, reserves the right to change the specification of its models at any
time.
The After Sales Division,
Morphy Richards Ltd, Mexborough, South Yorkshire, England, S64 8AJ
Helpline (office hours) UK 0845 871 0954 Republic of Ireland 1800 409119
o Head Office
Asko Appliances (Australia) Pty Ltd.
35 Sunmore Close Moorabbin
Victoria 3189
T: 1300 002 756
NZ
Glen Dimplex Australasia
38 Harris Road, East Tamaki, Auckland 2013. New Zealand
T: 9274 8265
E: sales@glendimplex.co.nz
f Les produits Morphy Richards sont conçus pour unusage exclusivement domestique.
Morphy Richards s’engage à mener une politique d’amélioration continue en termes de qualité
et de conception. Le fabricant se réserve donc le droit de modifier sans préavis la spécification
de ses modèles.
ZL Petite Montagne Sud
12 rue des Cevennes
91017 EVRY - LISSES Cedex
T: + 33 (0)1 69 11 11 91 F: + 33 (0)1 60 86 15 24
d Morphy Richards Produkte sind nur für den Einsatz im Haushalt vorgesehen. Ständige
Verbesserungen an der Produktqualität und dem Design gehören zur Philosophie von Morphy
Richards. Aus diesem Grunde behält sich die Firma das Recht vor, die Angaben zu ihren
Modellen jederzeit zu ändern.
Glen Dimplex Deutschland GmbH
Hotline: +49 (0) 9 11/6 57 19-719
F: +49 (0) 1805-355 467
E: service@glendimplex.de
Österreich
Kundendienst
Merangasse 17
A-8010 Graz
Telefon : +43(0) 316/323-041 Telefax: +43(0)316/382-963
e Los productos Morphy Richards están concebidos solamente para usodoméstico.
Morphy Richards tiene una política de mejora en la calidad ydiseño de sus artículos.
La compañía, por lo tanto, se reserva el derecho decambiar en cualquier momento las
especificaciones de sus modelos.
b Les produits Morphy Richards sont conçus pour un usage exclusivement domestique.
Morphy Richards s’engage à mener une politique d’amélioration continue en termes de qualité
et de conception. Le fabricant se réserve donc le droit de modifier sans préavis la spécification
de ses modèles.
De producten van Morphy Richards zijn alleen bedoeld voor huishoudelijk gebruik.
Morphy Richards streeft ernaar de kwaliteit en het design van zijn producten voortdurend te
verbeteren. Het bedrijf behoudt zich daarom het recht voor om de specificaties van de
producten op ieder ogenblik te wijzigen.
Glen Dimplex Benelux BV
Gentsestraat 60
B- 9300 Aalst
België
T: +32-(0)-53 82 88 62 F: +32-(0)-53 82 88 63
E: info@glendimplex.be www.morphyrichards.be
p Os produtos Morphy Richards foram concebidos apenas para utilizaçãodoméstica.
A Morphy Richards respeita uma política de aperfeiçoamento contínuo daqualidade e design
do produto. Desta forma, a companhia reserva-se o direitode alterar as especificações destes
modelos a qualquer momento.
Imporaudio Lda
Rua D. Marcos Da Cruz 1281
4455-482 Perafita
Portugal
T: +351 22 996 67 40 Fax: +351 22 996 67 41
i I prodotti Morphy Richards sono concepiti esclusivamente per uso domestico.
Morphy Richards è costantemente impegnata a migliorare la qualità e il design dei propri
prodotti, pertanto si riserva il diritto di modificare le specifiche dei diversi modelli in qualunque
momento.
PER ASSISTENZA TECNICA:
HELPLINE 199.193.328 LUN-VEN 9,30-13,00 e 14,30-17,30.
Costo della chiamata 14,26 cent. di Euro al minuto IVA inclusa
(da rete fissa).
E: assistenza@necchi.it
F: +39-0693496270
I prodotti Morphy Richards sono distribuiti in Italia da:
Necchi Spa, Via Cancelliera 60 00040 Ariccia (RM).
q Morphy Richards produkter er kun beregnet til husholdningsbrug. Det er praksis hos
Morphy Richards at fortsætte udviklingen af produktets kvalitet og design. Firmaet forbeholder
sig derfor retten til at ændre modellernes specifikationer når som helst.
Albaline AS
Avedoreholmen 84
2650 Hvidovre
Denmark
T: (45) 3678 8083
s Produkter från Morphy Richards är endast avsedda för hushållsbruk.
Morphy Richards har en policy för kontinuerlig förbättring i produktkvalitet och utformning.
Företaget förbehåller sig därför rätten att när som helst ändra specifikationen för sina modeller.
v
Morphy Richardsin tuotteet on tarkoitettu vain kotitalouskäyttöön.
Katso käyttörajoitukset turvallisuusohjeiden laitteen sijoittamista koskevasta kappaleesta.
Morphy Richards pyrkii jatkuvasti parantamaan tuotteen laatua ja muotoilua.
Yritys pidättää siksi oikeudet muuttaa tämän mallin teknisiä ominaisuuksia milloin tahansa.
} Produkty Morphy Richards są przeznaczone wyłącznie do użytku domowego. Morphy Richards
prowadzi politykę ciągłej poprawy jakości i wzoru produktów. Firma zastrzega sobie prawo
zmiany specyfikacji modeli w dowolnej chwili.
Proteas Sp. Z o.o.
Ul Sarmacka 9/45
02-972 Warsaw
Poland
T: 0048 666 555603
≈ Изделия Morphy Richards предназначены только для бытового использования.
Morphy Richards постоянно совершенствует качество и дизайн своей продукции. Таким
образом, компания оставляет за собой право в любое время вносить изменения в
технические характеристики своих изделий.
Technopark Holding
Pr-t Mira 119, VVC EN1, Fl 1, pav. 61
Moscow 129223
Russia
Tel: 74 957 555777
∂ Výrobky Morphy Richards jsou určeny pouze k použití v domácnostech.
Morphy Richards usiluje o neustálé zdokonalování kvality a provedení.
Proto si vyhrazuje právo kdykoliv změnit specifikace svých modelů.
Tauer Elektro a.s.
Milady Horákové 4
568 02 Svitavy
T: +420 461 540 130 F: +420 461 540 133
t
Morphy Richards ürünleri sadece ev içi kullanım amaçlıdır.
Morphy Richards, ürün kalitesi ve tasarımında sürekli geliştirme politikasına sahiptir.
Bu nedenle Şirket, modellerinin özelliklerini herhangi bir zamanda değiştirme hakkını saklı
tutar.
Gizpa Dayanıkılı Tüketim Mamülleri
Tic. ve Paz. İth. İhr. A.Ş.
Atatürk Cd. 19 Mayıs Mah. Esin Sok. No: 2/2
Koyzyataği-İSTANBUL
Tel +90(0216) 411 23 77 Fax +90(0216) 369 33 42
74
Page 75

VC70495MEE Rev4_9225 47507 MEE pump - Jon 25/01/2014 15:13 Page 75
g For electrical products sold within the European Community.
At the end of the electrical products useful life it should not be disposed of with
household waste.
Please recycle where facilities exist.
Check with your Local Authority or retailer for recycling advice in your country.
f Pour les appareils électriques vendus dans la Communauté européenne.
Lorsque les appareils électriques arrivent à la fin de leur vie utile, il ne faut pas les jeter
à la poubelle.
Il faut les recycler dans des centres spécialisés, s’ils existent.
Consultez la municipalité ou le magasin où vous avez acheté l’appareil pour obtenir des
conseils sur le recyclage dans votre pays.
d Für elektrische Artikel, die in der europäischen Gemeinschaft verkauft werden.
Am Ende der Nutzungsdauer sollte das Gerät nicht im regulären Hausmüll entsorgt
werden.
Bitte einer Recycling-Sammelstelle zuführen.
Informationen über geeignete Recycling-Annahmestellen erhalten Sie bei Ihrer Stadtbzw. Ortsverwaltung.
e Para productos eléctricos vendidos en la Comunidad Europea.
Al final de su vida útil los productos eléctricos no deberán desecharse con el resto de
residuos domésticos.
Recíclelos en las instalaciones destinadas para ello.
Infórmese sobre consejos de reciclaje en su tienda habitual o consulte a las
autoridades locales de su país.
p Para produtos eléctricos vendidos na Comunidade Europeia.
Quando os produtos eléctricos atingirem o final da sua vida útil, não devem ser
eliminados juntamente com o lixo doméstico.
Faça a reciclagem nos locais apropriados.
Contacte as autoridades locais ou o revendedor para saber como efectuar a
reciclagem no seu país.
i Per gli elettrodomestici venduti all’interno della Comunità europea.
Al termine della vita utile, non smaltire l’elettrodomestico nei rifiuti domestici.
Riciclarlo laddove esistano le strutture.
Verificare con la Locale Autorità o con il dettagliante in merito alle possibilità di
riciclaggio nel proprio paese.
q Angående elektriske produkter, der sælges inden for EU.
Når det elektriske produkt har nået enden af sin levetid, må det ikke bortkastes
sammen med husholdningsaffaldet.
Det bedes genbrugt, hvor der er faciliteter hertil.
Bed de lokale myndigheder eller forhandleren om råd om genbrug i dit land.
s Gäller elektriska produkter som säljs inom Europeiska Unionen.
När elektriska produkter inte längre kan användas ska de inte kastas med vanliga
hushållssopor.
Lämna dem till återvinning där det finns möjlighet.
Kontakta lokala myndigheter eller försäljningsstället och kontrollera vad som gäller för
återvinning i ditt land.
v Koskee Euroopan yhteisössä myytyjä sähkölaitteita.
Elinkaarensa loppuun tullutta sähkölaitetta ei saa hävittää kotitalousjätteen mukana.
Toimita vanha sähkölaite sille tarkoitettuun keräyspisteeseen.
Tarkempia tietoja paikallisista kierrätyspisteistä saat paikalliselta jätehuollosta vastaavalta
viranomaiselta tai jälleenmyyjältäsi.
} Dla produktów elektrycznych sprzedawanych na terenie Wspólnoty Europejskiej.
Po zakończeniu okresu uźywalności produktów elektrycznych, nie naleźy ich wyrzucać
wraz z odpadkami pochodzącymi z gospodarstwa domowego.
Jeźeli istnieją odpowiednie zakłady zajmujące się utylizacją, produkty naleźy poddać
recyklingowi.
W celu uzyskania porady na temat recyklingu w Twoim kraju zwróć się do miejscowych
władz lub lokalnego sprzedawcy.
∂ Pro elektrické výrobky prodávané v Evropském společenství.
Elektrické výrobky se po skončení životnosti nesmí vyhazovat do domovního odpadu.
Nechte je recyklovat v příslušných zařízeních.
Informace o recyklaci ve vaší zemi si zjistěte od místních úřadů nebo prodejce.
g
f
d
e
p
i
q
s
v
}
≈
∂
t
75
Page 76

VC70495MEE Rev4_9225 47507 MEE pump - Jon 25/01/2014 15:13 Page 76
Импортер: 000 «Cедан» 123001, г. Mocква,
yл. Большая, Садовая, д. 10, пом. 1, эт. 4
МорФи Ричардс Эдвик Парк,
Манверс Южный Йоркшир S63 5AB
VC70495MEE Rev4 10/14
АГ65
 Loading...