

Page 1
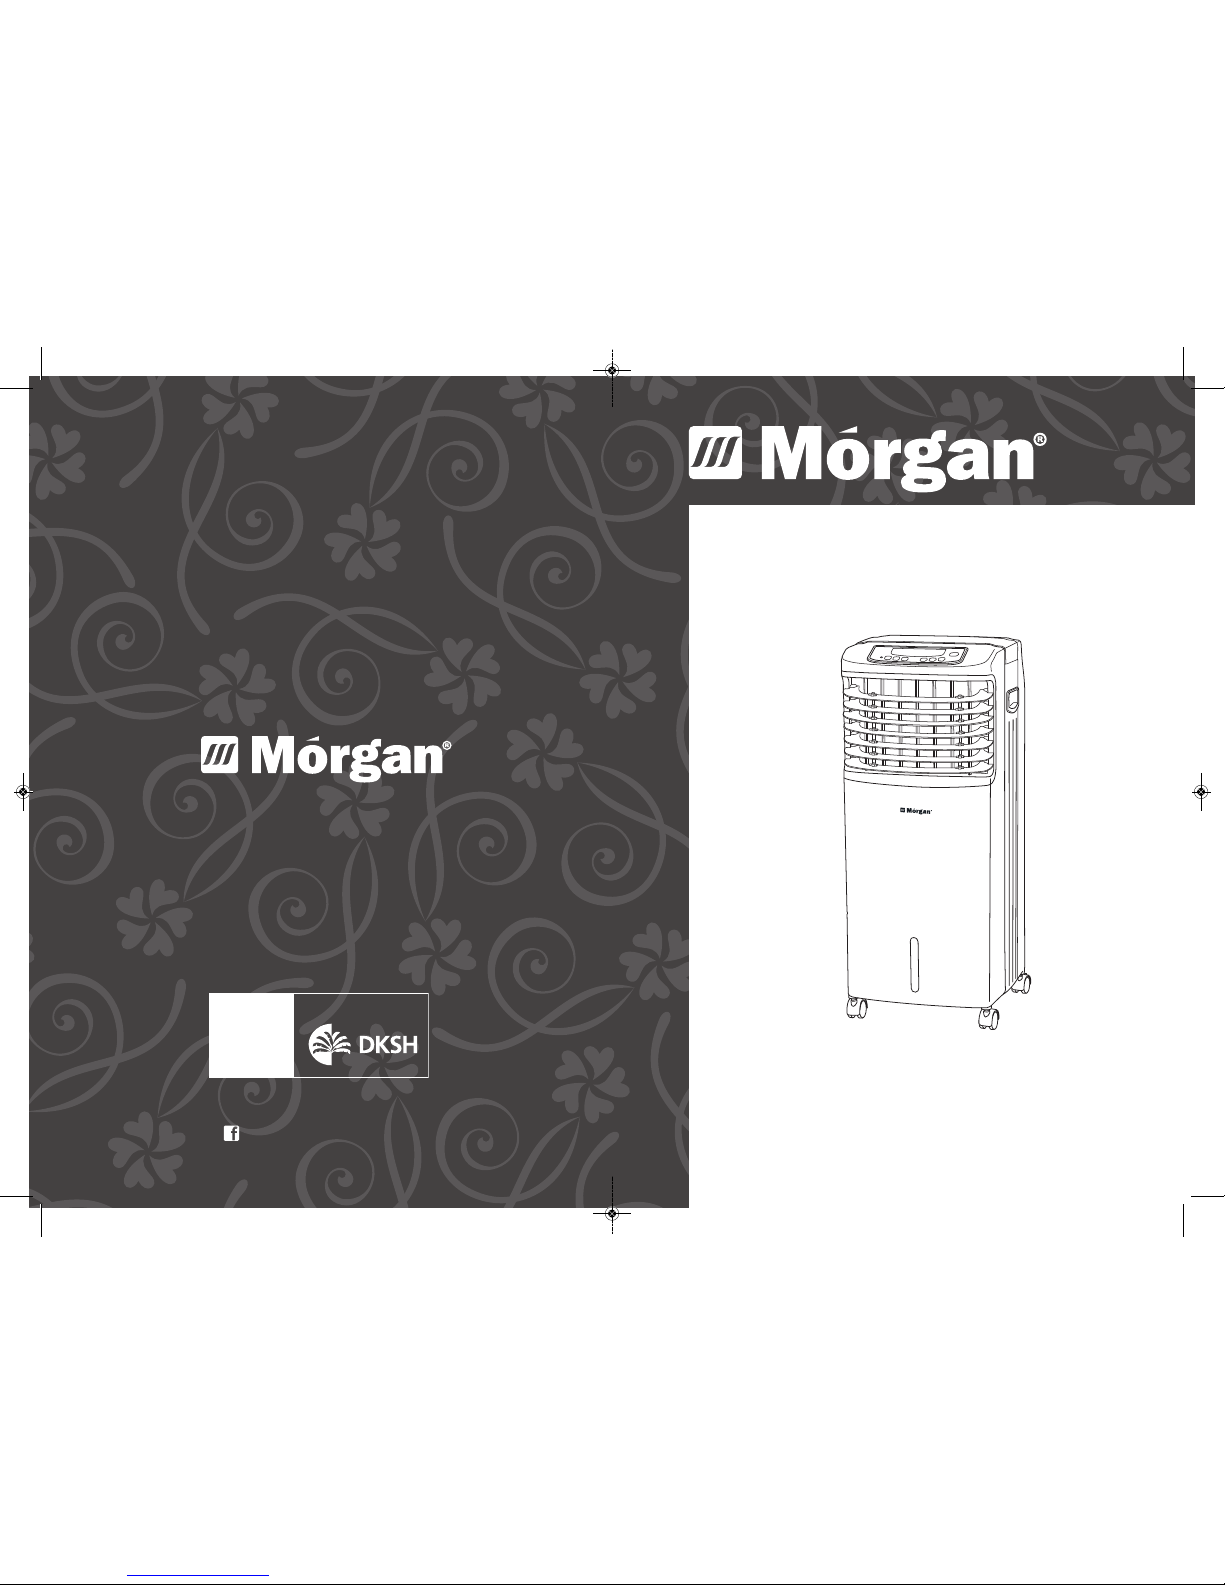
USER MANUAL
Air
Cooler
MAC-COOL4
E-mail: [email protected]
www.morgan.my
Market Expansion
Services by
www.dksh.com.my
facebook.com/morganappliances
MAC-COOL4(IM)140814_Layout 1 8/22/14 10:09 AM Page 1
Page 2
3
C O N T E N T S
4
4
5
5
5-7
8-9
10
11
Product Features
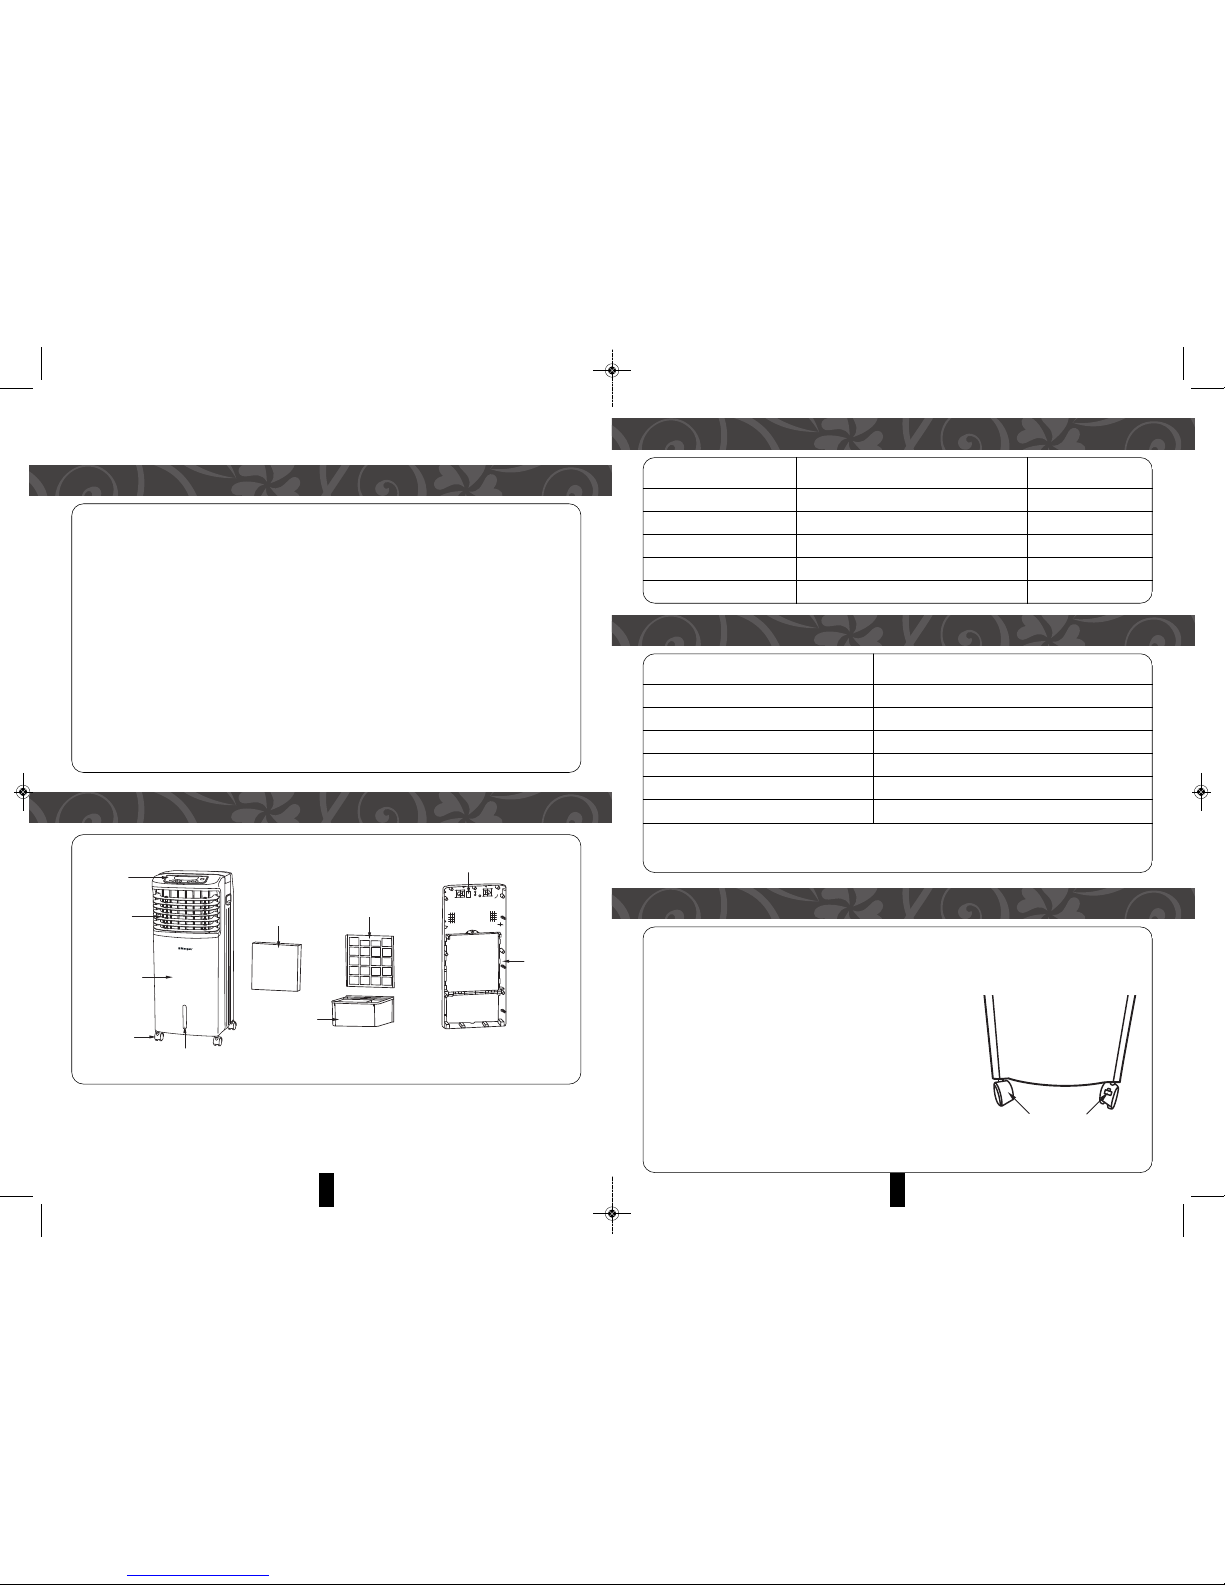
Construction Drawing
Accessories List
Specifications
Operating Instruction
Important Safeguards
Maintenance and Cleaning
Troubleshooting
MAC-COOL4(IM)140814_Layout 1 8/22/14 10:09 AM Page 2
Page 3
5
ACCESSORIES LIST
1. Remove the unit from the carton and place it on a solid heat-proof horizontal
surface.
2. Ensure the accessories are complete, corresponding to the accessories list.
3. Place the unit on a solid heat-proof horizontal
surface. Assemble the casters using the caster
wrench.
Note: Casters with skid lock fit into the two front
holes whilst casters without skid lock are meant for
the two back holes at the bottom of the unit.
(Shown as fig. 1)
SEQUENCE ACCESSORY NAME QUANTITY (pcs)
1 Remote Control 1
2 Instruction Manual 1
3 Caster with skid lock 2
4 Caster without skid lock 2
5 Caster wrench 1
SPECIFICATIONS
OPERATING INSTRUCTIONS
MODEL MAC-COOL4
RATING VOLTAGE / FREQUENCY 220-240V~ 50Hz
RATED WATTAGE 130W
MAX AIR FLOW 1650m³/h
MAX WATER VOLUME 10L
NET WEIGHT 9.5Kg
MEASUREMENTS(mm) 400 X 380 X 915
Note: Due to continuous improvement to our products, we reserve the right to modify
and upgrade the specification and design without prior notice.
caster
without
skid lock
caster
with
skid lock
fig. 1
4
Thank you for purchasing Morgan Air Cooler. Please read all instructions carefully
before using it for the first time. Always keep this manual for future reference.
PRODUCT FEATURES
• Cool – cycles the water to blow cool air and lowers the surrounding temperature to
provide a cool, comfortable environment.
• Ionizer –releases negative ions to refresh the air and for health.
• Easy to clean drawer style water tank, detachable filtration mesh – the filter removes
harmful solid but tiny substances, such as dust and pollen.
• Energy saving, high-efficiency, environment friendly with 130W input power.
• Choice of Air output – 100 angle wide ranges. 3 fan speeds; HI-MID-LOW.
• Memory function –memorizes current operation status that remains in use until
power is switched off.
• High tech computerized control system.
• 12 hours timer setting.
CONSTRUCTION DRAWING
Control
panel
Outlet of air
flow
Front cabinet
caster
Water level
window
Water
evaporation
Water tank
filtration mesh
On / Off
Back cabinet
MAC-COOL4(IM)140814_Layout 1 8/22/14 10:09 AM Page 3
Page 4
6 7
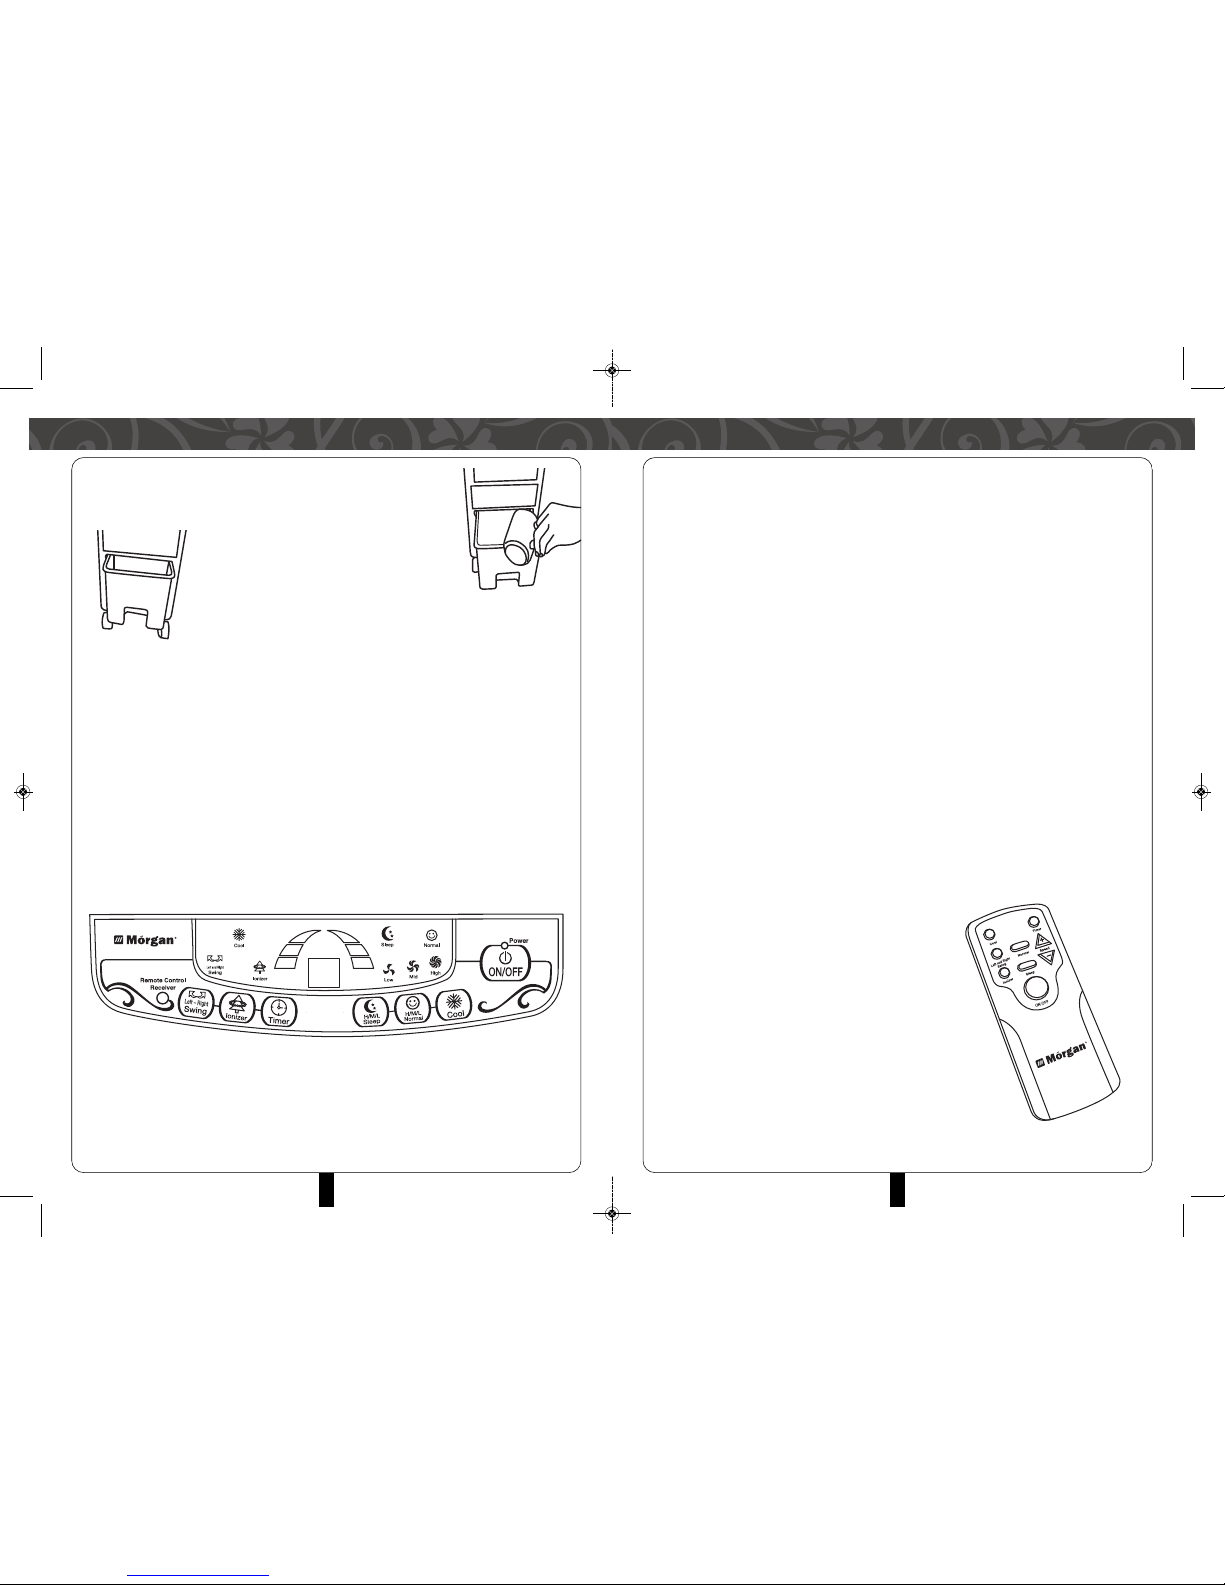
OPERATING INSTRUCTIONS OPERATING INSTRUCTIONS
2. SPEED
• Press this button to select desired fan speeds – LOW / MID / HIGH / LOW respectively.
3. WIND
• NORMAL - It starts up in MID speed: MID HIGH LOW MID in circle turns.
The corresponding air flow speed indicator light will be displayed. After 5 seconds,
it will automatic return to the timer or temperature display, the motor delay of 3
seconds for the first start.
• SLEEP - It starts up in LOW speed: LOW MID HIGH LOW in circle turns. The
corresponding air flow speed indicator light will be displayed. After 5 seconds, it will
automatic return to the timer or temperature display, the motor delay of 3 seconds
for the first start.
4. SWING
• Left/Right Swing - Press button once to swing louvres horizontally. Press again to
cancel swing direction.
• Manual Up/Down adjusting
5. COOL
• Press this button once to start the evaporative cooling function. Press this button
again to cancel.
6. IONIZER
• Press this button once to release negative ions into the air, to refresh and ionize the
air. Press this button again to cancel.
7. TIMER
• It can be set between 1 to 12 hours, with hourly
increamental intervals. When the digital display
12 hours, press this button again to cancel.
4. Remove the water tank and pull outwards about 10cm to
align to the locking pin, then add water.
(
shown as fig. 2)
NOTE:
a) Water level must be between the
MIN and MAX line.
(Shown as fig. 3)
b) Due to prolonged use, dust and dirt
may accumulate in the water tank. It
is a recommended to change water and clean the water tank
frequently.
5. Only use the unit with the recommended AC outlet.
6. Insert the power plug pin into a power supply and turn on the power switch located
at the side of the unit. Once switched on, a soft beep sound can be heard and the
power indicator will be lit.
NOTE:
a) To protect against electric shocks, do not remove power plug from power supply
with wet hands.
b) Unplug from power supply while moving the unit.
c) Insert the power plug pin into the power supply and ensure it is properly
connected.
CONTROL PANEL
1. ON/OFF
• Press this button once to operate the unit. It will begin at MID for 3 seconds and
then revert to work under the memorized status. For first time use, it will begin at
MID for 3 seconds and then resume to LOW.
• Press this button again to turn the unit off.
fig. 2
fig. 3
MAC-COOL4(IM)140814_Layout 1 8/22/14 10:09 AM Page 4
Page 5
9
IMPORTANT SAFEGUARDS
21. Do not use the unit with the power cord damaged. Send to an authorized service
centre for repairs immediately. If the power supply cord damaged, it must be
replaced by a recommended power cord or assembly available from the
manufacturer or its service agent.
22. Keep the unit out of reach of children. Close supervision should be exercised when
children are nearby.
WARNING: Please do not use the unit where children can easily come into contact
with nor allow children to operate the unit themselves.
23. Keep power cord away from sharp or hot objects.
24. Thoroughly clean the unit before using it for the first time.
25. Do not clean with metal scouring pads. It may scratch the surface or cause electrical
shock.
26. Do not clean the unit with flammable liquids.
27. Avoid sharing a power outlet with other appliances.
28. Always attach the power plug to the appliance first, only then plug the power cord
into the power supply. To disconnect, turn all controls to ‘OFF’ position before
removing the power plug from the wall outlet.
29. Do not combine the use of new and old batteries at the same time inside the
remote control.
30. Remove batteries from the remote control when not in use.
8
IMPORTANT SAFEGUARDS
1. READ ALL INSTRUCTIONS CAREFULLY BEFORE USING.
2. Do NOT open and repair the unit by yourself or any unqualified person.
3. To protect against electric shocks, keep the unit dry. Do not immerse in water or
any other liquids.
4. Unplug from power supply when filling water, before cleaning, maintenance works
or moving the unit.
5. Unplug from power supply when not in use.
6. Do not insert foreign objects into the air vent grids (intake or outlet) during
operation.
7. Do not cover the appliance with paper, cardboard, plastic metal foil, or any other
flammable materials as, a fire may occur. Keep the appliance away from any heat
sources.
8. Place the unit on a solid hot-proof horizontal surface.
9. Do not use outdoor.
10. Water level must be between the MIN and MAX line.
11. After filling with water, do not tilt the unit and avoid moving it as this may cause
water to overflow from the side of the tank and leak. If the unit needs to be
moved a little, push on the side gently.
12. Never turn the unit on its sides.
13. Do not place any objects on top of the unit. The air vent must not be obstructed
during operation.
14. Do not use petrol or any petroleum-based solvents to clean the body. For slight dirt
on the body, wipe it off with a soft damp cloth. To remove grease, squeeze a little
toothpaste or mild detergent onto a soft damp cloth, and then wipe the dirt off.
15. Keep the air vent (intake or outlet) away from obstacles.
16. Do not strike or shake the unit body during operation, otherwise, it will cease
operation automatically. Should this happen , restart the unit.
17. Due to prolonged use, dust and dirt will accumulate inside the water tank. It is
recommended to change the water and clean water tank frequently. If the
humidifier function is selected when the room temperature is below 0°C, be sure
to add warm water into the water tank.
18. Empty water tank to avoid unpleasant odours from occurring when not in use.
19. Do not use after the unit malfunctions. Send to an authorized service centre
immediately for repairs.
20. Do not use the unit for other than its intended use.
MAC-COOL4(IM)140814_Layout 1 8/22/14 10:09 AM Page 5
Page 6
11
TROUBLESHOOTING
In most cases, any problem encountered during operation may not be attributed with
the malfunction of the unit. The following are checklist to follow before sending the
unit for repair.
Problem Possible Reasons Solutions
Unit not functioning The power plug is not properly Insert the power plug pin into
inserted into the power socket or the power supply and ensure it is
not well connected. properly connected.
The “I” button, located on the Press the “I” button, on the
power switch which is at the side power switch located at the
of the unit body has not been back of the unit’s body.
activated.
The “ON/OFF” button is not Press “ON/OFF” button after
activated. connecting the power plug to
the power supply.
Dust filtration function The filtration mesh is clogged with Clean the filtration mesh.
not working efficiently dust and dirt, affecting the unit’s
performance
The air vent is obstructed Remove any foreign objects
from the air vent.
IMPORTANT:
1. If the problem encountered is not listed above, please contact our service centre or
a qualified technician for further inspection.
2. Do NOT attempt to disassemble and repair the unit yourself.
Note: After prolonged use, the filtration mesh will naturally become clogged with dust
and dirt. This will affect the unit’s performance and as such, it is recommended to clean
the filtration mesh frequently.
CLEANING THE FILTRATION MESH
1. Remove power plug from the power supply.
2. Grasp the filtration mesh handle and pull upwards
(fig. 4)
3. Clean filtration mesh using mild detergent and soft brush.
4. Ensure filtration mesh is thoroughly dry before installing.
CLEANING THE WATER TANK
1. Remove power plug from the power supply.
2. Detach the water tank from the unit
(fig. 5)
3. Clean the water tank with a little mild detergent on a towel
and then rinse in water.
4. Attach the water tank in place after cleaning.
CLEANING THE BODY
Clean the body using mild detergent and a soft cloth.
IMPORTANT
• Unplug from power supply before cleaning
• Ensure there is no water on the control panel.
10
MAINTENANCE AND CLEANING
fig. 5
f
ig. 4
MAC-COOL4(IM)140814_Layout 1 8/22/14 10:09 AM Page 6
 Loading...