

Page 1
Page 1
© 2013 Maka Technologies Group. All Rights Reserved.
Page 2
Page 2
© 2013 Maka Technologies Group. All Rights Reserved.
Page 3
Page 3
© 2013 Maka Technologies Group. All Rights Reserved.
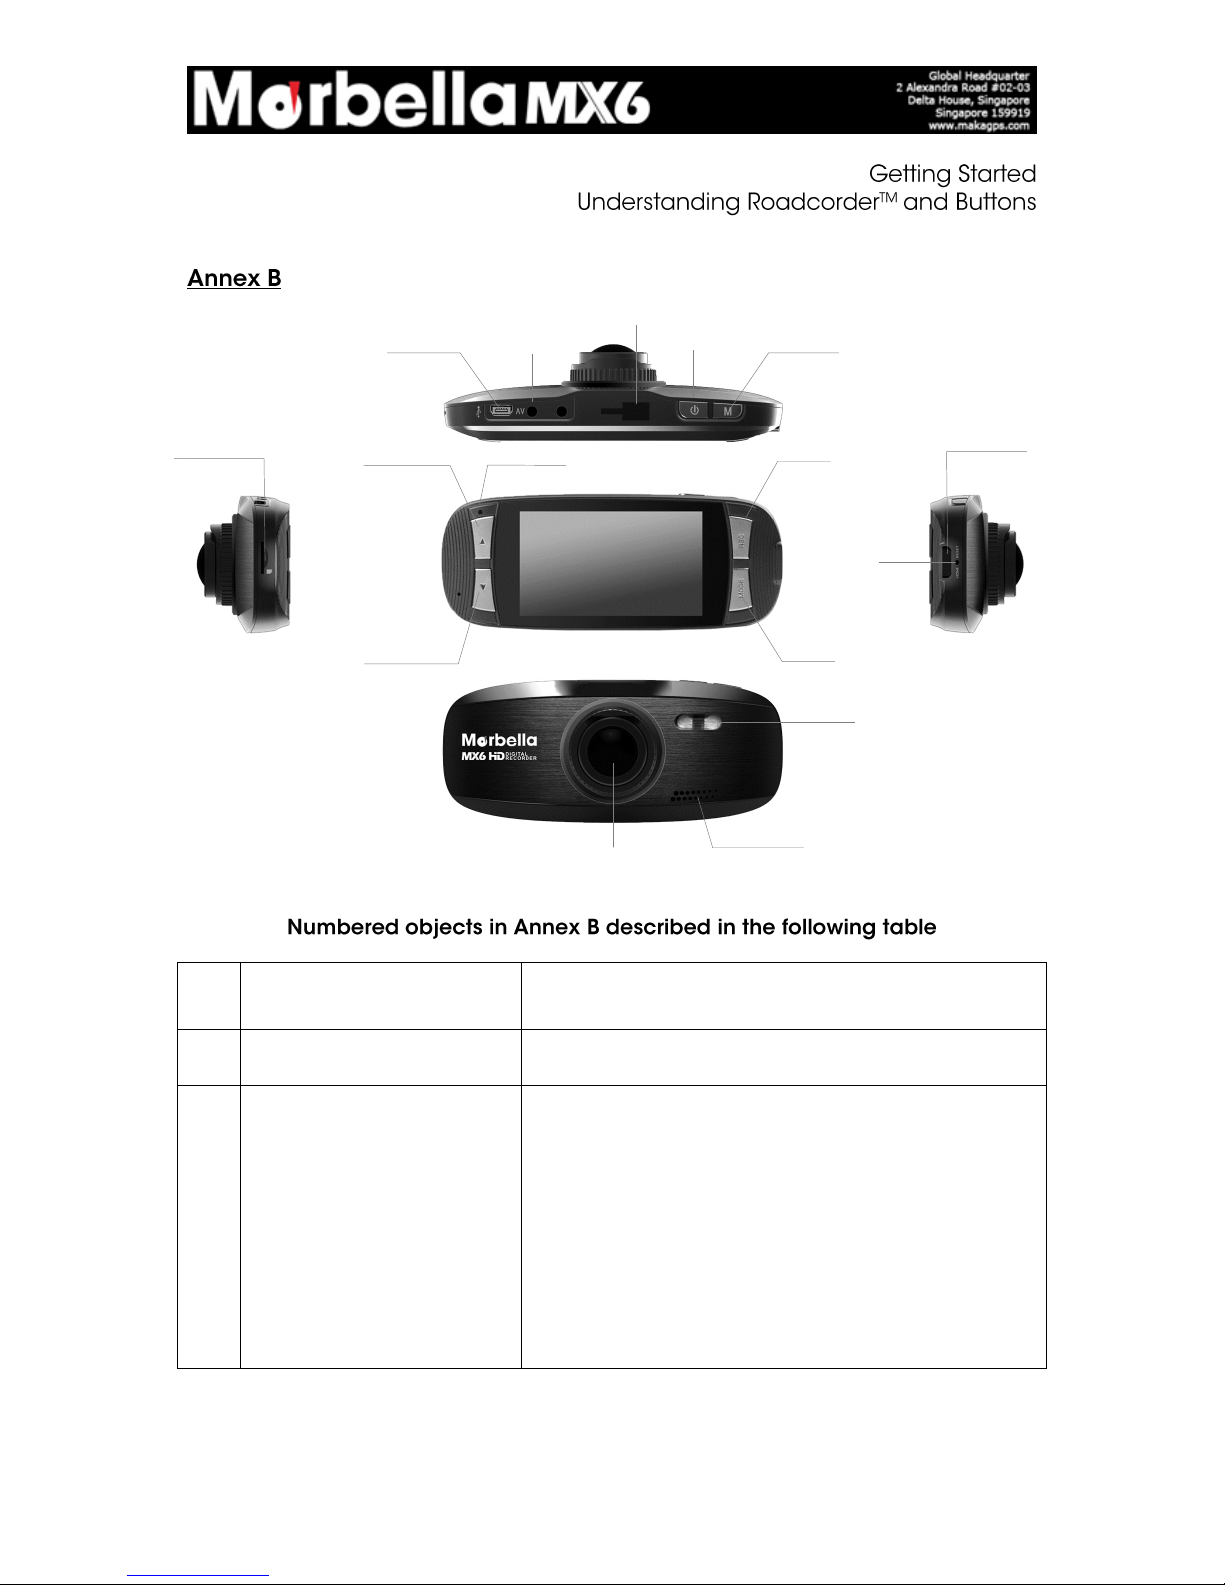
#
MX6 HD Digital
Roadcorder
TM
Feature
Description
1
ON/OFF Button
Hold on to the button for 3 seconds to turn on or off
the device.
2
Menu Button
Press to access a menu to configure features and
Preferences.
Under Video Mode - such as Resolution, Loop
Recording, WDR, Exposure, Motion Detection, Record
Audio, Date Stamp, G-sensor.
Under Camera Mode – such as Capture Mode,
Resolution, Sequence, Quality, Sharpness, White
Balance, Colour, ISO, Exposure, Anti-Shaking, Quick
Review, Date Stamp
16 – STATUS LIGHT
11 – DOWN
10 – UP
1 – ON/OFF
12 - REC
13 - MODE
3 – USB INTERFACE
4 – AV-OUT
2 – M
8 – LENS
7 – MICROPHONE
14 – FLASHLIGHT
5 – MICROSD SLOT
9 –RESET
6 – HDMI
15 – CAR HOLDER
Page 4
Page 4
© 2013 Maka Technologies Group. All Rights Reserved.
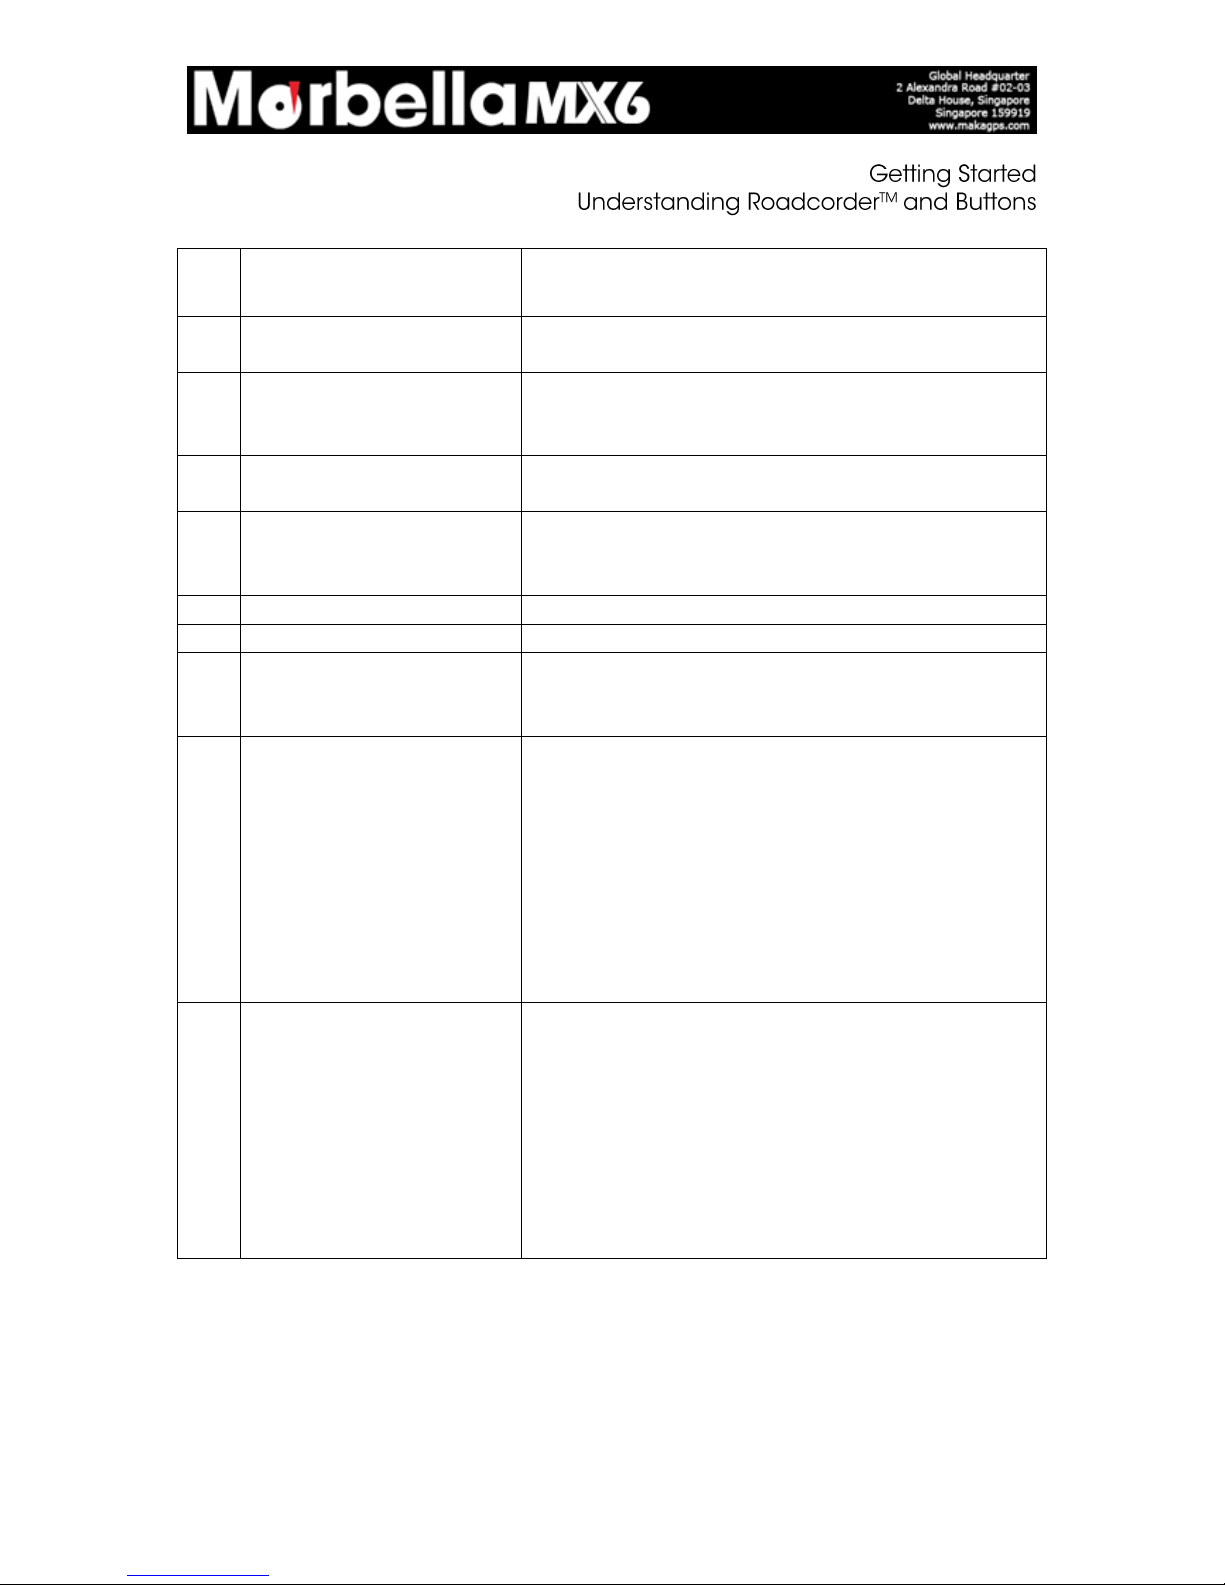
#
MX6 HD Digital
Roadcorder
TM
Feature
Description
3
USB Interface
Charge or connect your device to your PC for file
transfer.
4
AV-Output
Allow you to connect your DVR to another device that
supports AV-Input. For instance, you will be able to
view your video footages on a TV (supports AV-Input).
5
MicroSD/ TF Slot
Slot in your microSD card here. Support up to max.
32GB microSD card.
6
HDMI Port
Allow you to connect your device to a TV that has a
HDMI port. You will be able to display High definition
video footages on the TV.
7
Microphone
Record and play sound.
8
Camera Lens
CMOS Sensor Lens
9
Reset Button
Insert the end of a small paper clip or stylus into the
hole. This will allow you to restart the system when
device has no response.
10
&
11
Navigation Buttons
– Up & Down arrows
Press any arrow keys to go up or down through the
items shown on the device screen.
Under Video Mode – allow you to zoom in and out
during/ before recording
Under Camera Mode – allow you to zoom in and out
before taking a photo
Under Playback Mode – scroll up and down for your
respective photos or videos
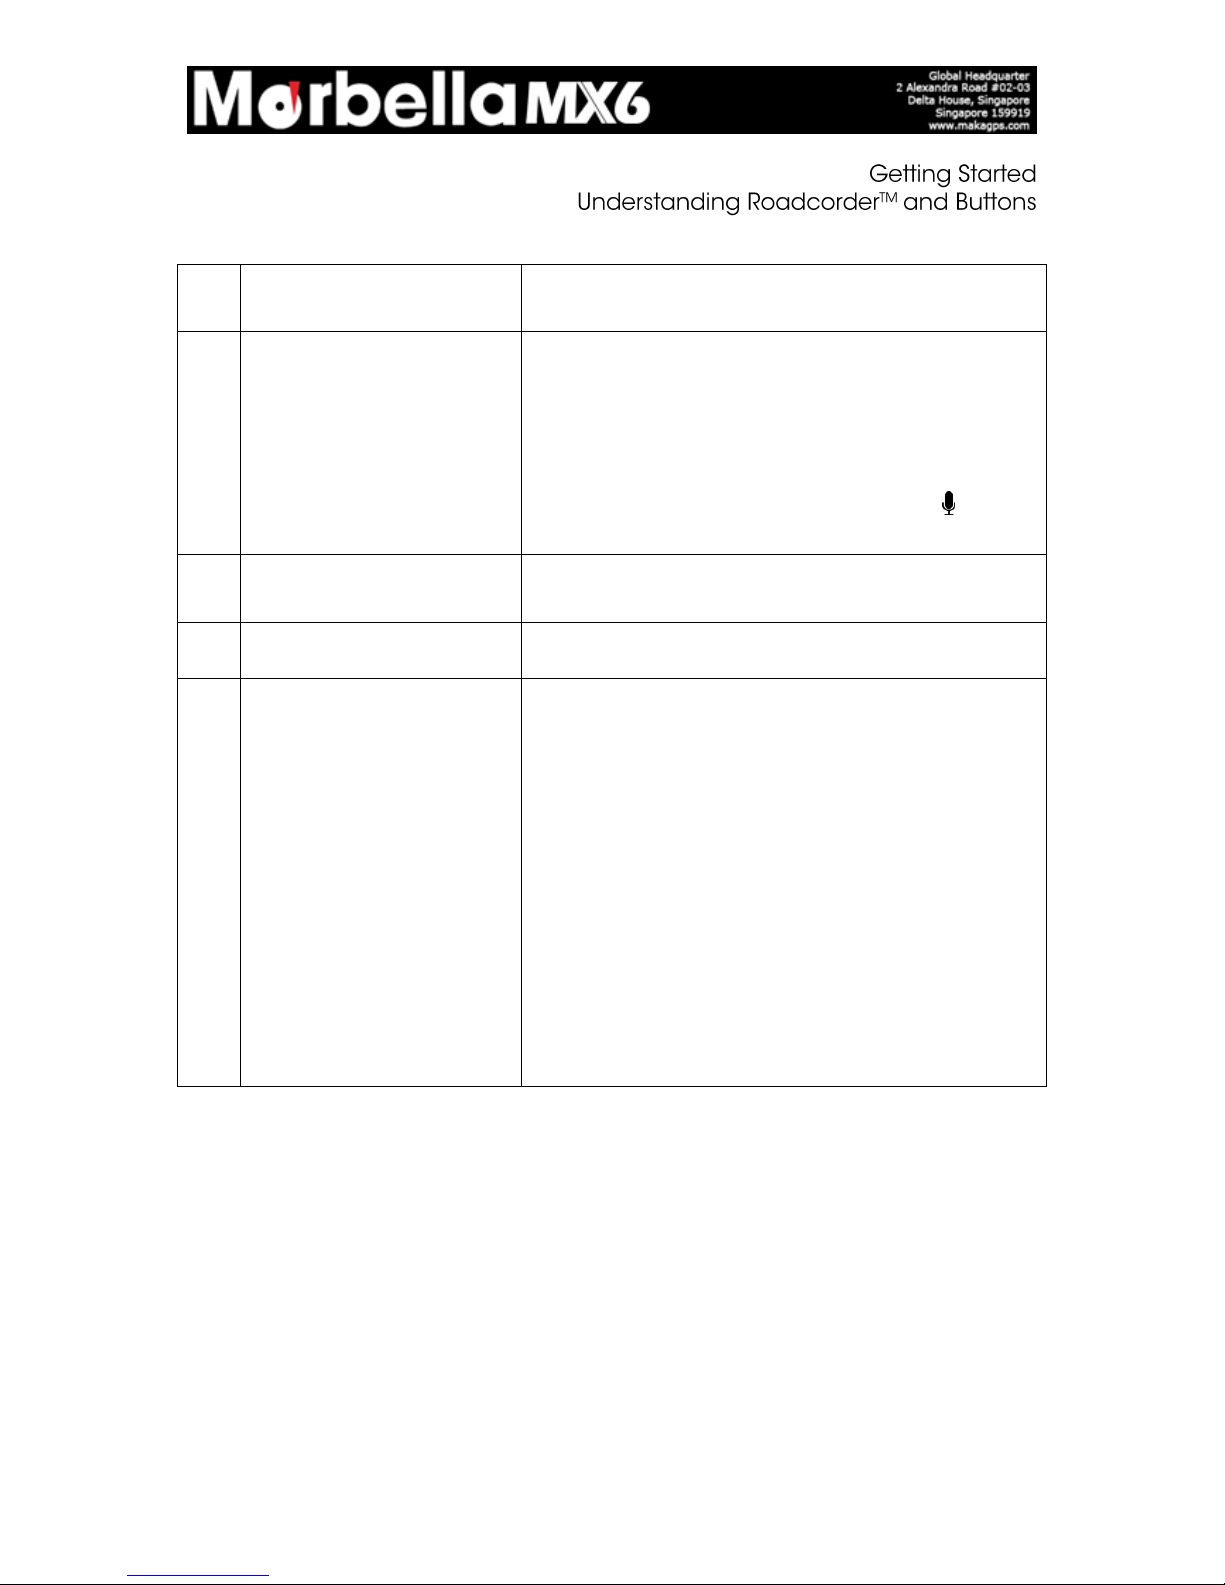
12
Record Button
With MX6 HD Digital RoadcorderTM, you can take both
still photos and videos. It also works as a “OK” button
in setting menu.
Under Video Mode – press button to record video
Under Camera Mode – press button one time to take
a still picture
Under Playback Mode – use this button to select the
video you wish to view
Page 5
Page 5
© 2013 Maka Technologies Group. All Rights Reserved.
#
MX6 HD Digital
Roadcorder
TM
Feature
Description
13
Mode Button
Toggle between Video Mode/Camera Mode/Playback
Mode.
It is also a shortcut key to mute your microphone. Hold
on to Mode button for 3 seconds to mute or unmute
feature.
Note: When the device is muted, the microphone icon will be
crossed out with a red line.
14
Flashlight
An LED flash on the back gives you extra light when
you need it.
15
Car Holder
Connect your window suction to MX6 HD Digital
RoadcorderTM.
16
Status Light
Indicate power status.
When lit:
Blue: Power OFF while battery is charging.
Note: Once battery is fully charged, status light will disappear.
Red (steady): Power ON while battery is not charging.
Pink (steady): Power ON while battery is charging.
Note: Pink status light will be lit when you sync your files to your
computer via USB. Please be reminded that charging of battery
via computer is not possible.
Red (flashing): Recording Mode ON while battery is
not charging.
Red & Blue (flashing): Recording Mode ON while
battery is charging.
Page 6
Page 6
© 2013 Maka Technologies Group. All Rights Reserved.
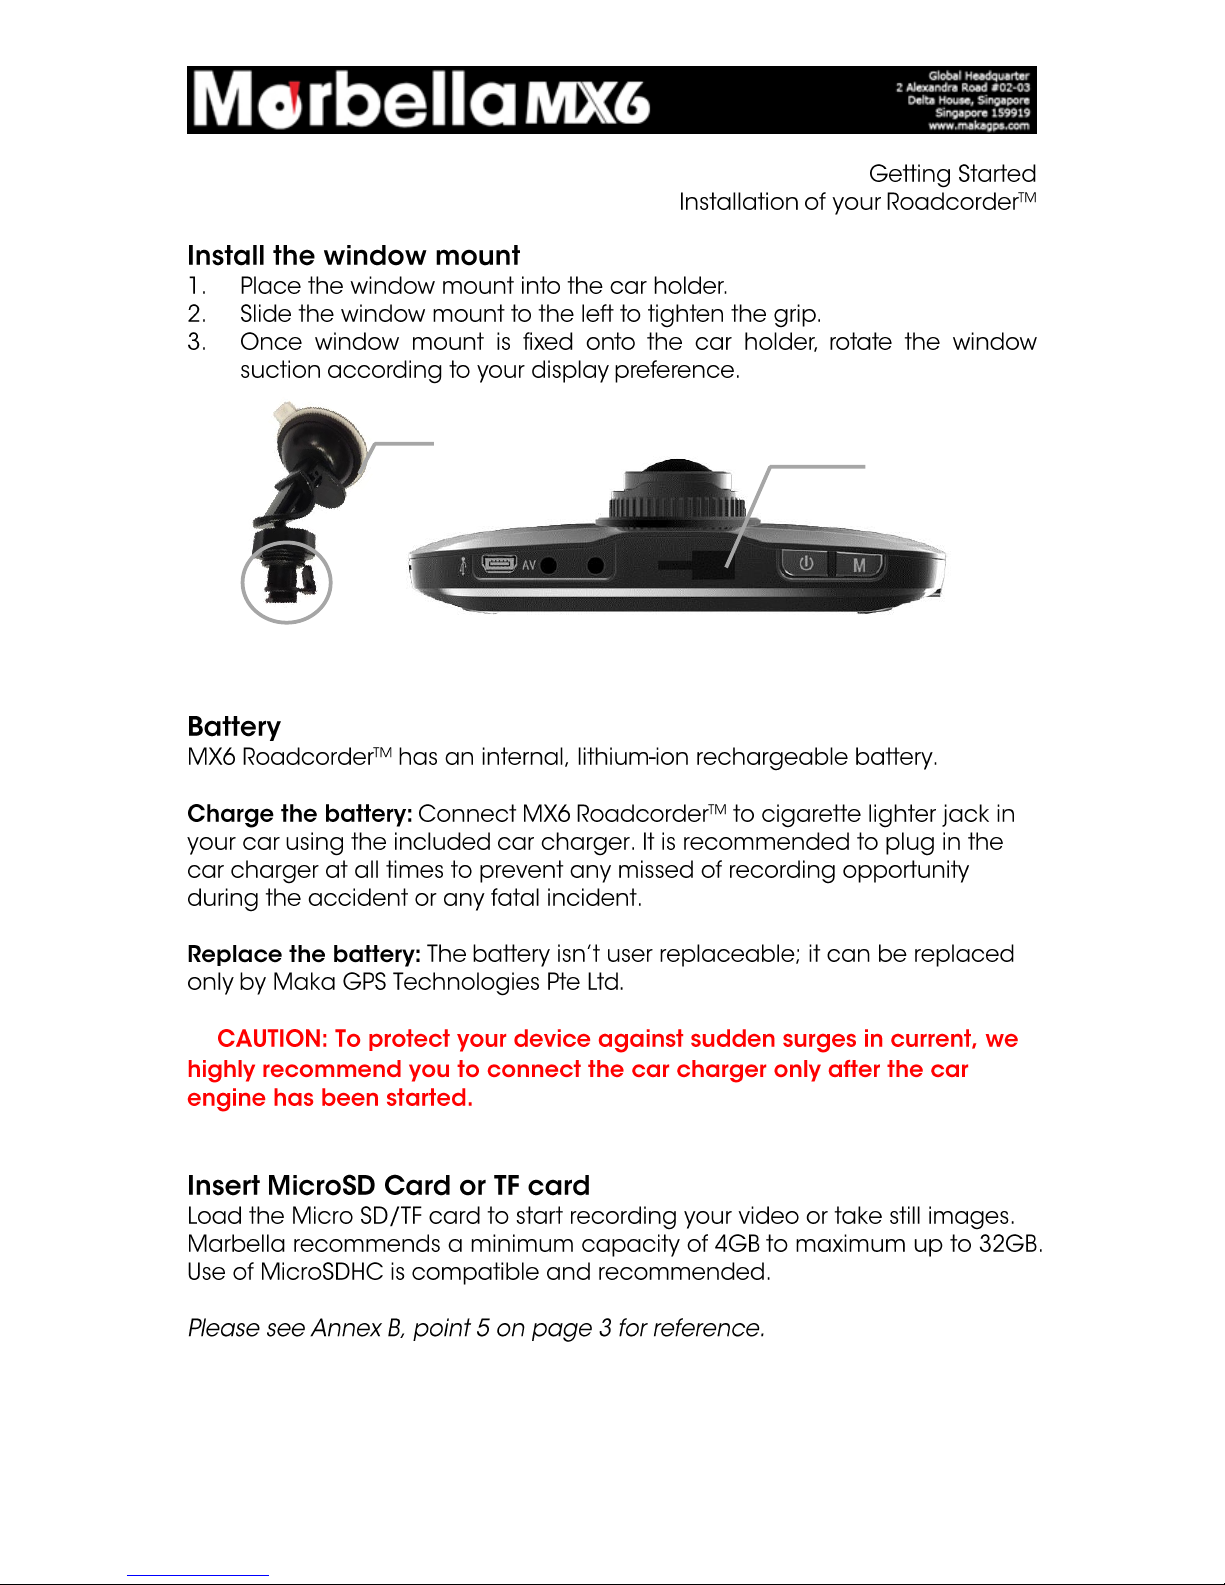
Video Recording Mode
Camera Mode
Playback Mode
Motion Detector Mode
Loop Recording: 2 minutes time frame
Loop Recording: 3 minutes time frame
Loop Recording: 5 minutes time frame
Battery Status: Charging
Battery Status: Fully Charged
Battery Status: Low
MicroSD Card/ TF Card: Card has been inserted
G sensor
Microphone: On
Microphone: Mute
Playback Mode: Rewind
Playback Mode: Play
Playback Mode: Fast Forward
Playback Mode: Pause
File locked: Click on [M] to activate lock file during recording
1080FHD
Video Resolution available in 1080FHD/ 720P/ WVGA/ VGA
Exposure status: +0.0
Photo Quality: Fine/ Normal/ Economy
Page 7
Page 7
© 2013 Maka Technologies Group. All Rights Reserved.
※
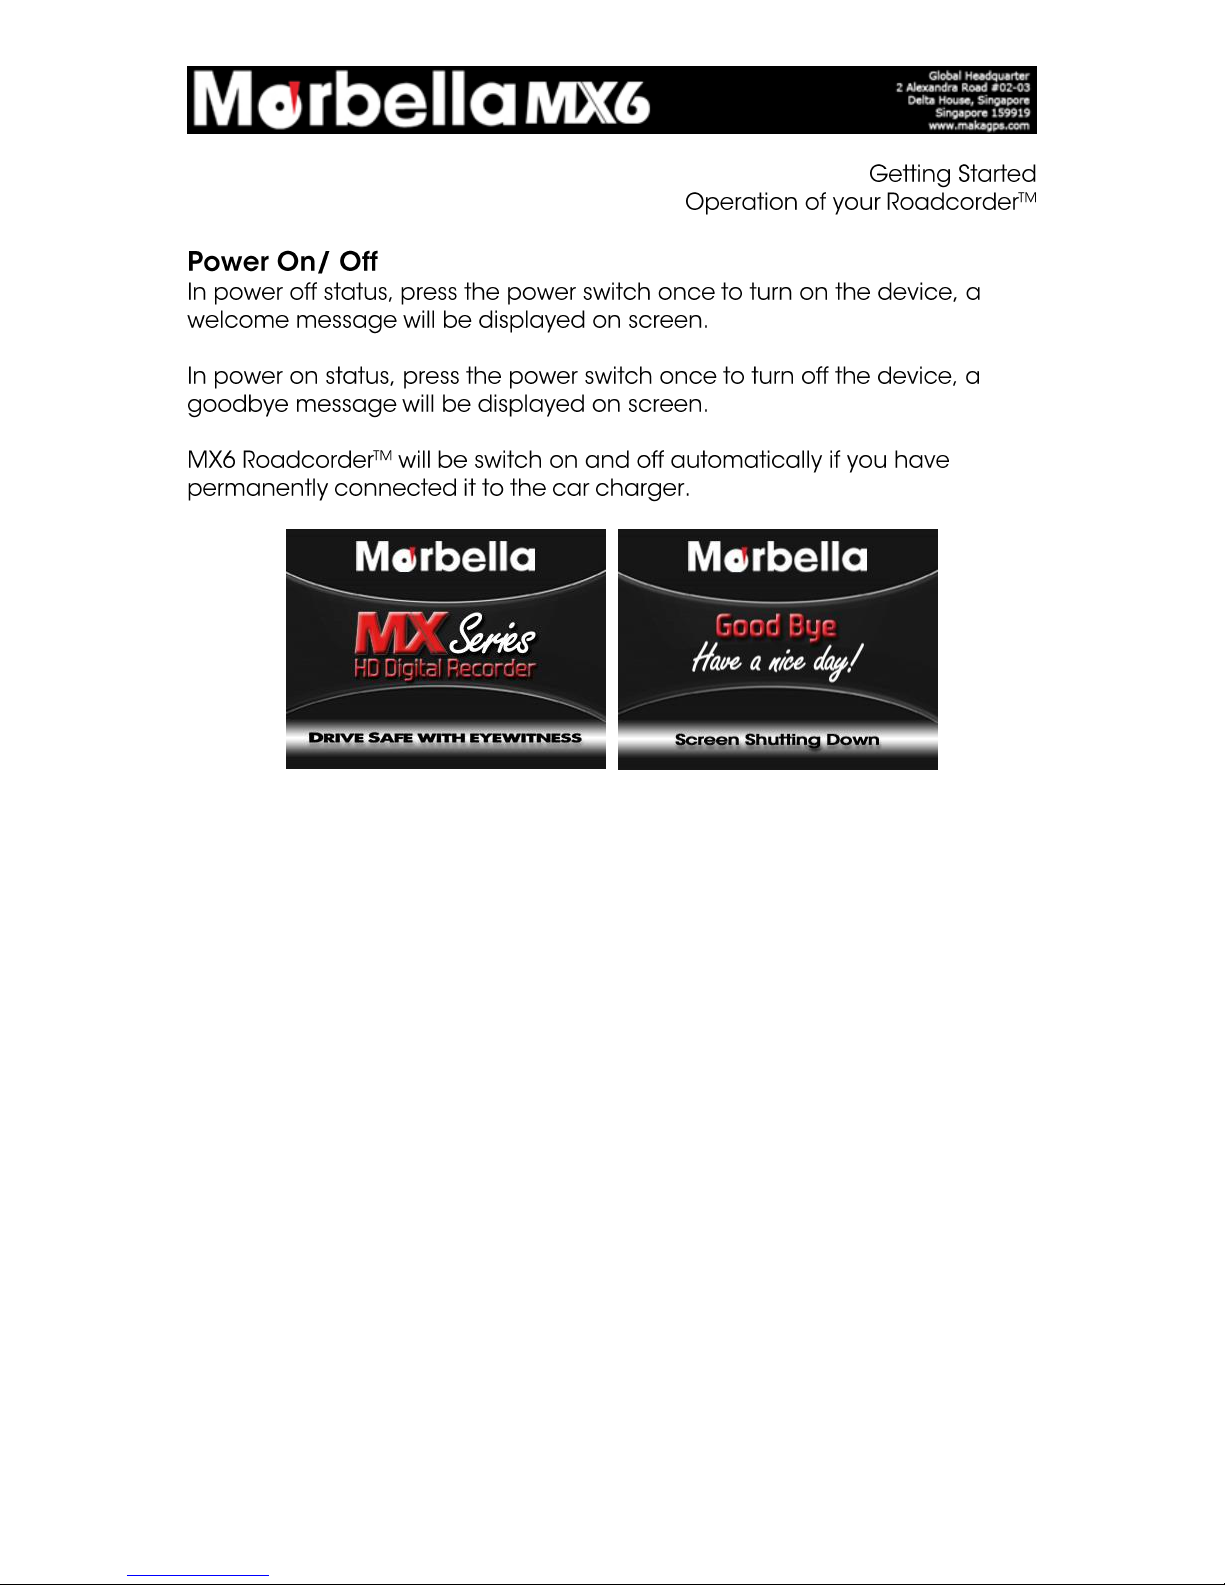
CAR HOLDER
WINDOW SUCTION
WINDOW MOUNT
Page 8
Page 8
© 2013 Maka Technologies Group. All Rights Reserved.
Page 9
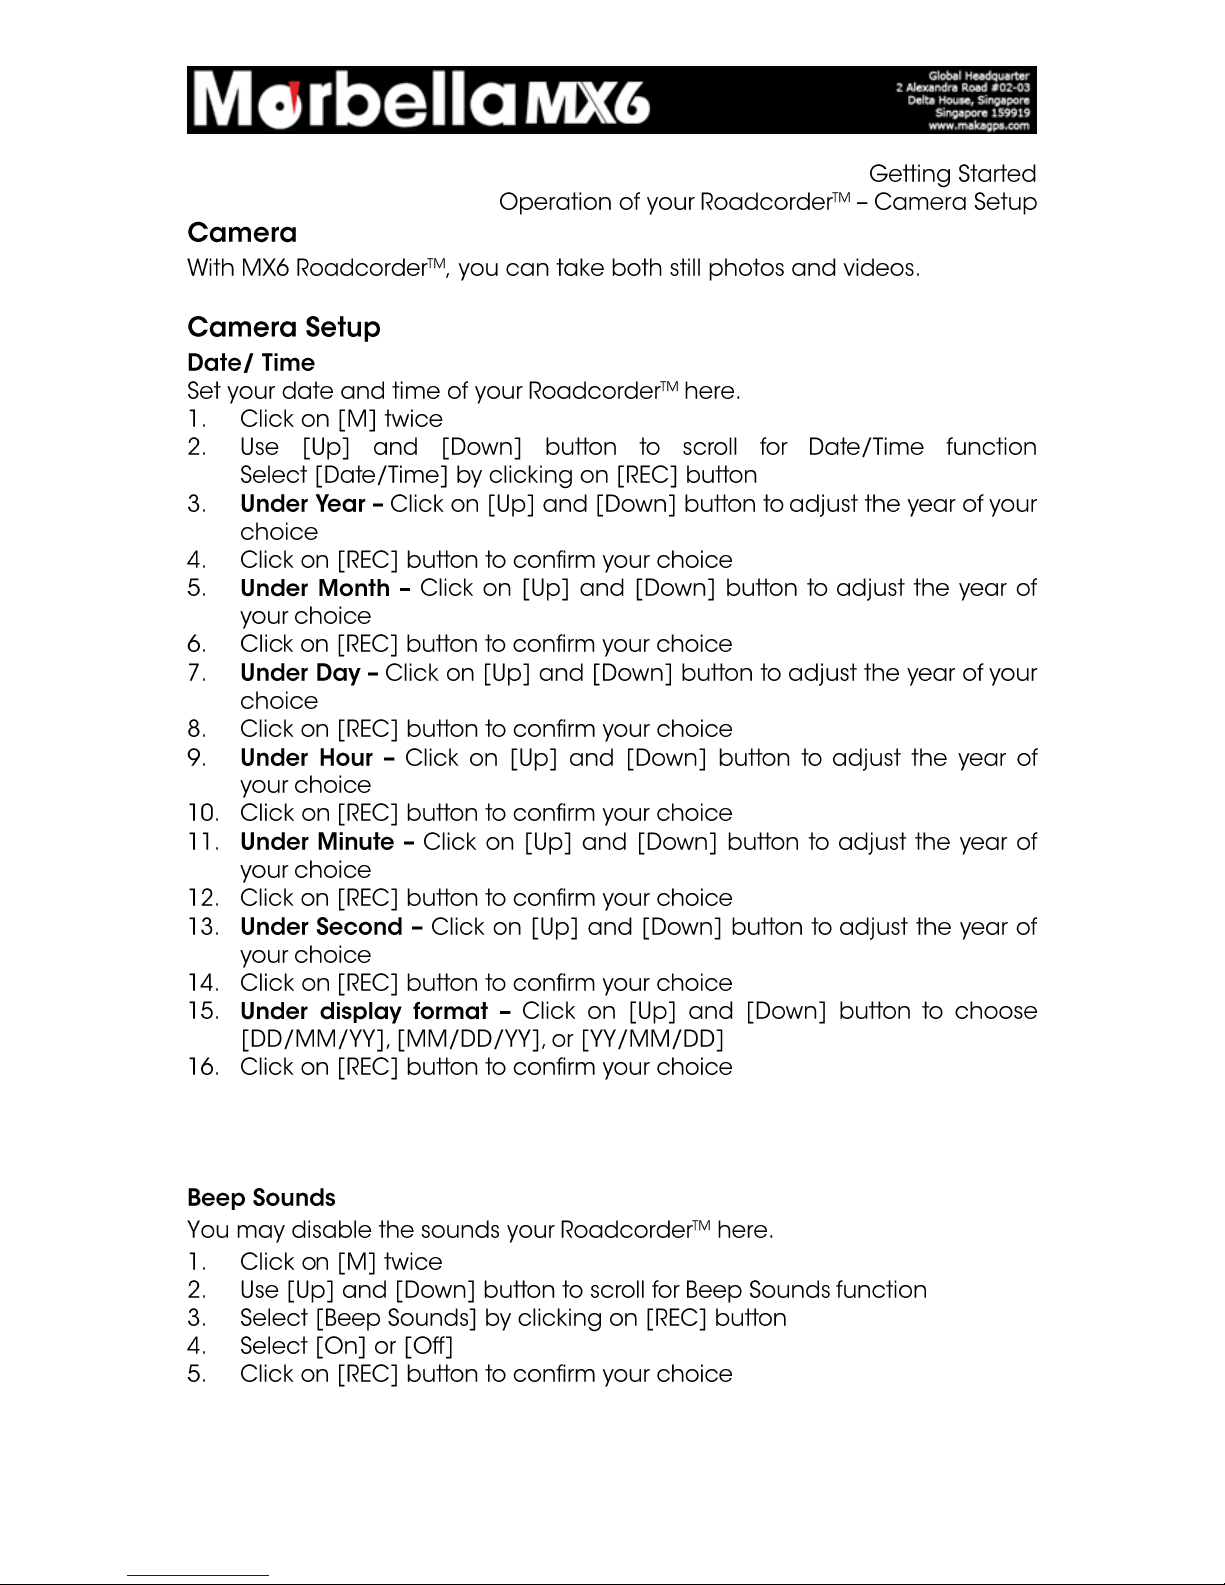
Page 9
© 2013 Maka Technologies Group. All Rights Reserved.
Page 10
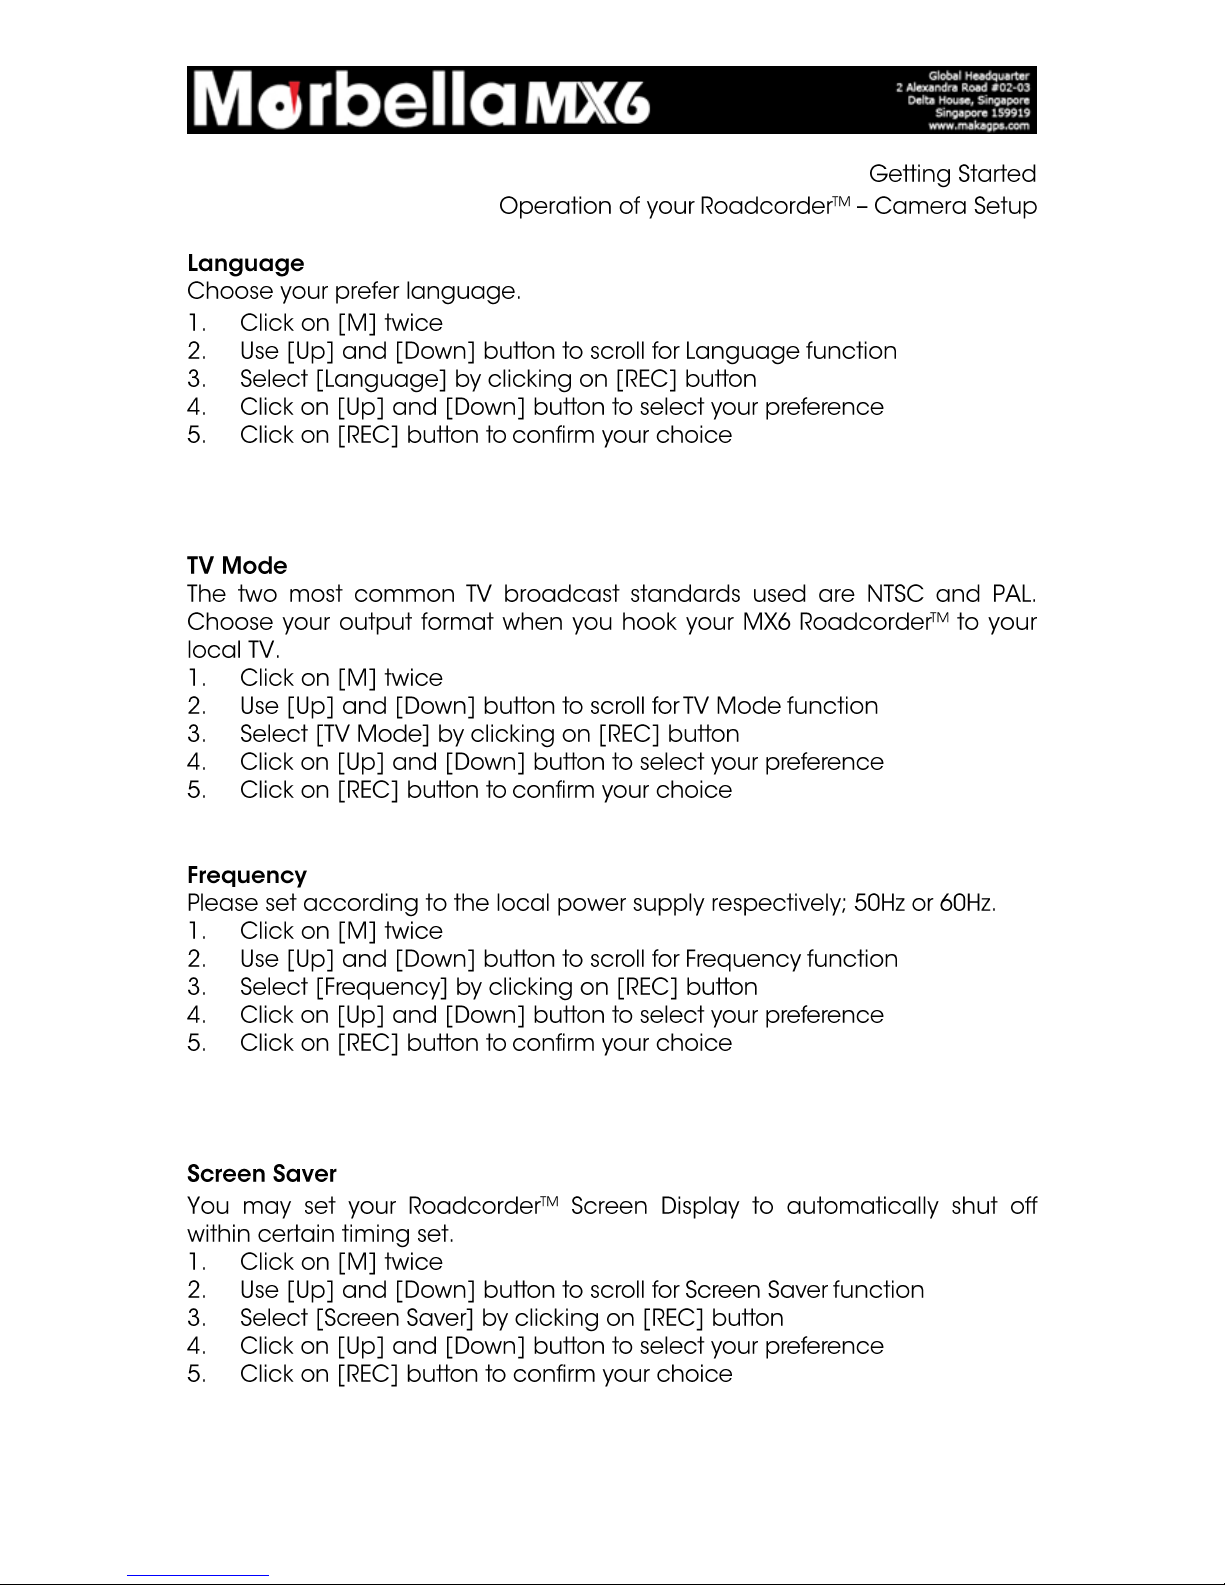
Page 10
© 2013 Maka Technologies Group. All Rights Reserved.
Page 11
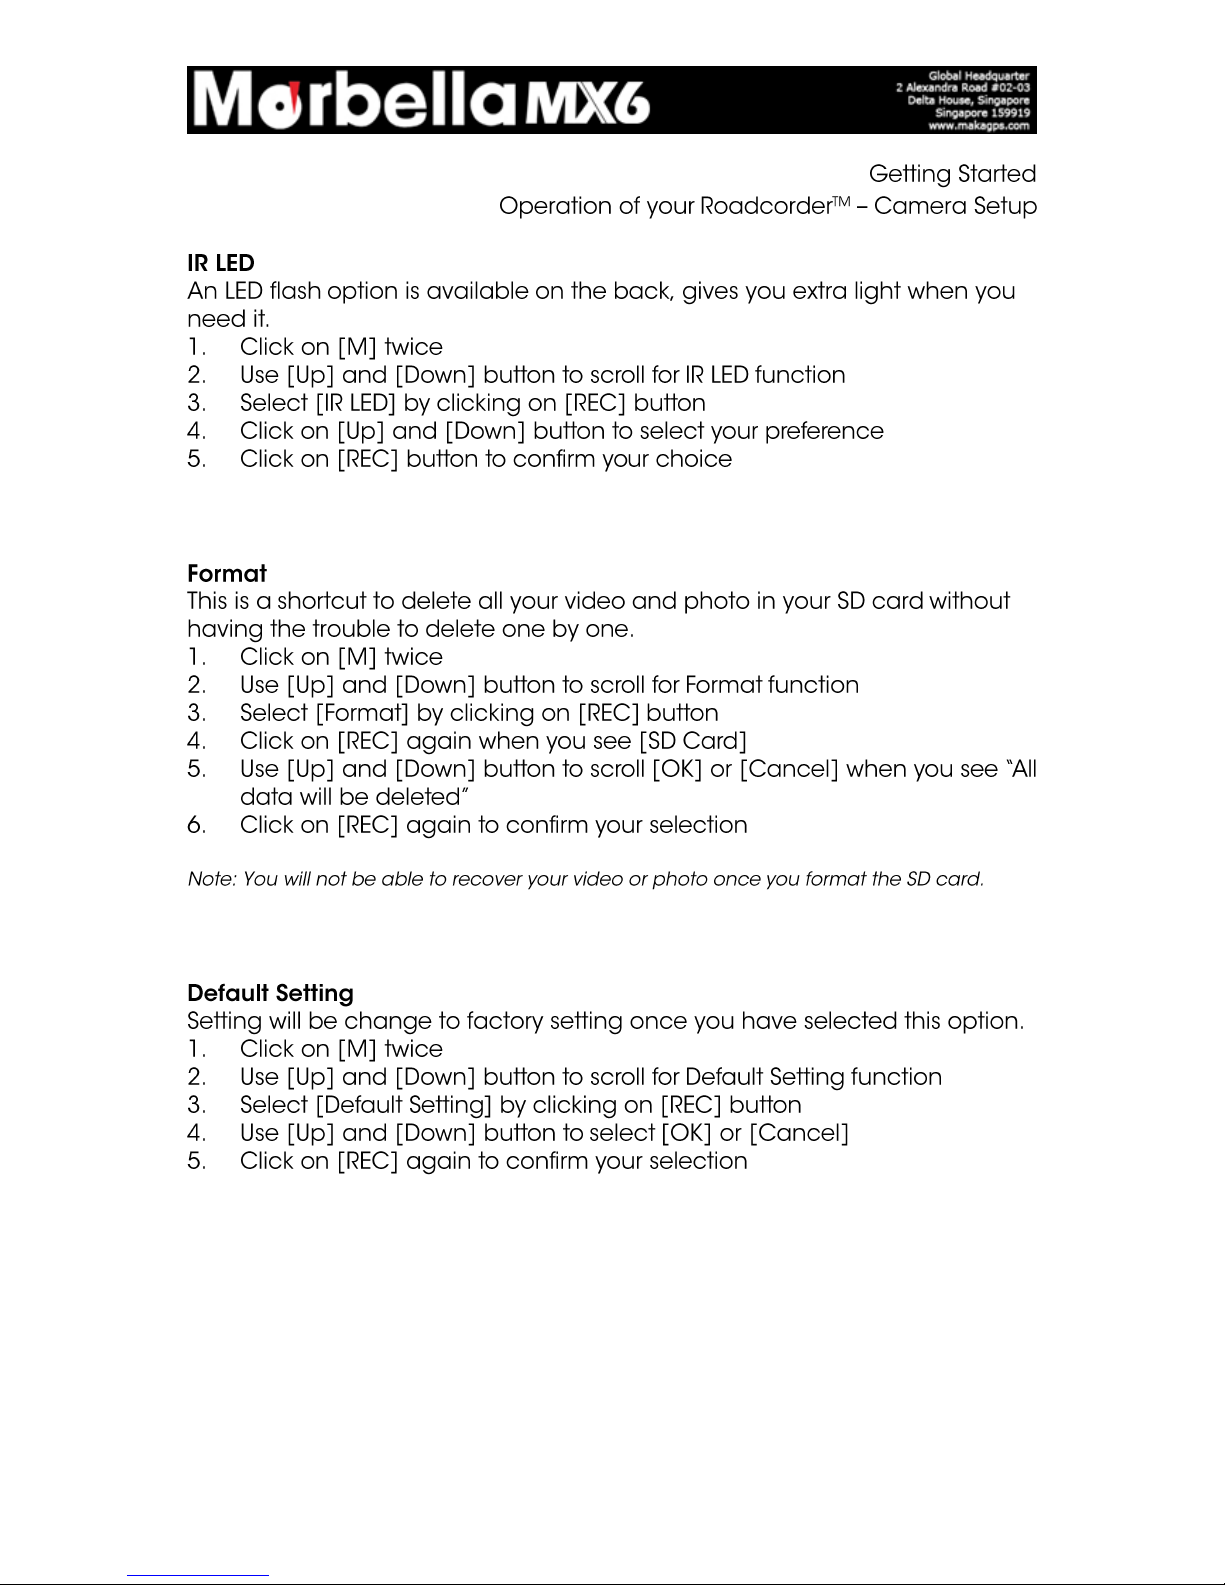
Page 11
© 2013 Maka Technologies Group. All Rights Reserved.
Page 12
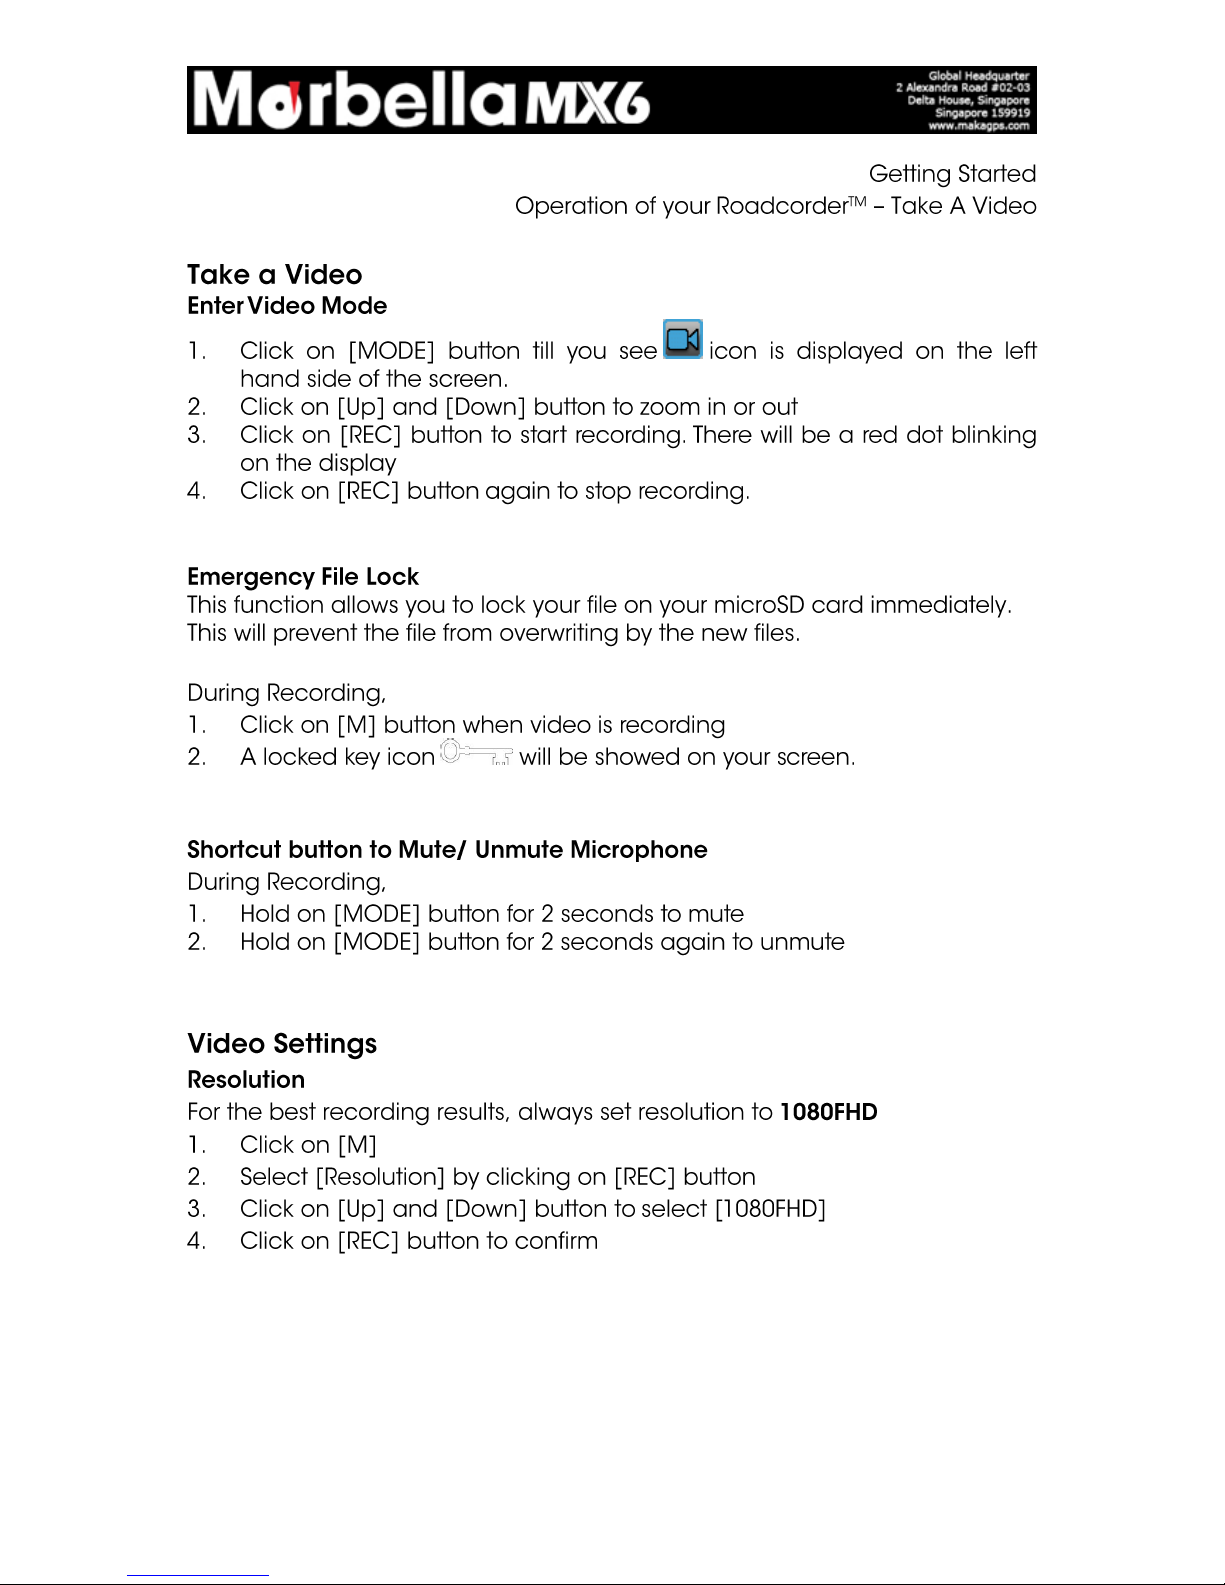
Page 12
© 2013 Maka Technologies Group. All Rights Reserved.
Page 13
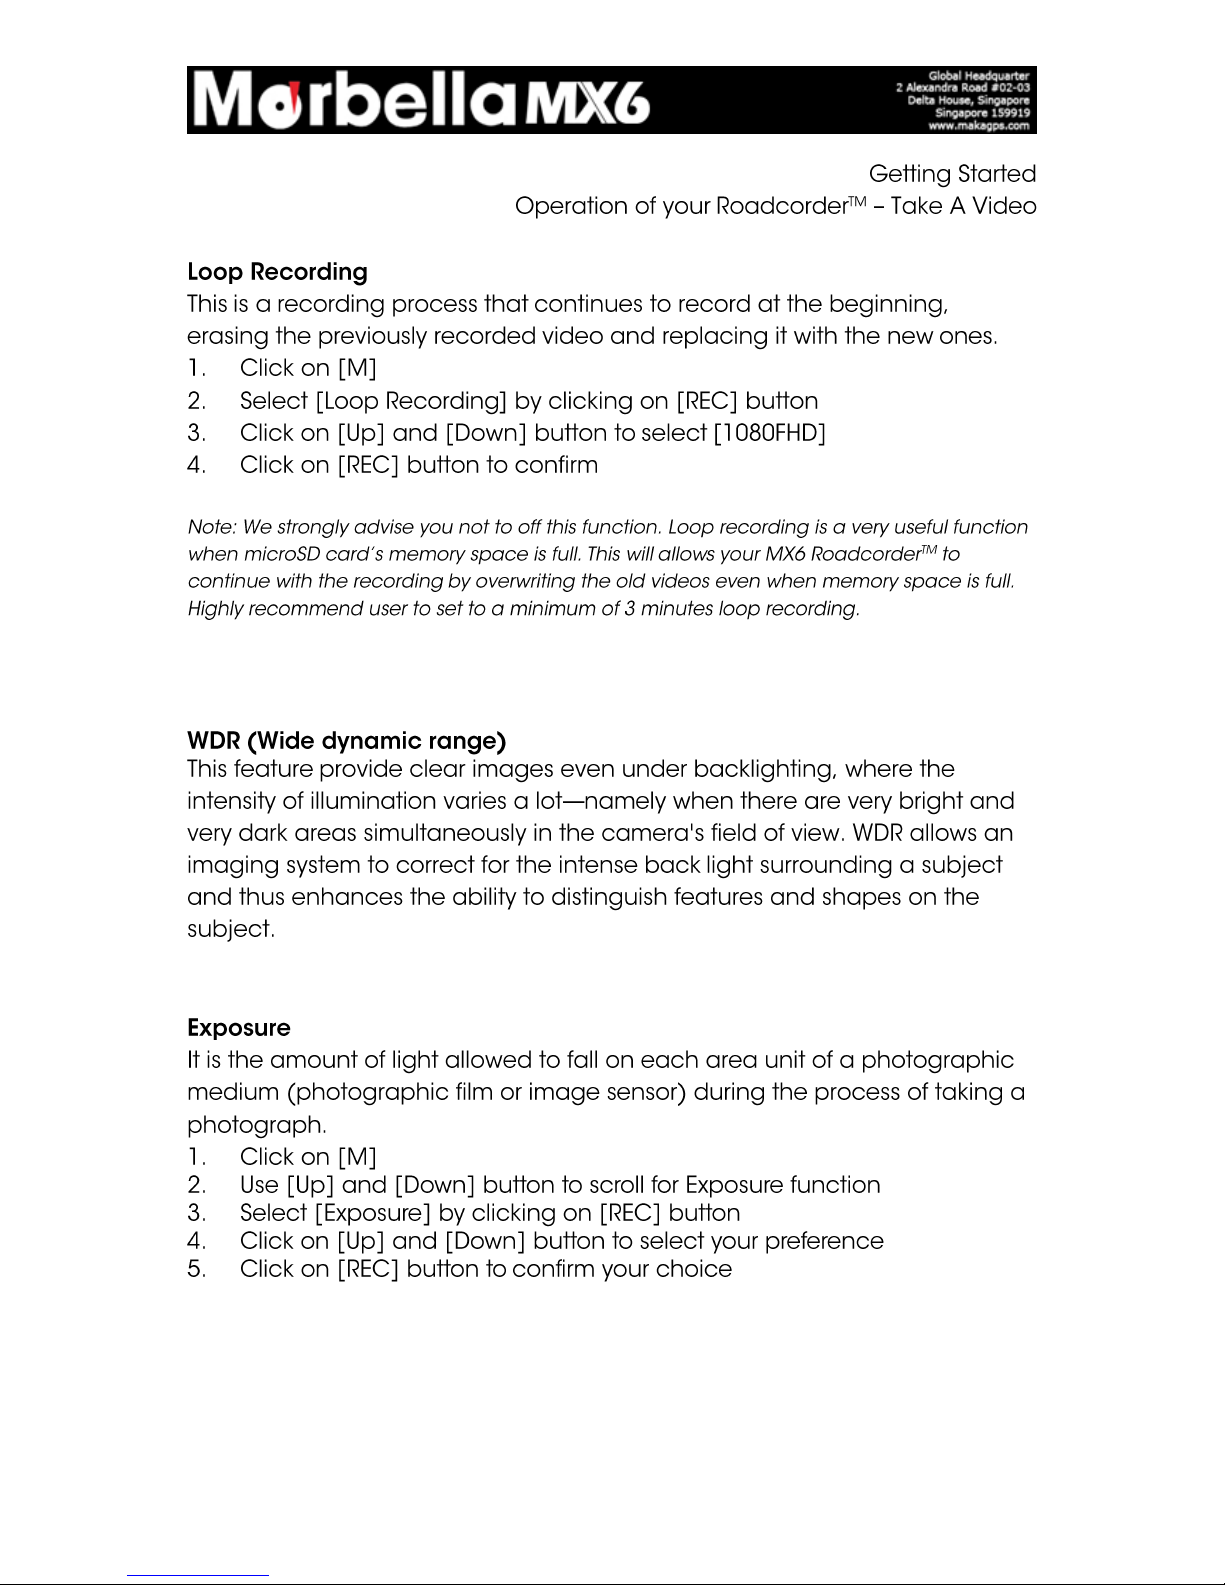
Page 13
© 2013 Maka Technologies Group. All Rights Reserved.
Page 14
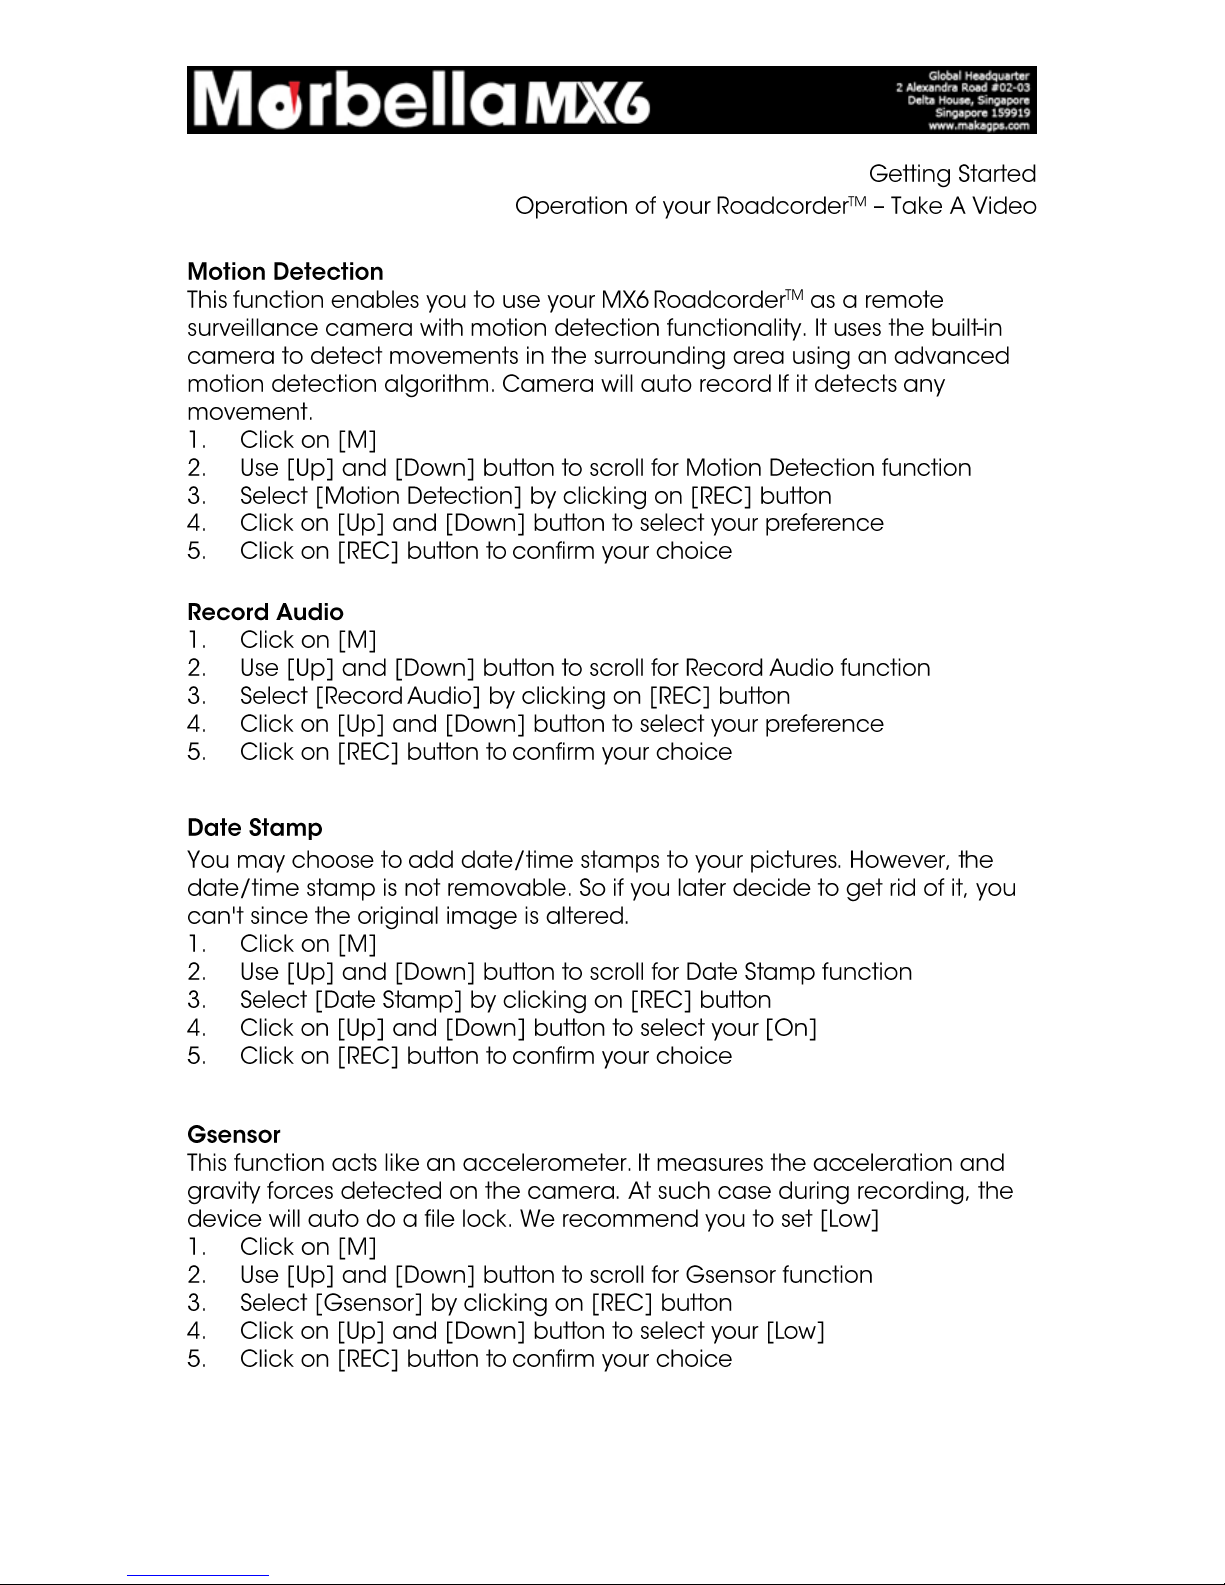
Page 14
© 2013 Maka Technologies Group. All Rights Reserved.
Page 15
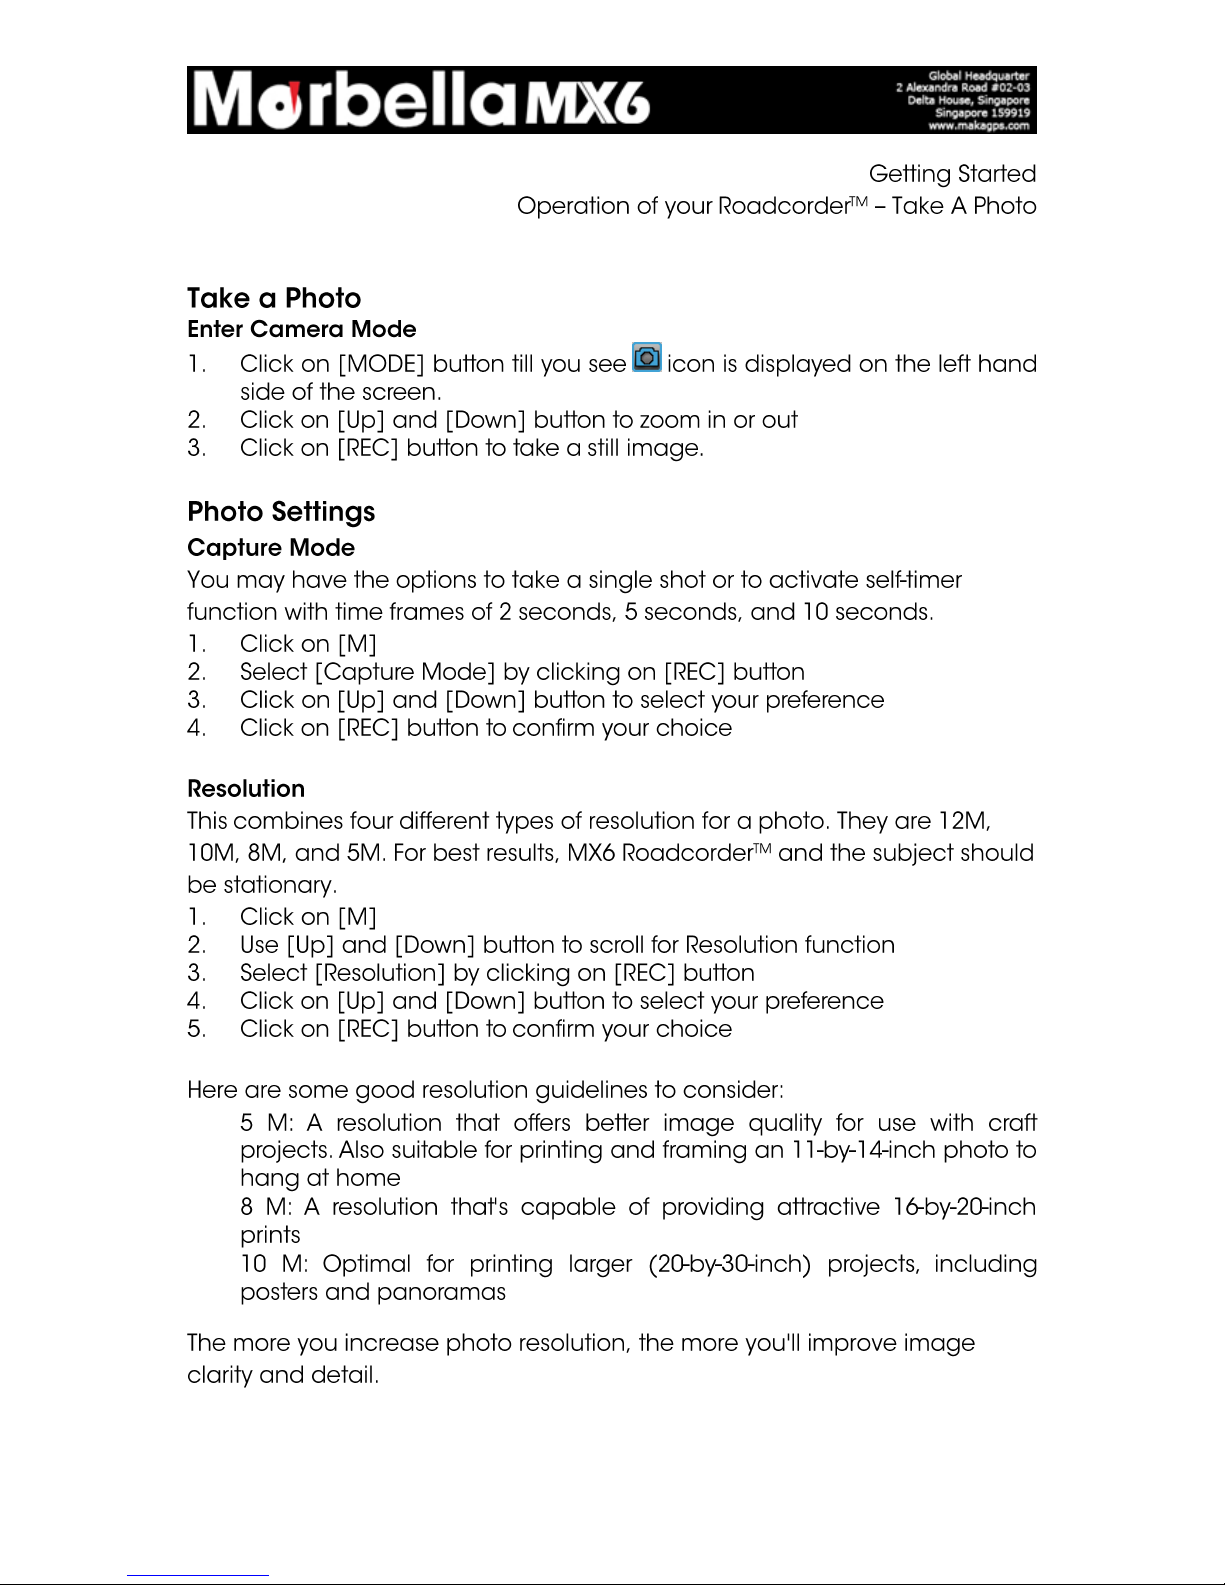
Page 15
© 2013 Maka Technologies Group. All Rights Reserved.
Page 16
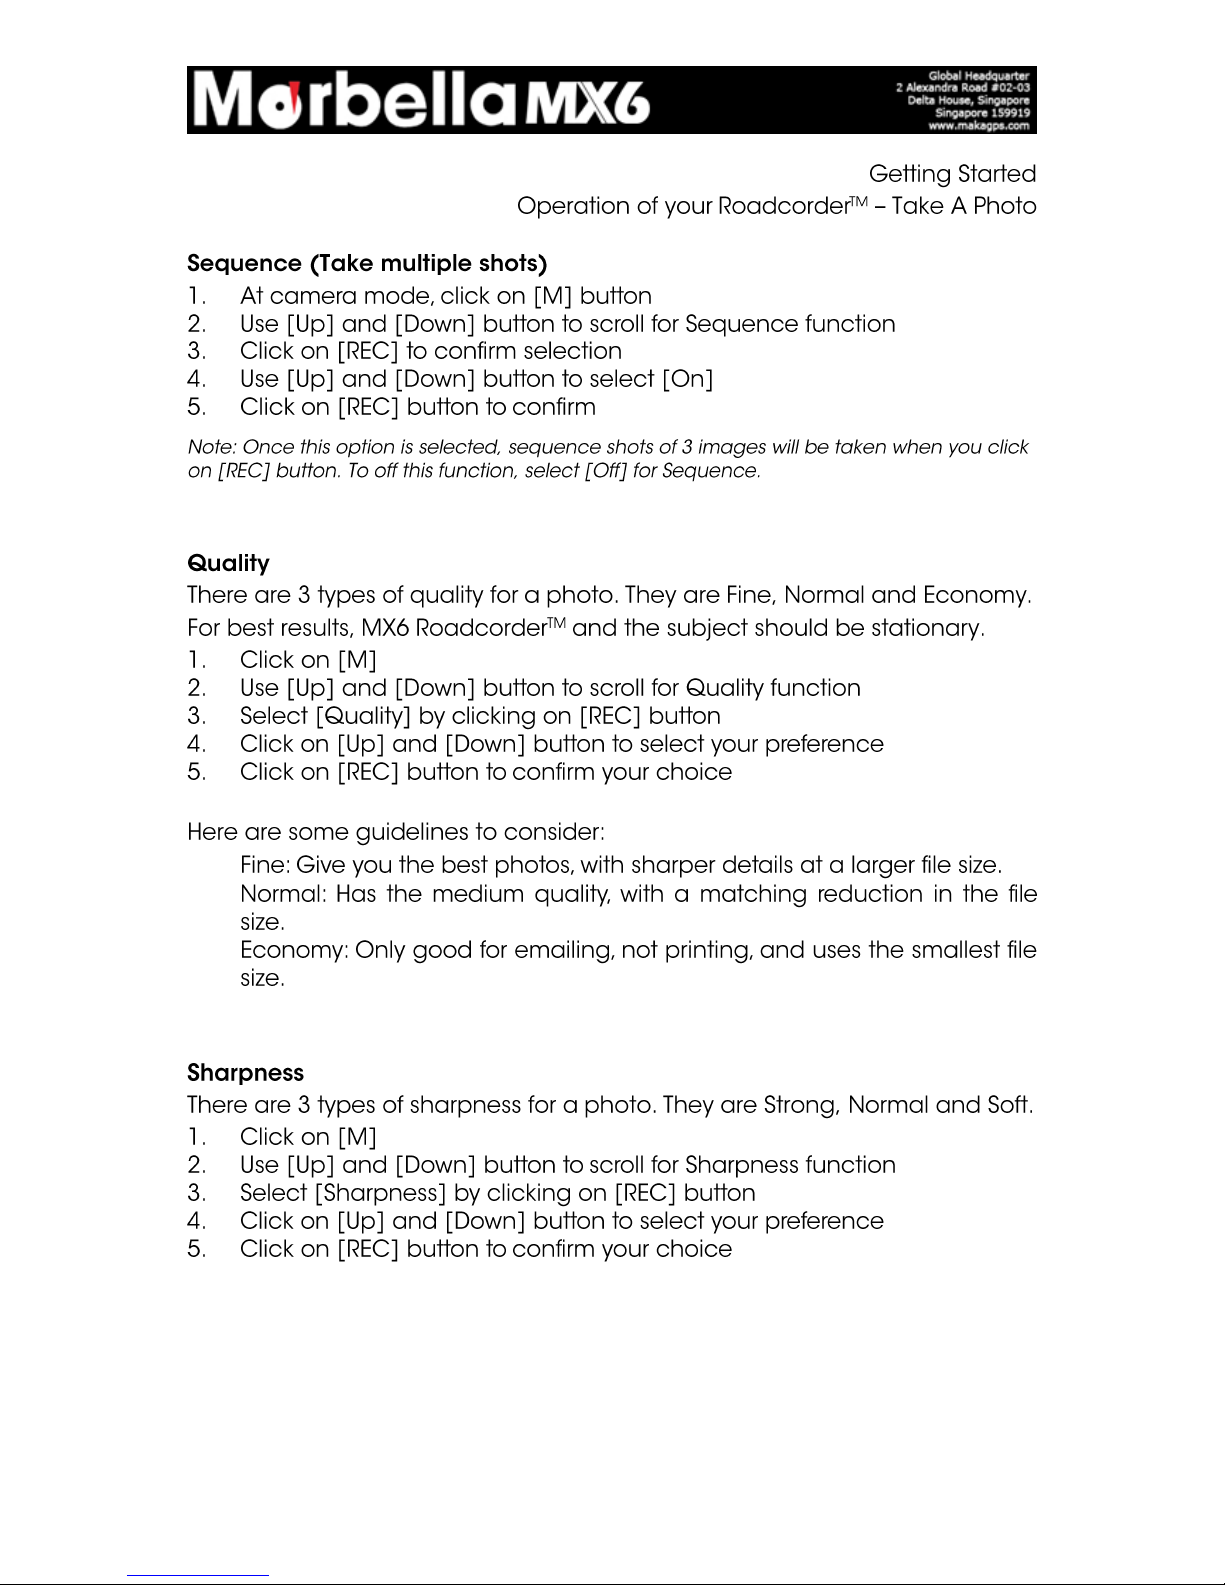
Page 16
© 2013 Maka Technologies Group. All Rights Reserved.
Page 17
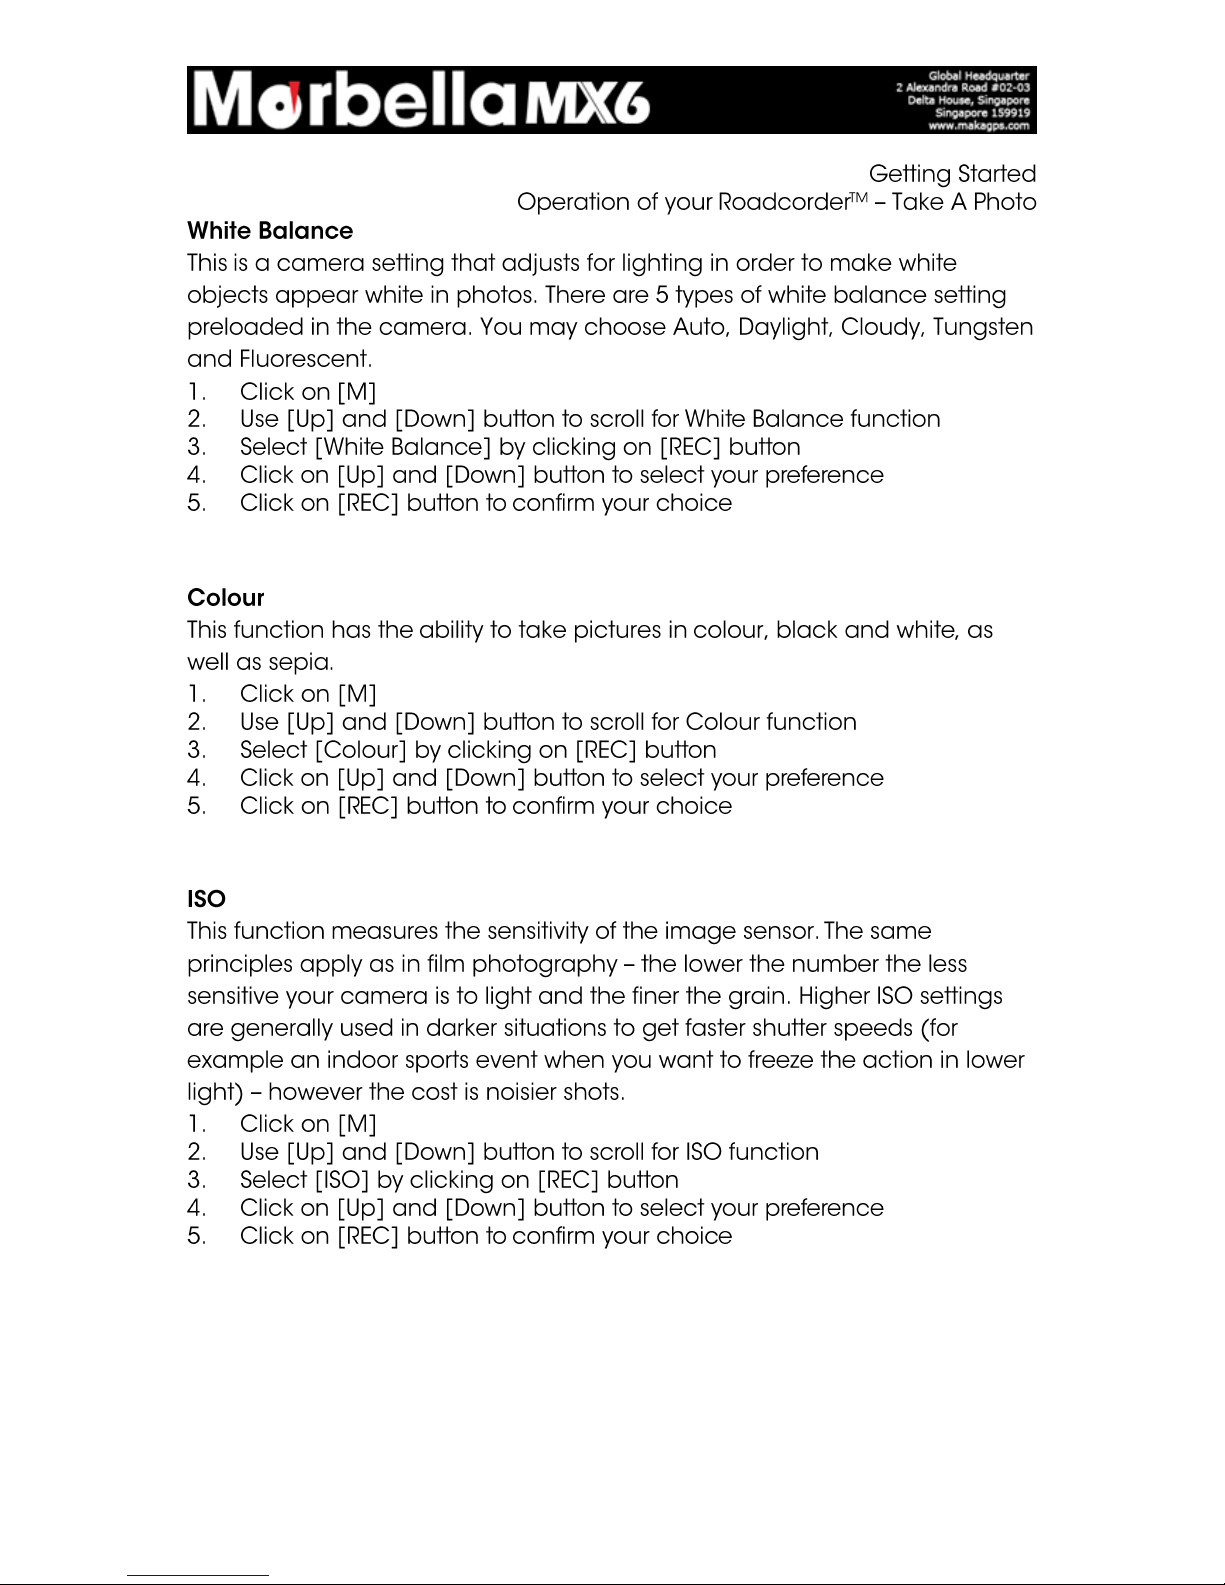
Page 17
© 2013 Maka Technologies Group. All Rights Reserved.
Page 18
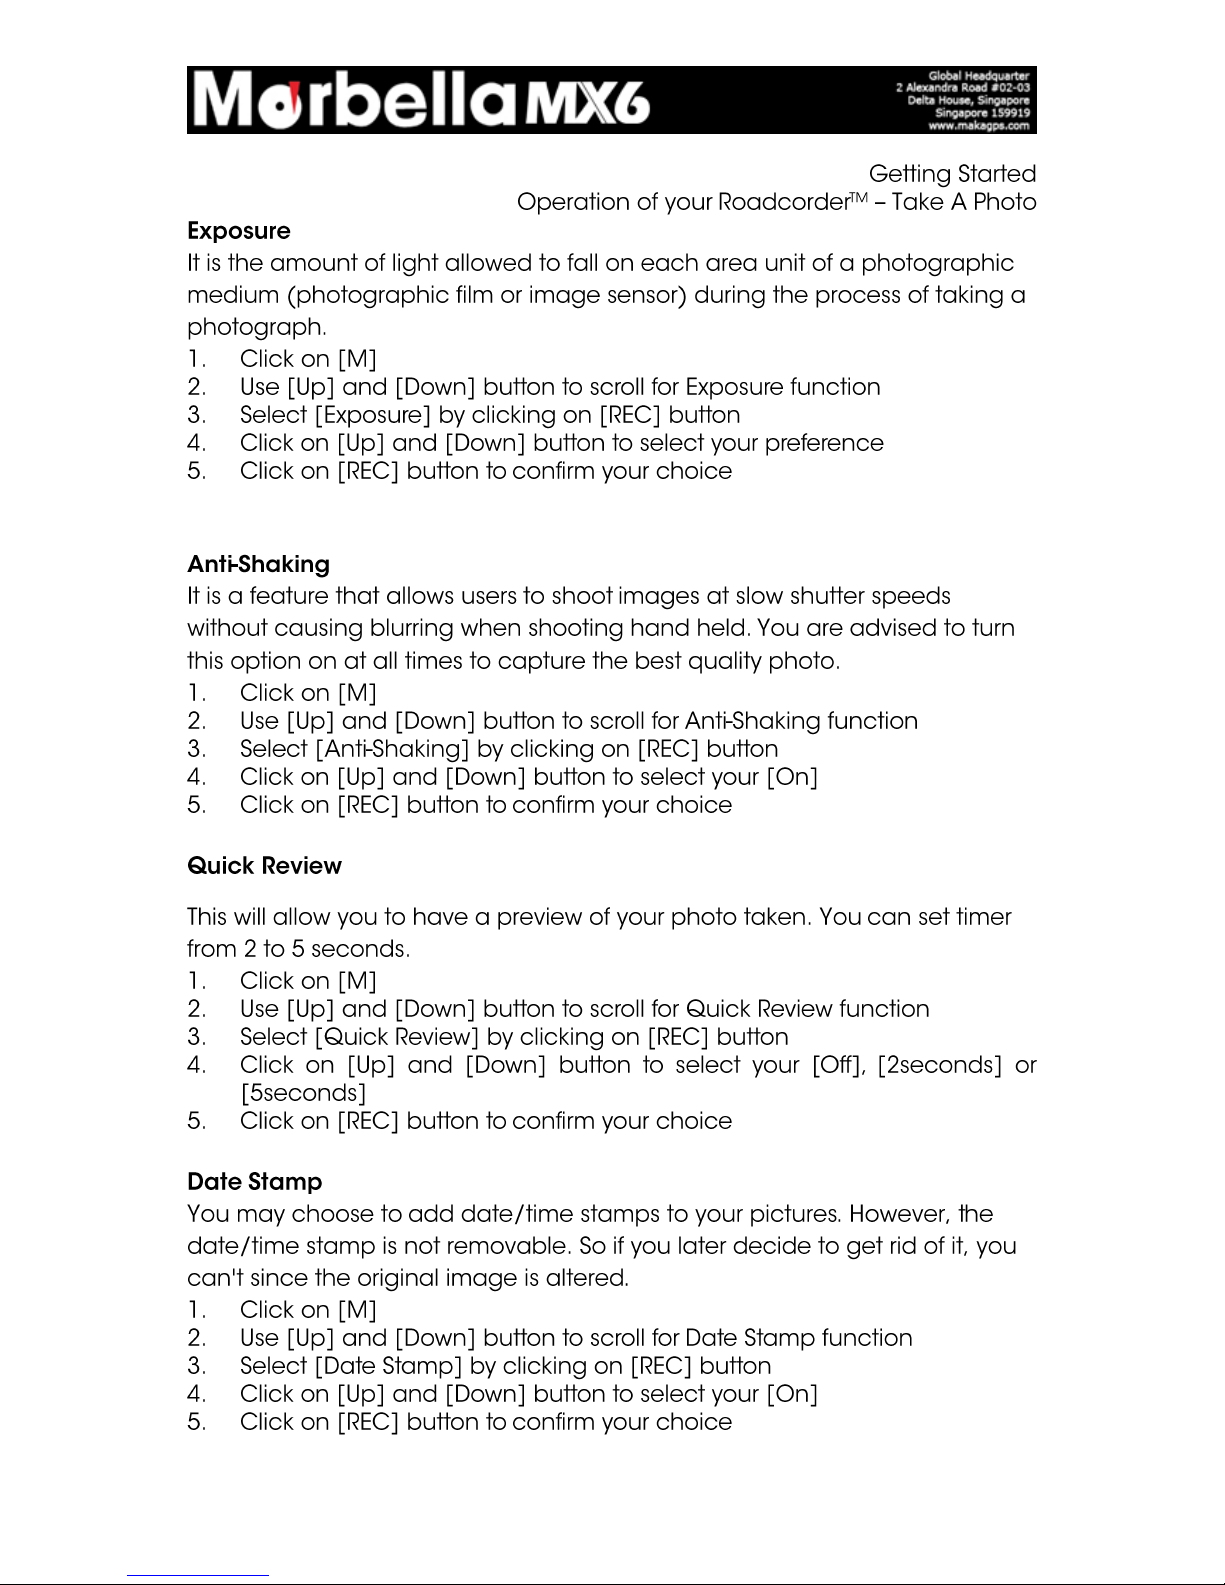
Page 18
© 2013 Maka Technologies Group. All Rights Reserved.
Page 19
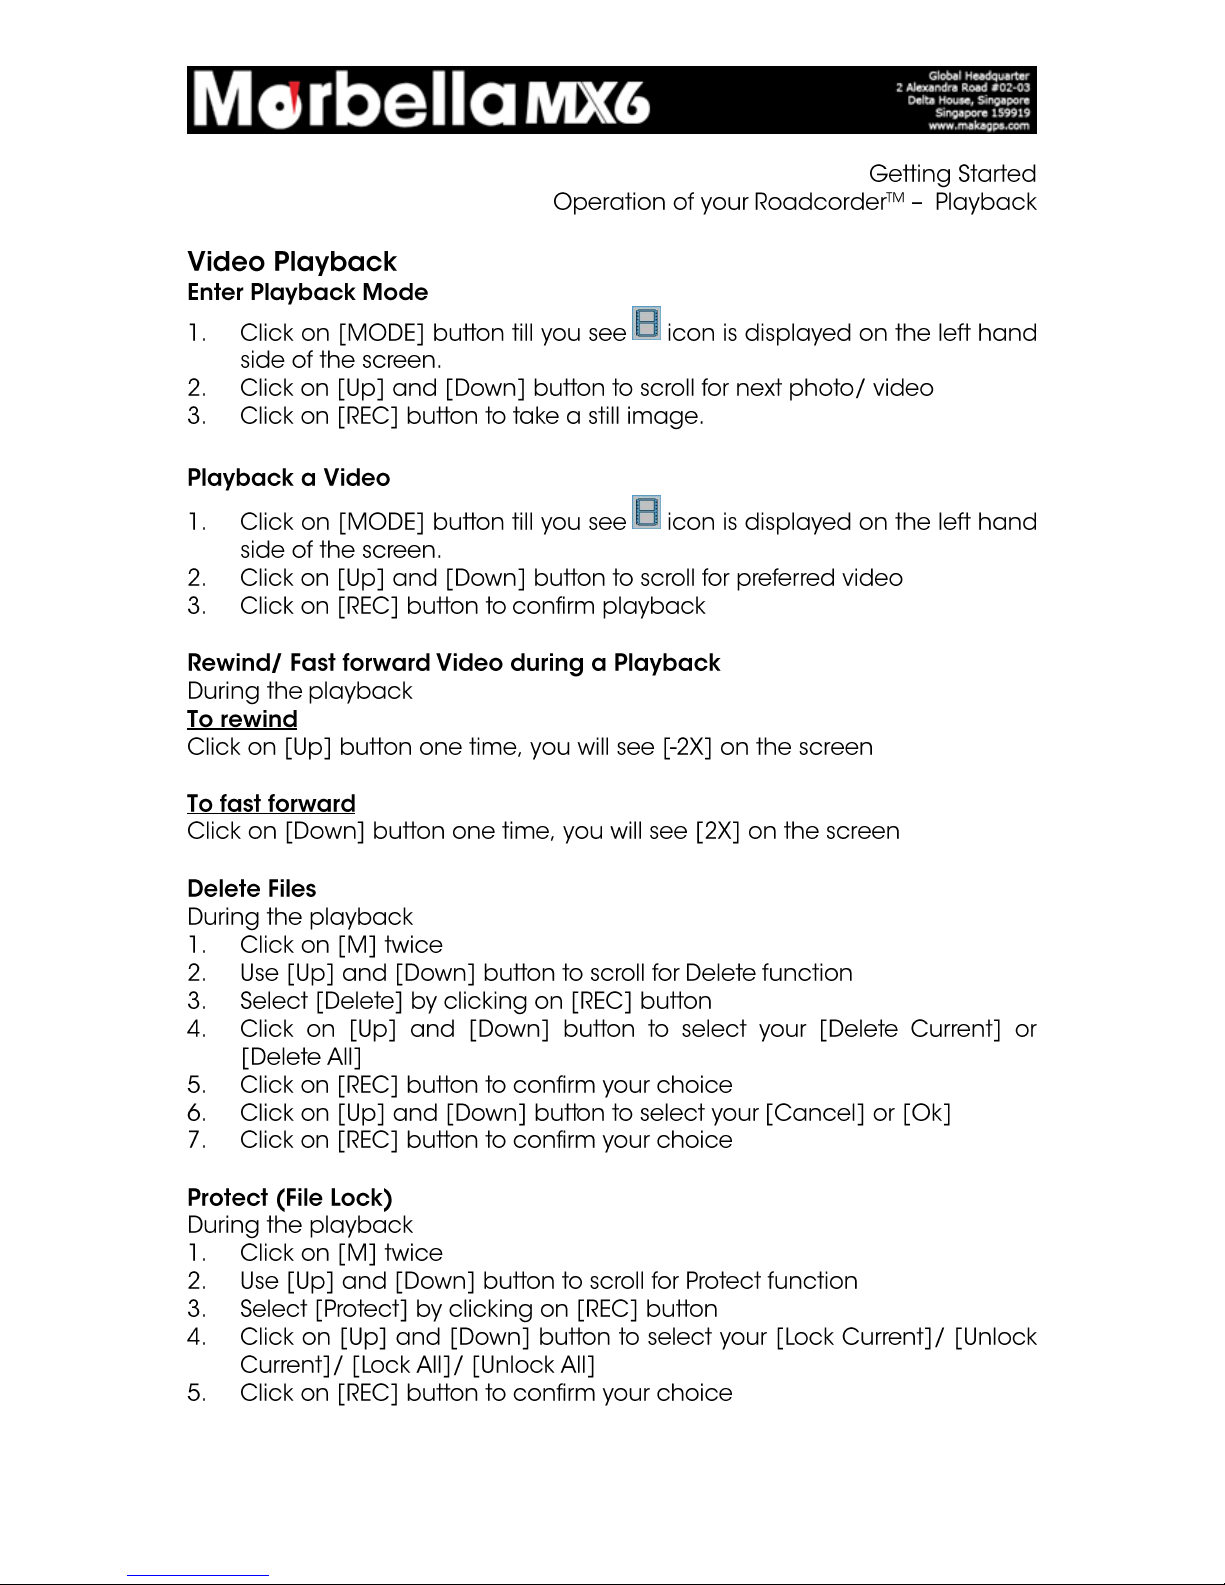
Page 19
© 2013 Maka Technologies Group. All Rights Reserved.
Page 20
Page 20
© 2013 Maka Technologies Group. All Rights Reserved.
Page 21
Page 21
© 2013 Maka Technologies Group. All Rights Reserved.
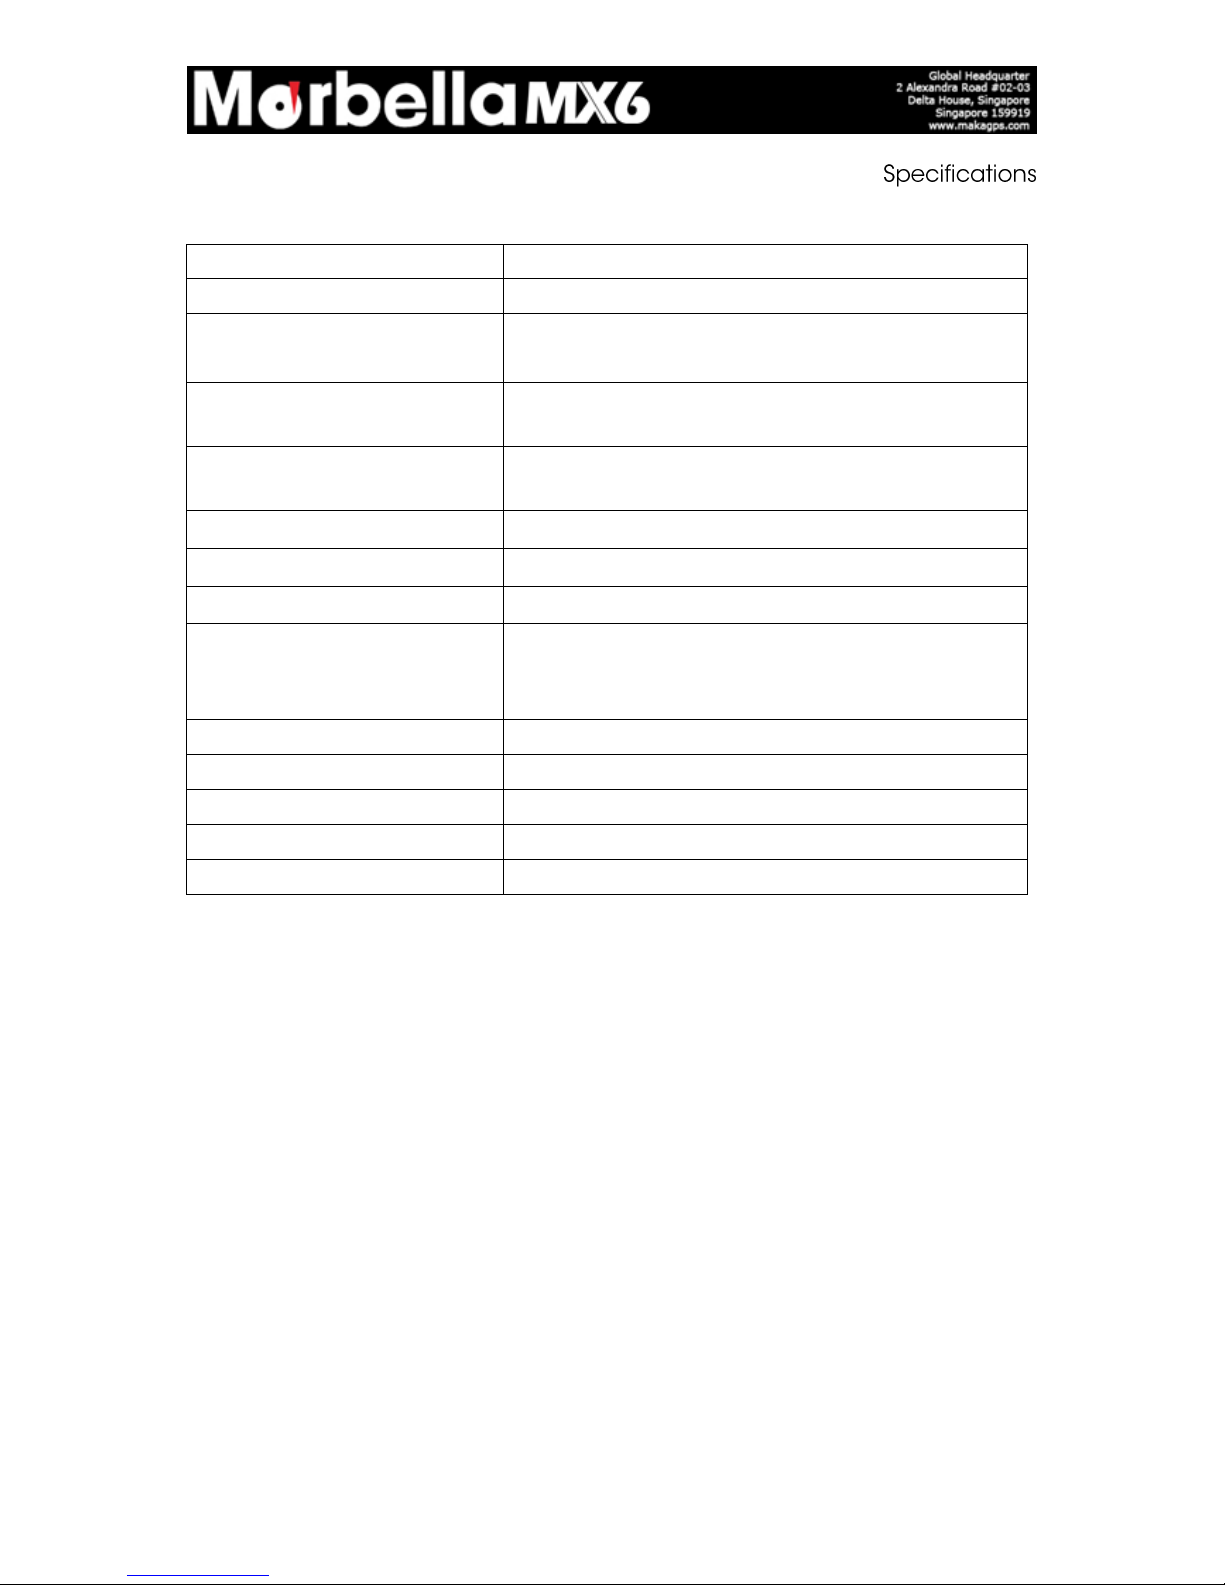
Chipset
NT96650
Storage
DDR3 128M
Video Resolution
1080HFD 1920×1080 /1080P 1440×1080 /720P 1280×
720/ WVGA 848×480/VGA 640×480/QVGA 320×240
File Format
Image: JPG
Video : MOV
Power-off File Recovery
Function
Support
Motion Detection
Support
Date time mark
Support
Memory Card
Support up to 32G MicroSD/ TF Card
Language System
English/French/ Spanish/ Portuguese/ German/
Italian/ Simplified Chinese/ Traditional Chinese/
Russian/ Japanese
HDMI
Support
AV-OUT
Support
TV Standard
NTSC/PAL
USB
Support
Audio Recording
Support
Page 22
Page 22
© 2013 Maka Technologies Group. All Rights Reserved.
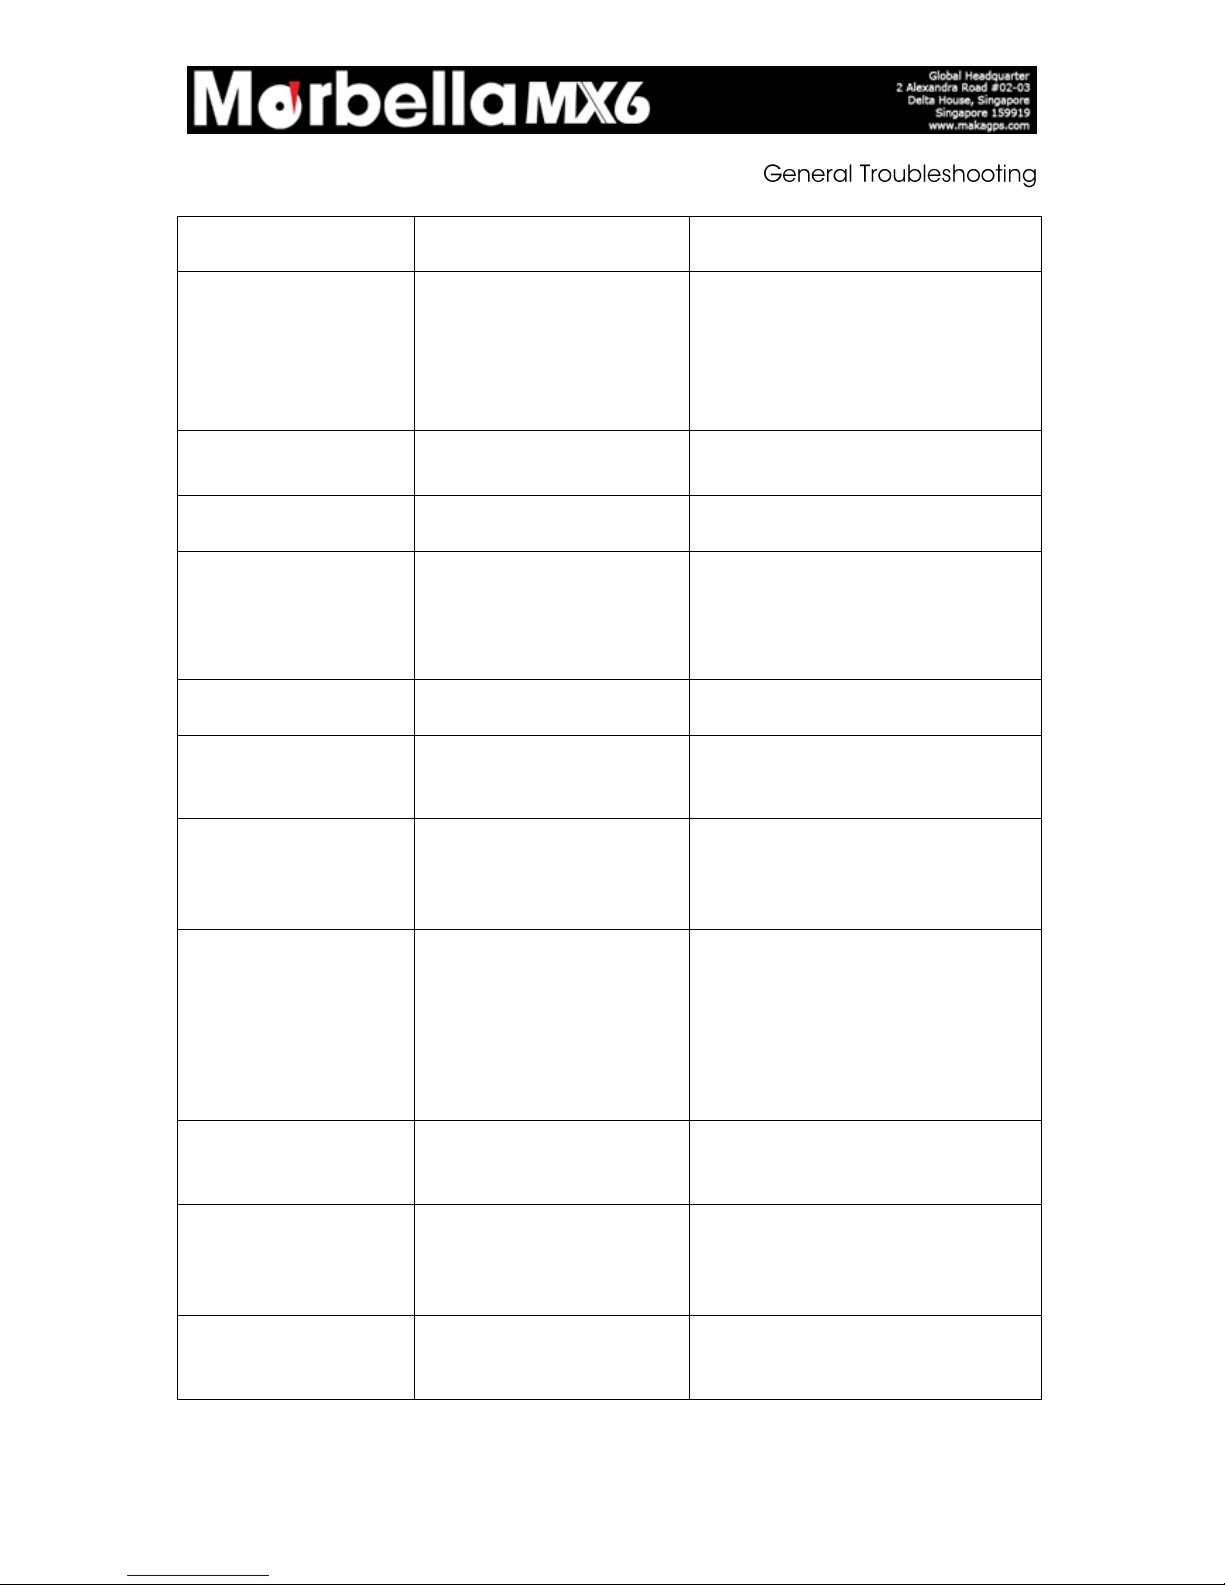
Question
Reason
Solution
The captured image is
not stored
1. MicroSD card might be
full.
2. Image is not saved
before the power
outage.
Make sure to stop recording before
shutting down.
All buttons are invalid
Procedural error or faulty
operation
Press RESET button to restart the
DVR.
Device cannot be turn
on
Device might be low in
battery.
Charge the Battery.
Screen Auto power-off
1. Screen Saver function
is enabled.
2. Low Battery.
1. Click on [M] twice to the setup
page and change [Screen Saver]
to off.
2. Charge the battery
Unable to take pictures
or record videos
MicroSD card might be full.
Check your microSD card’s memory
space. Delete files if required.
Auto stop recording in
video mode
Use a compatible SDHC
microSD card for HD video
recording.
Get a microSD card that has
minimum of Class 10 speed.
Encounter “file error”
when trying to
playback pictures or
videos
MicroSD card might be
corrupted. There bad
sectors in the card.
Reformat the microSD card.
No image is displayed
on a high-definition TV
screen
1. Cable plug might not be
plugged in properly.
2. Wrong TV Input mode
1. Ensure AV/ HDMI cable is plug
into the TV properly.
2. Refer to the back panel of your
TV to track the correct TV input.
Make sure you have selected
the correct input.
Hazy Images
Lens might be dirty.
Check if there are fingerprints or
dust on the lens. Clean it with a
micro fabric cloth if necessary.
Supply light cannot be
turn on
Device might be low in
battery. Supply light will
not be able to on when
power is insufficient.
Charge the Battery.
There are horizontal
stripes interference on
the image
This could be due to wrong
light frequency setting.
Please set according to the local
power supply respectively; 50Hz or
60Hz. For SG/MY: 50hz
 Loading...