

Android
USER MANUAL
Snap3D
& Mplayer3D
MOPIC Co., Ltd.

CONTENT
Introducing Snap3D and Mplayer3D
Snap3D Included Items
Key Points Before Use
Install Mplayer3D
Calibrate 3D Setting
• Important
• Angle setup
• Alignment setup
• Setup check
Saving 3D/VR Videos
• Player Home Screen
• How to save 3D/VR videos on your phone
2P
3P
3P
4P
4P
6P
Enjoying 3D/VR Videos
• Watching Videos on YouTube
• Watching Videos Saved on Your Device
• Menu While Playing 3D/VR Videos
7P
Introducing Snap3D and Mplayer3D
Snap3D is a unique smartphone case that converts your smartphone into a
3D device. If attached onto the front screen, Snap3D will convert your
smartphone screen into 3D. If attached onto the back, it becomes an
excellent protective case.
Mplayer3D requires 3D calibration setup.
Please make sure to consult the manual or video tutorials!
2
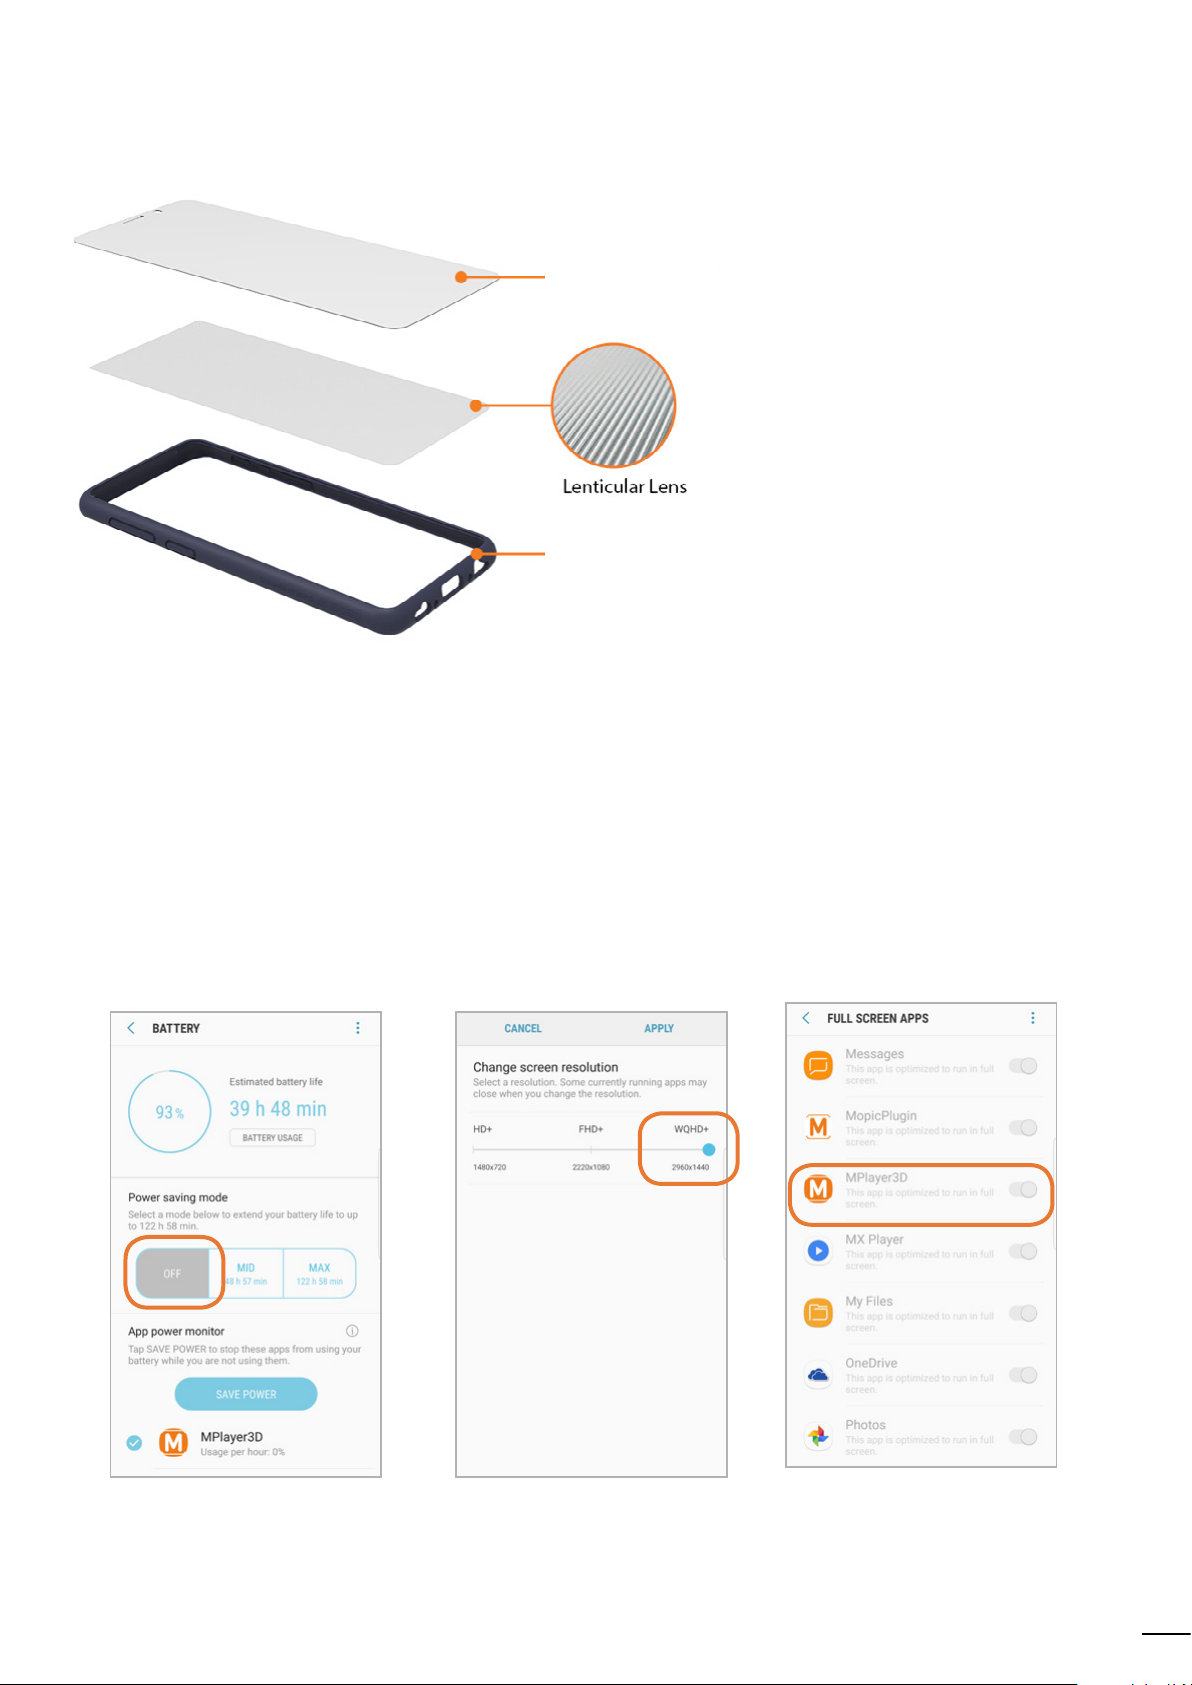
Snap3D Included Items
Plate
clear&transparent
Frame
shock-resistant
Protects the screen from scratches.
The 3D lens are in Lenticular form.
Designed with strong resistant
material to reduce impact
Key Points Before Use
• Use the Snap3D that matches your device model.
• Remove the protective film from the front and back of Snap3D,
and then put it on the front of your smartphone.
• If you have a thick (over 0.2mm) protective film applied to the screen,
you can not experience the 3D effects.
• Make sure the following settings are correct.
Do not use low-power mode
(Settings-Device Maintenance-
Battery-Power saving mode OFF)
Adjust your resolution settings.
(Settings-Display-
Screen resolution-WQHD+)
Keep your application adjusted
for full screen
(Settings-Display-Full screen
apps-Mplayer3D ON)
3
1
Install Mplayer3D
Mplayer3D, the 3D/VR media player application, is required to use Snap3D.
2
Calibrate 3D Setting
Required
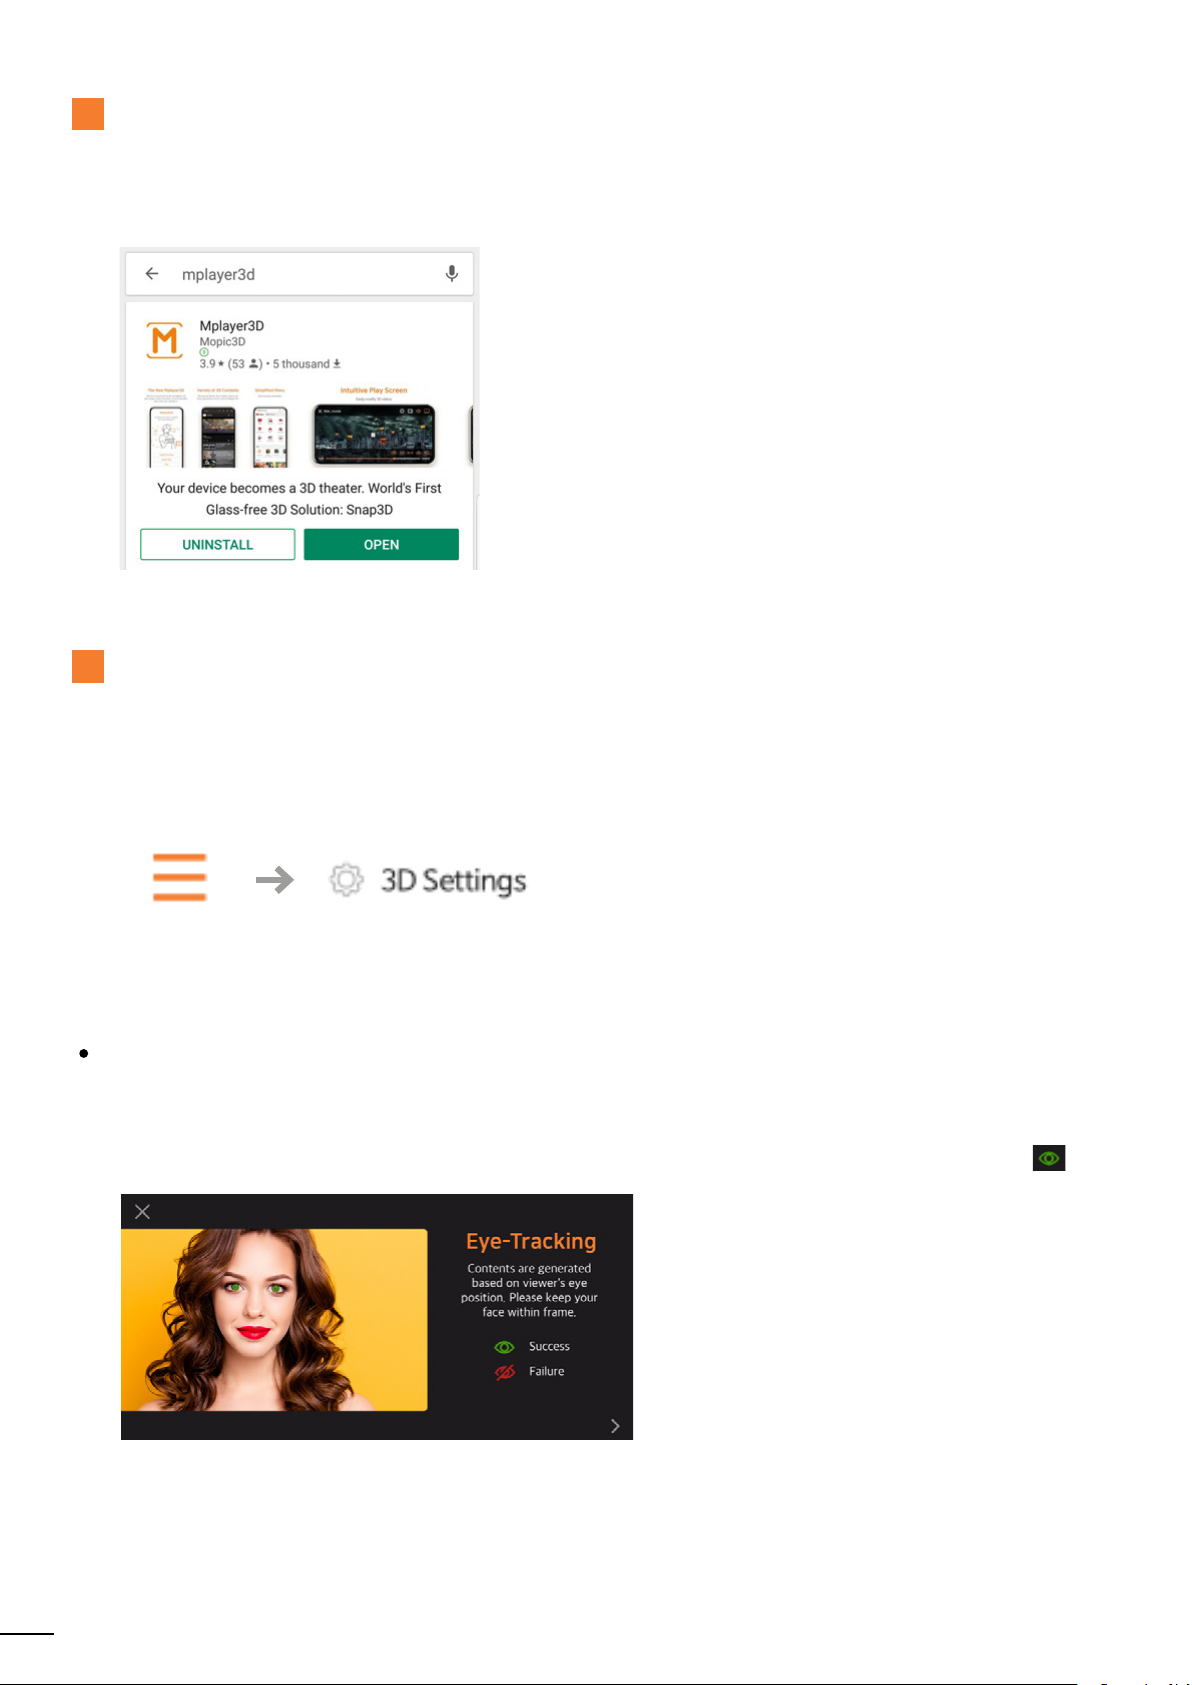
A.Search for “Mplayer3D” on the App Store and download.
B.Calibrate 3D settings before enjoying your videos.
When you first open Mplayer3D, the application will prompt you to calibrate 3D setting.
There are three steps to the process.
You must accurately calibrate all three steps before you can enjoy 3D videos.
If the application does not automatically prompt you to calibrate, use menu - 3D setting.
Important
Mplayer3D plays 3D videos based on the user’s current position.
The front camera must recognize your whole face, and the eye-tracking status must be green.
• Do not cover your face with sunglasses, masks, hair, etc.
• Keep your distance from the front camera to stay inside the orange lines.
• Keep your viewing distance to about 50 cm.
4
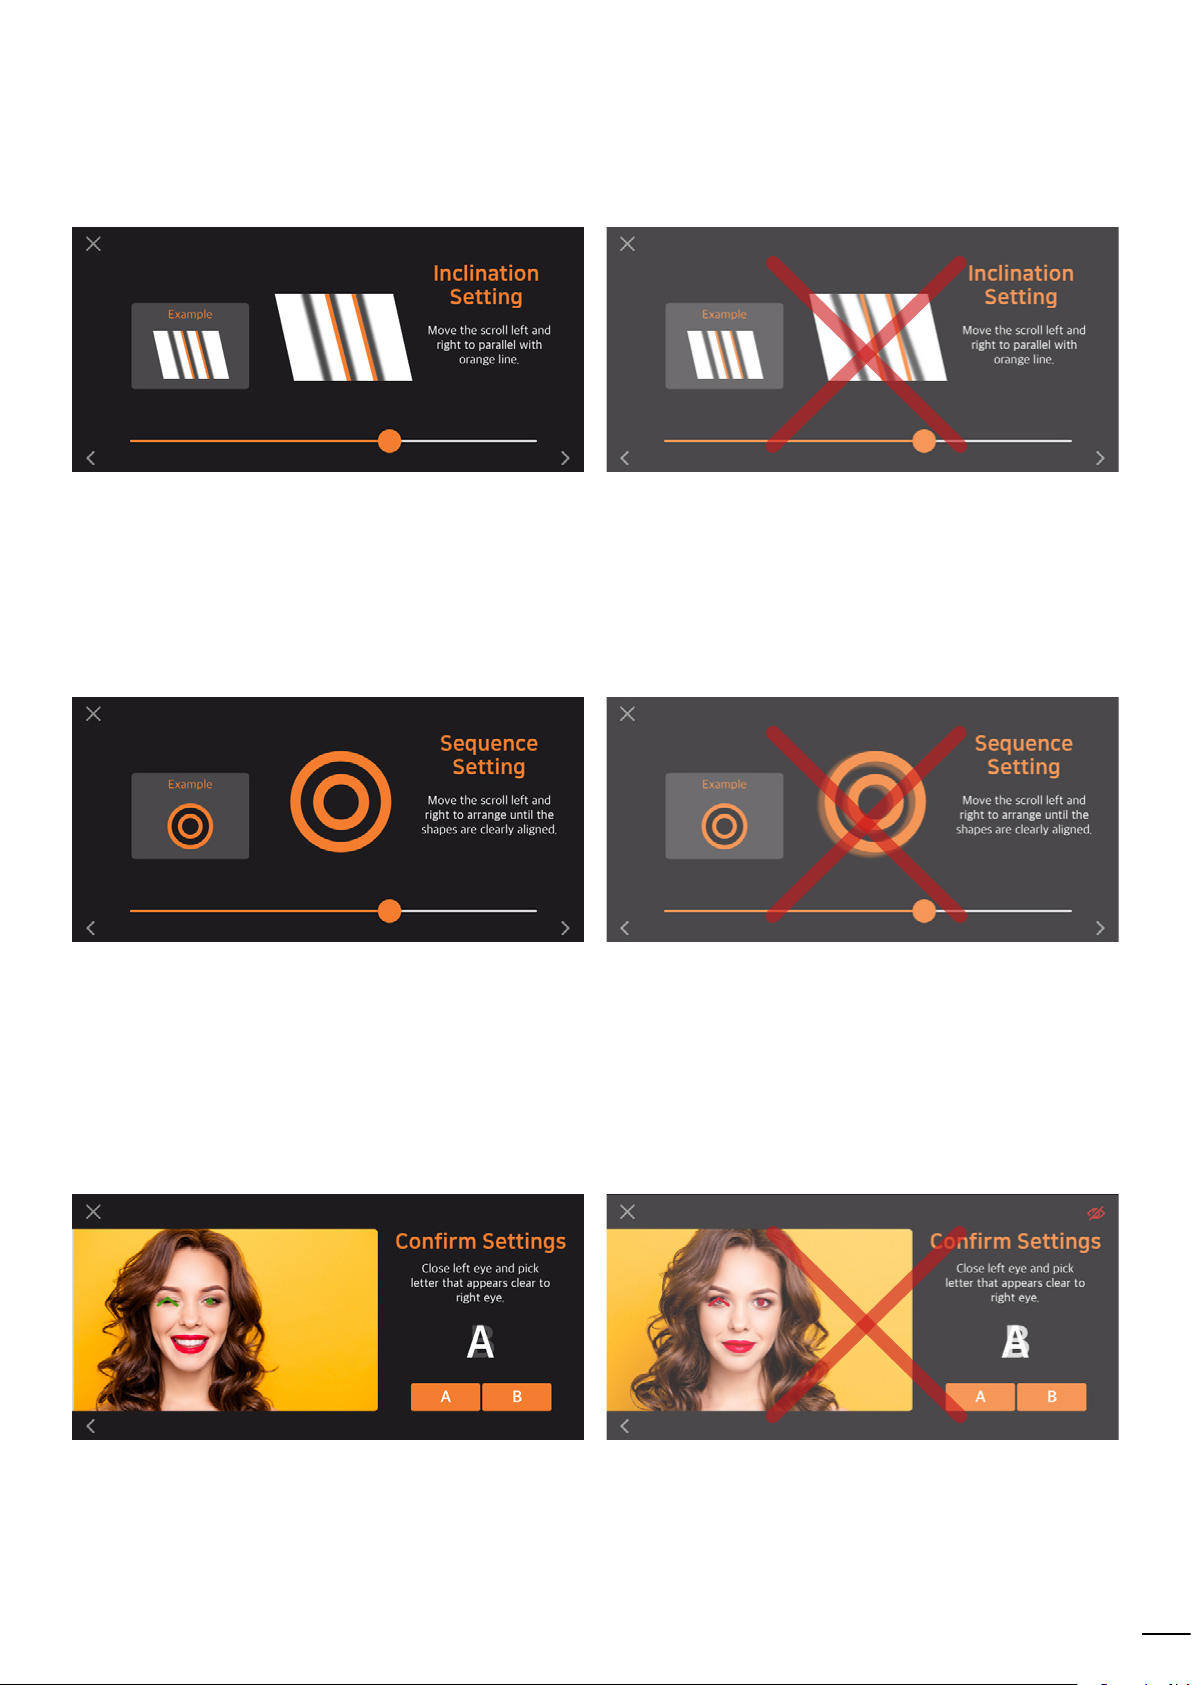
A. Angle setup
• Scroll left and right until the shaded lines are parallel to the dotted lines.
• Not every line needs to be perfectly centered.
B. Alignment setup
• Scroll left and right until the lines look clearly solid.
• Find the place where the moving lines that align with the still lines.
C. Setup check
• This is to check how well the angle and alignment were setup.
• Close your left eye and choose the alphabet (A or B) you see.
• If you cannot see either A or B clearly, you must calibrate again (or the 3D videos will not play clearly).
5
3
Saving 3D/VR Videos
You can save 3D/VR videos on your phone to watch them with Mplayer3D.
A. Player Home Screen
• You can play 3D/VR videos you have saved,
or choose channels on YouTube.
• You can download sample 3D videos.
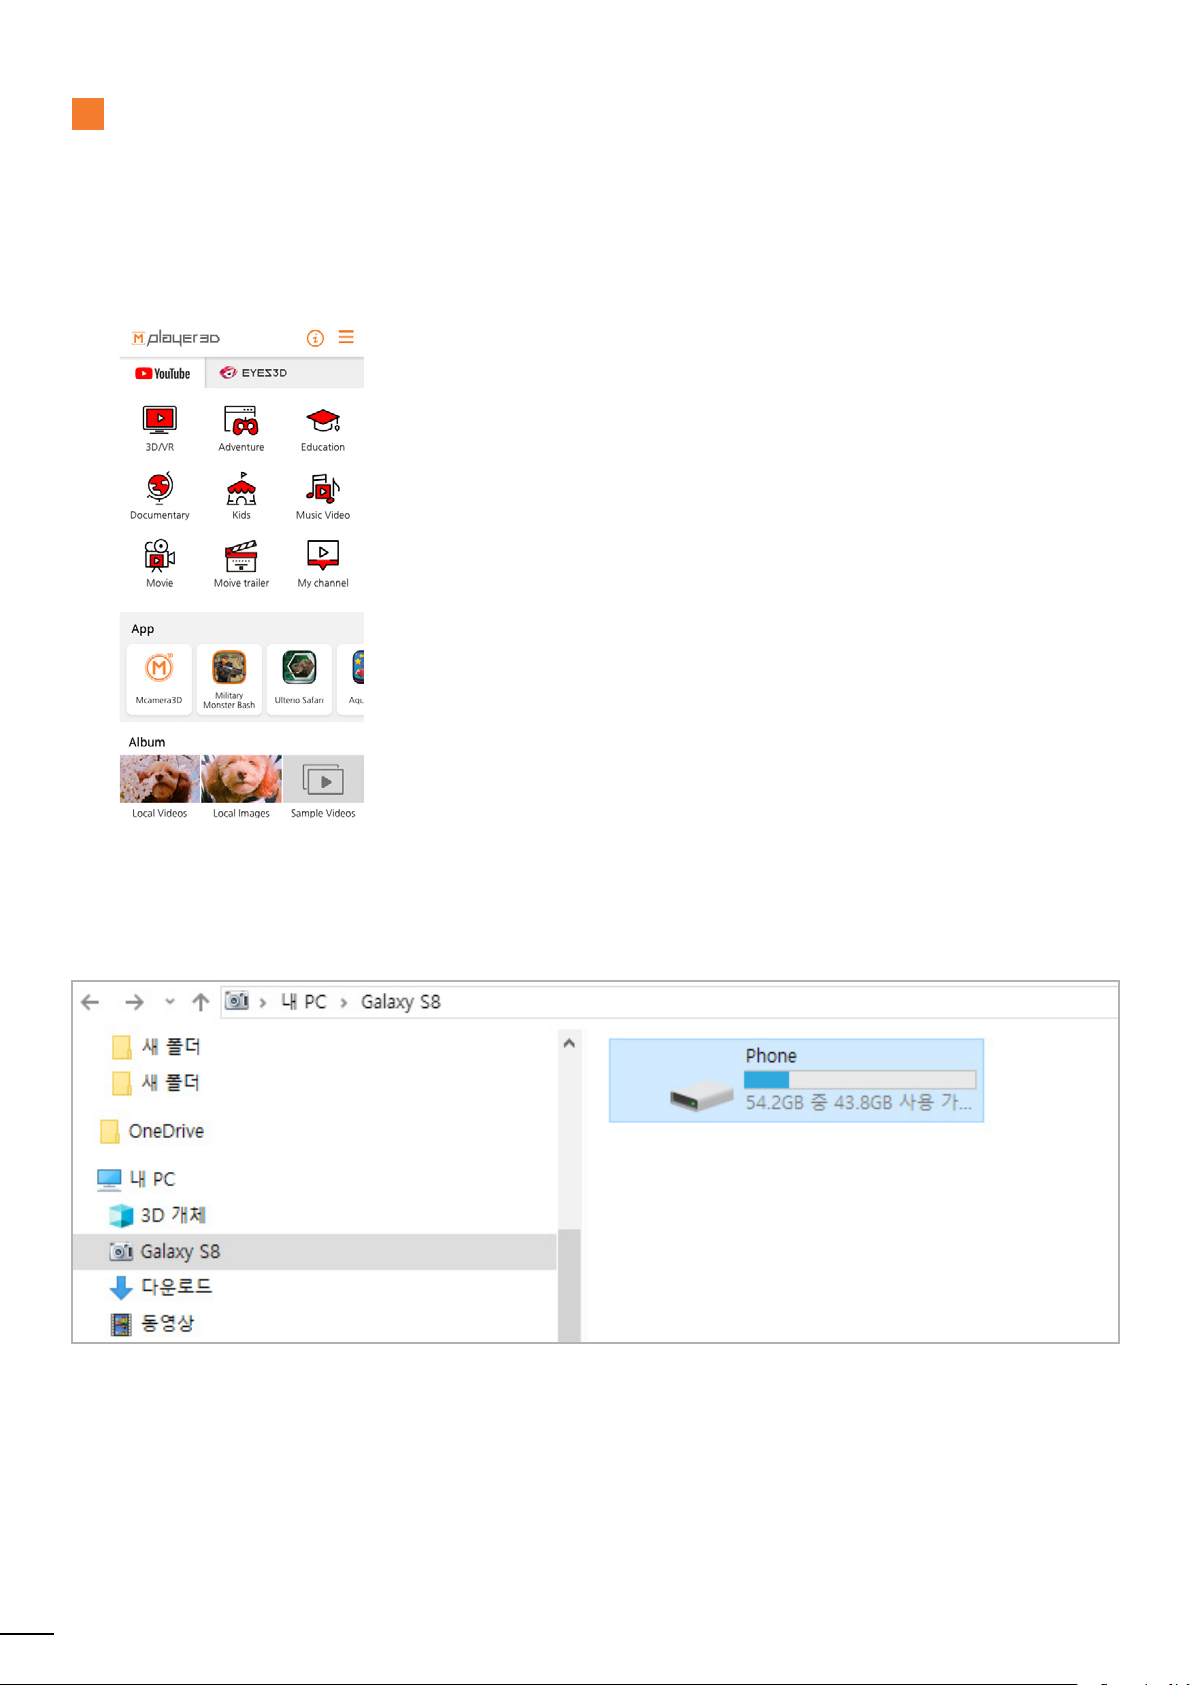
B. How to save 3D/VR videos on your phone (Windows Explorer)
• Connect your phone to a PC with a cable.
• Copy and paste 3D videos from your PC into the phone drive.
• If you place subtitle files into the same folder (using the same file name as the video file),
the videos will play with subtitles.
• You can play .mp4 files. (Subtitles must be .srt or .smi files coming soon.)
6

4
Enjoying 3D/VR Videos
With Mplayer3D, you can enjoy 3D/VR videos and media on your phone,
whether its stored on your device or uploaded to YouTube.
A. Watching Videos on YouTube
• Choose a channel from the
Mplayer3D Home screen.
• Search for 3D/VR videos on
YouTube with the Search
icon on the top right.
• Choose a YouTube video and
B. Watching Videos Saved on Your Device
• There are saved Local video/ Local image folder on the Mplayer3D home screen.
• Touch the 3D/VR media you wish to play.
press the 3D icon on the top
right to play.
7

C. Menu While Playing 3D/VR Videos
5
1
2
3
4
11
6 7 8 9 10
3D Setting
1
2
Depth
Adjustment
Eye-tracking
3
Subtitle
4
Touching the icon returns you to 3D setting.
If the video is not clear, consider recalibrating.
Adjust depth by scrolling up and down
↑ More depth
↓ Less depth
While green, the application will optimize 3D videos based on your position.
When it is red, the application will optimize based on your last known position.
Activate or search for subtitles.
(YouTube subtitles are not supported.)
8

VR Mode
5
Touch the icon to see the video in VR mode.
* Only recommended for VR videos. (180VR / 360VR)
6
Side-Side /
Top-Bottom
Swtich
7
Full / Half
Switch based on 3D video format.
Use with Side by Side videos.
Configure screen ratio by pressing the button.
Use with Top and Bottom videos.
3D Mode
8
Adding a
9
stereoscopic
effect to 2D
images
Expands the screen. Reduces the screen.
Touch the icon to see 3D effects. You can touch it again to see the video in 2D.
* It is not recommended.
1. Activate the ‘2D - 3D on’ icon.
2. Activate the ‘Depth adjustment’ icon.
3. Adjust the depth by scrolling up and down.
※ The stereoscopic effect can be felt differently depending on the video.
For viewing high-quality stereoscopic images, 3D format images are recommended.
1 2 3
Depth
adjustment
icon
2D & 3D on
Adjust the
Depth
9
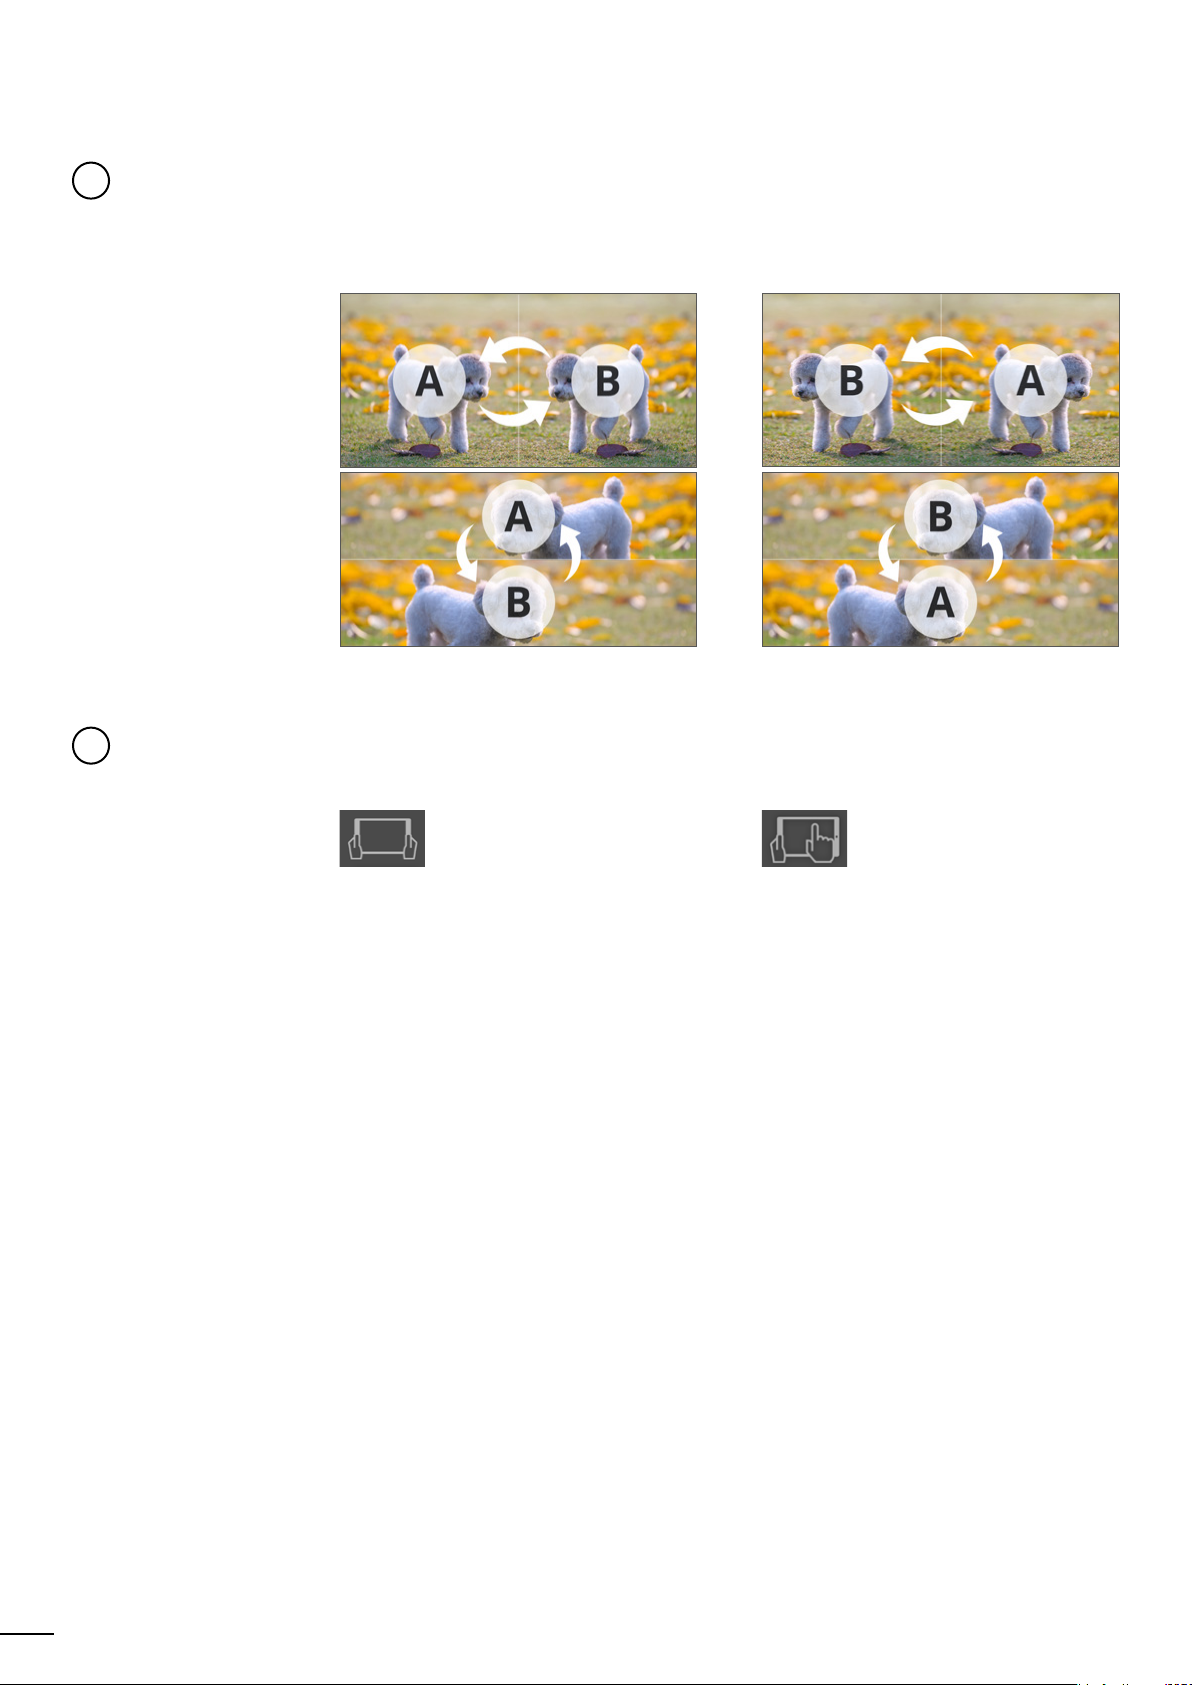
L-R/ R-L Switch
10
You can change how 3D videos are shown.
* This may be useful when depth of field feels off.
L-R Mode R-L Mode
VR Control
11
Mode
Choose control mode in VR.
* Only available for VR videos
Move device to control Touch device to control
10

http://mopic3d.com
+82 31 299 6835
info@mopic.co.kr
https://ko-kr.facebook.com/MopicVR
 Loading...