

Moo Technologies Moo-Cafe Installation Manual

INSTALLATION
INSTALLATION
PROCEDURE
PROCEDURE
September 2006
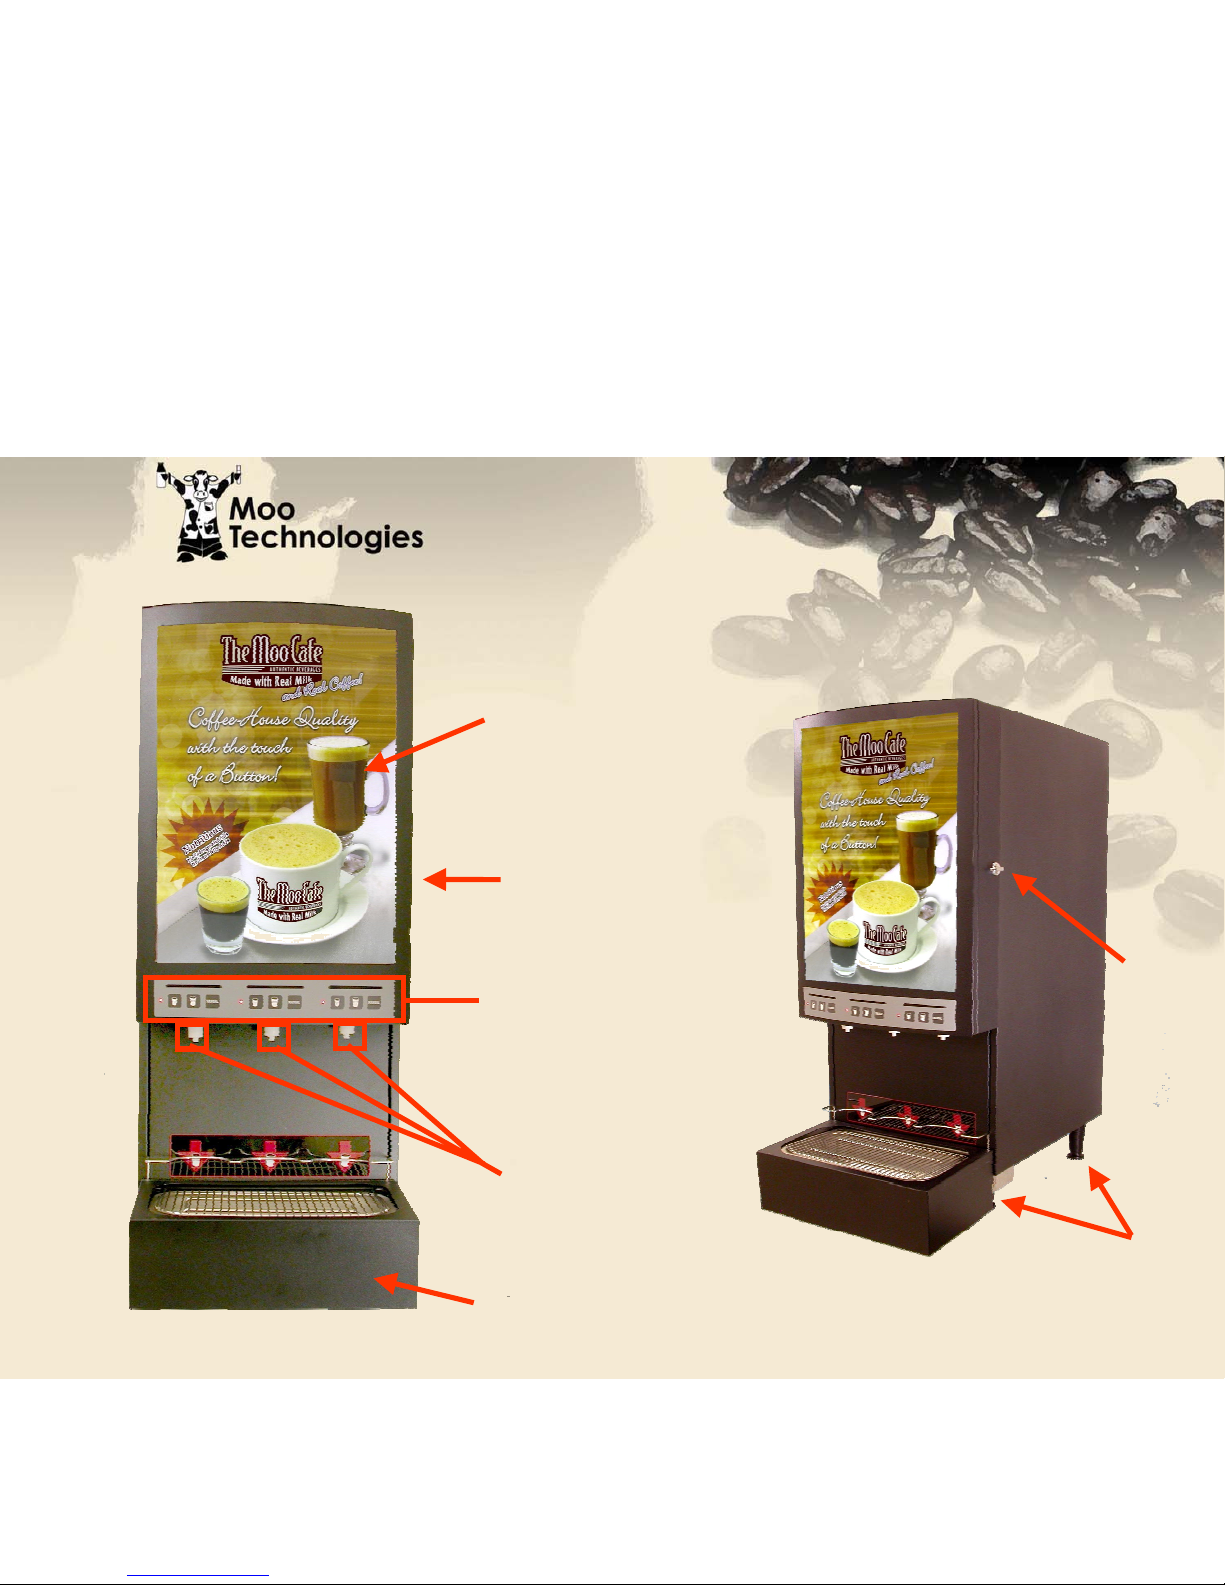
Unit Overview
Unit Overview
Drip Tray and
Drain Assembly
Dispensing
Nozzles
Programmable
Dispense Buttons
Legs
(4)
Translucent
Door Graphic
Cabinet
Door
Door
Latch
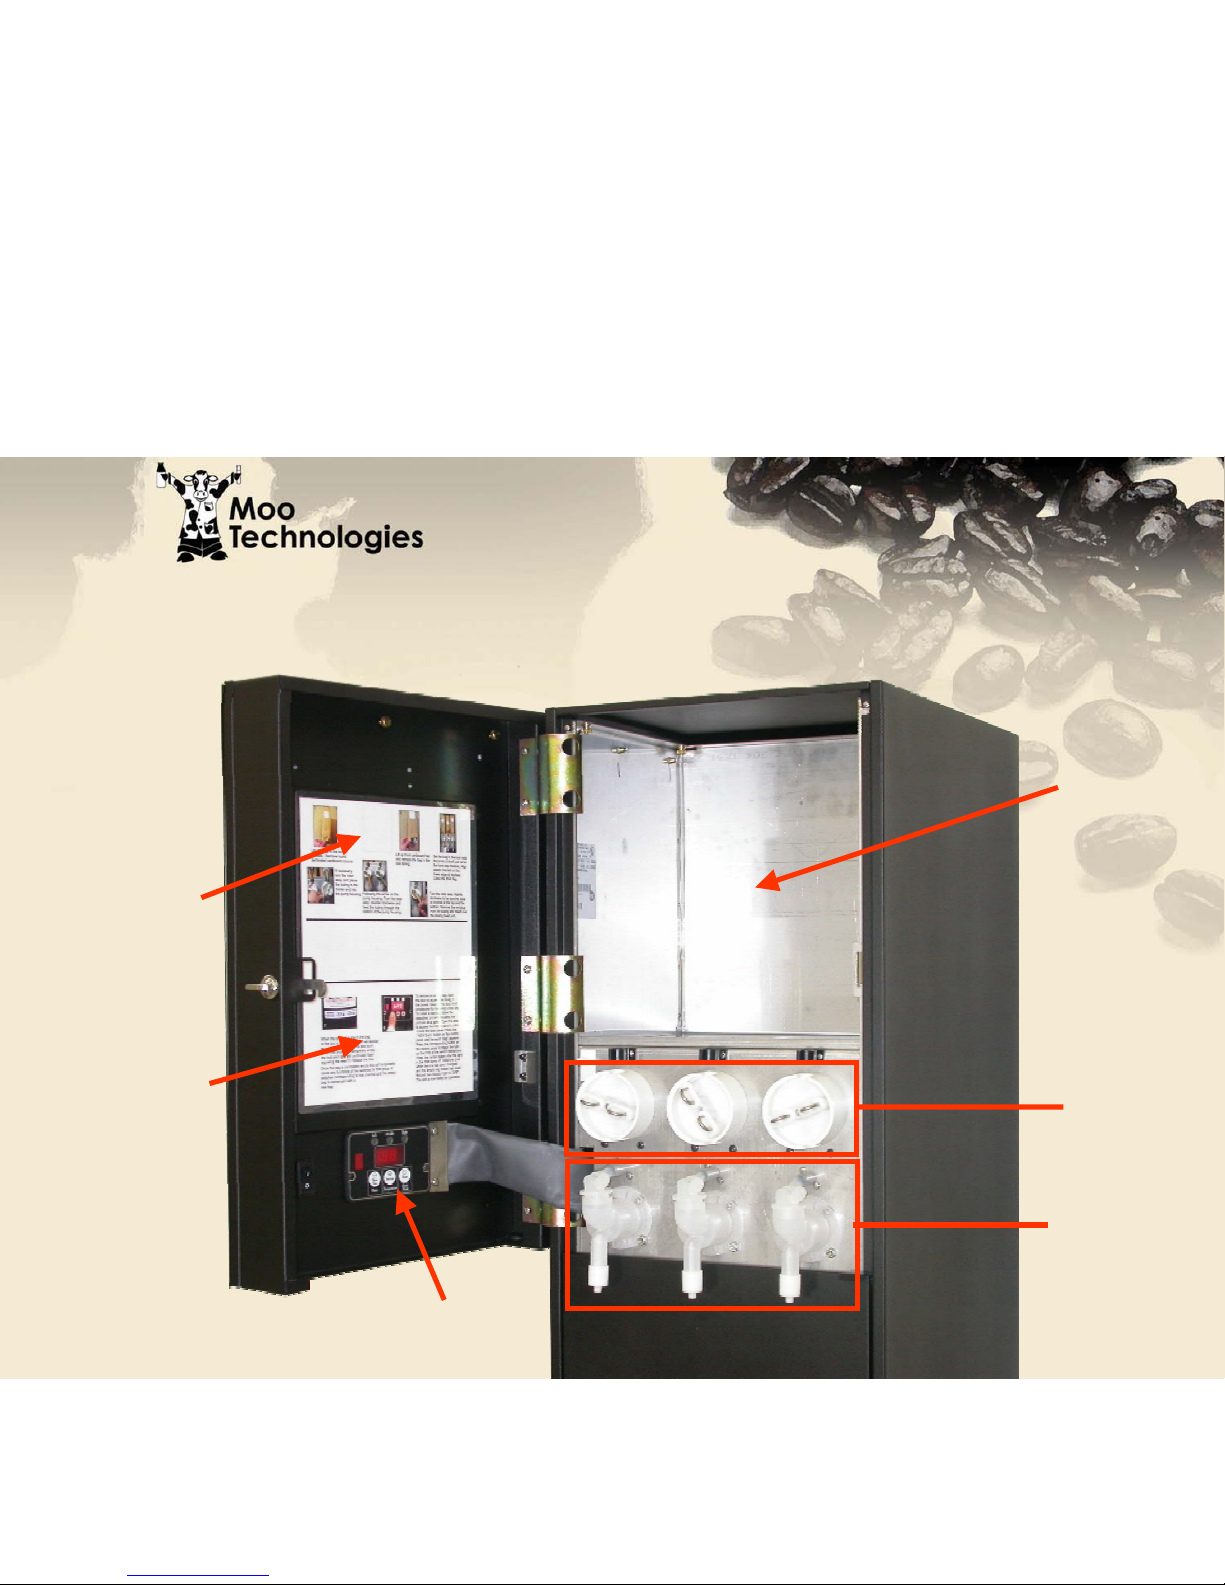
Display
Board
BIB
Installation
Instructions
Programming
Instructions
BIB
Cabinet
Whipper
Assemblies
Pump
Assemblies
Unit Overview
Unit Overview
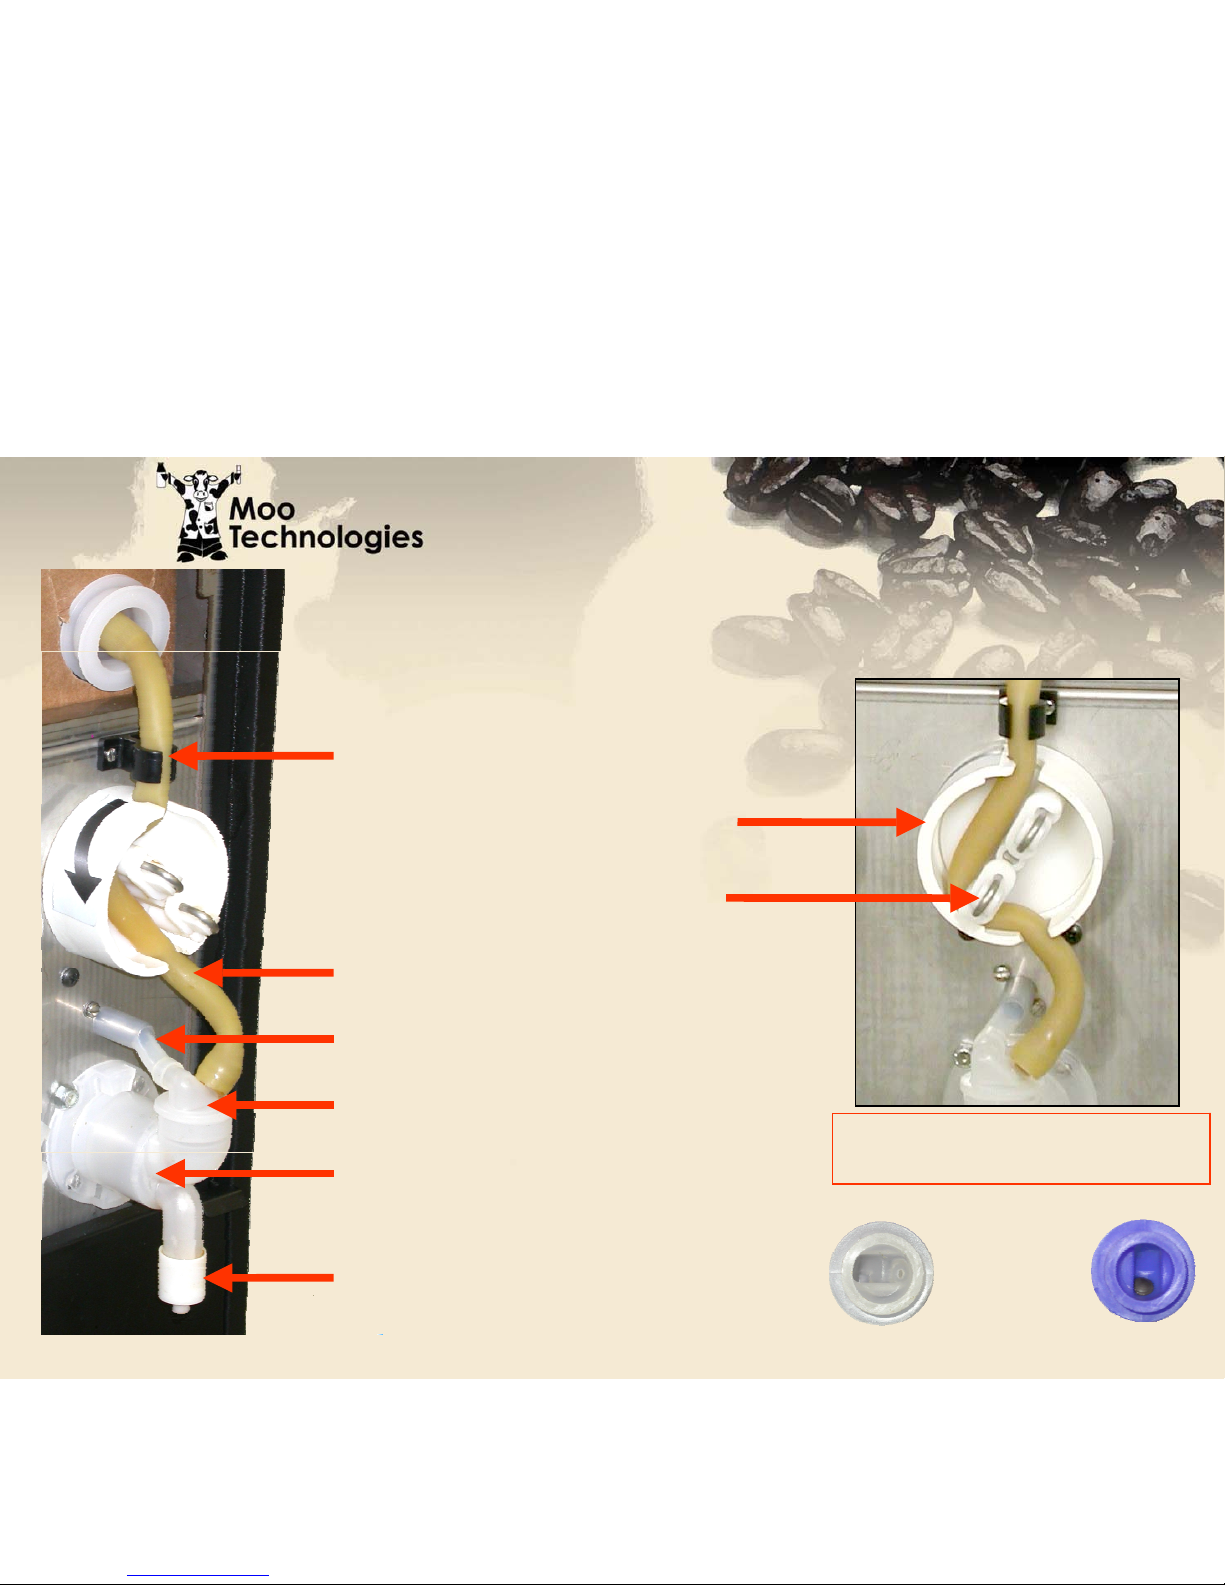
Whipper Restrictor
Whipper Chamber
Whipper Dosing Head
BIB Product Tube
Plastic Tubing Holder
Pump Housing
Pump Rotor
Note: Pump Rotor should only
be rotated counter-clockwise
Unit Overview
Unit Overview
Water Supply Tube
Dosing
Heads
Moo
Expresso
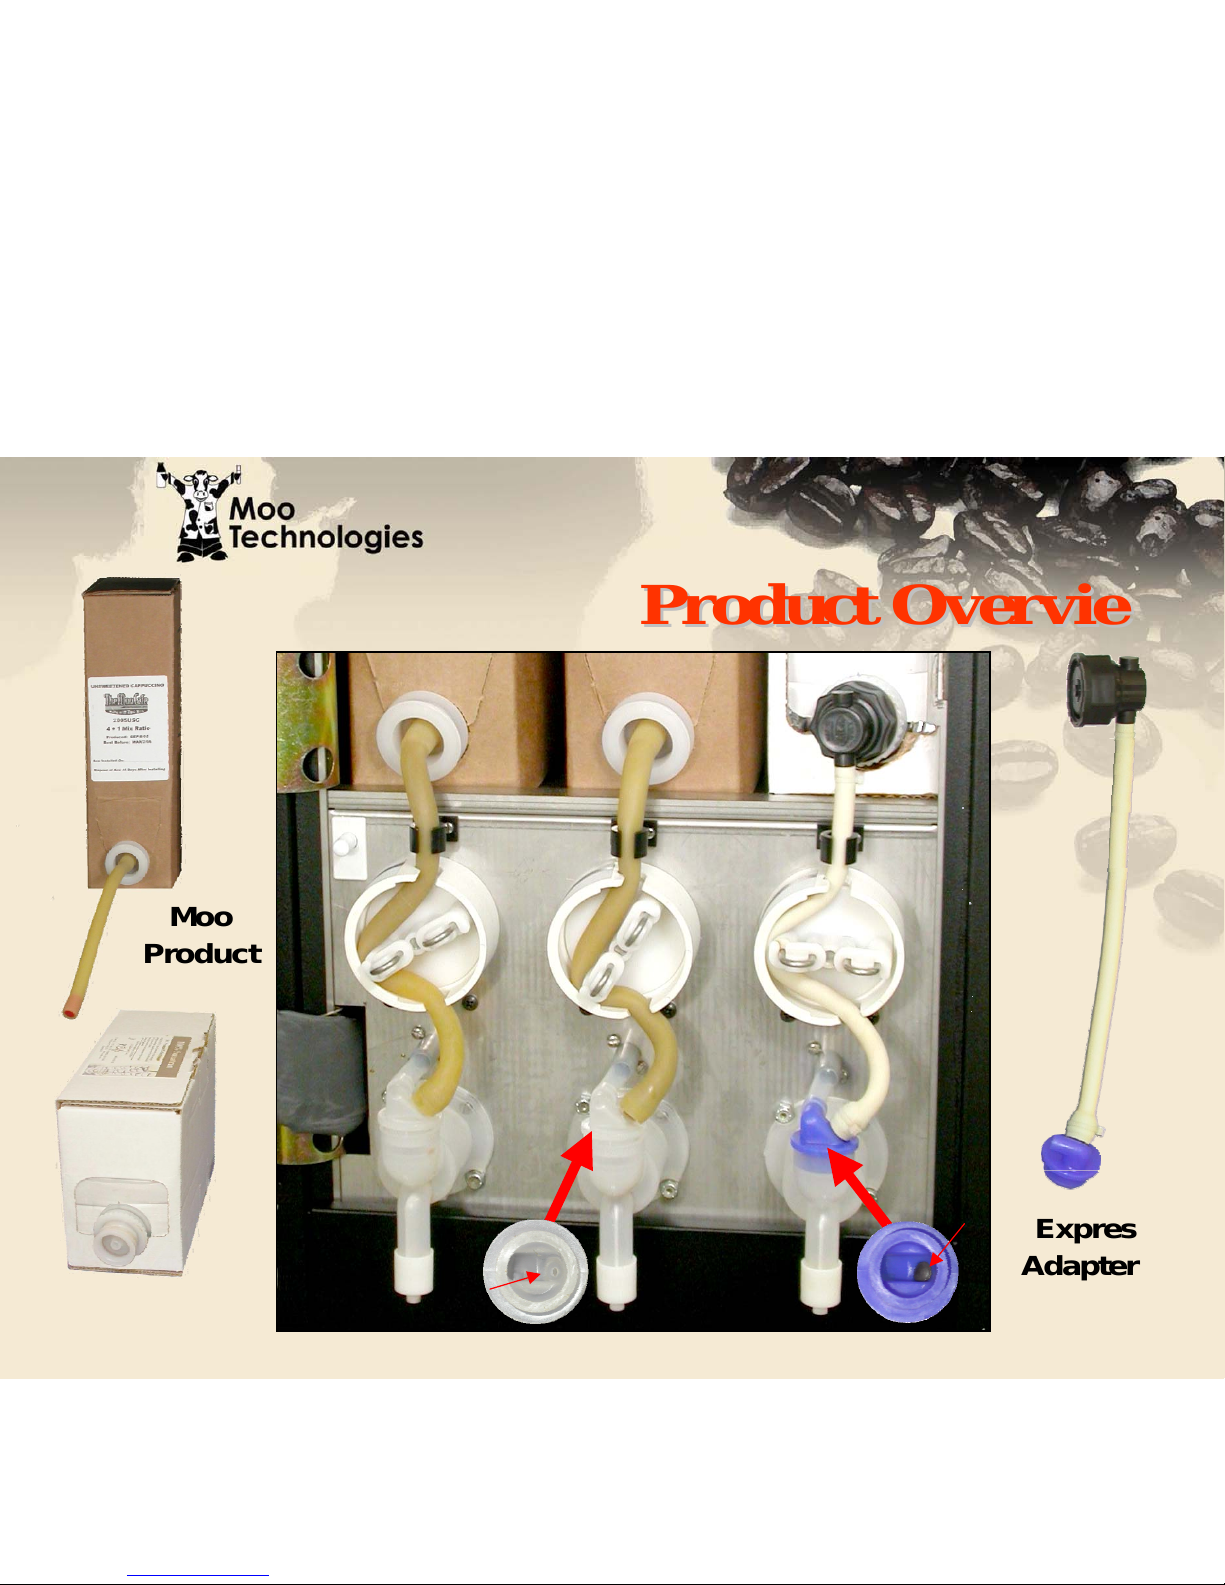
Product Overview
Product Overview
Expresso
Adapter Kit
Expresso
Product
Moo
Product
Moo Dosing Head Expresso Dosing Head
Check
Valve
No
Check
Valve

Shipping Carton Contents
Shipping Carton Contents
• MCM-Combo Unit
• Drip Tray Assembly (drain hose included)
• Water Filter (with shut-off & mounting hardware)
• Four Inch Plastic Legs (4)
• Fluorescent Tubes (2)
• Translucent Door Graphic

103420-BPC Drip Tray Housing
103417 Drain Support Bracket
103424 Drain Receptacle
103455 Drain Hose
103452 Hose Clamp
103415 Drain Pan
103425 Drain Pan Fitting
02-0158 O-Ring
103426 Cup Rest
Drip Tray Assembly
Drip Tray Assembly

Water Filter
Shut-off Assembly
Water Filter Bracket
Bracket (Filter) Mounting Screws (4)
Bracket (Unit) Mounting Screws (2)
Product Labels
Nozzle Brush
Espresso Product Packing Adapter
Filter to Unit Water Line
Water Filter
Water Filter
Accessories Bag
Accessories Bag
511027
100054
100754
103382
107038
107018
103485
100626
111622
103457

New Water
New Water
Filter Assembly
Filter Assembly
Shut-off
Bracket
Filter cartridge
New units will be shipped with
an upgraded water filter
assembly. The installation will
be exactly the same as the
previous filter assembly,
however some of the parts
(shutoff, filter, & bracket) may
look slightly different.

Plastic Legs, Fluorescent Tubes and
Plastic Legs, Fluorescent Tubes and
Translucent Door Graphic
100542
103377
102062
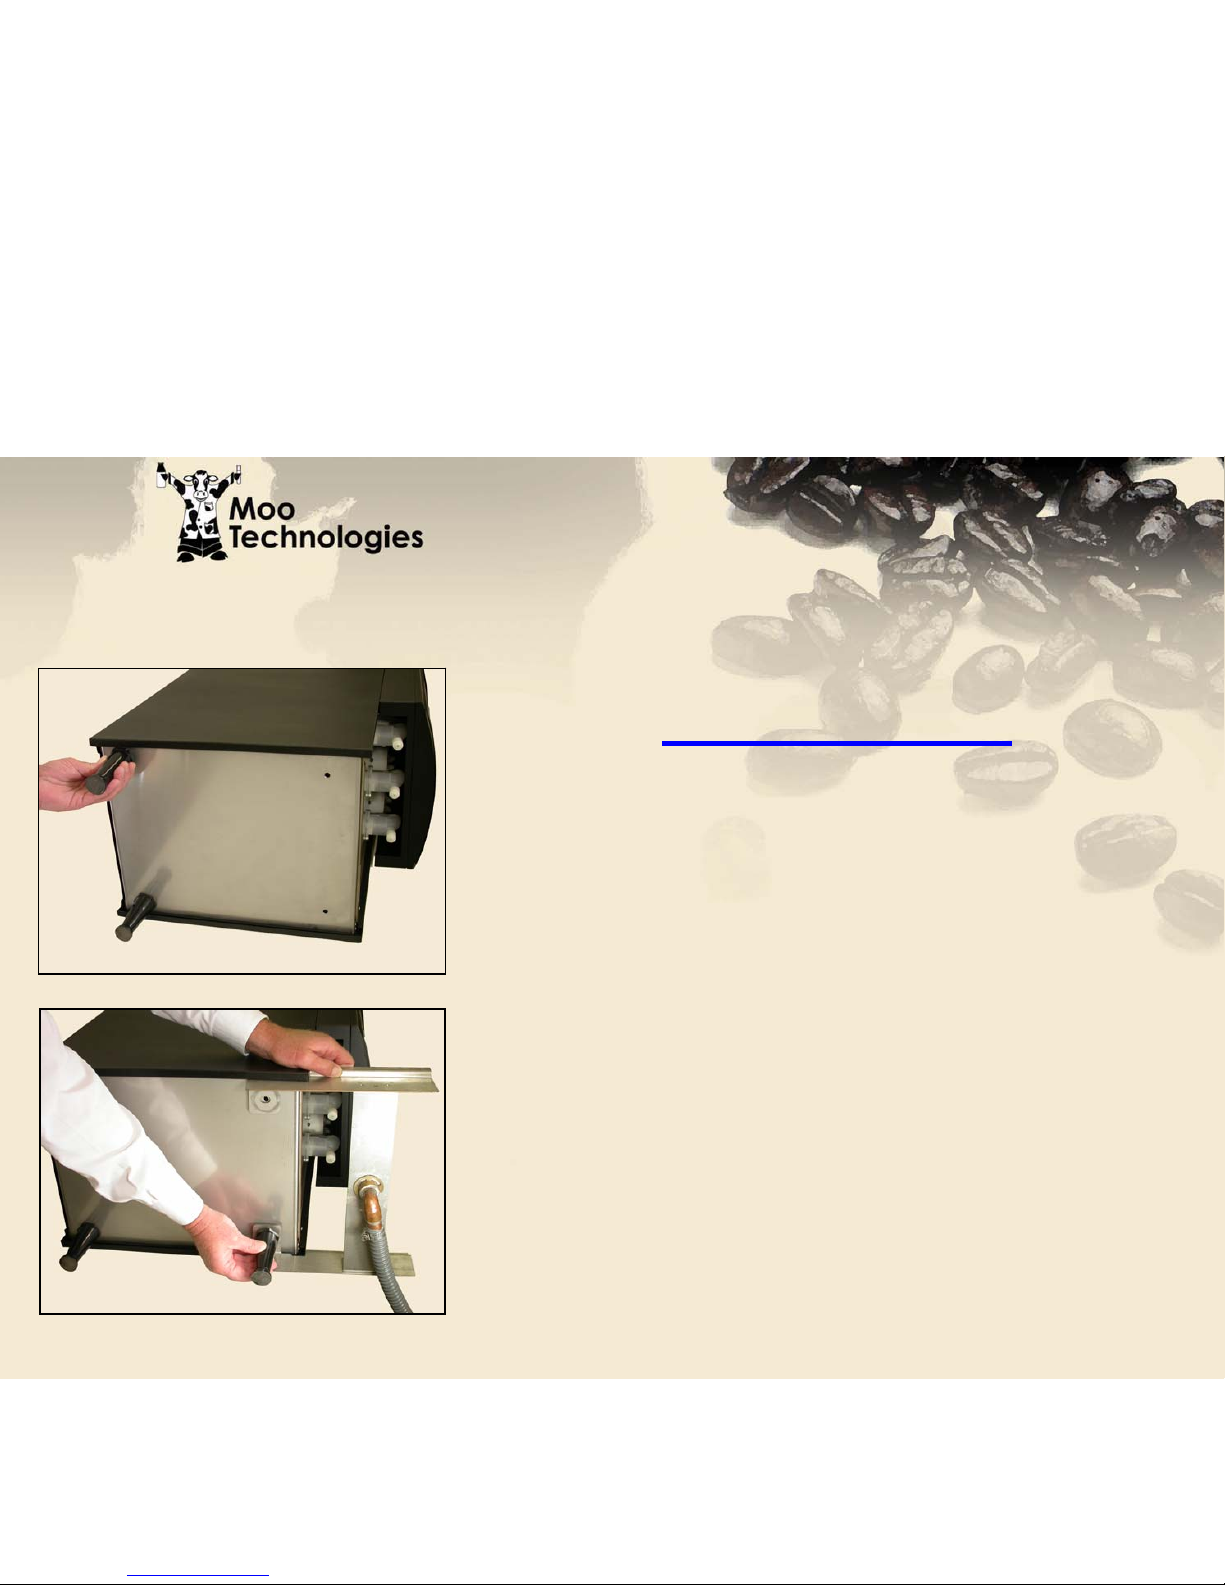
1. Install two rear unit legs.
2. Align Drain Support Bracket holes
with those in bottom front of unit and
install front legs.
Leg Installation
Machine Setup
Machine Setup

Machine Setup
Machine Setup
Fluorescent Tube Installation
Install two (2) fluorescent tubes in
door face and rotate ¼ turn to lock in
holder.
Machine Setup
Machine Setup
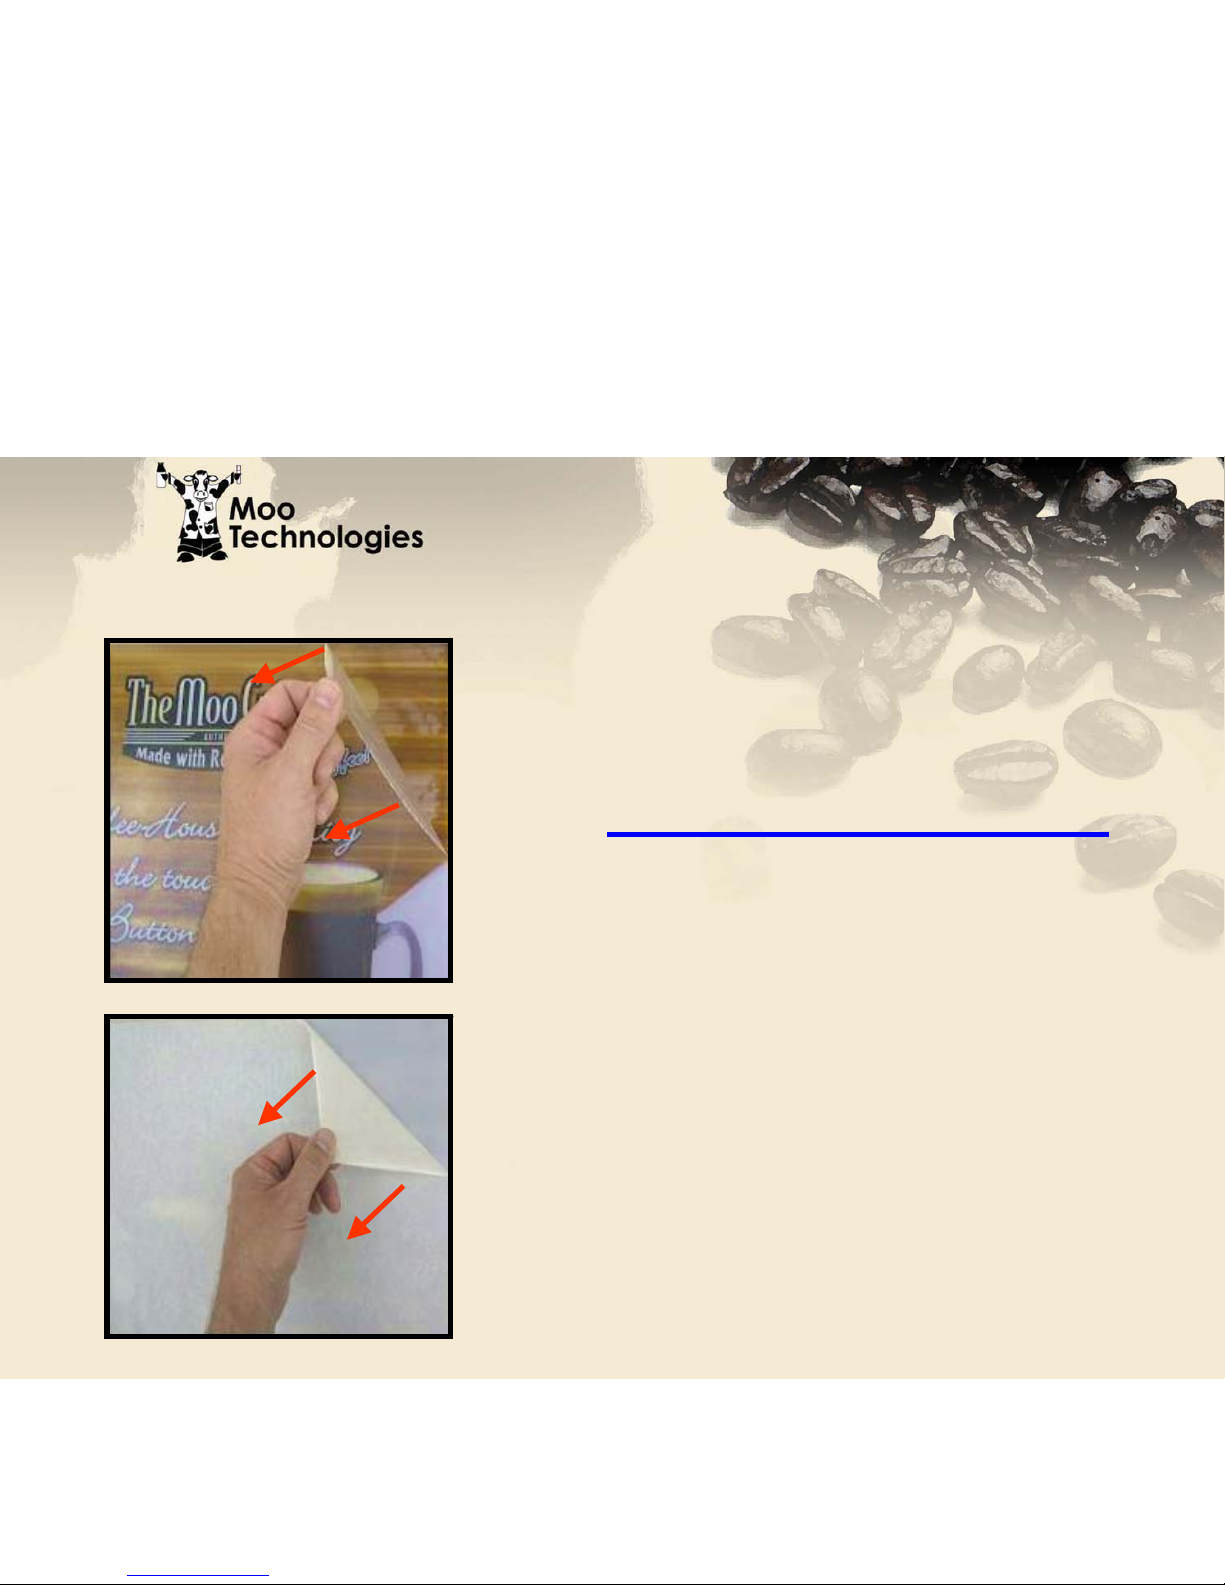
Preparing the Graphic
Both the translucent graphic and
the clear plastic cover shield are
shipped with a protective film.
Start at a corner, and carefully pull
the protective film diagonally to
remove.
Translucent Graphic
Clear Plastic Cover
Machine Setup
Machine Setup
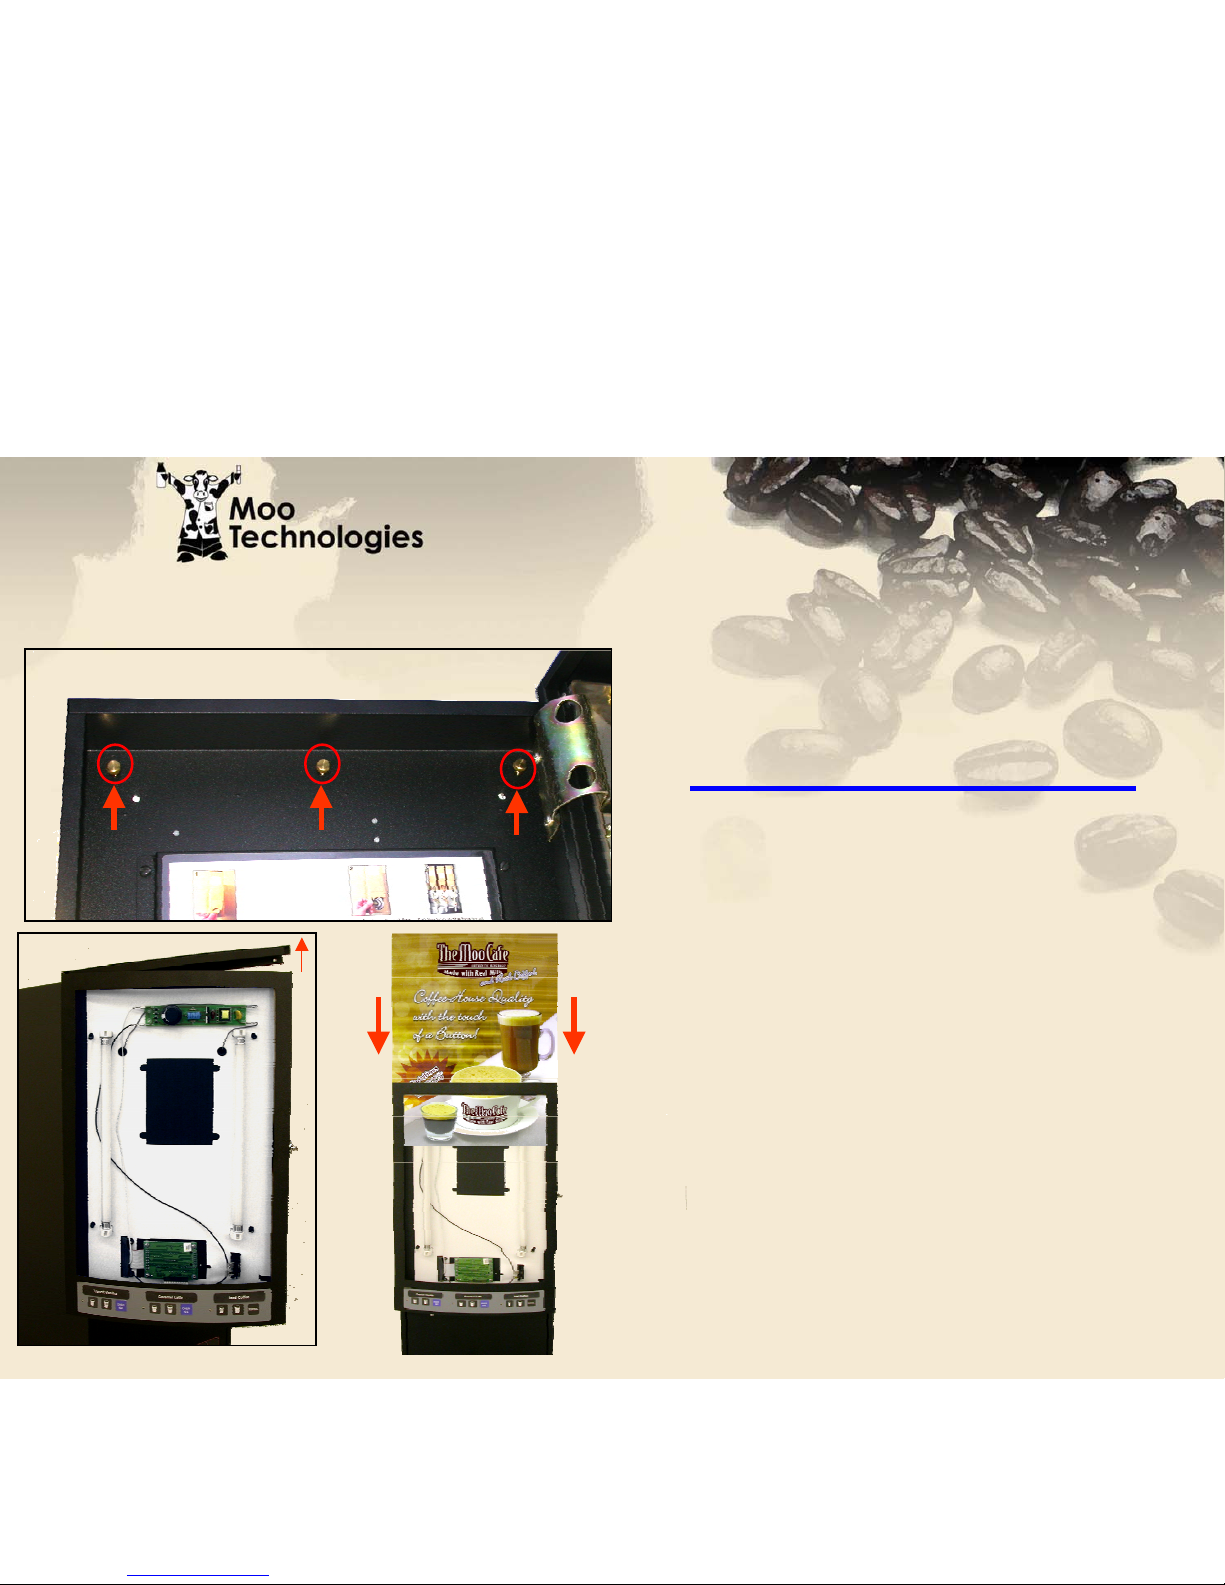
Graphic Installation
Unscrew and remove three (3)
brass thumbscrews from inside top
of door panel, then lift and remove
door cap. Peel clear plastic on
front, and white paper on rear of
Graphic. Slip Graphic into slide
guides and lower until sign is
seated at bottom of guides.
Reinstall door cap and secure with
the three (3) brass thumbscrews.
Machine Setup
Machine Setup
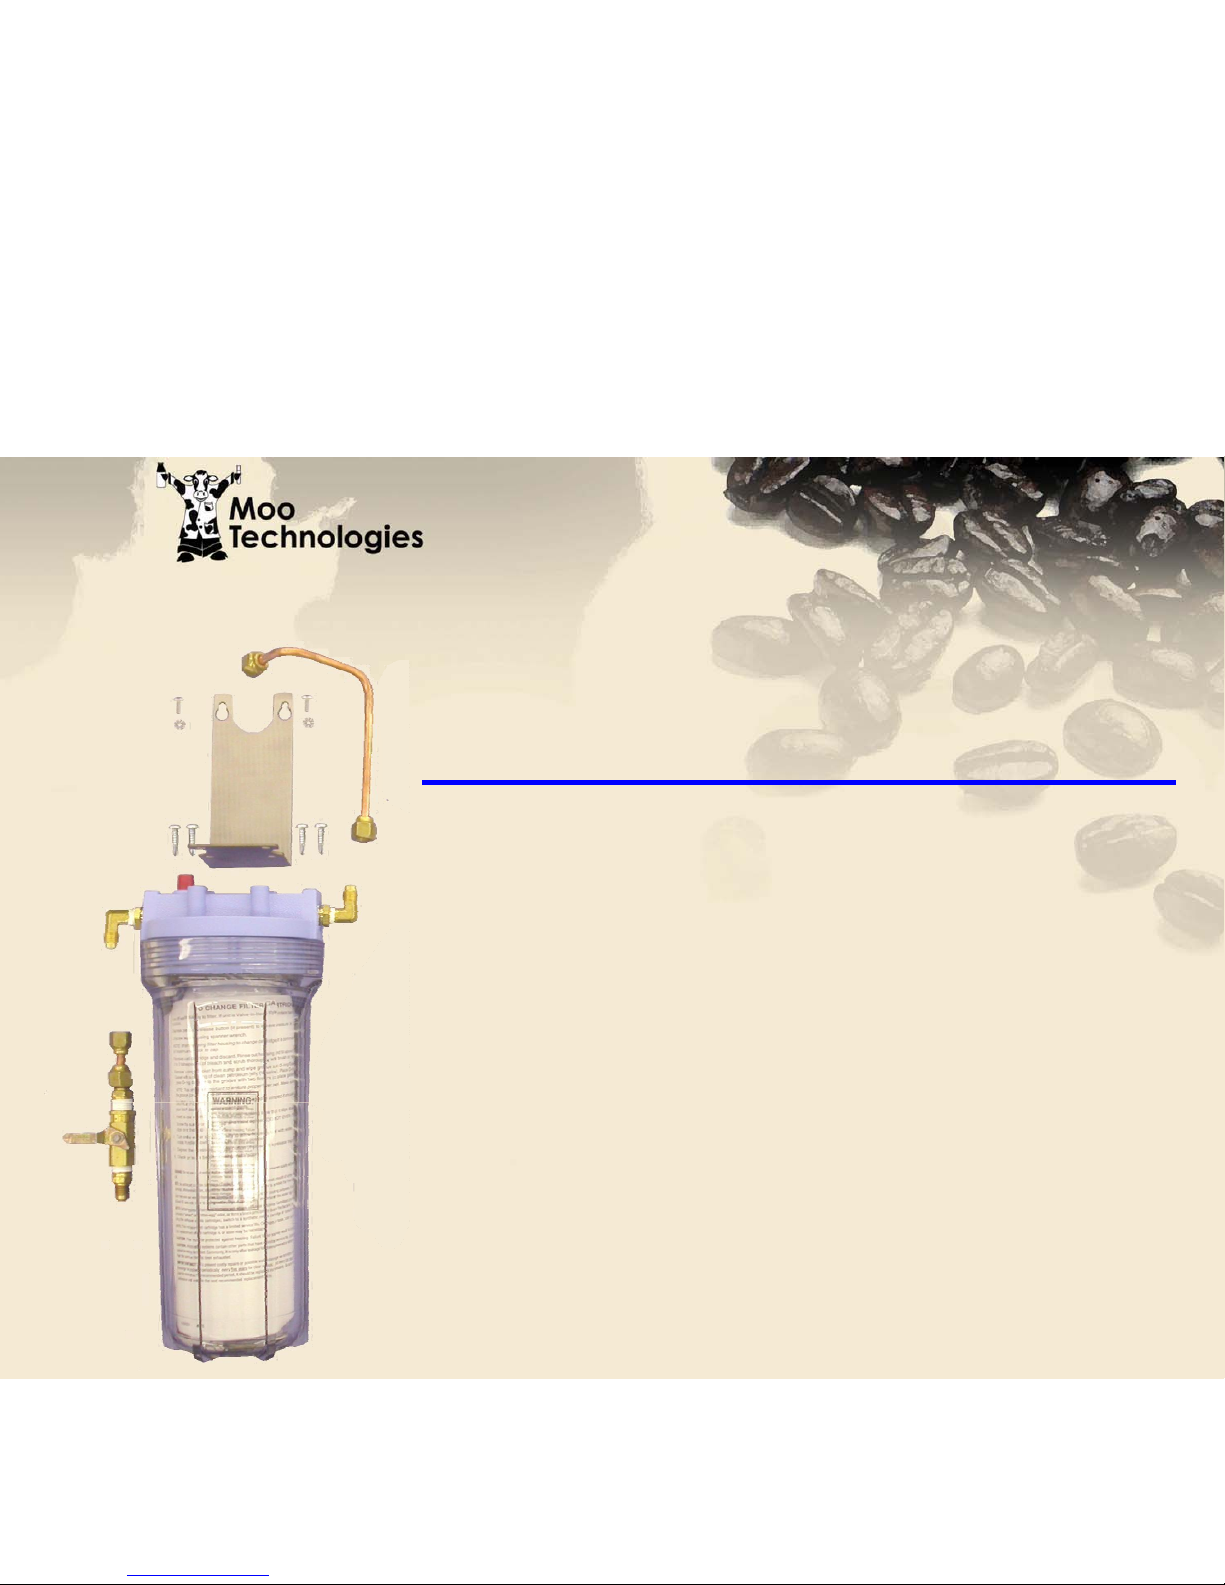
Water Filter Installation Overview
The water filter will require some assembly and
preparation prior to installing. The filter bracket
will need to be mounted to the top of the filter,
the cartridge will need to be removed from the
protective bag and the filter installation
instructions must be removed from the canister.
 Loading...