

Page 1
1
1
1
4
Wall Stud
Board Location
Draw line
Bottom Edge of Board
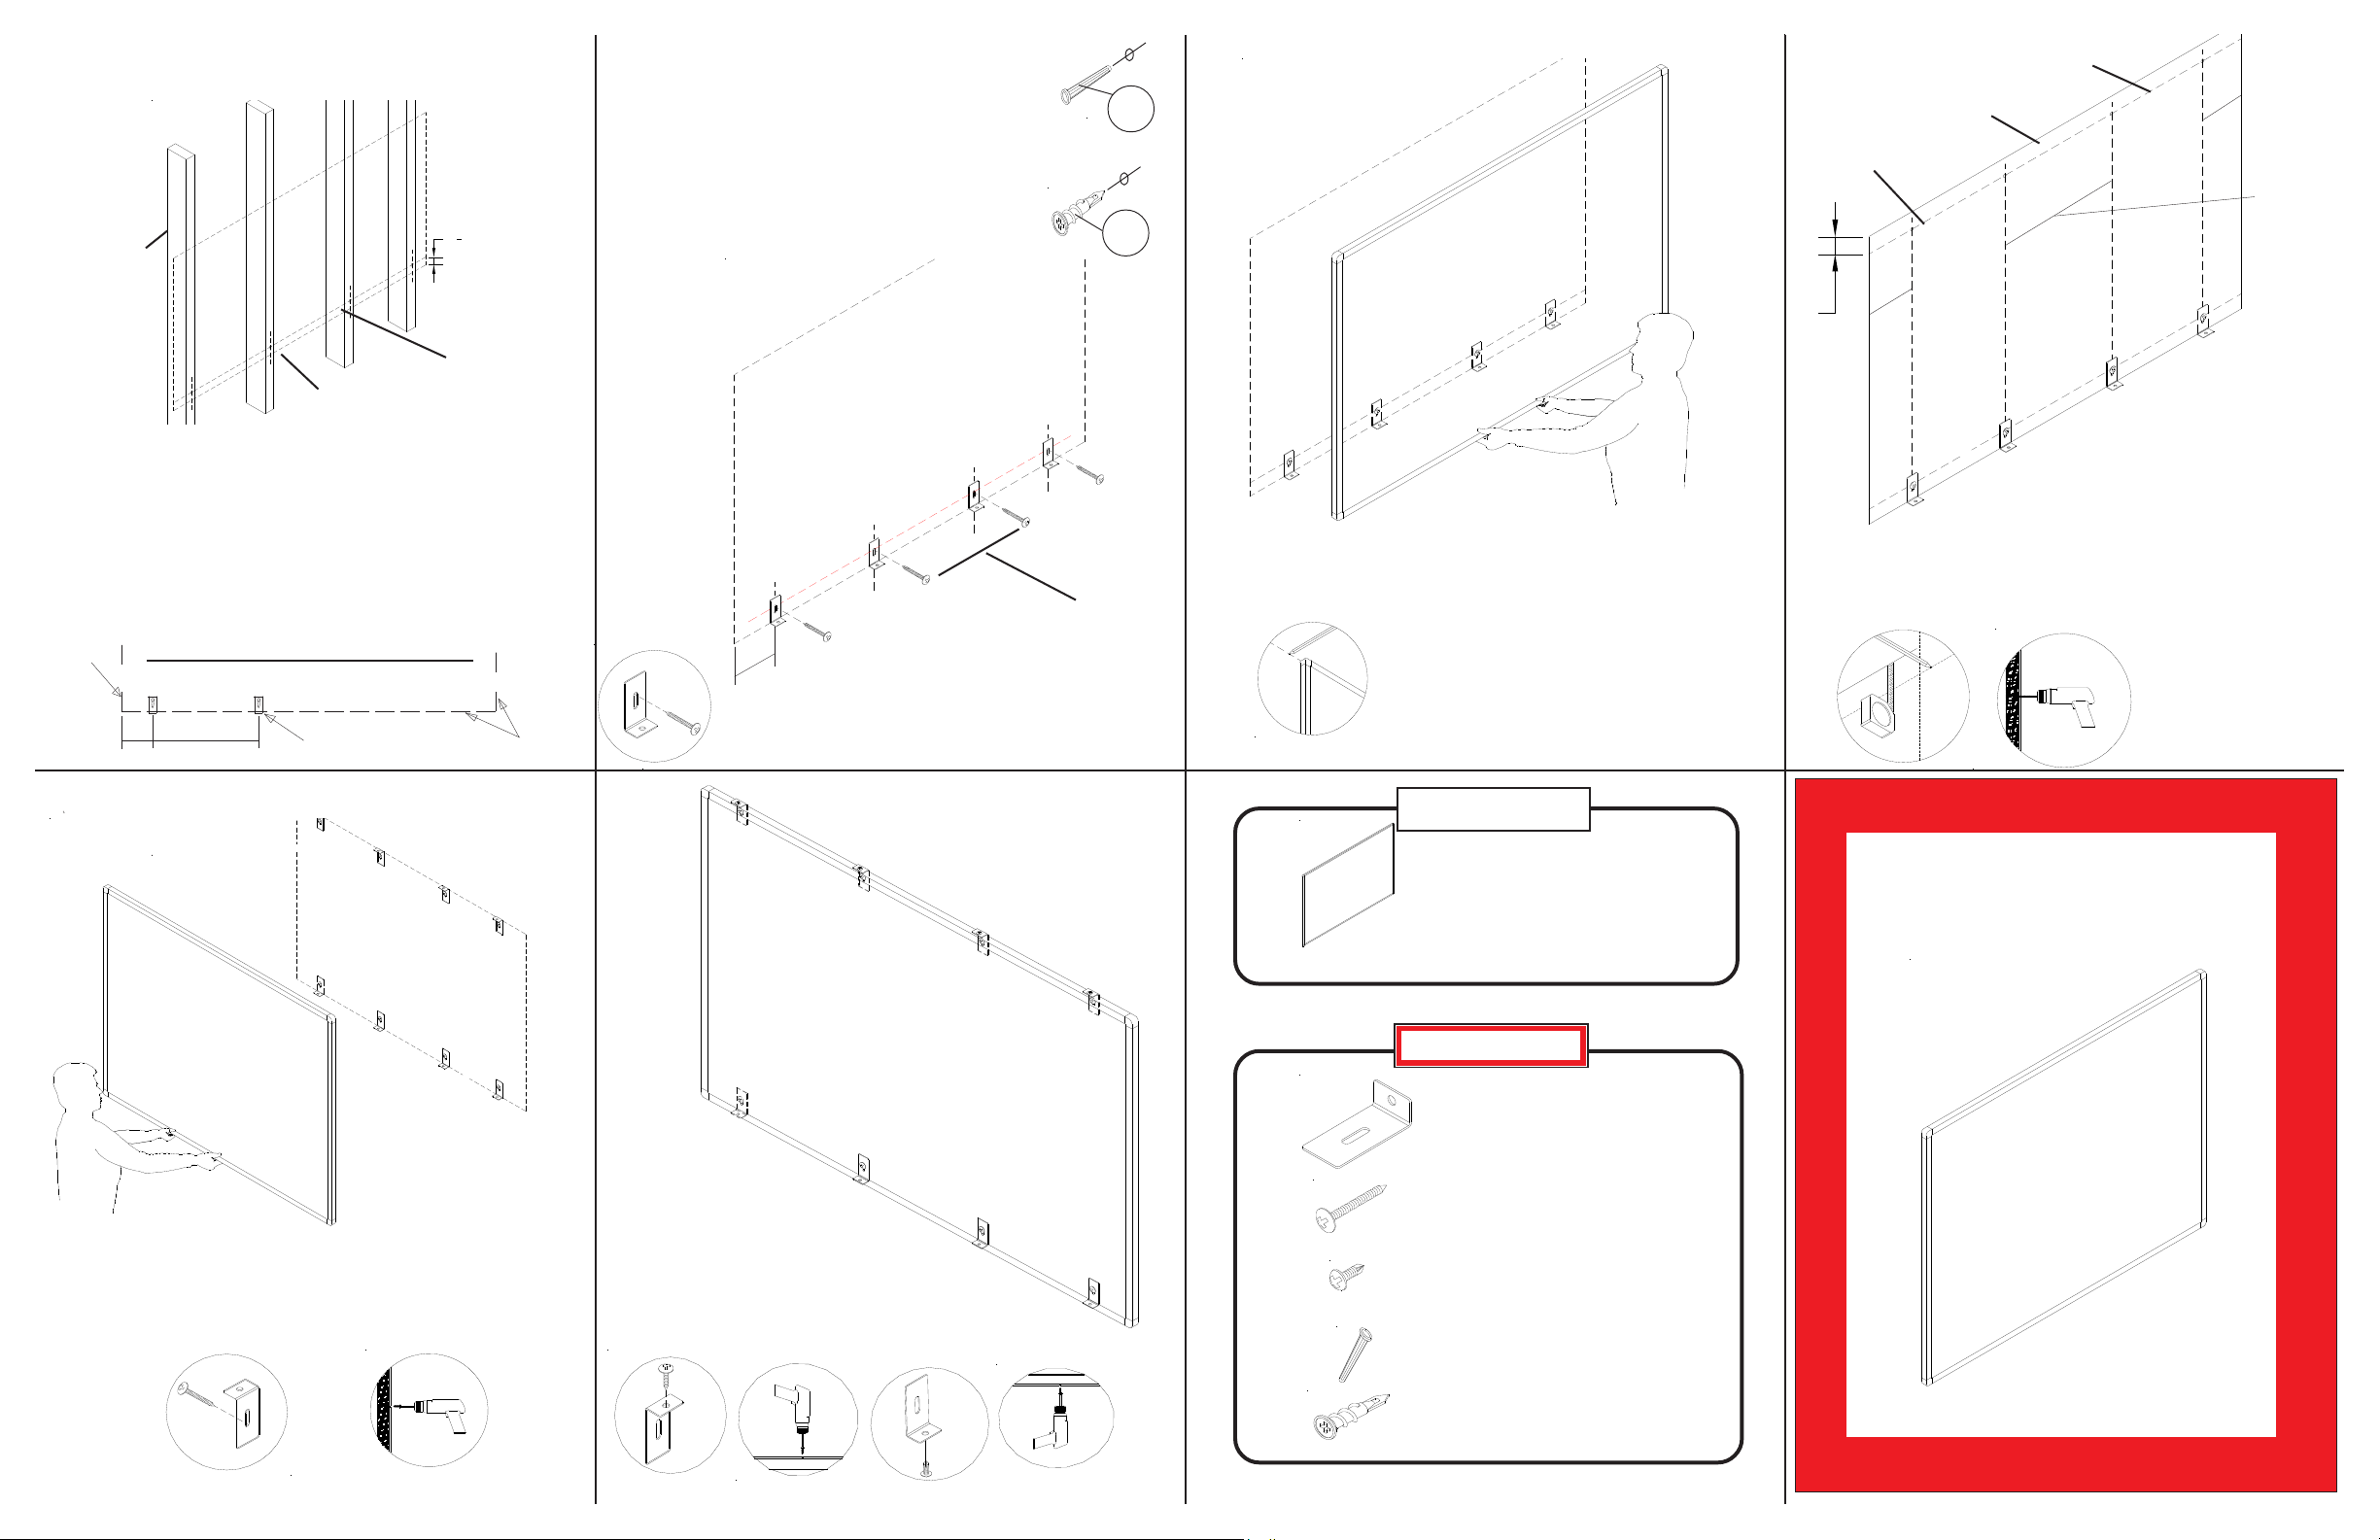
Determine board location. Measure from floor to
1
the bottom edge of board. Mark with pencil line the
corner location. Measure up from bottom edge of
board 1-1/4” and draw line as shown. Locate
stud near each end of board and drill pilot holes
along line using 1/8” drill bit.
Edge of
Board
Angle Bracket Locations on Board
16” min.
6”
24” max.
See diagram below.
Angle
Bracket
Edge of
Board
Note:
Install Masonry Anchors (D) into 1/4”
Diameter predrill holes for masonry
walls.
Install Drywall Anchors (E) into 1/4”
Diameter predrill holes for sheet rock
walls.
Board Location
3”
Attach ½ the # of Angle Brackets using
2
Long Screws (B) as shown.
D
E
16”-24”
Equally
Spaced
3
Set board on the Angle
Brackets. Draw line along
top edge of board.
T op Edge of Board
Drill Holes
3”
Board Location
from top line of board 1” and draw line
as shown. Locate stud near each end of
board and drill pilot hole along line using
Draw line
3”
16”-24”
Equally
Spaced
Lift and remove board from
4
the angle brackets. Measure down
1/8” drill bit.
Parts List
Markerboard / Tackboard
P1 Board
Hardware List
A Angle Bracket
B Long Screw
Secure top Angle Brackets (A) to the wall using
5
long screws (B) as shown. Follow diagram in
Step 1. Set board on the bottom angle bracket s.
Secure board to bottom and
6
top brackets (A) using short
screws (C) as shown.
C Short Screw
D Screw Anchor-Concrete
L Clip Install
1/4” Board
E Screw Anchor-Drywall
L Clip Install_02-27-17
 Loading...