

Page 1
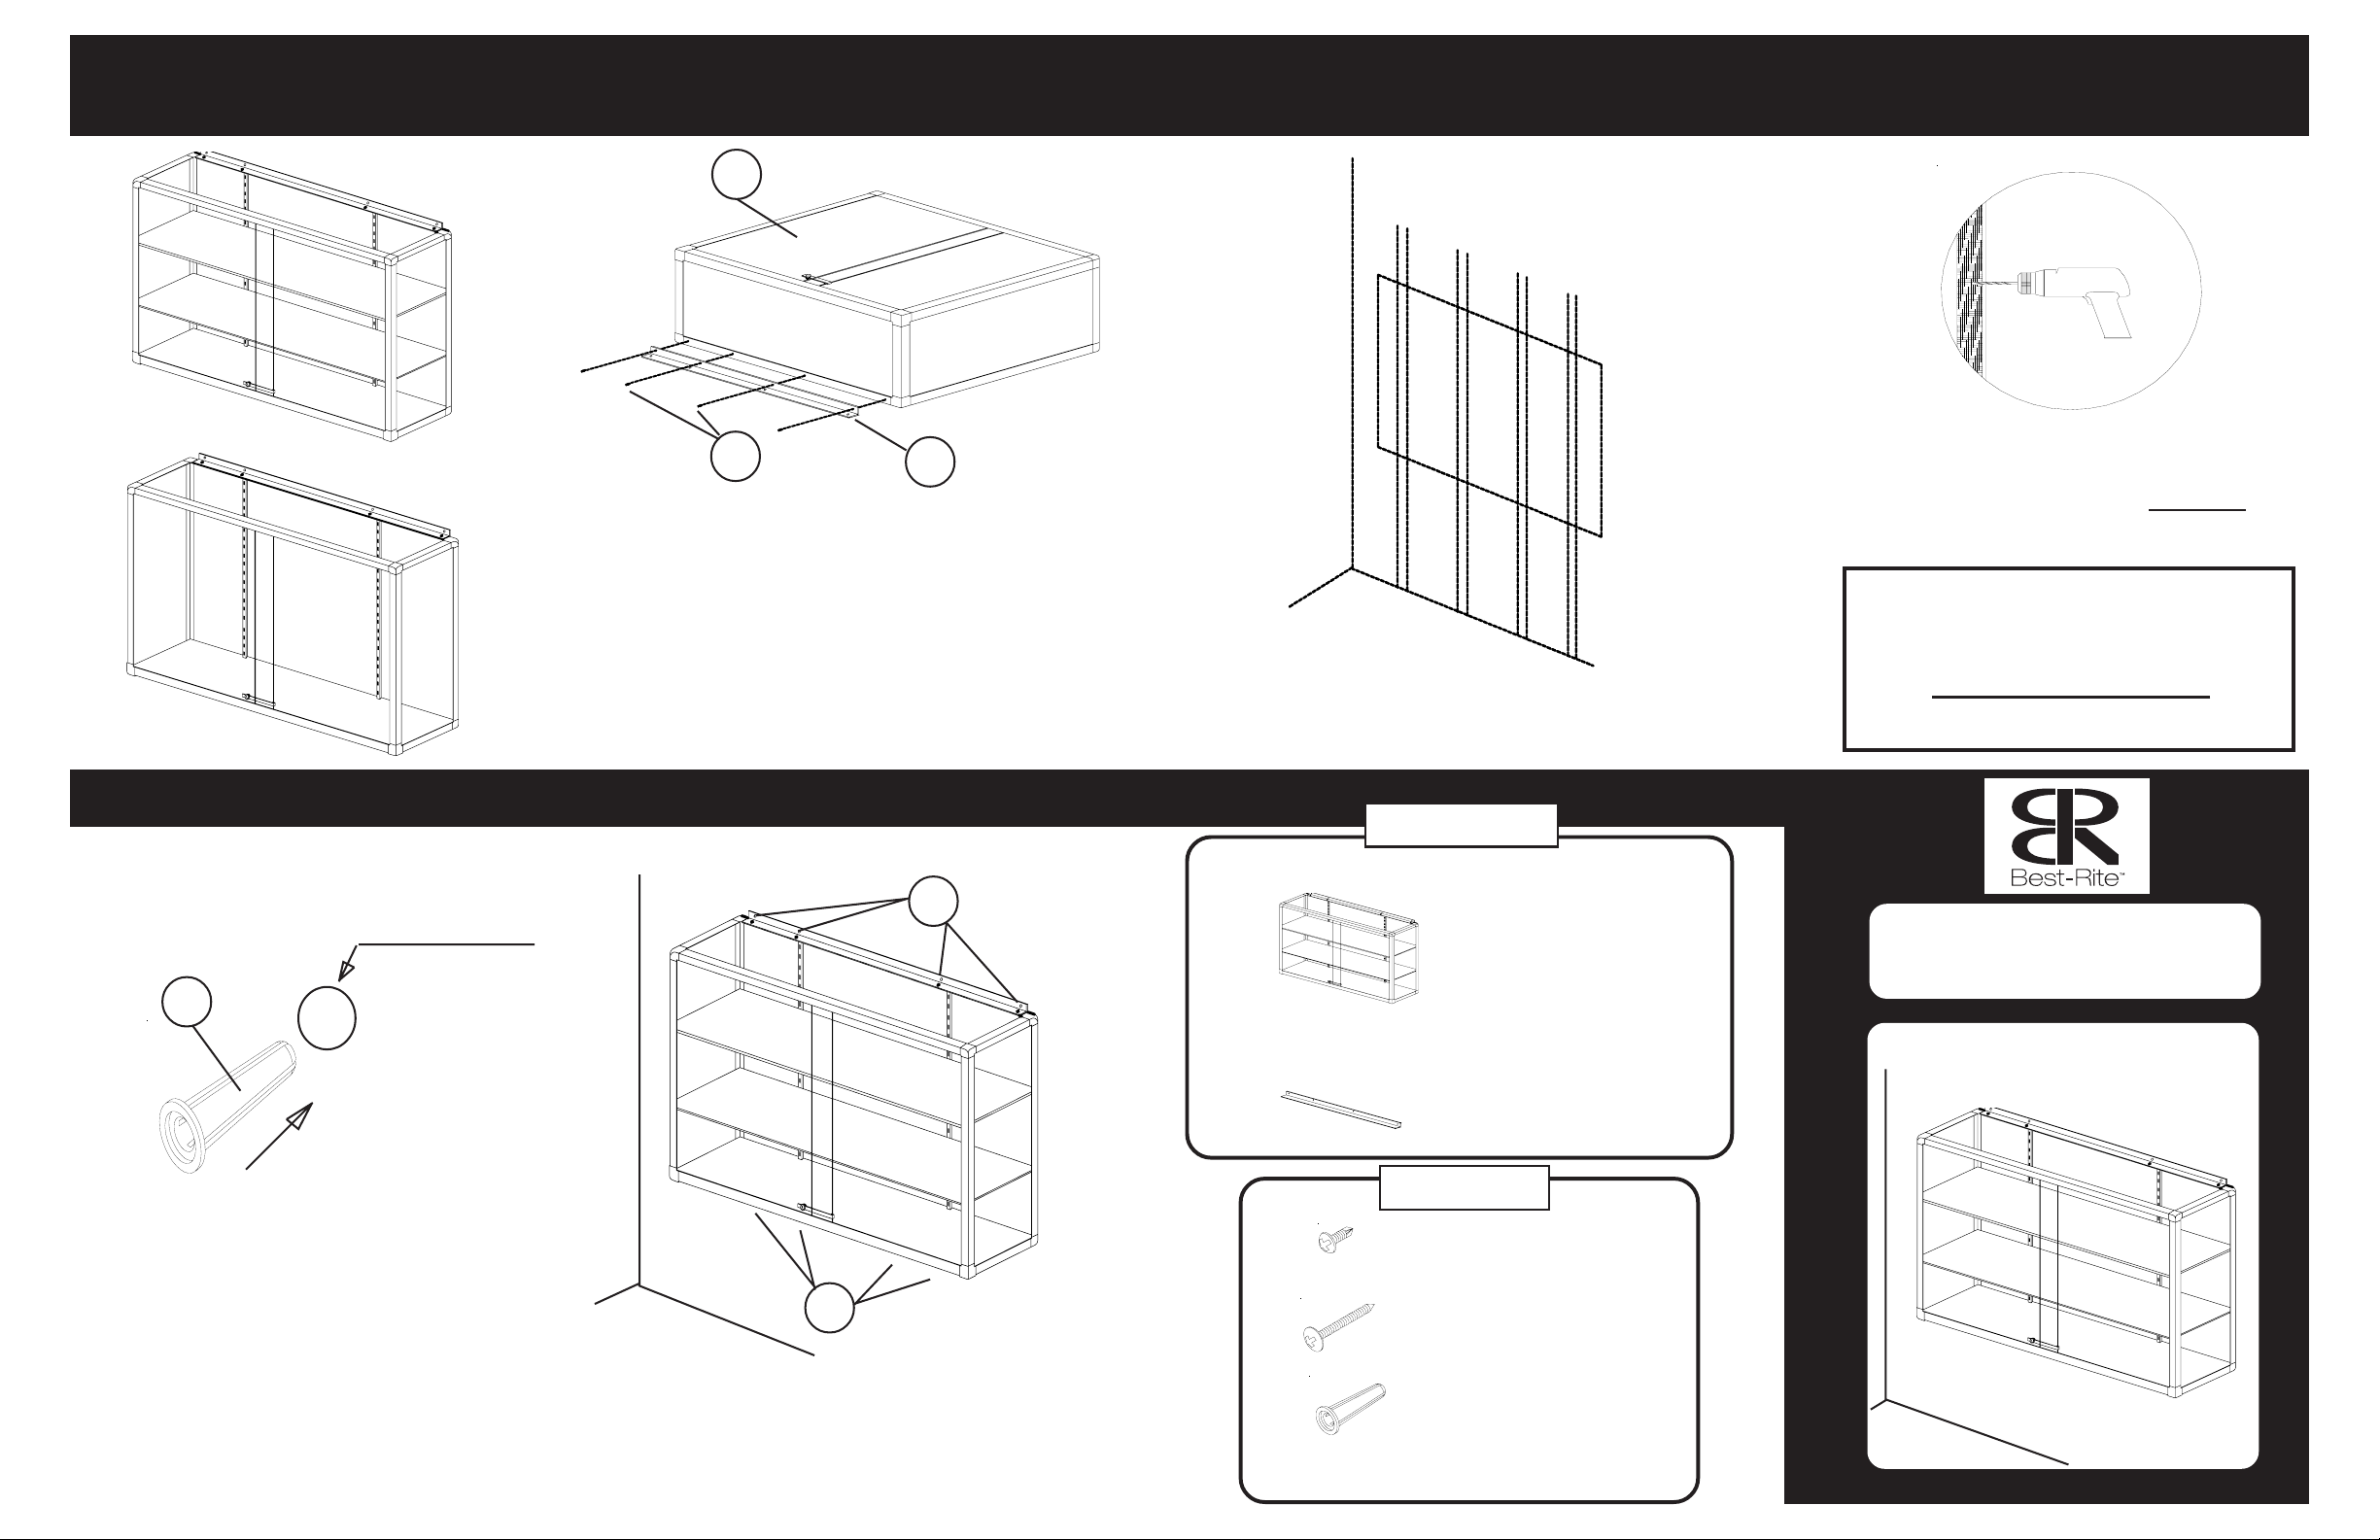
Remove all the glass shelves and shelf supports
1
from inside the unit.
Attach the “L” Angle Bracket (P-2) to the bottom
2.
of the Display Case (P-1) using 1/2” Screws (A).
P-1
Find the desired location for the unit and mark the Stud
3.
locations on a Sheetrock/ Wood/Metal Stud wall. You
MUST hit the studs with the 1 1/4” Screws (B) on this
type wall.
Use a 1/4” drill bit to drill through the top and bottom
4
“L” Angle Brackets (P-2). [Keep drilling through
and into masonry walls at least 1”]
Insert Plastic Wall Acnhors (C) into holes in masonry
5.
walls only.
1/4” Predrilled Hole
C
A
Position the Display Case (P-1) on the wall over your
6.
drilled holes(masonary wall) and attach with1 1/4” Screws
(B).
P-2
B
Parts List
P-1 Display Case 1 EA
R
EAD THROUGH INSTRUCTIONS
FROM BEGINNING TO END
STARTING TO ASSEMBLE UNIT
Missing Parts or UPS Damaged Parts
For Your Convenience you can
EMAIL us at
BEFORE
.
24HOURS 7 DAYS A WEEK
# 90 HC and # 90 W
Wall Mount Display Case
B
(Hidden)
P-2 “L” Angle Bracket 1 EA
Hardware List
A 1/2” Screw 4 EA
B 1 1/4” Screw 8 EA
C Plastic Wall Anchor 8 EA
90HC&W_2-4-10
 Loading...