

Moondyne ghost eye Instruction Manual

3GExtreme Trail Camera
Instruction Manual

Contents
1. Introduction.......................................................................................................... - 1 -
1.1 Full Functionality Introduc tion ............................................................................ - 1 -
1.2 Application ....................................................................................................... - 1 -
1.3 Power Supply............................................................................................................- 1 to 2 -
1.4 SD Card Selection ............................................................................................. - 2 -
1.5 USB Connection................................................................................................ - 2 -
1.6 Key Features ..................................................................................................... - 3 -
2. Whole View and Details of Camera ............................................................................ - 3 -
2.1 Figure 1: Front View of Camera .......................................................................... - 3 -
2.2 Figure 2: Bottom View of Camera..................................................................................- 4 -
2.3 Figure 3: Internal, Side and Back View of Camera ................................................. - 5 -
2.4 Function Keys & Other Details............................................................................ - 6 -
3. Quick Start............................................................................................................... - 7 -
3.1 How to Start the Camera..................................................................................... - 7 -
3.2 How to Set the Functions .................................................................................... - 7 -
3.3 How to Enable Camera to Send Photos................................................................. - 7 -
4. Operation List .......................................................................................................... - 8 -
4.1 Video/Photo Playback ................................ ........................................................ - 8 -
4.2 Delete .............................................................................................................. - 8 -
4.3 Format of SD Card ............................................................................................ - 8 -
4.4 Auto PIR ON .................................................................................................... - 8 -
4.5 Operation Menu ........................................................................................ - 9 to 12 -
5. Specification ........................................................................................................... - 13 -
6. Trouble Shooting .................................................................................................... - 14 -
6.1 Photos Do Not Capture Subject of Interest .......................................................... - 14 -
6.2 Camera Stops Taking Images or Won’t Take Images............................................. - 14 -
6.3 Night Vision Flash Range Doesn’t Meet Expectation............................................ - 14 -
7. Warranty ............................................................................................................... - 15 -

- 1 -
1. Introduction
Thank you for choosing a Moondyne 3GExtreme Trail Camera.
Our cameras have been developed for Australian conditions and have been tested in some of
the most demanding conditions Australia has to offer. We are confident that you will be happy
with your purchase and we encourage any feedback you have that will help to continually improve
our products.
1.1 Full Functionality Introduction
Our trail cameras are designed to be easy to use, whilst still having all of the functions you would
expect from today’s high tech devices. Such as 52°FOV lens, 56pcs (Black Flash) IR LEDs, 0.4
seconds trigger time, 1 photo/sec (up to 5 photos per trigger) multi-shot, HD Video, and a user
friendly operational menu.
1.2 Application
This camera is the ideal product for farm security, property surveillance, or animal monitoring.
Its camouflage finish combined with black flash IR LEDs keeps it out of sight, whilst monitoring
your property or game trails.
A hassle free surveillance camera for home, farm, construction site, warehouse or outdoors that
can send a photo directly to your phone or email (requires SIM card for this function) and also
keeps a copy on your SD card.
1.3 Power Supply
A. Batteries
The camera runs on 8 x AA size batteries. It can work with alkaline, high-quality NiMH, or Lithium
rechargeable batteries.
It is suggested to run the camera with NiMH or Lithium batteries as these provide better power
and longer run times.
Batteries should be inserted as indicated inside the battery case. Batteries inserted contrary to
this may cause device malfunction. We strongly recommend changing the batteries when the
power icon on camera screen or photo stamp shows empty or near empty.
Note: Do not mix batteries types. Mixing battery types in the camera may cause permanent
damage, which also violates our warranty policy.
Due to different settings, subject movement within the camera detection zone, different brands
and qualities of batteries, and the environment, we are unable to list exact number of photos and
videos that the camera can achieve. The table below shows approximate number of photos or
videos the camera can take with 8 x AA alkaline batteries. Better performance can be achieved
by using rechargeable NiMH or Lithium batteries.

- 2 -
Test Condition: LCD screen off. Mode: “Power On” _PIR intelligent automatically monitoring
8 x AA Alkaline Batteries
Photos shot per day
Working time
Video clips shot per day
Working time
IR LEDs On
Max.Range
100 pics
36 days
10secs video clips
10 clips
37 days
Balanced
100 pics
31 days
Min. Blur
100 pics
21 days
IR LEDs Off
Photo
100 pics
89 days
10secs video clips
10 clips
179 days
B. Solar Panel
Our engineers have designed this camera to be able to work with most standard 12V/1~2 Amp
built-in lithium battery, solar panels. Solar panels with built in batteries are only designed to recharge their in-built batteries. They will not recharge the AA batteries inside the camera.
C. Power Adaptor—Security Surveillance Purpose
This camera can also be powered by an external 12V/ 1~2A DC adapter. It is recommended to
remove the batteries when a power adapter is being used. Electrical power is recommended for
security purposes.
1.4 SD Card Selection
A memory card is required to operate the camera. When the camera is "ON" and there is no
memory card inserted, the screen will display "No Card!". The SD slot of the camera has a 32GB
SD memory card capacity. Before inserting or removing the memory card the camera must be
turned "OFF". Failing to do so may cause loss of or damage to the pictures on the card. When
the SD card is full, the viewing screen indicates "Memory Full". Camera function can be set to
overwrite, allowing new pictures to overwrite the old ones once the memory card is full.
The chart below shows the approximate capacity of different size SD cards. Please check to see
which size card will best suit your needs.
SD
Size
Capacity
8 GB
16 GB
32 GB
Photo (pictures)
5MP
7492
15307
30936
8 MP
4798
9794
19795
12 MP
3371
6887
13919
Video (hours)
640x480
00:46:57
01:35:56
03:13:52
HD
00:33:53
01:09:14
02:19:56
FHD
00:17:48
00:36:20
01:13:21
1.5 USB Connection
When the camera is connected via the USB cable the screen will display “MSDC”. Files on the
SD card can then be viewed using the camera as an external device.
- 3 -
1.6 Key Features
0.4s Trigger speed
52
0
Field of view and 700 PIR angle
Max 12mp / 1080P
Programmable 5/8/12 Megapixel high-quality resolution
56pcs (Black Flash) Invisible LEDs offer 20 metres of real night vision distance
Crystal clear day & night photo/video quality
Multi-shot 1 shot per second (1~5 photos per trigger)
Adjustable PIR sensitivity, multi-shot (1~5 photos per trigger), programmable delay between
motions, time lapse, timer, audio recording, TV out, time stamp (camera ID, date/time,
temperature, moon phase)
Built-in 2.0" TFT color screen
Operating temperature -25
0
c to 600c
With MMS/3G/SMTP/FTP function, camera can transmit photos to 1-2 preset mobile phones
and 1-2 email addresses per trigger
Supports Telstra 3G SIM card
Optional small size (640*480) and large size (1920*1440) Email/FTP photos
APP available in IOS & Android APP store. APP can be used to change settings remotely
2. Whole View and Details of Camera
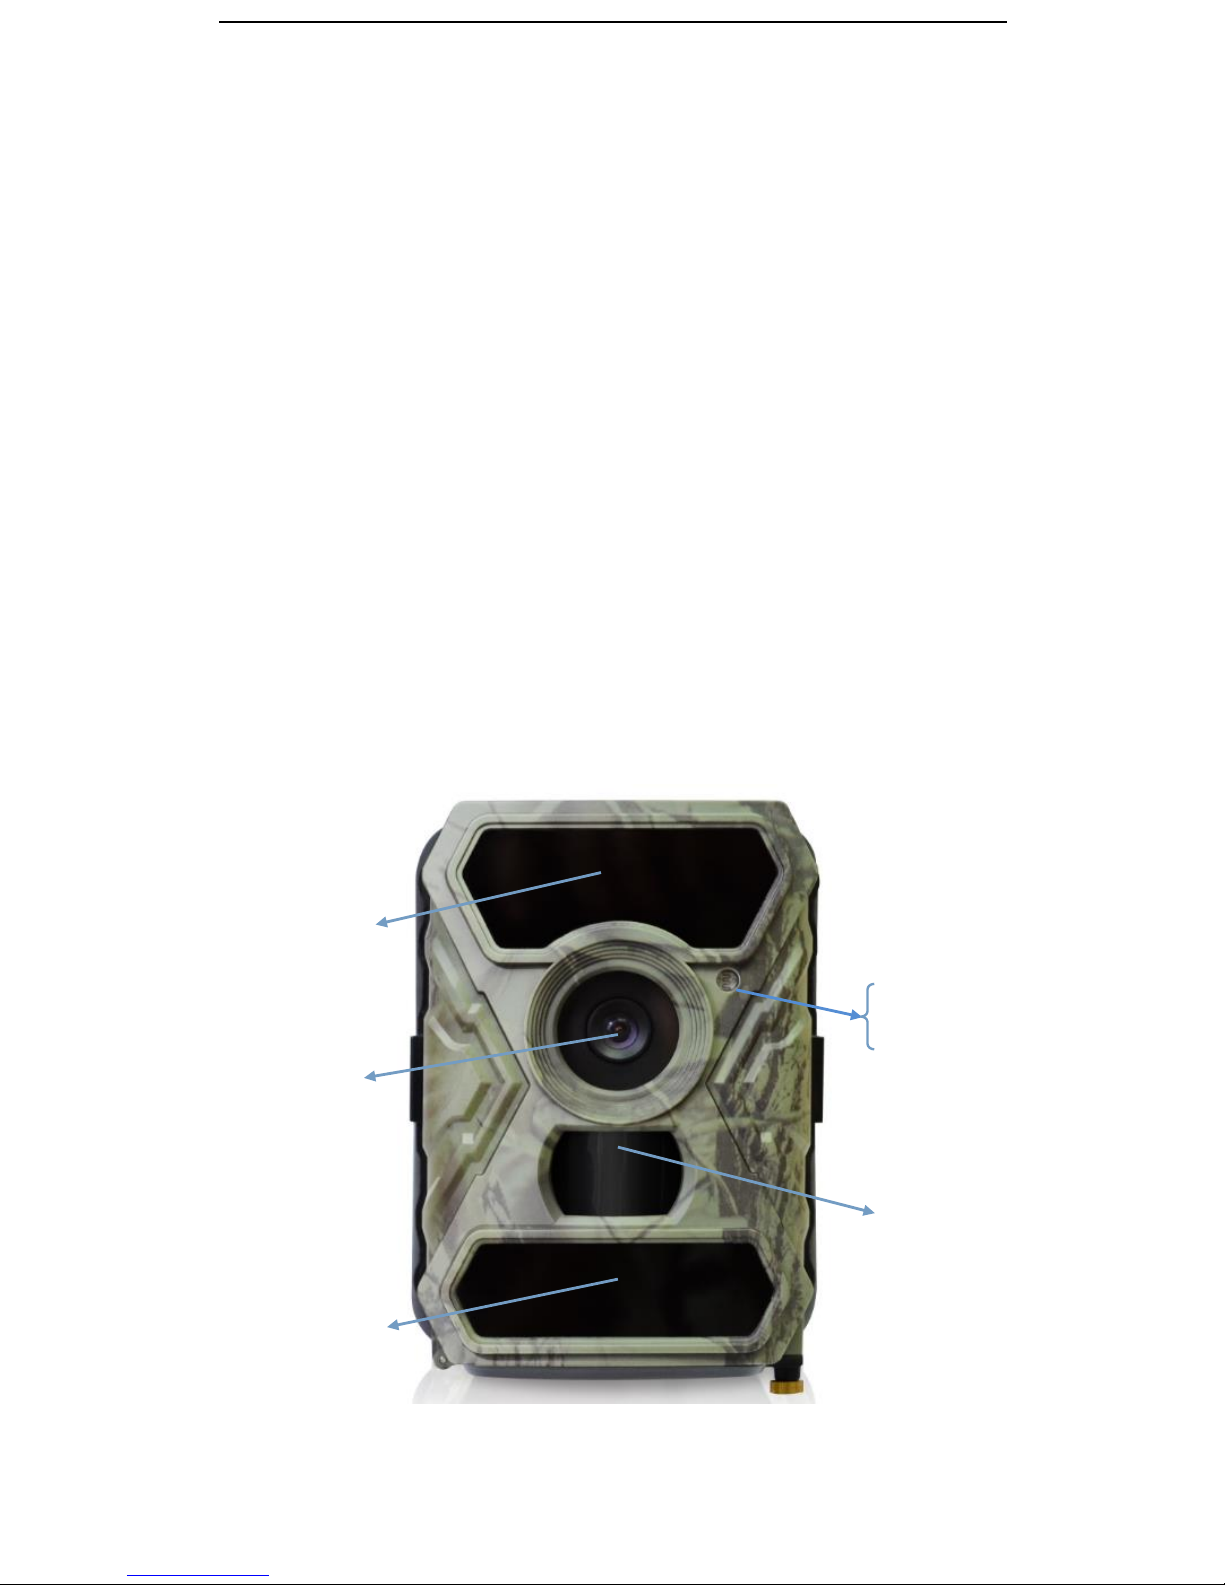
2.1 Figure 1: Front View of Camera
25 IR LEDs
Indicator Light
Light Sensor
Lens (day/night)
PIR Sensor
31 IR LEDs
(Can be turned off)
- 4 -
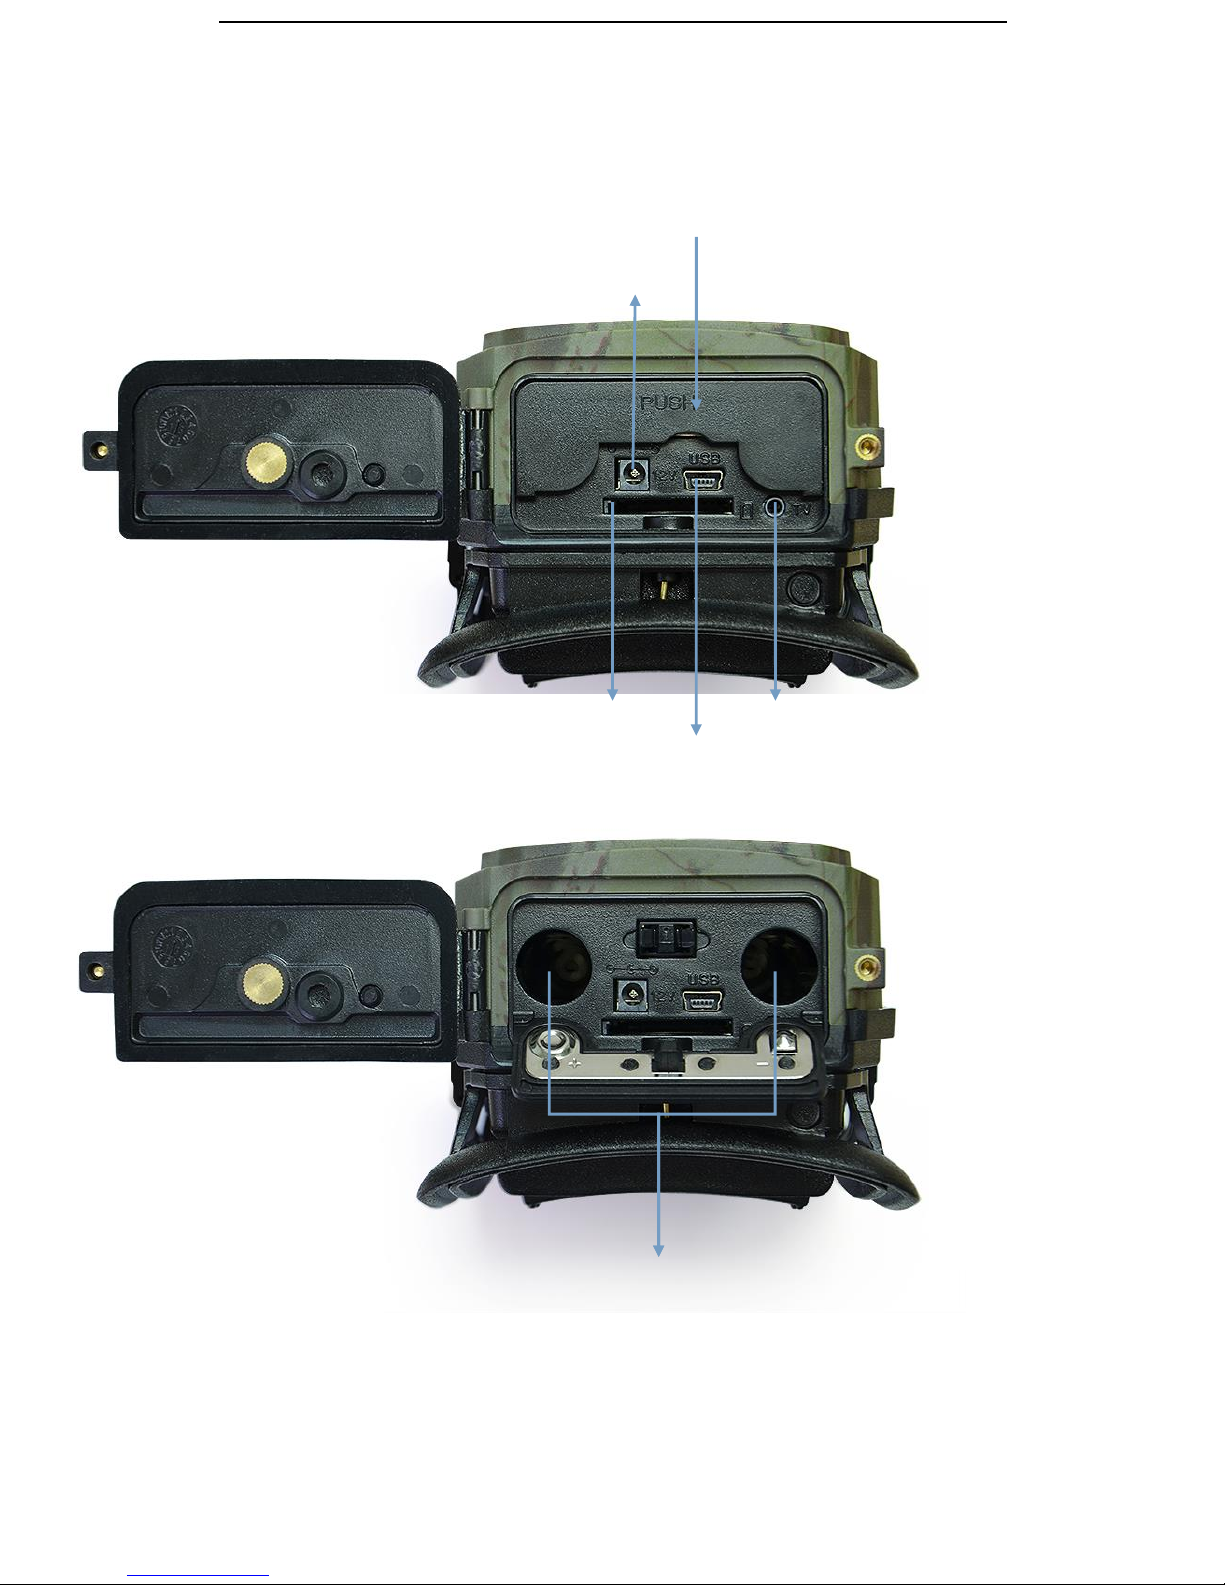
2.2 Figure 2: Bottom View of Camera
Push slightly to open this cover
DC in
SD Card Slot TV Out
USB Port
Battery Slot
 Loading...