

Installation and Operating Instructions
MODEL: INT900
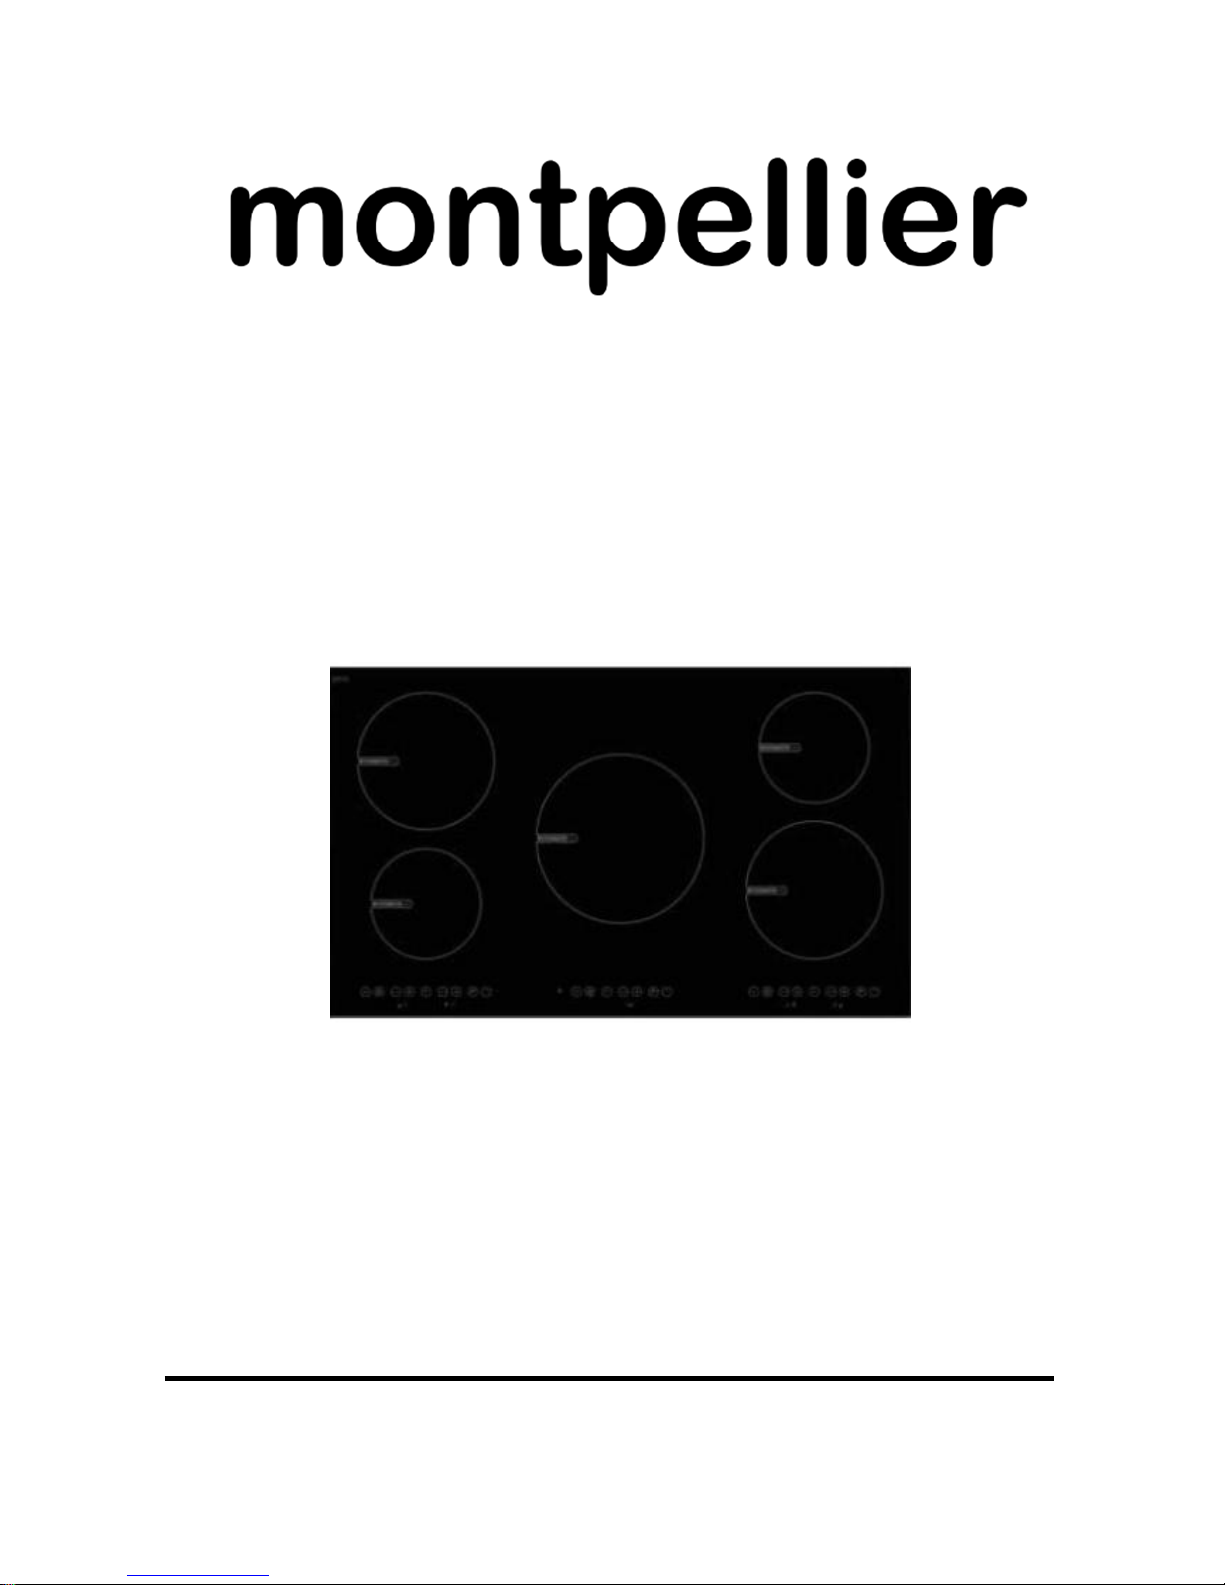
Built-In 5 Zone Induction Hob
(Picture shown for indicative purposes only)
Please read these instructions carefully before attempting to install or use this appliance.
It is advisable to keep these instructions in a safe place for future reference.

2
Introduc
t
ion
and
le
T
his quali
ty
applian
ce
has
been
tested and
certif
ied to meet all
Thank you for choosing this
has been
Please read these instructions carefully before installing or
using your appliance. It is advisable to keep your purchase
installation receipts with these instructions in a safe place for
future reference. Included is some important safety information
in addition to guidelines and recommendations that will enab
After unpacking the appliance ensure that there is no visible
damage. If the appliance has been damaged during transit,
designed to give years of trouble-free use provided
it is installed and maintained correctly.
you to take full advantage of all the functions available.
applicable UK electrical and safety standards.
This appliance must be installed and connected in
accordance with current regulations.
do not use it, contact your retailer immediately.
montpellier
branded appliance
. It

3
Your 2 year Manufacturer's guarantee
THIS DOES NOT AFFECT YOUR STATUTORY RIGHTS.
Your new montpellier appliance carries a free guarantee which protects you against the cost of
repairs during the first 24 months from date of purchase provided that:
Any claim is accompanied by evidence of the model reference, model serial number and proof of
purchase, such as a Sales Receipt, showing that the appliance was purchased within the 24
months prior to the date of claim.
What is not covered under the Guarantee:
· Any appliance not correctly installed and operated in accordance with the
manufacturer's instructions.
· Any appliance that is used for anything other than domestic purposes.
· Any defect caused by accident, misuse, unauthorized modification or inexpert repair.
· Cost of Call-out where a fault cannot be found with the appliance.
· Cost of Call-out for work covering routine maintenance, such as, but not exclusively,
cleaning of filters or defrosting.
· Cost of Call-out for work required to correct the alignment of doors following door
reversal procedures carried out by you.
· Use of the appliance by anyone other than the Householder.
· Use in any commercial environment.
· Consumable items, such as, but not exclusively, fuses in plugs, bulbs and breakable
items which require routine replacement.
· Repair costs incurred that have not been authorised by Repairtech and/or carried
out by a non-approved Repairtech engineer.
YOUR GUARANTEE IS VALID ONLY IN THE UK.
To Register your Appliance simply complete the card in your appliance pack and return it with a
stamp affixed or Alternatively you can Register online at www.repairtechuk.com
SERVICE HELP-LINE
Should your appliance develop a fault, please call the
Please remember to have all your product details available, including the model number, serial
number, date of purchase and your retailers’ details before registering a fault.
Your service call cannot progress without this information.
Repairtech Service Helpline on:
01527-888133
4
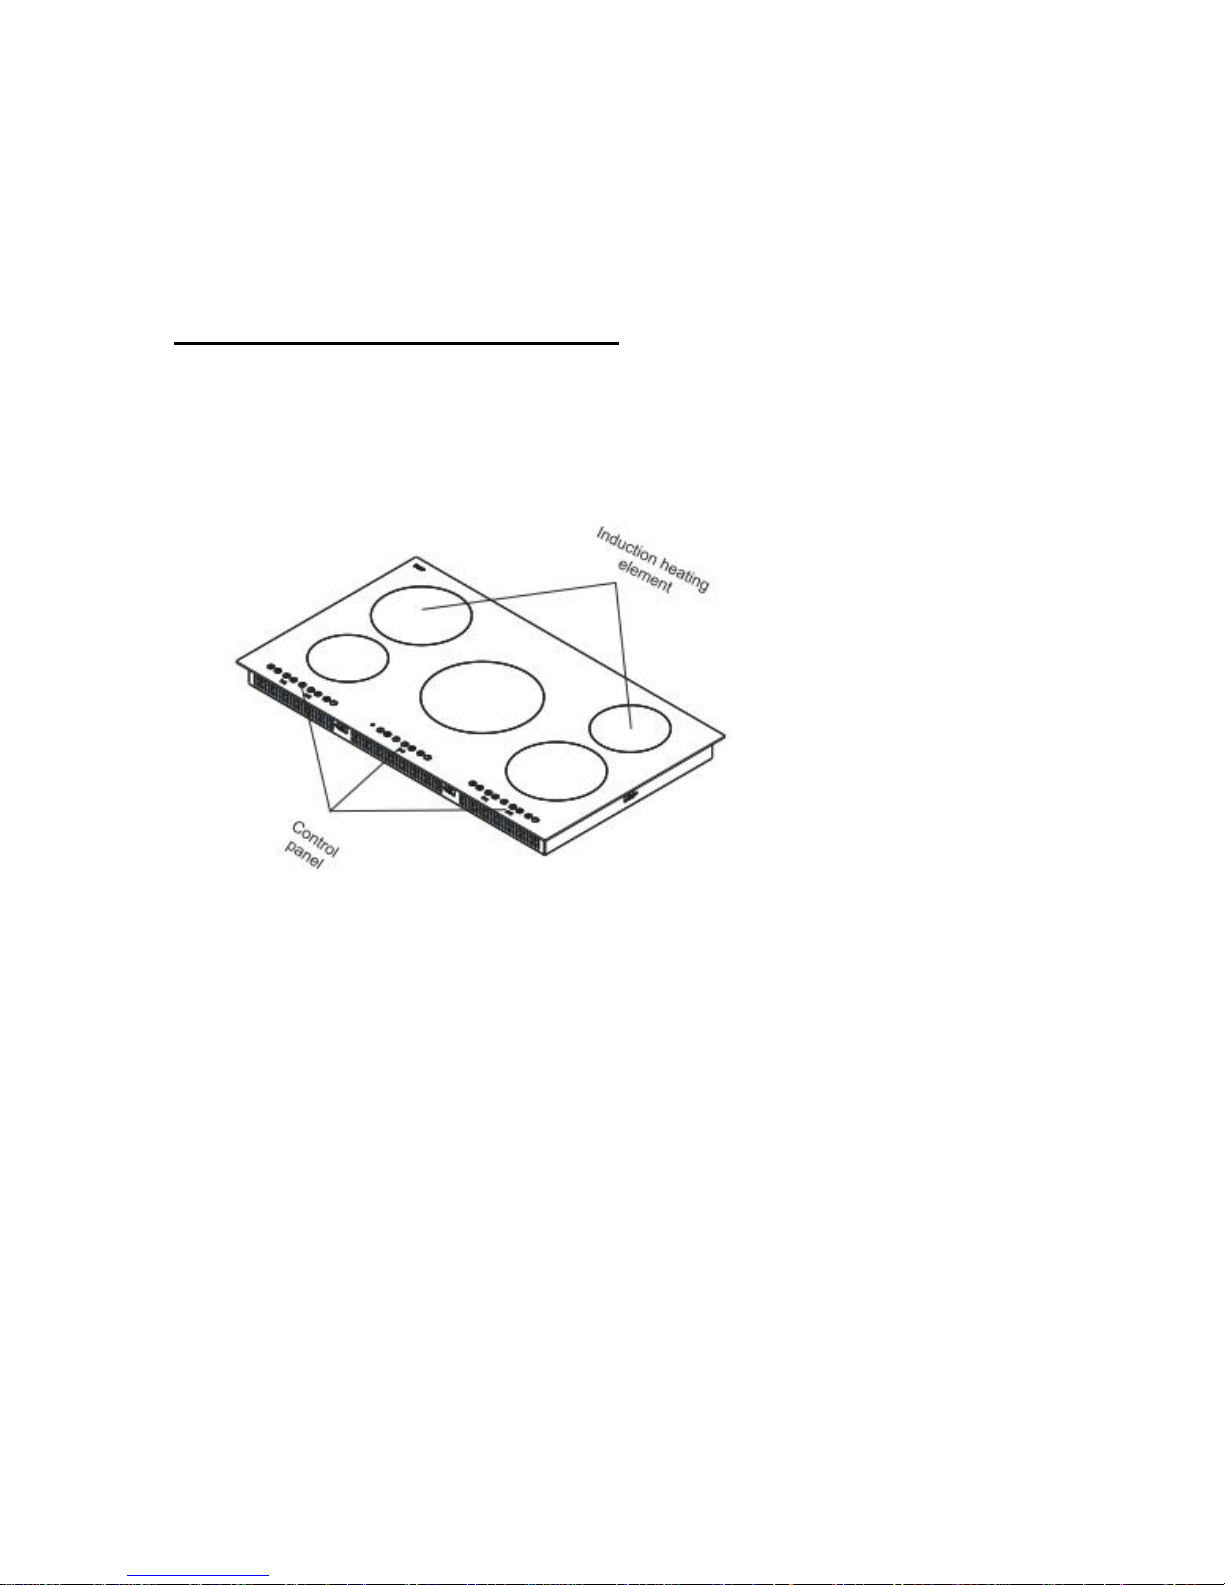
Description of the Appliance

5
CONTENTS:
Section 1. Safety Advice
Section 2. Installation
Section 3. Operating the Appliance
Section 4. Maintenance

Section 1. Safety Advice
- Please read this booklet thoroughly before installing and switching on the
appliance. The manufacturer accepts no responsibility for incorrect
installation and usage.
- This appliance is guaranteed for domestic use only.
- The appliance is not intended for use by persons (including children of
age 8 and above) with reduced physical, sensory or mental capabilities,
or lack of experience and knowledge, unless they have been given
supervision or instruction concerning the use of the appliance by a
person responsible for their safety. Children should be supervised to
ensure that they do not play with the appliance.
- This appliance must only be used for cooking/heating foods and liquids.
Do not use it for any other purpose.
- If using an adaptor, this must be used in accordance with the
manufacturers instructions and ensure that the electrical circuit is not
overloaded as this could cause overheating.
- Do not twist or bend the cables, and keep them away from hot surfaces.
- Following installation make sure that the power cable is not trapped
underneath the appliance.
-
Keep the appliance surfaces clean. Failure to do this could lead to the
appliance malfunctioning.
-
The surface of this appliance will get extremely hot during use. The
surface of this appliance will remain hot after it has been turned off. Do
not touch or clean the heating zone until it has completely cooled down.
- If the power supply cord is damaged, it must be replaced by the
manufacturer, its service agent or similarly qualified persons in order to
avoid a hazard.
- WARNING: The appliance and its accessible parts become hot during
use. Care should be taken to avoid touching heating elements. Children
less than 8 years of age shall be kept away unless continuously
supervised.
- WARNING: Unattended cooking on a hob with fat or oil can be
dangerous and may result in fire. NEVER try to extinguish a fire with
water, but switch off the appliance and then cover flame e.g. with a lid or
a fire blanket.
- WARNING: Danger of fire: do not store items on the cooking surfaces.
- WARNING: If the surface is cracked, switch off the appliance to avoid the
possibility of electric shock.
- The appliance is not intended to be operated by means of an external
timer or separate remote-control system.
6

- Do not use harsh abrasive cleaners or sharp metal scrapers to clean the
oven door glass and other surface since they can scratch the surface,
which may result in shattering of the glass or damage to the surface.
- Do not use steam cleaners when cleaning the appliance.
- For induction hobs, metallic objects such as knives, forks, spoons and
lids should not be placed on the hob surface since they can get hot.
- For induction hobs, after use, switch off the hob element by its control
and do not rely on the pan detector.
Important message for cardiac pacemaker implant patients!
This induction hob generates magnetic fields in its immediate
surroundings.
Your pacemaker must be designed in compliance with the corresponding
regulations in order for no interference to be caused between it and the
hotplate. Consult the pacemaker manufacturer or your doctor to
determine whether it complies with the regulations in force or whether
any incompatibilities exist.
7

Section 2. Installation
- Remove all packaging, protective film and securing tape from the appliance.
- Position the appliance in a dry atmosphere.
- The following dimensions are provided as a guide for installation – your installer will
carry out the installation in accordance with the current regulations.
- Your installer will connect the power cable in accordance with the current regulations.
To install this appliance, please proceed as follows:
2.1 Work-Surface Cut-Out & Position Near Walls
Please see the below installation recommendations if your hob is being placed above
a built-in oven. You must ensure the air gaps are as follows:
8

Work-Surface Cut-Out & Position Near Walls continued.
Please see the below installation recommendations if your hob is being placed above
draws. You must ensure the air gaps are as follows:
9

10
2.2 Securing the Hob
Apply the self-adhesive sealing tape all the way around the lower edge of the cooking
surface as shown in the diagram below.
Now position the hob into the work surface cut-out to secure it into place.
2.3 Electrical Connection
This appliance must be ‘hard wired’ to a suitable fused point adjacent to the
appliance housing and protected with a 32 amp fuse. Please note that a switchable
spur should be accessible above the work surface to allow the power to be turned off.
N.B. This hob cannot be connected via a 3pin plug!
Your installer will connect this appliance in accordance with current regulations.
Electrical connection diagram:

11
Section 3. Operating the Appliance
3.1. Cookware Suitable for Induction
Induction hobs are made from smooth, ceramic glass, the heat comes from a
magnetic induction coil which heats the cookware but not the cooking surface. The
heat from the cookware is transferred to the food.
Pans suitable for induction hob use must be made from magnetisable metal such as
cast iron or steel. Pure aluminium, copper or glass pans will not work with this type of
hob unless the base is bonded with a magnetic metal.
Check that pans are attracted to a magnet - this ensures that they are suitable for use
with an induction hob.
3.2. Control Panel
Please note that this 5 zone appliance has 3 separate control panels.

12
3.3. Timer, Power and Cooking Functions
Switching the appliance on:
Switch the hob on by touching the ON/OFF key . All heater displays show a static
“0” and the bottom right dot will blink. If no cooking zone is selected within 20
seconds, the hob will automatically turn off.
Switching the appliance off:
Switch the appliance off at any time by touching .
Switching the cooking zones on:
Touch the heater selection key corresponding to the zone you wish to cook on.
There is a static dot indication of the selected heater display and a blinking dot on all
other displays.
Select the temperature setting by using the increase setting key or decrease
setting key . The element is now ready to cook. For the quickest cooking times,
select the desired cooking level and then touch the “P” key to activate the boost
function.
Switching the cooking zones off:
Select the element you want to switch off by pressing the heater selection key. Using
the key, turn the temperature down to “0”. Also, using the and keys
simultaneously will turn the temperature down to “0”.
If the cooking zone is hot, “H” will be displayed instead of “0”.
Smart Pause:
Press Smart Pause to lower the power of all zones being used – press it again to
restore power. When Smart Pause is activated, the power setting of the heat zone will
reduce to “1” and “ll” will appear at all displays. If you do not deactivate Smart Pause,
the hob will close down after a period of 30 minutes.
Safety switch off function:
Every cooking zone will be switched off after a defined maximum operation time if the
heat setting is not modified. Every change in the cooking zone resets the timer of the
safety switch off function. The maximum operation time depends on the selected
temperature level.

13
Child Lock:
After switching on the control, the child lock function can be activated. To activate the
child lock, simultaneously operate the increase heat setting key and decrease heat
setting key , and then operate the increase heat setting key again. “L” meaning
LOCKED will appear in all the heater displays and the control cannot be changed.
The hob will remain in a locked condition until it gets unlocked, even if the control has
been switched on and off.
To deactivate the child lock, simultaneously operate the increase heat setting
key and decrease heat setting key , and then operate the decrease heat setting
key again. The ”L” symbol, meaning LOCKED should now have disappeared.
Key Lock:
While the Key Lock function is active it is only possible to switch the appliance off. If
the key lock button is pressed and held for two seconds the lock will be activated
and acknowledged by a buzzer. After this two second period the key lock indicator
will flash and the heater will be locked.
Timer function:
The timer function is available for the following situations:
Minute minder timer (1-99 min):
The minute minder timer can be operated if the cooking zones are switched off. The
timer display shows “00” with a blinking dot.
Touch to increase the time or touch to decrease the time. You can adjust the
timer between 0 and 99 minutes. If there is no further adjustment within 10 seconds,
the minute minder timer will be set and the blinking dot will disappear.
When the time is over, a signal sounds and the timer display blinks. The sound signal
will be stopped automatically after 30 seconds and/or by operating any key.
The minute minder timer can be changed or switched off at any time by operating the
timer setting key and/or decrease timer key . Switching off the hob by touching
at any time will also switch off the minute minder timer.
Cooking zone timer (1-99 min):
When the hob is switched on, an independent timer can be programmed for every
cooking zone. Select a cooking zone, then select the temperature setting before
finally activating the timer setting key , the timer can be programmed as a switch
off function for a cooking zone. Around the timer four LEDs are arranged which
indicate for which cooking zone the timer has been activated. The timer display will
show which timer will run out next and when a timer has run down, a signal sounds
and the timer display shows “00”. The programmed cooking zone will be switched off
and the “H” will display if the cooking zone is hot. The sound will stop after two
minutes or by operating any key.

14
Buzzer:
While the hob is in operation, the following activities will be signalled by means of a
buzzer:
· Normal key activation with a short sound signal.
· Continuous operation of keys over a longer period of time (10 seconds) with a longer,
intermittent sound signal.
Boost Function:
A cooking zone must be selected, with the cooking level set and then the “P” (Boost)
key must be pressed. The boost function can be activated if applicable to the cooking
zone. If the boost function is active a “P” will be shown on the corresponding display.
Activating the booster can exceed the maximum power and may cause the integrated
power management system to be activated. The necessary power reduction is shown
by the blinking of the corresponding cooking zone display. Blinking is active for 3
seconds and allows further adaptations of the setting before power reduction.
Residual Heat Indicator:
This function will indicate that the glass is still hot and should not be touched by
displaying a letter “H”. This will show until the hob is safe to touch.

15
Section 4. Maintenance
Before any maintenance or cleaning work is carried out, DISCONNECT the
appliance from the ELECTRICITY supply and ensure that the appliance is
completely cool.
4.1. Cleaning the Hob Surface
Clean spillages from the hob surface as soon as possible after use. Always ensure
that the surface is cool before cleaning.
Use a soft cloth or kitchen paper to clean the surface. If the spillage has dried on the
surface you may need to use a specialist vitro-ceramic glass cleaner, available from
all good supermarkets.
Do not use other abrasive cleaners and/or wire wool etc as this may scratch the
surface of the hob.
4.2. What to do if something goes wrong
There is no power to the appliance:
- Check there is not a power cut.
- Check there is power to the electric socket/appliance.
After cooking the letter ‘H’ is displayed:
- This is the hot surface indicator – it will remain on until the appropriate heat zone has
cooled down to a safe temperature.
After switching off, the appliance sounds like it is still running:
- This is the cooling fan – it will remain on until the appliance has cooled down.
The hob makes a ‘clicking’ noise during use:
- This is quite normal – it is the sound of the induction coils during operation.

16
If after the pre
vious checks there is still a fault, please
Error Codes are as follows:
E1: Cooling fan is disabled, call the Repairtech helpline.
E3: Supply voltage is over the rated values, turn off the hob and wait until
“H” disappears from all zones. Turn the hob back on and continue to use,
if the same error appears again, call the Repairtech helpline.
E4: Supply frequency is different from rated values, turn of the hob and wait
until “H” disappears from all zones. Turn the hob back on and continue to
use, if the same error appears again, call the Repairtech helpline.
E5: The internal temperature is too high, turn the hob off and allow the heat
zones to cool down.
E6: Communication error between touch control and heat zone, call the
Repairtech helpline.
E7: Coil temperature sensor is disabled, call the Repairtech helpline.
E8: Cooler temperature sensor is disabled, call the Repairtech helpline.
E9: Calibration error, call the Repairtech helpline.
contact the Repairtech Service Helpline below. Please
ensure that you have the model number, serial number,
date of purchase and retailers information available
before you make the call.
Should your appliance develop a fault, please call the
Repairtech Service Helpline on:
01527-888133

17
Important Note:
This appliance is marked according to the European directive
2002/96/EC on Waste Electrical and Electronic Equipment (WEEE).
By ensuring this product is disposed of correctly, you will help
prevent potential negative consequences for the environment and
human health, which could otherwise be caused by inappropriate
waste handling of this product.
The symbol on the product, or on the documents accompanying the
product, the Crossed Out Wheelie Bin, indicates that this appliance
may not be treated as household waste. Instead it shall be handed
over to the applicable collection point for the recycling of electrical
and electronic equipment.
Disposal must be carried out in accordance with local
environmental regulations for waste disposal. For more detailed
information about treatment, recovery and recycling of this product,
please contact your local authority, your household waste disposal
service or the retailer where you purchased the product.
We continuously try to improve our products for the benefit of our customers.
For this reason we reserve the right to make changes to any product at any
time, without notice.
Issue: 04/02-03-2015
 Loading...