

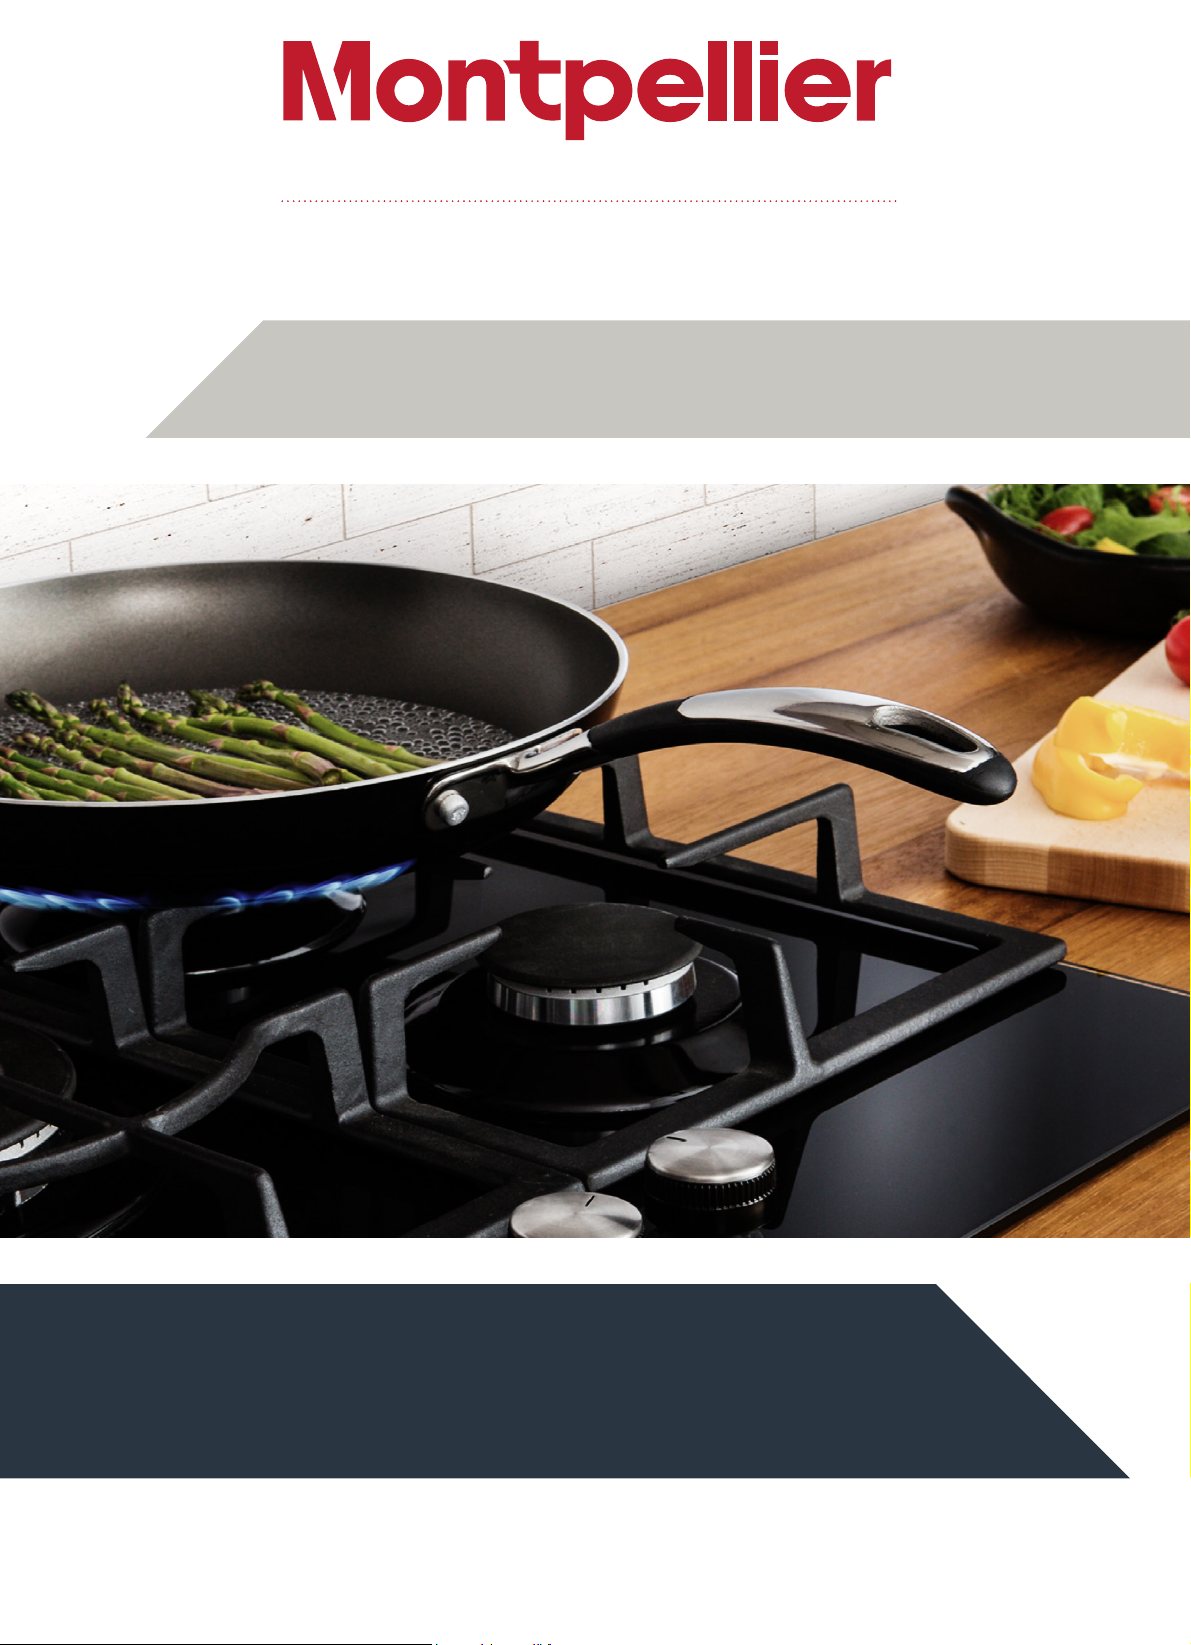
THE PERFECT BALANCE OF FUNCTION AND STYLE
LAUNDRY - DISHWASHING - COOKING - COOLING
Installation and Operating Instructions
Built In Gas Hobs - 60cm
GH60
BG/GH60X/GH61X - Black Glass/Stainless Steel
Please read these instructions carefully before attempting to install or use this appliance.
We recommend that you keep these instructions in a safe place for future reference.
Welcome
Thank you for choosing this Montpellier Gas Hob.
Our Gas Hobs have been designed to provide you with the best combination of style, reliability and performance
to give you years of trouble-free use.
You may be familiar with a similar product, but please take time to read these instructions carefully before installing
or using your Hob to ensure you get the most from your purchase.
We recommend that you keep this manual in a safe place for future reference.
Your Gas Hob is covered by a comprehensive two year Parts & Labour
Guarantee. In the unlikely event that you experience a problem with your Hob,
you can rest assured that you are fully protected against the cost of repairs for
the first 24 months . Please note that any claim must be accompanied by the
model reference number, serial number and proof of purchase.
To activate your guarantee, you will need your product serial number. This can
be found on the rear of the machine.
There are two ways to register your Guarantee:
YEAR
GUARANTEE
PA R T
S & L
A BOU R
ACROSS ALL OUR MODELS
www.montpellier-appliances.com
• Online: Visit the Support page on our website and complete the online Product
Registration form. www.montpellier-appliances.com
By Post: Simply detach and ll in the form provided, attach a stamp and send
•
it in the post. Don’t forget to include your e-mail address so that we can send
conrmation through to you.
Note: We are unable to take registrations over the phone.
Description Of The Appliance
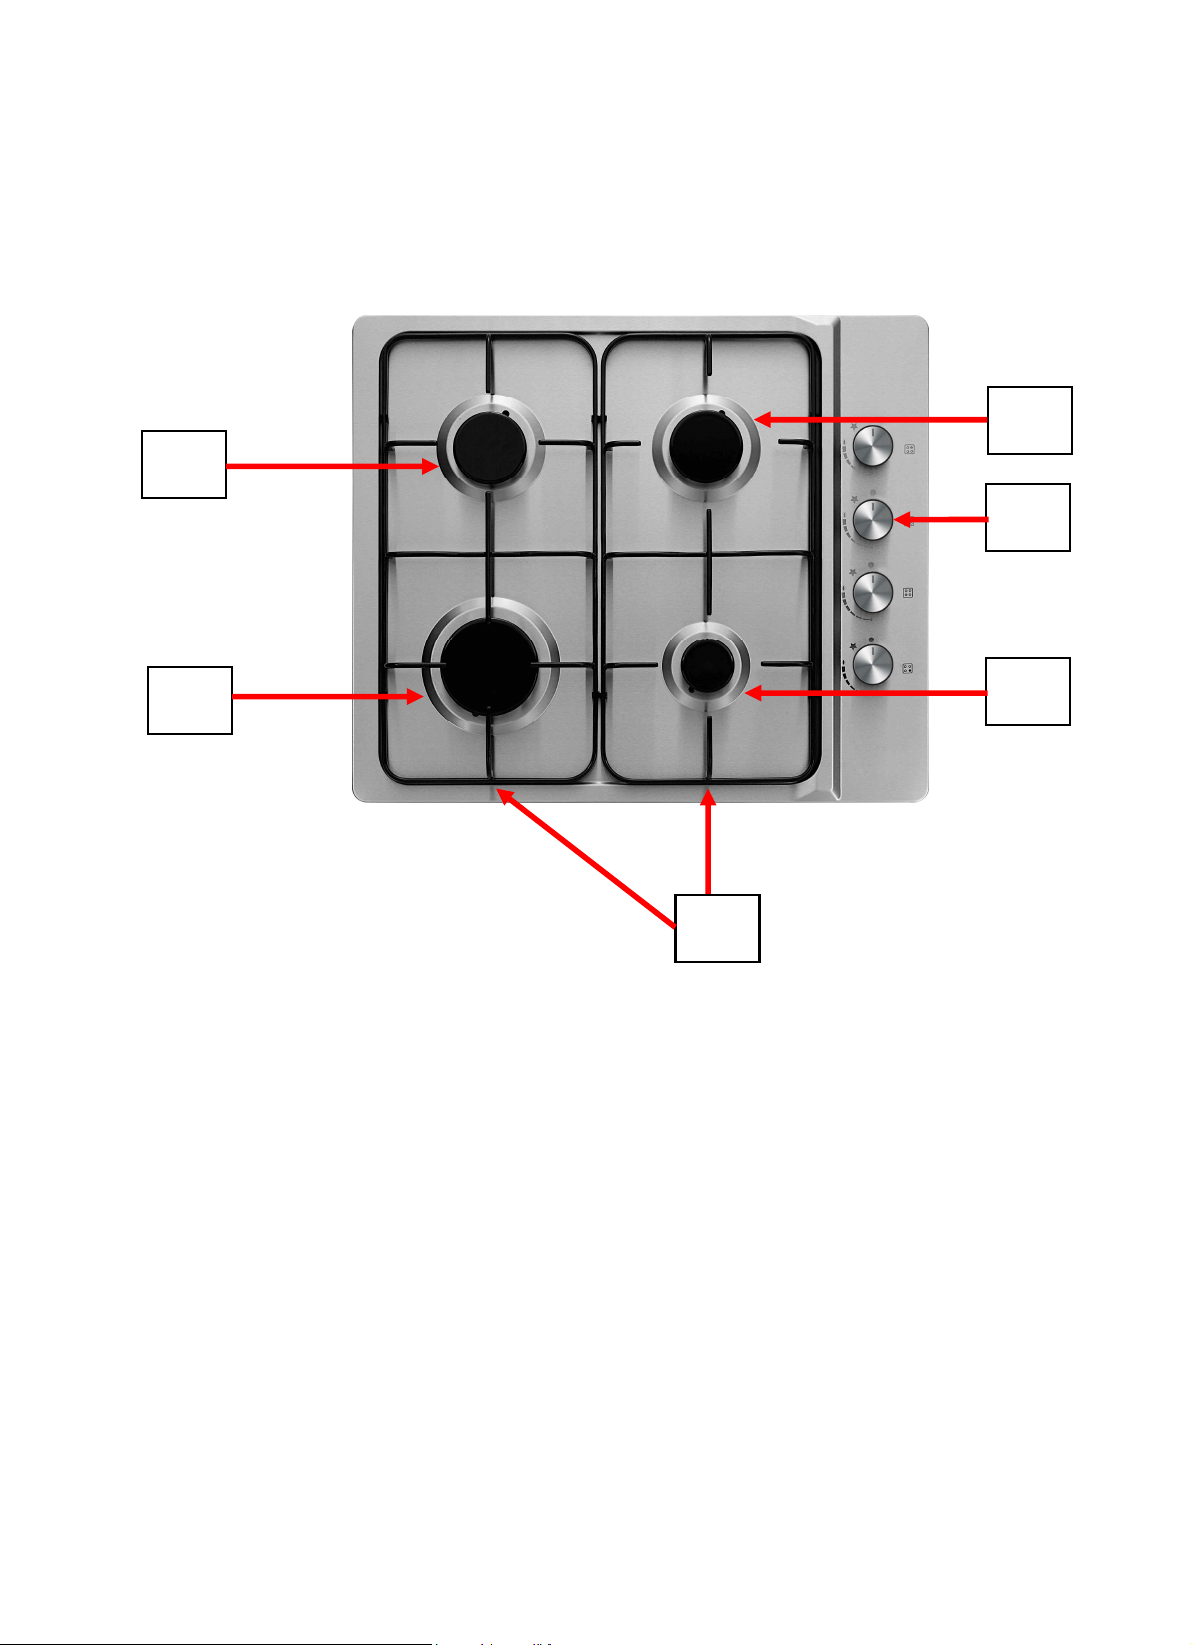
a) MON-GH60X
1.
1.
4.
2.
3.
5.
1. 1.75kW Burners
2. 3.0kW Burner
3. 1.0kW Burner
4. Burner Control Knobs
5. Pan Supports
2
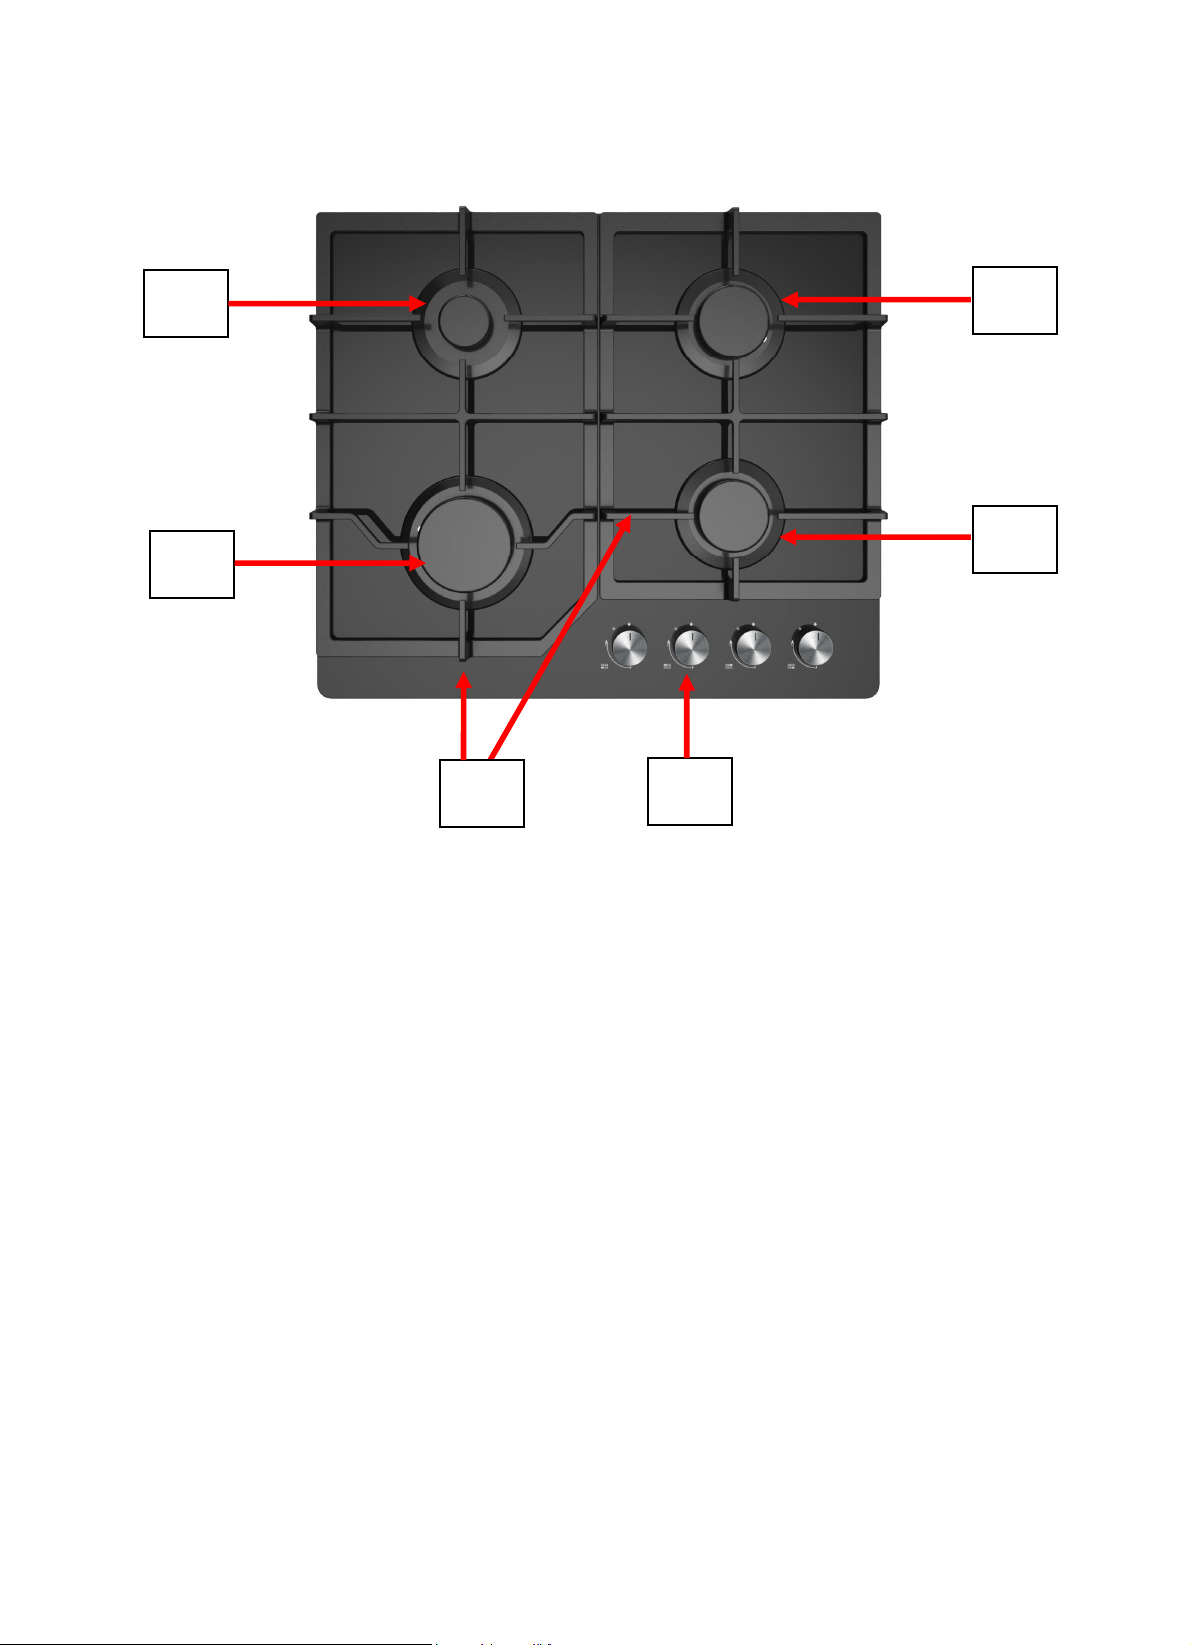
b) MON-GH60BG (black) & MON-GH61X (Stainless-Steel)
1.
2.
4.
1.
3.
4.
(Model shown above: MON-GH60BG)
1. 1.75kW Burners
2. 3.0kW Burner
3. 1.0kW Burner
4. Burner Control Knobs
5. Pan Supports
3

CONTENTS:
Section 1. Installation
Section 2. Safety Advice
Section 3. Operating the Appliance
Section 4. Maintenance
4

S
ection 1. Installation
- Remove all packaging, protective film and securing tape from
the appliance.
- Position the appliance in a dry atmosphere.
- The following dimensions are provided as a guide for
installation – your GasSafe installer will carry out the installation
in accordance with the current regulations.
- Your GasSafe installer will connect the appliance in accordance
with the current regulations.
To install this appliance, please proceed as follows:
1.1. Work-Surface Cut-Out & Positioning
- Cut out the work-top, ensuring that the actual sizes used are as
per the diagram below (553mm x 473mm).
- For installation and use, a minimum of 5cm must be maintained
around the cut-out.
- The work surface must have a thickness of at least 30mm.
- The work surface must be heat resistant.
- The rear edge of the hob must be at least 60mm from the rear
wall.
- You must maintain a clearance of at least 700mm between the
top of the hob and any surface directly above it.
- Note the clearances required between the hob/work surface
and any adjacent wall cupboard (400mm).
- You must ensure that there is a minimum gap of 25mm
between the bottom surface of the hob and anything
positioned directly below it.
5

6

1.2. Sealing/Fixing the Hob Into Position
- Fix the sealing tape (A) to the underneath rim of the hob as
follows:
- Loosely fix the brackets (B) to the underside of the hob using
screws (C) then carefully turn the hob upright and lower into
the work-surface cut-out.
- Once the hob is in position, ensure the fixing brackets are
positioned overlapping the under-side of the work-surface and
then tighten the bracket screws to secure the hob into
position.
7

1.3. Electrical Connection
These appliances require an electrical connection for the
spark ignition only. Connect the wires to a 3 Amp Plug,
(protected by a 5amp fuse) and plug into a standard,
switchable 13 Amp socket behind the housing unit.
Please note that a switchable spur should be accessible
above the work surface in order that the power can be turned
off.
Green/Yellow = Earth
Blue = Neutral
Brown = Live
1.4. Gas Connection
This appliance must be installed by a ‘Gas Safe’ engineer. Your
approved ‘Gas Safe’ engineer will ensure that your appliance is
connected in accordance with the current regulations.
8

Section 2. Safety Advice
- This appliance must be installed by a ‘Gas Safe’ engineer.
- Please read this booklet thoroughly before installing and
switching on the appliance. The manufacturer
responsibility for incorrect installation and usage.
- This appliance is guaranteed for Domestic Use Only.
This appliance shall not be used by children aged from 8 years
and above and persons
mental capabilities, or lack of experience and knowledge,
unless they have been given supervision or instruction on
to use the appliance in a safe way and understand the hazards
involved. Children shall not play with the
and user maintenance shall not be made by children without
supervision.
- This appliance must only be used for cooking/heating foods
and liquids. Do not use it for any other purpose.
- It is important that you use only metal pans specifically
designed and/or approved for use on Gas Hobs. Never allow
melamine or plastic containers to come in contact with the
with reduced physical, sensory or
appliance. Cleaning
accepts no
how
burners.
- If using an adaptor, this must be used in accordance with the
manufacturers instructions and ensure that the electrical
circuit is not overloaded as this could cause overheating.
- Do not twist or bend the cables, and keep them away from hot
surfaces. Following installation make sure that the power cable
is not trapped underneath the appliance.
- Keep the appliance burners and surfaces clean. Failure to do
this could lead to the appliance malfunctioning.
- The burners and surface of this appliance will get extremely
hot during use and will remain hot after it has been turned
Do not touch or clean the burners, pan supports or furfaces
until it has completely cooled down.
- If the power supply cord is damaged, it must be replaced by
the manufacturer, it’s service agent or
persons in order to avoid a hazard.
similarly qualified
off.
9

Section 3. Operating the Appliance
3.1. Igniting & Operating the Gas Burners
- Push in and turn the required burner control knob anticlockwise to the maximum heat setting (Large flame).
- You will hear an audible click from the spark ignition.
- Continue to maintain pressure on the control knob for a few
seconds after the burner has ignited and the flame is stable.
- If you fail to maintain pressure on the control knob, the burner
will either not light or the flame will go out.
- Once the flame is stable you can turn the burner down to a
lower heat setting, if required.
- When you have finished using the burner, turn the burner
control knob back to the ‘off’ position and beware that the
burner and pan support will remain hot for a period of time.
3.2. Hot Burners and Pan Supports
Please note that the gas burners, burner caps and pan supports
will remain very hot for some time after the burner has been
switched off. You must take care until the parts have cooled down
completely.
Never, clean the hob surface, burners and/or pan supports until
they have cooled down completely.
10

Section 4. Maintenance
Before any maintenance or cleaning work is carried out,
DISCONNECT the appliance from the ELECTRICITY supply and
ensure that the appliance is completely cool.
4.1. Cleaning the Hob Surface
Clean spillages from the hob surface as soon as possible after use.
Always ensure that the surface has cooled down before cleaning.
Use a soft cloth or kitchen paper to clean the surface. If the spillage
has dried on the surface you may need to use a specialist vitroceramic glass cleaner or stainless steel cleaner, available from all
good supermarkets.
Do not use other abrasive cleaners and/or wire wool etc as this may
scratch the surface of the hob.
4.2. Cleaning the Burners
Clean the burner parts with warm soapy water and a cream cleaner if
required.
After removing and cleaning
the burner cap and burner
skirt, re-assemble as follows:
Place the burner skirt (2) onto
the burner base (3) ensuring
that it sits correctly over the
2
spark electrode (4) and the
flame failure electrode (5).
4
5
3
Now place the burner cap (1)
onto the burner skirt (2)
ensuring that it is sitting
central – the central pins will
sit into recesses.
11

4.3. What to do if something goes wrong
The spark ignition will not operate:
- Check there is not a power cut
- Check there is power to the electric socket/
appliance
The gas burners will not operate:
- Have you pushed in the control knob and maintained pressure
for at least 10 seconds after the burner has lit?
4.3. Specifications
Please refer to the Rating Label on the appliance –
example shown below (MON-GH60BG).
Product Name
Model Number
Cat
Country code
Categories
Direct Country
of Destination
Nominal Heat Input
Total Heat Input
Electrical Supply
CAUTION:
This appliance shall be installed in accordance with the regulations in force and only used in a well ventilated space. Read the
instructions before installing or using this appliance.
Gas hob
MON-GH60BG
I3B/P(50) I3+(28-30/37) I3B/P(30) I2L I2H/I2E/I2E+ II2H3+ II2H3B/P(30) II2E+3+
DE,AT,CH,LU,SK BE, CH, CY, CZ,
ES, FR, GB, GR,
IE, IT, LT, LU, LV,
PT, SK, SI.
G30 Butane and
G31 Propane at
50mbar
AT,BE,BG,CH,CY,CZ,DE,DK,EE,ES,FR,FI,GE,GB,GR,HR,HU,IE,IT,IS,LT,LU,LV,MT,NL,NO,
PT,RO,SE,SI,SK,TR,NL
G30 Butane
at 28-30mbar and
G31 Propane at
37mbar
Qn=Rapid burner: 3.0kW; Semi-rapid burner: 1.75kW; Auxiliary 1.0kW
∑Qn=7.5 kW( 546 g/h)
2
20-240 V~ ,
50Hz-60Hz, 0.6W
BE, CY, DK, EE,
FR, GB, HU, IT,
LT, NL, NO, SE,
SI, SK, RO, HR,
TR, BG, IS, LU,
MT, FI
G30 Butane and
G31 Propane at
30mbar
NL AT,CH,CZ,DK,E
S,FI,GB,GR,IE,
IS,IT,PT,SE,SI,S
K,DE,LU,GE,
FR
G25
Methane
25mbar
G20 Methane
20mbar
CH,
CZ,ES,GB,GR
,IE, IT,PT,SI
G20 at
20mbar, G30
Butane at
28-30mbar
and G31
Propane at
37mbar
2531-18
Pin 2531CS-0060
CH,CZ,DK,FI,G
R,SE,SI,SK
G20 at 20mbar,
G30 Butane and
G31 Propane at
30mbar
BE, FR
G20/G25 at
20/25mbar, G30
Butane at
28-30mbar and
G31 Propane at
37mbar
12

Here For You
After-sales assistance
If you continue to experience problems with your Gas Hob, please call the Montpellier customer service helpline
on: 01759 487839.
Please have all your product details available, including the model number, serial number, date of purchase,
and your retailer’s details before registering a fault.
The service call cannot progress without this information.
Your 2 year Manufacturer’s guarantee
THIS DOES NOT AFFECT YOUR STATUTORY RIGHTS.
Your new Montpellier appliance carries a free guarantee which protects you against the cost of repairs during the
rst 24 months from date of purchase provided that:
Any claim is accompanied by evidence of the model reference, model serial number and proof of purchase, such
as a Sales Receipt, showing that the appliance was purchased within the 24 months prior to the date
of claim.
What is not covered under the Guarantee
• Any appliance not correctly installed and operated in accordance with the manufacturer’s instructions.
• Any appliance that is used for anything other than domestic purposes.
• Any defect caused by accident, misuse, unauthorised modification or inexpert repair.
• Cost of Call-out where a fault cannot be found with the appliance.
• Cost of Call-out for work covering routine maintenance, such as, but not exclusively, cleaning of filters or
defrosting.
• Cost of Call-out for work required to correct the alignment of doors following door reversal procedures
carried out by you.
• Use of the appliance by anyone other than the Householder.
• Use in any commercial environment.
• Consumable items, such as, but not exclusively, fuses in plugs, bulbs and breakable items which require
routine replacement.
• Repair costs incurred that have not been authorised by Montpellier and/or carried out by a non-approved
Montpellier engineer.
YOUR GUARANTEE IS VALID ONLY IN THE UK & ROI.
To register your appliance simply complete the card in your appliance pack and return it with a stamp axed or
alternatively you can register online at www.montpellier-appliances.com/support
Here For You
SERVICE HELP-LINE
Should your appliance develop a fault, please call the Montpellier customer service helpline on: 01759 487839.
Please remember to have all your product details available, including the model number, serial number, date of
purchase and your retailer’s details before registering a fault.
Your service call cannot progress without this information.

Montpellier Domestic Appliances Ltd.
Unit 1, Tewkesbury Retail Park, Northway Lane,
Tewkesbury, Gloucestershire GL20 8JU
www.montpellier-appliances.com
The symbol on the product or on its packaging indicates that this product may not be treated as household waste. Instead it shall
be handed over to the applicable collection point for the recycling of electrical and electronic equipment. By ensuring this product
is disposed of correctly, you will help prevent potential negative consequences for the environment and human health, which could
otherwise be caused by inappropriate waste handling of this product. For more detailed information about recycling of this product,
please contact your local city oce, your household waste disposal service or the shop where you purchased the product.
 Loading...