

Montigo HL38SVO-ST, H38VOSTN-I, H38VOSTL, H38VOSTL-I, HL38VOSTN Maintance Manual
...
C
US
Installation & Maintenance Manual
H38SVO-ST,
45,000 BTU/hr Natural Gas or Propane Gas
HL38SVO-ST,
45,000 BTU/hr Natural Gas or Propane Gas
• Theinstallationofthisreplacemustbedonebya
®
qualiedandcertiedgasapplianceinstaller.
• Checklocalcodesandreadallinstructionspriorto
installation.
WARNING:
FIRE OR EXPLOSION HAZARD
Failure to follow safety warnings exactly could result in serious injury,
death, or property damage.
—Donotstoreorusegasolineorotherammablevaporsand
liquidsinthevicinityofthisoranyotherappliance.
— WHAT TO DO IF YOU SMELL GAS
• Do not try to light any appliance.
• Do not touch any electrical switch; do not use any
phoneinyourbuilding.
• Leavethebuildingimmediately.
• Immediatelycallyourgassupplierfromaneighbour's
phone. Follow the gas supplier’s instructions.
• Ifyoucannotreachyourgassupplier,callthere
department.
—Installationandservicemustbeperformedbyaqualied
installer,serviceagencyorthegastter.
WARNING
Do not store or use gasoline or any other ammable vapours or
liquids in the vicinity of this or any other gas burning appliance. A re
or explosion may occur resulting in serious injury, property damage
or death
NOTICE
Installer: Leave this manual with the appliance.
Consumer: Retain this manual for future reference.
Installation and service must be performed by a qualied installer,
service agency or the gas tter.
WARNING
CARBON MONOXIDE HAZARD
This appliance can produce carbon monoxide which has no odour.
Using it in an enclosed space can kill you. Never use this appliance in
an enclosed space such as a camper, tent, car or home.
WARNING
Some materials used in the manufacturing process of this product can
expose you to Benzene which is known in the State of California to
cause cancer and birth defects or other reproductive harm. For more
information go to www.P65warnings.ca.gov
WARNING
FOR OUTDOOR USE ONLY
XG0817
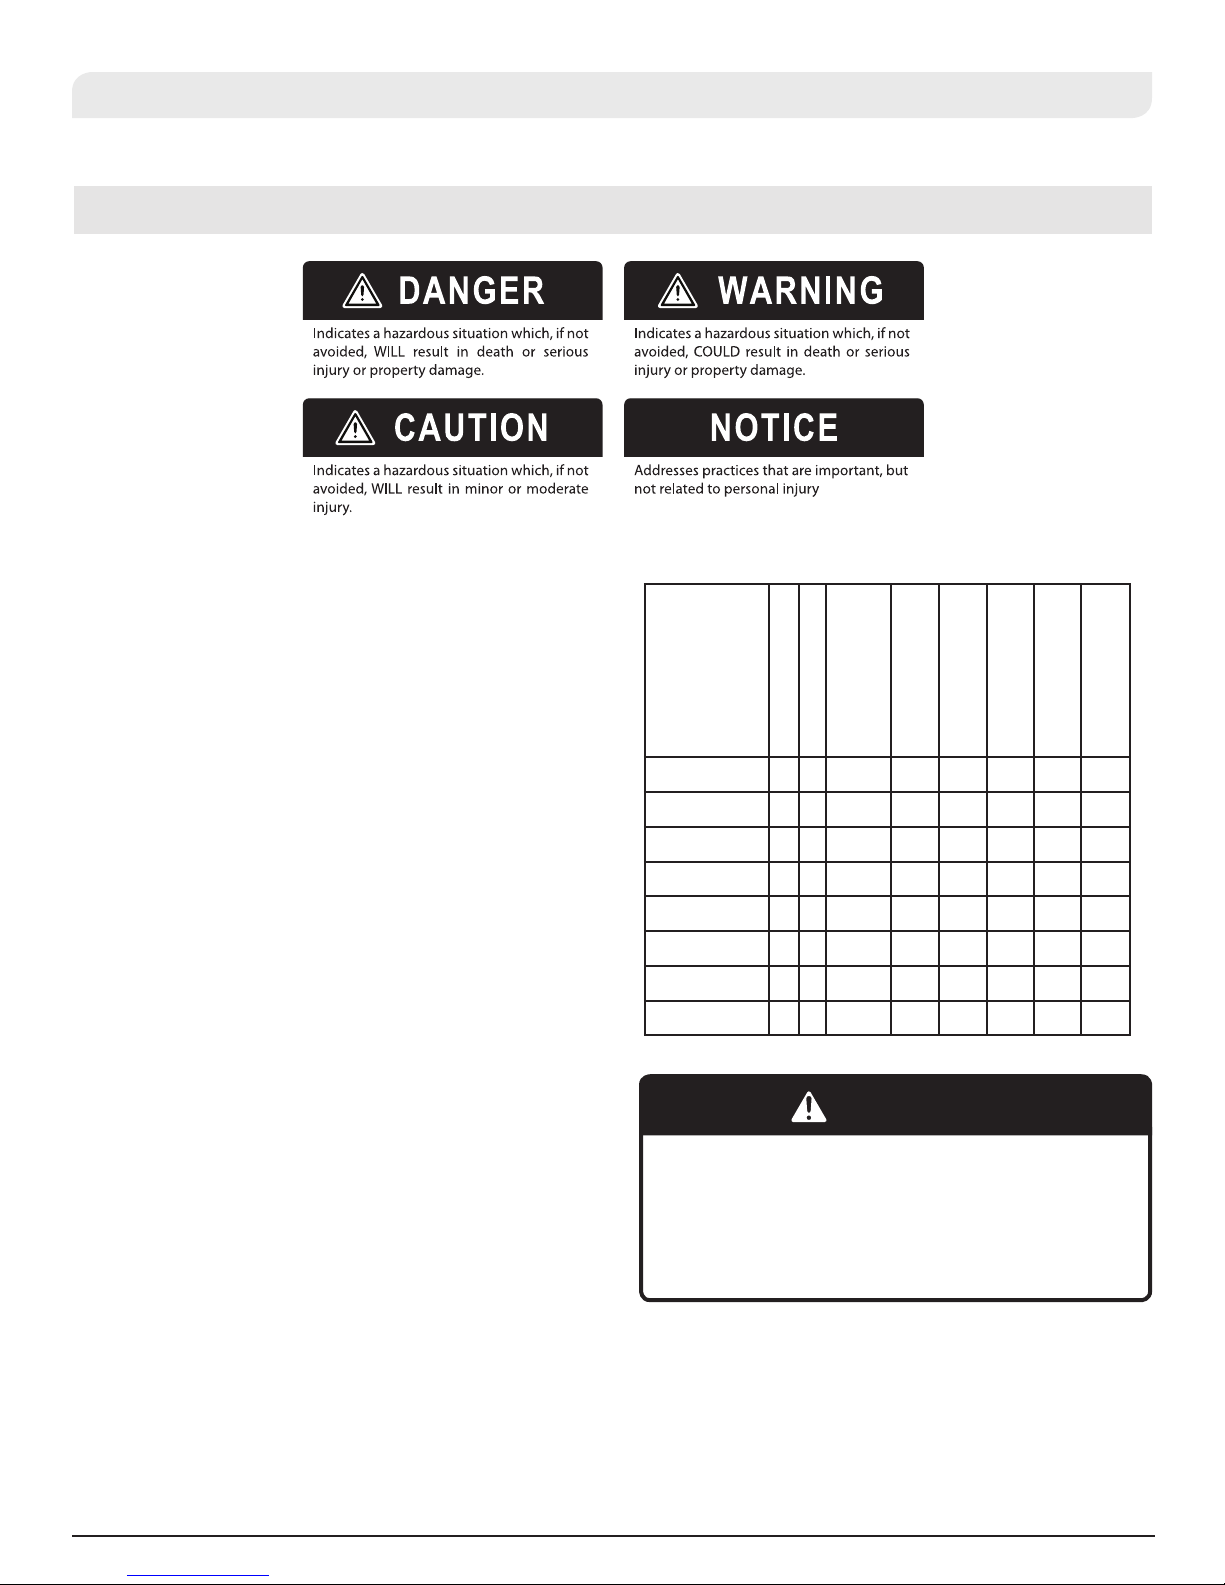
Safety Alert Key
Introduction
Congratulations on your purchase of a Montigo Fireplace.
With over 30 years of experience, Montigo is committed to providing
you with a gas fireplace that is not only a beautiful addition to your
space, but that is also designed and manufactured to the highest
safety, reliability and engineering standards.
We strongly encourage you to read and carefully follow the
instructions laid out in this Installation, Operation and Maintenance
Manual and retain it for your future reference. Pay special attention
to all cautions, warnings, and notices throughout this manual
intended to ensure your safety.
This manual covers installation, operation and maintenance. Lighting,
operation and care of this replace can be easily performed by the
homeowner. All installation and service work should be performed
by a qualied or licensed installer, plumber or gas tter as certied
by the state, province, region or governing body where the replace
is being installed.
This installation, operation and maintenance manual is applicable
to the models described in Table 1. Refer to your rating plate to
verify included options.
General
MODEL
H38VOSTN X 45,000 X X
H38VOSTN-I X 45,000 X X
H38VOSTL X 45,000 X X
H38VOSTL-I X 45,000 X X
HL38VOSTN X 45,000 X X
HL38VOSTN-I X 45,000 X X
HL38VOSTL V 45,000 X X
HL38VOSTL-I X 45,000 X X
Natural Gas
Liquid Propane
Gas Rating
(BTU hr)
Traditional Burner /
Logset
Linear Burner w/
Glass Accessories
Standing Pilot
Ignition
Honeywell Hot
Surface Ignition
SIT Electronic
Ignition
Warranty and Installation Information: (See Appendix B)
The Montigo warranty will be voided by, and Montigo disclaims any
responsibility for, the following actions:
• Modication of the replace and/or components including glass
doors.
• Use of any component part not manufactured or approved by
Montigo in combination with this Montigo replace system.
• Installation other than as instructed in this manual.
• Consult your local Gas Inspection Branch on installation
requirements for factory-built gas replaces. Installation & repairs
should be done by a qualied contractor.
CAUTION
Young children should be carefully supervised when they are in the
same room as the appliance. Toddlers, young children, and others
may be susceptible to accidental contact burns. A physical barrier is
recommended if there are at-risk individuals in the house. To restrict
access to a replace or stove, install an adjustable safety gate to keep
toddlers, young children, and other at-risk individuals out of the room
and away from hot surfaces
XG08172

Contents
Safety Alert Key .................................................................................. 2
Introduction ....................................................................................... 2
Section A: Before You Begin ....................................................................... 4
Installation Checklist ......................................................................................4
Section 1: Product Dimensions ......................................................... 5
Unit Dimensions .............................................................................................5
Section 2: Framing ............................................................................ 6
Installing The Fireplace .................................................................................. 6
Framing (without surround) ......................................................................... 6
Clearances ........................................................................................................6
Back framing dimensions ............................................................................. 6
Fireplace Facing ..............................................................................................6
Section2b:OptionalEnclosure ........................................................ 7
Optional Enclosure Dimensions ................................................................. 7
Enclosure clearances .....................................................................................7
Section 3: Wiring ................................................................................ 8
Wiring Diagram ...............................................................................................8
Installing The Remote Switch (H(L)VO-ST) ................................................8
Standing Pilot Diagram .................................................................................. 8
Section 4: Installing the gas line.......................................................9
Fuel conversion ...............................................................................................9
Gas Pressure ...................................................................................................9
Gas connection ...............................................................................................9
Section5:Installing&RemovingtheDoor ................................... 10
Removing the door ......................................................................................10
Reinstalling the door ....................................................................................10
Section 6: Installing the Accessories .............................................. 11
Installing the Logs and Embers .................................................................11
Installing the Glass Beads...........................................................................11
Section 7: Start-up Sequence .......................................................... 12
Lighting Instructions ....................................................................... 14
General............................................................................................................14
Burner Adjustment ......................................................................................14
Cleaning ..........................................................................................................14
Gas Control Valve .........................................................................................15
Pilot Burner Adjustment .............................................................................15
Troubleshooting............................................................................................15
Appendix B: Warranty ..................................................................... 16
General
XG0817 3
Section A: Before You Begin
IMPORTANT MESSAGE: SAVE THESE INSTRUCTIONS
The H*38VO-ST Ventless fireplace must be installed in accordance
with these Instructions. Carefully read all the Instructions in this
manual first. Consult the Local Gas Branch to determine the need
for a permit prior to starting the installation. It is the responsibility
of the installer to ensure this fireplace is installed in compliance with
the manufacturers instructions and all applicable codes.
General
Installation Checklist
• Determine the desired install location of your replace.
• See Section 2, Dimensions on Page 6, and refer to the Framing
Section 2 for details.
• Layout Electrical Requirements Refer to Section 4: Wiring, for Details.
• Refer to Section 4: Installing the Gas Line, for details on the gas
connection and access.
NOTICE
Do not use this appliance if any part has been under water.
Immediately call a qualied service technician to inspect the appliance
and to replace any part of the control system and any gas control that
has been under water
NOTICE
Due to high temperatures, the appliance should be located out of
trac and away from furniture and draperies
NOTICE
Children and adults should be alerted to the hazards of high surface
temperature and should stay away to avoid burns or clothing ignition
• Refer to local codes and guidelines for installation requirements.
• Installation and repairs should be done by a qualied contractor
and must conform to:
• Installations in Canada must conform to the local codes or in the
absence of local codes to the current version of Natural Gas and
Propane Installation Code, CSA B149. Electrical installations must
conform to the local codes or, in the absence of local codes, to the
current version of Canadian Electrical Code, CSA C22.1.1
• Installations in the USA must conform to the local codes or in the
absence of local codes to the current version of National Fuel Gas
Code, ANSI Z223.1/NFPA 54. Electrical installations must conform
to the local codes or, in the absence of local codes, to the current
version of the National Electrical Code, ANSI/NFPA 70. See Appendix
C for installation within the State of Massachusetts
NOTICE
Clothing or other ammable material should not be placed on or near
the appliance
NOTICE
Installation and repair should be done by a qualied service person.
The appliance should be inspected before use and at least annually
by a professional service person. More frequent cleaning might be
required due to excessive lint from carpeting, bedding material, etc. It
is imperative that control compartments, burners, and circulating air
passageways of the appliance be kept clean
XG08174
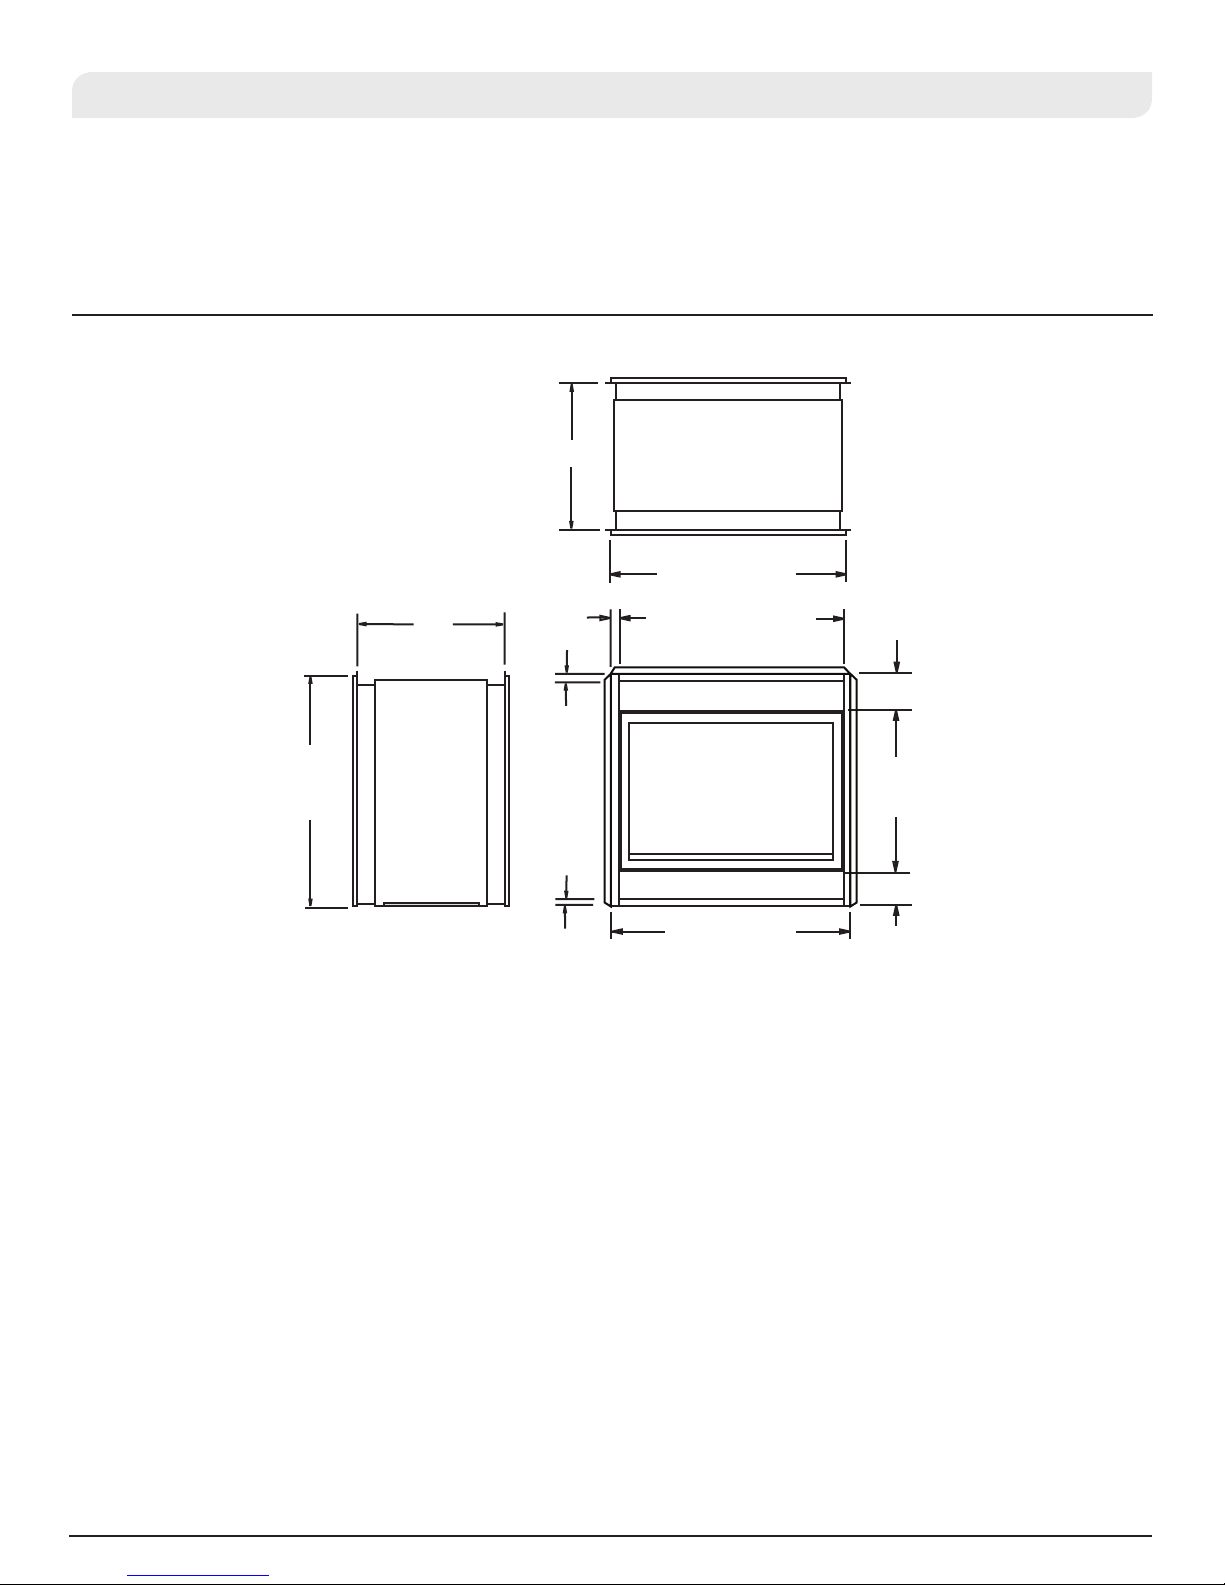
Section 1: Product Dimensions
Unit Dimensions
24"
24"
36⅞" Width
35⅝" Opening
General
36½"
Height
1¼"
1"
Figure 1. Fireplace dimensions
6¾"
5¾"
Opening
5¼"
36⅞" Width
XG0817 5
Section 2: Framing
41"
23 7/8”
Combustible
materials
Backframe Min. 38"
both sides Typical
41"
Installation
Installing The Fireplace
The replace must be installed in a location that maintains
clearances to ALL exterior furniture, appliances and other exterior
equipment. Safety, as well as eciency of operation, must be
considered when selecting the replace location. Try to select a
location that does not interfere with foot trac, has adequate
ventilation, and oers an accessible pathway for ventilated gasses.
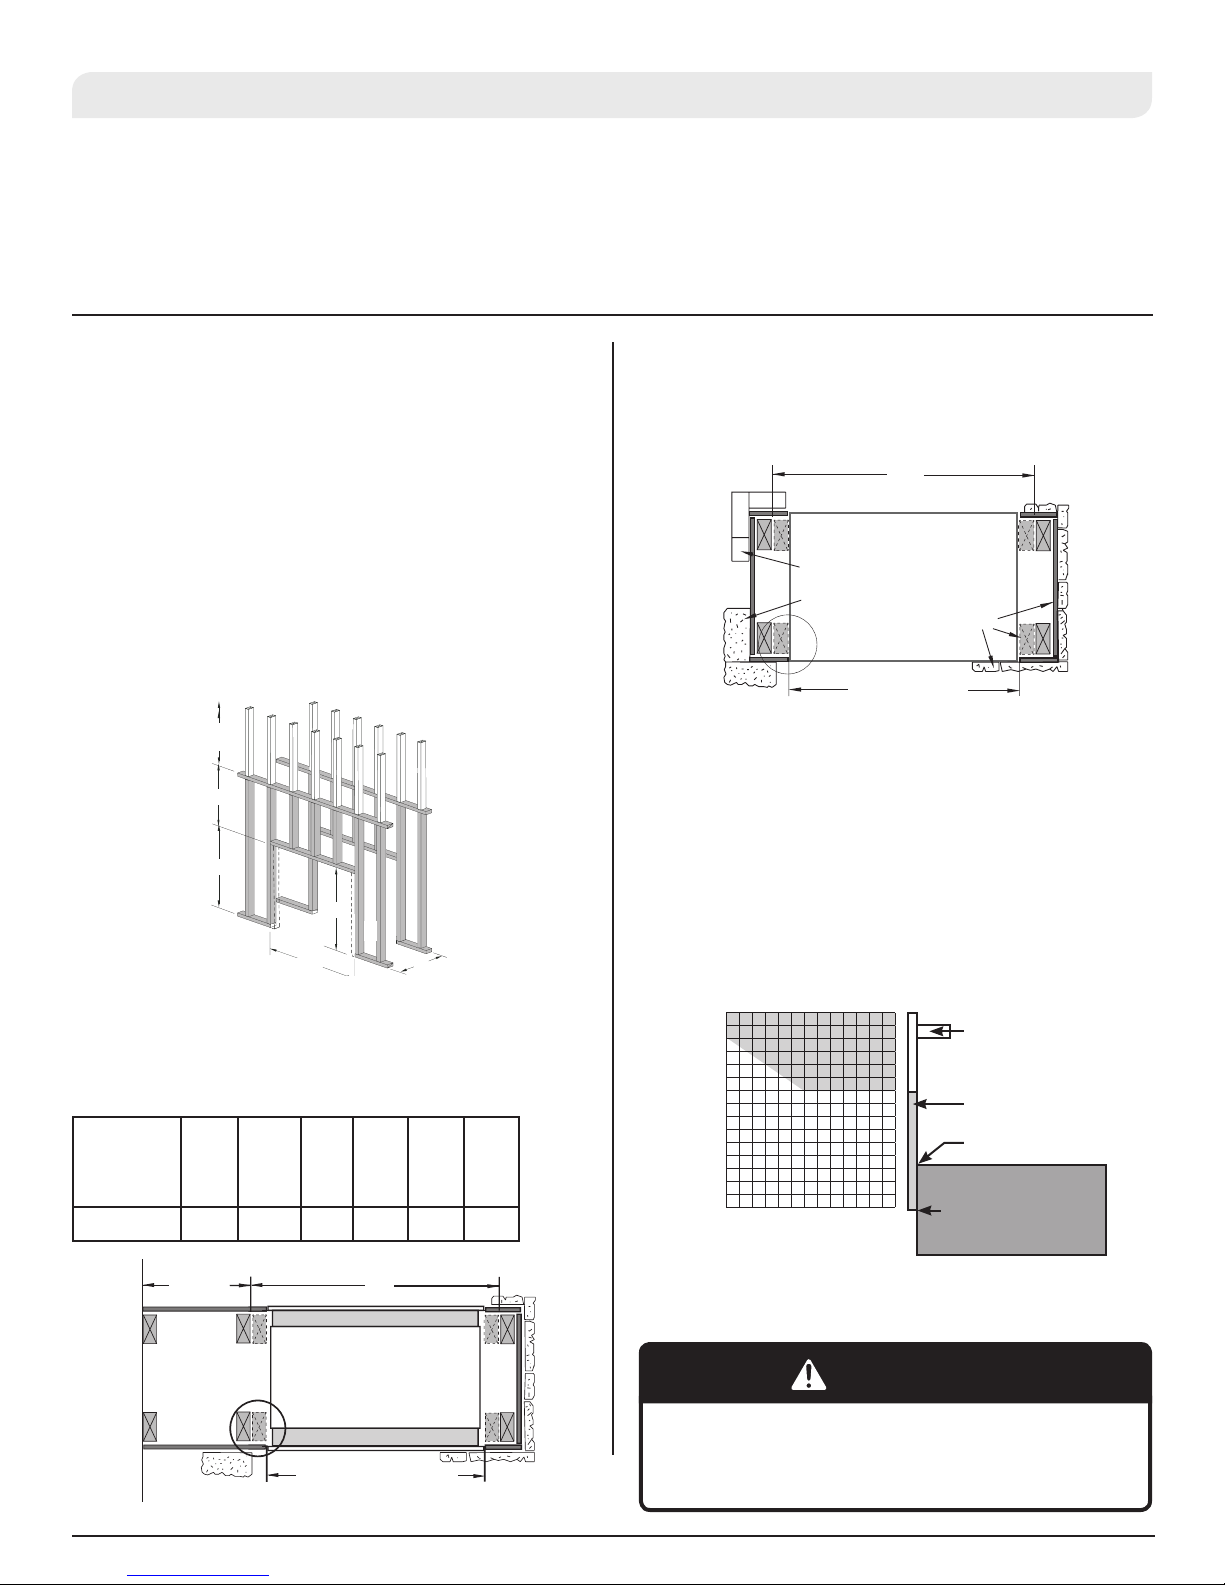
Framing (without surround)
Frame in the enclosure for the unit with framing materials. The
framed opening for the assembled replace is 41" wide x 38" high x
23 ⅞" deep, see Figure 2.
NOTE: When constructing the framed opening, please ensure there
is access to install the gas line when the unit is installed.
Clearances
When installing a shelf over the top of the replaces, the following
guidelines must be adhered to:
Combustible
materials
36”
36"
38”
38"
12”
12"
40”
41”
41"
Figure 2. Framing dimensions (without optional surround). Must be back-framed
MODEL
Top
Header
Sides
Floor
23⅞"
Mantel
H*38VO-ST 36'' 36'' 12'' 0'' 24'' 48''
Ceiling
Back framing dimensions
Note: ONLY Non-combustible materials must be used in
construction of the enclosure. (top, bottom and sides). Steel studs
in combination with concrete, rock, or stone nishing materials, are
acceptable.
41"
Surrounding construction
(sides and top) must be noncombustible materials, metal
studs, concrete, brick or stone
Backframe Min. 38"
Both sides typical
Figure 2.b Back framing dimensions. (without Optional surround)
Fireplace Facing
When selecting the nish material for your replace, it is important
to remember the following: THE LOWER GAS CONTROL PANEL
MUST NOT BE OBSTRUCTED IN ANY WAY - to do so restricts the air
supply for the control compartments and heat exchanger it also
prevents access for servicing controls.
Decorative facing must not extend past the replace opening at all,
because it will interfere with the access to retainers for removal of
glass door.
42
39
36
33
30
27
24
21
18
15
12
9
Vertical Height (In.)
6
3
1
Mantle width (In.)
1234567891011121314
Non-combustible
header
Non-combustible
facing
Top of replace
Top of replace opening
24"
Min.
Surrounding construction
(sides and top) must be non-
combustible materials, metal
studs, concrete, brick or stone
Existing combustible structure
41"
Backframe Min. 38"
Both sides typical
Figure 2.c Non-combustible mantles and facings.
WARNING
When covering the upper metal portion of the replace with a non-
combustible material, please note the decorative facing materials
may be subject to temperatures in excess of 350F. This should be
considered when selecting facing materials.
XG08176
 Loading...