

Montigo HFK50R User Manual
Installing the HFK50R Fan Kit for Proame 2
US
For use with:
H*34-DF/DL; L38-DF
H*38-DF/DL; L42-DF
H*-DF/DL; L52-DF
* = C, L, P, R, W
Fan Kit
CAUTION
Ensure that all power to the appliance is off at the electrical breaker or fuse
before beginning installation. Ensure gas is turned off at the shutoff valve before
beginning installation.
This kit should be installed by a qualied person.
®
Check local codes and read all instructions prior to installation.
C
General Information
This blower kit is for installation with the models listed above.
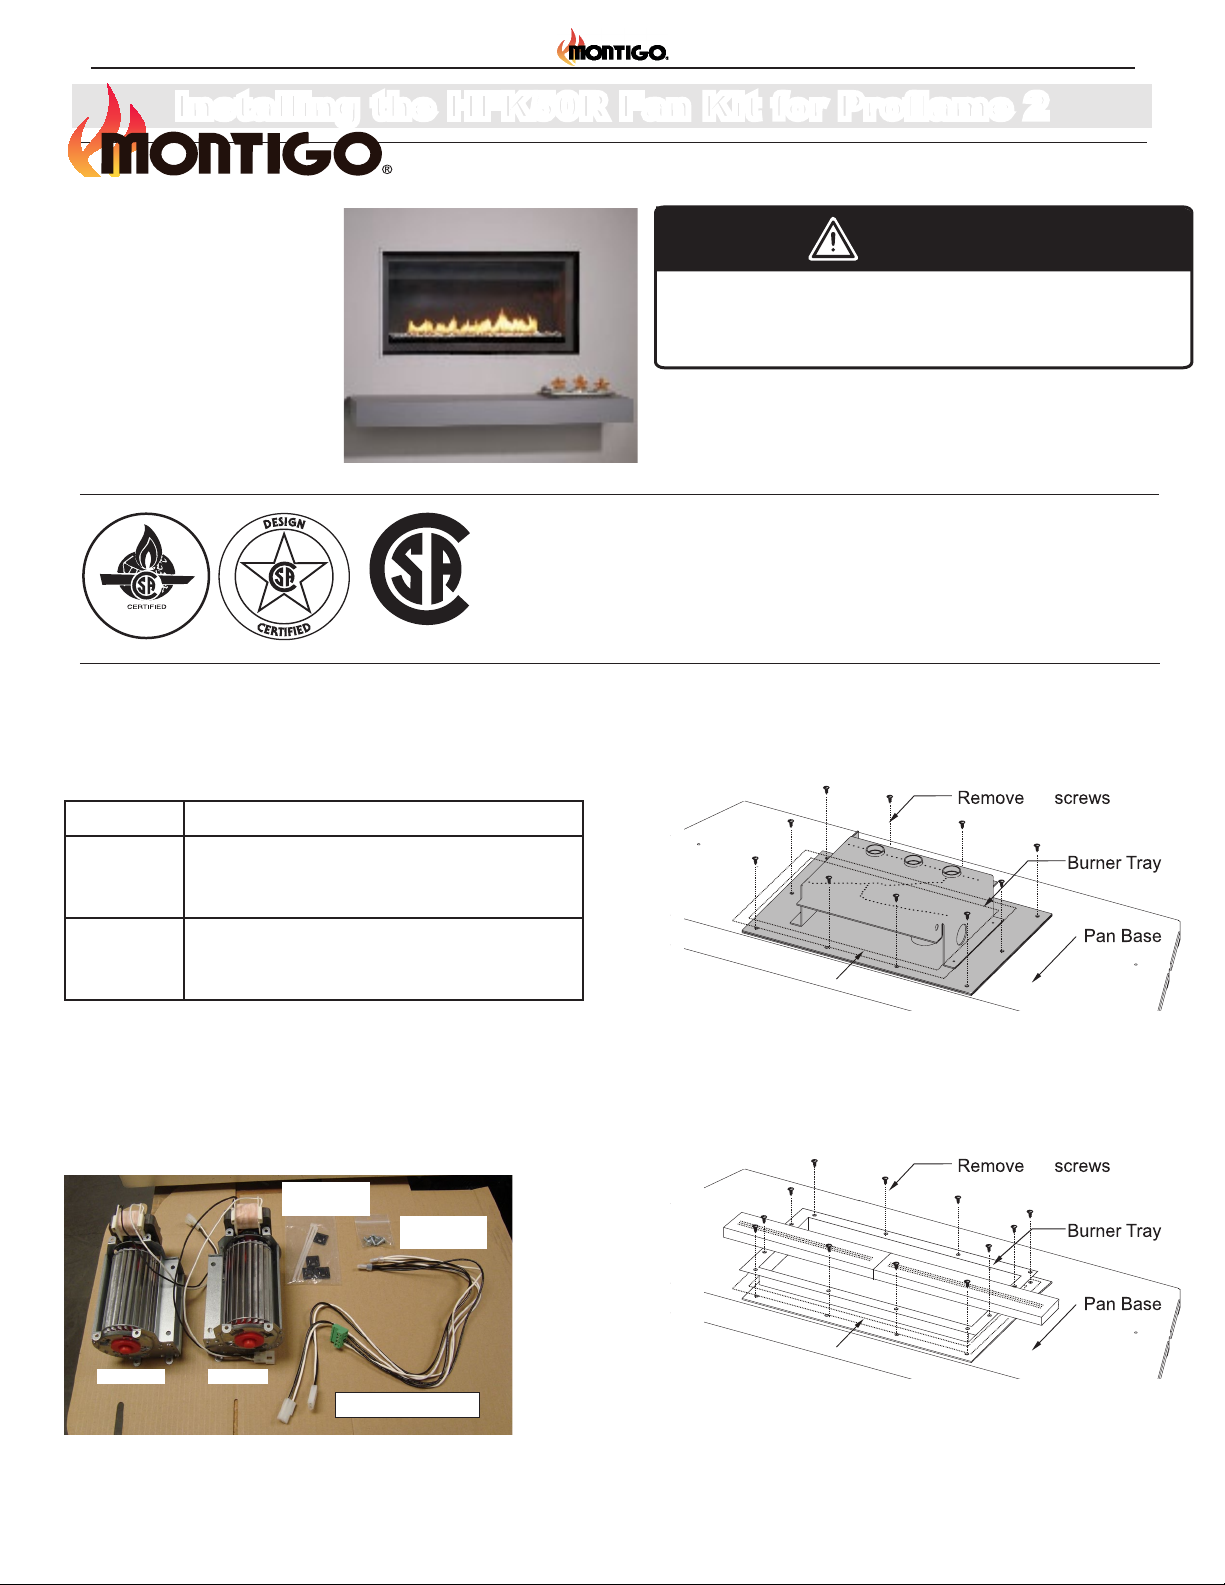
KIT # Contents
HFK50R 2x blowers, 1x fan cord assembly, 4x mounting screws,
Velcro strips, self-adhesive cable tie mounts and cable
ties.
HFK50R
Required: This fan kit requires one of the remote control
kits (PF2 Remote Kit or RX 100*) for proper operation.
Before You Begin
Ensure that the power supply has been turned off at the breaker or
fuse before beginning the installation.
Shut off the gas supply at the shut-off valve, and ensure that the main
burner and pilot light have been turned off and the replace has been
cooled off for at least two hours before installation.
Cable ties &
mounts
Fan mounting screws
Installation
1. Remove burner tray if required.
17
Burner Tray Gasket
Figure 2 Removing the burner tray (L38DF, L42DF, L52DF
models only).
18
Left fanRight fan
Fan wire harness
Figure 1 Contents of HFK50R Fan Kit package.
Page 1
Burner Tray Gasket
Figure 3 Removing the burner tray (L38DF, L42DF, L52DF
models only).
XT0015 - 092214
Installation
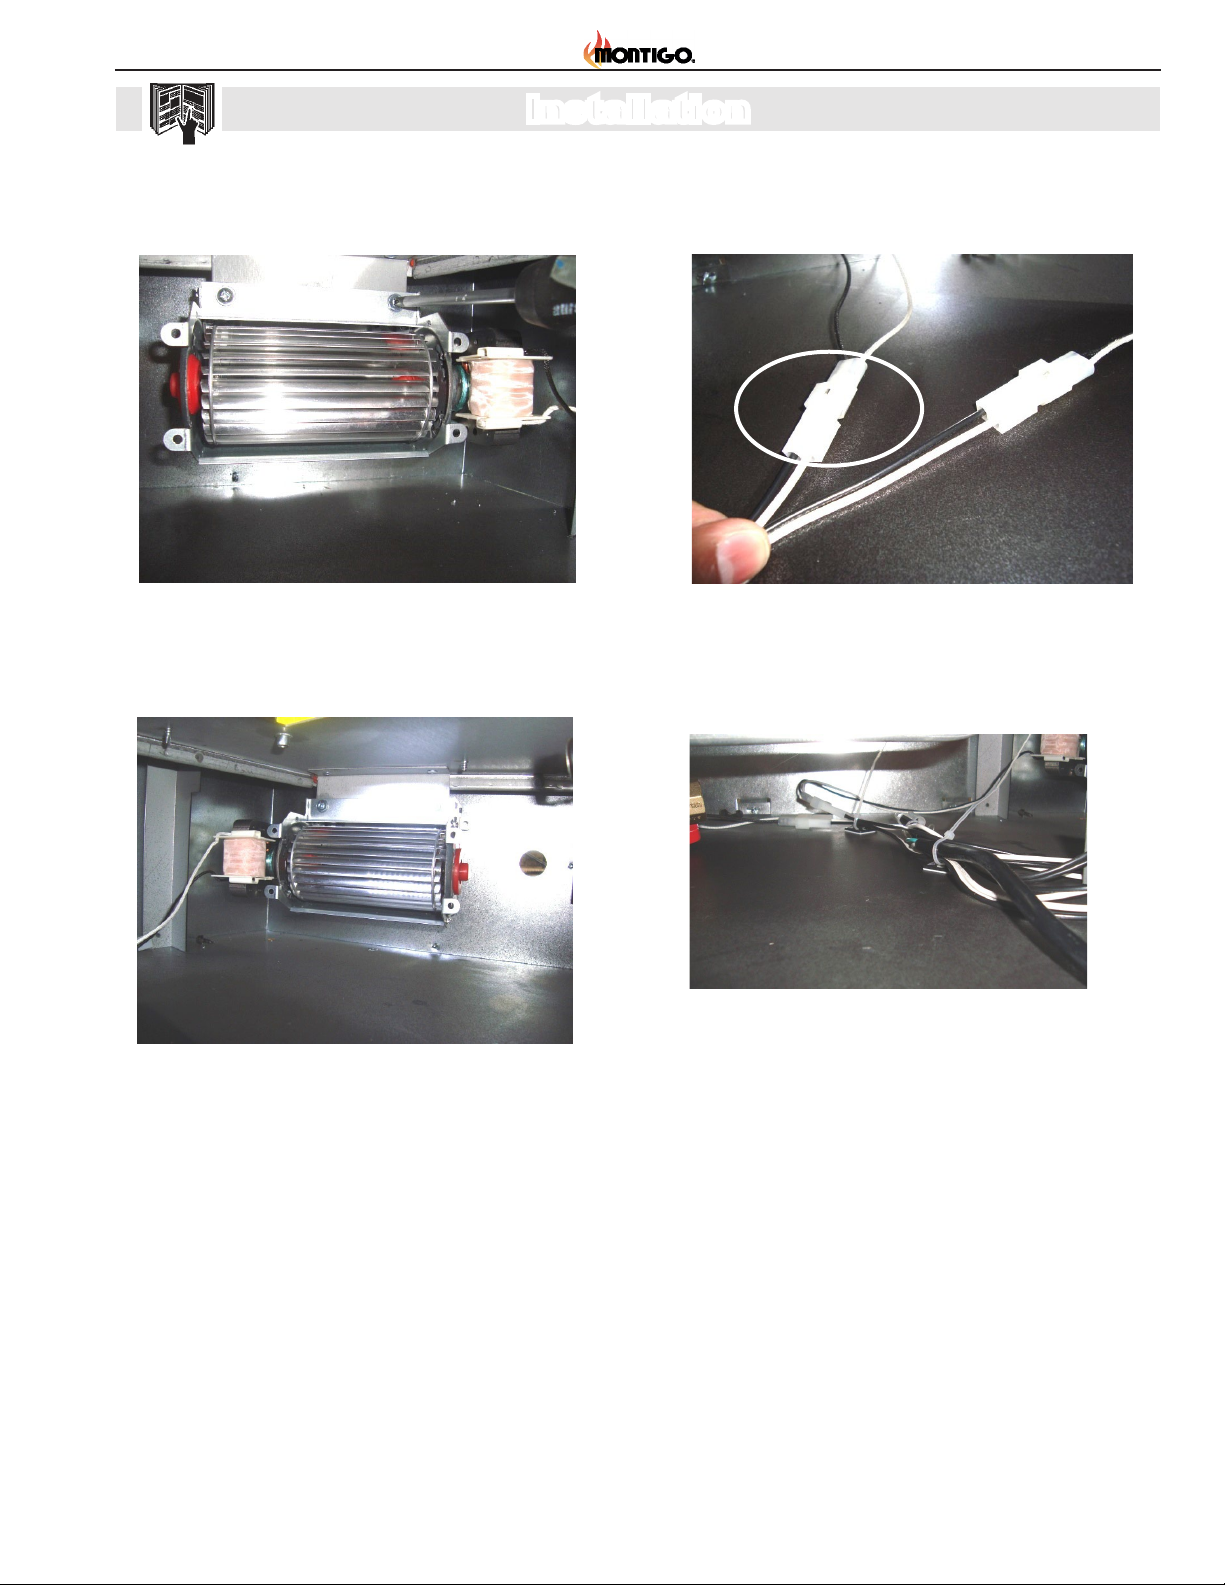
2. Install the left fan as shown in Figure 4 to the bracket underneath
the rebox using the screws supplied (motor should be oriented
towards the back side of the replace).
Figure 4 Install left fan to bracket
3. Install the right fan as shown in Figure 5 to the bracket underneath
the rebox using the screws supplied (motor should be oriented
towards the back side of the replace).
5. Plug the 2-pin molex connectors on the other end of the harness
to the connectors from both fans. Note: the left or right fan can be
plugged into either plug.
Figure 6
6. Using the supplied cable ties and self-adhesive cable tie mounts,
secure the fan harness to the bottom of the rebox. Make sure to
keep the wires away from fan blades and door buckles.
Figure 5 Install right fan to bracket
4. Plug in the 4-pin green connector from fan harness to X10 of the
control box.
Page 2
Figure 7
7. Reinstall the burner tray (if removed). See Figure 2 or Figure 3 for
examples
8. Complete the installation as per the replace installation manual.
Program the remote transmitter to the control box as per the
supplied "Proame2 Operation and Maintenance Manual-
XG0677" and start-up your replace. Turn the fans on using the
remote control.
9. Use the remote control to adjust the fan speed to the desired setting.
The fans only operate when the unit is running. You may
turn the fans off completely using the remote control.
XT0015 - 092214
 Loading...