

Page 1
Instruction Manual
Item No.: 710104
120V~, 60Hz, 1200W
Wards.com 1•888•557•3848
MODEL: SG-5001
Montgomery Ward Customer Service
1112 7th Avenue, Monroe, WI 53566
8:00 a.m. to Midnight, Monday through Friday
Wards.com 1•888•557•3848
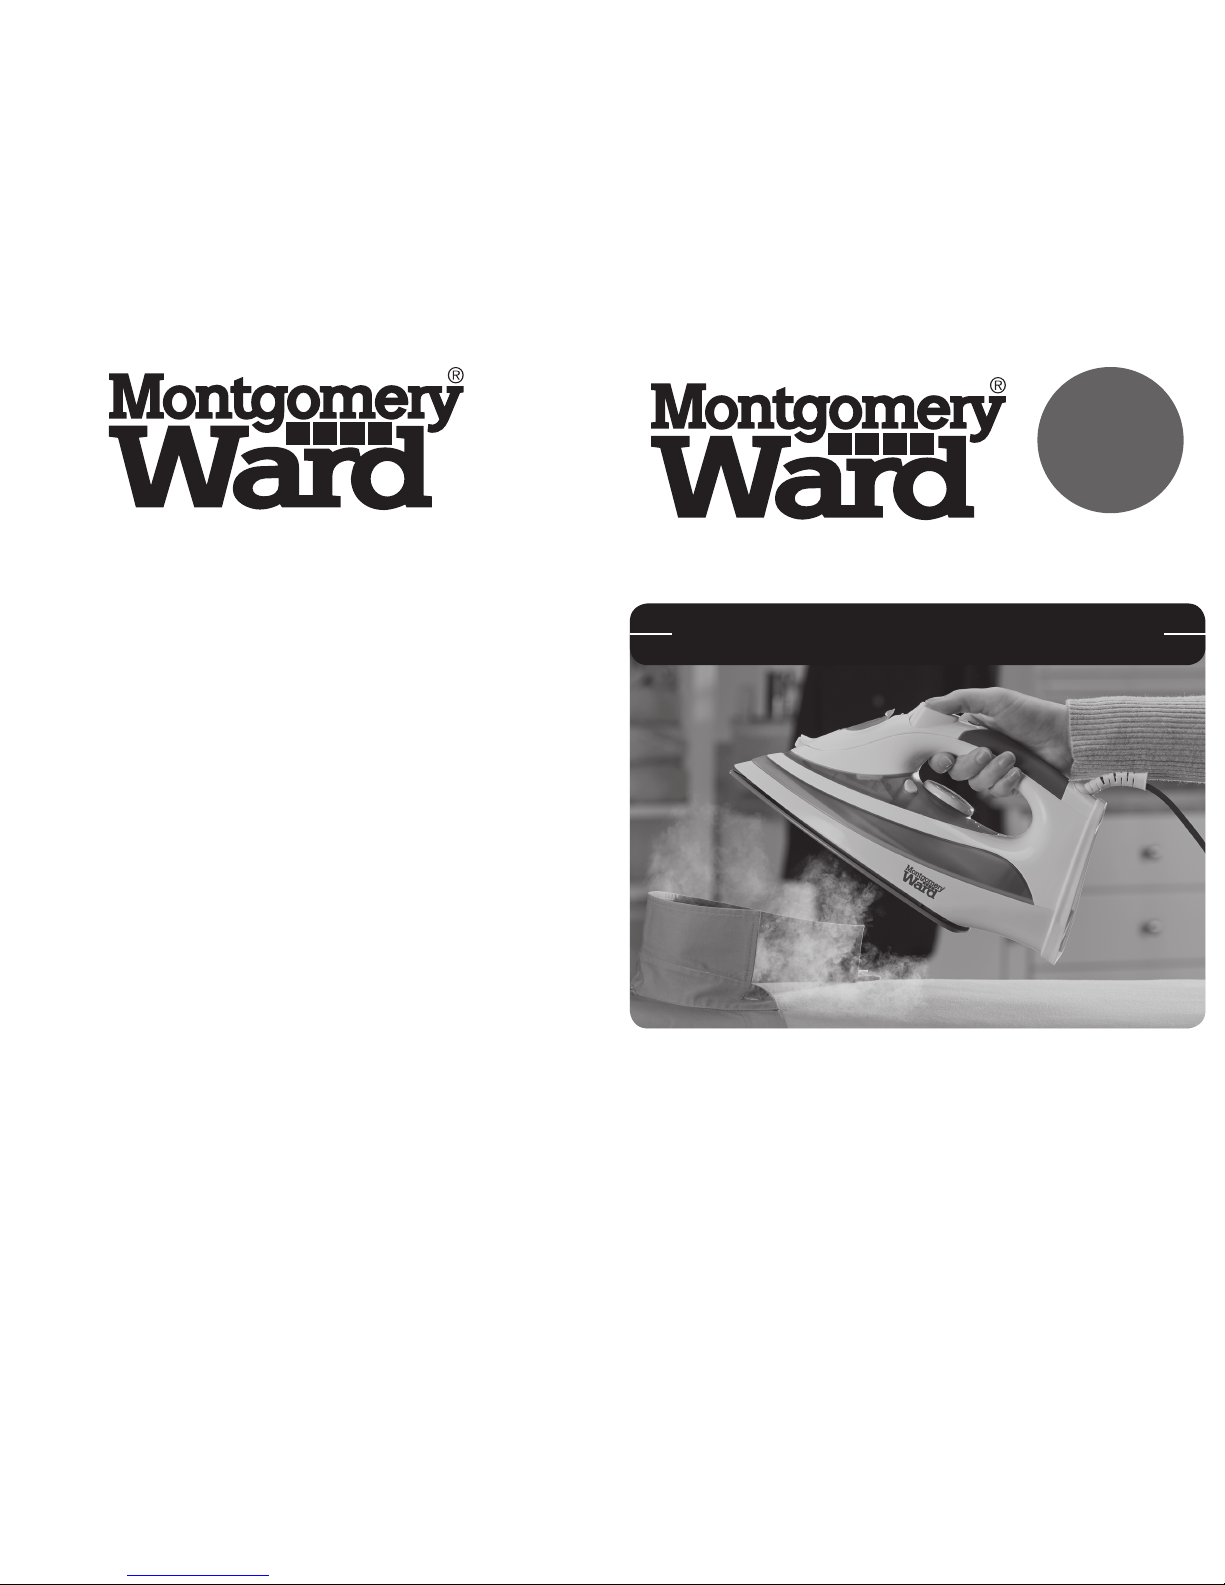
Nonstick Ceramic Ultra Steam Iron
Powerful
burst of
sam and lots
of easy--use
functions!
Page 2

Thank you for purchasing your Steam Iron by Montgomery Ward®. We guar-
antee that it will perform to the highest standard, time after time, with all the
convenience, easy cleanup and durability you rely on from Wards.
Tackle even the toughest wrinkles with your new Ultra Steam Iron and
its super-powered blast of steam! A precision slide control lets you
adjust the level of output and it also has vertical steam and mist spray
capability. Plus, the nonstick ceramic coated aluminum soleplate and
360° swivel cord plus anti-calc, anti-drip, self-cleaning and auto shut-off
help turn ironing into a pleasurable experience
3
PLEASE READ THESE INSTRUCTIONS BEFORE USE
Basic safety precautions should always be followed when using your Steam Iron
especially when children are present.
WARNING: TO AVOID THE RISK OF ELECTRICAL SHOCK, ALWAYS MAKE
SURE THE PRODUCT IS UNPLUGGED FROM THE ELECTRICAL OUTLET
BEFORE ASSEMBLING, DISASSEMBLING, RELOCATING, SERVICING OR
CLEANING
1. Before using for the first time, make sure that the voltage rating on the type plate
corresponds to the main voltage in your home.
2. Do NOT touch hot surfaces. Use any handles or knobs.
3. The steam emitted from the iron is hot and therefore hazardous. NEVER direct
the steam toward other people.
4. To protect against electrical shock, do NOT place cord, plug or appliance in
water or other liquid.
5. Unplug from outlet when not in use and before cleaning. Allow to cool before
cleaning.
6. Unplug the iron from the electrical socket before filling the iron with water.
7. Close supervision is necessary when any appliance is used by or near children.
8. Unplug from outlet when not in use and before cleaning. Allow to cool before
cleaning.
9. Do NOT operate any appliance with a damaged cord or plug, or after the
appliance malfunctions or has been damaged in any manner. Call our toll-free
customer service number for information regarding replacement, or returning
the product.
10. The use of accessory attachments not recommended by the appliance
manufacturer may cause personal injury or damage to the appliance.
11. Do NOT use outdoors.
12. Do NOT let cord hang over edge of table or counter or touch hot surfaces.
13. Do NOT place on or near a hot gas or electric burner, or in a heated oven.
14. Do not use appliance for other than intended use.
15. To disconnect, turn control to Off, then remove plug from wall outlet.
16. Do NOT leave appliance unattended while plugged into an electrical outlet.
Important Safeguards .......................... 3–4
Polarized Plug.......................................... 4
Parts & Features ...................................... 5
Before Using for the First Time ................ 6
Setting the Correct Temperature .............. 6
How to Use .......................................... 7–8
Cleaning & Maintenance ......................... 8
Troubleshooting ....................................... 9
Warranty & Return Information ........ 10–11
Table of Contents
2
1•888•557•3848
Wards.com
Important Safeguards
PLEASE SAVE THESE INSTRUCTIONS
THIS APPLIANCE IS FOR HOUSEHOLD USE ONLY
© 2015 Montgomery Ward, Inc. All rights reserved.
ank you
for your
purchase!
Page 3

4
1•888•557•3848
Wards.com
4
5
Parts & Features
Polarized Plug
This appliance has a polarized plug (one blade is wider than the other). As a safety
feature to reduce the risk of electrical shock, this plug is intended to fit a polarized
outlet only one way. If the plug does not fit fully in the outlet, reverse the plug. If it still
does not fit, contact a qualified electrician. Do not attempt to modify the plug in any
wa y.
SHORT CORD INSTRUCTIONS
1. A short power supply cord is provided to reduce the risk resulting from
becoming entangled in or tripping over a longer cord.
2. Longer detachable power-supply cords or extension cords are available and may
be used if care is exercised in their use.
3. If a long detachable power cord or extension cord is used:
• The marked electrical rating of the detachable power supply cord or exten-
sion cord should be at least as great as the electrical rating of
the appliance.
• If the appliance is of the grounded type, the extension cord should be the
same type 3-wire.
• The longer cord should be arranged so that it will not drape over
the countertop or tabletop where it can be pulled on by children or tripped
over.
PLASTICIZER WARNING
CAUTION: To prevent Plasticizers from migrating from the finish of the
countertop or tabletop or other furniture, place NON-PLASTIC coaster or place-mats
between the appliance and the finish of the counter top or table top. Failure to do
so may cause the finish to darken. Permanent blemishes may occur or stains
can appear.
Important Safeguards (cont’d)
17. Use the iron on a flat, stable and heat-resistant surface.
18. Do NOT use this appliance if it has been dropped, if there are visible signs of
damage or if it is leaking.
19. When placing the iron on its heel rest, make sure that the surface on which the
stand is placed is stable.
20. Deposits or minerals in the water will lead to a scale buildup and result in a
blockage of the steam vents. We advise using distilled water.
21. Do NOT use chemically distilled water.
A
B
C
D
E
F
G
H
I
J
K
A.
B.
C.
D.
E.
F.
G.
H.
I.
J.
K.
Spray Nozzle
Watter Filling Cover
Burst of Steam Button
Spray Button
Steam Control Button
Power Indicator Light
Swivel Connector
Heel Rest
Thermostat Knob
Self-Cleaning Button
Soleplate
Page 4

7
Filling with Water:
Make sure the iron is unplugged and the Temperature Knob is in the “MIN” position.
Place the iron on its Heel Rest, tilt forward to approximately a 45° angle and pour
water into the water-filling opening to the “MAX” position of the Water Tank.
Burst of Steam:
This function works well for tough wrinkles and heavy fabrics. By pressing the Burst
of Steam button, an intense burst of steam is emitted from the Soleplate. This can
be very useful when removing stubborn creases. For optimum results, there should
be 5 seconds of rest between each press of the Burst of Steam button.
*NOTE: To prevent water from leaking out of the soleplate, NEVER press the Burst
of Steam button continuously for more than 5 seconds.
Vertical Steam:
“Burst of Steam” can also be applied when holding the iron in the vertical position,
this is useful for removing creases from hanging clothes curtains, etc.
Dry Ironing:
1. Set the Steam Control button to the “O” position (no steam).
2. As per washing label of various clothes, set to the correct ironing temperature.
Spraying Methods:
You can add moisture to the clothing/fabric that you are ironing at any time by
pressing the Spray Button a few times. Before pressing the Spray Button, make
sure that there is water in the Water Tank.
Steam Ironing:
1. Fill the Water Tank by following the “Filling with Water” instructions.
2. Position the Steam Control button to “O”.
3. Plug the appliance into the socket. The Power Indicator Light will flash to let you
know that the soleplate is heating. At this time, you should adjust the Thermostat
Knob to the appropriate setting (according to the care label on your clothing or
fabric). When the Power Indicator Light goes off, the Soleplate has reached the
selected temperature. Press the “Steam Control” button to release steam and
iron clothes or fabric.
4. To increase steam output, press the “Steam Control” button back. To decrease
steam output, press the “Steam Control” button forward.
Anti-Calc:
A special resin filter inside the water tank softens the water and prevents scale
buildup in the Soleplate. The resin filter is permanent and doesn’t need to be replaced.
6
1•888•557•3848
Wards.com
How to Use
1. Remove any sticker or protective foil from the soleplate. Clean the soleplate
with a soft cloth.
2. The iron has been greased, and as a result, the iron may smoke slightly when
switched on for the first time. After a shor t period, this will stop.
3. Keep the soleplate smooth; avoid hard contact with metal objects.
4. When using for the first time, hit the Burst of Steam button several times. The
iron may emit some small particles from the steam vents.
5. After your first use, the following steps will prolong the life of your iron:
• Press the Spray button until you exhaust all of the water in the water tank
• Then press the Burst of Steam button until no strong bursts come out.
• Set the Thermostat Knob to “MAX” and adjust the Steam Control button to
“OFF”
• Plug the iron into the electrical outlet to heat
• When the Power Indicator Light goes off, turn the Thermostat Knob to
“OFF”, unplug from the outlet and allow the iron to cool down
Before Using for the First Time
Setting the Correct Temperature
CAUTION: Please note that this symbol on the label means that this
article CANNOT be ironed.
Instructions on
Label:
Type of Fabric
Thermostat
Dial
Nylon
Silk
MIN
MAX
Wool
Cotton
Linen
Page 5

Before cleaning, remove the plug from the socket and allow the iron to cool down.
1. Pour any remaining water out of the Water Tank, set the Steam Control Dial to
“O” and set the Iron on its Heel Rest.
2. Wipe off the Soleplate with a damp cloth and a non-abrasive (liquid) cleaner.
3. If there are fibers adhered to the Soleplate, use a damp cloth with vinegar to
wipe off the Soleplate.
4. NEVER use strong acid or alkali in order to avoid damaging the Soleplate.
5. If scale build-up blocks the Steam Vents, remove the build-up with a toothpick;
do NOT damage the surface of the Soleplate.
Before calling our Customer Service for information on returns or refunds, try to fix
any of the below problems by using this chart:
Problem Possible Reasons Solution
Not enough
heat or too hot
The Thermostat Dial is not
set correctly; the Iron is not
plugged in
Set the Thermostat Dial correctly; check to see that the
Iron is plugged in
No steam or
leakage
The Thermostat Dial has been
set to “MIN”
Set the Thermostat Dial to the
correct position
No Burst of
Steam or no
vertical steam
The (vertical) Burst of Steam
function has been used too
often within a short period of
time; the Iron is not hot enough
Continue ironing in the
horizontal position and wait
awhile before using the (vertical) Burst of Steam Function
again
Leaking water
from Soleplate
The Thermostat Dial has been
set out of steam range
Set the Thermostat Dial to the
correct position
The Iron is not hot enough
Wait until the Power Indicator Light has gone off before
opening the Steam Vents
There is too much water in the
Water Tank
Pour out the additional water
until the water line is below
the “Max” line
Little steam
The Steam Dial is not set to
the proper position
Set the Steam Dial to the
proper position
The Steam Vents are blocked
Clean the Steam Vents with
the “self-cleaning function” or
by using toothpicks
Not enough water in the Water
Tank
Add water to the Water Tank
(up to the “Max” line)
No spraying
Not enough air pressure inside
Press the Spray Nozzle by
hand and push the “Spray”
button several times
Little or no water in the Water
Tank
Add water to the Water Tank
(up to the “Max” line)
8
9
1•888•557•3848
Wards.com
Cleaning & Maintenance
Troubleshooting
Anti-Drip:
There is an assembly inside the iron which closes the steam vents when the
temperature of the iron’s Soleplate becomes very low, preventing water leakage.
Auto Shut-Off:
The auto shut-off feature trips after the iron has been left in the upright position
for approximately 15 minutes, or if it has been unused for 30 seconds in the
horizontal position. The Auto Shut-Off Indicator Light will begin to flash to indicate that the Auto Shut-Off feature has been tripped. As soon as you move the
iron, the device turns on and the iron will begin to work immediately.
Self-Cleaning:
Use the self-cleaning function once every 2 weeks when using the iron regularly.
If the water in your area is very hard, the self-cleaning function should be used
more frequently.
1. Make sure the iron is unplugged and set the Steam Control button to “O”.
2. Fill the Water Tank to the “MAX” position. Do NOT put vinegar or other
descaling agents in the Water Tank. Set the Temperature Dial to “MAX”
and plug the power cord into the electrical outlet.
4. Once the Power Indicator Light goes off, unplug from the outlet, hold the iron
over the sink and press and hold the Self-Cleaning button and gently shake
the iron back and forth. As steam and water is forced out of the iron, impurities
and flakes (if any) will be flushed out. Release the Self-Cleaning button when
all of the water in the Water Tank has been drained out of the iron.
5. Repeat the self-cleaning process if there are still a lot of impurities in the iron.
6. When finished, plug the iron back into the wall outlet and allow the iron to heat
up so that the Soleplate will dry. Once the iron has reached the set ironing
temperature and the Power Indicator Light goes off, unplug the iron and gently
move it over a piece of cloth to remove any water stains that may have formed
on the Soleplate.
7. Allow the iron to cool down before storing it.
How to Use (cont’d)
Page 6

10 11
1•888•557•3848
Wards.com
Returns
If any item, for any reason, does not meet your expectations, just return it to us.
We’ll gladly either:
• Refund your merchandise amount
• Credit your account
• Send a replacement
You can return any unused item in its original packaging within 60 days of its
receipt for a full refund of the purchase price (excluding shipping and handling
charges).
Please send returns to:
Montgomery Ward, Inc.
Attn: Customer Returns
2000 Harrison Suite 100
Clinton, IA 52732-6676
When returning an item:
• Use the original packaging and pack it securely.
• Please adequately insure your item in case you need to make a claim
with the carrier you choose for returning your item.
• Include your order number and reason for return.
• We recommend keeping the receipt for 4 weeks.
Wards.com 1•888•557•3848
Montgomery Ward, Inc. warrants this product
to be free from defects in material and workmanship
for one year from provable date of purchase.
Within this warranty period, Montgomery Ward will repair or
replace, at its option, defective parts of this
product at no charge, provided the product is returned,
freight prepaid with proof of purchase to Montgomery Ward.
Allow 2-4 weeks for return shipping.
This warranty does not cover improper installation, misuse,
abuse or neglect on part of the owner. Warranty is also
invalid in any case that the product is taken apart or
serviced by an unauthorized service station.
This warranty gives you specific legal rights and they may
vary from state to state.
THE FOREGOING WARRANTIES ARE IN LIEU OF ALL
OTHER WARRANTIES AND CONDITIONS,
EXPRESS OR IMPLIED, INCLUDING
BUT NOT LIMITED TO THOSE OF MERCHANTIBILITY
OR FITNESS FOR A PARTICULAR PURPOSE.
1 Year Limited Warranty
Montgomery Ward Customer Service
8:00 am to Midnight CST, Monday through Friday
 Loading...