

Page 1
Instruction Manual
Item No.: 738245
120V~, 60Hz, 1500W
Wards.com 1•888•557•3848
Montgomery Ward Customer Service
1112 7th Avenue Monroe, WI 53566
8:00 a.m. to Midnight, Monday through Friday
Compact
yet
Powerful!
by
Wards.com 1•888•557•3848
by
Digital Convection Toaster Oven
®
®
Model: GH25ACLD
Page 2

3
2
1•888•557•3848
Wards.com
PLEASE SAVE THESE INSTRUCTIONS
THIS APPLIANCE IS FOR HOUSEHOLD USE ONLY
© 2016 Montgomery Ward, Inc. All rights reserved.
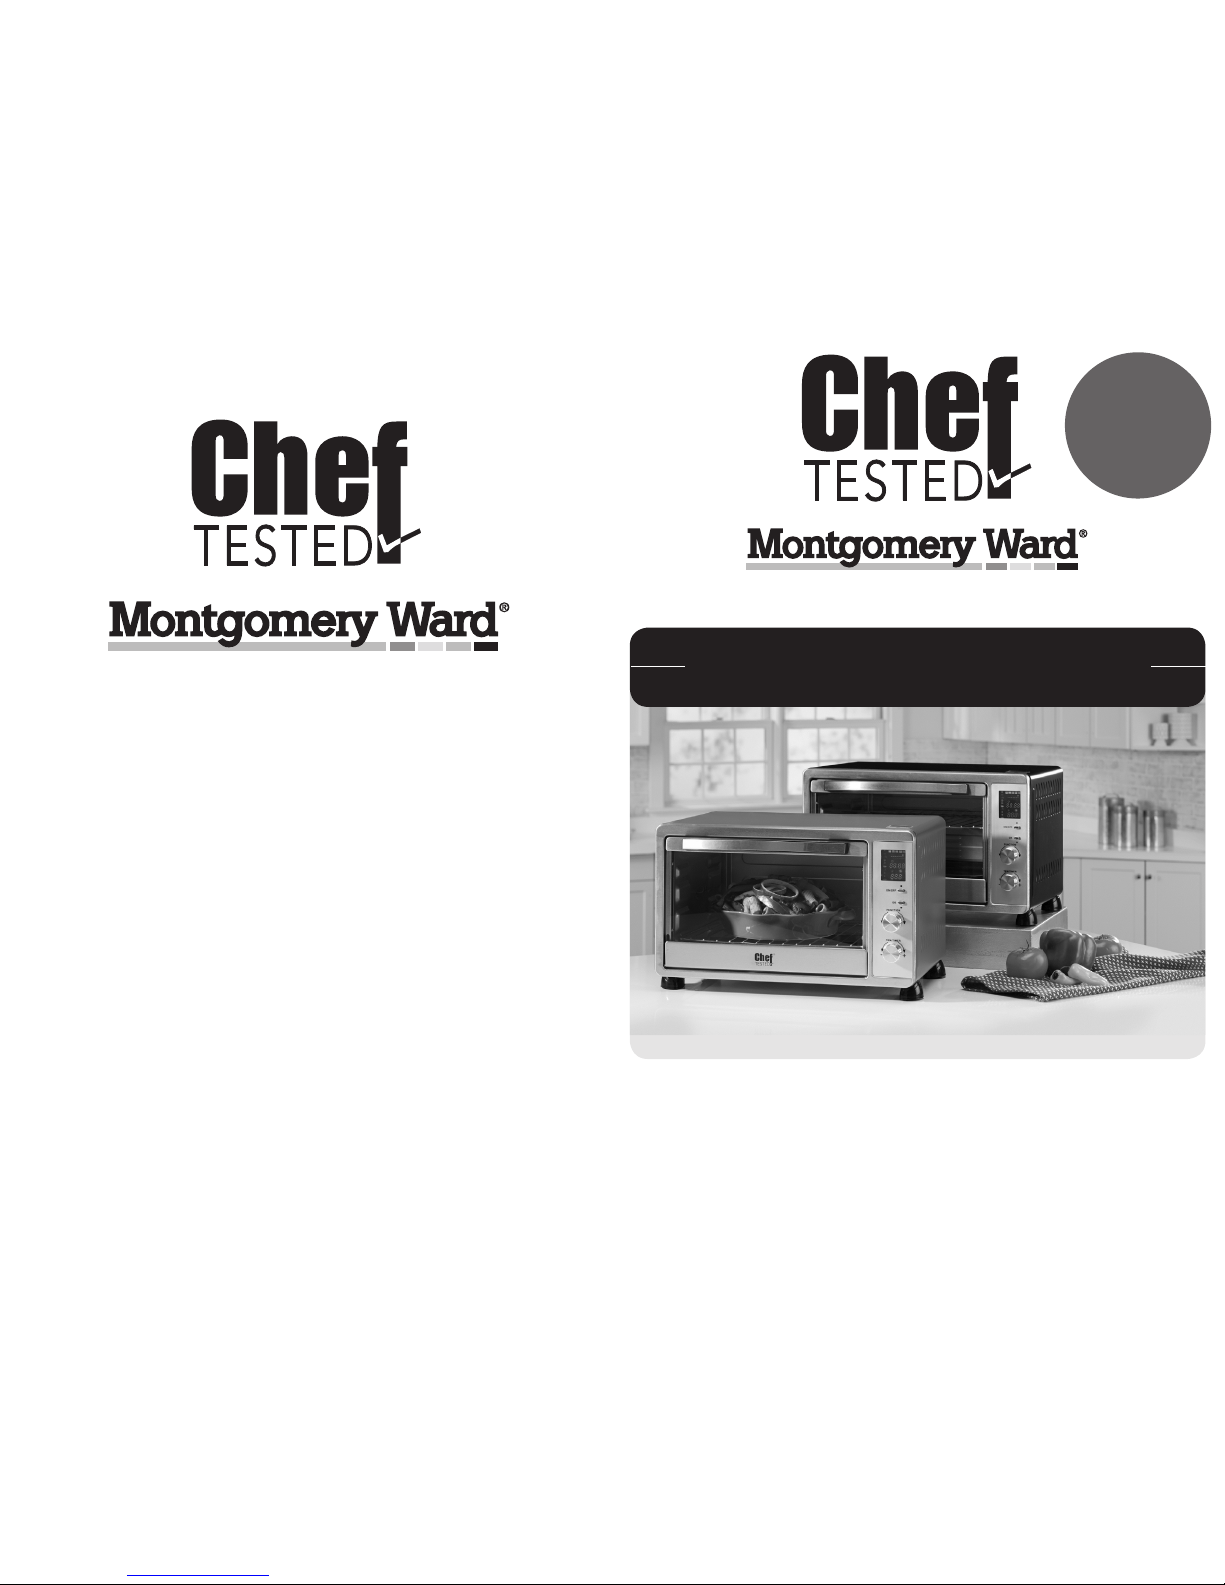
Thank you for purchasing your Chef Tested
®
Digital Convection Toaster Oven by
Montgomery Ward®. Put through the paces by the experts, it will perform to the
highest standard, time after time, with all the convenience, easy cleanup and
durability you rely on from Wards.
We guarantee it!
This heavy-duty workhorse is surprisingly lightweight, giving you the option to
move it where it's needed most. With all of the features on your Chef Tested®
Digital Convection Toaster Oven, you might find that it gets used more often
than your regular oven – even when it's not hot outside! You will love the
convenience and versatility of this appliance!
PLEASE READ THESE INSTRUCTIONS BEFORE USE
Basic safety precautions should always be followed when using your appliance.
WARNING: TO AVOID THE RISK OF ELECTRICAL SHOCK, ALWAYS MAKE
SURE THE PRODUCT IS UNPLUGGED FROM THE ELECTRICAL OUTLET
BEFORE ASSEMBLING, DISASSEMBLING, RELOCATING OR CLEANING.
This appliance is intended for cooking food products. Do NOT use this
appliance for anything other than the intended purpose.
1. Before using this appliance, make sure voltage is compatible with rating label.
2. To protect against electrical shock, do NOT place cord, plug or appliance in
water or other liquid.
3. Do NOT let cord hang over edge of table or counter, or touch any hot surfaces.
4. Unplug from outlet when not in use and before moving. Always unplug using the
plug and not by pulling on the cord.
5. NEVER connect or disconnect plug with wet hands.
6. Do NOT allow appliance to rest on cord.
7. Keep cord away from hot surfaces during use.
8. Do NOT operate any appliance with a damaged cord or plug, or after the
appliance malfunctions or has been damaged in any way. Call our toll-free customer
service number for information regarding returning or replacing the product.
9. Always place appliance on a flat, level and heat-resistant surface.
10. Do NOT place or use the appliance on or near a hot gas or electric burner, in a
heated oven, under a broiler, on a stovetop or in a freezer.
11. Do NOT use or place appliance near or on any flammable materials such as
tablecloth, curtains, towels, paper, plastic, etc.
12. Do NOT place flammable materials such as paper, cardboard or plastic in or on
top of the toaster oven.
13. Do NOT wrap any part of the appliance in foil.
14. When operating the toaster oven, keep a minimum of 4 inches of clearance on
all sides to allow for adequate air circulation.
15. Close supervision is necessary when any appliance is used by or near children.
This appliance is not suitable for use by children.
16. NEVER leave appliance unattended when in use.
17. Do NOT touch any of the hot surfaces of the appliance. Always use the handles
or knobs to operate.
Important Safeguards ........................3-4
Polarized Plug ......................................4
Parts & Features ...................................5
Before Using for the First Time............. 6
How to Use ........................................6-7
Helpful Hints ......................................... 8
Cleaning & Maintenance ...................... 8
Recipes............................................9-13
Warranty & Return Information ......14-15
by
ank you
for your
purchase!
Table of Contents
Important Safeguards
®
Page 3
4
1•888•557•3848
Wards.com
4
5
18. Do NOT move appliance while in operation.
19. Always allow appliance to cool down completely before handling and cleaning.
20. This appliance is NOT recommended for outdoor use.
21. Do NOT clean unit with any abrasive pads or cleaners.
Important Safeguards (cont’d)
Polarized Plug
This appliance has a polarized plug (one blade is wider than the other). As a safety
feature to reduce the risk of electrical shock, this plug is intended to fit a polarized
outlet only one way. If the plug does not fit fully in the outlet, reverse the plug. If it
still does not fit, contact a qualified electrician. Do NOT attempt to modify the plug in
any way.
SHORT CORD INSTRUCTIONS
1. A short cord is provided to reduce the risk resulting from
becoming entangled in or tripping over a longer cord.
2. Longer, detachable cords or extension cords should not be used with this appliance.
3. If a long detachable cord or extension cord is used:
• The marked electrical rating of the detachable cord or extension cord should be
at least as great as the electrical rating of the appliance.
• If the appliance is of the grounded type, the extension cord should be the
same type 3-wire.
• The longer cord should be arranged so that it will not drape over the
countertop or tabletop where it can be pulled on by children or tripped over.
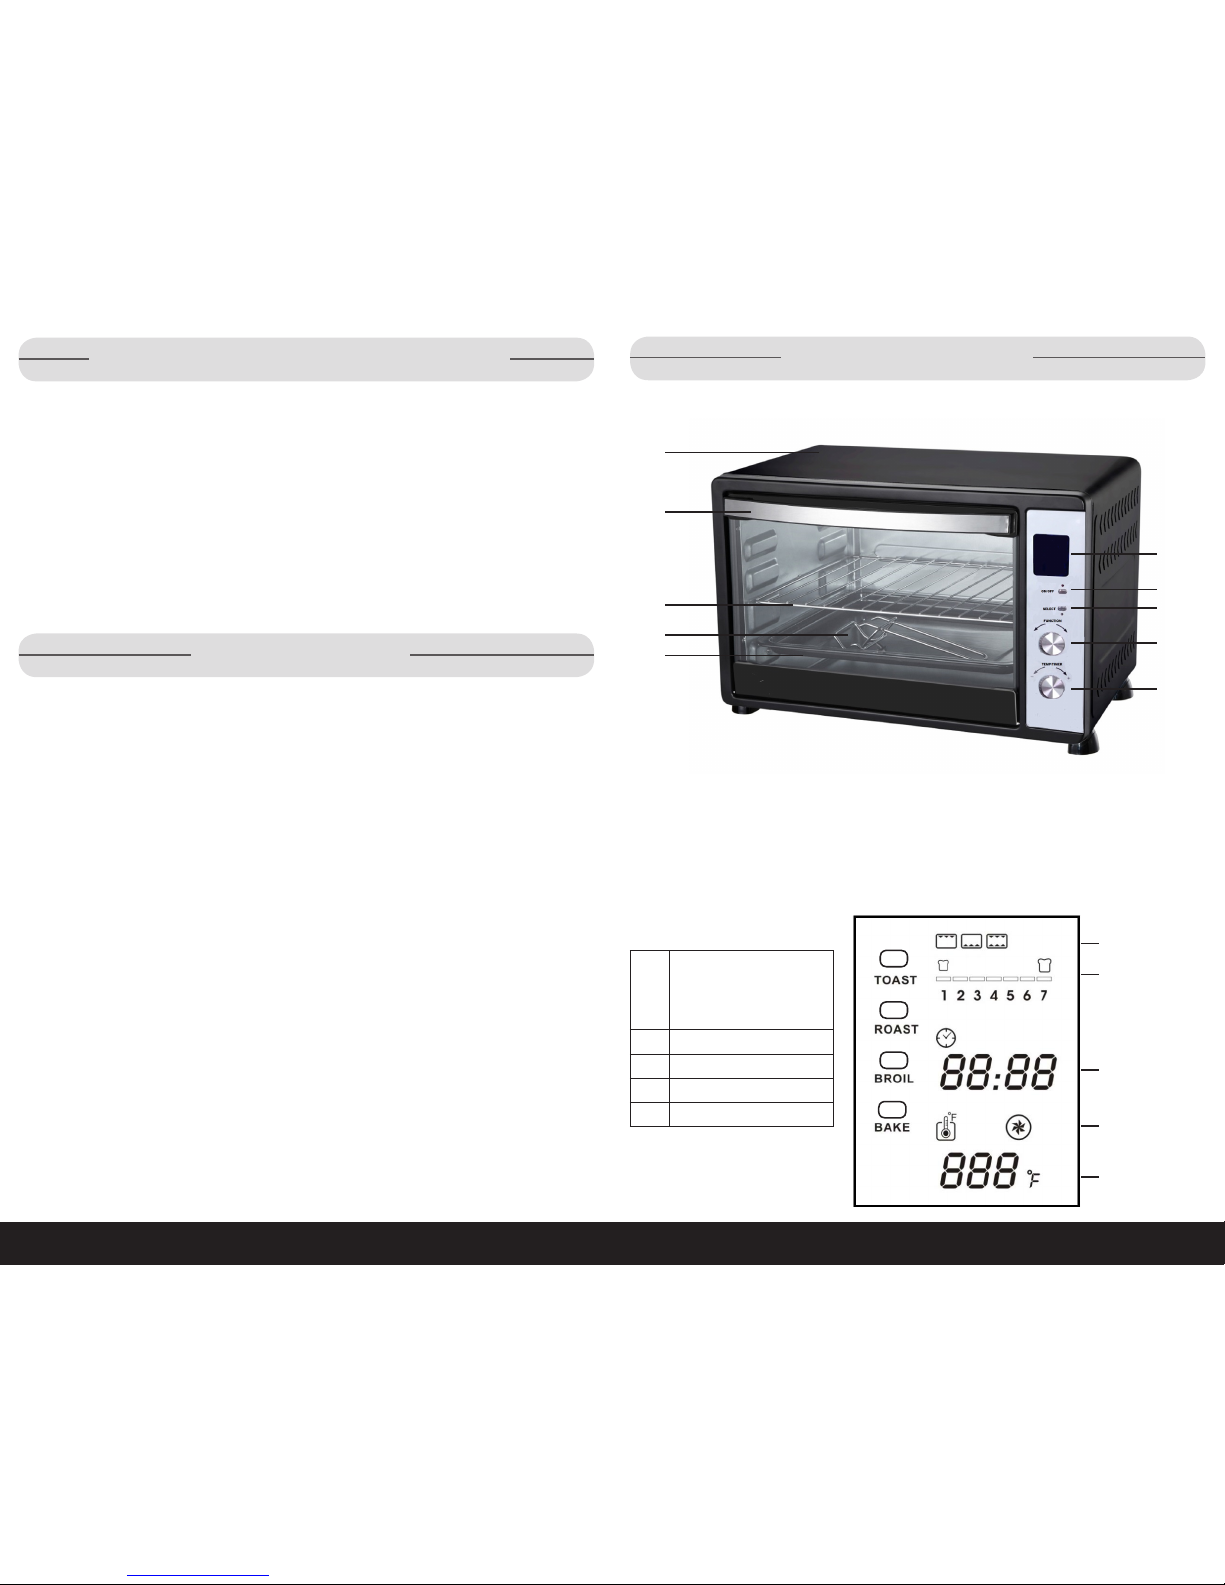
Parts & Features
8
9
10
1
2
3
4
5
6
7
Digital Display
1. Housing 6. LCD Digital Display
2. Handle 7. ON/OFF Button
3. Wire Rack 8. Select Button
4. Tray Removal Tool 9. Function Knob
5. Bake/Drip Tray 10. Temperature/Timer Knob
A
B
C
D
E
A. Heating Elements:
• Upper
• Lower
• Upper & Lower
B. Toast Browning Level
C. Time
D. Convection Fan
E. Temperature
Page 4

Before Using for the First Time
After unpacking, dispose of all packing materials in accordance with local ordinances.
CAUTION: Risk of suffocation - keep all packaging and plastic bags out of the
reach of children.
1. Wipe down all surfaces with a damp non-abrasive cloth. Do NOT use any
abrasive cleaners or scouring pads. Grill rack, tray removal tool and food tray
are dishwasher safe.
2. Dry completely with a clean, dry cloth.
3. Place appliance on a flat, level and heat-resistant surface with 4 inches of
clearance on all sides.
4. Plug cord into outlet.
CAUTION: Do NOT store items on top of oven; exterior gets hot during use.
How to Use
Toasting
Shade select is indicated on the control panel
1–2: Light Color
3–5: Medium Color
6–7: Dark Color
See Helpful Hints section for toasting suggestions.
1. Place the rack in middle position and center the food in the middle of the rack.
2. Turn the function knob to toast. The icon will blink.
3. Press the select button. The function icon will illuminate.
4. Use the function knob to choose desired shade.
5. Press the select button.
6. Press the ON/OFF button to start toasting. The icon for upper & lower heating
elements will illuminate. A beep will sound when toasting is done.
7. Press the ON/OFF button to shut off the oven.
All Other Functions
1. Turn the function knob to the desired function. The function and convection fan icons
will blink.
2. Press the select button once to set the function. The function icon will illuminate.
3. To add the convection fan during roasting, baking or broiling, press the select button
once more (the icon will illuminate). If you don't want convection added, turned the
function knob once to turn off the blinking convection fan icon and press select to
confirm.
4. Use the temperature/timer knob to select desired time from 1–60 minutes.
5. Press the select button to confirm the time.
6. Use the temperature/timer knob to choose a temperature from 150°– 450° F.
7. Press the select button to set the temperature.
8. Press the ON/OFF button to start. The heating element with that function will
illuminate. A beep will sound when time has expired and the oven will shut off.
9. Press the ON/OFF button to shut off the oven.
NOTE: If you'd like to use the pre-set time and temperature, simply press the ON/OFF
button after selecting the function.
Presets
Function Time Temperature
Roast 60 min. 450° F
Broil 10 min. 400° F
Bake 30 min. 350° F
30 min. 350° F
30 min. 350° F
16 min. 450° F
7
6
1•888•557•3848
Wards.com
Function Knob
In addition to selecting toast, roast, broil or bake, you can also use the function
knob to select from the following:
Upper heating element
Toast Browning Level
Lower heating element
Upper & Lower heating elements
Convection
Select Button
After choosing a function, temperature or time, press the select button to confirm
the operation.
Temperature/Timer Knob
Use this knob to set the cooking temperature and length of cooking time. The pre-set times
and temperatures, which vary for each function, can be changed.
ON/OFF Button
This button is used to start and stop the cooking cycle.
Convection
A fan circulates the heat so food will cook faster and more evenly. The convection
fan can only be used with roast, bake and broil functions.
Preheating
It is recommended that you preheat the oven for 10 minutes at 450° F prior to use.
Turn the function knob to upper & lower heating elements then press the ON/OFF
button. After 10 minutes, press the ON/OFF button to stop preheating and then
select your desired function.
6
7
How to Use
Page 5

8
1•888•557•3848
Wards.com
9
Toasting is a combination of drying and cooking the bread. Therefore, differences
in density and moisture from one bread to another can result in varying
toasting times.
For slightly dry or thinly sliced bread, which will toast more quickly, use a lighter
setting than you normally would.
For very fresh, dense, thickly sliced or whole wheat bread, use a darker setting
than you normally would.
Breads with very uneven surfaces (such as English muffins) will require a darker
toast setting.
When toasting raisin or other fruit breads and muffins, remove any loose fruit from
the surface of the bread/muffin before placing into the oven.
To prevent overtoasting of a single slice, set browning control to a lighter setting
than you normally would.
Cleaning & Maintenance
This appliance contains no user-serviceable parts. Do NOT try to repair it yourself.
If your appliance is damaged or does not operate, call our toll-free customer service
number for information regarding returning or replacing the product
Always allow oven to cool completely before cleaning.
1. Unplug oven from outlet.
2. Clean interior and exterior with a damp cloth. Do NOT clean unit with any
abrasive pads or cleaners.
3. Dry interior thoroughly.
Bake/drip tray and wire rack are dishwasher safe.
Recipes
Cajun Stuffed Pork Chops
Ingredients:
4 (approx. 8 oz.) thick-cut boneless pork chops
Dry Rub:
1 Tbsp. paprika ½ tsp. cayenne pepper
1 tsp. seasoned salt ½ tsp. black pepper
1 tsp. rubbed sage ½ tsp. garlic powder
Stuffing:
4 oz. butter, melted 1 Tbsp. Parsley, chopped
2 ribs celery, small dice ½ Tbsp. dried thyme
1 small onion, small dice ½ Tbsp. dried oregano
1 red bell pepper, small dice salt and pepper, to taste
4 oz. fresh bread, in ½" cubes Water, as needed
Instructions:
• Preheat oven to 350° F.
• Trim fat from chops, if needed, and pat dry.
• Combine dry rub seasonings and coat both sides of chops.
• Cut pockets in the chops.
• Sauté the celery, onion and bell pepper in the butter until tender.
• Combine sauté mixture with bread cubes, parsley, dried herbs, salt and pepper.
Add enough water to moisten the dressing.
• Stuff the mixture into each of the pork chops. Seal the pockets with toothpicks
and/or tie with butcher’s twine.
• Bake in preheated oven until tender, approximately 30–35 minutes.
Yield: 4 servings
Helpful Hints
Page 6

11
10
1•888•557•3848
Wards.com
Recipes
Salmon with Creamy Horseradish Sauce
Ingredients:
1 whole salmon fillet (approx. 2 lbs.), skin on 1 small onion, sliced & separated into rings
1 Tbsp. lemon-pepper seasoning 1 lemon, sliced into 8 thin slices
Zest of one lemon ¼ cup chopped Italian parsley
1 tsp. onion powder 1 stick of butter, cubed
1 tsp. salt
Creamy Horseradish Sauce:
1 Tbsp. finely chopped green onion ¼ cup mayonnaise
1 tsp. lemon juice ¾ tsp. fresh chopped dill
1 Tbsp. prepared horseradish ¼ tsp. garlic powder
½ cup sour cream Salt and pepper to taste
Instructions:
• Preheat oven to 350° F.
• Line baking pan with heavy-duty foil; grease lightly. Place salmon skin side down
on foil. Sprinkle with lemon-pepper, lemon zest, onion powder and salt.
• Top with onion, lemon slices and parsley. Dot with butter. Fold foil around
salmon; seal tightly.
• Bake in preheated oven for 20 minutes. Open foil carefully, allowing steam to
escape. Broil 4–6" from the heat for 8–12 minutes or until the fish flakes easily
with a fork.
• Combine the sauce ingredients. Serve with salmon.
Yield: 6 servings
Recipes
Potato Chip Ranch Chicken Recipe
Ingredients:
½ cup olive oil 1 Tbsp. garlic powder
1 cup crushed potato chips (any flavor) 1 envelope ranch salad dressing mix
1 cup Parmesan cheese, grated 4 chicken breasts, skinless and boneless
Instructions:
• Preheat oven to 350° F.
• Place olive oil in shallow container. In another container, combine potato chips,
Parmesan cheese, garlic powder and ranch dressing mix.
• Dip chicken in the olive oil and then roll in potato chip mixture.
• Place chicken on a foil lined tray and bake uncovered for 45 minutes or until
internal temperature of chicken is 165° F, as measured with a meat thermometer.
Yield: 4 servings
Hasselback Potatoes
Ingredients:
1 stick of butter, softened ¼ cup parsley, finely chopped
¼ cup olive oil 1 Tbsp. garlic powder
¼ cup chives, finely minced Salt and pepper, to taste
¼ cup dill, finely chopped 4 medium russet potatoes, washed and
scrubbed
Instructions:
• Preheat oven to 450° F.
• Stir together butter, olive oil, herbs, garlic powder, salt and pepper.
• Holding the potato between two wooden spoons or chopsticks, slice the potato
into thin slices, leaving ¼ inch at the bottom UNSLICED. The spoons/chopsticks
should help prevent you from slicing all the way through.
• Repeat with remaining potatoes.
• Put the potatoes on a baking sheet and brush on the butter mixture, making sure
to get between all of the slices. Bake until tender and crunchy, approximately
55–60 minutes.
• Serve with any remaining butter mixture.
Yield: 4 servings
Page 7

13
12
1•888•557•3848
Wards.com
Recipes
Cranberry Pecan Butterscotch Cookies
Ingredients:
1 cup butter, softened 2¼ cups all-purpose flour
¾ cup granulated sugar 1 tsp. baking soda
¾ cup firmly packed brown sugar 1–10 oz. package butterscotch chips
2 eggs 1 cup chopped pecans
1 tsp. vanilla extract 1½ cups dried cranberries
Instructions:
• Preheat oven to 350° F.
• In a large mixing bowl, combine butter, sugars, eggs and vanilla. Mix with
electric mixer on medium speed until thoroughly mixed.
• Combine flour and baking soda; gradually add flour mixture to butter mixture.
• Stir in butterscotch chips, dried fruit and nuts.
• Drop by rounded tablespoonfuls onto ungreased baking sheets.
• Bake in a preheated oven 15–18 minutes, or until golden brown.
• Let cool on wire racks; store in a tightly covered container.
Yield: 4½ dozen cookies
Recipes
Chocolate Peanut Butter Brownies
Ingredients:
½ pound all-purpose flour 6 oz. peanut butter
¼ cup cocoa powder 1 tsp. vanilla extract
¾ teaspoon baking powder 2 oz. unsalted butter, melted
3 eggs 3 oz. peanuts or walnuts, toasted
6 oz. granulated sugar 4 oz. semisweet chocolate chunks
6 oz. brown sugar
Instructions:
• Grease a 9x9 inch pan. Set aside.
• Preheat oven to 350° F.
• Sift together the flour, cocoa powder and baking powder. Set aside.
• In a mixing bowl with paddle attachment, blend eggs and sugars. Add peanut
butter and vanilla extract. Mix until well combined then beat in the butter.
• Stir in the flour, nuts and chocolate chunks.
• Spread the batter into prepared 9x9 pan. Bake in preheated oven until set,
approximately 35–40 minutes.
• Remove from oven and let cool for 30 minutes before serving.
Yield: 2 dozen
Page 8

12
13
1•888•557•3848
Wards.com
Returns
If any item, for any reason, does not meet your expectations, just return it to us.
We’ll gladly either:
• Refund your merchandise amount
• Credit your account
• Send a replacement
You may return any unused item in its original packaging within 60 days of its
receipt for a full refund of the purchase price (excluding shipping and handling
charges).
Please send returns to:
Montgomery Ward, Inc.
Attn: Customer Returns
2000 Harrison Suite 100
Clinton, IA 52732-6676
When returning an item:
• Use the original packaging and pack it securely.
• Please adequately insure your item in case you need to make a claim
with the carrier you choose for returning your item.
• Include your order number and reason for return.
• We recommend keeping the receipt for 4 weeks.
Montgomery Ward, Inc. warrants this Chef Tested product
to be free from defects in material and workmanship
for one year from provable date of purchase.
Within this warranty period, Montgomery Ward will repair or
replace, at its option, defective parts of this Chef Tested
product at no charge, provided the product is returned,
freight prepaid with proof of purchase to Montgomery Ward.
Allow 2–4 weeks for return shipping.
This warranty does not cover improper installation, misuse,
abuse or neglect on part of the owner. Warranty is also
invalid in any case that the product is taken apart or
serviced by an unauthorized service station.
This warranty gives you specific legal rights and they may
vary from state to state.
THE FOREGOING WARRANTIES ARE IN LIEU OF ALL
OTHER WARRANTIES AND CONDITIONS,
EXPRESS OR IMPLIED, INCLUDING
BUT NOT LIMITED TO THOSE OF MERCHANTIBILITY
OR FITNESS FOR A PARTICULAR PURPOSE.
1 Year Limited Warranty
Montgomery Ward Customer Service
8:00 a.m. to Midnight CT, Monday through Friday
Wards.com 1•888•557•3848
®
14
1•888•557•3848
Wards.com
15
 Loading...