

Page 1
VR Camera
Quick Start Guide
US – V1.03
Page 2

2
THANK YOU!
Thank you for purchasing the Monster Vision™ VR Action Sport
Camera by Monster Digital! This Quick Start Guide will help get
you started using your camera in no time. You’ll be able to take
awesome videos and amazing photos! Feel free to share them
with us. We’d love to see what you can do with your camera.
If you ever have any issues or want to learn more, please reach
out to us through any number of means, all listed on our website.
We will get your question answered or problem solved right away.
Also be sure to register your camera at www.MonsterDigital.com
Be safe and have tons of fun!
- The Monster Vision Team
Page 3
3
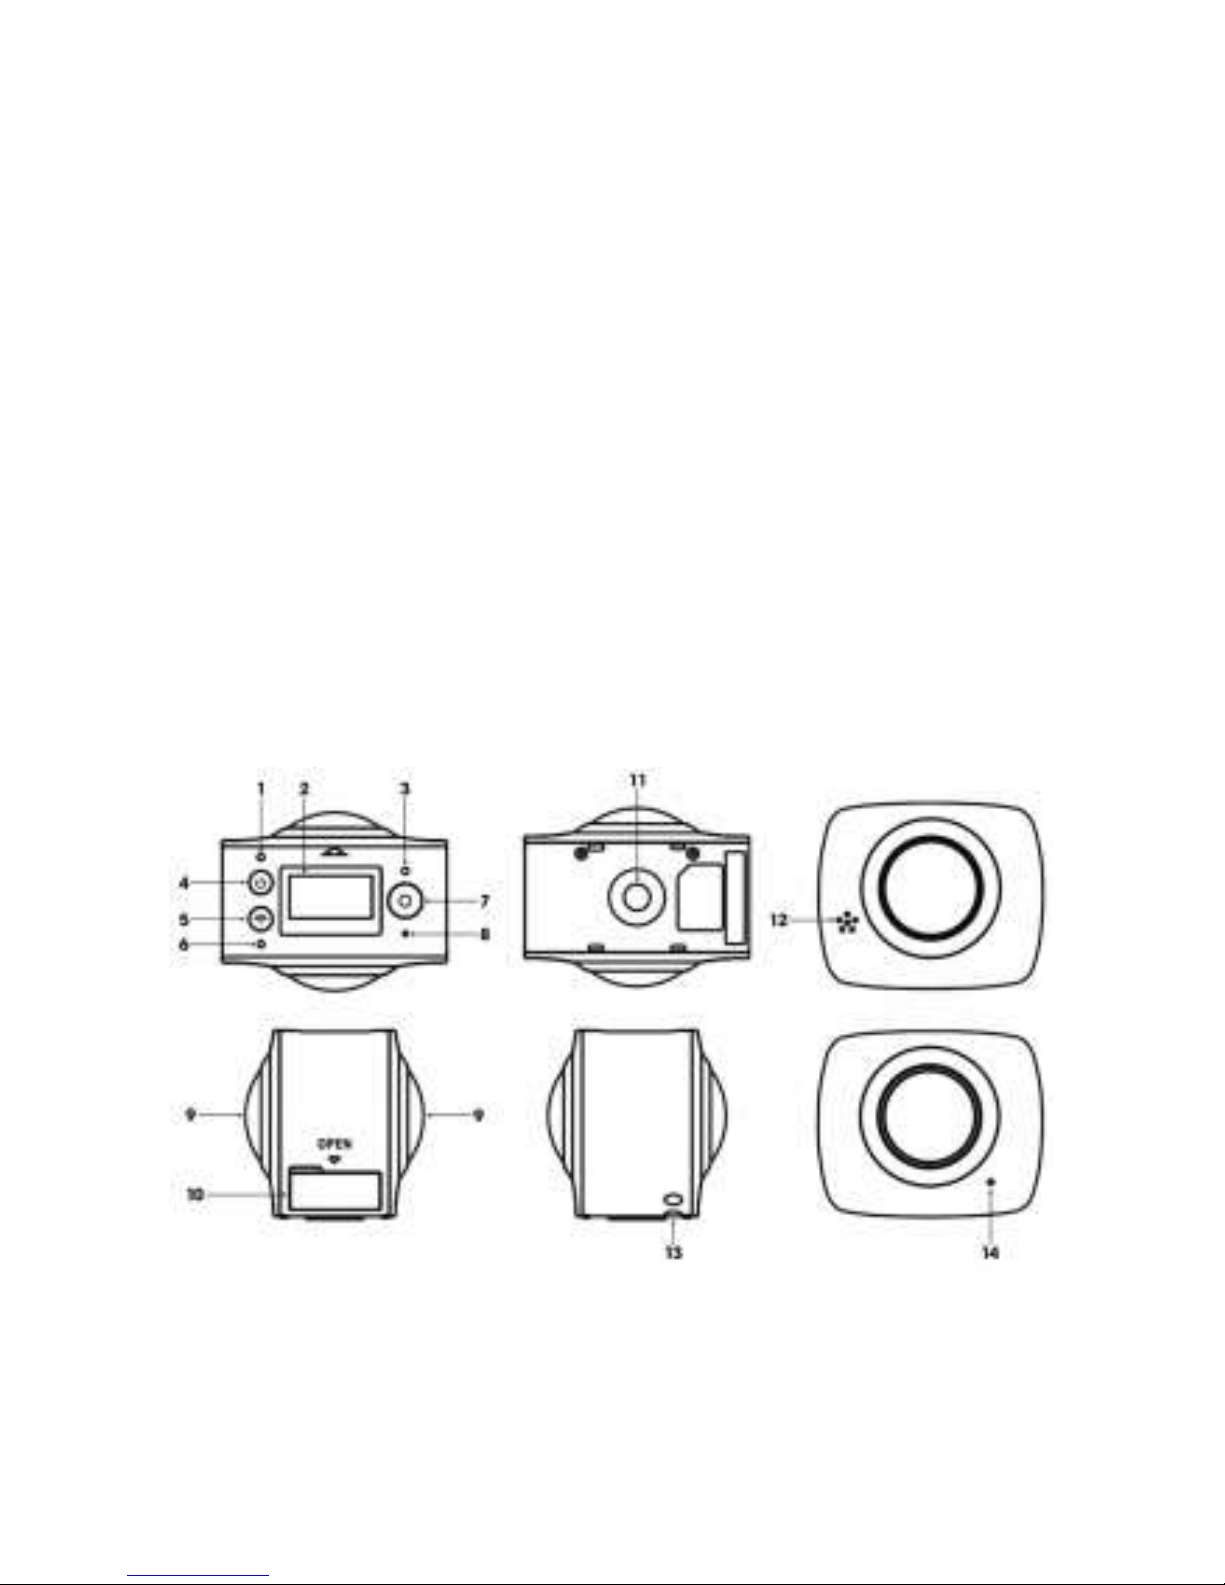
Parts of the VR Camera
1. Power/charging indicator (red/blue)
2. LCD display
3. Activity indicator (red)
4. Power/mode button
5. WiFi/menu button
6. WiFi Indicator (red)
7. Shutter button
8. Reset access hole
9. Lens
10. Port door (microSD card and micro USB)
11. ¼-20 mount
12. Speaker
13. Lanyard pass through
14. Microphone
Page 4
4
GET STARTED IN QUICK THREE STEPS
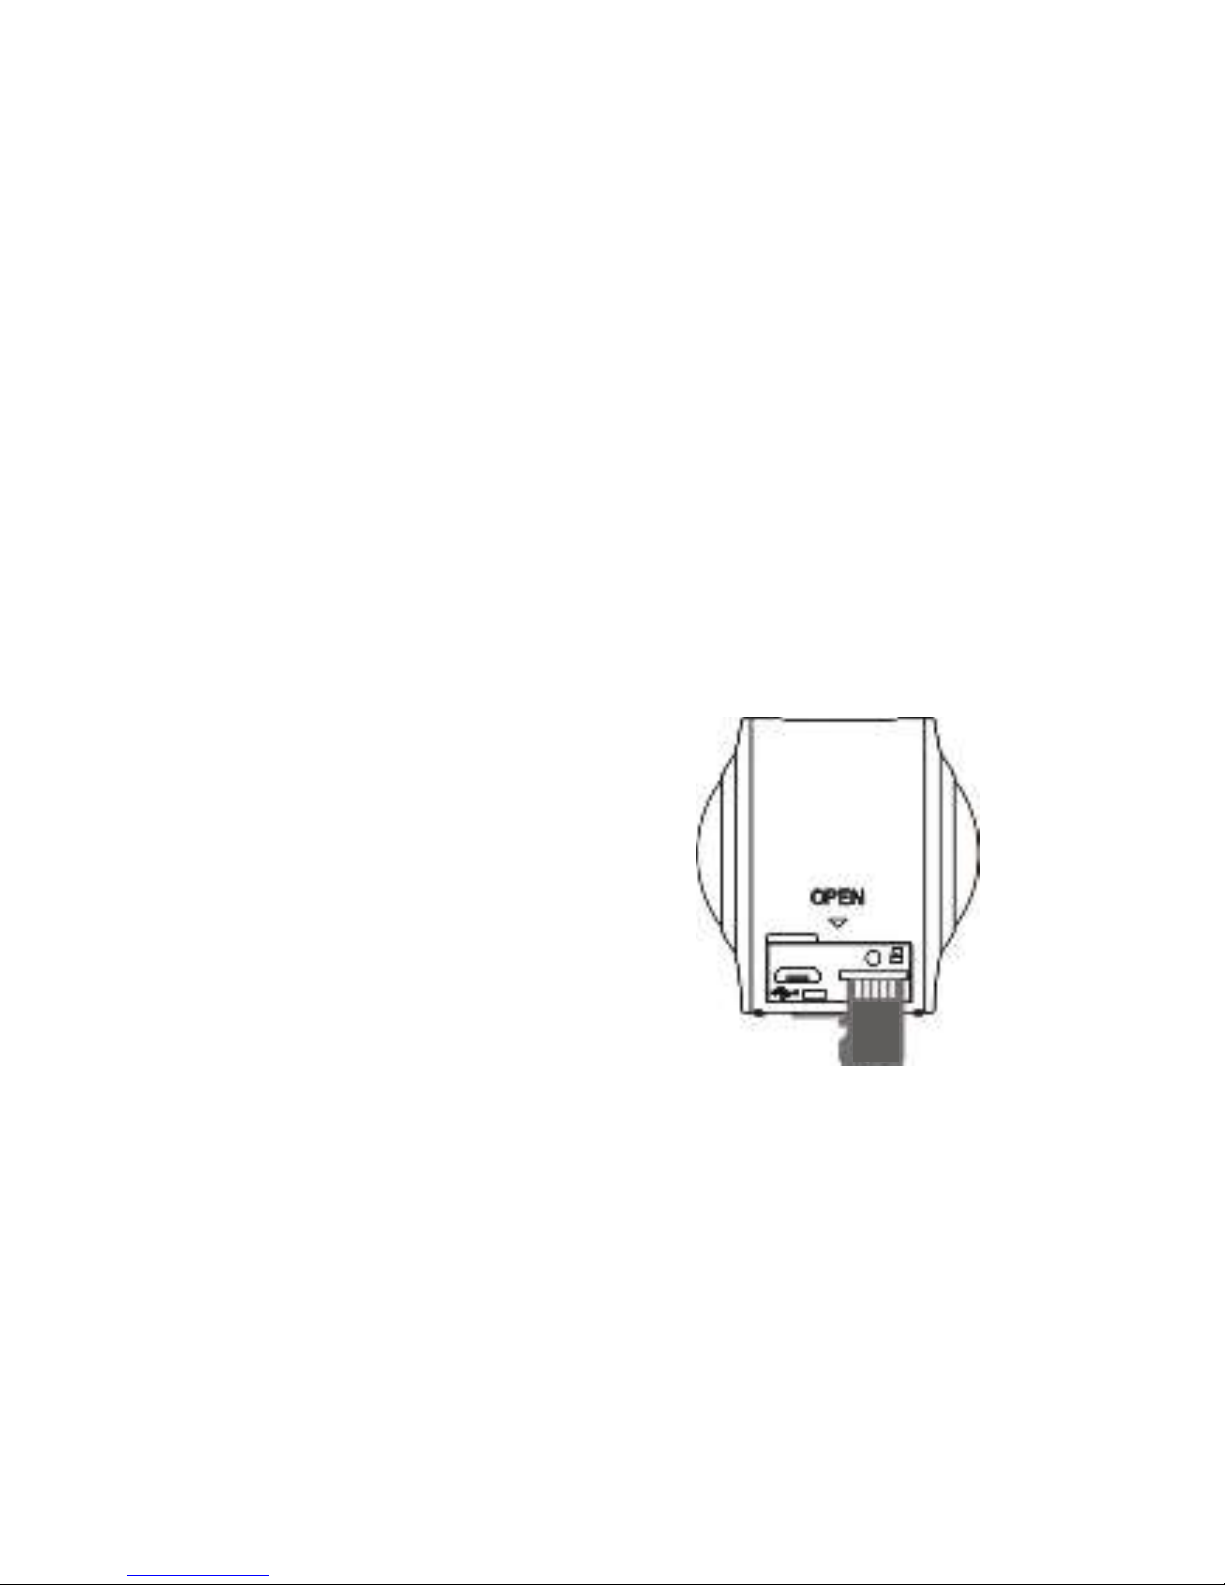
1. Install the microSD card FACE DOWN
2. Fully charge the battery with a micro USB cable (included)
and power source. To charge faster use a 2A power supply.
3. Get the App - Scan the QR Code on next page, or search for
“Monster Vision VR” on Apple Store or Google Play, then
download and install. The camera can be operated
without the app but the app or viewer is needed for
playback and conversion to a format compatible with
Facebook and YouTube.
MEMORY CARD
With the camera off
Insert the memory card U
FACE DOWN
Push the card in until
it clicks
To remove the card, push
in on the edge of the card,
release and it will pop out
Important
Use a Class 10 or better card up to 32GB
Turn the camera off before installing or
removing the card
WIFI WILL NOT WORK without a memory card installed.
Files are 2.12GB, roughly 20 minutes in length and
record continuously. For example a 30 minute
recording will consist of two files. One around 20
minutes in length and the other about 10 minutes.
Page 5
5
CHARGING
Use the included USB cable to charge the camera. While
charging, the indicator light is blue. When charging complete,
the light will turn off.
Important
Be sure to charge with a 0.5 to 2.0A USB power source.
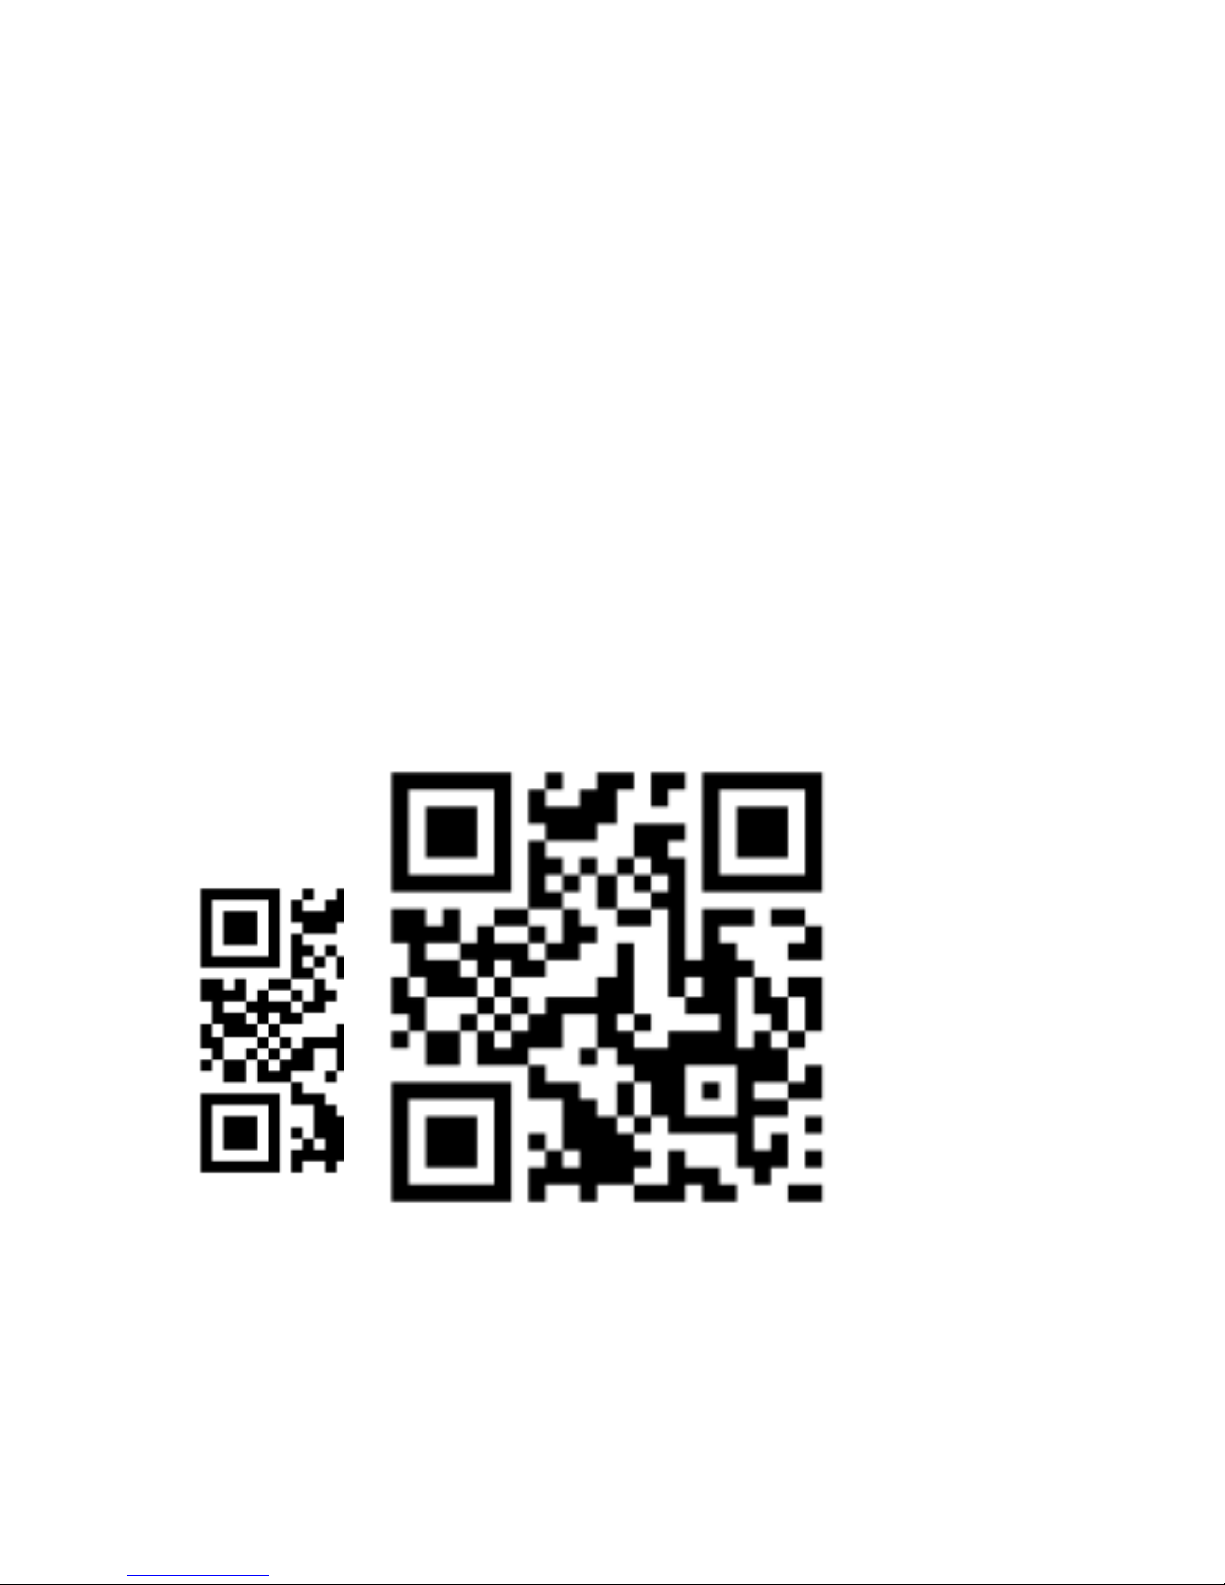
THE APP
For Apple or Android systems, please scan this QR code below or
search “Monster Vision VR” in the App Store or Google Play.
Page 6
6
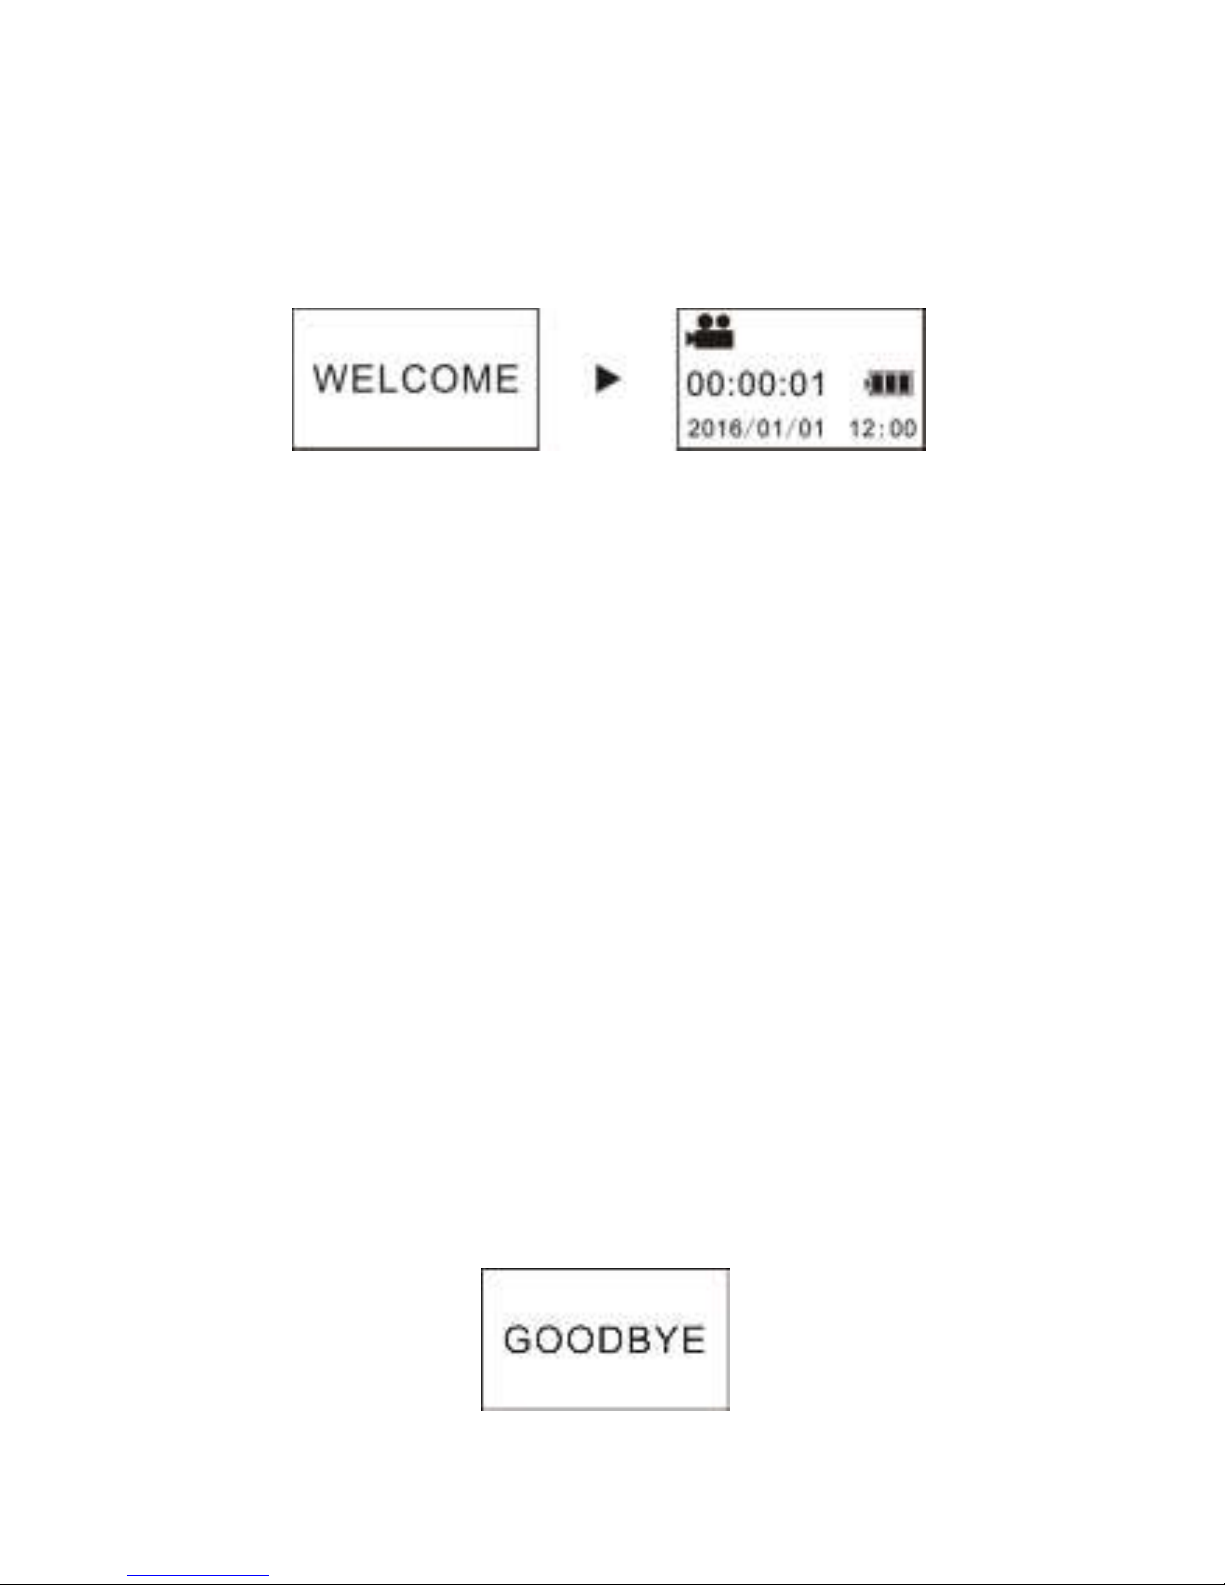
TURN ON CAMERA
Press and hold power/mode button for about 2 seconds.
The camera will turn on and the display screen will illuminate.
Important
If the camera does not turn on make sure the battery
has been charged.
POWER SAVING FEATURES
Display off: If the camera is idle for 1 minute the display will
automatically turn off. Press any button to turn it back on.
Auto Turn off: To save power the camera will turn off
automatically after 3 minutes of sitting idle. This setting is
adjustable.
TURN OFF CAMERA
Press and hold the power/mode button for about 2 seconds and
the camera will turn off.
Page 7
7
VIDEO AND PHOTO MODES
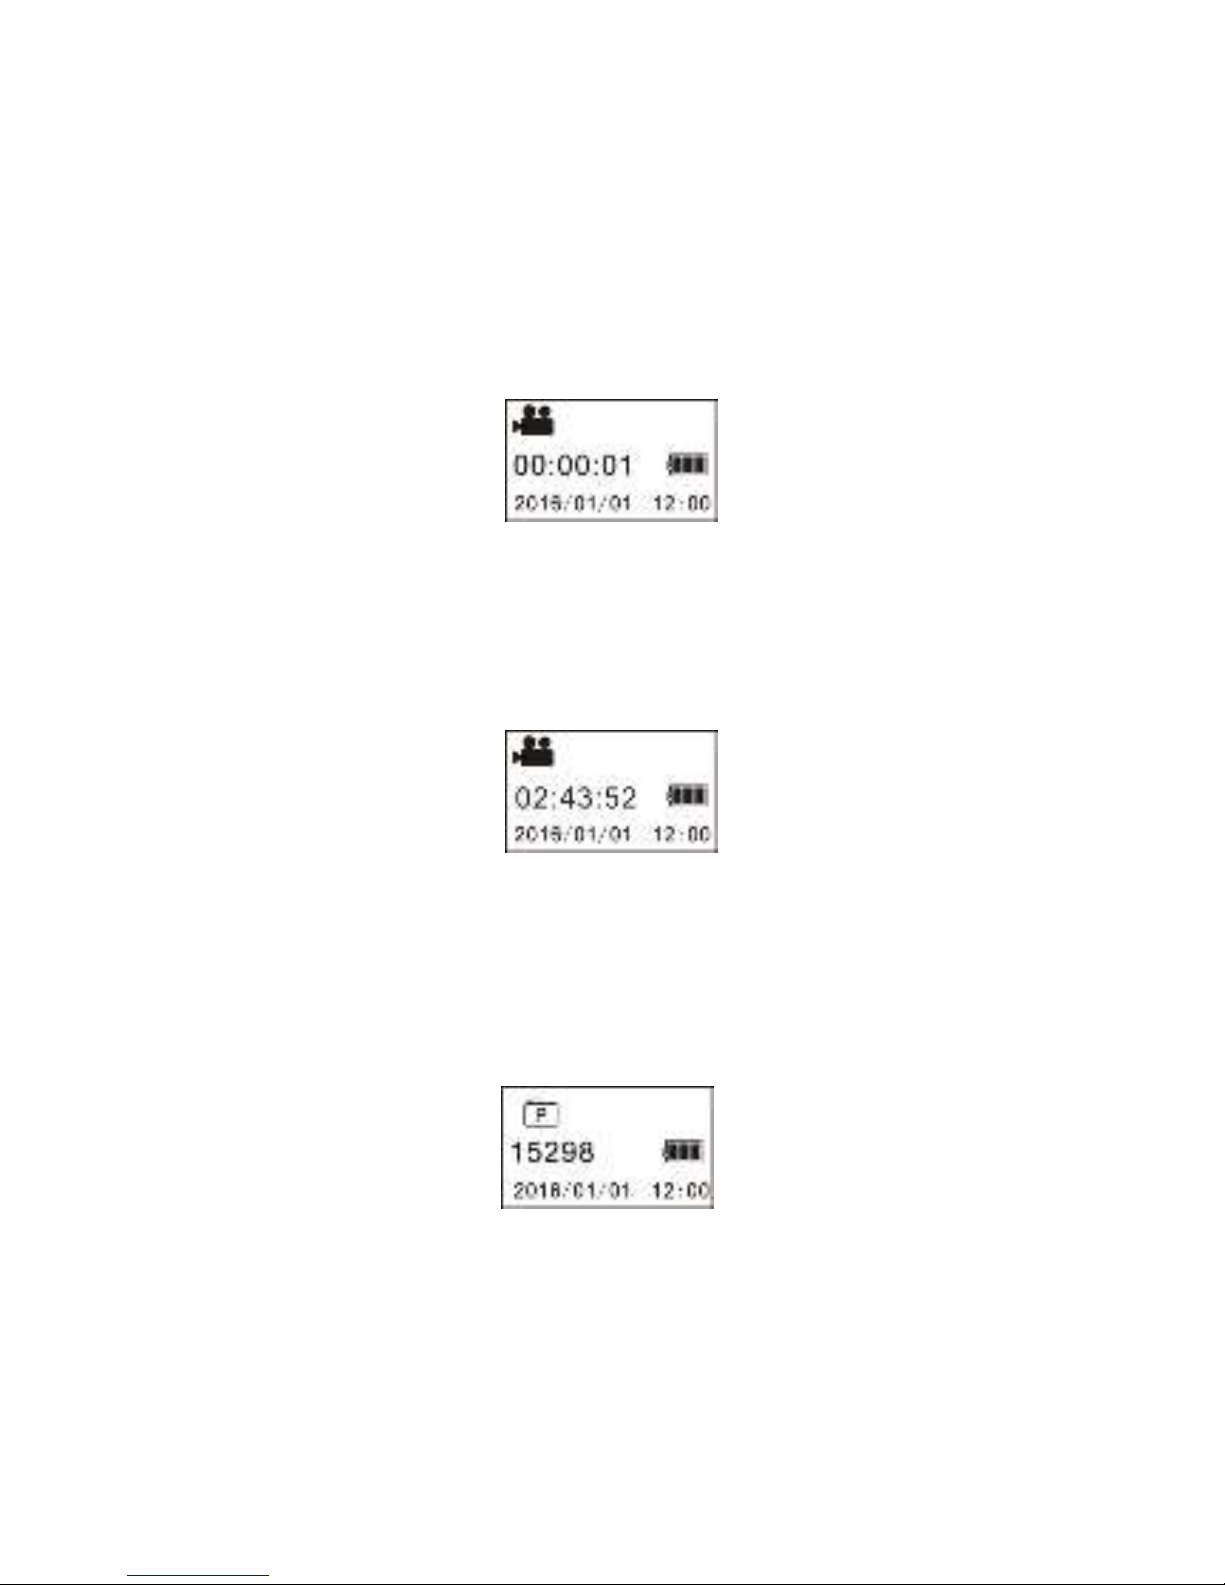
Press the power/mode button to switch between modes.
The corresponding icon will appear on the display.
Start recording: Press Shutter button. The camera will display the
recording’s time.
Stop recording: Press the shutter button to stop. The video will be
stored to the memory card and the display screen will show the
remaining time available on the card.
Photos: In photo mode, press the shutter button to take pictures.
After shooting, the screen will show the estimated number of
pictures available on the card.
Page 8

8
SETTINGS
To access the Settings Menu, press and hold the WIFI button for
about 3 seconds. The screen below will appear.
Navigation
In Menu mode, press the WIFI button to move the cursor down.
Press the shutter button to confirm.
Press and hold the WIFI button for 3 seconds to go back or exit.
Power-save
You may set the camera to enter a power-saving mode after a
certain amount of time. Available options are 1min/3min/5min or
OFF.
Date & Time
Set the camera’s system time and date.
Press the power/mode button to advance to the next unit.
Press the WiFi button to go to the next lower number.
Press the shutter button to exit.
Language
Select the system language
English, Chinese, French, Spanish, Italian, Portuguese, Dutch, or
Russian
Page 9

9
Factory Reset
Restore the factory default settings.
System
Check the camera’s firmware version and microSD card
information. MicroSD info includes speed class, total and
available capacity.
Format
Formats the microSD card.
WARNING: FORMATTING PERMANENTLY ERASES ALL DATA ON THE
MICROSD CARD. MAKE SURE YOU HAVE A BACKUP OF ANY
IMPORTANT FILES, VIDEOS, OR PHOTOS BEFORE FORMATTING.
Page 10

10
VIEWING VR VIDEOS AND PHOTOS
VR videos and photos shot with this camera must be viewed with
the VR viewer or app. They can also be viewed on YouTube 360
or Facebook 360 after going through the drag-and-drop
conversion process explained below.
Auto-Stitching
When shooting photos and videos with multiple lenses the two
images must be “stitched” together. The software and apps,
designed specifically for this camera, perform the stitching
process automatically.
Other apps or viewer will not auto-stitch and will result in a
double-sphere image like this during playback.
VIEWING ON YOUR MOBILE PHONE
Connect the mobile phone and camera via WiFi
STEP 1 - Turn on the camera’s WIFI
Press the WIFI button and release.
The camera will beep and the screen will display “WI-FI ON”,
The next screen will show the camera name “MV_VR_XXX”,
password and the connection status
Note: If the battery is too low, WiFi will not work.
Page 11
11
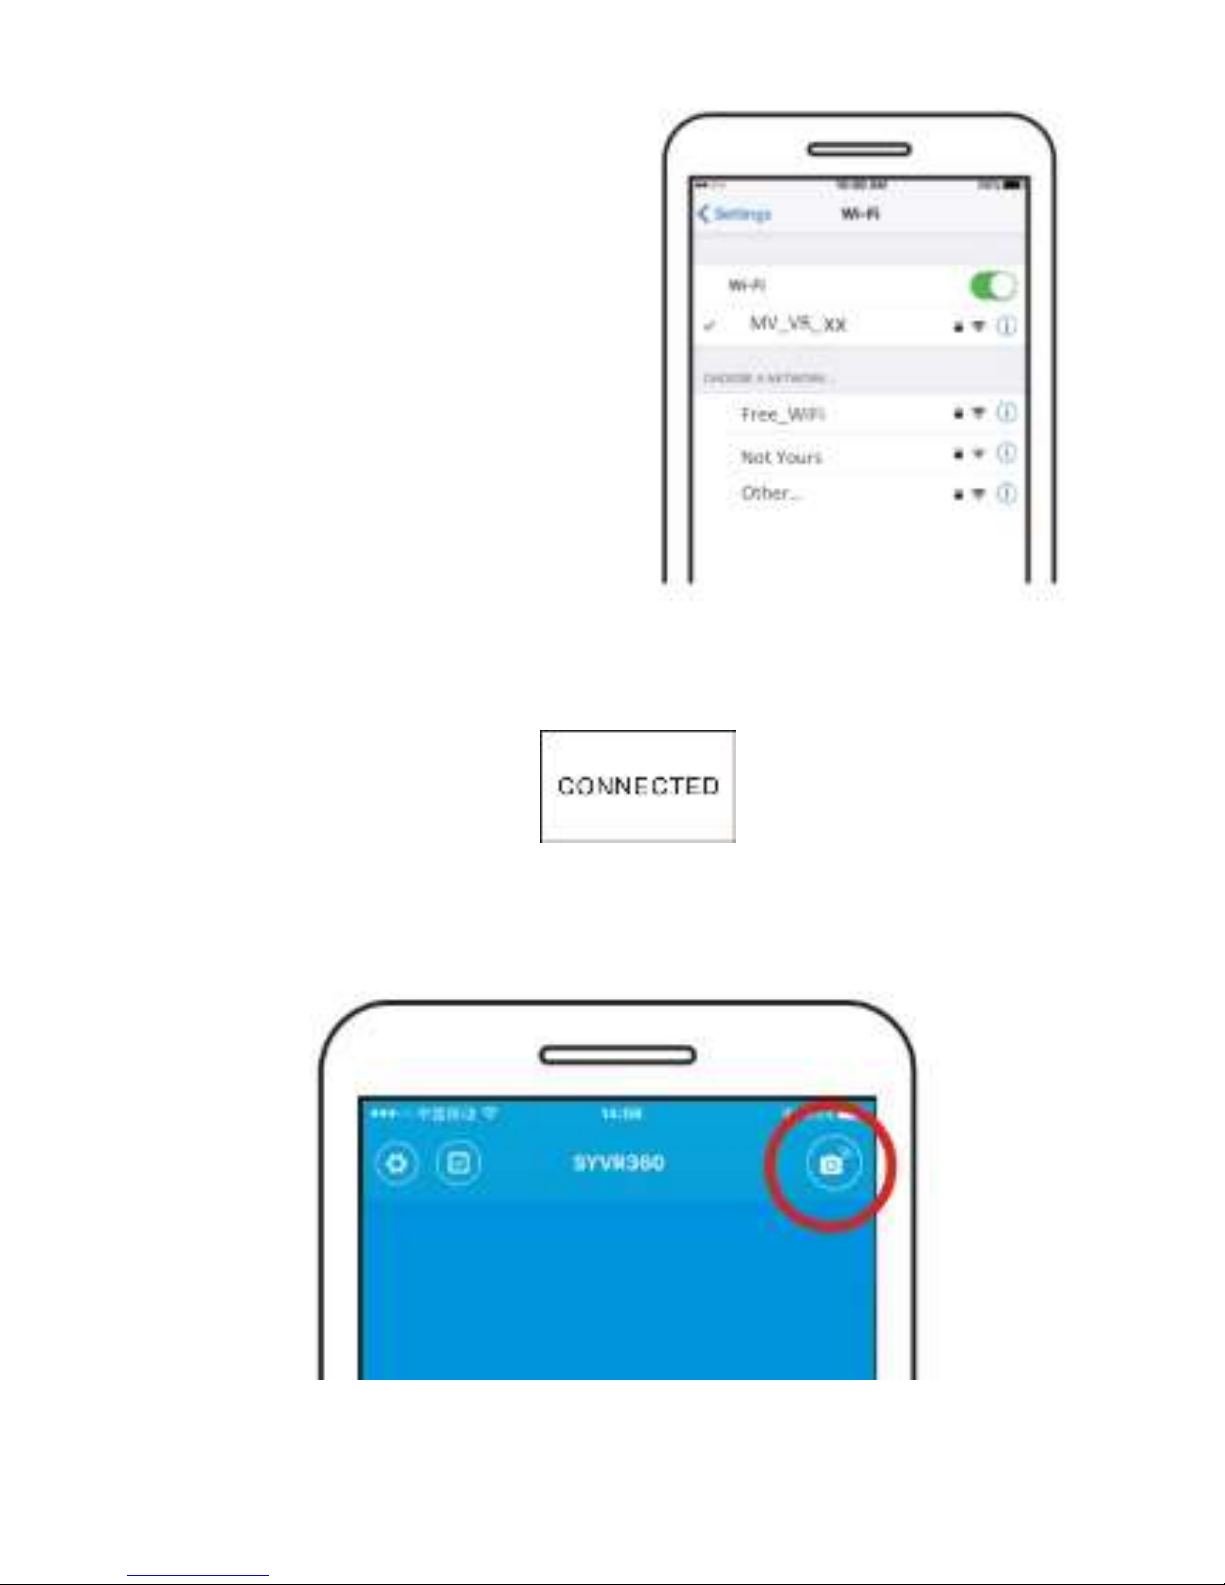
STEP 2 – Go into the phone’s WiFi
settings and select the camera’s
signal.
Password 12345678
You can change the password in
the app setting. Tap on the gear
icon in the lower right corner as
show on the next page.
When connected, the camera will display “CONNECTED”.
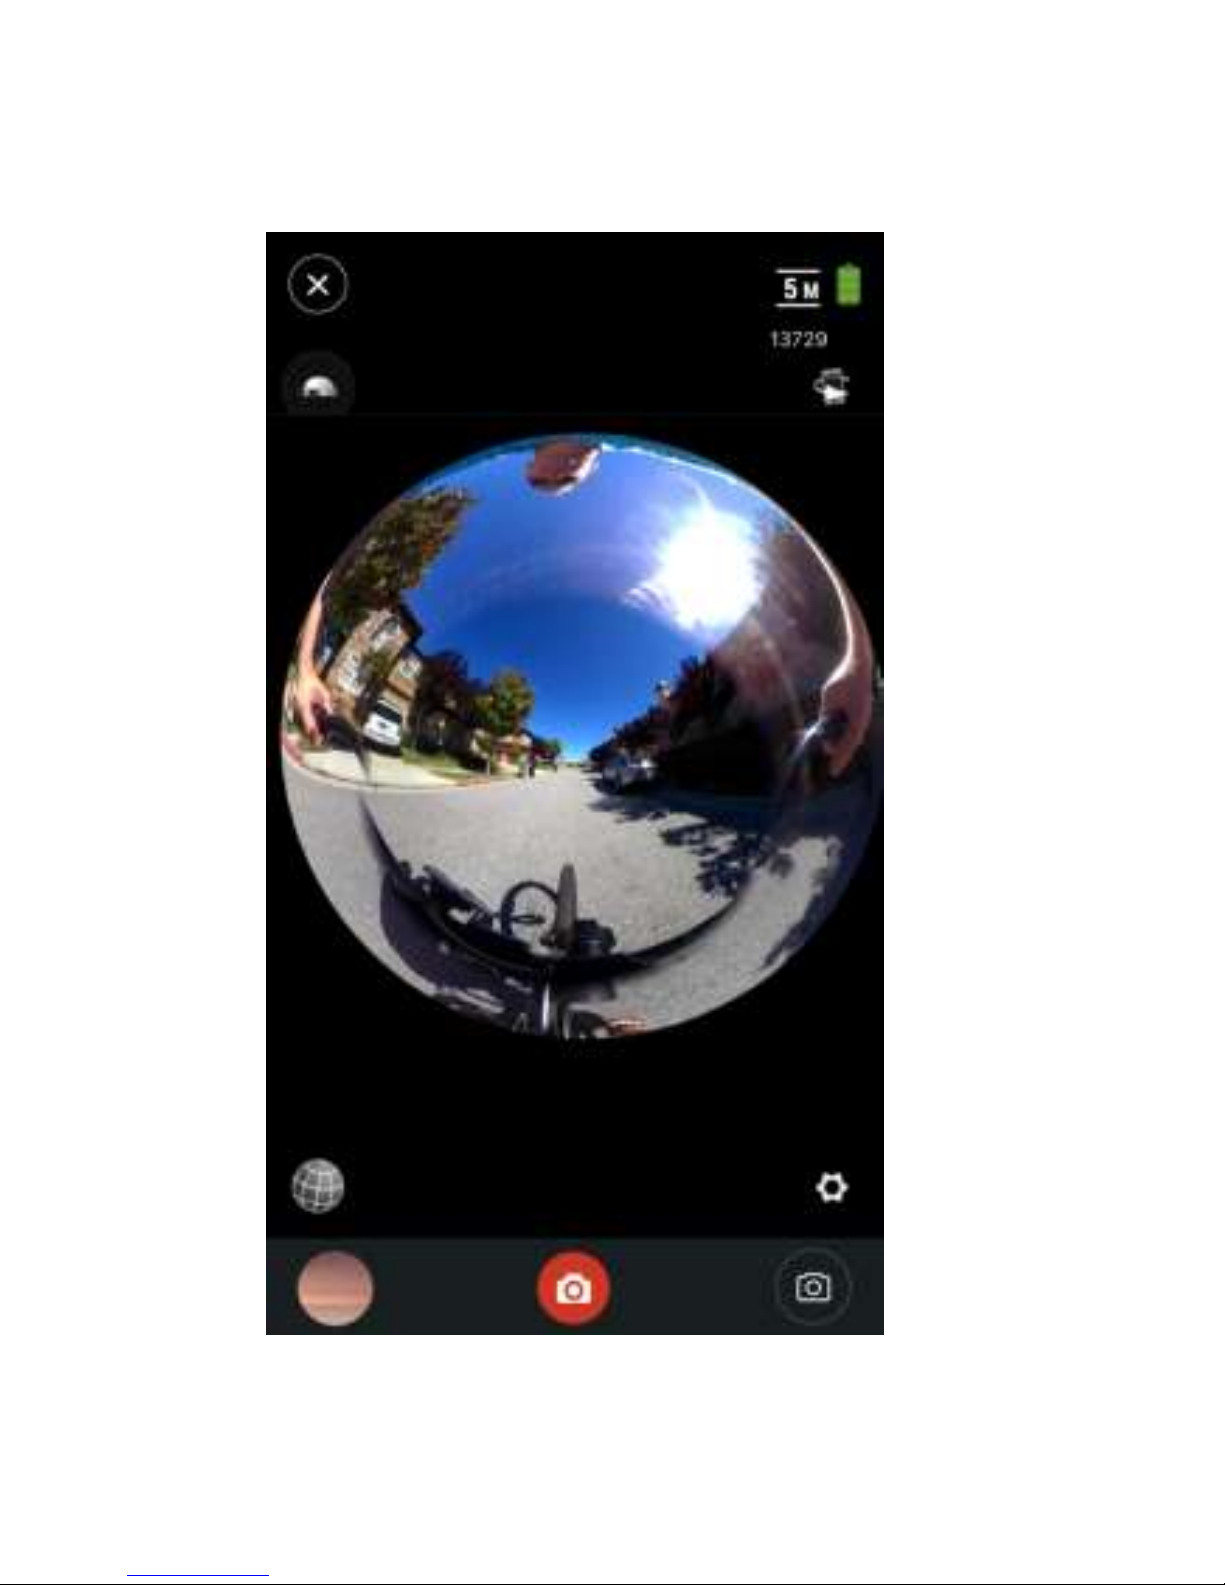
STEP 3 – Open the App
Tap the upper right corner to “Search for Camera”.
Page 12
12
STEP 4 – After the connection is made, the camera will be ready to
shoot pictures or record video.
To exit this mode, select the icon in the lower left corner.
Page 13
13
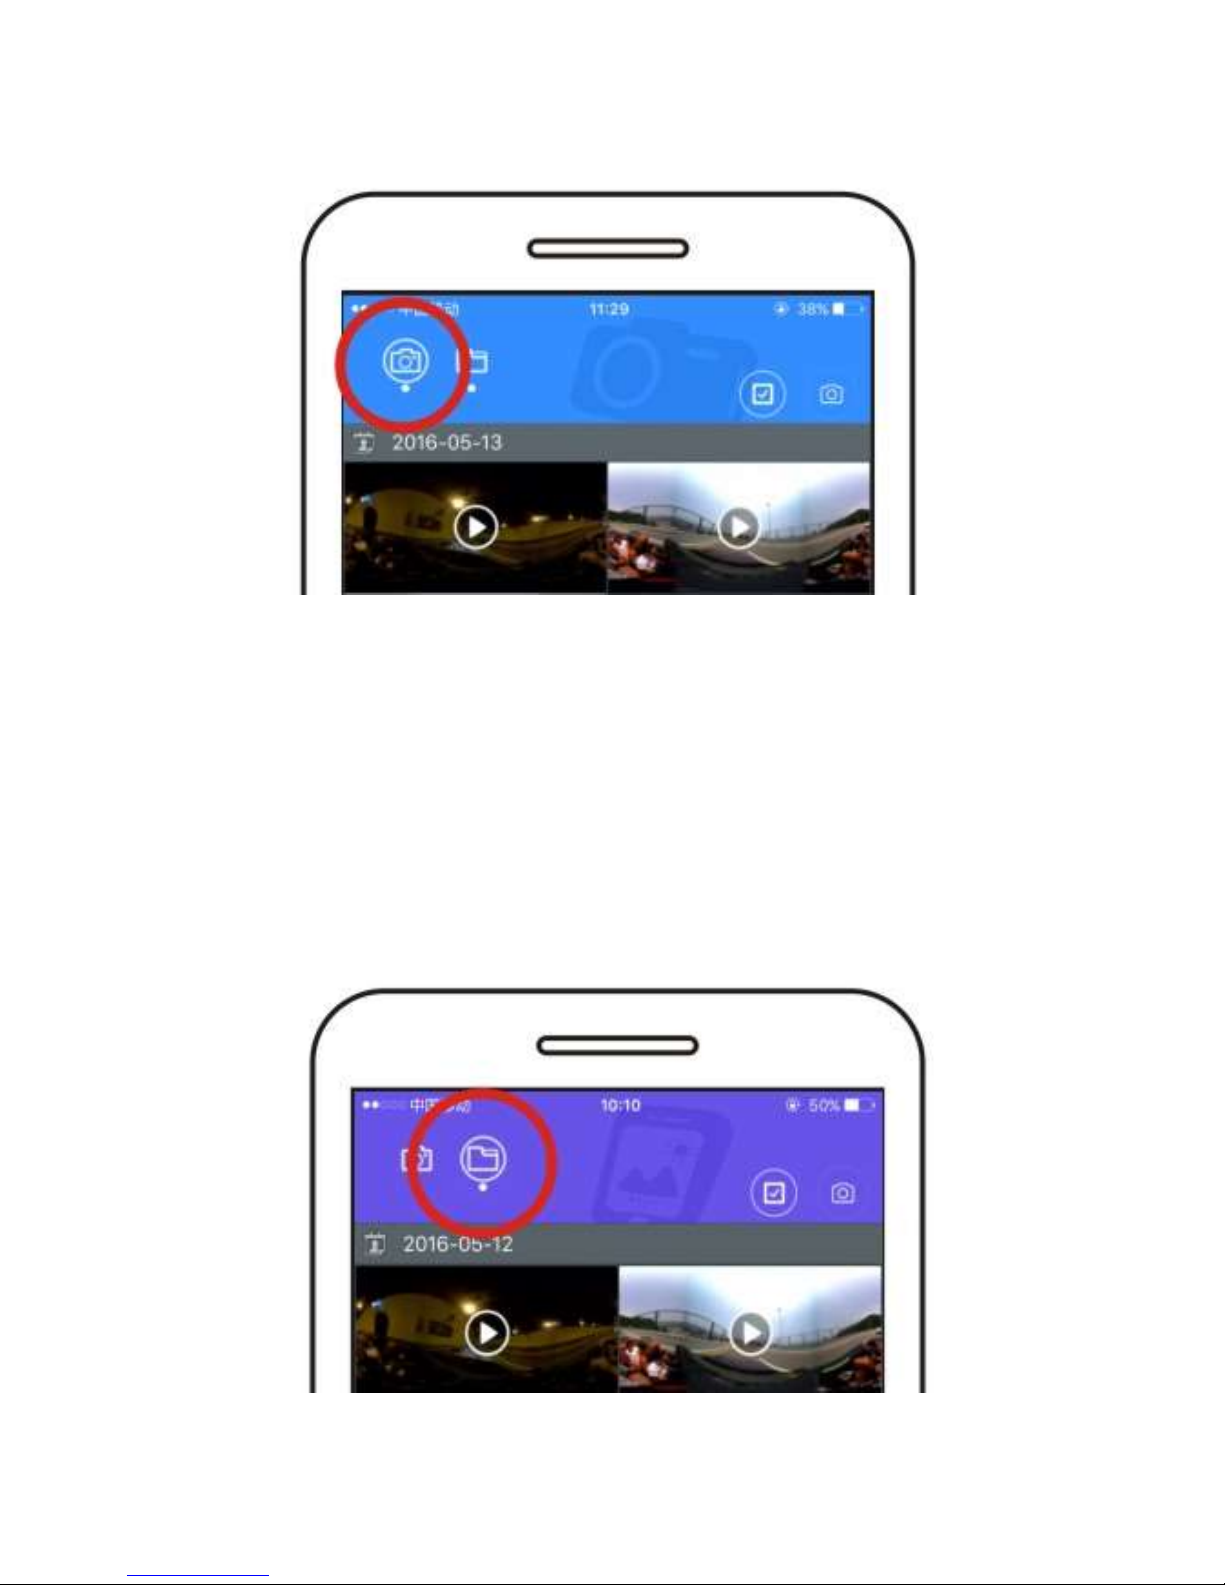
STEP 5 – Select the camera icon to access the camera’s microSD
card.
Tap the check mark inside the square to select multiple files.
Select the files to be downloaded.
Tap the down arrow.
Confirm the download and the files will be copied to the phone.
Tap the four squares in the upper left corner to exit.
STEP 6 – Tap the folder icon to access the VR files on the phone. To
view, select the file and tap to play.
Page 14
14
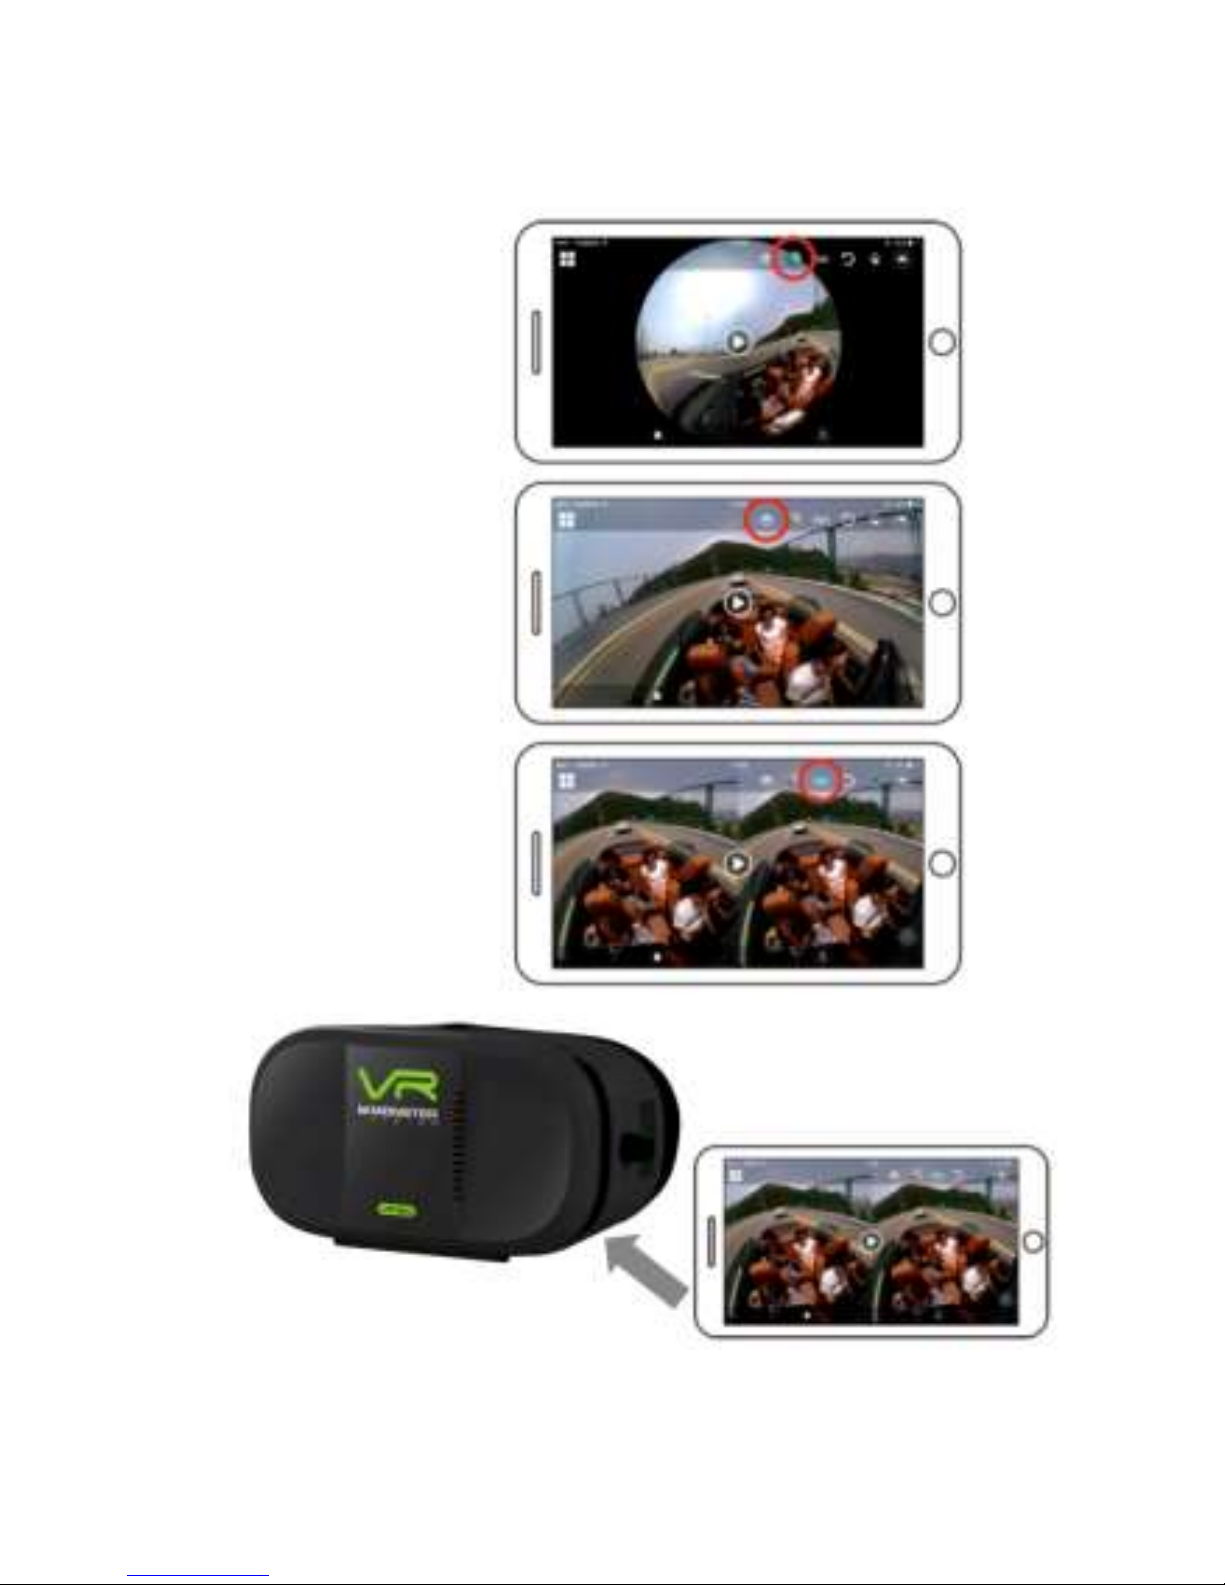
APP PLAYBACK MODES
Spherical
Flat
Goggle
Page 15
15
COMPUTER PLAYBACK
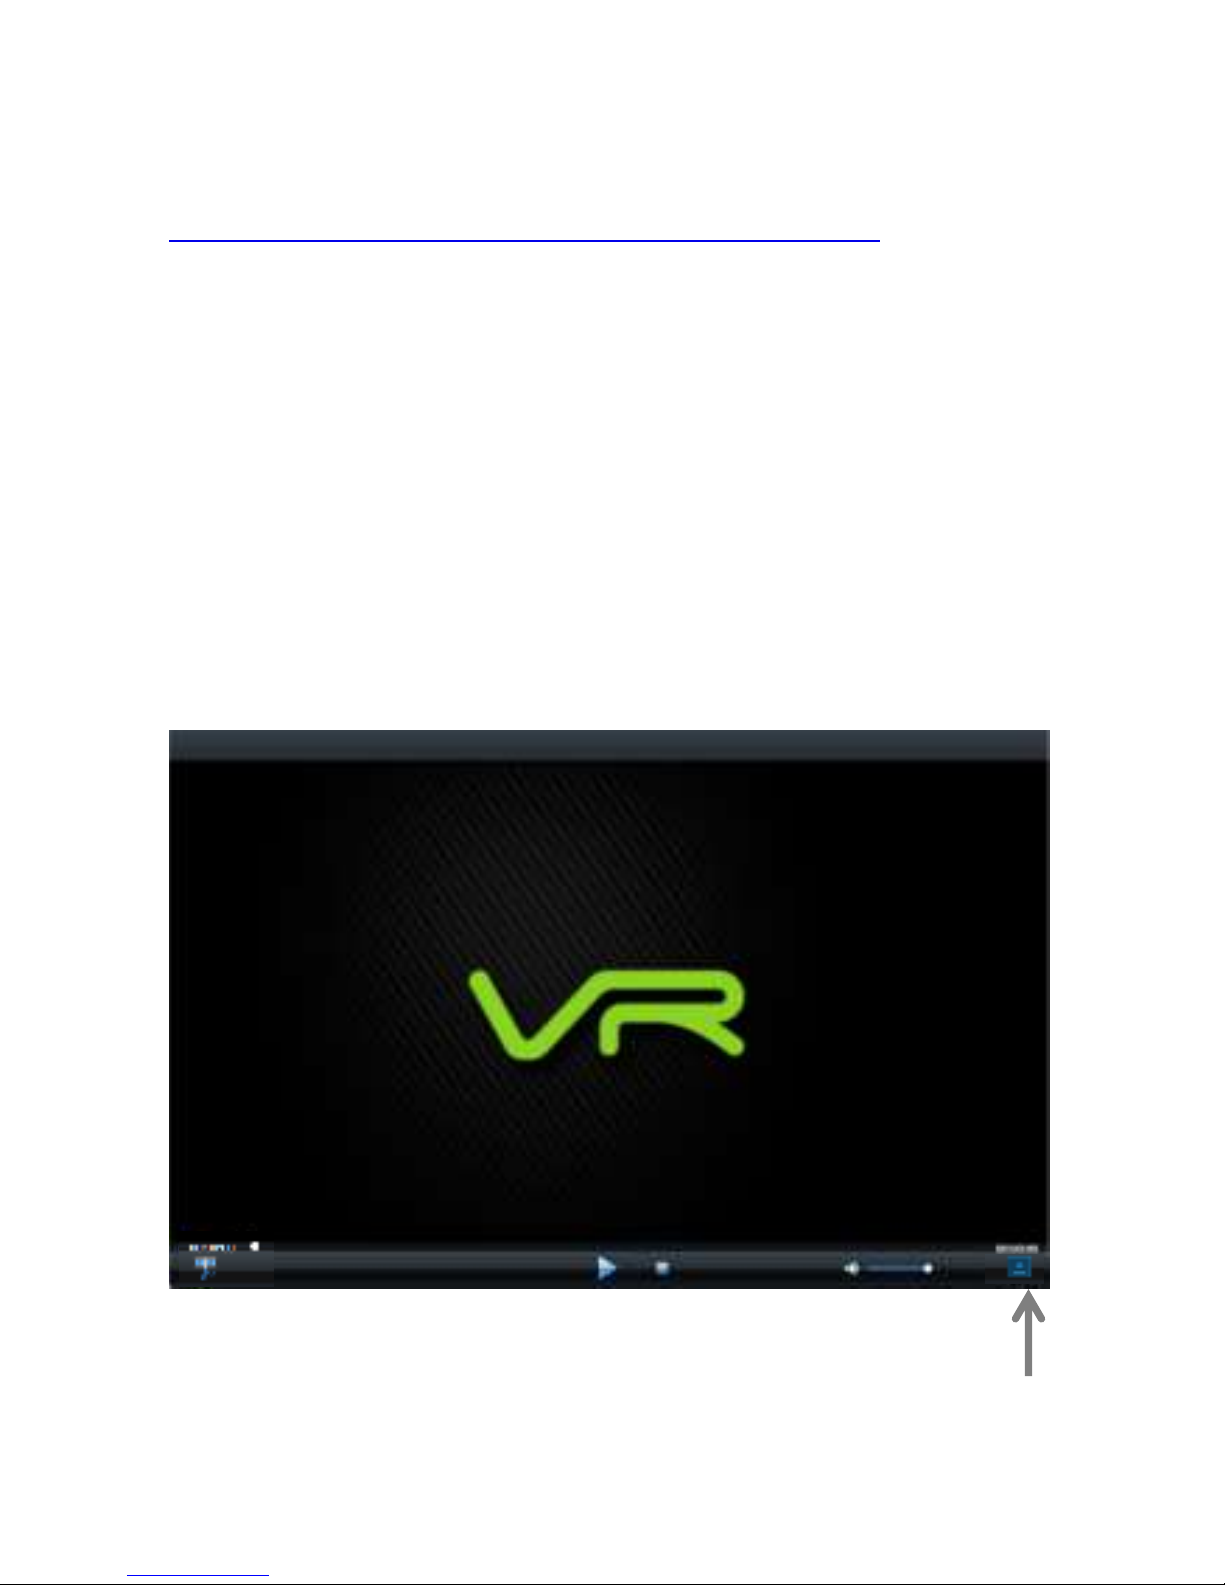
First - Download and install the “Monster Vision VR Viewer”.
https://monsterdigital.com/pages/applications
Note: If you are on a Mac you may need to enter SYSTEM
PREFERENCES, SECURITY & PRIVACY to allow the app to open.
Next – Open the viewer, then load a video or photo.
The memory card can be connected to the computer several
different ways.
- USB cable from the camera to computer
“MSDC” will appear on the camera screen
- USB card reader
- SD card adapter
Click the icon in the lower right corner to choose a file.
Page 16
16
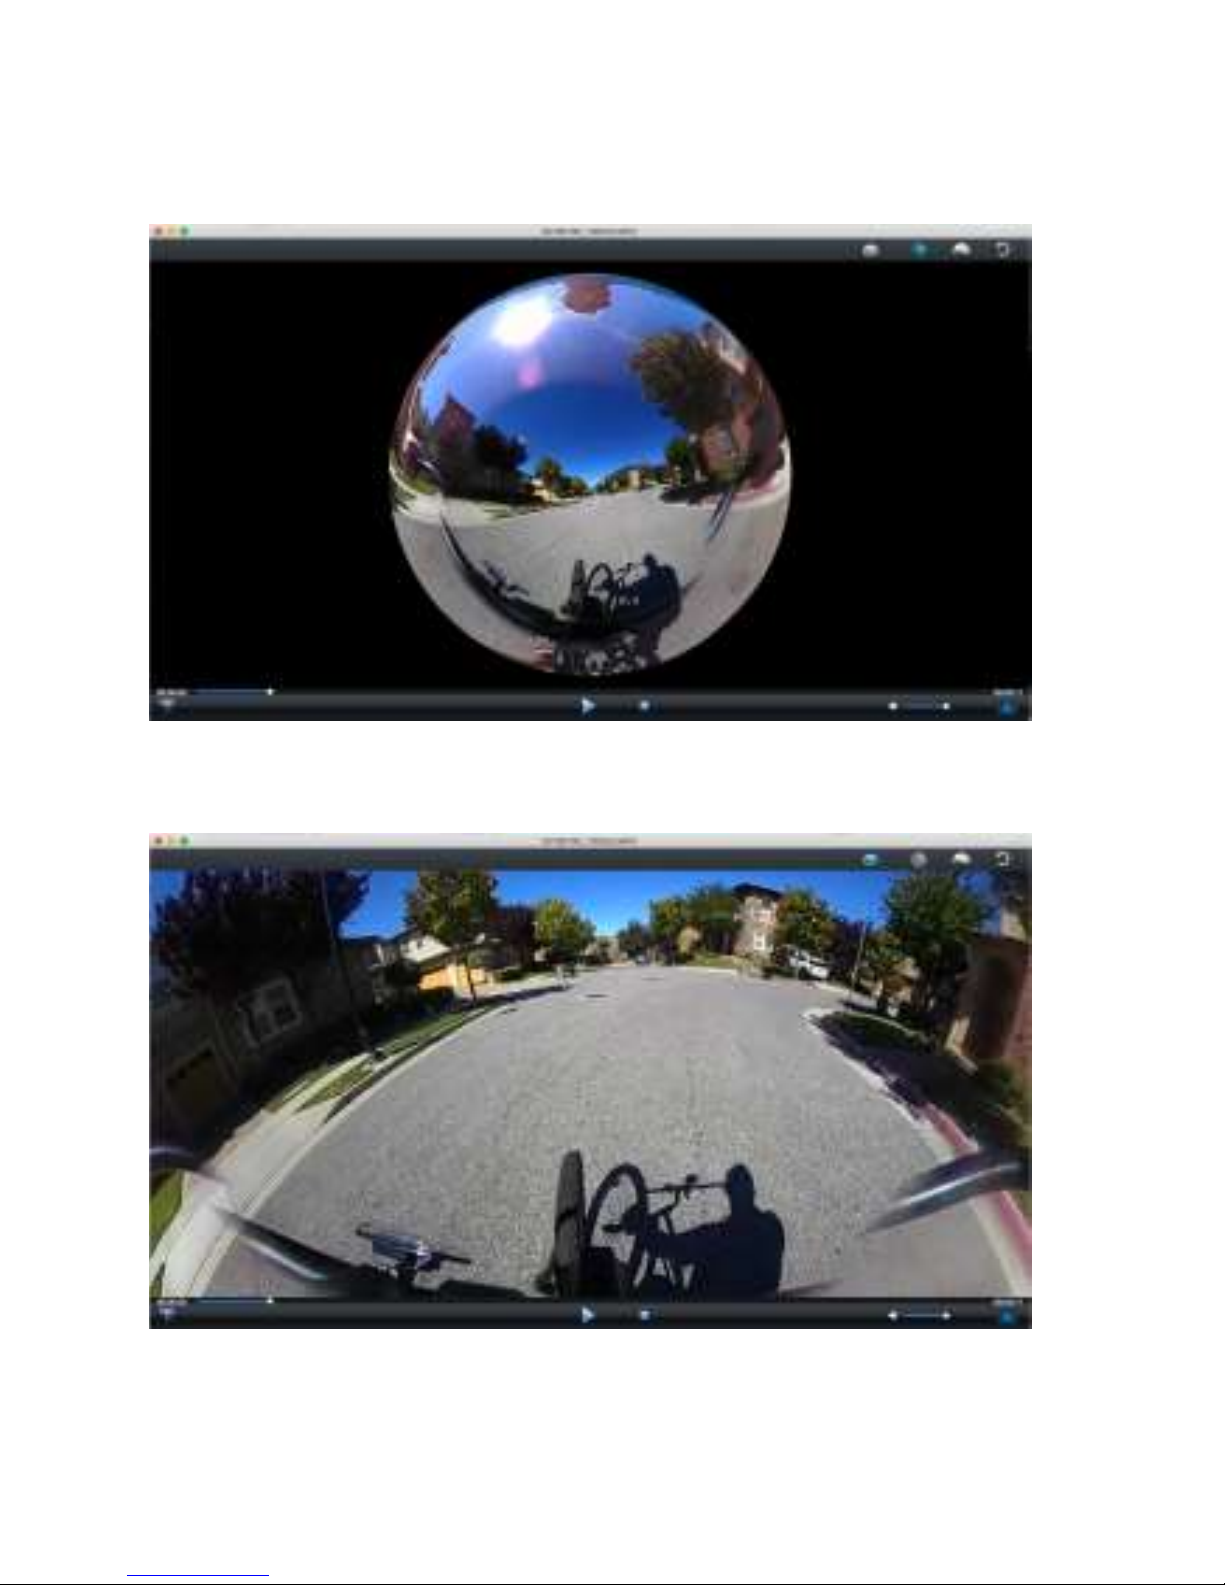
Playback will start in a spherical view setting.
Left click on the image and move the cursor to look around.
The blue globe highlighted in the upper right of the screen
indicates the playback setting.
Click the icon to its LEFT (a dome with a double arrow) to flatten
out the image as shown.
Page 17
17
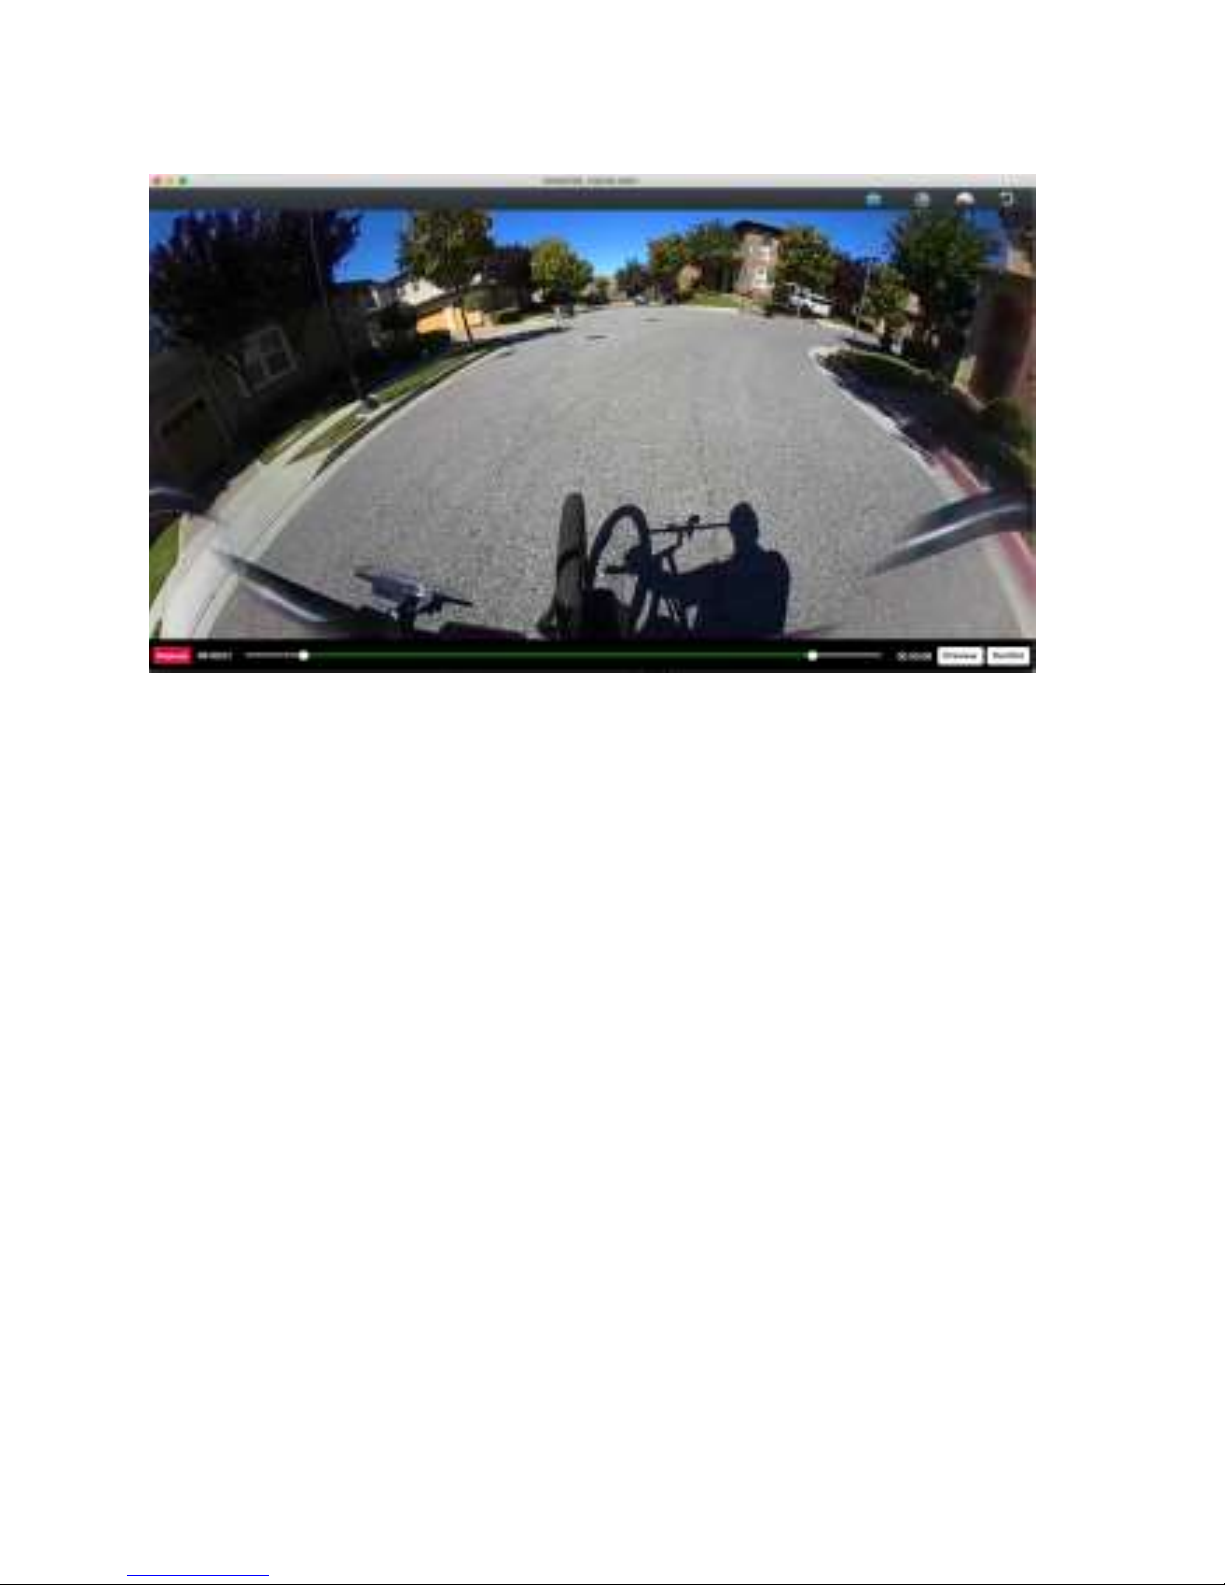
TRIMMING, CONVERTING and UPLOADING
Clipping points can be selected at either the front or back of the
video, or both.
Slide the white dot up and down the video timeline to select the
trim point.
You can preview the clip by clicking on the “preview” button to
the right.
Page 18
18
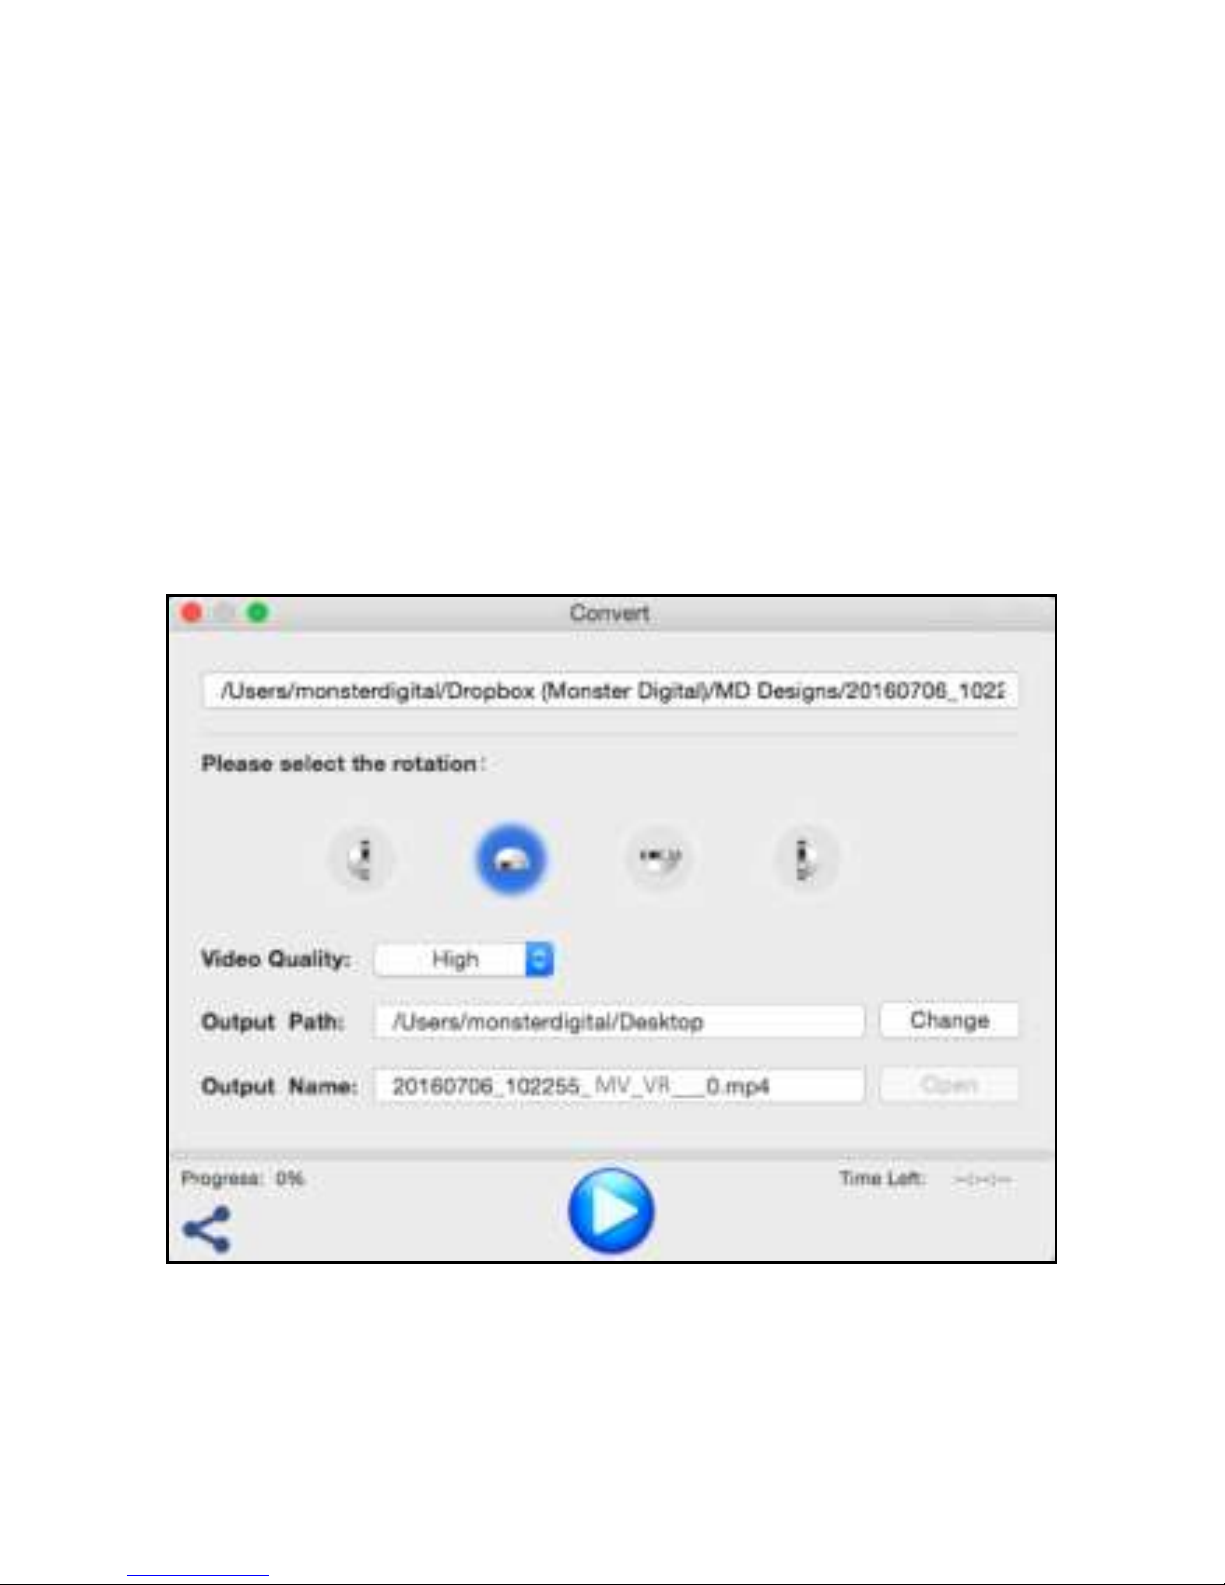
CONVERTING
Press the CONFIRM button in the bottom right corner.
A window will open with several options to choose from.
Be sure to select “HIGH” under Video Quality.
Confirm or change the Output Path.
Note: the “Output” or file name will be automatically generated
but, like any other file, you can rename it after the file is created.
Press the big blue button in the lower center section of the
window to start the conversion.
Progress is displayed on the bar above the button.
Page 19
19
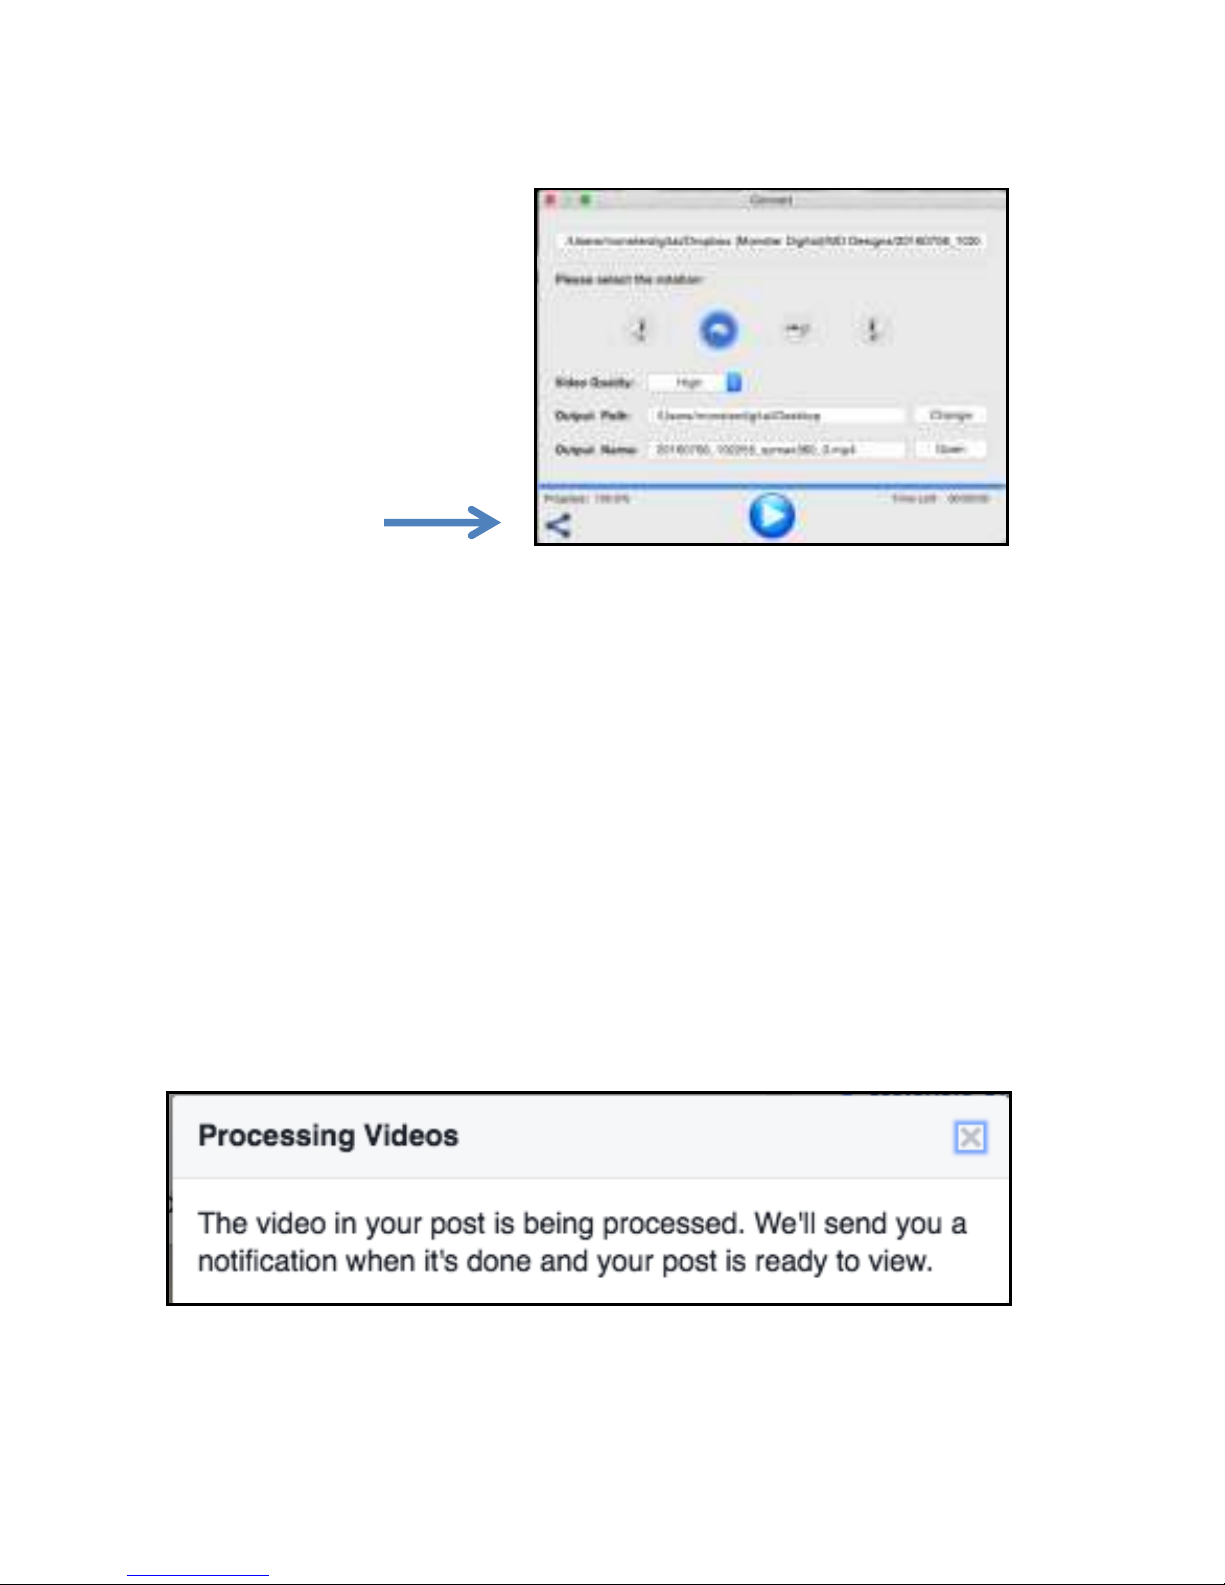
UPLOADING
Click the share button in
the bottom left corner of
the window.
Facebook
Click the Facebook icon and Facebook will open in your browser.
Click “Photo/Video” and select the file you just created.
Select the appropriate share setting
Say something about the video if you like
Finally click POST
Facebook will notify you when the post is available.
It will take a few minutes for Facebook to process the VR video.
Page 20
20
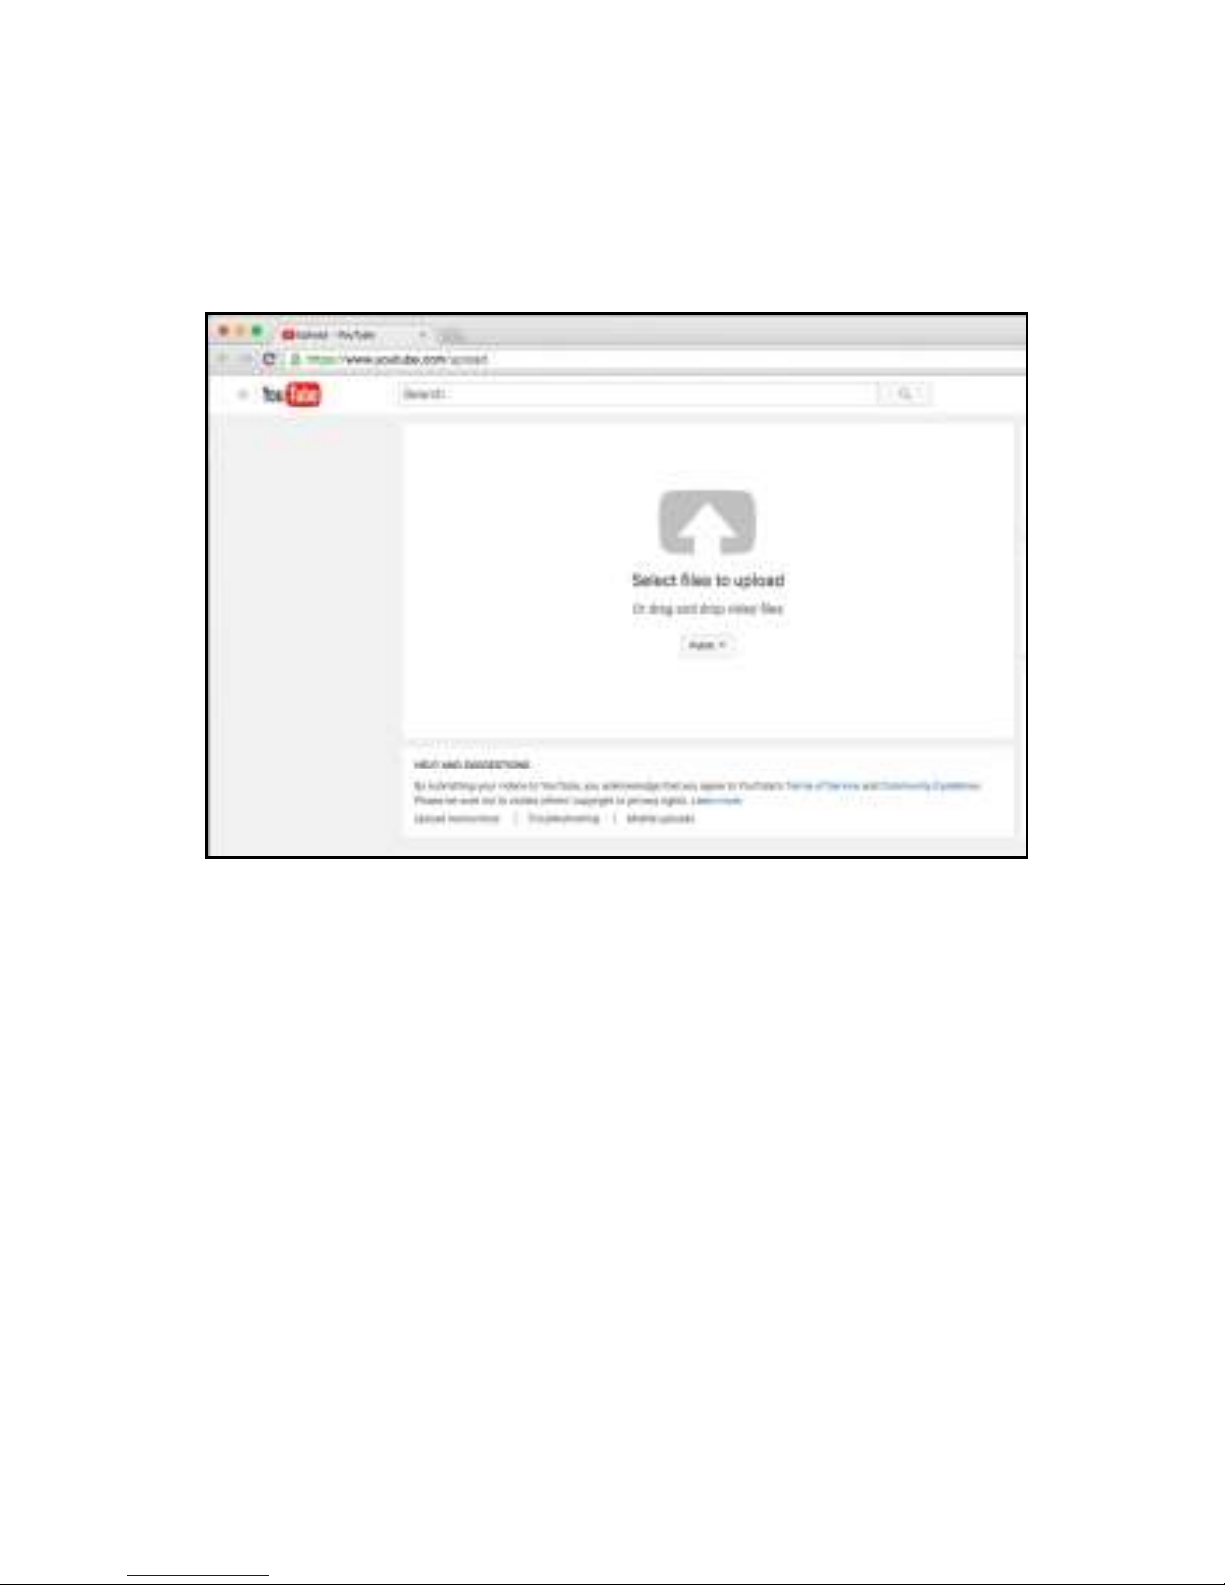
YouTube
Click the YouTube icon and the YouTube upload page will open.
Click on the white arrow in the center of the window.
Select the file you just created.
Like any other upload, add tags, a description and determine the
sharing criteria then click “publish”.
Page 21
21
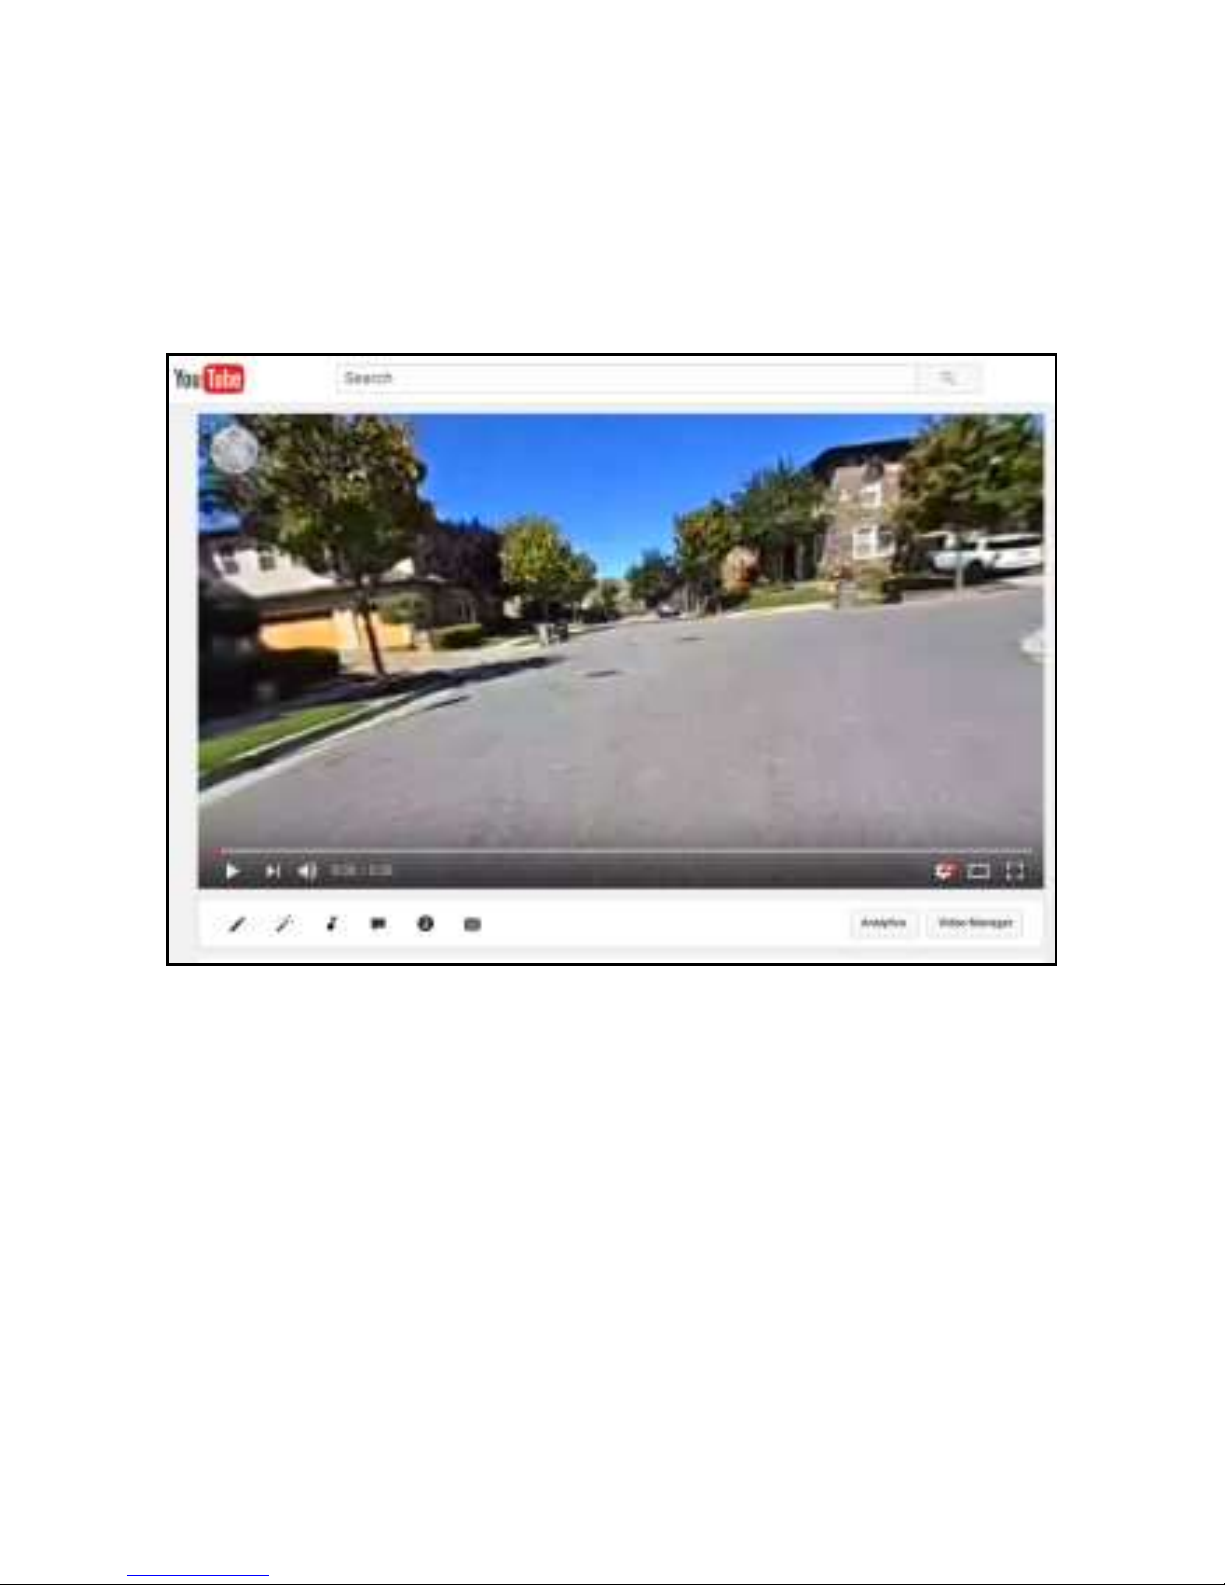
NOTE: It may take 10-15 minutes for YouTube to process the video
after it has been published. This is not a visible process like the
uploading procedure. Just wait a few minutes, keep refreshing
the page and be patient. The final 360 video will have a
directional button in the upper left corner as shown below.
ALTERNATE METHODS OF UPLOADING
You can also go to Facebook or YouTube and upload the file like
any other video.
We found video websites compress files differently so the
playback quality will vary.
Be sure to set YouTube playback setting to “Auto1080”.
Click on the gear icon with red HD in the lower right corner of the
YouTube window to adjust this setting.
Page 22
22
Accessories
We include accessories with the camera so you get great shots
right out of the box. Additional accessories are available on our
website.
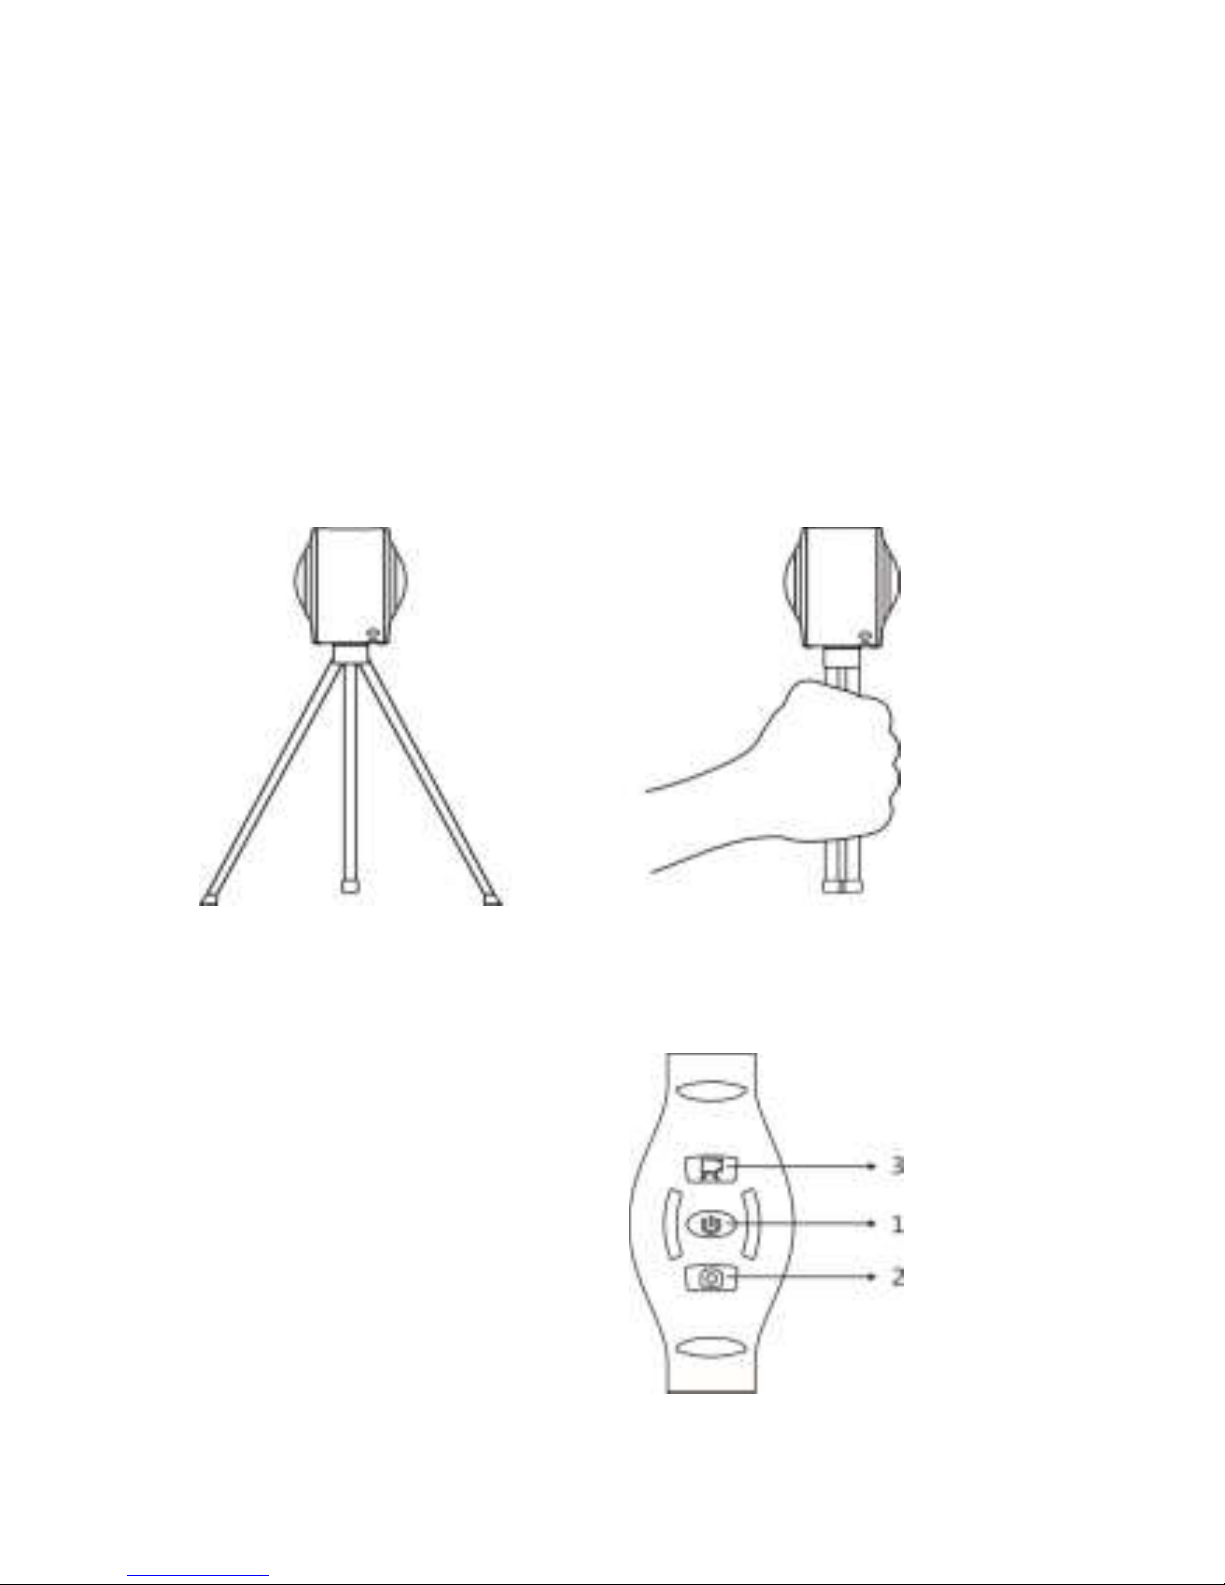
Tripod: Screw the tripod mount into the threaded hole on the
bottom of the camera. The tripod can serve as both a stand and
as a handle. Note that the camera has a small area around its
edge that is not visible in recordings.
Tripod Hand hold the Tripod
OPTIONAL WATCH REMOTE
(not included, available separately)
1. Power
2. Photo
3. Video
Page 23
23
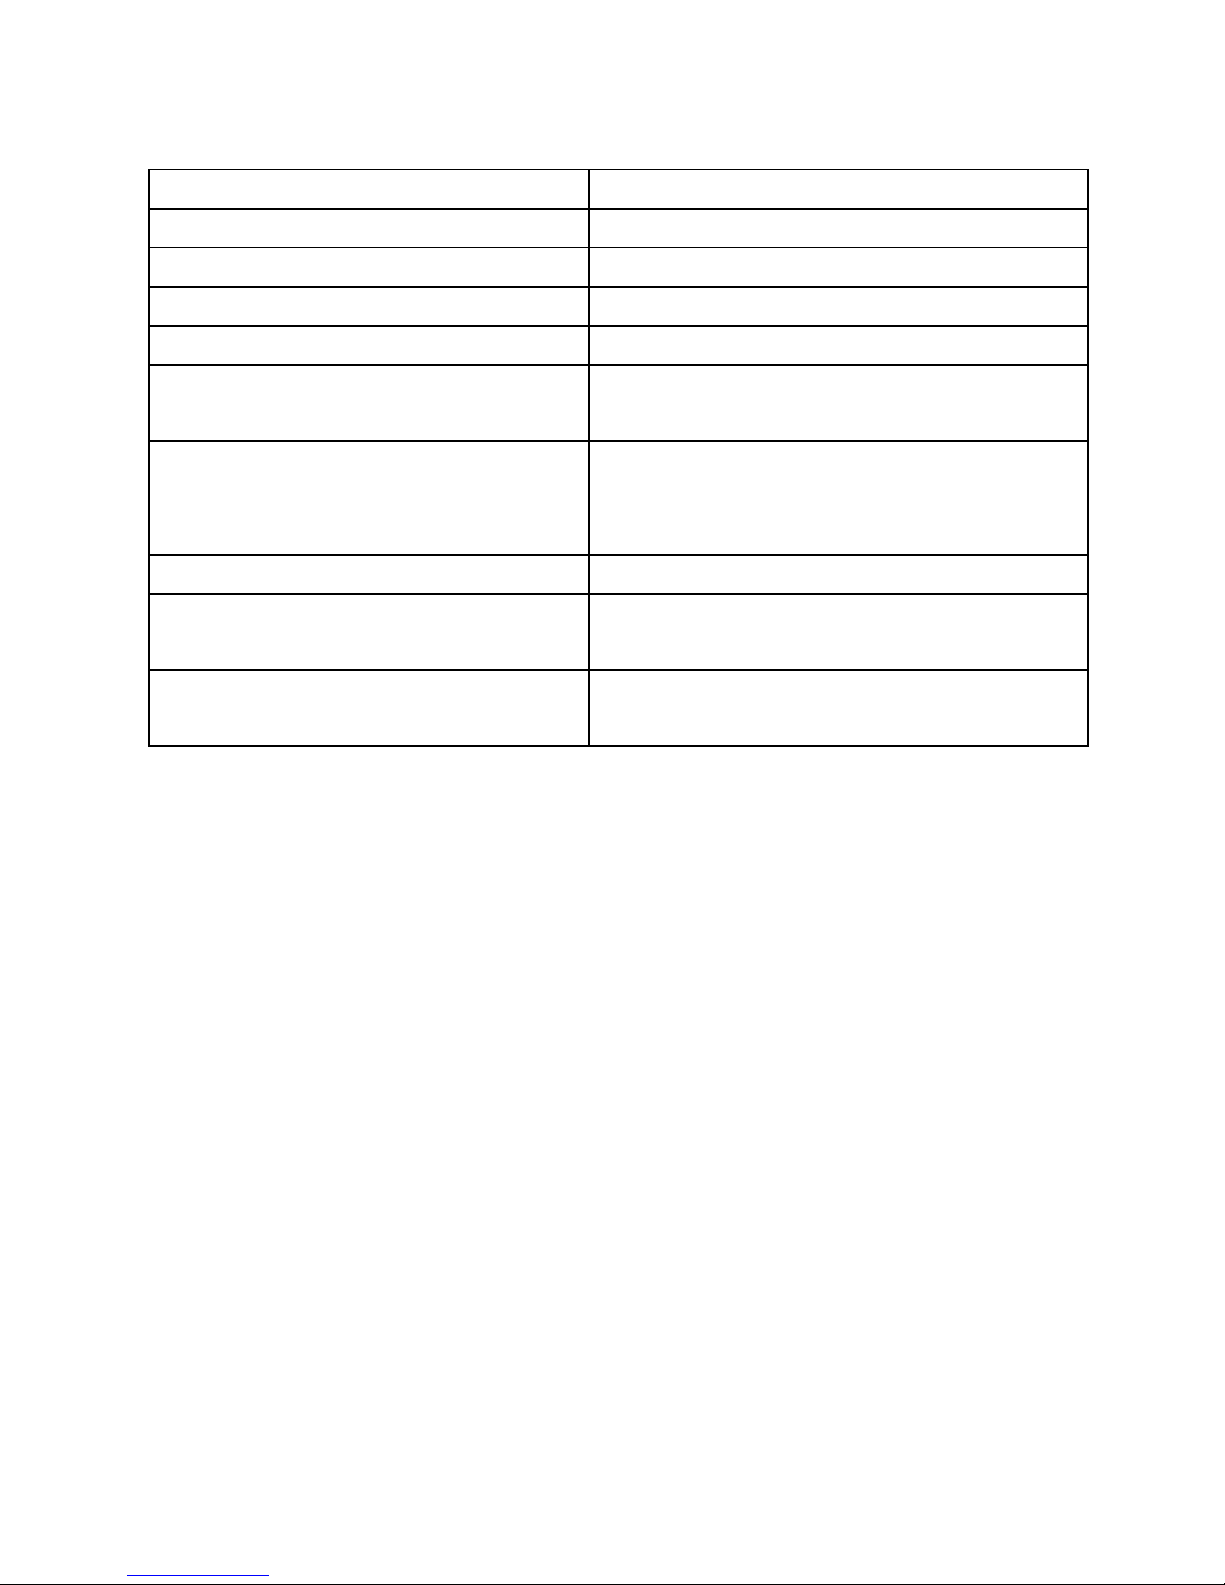
Specifications
Image sensors
2x 4.0MP (CMOS)
Functional modes
video, photo
Lens
F2.0 f=1.1mm
Video resolution
1920x960 (30fps)
Picture resolution
3008x1504
File format
Video: H.264 (MOV)
Image: JPG
Memory
microSD card
no internal memory
32GB maximum capacity
USB interface
High-speed USB 2.0
Power supply
Built-in lithium ion battery
1500mAh, 3.8v, 5.7Wh
Camera Dimensions (mm/g)
(in/oz.)
60.0 w x 50.0 h x 50.0 d, 106g
2.36 w x 1.96 h x 1.96 d, 3.7oz
Warning
The camera battery is built-in. It is not removable.
Do not light the camera on fire or it could explode.
The camera may get hot when operating for along period
of time or when exposed to direct sunlight. This is normal,
however the operating temperature maximum is 40C, 113F.
If video recording while the camera is charging, the
temperature may exceed the operating maximum.
In temperatures lower than 0℃ (32F) the camera may not
turn on or operate properly.
Do not use the camera in extreme humidity.
Do not put the camera directly into water.
Use the water case sold separately.
Protect the lenses to prevent scratching or damage.
RESET: If the camera stops working or fails to respond, use a
push-pin to press the RESET button. It can be a tight fit.
 Loading...