

Monstertech MTX HOTAS Instruction Manual

MTX HOTAS
Instruction Manual EN
MTX HOTAS INSTRUCTION MANUAL MTX HOTAS INSTRUCTION MANUAL
1 General information
This guide is meant to help you assemble your Sim Rig as smoothly as possible. If you still
have questions about the assembly process, please contact info@monstertech.de or support@
monstertechusa.com.
1.1 Before you start
Before you start the assembly, we are going to look at some common assembly steps and often used parts, as well as required tools.
1.1.1 Required Tools
For our assembly, we need following tools*:
- Hex key set with ball head with extension
- Rubber or plastic mallet
- Flat head screwdriver
- Tape measure w/ millimeters
*Tools are not included with the Sim Rig
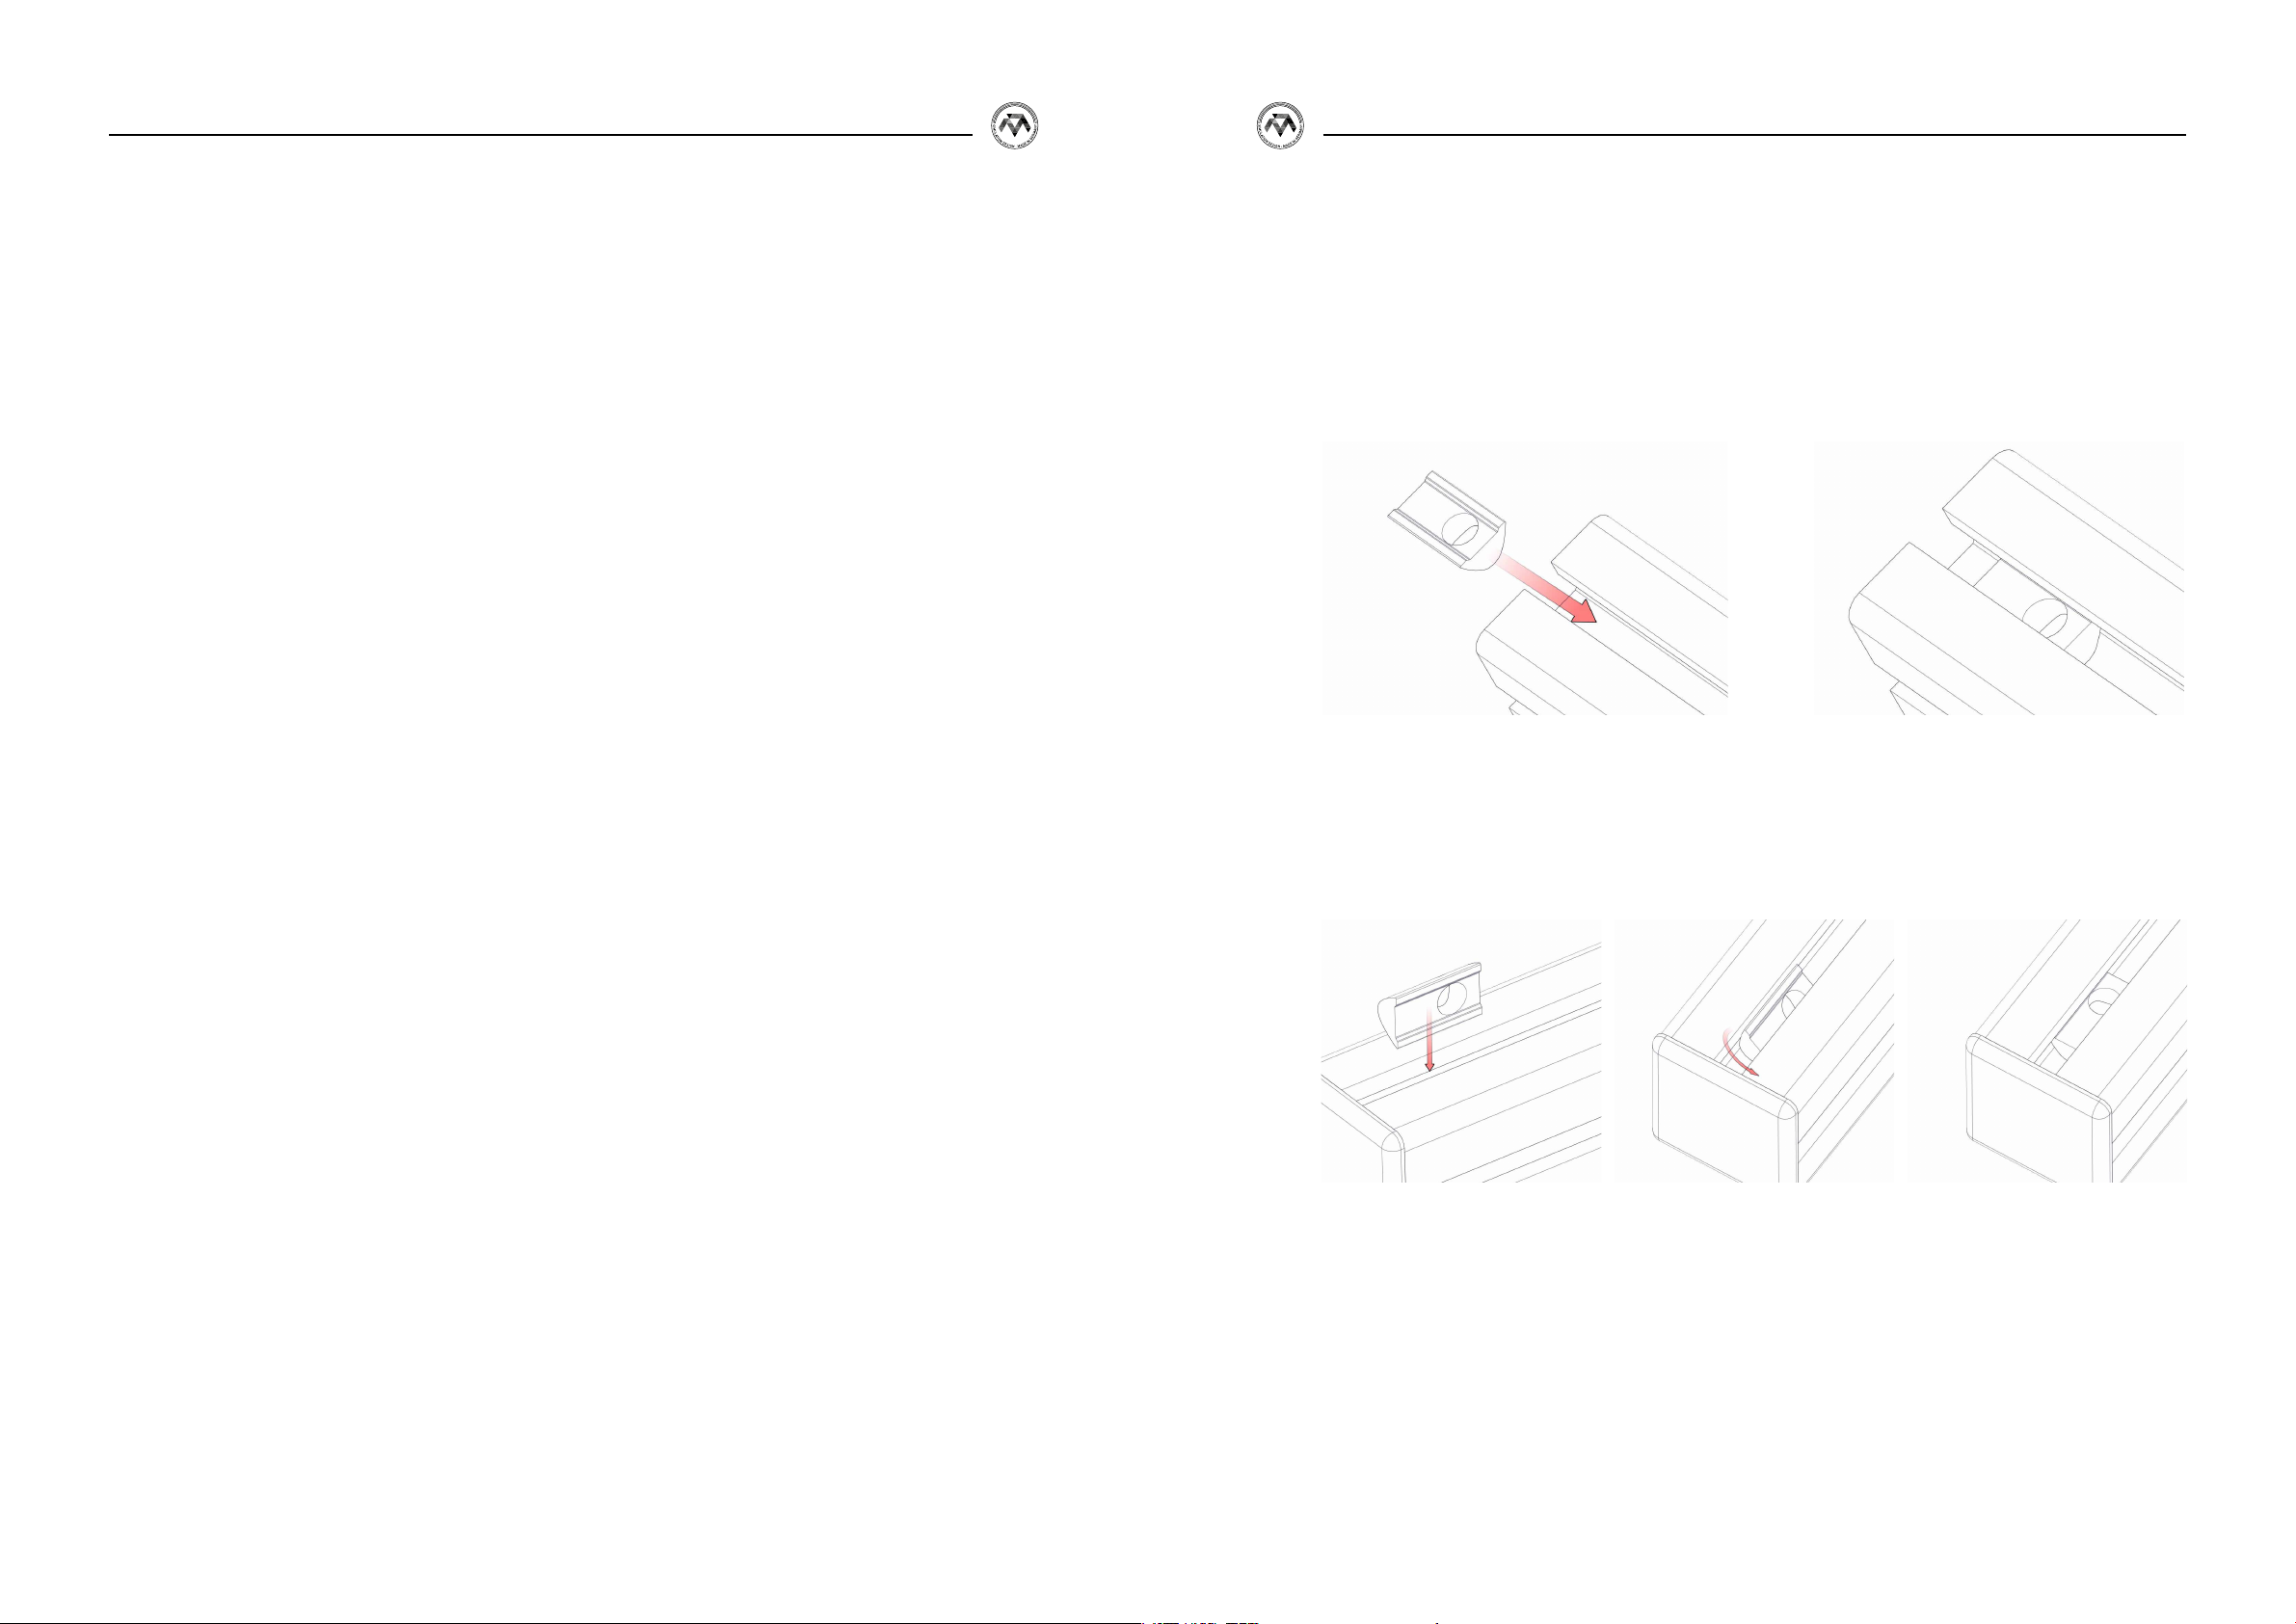
1.1.2 Inserting T-Nut into Profile
There are two ways to insert the M8 T-Nuts into the respective prole groove; refer to Figure 1
and 2 respectively.
Figure 1: Slide in from side
Figure 2: Rotate in from top
2 3
MTX HOTAS INSTRUCTION MANUAL MTX HOTAS INSTRUCTION MANUAL
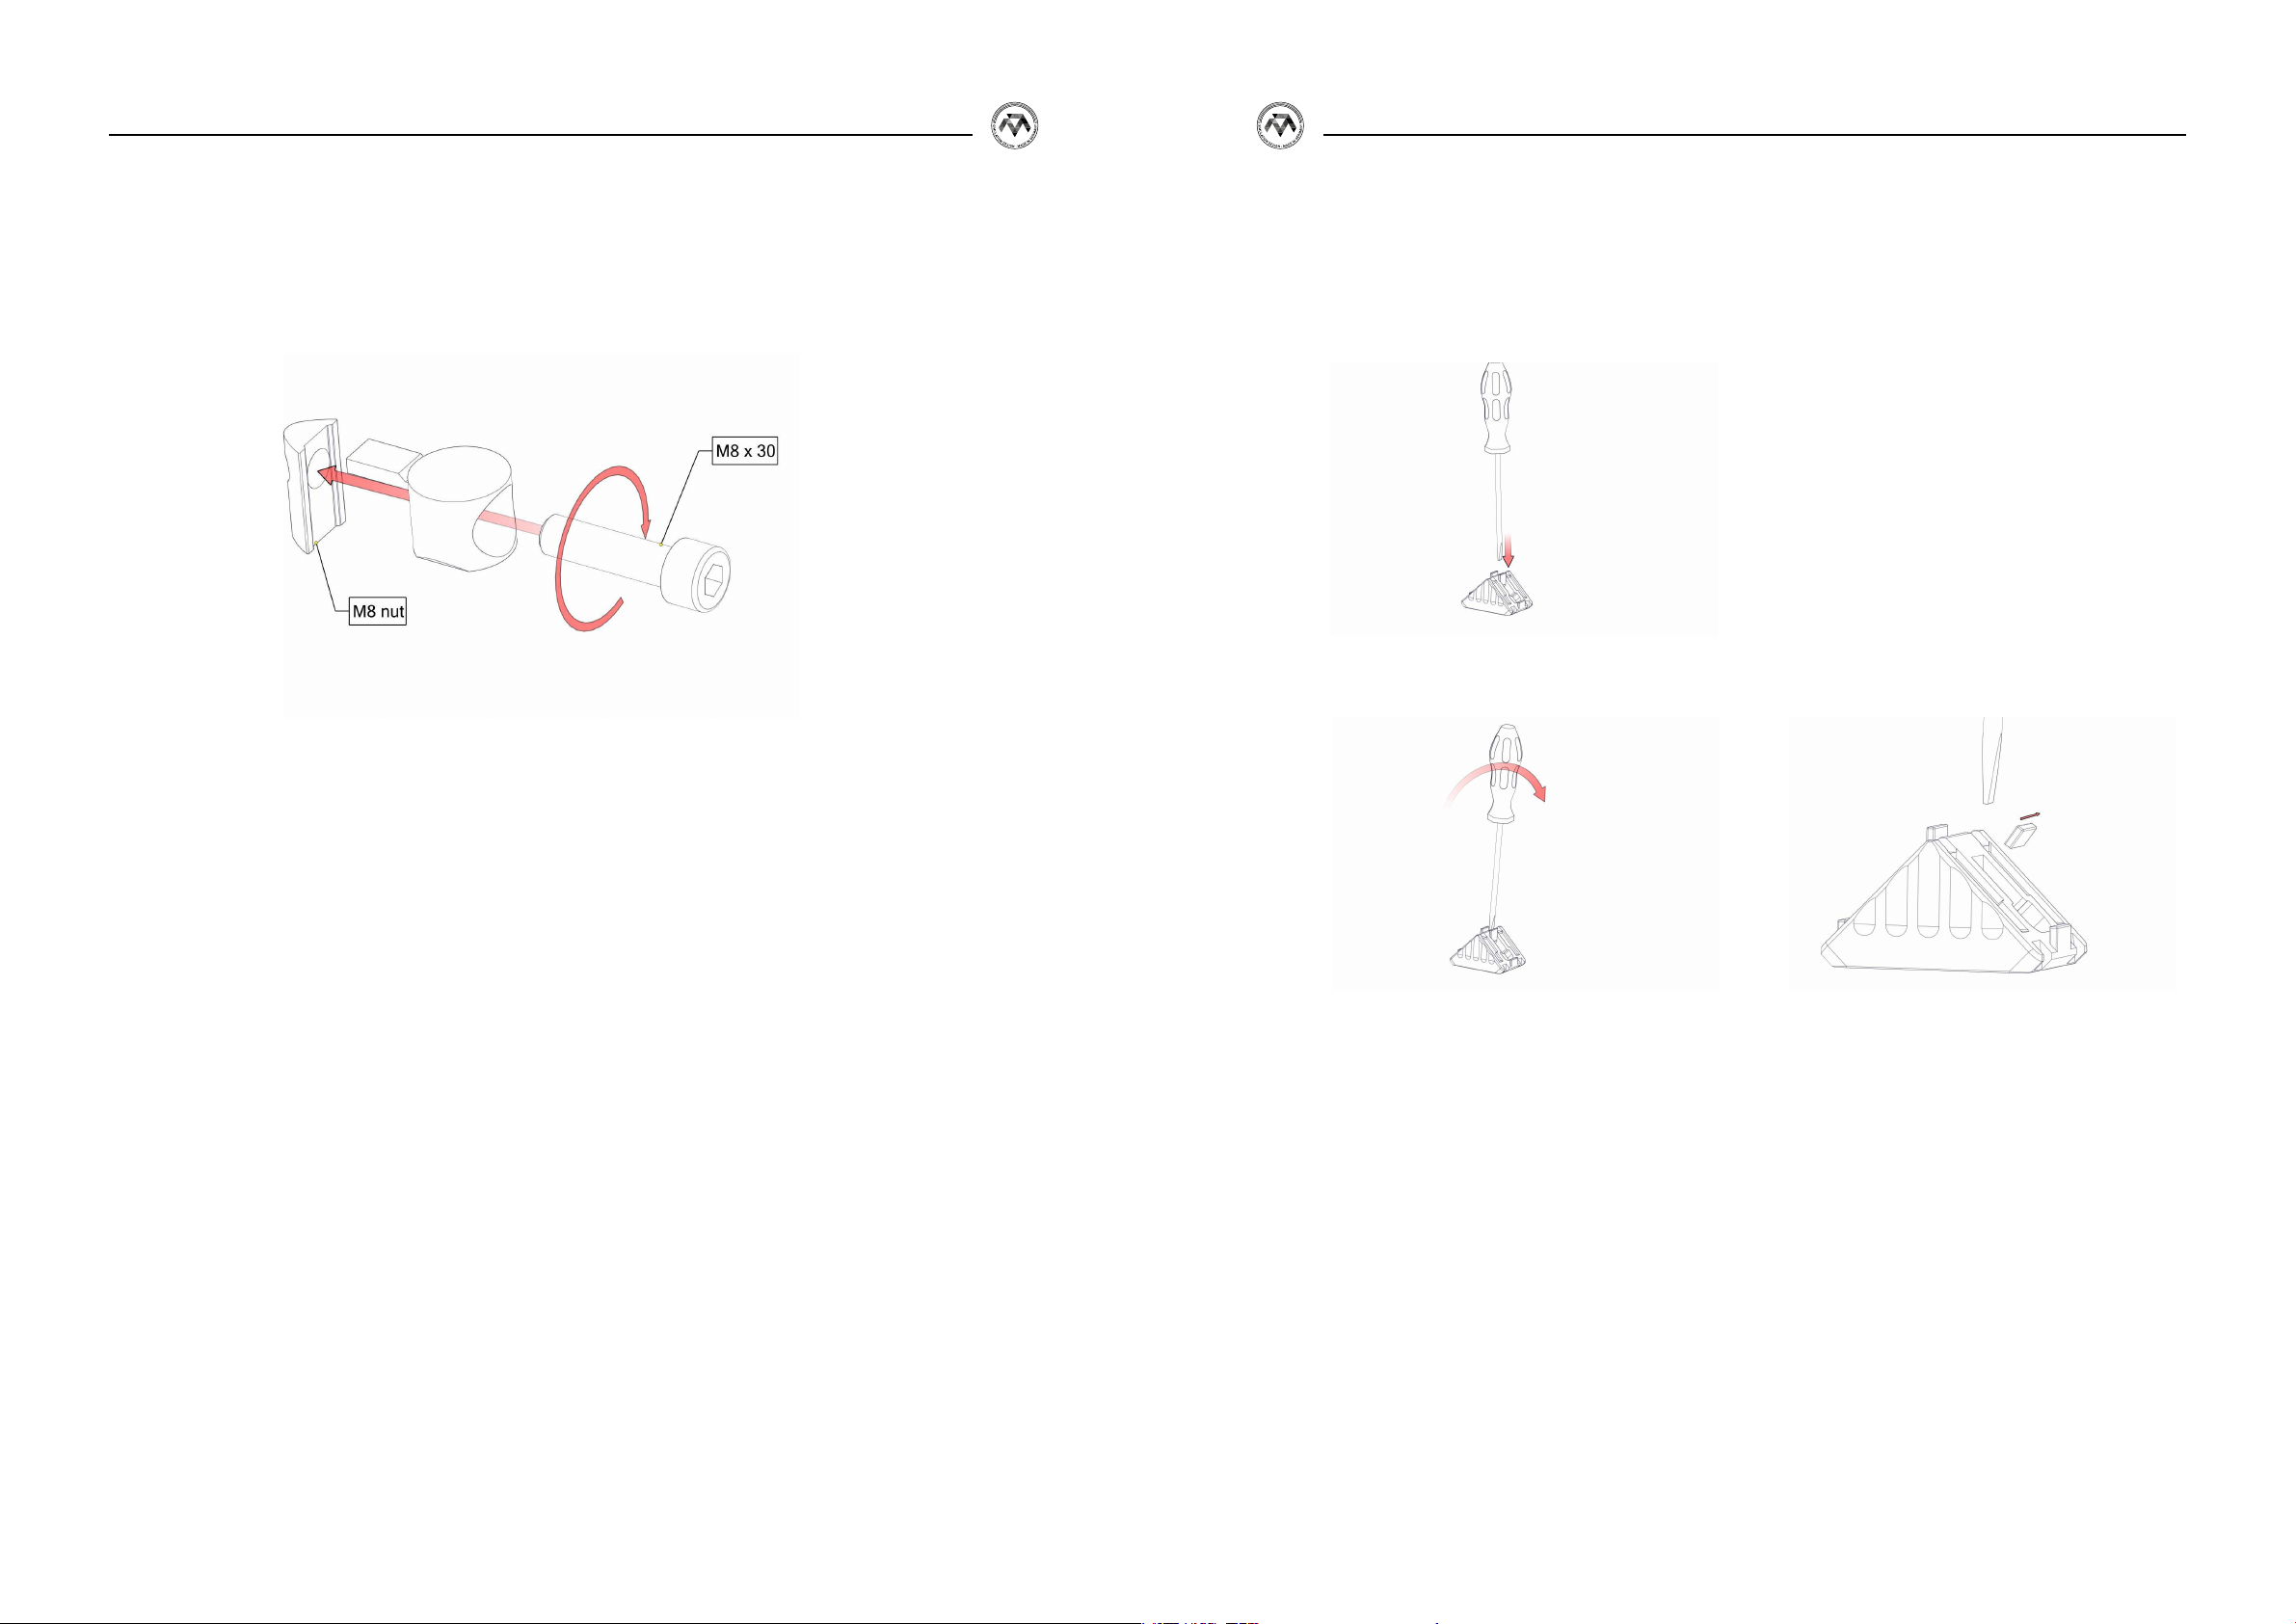
1.1.3 Universal Fastener Assembly
The universal fastener assembly can be prepared the following way, so long as the T-Nut can
be slid in from the side. One Universal Fastener Assembly is made up from one (1) M8x30 Hex
Screw, one (1) T-Nut, and one (1) Universal Fastener.
Figure 3: Universal fastener assembly
1.1.4 Angle Bracket Stud Removal
Sometimes it might be necessary to break off the studs from angle brackets (if those are part
of the product). This is best achieved by:
1. Inserting a at-head screwdriver between the stud and the bracket, and then
2. Rotate the screwdriver for the stud to come off
If inserting the universal fastener assembly from the side is not possible, it is necessary to rota-
te the T-Nut into the prole groove rst, and then screw the M8x30 bolt (along with the universal fastener) into the T-Nut.
4 5
 Loading...