

Page 1
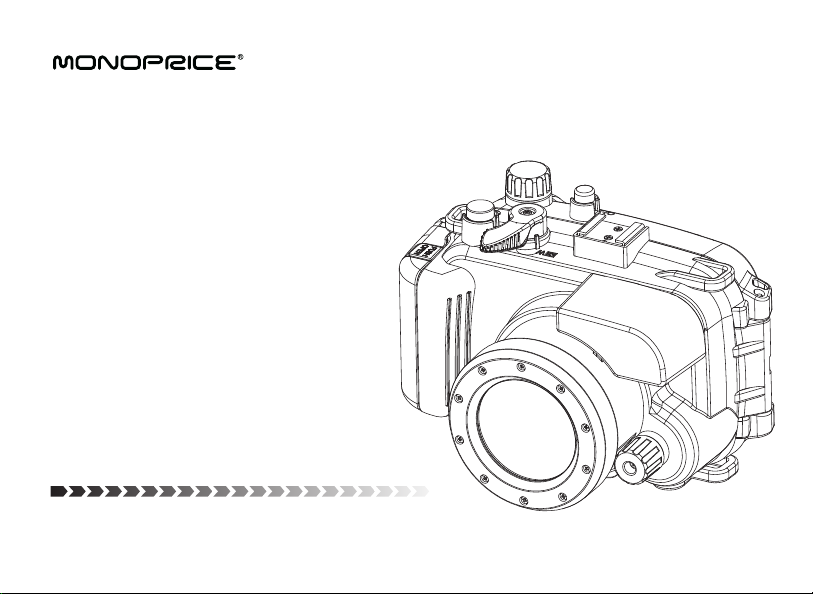
Waterproof Camera Dive Housing
FOR SONY RX100
PID 10603
User’s Manual
Page 2

Page 3

Please ensure that you read this guide before using the
Waterproof Case
Check if the following items are included in your
Waterproof Case package. If anything is missing,
contact Monoprice Customer Service for a replacement.
• Waterproof Case with Installed Waterproof Seal and
Tethered Flash Diffuser
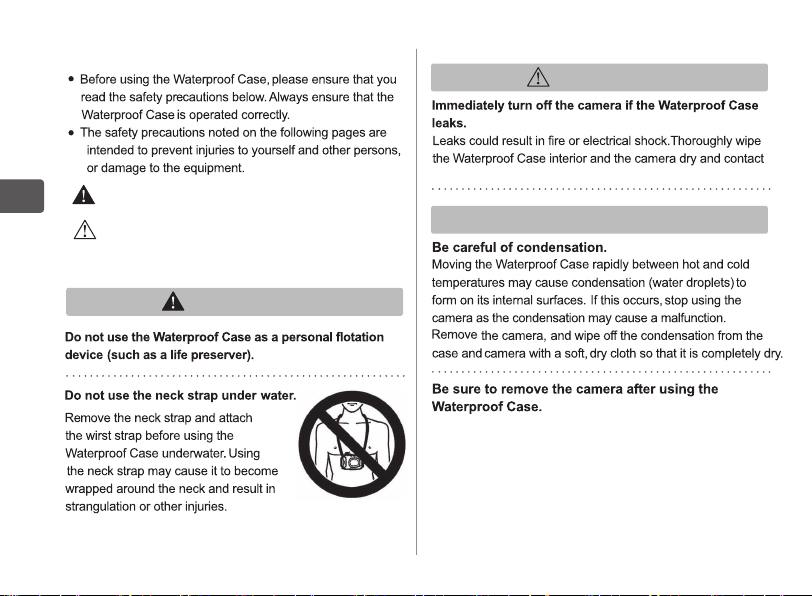
• Neck Strap
• Wrist Strap
• Silicone Grease for the Waterproof Seal
• Silica Gel Dry Packs
• Spare Waterproof Seal
• User’s Manual
Read This First
Before you use the Waterproof Case, make sure it is functioning
correctly and does not leak. To check for leaks, close the camera
case before putting the camera in and hold it under water at an
approximate depth of 5.9 inches (15cm) for about three minutes.
If it leaks, contact Monoprice Technical Support for assistance.
Disclaimer
• Monoprice reserves the right to change the contents
of this guide at any time without prior notice.
• Illustrations and screenshots in this guide may dier
slightly from the actual equipment.
• Monoprice, its subsidiaries, and distributors of the
Waterproof Case are not liable for any damages due
to misuse of the case.
Please also carefully read the Camera User Guide
•
supplied with your camera.
• : Things you should be careful about.
• : Hints for getting more out of your Waterproof Case.
• The various types of memory cards that can be used in
the camera are collectively referred to as memory cards
in this guide.
Page 4
Safety Precautions
CAUTION
WARNING Denotes the possibility of serious injury
or death.
CAUTION Denotes the possibility of injury.
NOTICE Denotes the possibility of damage to
the Waterproof Case and Camera
WARNING
Monoprice Technical Support for assistance.
NOTICE
Leaving the camera in the Waterproof Case and placing
it in direct sunlight or other places subject to high
temperatures may result in fire, or cause the case to burst.
Page 5

The following actions could result in leakage:
The following actions may warp the case and
cause malfunctions:
Use only the supplied silicone grease or an
exact replacement.
Debris stuck to the waterproof seal may cause water
leakage. The presence of even a single strand of hair
or a tiny grain of sand in the seal can cause leaks.
Monoprice Technical Support for assistance.
To ensure that the case remains watertight, you should
replace the seal approximately once a year.
Check the Monoprice website for replacement seals
and additional silicone grease.
Page 6

Introduction
Thank you for purchasing th waterproof case his manual explains not only how to use
the waterproof case
this manual carefully before you use the waterproof case and retain it for future reference
Before you use the waterproof case, check that it is functioning correctly and does not leak
Refer to Preparing
data due to mistaken operation or malfunction of the waterproof case, the camera, the
battery pack
recorded
1
but also includes important precautions regarding its use. Please read
he Waterproof Case for details (P )
hall not be liable for any consequential damages arising from corrupted or lost
r the memory card, results in the failure of a movie or photo to be
Page 7
Safety Precautions
Waterproof ase and for
.
- While using the Waterproof
at all times. Failure to do so may lead to an accident.
Waterproof ase breaks or leaks, remain calm and surface according
to usual safety conventions.
- After you use the Waterproof
waterproof case containing the camera in direct sunlight or in a high-temperature place,
this may cause a re or the case to burst.
- Do not use the Waterproof
- Do not use the Waterproof
an accident, present a burn hazard, or cause the case to leak.
- When in the water, do not press the lever of the Waterproof
his may warp the casing and cause leak.
- When cleaning the Waterproof
seal
his may cause an accident, present a burn hazard, or cause the case to leak.
- Do not disassemble or modify the waterproof case
burn hazard, or cause the case to leak.
ase underwater, pay close attention to your current situation
ase, be sure to remove the camera f you leave the
ase as a personal otation device (life preserver).
ase at water depths exceeding 130 ft. his may cause
ase with unnecessary force.
ase, do not spray water under pressure at the waterproof
his may cause an accident, present a
2
Page 8
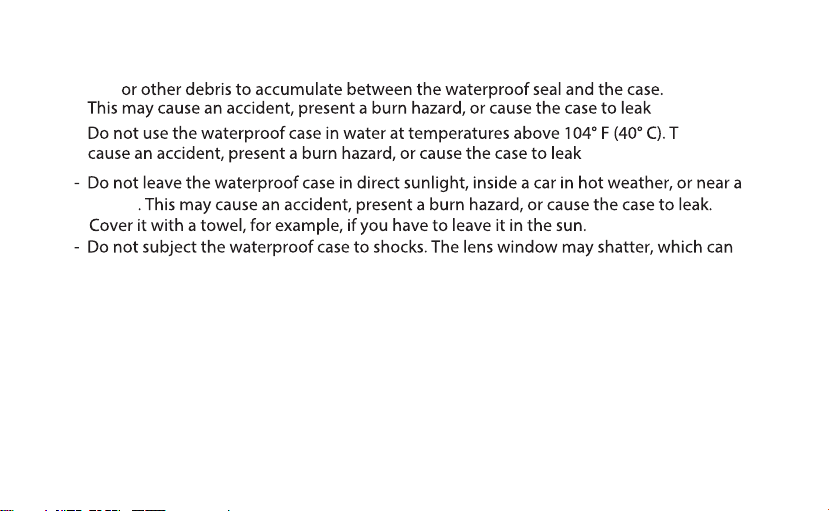
- Do not damage the waterproof seal, scratch its contact surfaces, or allow, hair, sand,
dirt,
-
.
heater
lead to injury.
- Before installing the camera in the waterproof case, remove the wrist strap and any
other optional accessories, from the camera.
3
.
his may
Page 9

Handling Precautions
1. Avoid opening or closing the aterproof ase near water. When you are installing
the camera or changing the memory card or the batter
low humidity well away from salty sea air.
2. Use only the supplied silicone grease. Use of other waterproong products may impair
the strength of the
applied, wipe it o immediately.
3. Before going into or getting out of the water, handle the
order to prevent damage or loss.
4. Avoid using the
interior will become hot, which can damage the camera. When using the cas
days, do not leave the waterproof case in direct sunlight. Also, turn o the camera regularly.
5. Remove sand and debris from the spaces surrounding the buttons and zoom lever by
rinsing them with water. Do not use the buttons or zoom lever while sand or debris is
Battery life is reduced in cold temperatures. When you use the waterproof case in very
6.
cold places, keep it warm by putting it in a bag whenever you are not shooting. It is not
advisable to use
aterproof ase. If any other waterproong product is mistakenly
aterproof ase for long periods of time in hot temperatures
waterproof case in temperatures below the freezing point.
pack, choose a place with
aterproof ase carefully in
.
4
Page 10

7. Moving the waterproof case rapidly between hot and cold temperatures may cause
5
.
Page 11

About Water Leakage
If the waterproof case leaks, stop using the camera immediately. Do not use it in this state
under any circumstance. If you use the camera in this state, this may cause a fire, electric
shock, or injury. Remove the battery pack and thoroughly wipe the waterproof case
interior and the camera until they are dry.
Notes Regarding The Waterproof Seal
Because the waterproof seal is designed to ensure that the
waterproof case remains waterproof, it is important that you
observe the following:
- Perform a rolling motion with your fingertip to remove
the waterproof seal from the waterproof case so you do not
damage the seal. Do not dig your fingernails into it or use
pointed or metallic objects to remove it.
- Do not forcibly pull the waterproof seal. Forcibly pulling the seal may overstretch it,
which may cause the waterproof case to not close properly, resulting in leaks.
- While attaching the waterproof seal, do not forcibly twist or pull the seal. Extreme care
should be taken to ensure the waterproof seal is level around the mounting groove.
Please check to ensure that the waterproof seal is working.
6
Page 12

- Make sure you check the waterproof seal before use Debris (e.g. hair, sand, lint or dirt)
to the waterproof seal may cause leaks Even a single strand of hair or a tiny grain
- Use your ngers to apply grease to the seal. Do not use paper or cloth
- A damaged or cracked waterproof seal may cause leaks. You can purchase
7
Page 13

Names of Parts
2
1
3
6
5
8
4
7
10
9
13
11
12
20
16
14
15
17
18
19
1. Shutter Button
5. Bracket Hole
9. Set Button
13.Mode dial
17.Control Dial/Right
2. Zoom Lever
6. Lens
10. Fn Button
14.MENU Button
18.Control Dial/Down
3. Hot Shoe
7. Control Ring
11.Power On/O
15.Video Button
19.Delete Button
4. Light Shield
8. Control Dial/Left
12.Control Dial/Up
16.Safety Lock
20.Play Button
8
Page 14

Preparing The Waterproof Case
Before securing the camera in the waterproof case, check over the waterproof case to make
sure there are no problems.
1. Check the waterproof case
Make sure the exterior is not damaged and the lens window is not dirty.
If it is dirty, gently wipe it with a soft and dry cloth.
2. Remove the waterproof seal from the mounting groove
Before the first use and after each successive use, perform a
rolling motion with your fingertip to remove the seal. Do not dig
your fingernails into it or use pointed or metallic objects to remove it.
3. Check the waterproof seal and mounting groove
* Make sure there is no debris (e.g. hair, sand or dirt) attached to the seal or in the
mounting groove.
* To remove debris from the seal, put about a droplet of grease on your index finger,
hold the seal between your index finger and thumb, and slide your fingers around
the seal.
*
Make sure the seal is not cracked or damaged. If the seal is damaged, replace it.
9
Page 15

4. Apply grease to the entire waterproof seal then attach the seal
* Before the first use and after each successive use, put about a droplet of grease
on your index finger, hold the seal between your index finger and thumb, and
slide your fingers, around the seal so the grease is applied evenly.
* Do not to damage the seal when applying the grease.
* Do not forcibly pull the seal when putting it in the mounting groove.
5. Close the waterproof case
Seat the camera securely inside the case before closing it.
6. Hold the waterproof case in water
Submerge the waterproof case slowly in a tub filled with water
and make sure there are no leaks.
7. Wipe the exterior of the waterproof case with a soft, dry cloth
NOTE S
i
When using commercially available anticondensation products, the anticondensation
solution should be applied only to the inside surface of the lens window using a soft, dry
cloth. If the solution comes in contact with any other surface, wipe it off immediately as it
could lead to deterioration of the waterproof case.
10
Page 16

Preparing The Camera
Set the camera's recording program to [underwater ] to ensure your recordings have natural
looking colors with toned-down blues.
Before using the camera underwater, make sure you save your important recordings to a
computer. See saving and sharing your recordings in the camera's instruction manual.
1
Insert a memory card (if necessary) and attach a fully-charged battery pack
2
Remove the grip belt and the optional wrist or shoulder strap, if attached
3
Turn on the camera and change in advance the camera s settings as necessary
* Set the recording program to [underwater]. See Special Scene
the camera's instruction manual
* Check that the image stabilizer is set to [Dynamic]. See
the camera's instruction manual.
* Check that simultaneous recording is not turned o if you want to take photos with
an aspect ratio of 16:9 while you record movies. See
(Simultaneous recording) in the camera's instruction manual.
* Check that the wireless controller is not turned o if you want to access menus and
settings while the camera is secured in the waterproof case. See [Wireless
under the system setup menu in the camera's instruction manual.
11
aking hotos While ecording ovies
ecording program in
dvanced mage Stabilization in
emote ontrol]
Page 17

If necessary, adjust the LCD s brightness See Adjusting The Position and Brightness
of
4. Turn o the camera
NOTES
i
For important details about the cameras settings and restrictions while the recording program
set to [underwater] or [surface], see the Power/Others section of the specications in the
s instruction manual.
camera
S
12
Page 18

Securing The Camera in the Waterproof Case
The camera must be secured in the waterproof case before recording underwater.
Perform the following procedure to secure the camera properly.
1. Open the waterproof case
Squeeze the recessed buttons on each side of the cover latch.
Release the catch
*
Open the case
*
2
. Insert the camera
Ensure the camera is off.
*
Gently insert the camera into the case.
*
*
Insert a new silica gel dry pack into the case to
absorb any moisture that might accumulate.
Close the waterproof case
3.
Close the case securely, make sure that the waterproof seal and its
*
contact surfaces are free of debris (e.g. hair, sand or dirt). Even a single
strand of hair or a tiny grain of sand caught in the seal can cause leaks.
* Fasten the catch
13
Page 19

4 Make sure the buttons and zoom lever are operating correctly
* If they are not operating correctly, remove the camera from the waterproof case
and
Attach the wrist strap to the waterproof case
5
Testing the waterproof case
Before recording, it is important to make sure the waterproof case is functioning correctly and
does not lea
Remove the waterproof case and then hold it underwater again for 30 seconds to 1 minute.
Finally, remove the waterproof case and hold it underwater again for 3 to 5 minutes, pressing
the buttons and moving the zoom lever to check for leaks.
the camera again.
. Hold the waterproof case in a tub lled with fresh water for 5 to 10 seconds.
14
Page 20

Recording Movies and Taking Photos
After the camera is secured in the waterproof case, you are ready to start recording movies
and taking photos
1. Turn on the camera
* Press “ POWER ”
* The ON/OFF(CHG) indicator on the
2. Make a recording
Press “ START/STOP ” to begin/end recording a movie or “ PHOTO ” to take a photo
*
* Use the wrist strap and hold the
3. Turn o the camera
* Press “ POWER ”
* The “ON/OFF(CHG)” indicator on
15
Page 21

Changing the camera s setting while it is secured in the waterproof case.
While the camera is secured in the waterproof case, most settings can only be accessed
using the camera's wireless controller. Make sure your hands are dry when you use the
wireless controller.
1. To switch between recording and playback mode: Press and hold on the wireless
controller for more than 2 secured.
2. To switch the recording program between [Underwater] and [Surface]: Turn on the
camera while holding
PHOTO
pressed down.
16
Page 22

Removing The Camera
Make sure you wash the exterior of the waterproof case before removing the camera
1. Make sure the catch is securely closed
2. Wash the exterior of the waterproof case in fresh water
Put the waterproof case in tub of fresh water
(for example,
Clean the waterproof case by moving it back and forth,
up,
3. Wipe the exterior of the waterproof case with a soft, dry cloth
4. Open the waterproof case to remove the camera
17
,
Page 23

Cleaning The Waterproof Case
Make sure you clean the waterproof case and waterproof seal as soon as possible after use
1 Close the waterproof case
Make sure the catch is securely closed
2 Wash the exterior of the waterproof case in fresh water
Put the waterproof case in tub of fresh water
(for example,
Clean the waterproof case by moving it back and forth up,
If the waterproof case was used in salt water, let it soak in fresh water for several
hours to remove salt deposits. If salt deposits remain on the waterproof case.
metallic parts may rust or buttons may become harder to press
3 Remove the waterproof case from the water
ake sure no debris remains on the exterior
18
Page 24

4 Wipe the exterior of the waterproof case with a soft, dry cloth and open the case
Remove the waterproof seal and remove any debris on it, its contact surfaces,
5
and the
To remove debris from the seal put about a droplet of grease on your index nger,
hold the seal between your index nger and thumb
seal. Use a cotton swab or similar item for the other surfaces.
Wipe the interior and exterior of the waterproof case with a soft, dry cloth
6
Do not wash the interior with water and do not use cloth that may leave lint.
Also, do not use a cloth to wipe the mounting groove or contact surfaces as it
may leave small bits of thread in the groove or on the surface.
Let the waterproof case dry in a shaded place
7
IMPORTANT
i
Do not leave the waterproof case in direct sunlight. This may cause discoloration of the
case or cause the waterproof seal to degrade more quickly.
19
and slide your ngers around the
Page 25

Checking The Waterproof Seal
Check the waterproof seal before each use, after recording in a sandy environment or when you
have not used the waterproof case for an extended period of time.
1. Remove the waterproof seal and wipe o the grease
To wipe o the grease, hold the seal between your index nger and thumb, and slide
2. Check the waterproof seal
Make sure there are no cracks, scratches
(e.g. hair, sand or dirt) on it.
3. Check the mounting groove on the waterproof case
Make sure there is no debris in the mounting groove.
Replacing the waterproof seal
We recommend that you replace the waterproof seal once a year to ensure that the water
case remains waterproof.
silicone grease.
Check the Monoprice website for replacement seals and additional
or deformities. Also, make sure there is no debris
proof
20
Page 26

Storing The Waterproof Case
- Keep the waterproof case open when storing it his will prevent the waterproof seal from
c s
- If using the waterproof seal after it has been in storage, make sure that it is not deformed,
21
Page 27

Specifications
Maximum Depth: 130 ft. (40 m)
Waterproofing: Waterproof seal
Main Materials: PC, Clear plate glass, EPDM rubber, O-ring, etc.
Filter Diameter: 55mm
Dimensions: 6.1" x 5.0" x 4.8" (156 x 126 x 121 mm)
Weight: 14.8 oz (420g)
Camera Operating Temperature: +32 ~ +104° F (0 ~ +40° C)
22
Page 28

Copyright © 2013 Monoprice, Inc. All rights reserved.
 Loading...