

Page 1
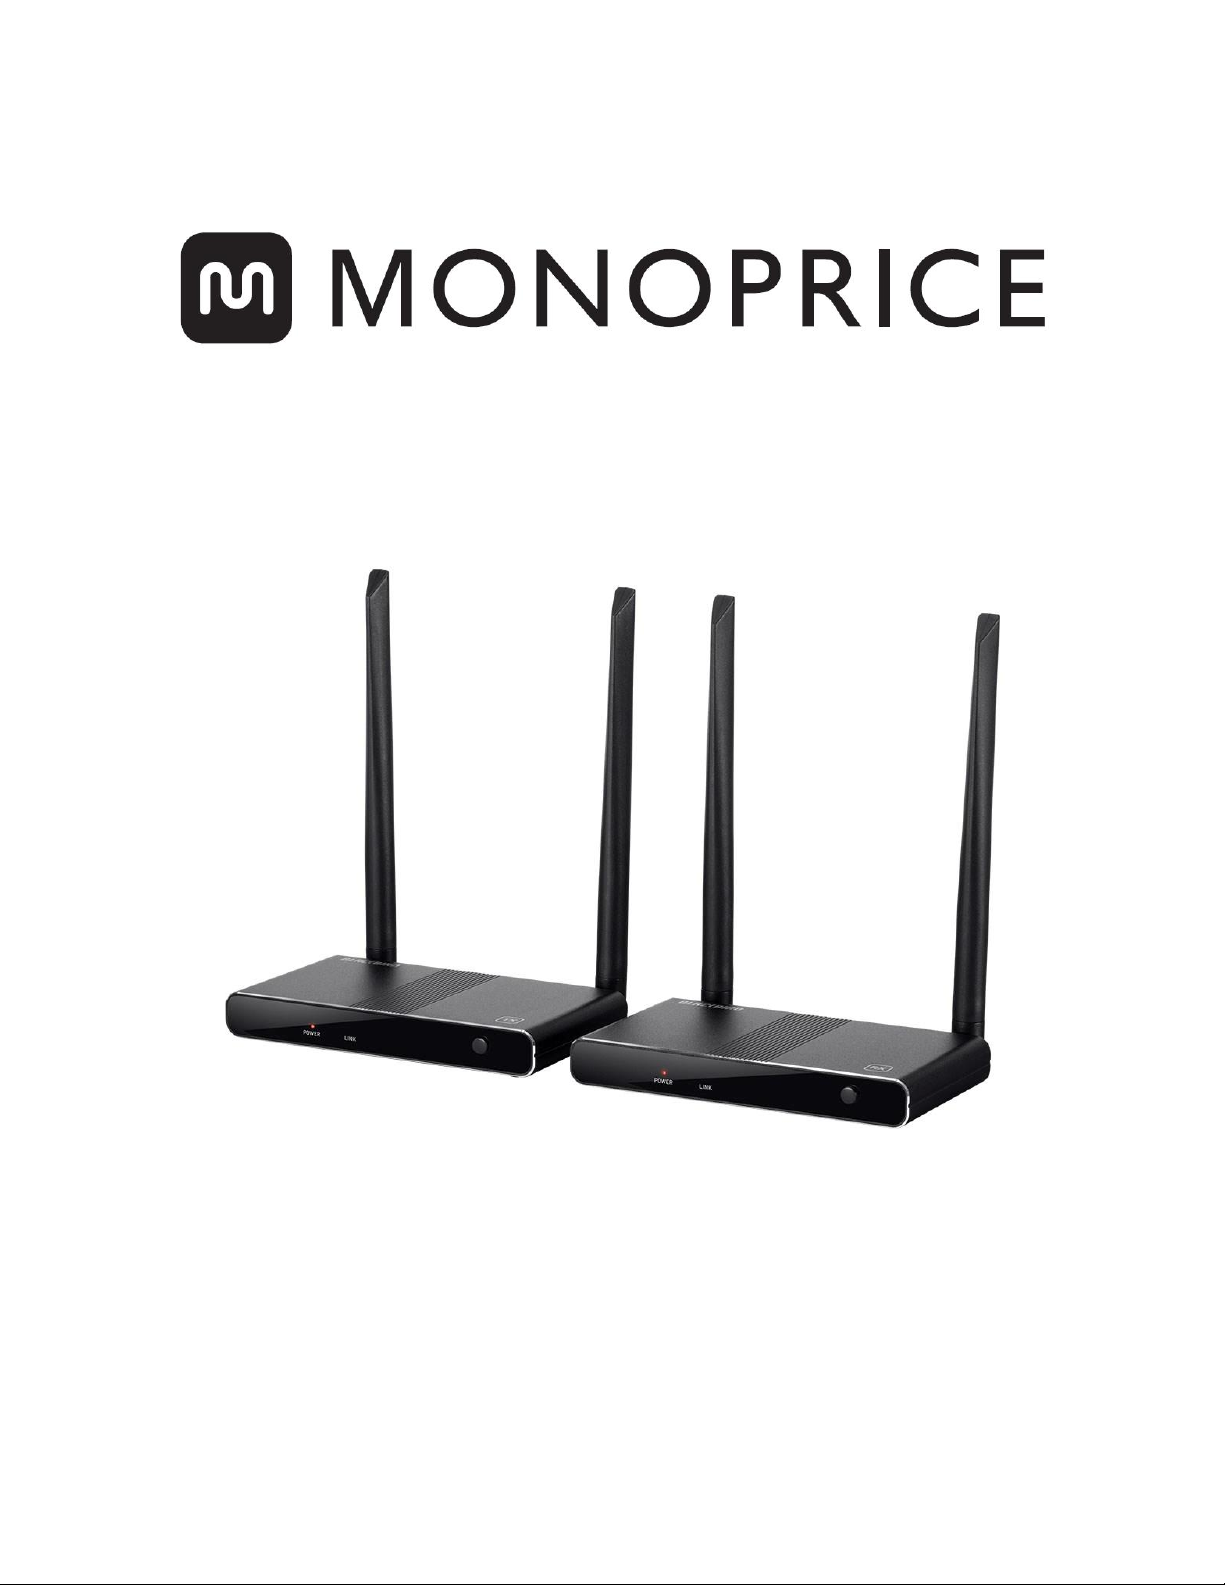
Blackbird™ HDMI® Wireless Extender
P/N 30915
User's Manual
Page 2

CONTENTS
SAFETY WARNINGS AND GUIDELINES ....................................................................................................................................... 3
INTRODUCTION ................................................................................................................................................................................................ 4
FEATURES .............................................................................................................................................................................................................. 4
CUSTOMER SERVICE .................................................................................................................................................................................... 4
PACKAGE CONTENTS ................................................................................................................................................................................. 5
PRODUCT OVERVIEW ................................................................................................................................................................................. 5
Transmitter .................................................................................................................................................................................................... 5
Receiver ............................................................................................................................................................................................................ 6
SAMPLE CONNECTION DIAGRAM .................................................................................................................................................. 7
INSTALLATION .................................................................................................................................................................................................. 8
MULTICASTING .............................................................................................................................................................................................. 10
WI-FI FREQUENCY ....................................................................................................................................................................................... 10
TROUBLESHOOTING ................................................................................................................................................................................... 11
TECHNICAL SUPPORT ............................................................................................................................................................................... 12
SPECIFICATIONS ............................................................................................................................................................................................ 13
REGULATORY COMPLIANCE .............................................................................................................................................................. 14
Notice for FCC .......................................................................................................................................................................................... 14
Radio Notice for FCC .......................................................................................................................................................................... 15
RF Exposure Statement for FCC ............................................................................................................................................... 15
Notice for Industry Canada ........................................................................................................................................................... 15
Radio Notice for Industry Canada ........................................................................................................................................... 16
RF Exposure Statement for Industry Canada ............................................................................................................... 16
2
Page 3

SAFETY WARNINGS AND GUIDELINES
Please read this entire manual before using this device, paying extra attention to these
safety warnings and guidelines. Please keep this manual in a safe place for future reference.
This device is intended for indoor use only.
Do not expose this device to water or moisture of any kind. Do not place drinks or
other containers with moisture on or near the device. If moisture does get in or on
the device, immediately unplug it from the power outlet and allow it to fully dry
before reapplying power.
Do not expose this device to excessively high temperatures. Do not place it in, on,
or near heat sources, such as a fireplace, stove, radiator, etc. Do not leave it in direct
sunlight.
Do not place or install this device in an area where it can be exposed to excessive
amounts of dust, humidity, oil, smoke, or combustible vapors.
Prior to operation, check the unit and power cord for physical damage. Do not use if
physical damage has occurred.
Before plugging the unit into a power outlet, ensure that the outlet provides the
same type and level of power required by the device.
Never unplug the unit by pulling on the power cord. Always grasp the connector
head or adapter body.
Ensure that power is turned off and disconnected before making any electrical
connections.
Take care to prevent damage to the power cord. Do not allow it to become
crimped, pinched, walked on, or become tangled with other cords. Ensure that the
power cord does not present a tripping hazard.
Clean using a soft, dry cloth only. Do not use chemical cleaners, solvents, or
detergents. For stubborn deposits, moisten the cloth with warm water.
This device has no user serviceable parts. Do not attempt to open, service, or
modify this device.
3
Page 4

INTRODUCTION
This Blackbird™ HDMI® Wireless Extender allows you to wirelessly distribute 1080p HDMI
signals to distances up to 164 feet (50 meters) in open space. It supports multicasting,
allowing you to pair up to four receivers with the transmitter. It features a USB extension
from the transmitter to the receiver, allowing you to connect a keyboard and mouse at the
extended location, so you can remotely operate your PC. It includes a local HDMI output
and operates in the 2.4GHz and 5GHz ISM Wi-Fi® bands.
FEATURES
Supports HDMI® resolutions up to 1080p@60Hz
Can transmit to distances up to 164 feet (50 meters)
Supports multicasting to up to 4 receivers
Delivers up to 4.95Gbps bandwidth
Supports 8-bits per channel Deep Color (24-bits total)
Compliant with the HDMI 1.4b and HDCP 1.4 specifications
Operates in the 2.4GHz and 5GHz ISM Wi-Fi® frequencies
Extends wideband (20~60 kHz) IR signals from the receiver to the transmitter
Supports 2-channel LPCM audio
CUSTOMER SERVICE
The Monoprice Customer Service department is dedicated to ensuring that your ordering,
purchasing, and delivery experience is second to none. If you have any problem with your
order, please give us an opportunity to make it right. You can contact a Monoprice
Customer Service representative through the Live Chat link on our website
www.monoprice.com during normal business hours (Mon-Fri: 5am-7pm PT, Sat-Sun: 9am-
6pm PT) or via email at support@monoprice.com
4
Page 5
PACKAGE CONTENTS
Please take an inventory of the package contents to ensure you have all the items listed
below. If anything is missing or damaged, please contact Monoprice Customer Service for a
replacement.
1x HDMI® wireless transmitter
1x HDMI wireless receiver
1x Wideband IR transmitter
1x Wideband IR receiver
2x AC power adapters (5 VDC, 2A)
1x User's manual
PRODUCT OVERVIEW
Transmitter
1. IR Transmitter Window: Transmits IR signals sent by the receiver.
2. Power LED: The LED illuminates when power is applied.
3. Link LED: The LED illuminates steadily when there is a valid link with a receiver. The
LED will flash if there is no valid link with a receiver.
5
Page 6

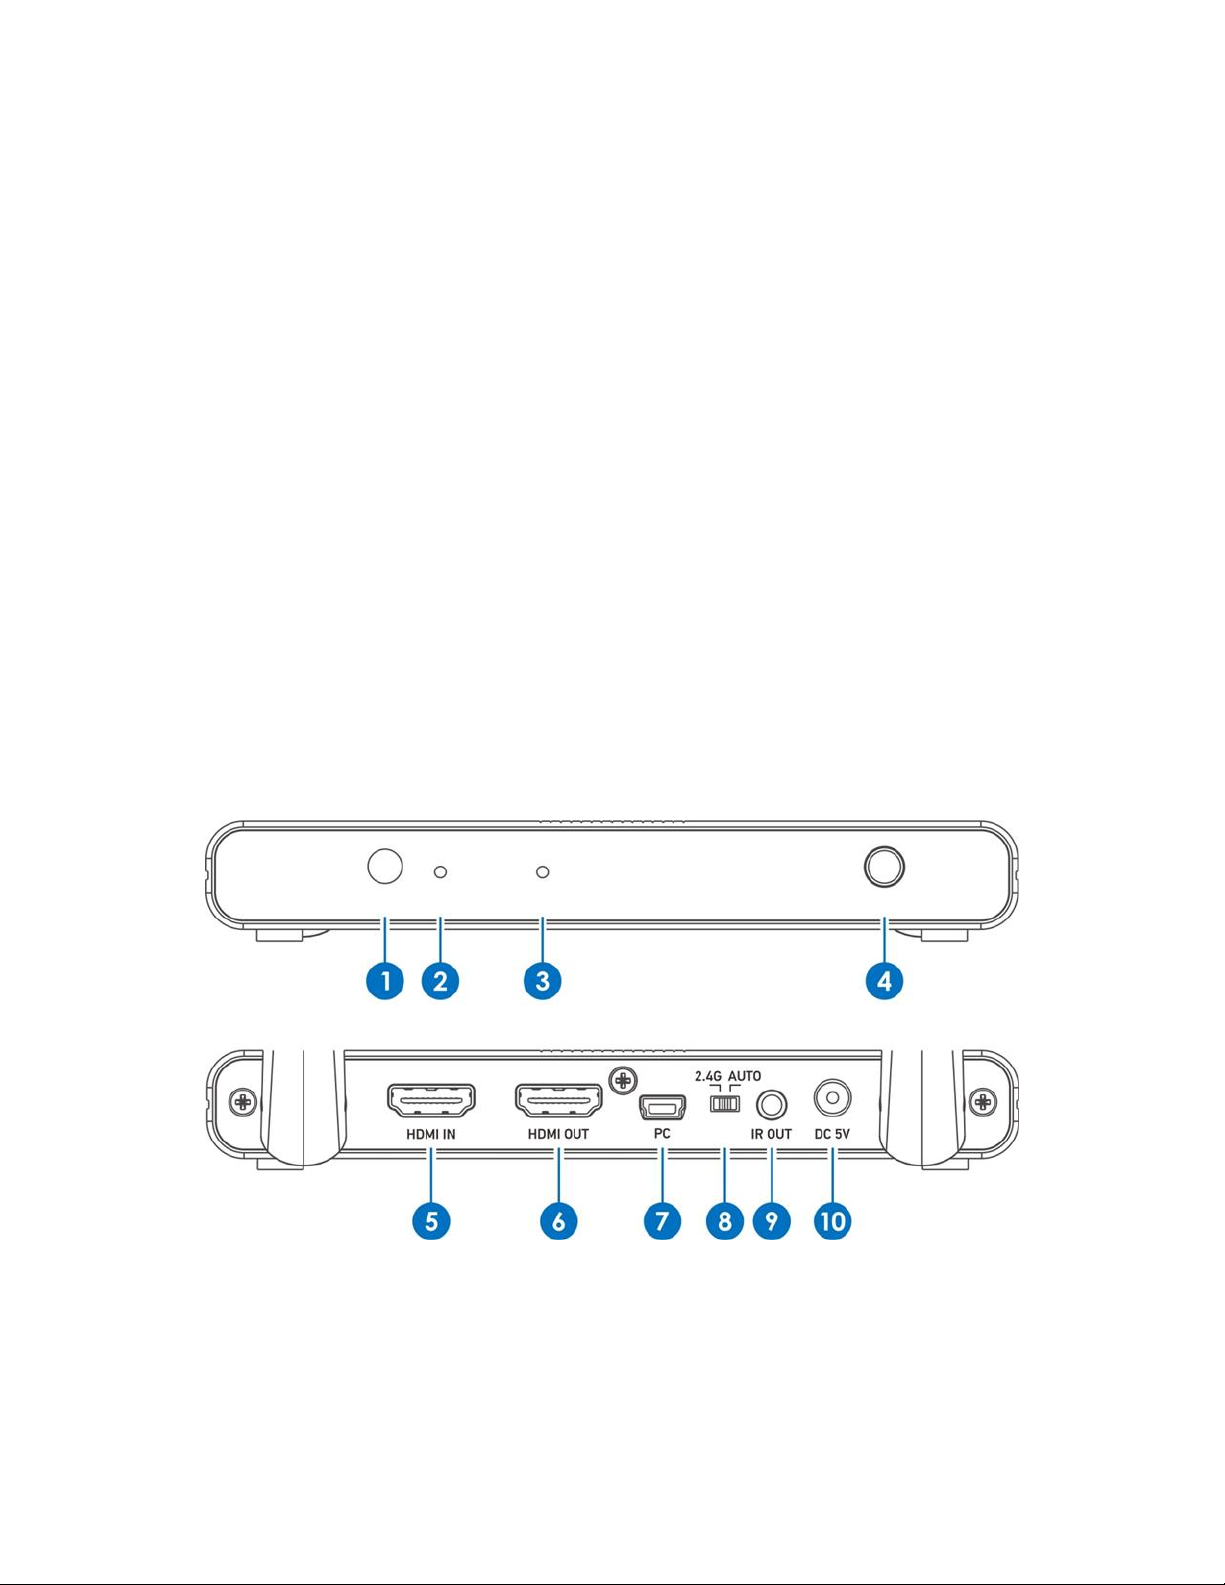
4. Pair Button: Press the pair button to pair the receiver and transmitter for the first
time. Once paired, the receiver and transmitter will automatically connect each time
power is applied.
5. HDMI IN: HDMI® input connector for connecting your video source device.
6. HDMI OUT: HDMI output connector for connecting a local display.
7. PC: Mini USB connector for connecting to a laptop or PC.
8. 2.4G/AUTO: Switch sets the wireless operating frequency. Put the switch in the 2.4G
position to force the extender to work in the 2.4GHz wireless frequency. Put the
switch in the AUTO position to allow the extender to automatically select the
2.4GHz or 5GHz frequency according to the current Wi-Fi® condition.
9. IR OUT: 3.5mm jack for connecting the included wideband IR transmitter.
10. DC 5V: DC barrel connector for connecting one of the included AC power adapters.
Receiver
1. IR Receiver Window: Receives IR signals from a remote control.
2. Power LED: The LED illuminates when power is applied.
3. Link LED: The LED illuminates steadily when there is a valid link with the transmitter.
The LED will flash if there is no valid link with the transmitter.
6
Page 7

4. Pair Button: Press the Pair Button to pair the receiver and transmitter for the first
time. Once paired, the receiver and transmitter will automatically connect each time
power is applied.
5. HDMI OUT: HDMI® output connector for connecting the remote display.
6. Keyboard: USB connector for attaching a USB keyboard or other USB device.
7. Mouse: USB connector for attaching a USB mouse or other USB device.
8. IR IN: 3.5mm jack for connecting the included wideband IR receiver.
9. DC 5V: DC barrel connector for connecting one of the included AC power adapters.
SAMPLE CONNECTION DIAGRAM
7
Page 8

INSTALLATION
These installation steps will assume extension of video from a laptop or PC to a remote
location for remote operation of the computer. For other configurations, skip or alter steps
as appropriate. Perform the following steps to install this extender kit.
1. Ensure that all equipment to be connected is powered off and unplugged from its
power source.
2. Place the receiver and transmitter next to each other.
3. Plug the DC barrel connector on one of the AC power adapters into the DC 5V jack
on the transmitter, then plug the adapter into a nearby AC power outlet. The Power
LED on the transmitter will illuminate and the Link LED will begin flashing.
4. Plug the DC barrel connector on one of the AC power adapters into the DC 5V jack
on the receiver, then plug the adapter into a nearby AC power outlet. The Power
LED on the receiver will illuminate and the Link LED will begin flashing.
5. Simultaneously press the Pair Button on both the transmitter and receiver. The Link
LED on both the transmitter and receiver should illuminate steadily, indicating that
the receiver and transmitter have been successfully paired.
6. Unplug the AC power adapters from the AC power outlets, then unplug the DC
barrel connectors from the DC 5V jacks.
7. Place the receiver in its intended location.
8. Using a High Speed HDMI® Cable (not included), plug one end into the HDMI input
on your remote display, then plug the other end into the HDMI OUT port on the
receiver.
9. Plug a USB keyboard into the Keyboard port, then plug a USB mouse into the
Mouse port.
10. (Optional) If you want to control a device at the source location using an infrared
remote control, plug the included wideband IR receiver into the IR IN jack on the
receiver, then position the receiver bulb where it can receive IR signals from your
remote control. Alternatively, you can point your remote control at the IR Receiver
Window on the front panel.
8
Page 9

11. Plug the DC barrel connector on one of the included AC power adapters into the DC
5V jack on the receiver, then plug the adapter into a nearby AC power outlet. The
Power LED on the receiver will illuminate steadily and the Link LED will begin
flashing.
12. Place the transmitter in its intended location.
13. (Optional) Using a High Speed HDMI® Cable (not included), plug one end into the
HDMI input on a local display, then plug the other end into the HDMI OUT port on
the transmitter.
14. (Optional) If you want to use an IR remote control to control a local device from the
remote location, plug the included wideband IR transmitter into the IR OUT jack on
the transmitter, then position the IR emitter bulb where it can transmit IR signals to
the IR receiver on the IR controlled device. Alternatively, you can use the IR
Transmitter Window on the front panel.
15. Using a High Speed HDMI Cable (not included), plug one end into the HDMI IN port
on the transmitter, then plug the other end into the HDMI video output on your
laptop or PC.
16. Using a Mini USB cable (not included), plug the mini USB end into the PC connector
on the transmitter, then plug the other end into a USB connector on your laptop or
PC.
17. If you want to force use of the 2.4GHz Wi-Fi® frequency, put the 2.4G/AUTO switch
in the 2.4G position, otherwise put the switch in the AUTO position.
18. Plug the DC barrel connector on one of the included AC power adapters into the DC
5V jack on the transmitter, then plug the other end into a nearby AC power outlet.
The Power LED on the transmitter will illuminate steadily and, after the transmitter
and receiver have connected, the Link LED on both the transmitter and receiver will
illuminate steadily.
19. Power on the displays and your laptop or PC. Verify that the video can be seen on
the remote display as well as the local display, if you installed one. Verify that you
can control your PC or laptop using the remote USB keyboard and mouse.
Congratulations, your HDMI wireless extender is successfully installed and operating!
9
Page 10

MULTICASTING
This extender has the ability to pair with up to four receivers, allowing you to view video in
multiple remote locations. Perform the following steps to pair additional receivers with a
single transmitter.
1. Install and pair the first receiver with the transmitter as normal.
2. Place the second receiver next to the transmitter.
3. Plug the DC barrel connector on the second receiver's AC power adapter into the
DC 5V jack on the second receiver, then plug the other end into a nearby AC power
outlet. The Power LED on the second receiver will illuminate steadily and the Link
LED will begin flashing.
4. Simultaneously press the Pair Button on the transmitter and the second receiver.
The Link LED on the second receiver should illuminate steadily, indicating that the
second receiver is paired with the transmitter.
5. Unplug the AC power adapter for the second receiver from the AC power outlet,
then unplug the DC barrel connector from the DC 5V jack on the second receiver.
6. Repeat steps 2-5 above for the third and fourth receivers.
7. Once all receivers are paired with the transmitter, follow the instructions in the
INSTALLATION
section above to install each additional receiver.
WI-FI FREQUENCY
This wireless extender is capable of operating in the 2.4GHz and 5GHz Wi-Fi® frequencies.
The 2.4G/AUTO switch on the rear of the transmitter allows you to either force the signal
to operate at only 2.4GHz or to automatically switch between 2.4GHz and 5GHz as needed,
depending on the current Wi-Fi condition. In most cases, the AUTO position will give the
best results.
10
Page 11

TROUBLESHOOTING
Q1. The Link LEDs on the transmitter and receiver are flashing.
A1. The transmitter and receiver need to be paired. Simultaneously press the Pair Button
on both the transmitter and receiver.
Q2: The display connected to the receiver shows the word Scanning.
A2: The receiver is unable to find the transmitter. Check the transmitter to ensure that it
is powered on. If the transmitter is powered on and the Link LED is flashing, unplug
the transmitter from the power source, wait 30 seconds, then plug it back into the AC
power outlet. After being powered on, press the Pair Button on the transmitter to
send a pairing signal to the receiver.
Q3: The display connected to the receiver shows the word Connected, but there is no
video.
A3: Check to ensure that your video source device is plugged in, powered on, and playing
or displaying video.
Q4: Video on the remote display pauses or displays video noise.
A4: The transmitter and receiver are too far apart and/or there are too many obstructions
between the transmitter and receiver. Move the two closer together or remove
obstructions from between the two devices. Try using a different High Speed HDMI®
Cable.
Q5: The USB mouse and keyboard are not functioning.
A5: Ensure that there is a USB connection between your laptop or PC and the PC
connector on the transmitter. Try using a different USB cable.
11
Page 12

Q6: The IR function is not working.
A6: Ensure that the remote control is pointing to the IR Receiver Window or the IR bulb
on the external IR receiver. Ensure that the IR Transmitter Window or the emitter on
the external IR receiver and "see" the IR receiver on your device. Ensure that you are
using an IR remote control.
TECHNICAL SUPPORT
Monoprice is pleased to provide free, live, online technical support to assist you with any
questions you may have about installation, setup, troubleshooting, or product
recommendations. If you ever need assistance with your new product, please come online
to talk to one of our friendly and knowledgeable Tech Support Associates. Technical
support is available through the online chat button on our website www.monoprice.com
during regular business hours, 7 days a week. You can also get assistance through email by
sending a message to tech@monoprice.com
12
Page 13

SPECIFICATIONS
Model
30915
HDMI® Version
1.4b
HDCP™ Version
1.4
Maximum Video Resolution
1920 x 1080p @ 60Hz
Bandwidth
4.95Gbps
Maximum Connected Receivers
Up to 4
Wireless Standard
802.11a/b/g/n
Supported Wi-Fi® Frequencies
2.4GHz and 5GHz ISM bands
Maximum Connection Distance
Up to 164 feet (50 meters) in clear air
Modulation Methods
BPSK, QPSK, 16-QAM, 64-QAM
Deep Color
8-bits per channel (24-bits total)
Supported Color Spaces
RGB, YCbCr 4:4:4, YCbCr 4:2:2
HDMI Audio Support
2-channel LPCM
IR Frequency Range
20 ~ 60 kHz
Input Power
5 VDC, 2A
AC Adapter Input Power
100 ~ 240 VAC, 50/60 Hz
Maximum Power Consumption (each)
3 watts
Operating Temperature
+32 ~ +104°F (0 ~ +40°C)
Storage Temperature
-4 ~ +140°F (-20 ~ +60°C)
Relative Humidity
20 ~ 90% RH, noncondensing
Dimensions (each)
5.6" x 3.1" x 0.7" (142 x 80 x 19 mm)
Transmitter Weight
9.5 oz. (270 g)
Receiver Weight
9.2 oz. (260 g)
13
Page 14

REGULATORY COMPLIANCE
Notice for FCC
This device complies with Part 15 of the FCC rules. Operation is subject to the following
two conditions: (1) this device may not cause harmful interference, and (2) this device must
accept any interference received, including interference that may cause undesired
operation.
Modifying the equipment without Monoprice's authorization may result in the equipment
no longer complying with FCC requirements for Class B digital devices. In that event, your
right to use the equipment may be limited by FCC regulations, and you may be required to
correct any interference to radio or television communications at your own expense.
This equipment has been tested and found to comply with the limits for a Class B digital
device, pursuant to Part 15 of the FCC Rules. These limits are designed to provide
reasonable protection against harmful interference in a residential installation. This
equipment generates, uses and can radiate radio frequency energy and, if not installed and
used in accordance with the instructions, may cause harmful interference to radio
communications. However, there is no guarantee that interference will not occur in a
particular installation. If this equipment does cause harmful interference to radio or
television reception, which can be determined by turning the equipment off and on, the
user is encouraged to try to correct the interference by one or more of the following
measures:
Reorient or relocate the receiving antenna.
Increase the separation between the equipment and receiver.
Connect the equipment into an outlet on a circuit different from that to which the
receiver is connected.
Consult the dealer or an experienced radio/TV technician for help.
14
Page 15

Radio Notice for FCC
Caution
This FCC Part 15 radio device operates on a non-interference basis with other devices
operating at this frequency. Any changes or modification to said product not expressly
approved by Monoprice, including the use of non-approved antennas, could void the user’s
authority to operate this device.
This device complies with Part 15 of the FCC Rules. Operation is subject to the following
two conditions: (1) this device may not cause harmful interference, and (2) this device must
accept any interference received, including interference that may cause undesired
operation.
RF Exposure Statement for FCC
Caution
This equipment complies with radiation exposure limits set forth for an uncontrolled
environment. End users must follow the specific operating instructions for satisfying RF
exposure compliance. This transmitter must be at least 20 cm from the user and must not
be collocated or operated in conjunction with any other antenna or transmitter.
Notice for Industry Canada
This Class B digital apparatus complies with Canadian ICES-003.
Cet appareil numérique de la classe B est conforme à la norme NMB-003 du Canada.
15
Page 16

Radio Notice for Industry Canada
Caution
This IC RSS-210 radio device operates on a non-interference basis with other devices
operating at this frequency. Any changes or modification to said product not expressly
approved by Monoprice, including the use of non-approved antennas, could void the user’s
authority to operate this device.
This device complies with IC RSS-210. Operation is subject to the following two conditions:
(1) this device may not cause harmful interference, and (2) this device must accept any
interference received, including interference that may cause undesired operation.
RF Exposure Statement for Industry Canada
Caution
This equipment complies with radiation exposure limits set forth for an uncontrolled
environment. End users must follow the specific operating instructions for satisfying RF
exposure compliance. This transmitter must be at least 20 cm from the user and must not
be collocated or operated in conjunction with any other antenna or transmitter.
Blackbird™ is a trademark of Monoprice Inc.
HDMI®, the HDMI Logo, and High-Definition Multimedia Interface are trademarks or
registered trademarks of HDMI Licensing LLC in the United States and other countries.
Wi-Fi® is a registered trademark of Wi-Fi Alliance.
HDCP™ is a trademark of Digital Content Protection LLC.s
16
 Loading...