

Monogram 49-80008, ZX48CTACSS, ZX36CTACSS Installation Instructions Manual
GE Monogram ®
Assembly Instructions
Before you Begin - Read these instruclions completely and careflllly.
Note To Inslaller: Be sure to leave these instructions wilh tile ConsuIner.
Note to Consunmr: Keep these instructions with your Use and Ca1 e Book for fhture reference.
If you have questions concerning the installation of
this product, call tile GE Answer Center ® Consumer
Information Service at 800.626.2000, 24 hours a day,
7 days a week.
If you received a damaged Grill Cart, you should
contact your dealer.
Assembly of this grill cart requires basic mechanical
skills. Proper assembly is the responsibility of tile
installer.
For MonograIn local service in your area,
1-800-444-1845.
For MonograIn service in Canada, 1-888-880-3030.
For MonograIn Parts and Accessories, call
1-800-62(}-2002.
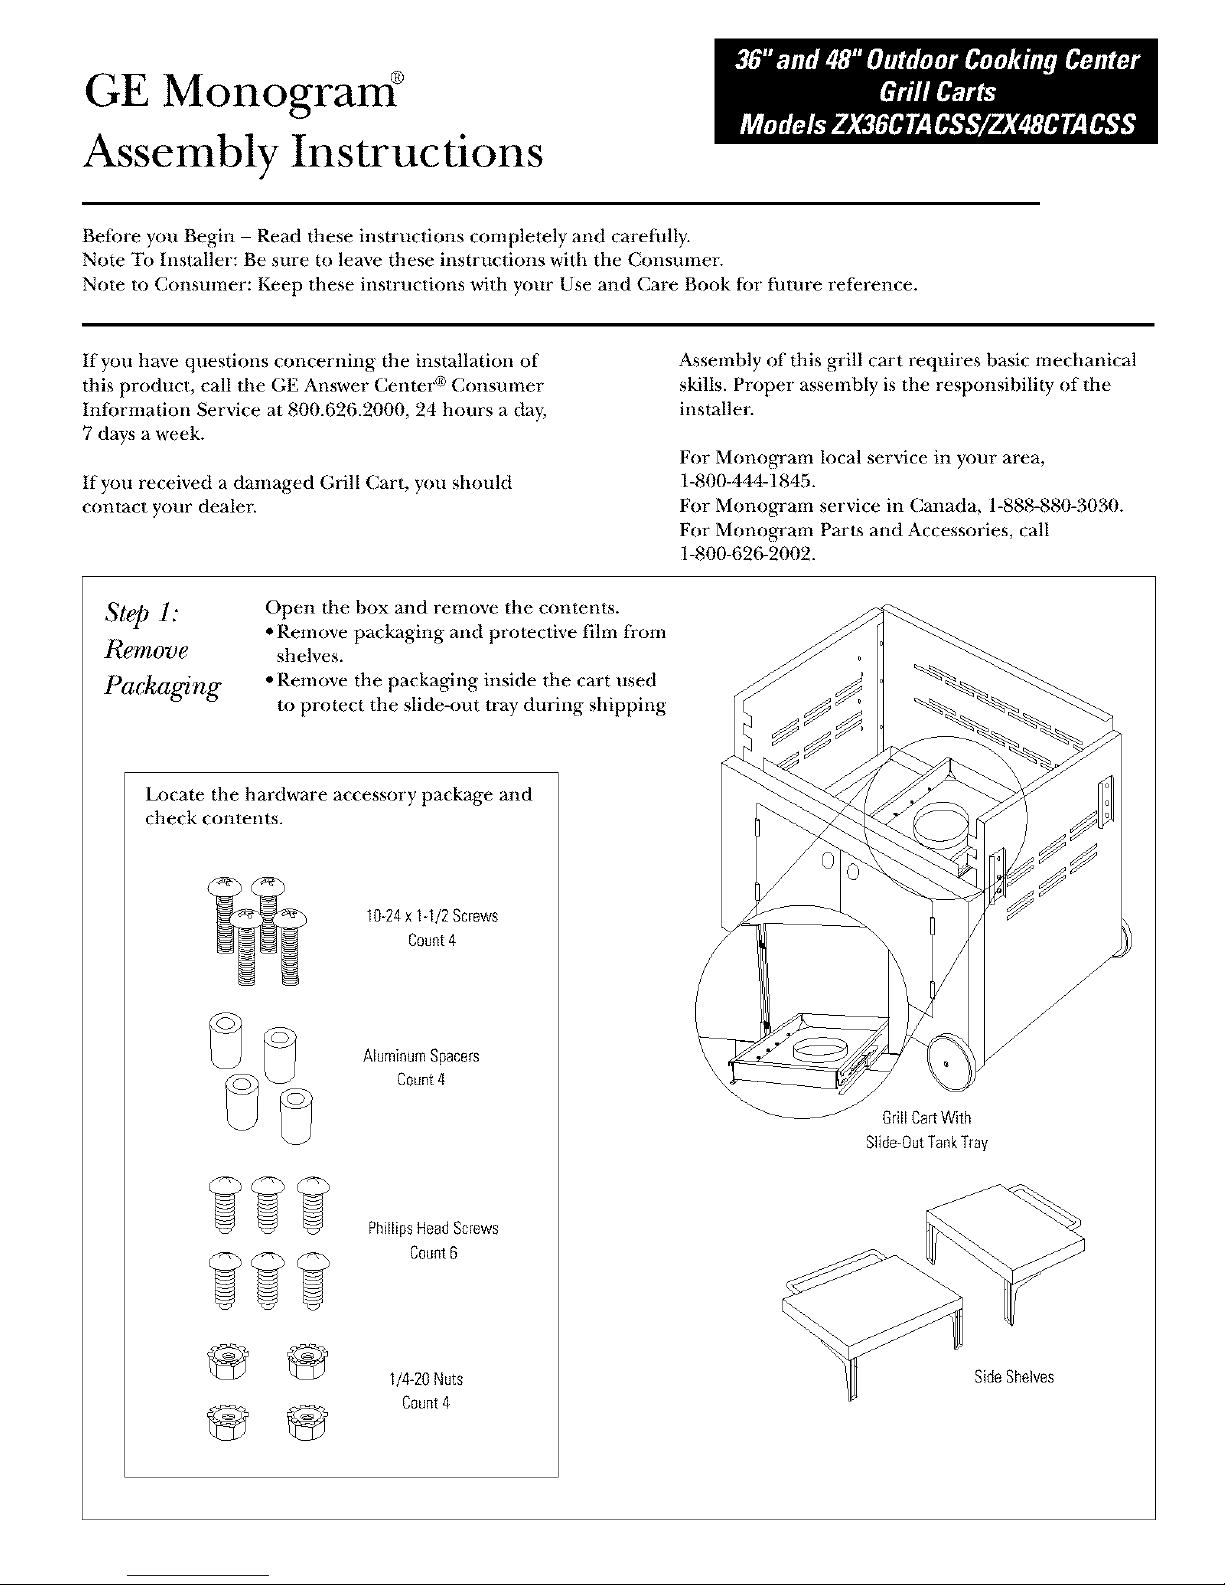
Step h
Re.love
Packaging
Open lhe box and remove the contents.
• Remove packaging and prmective fihn fl*om
shelves.
• Remove the packaging inside dm cart used
to protect the slide-out 1ray during shipping
Locate the hardware accessory package and
check conteIltS.
10-24x 1-1/2 Screws
Count4
_ _ PhillipsHeadScrews
J
/
GrillCart With
Slide-0ut Tank Tray
1/4-20 Nuts Side Shelves
Count4
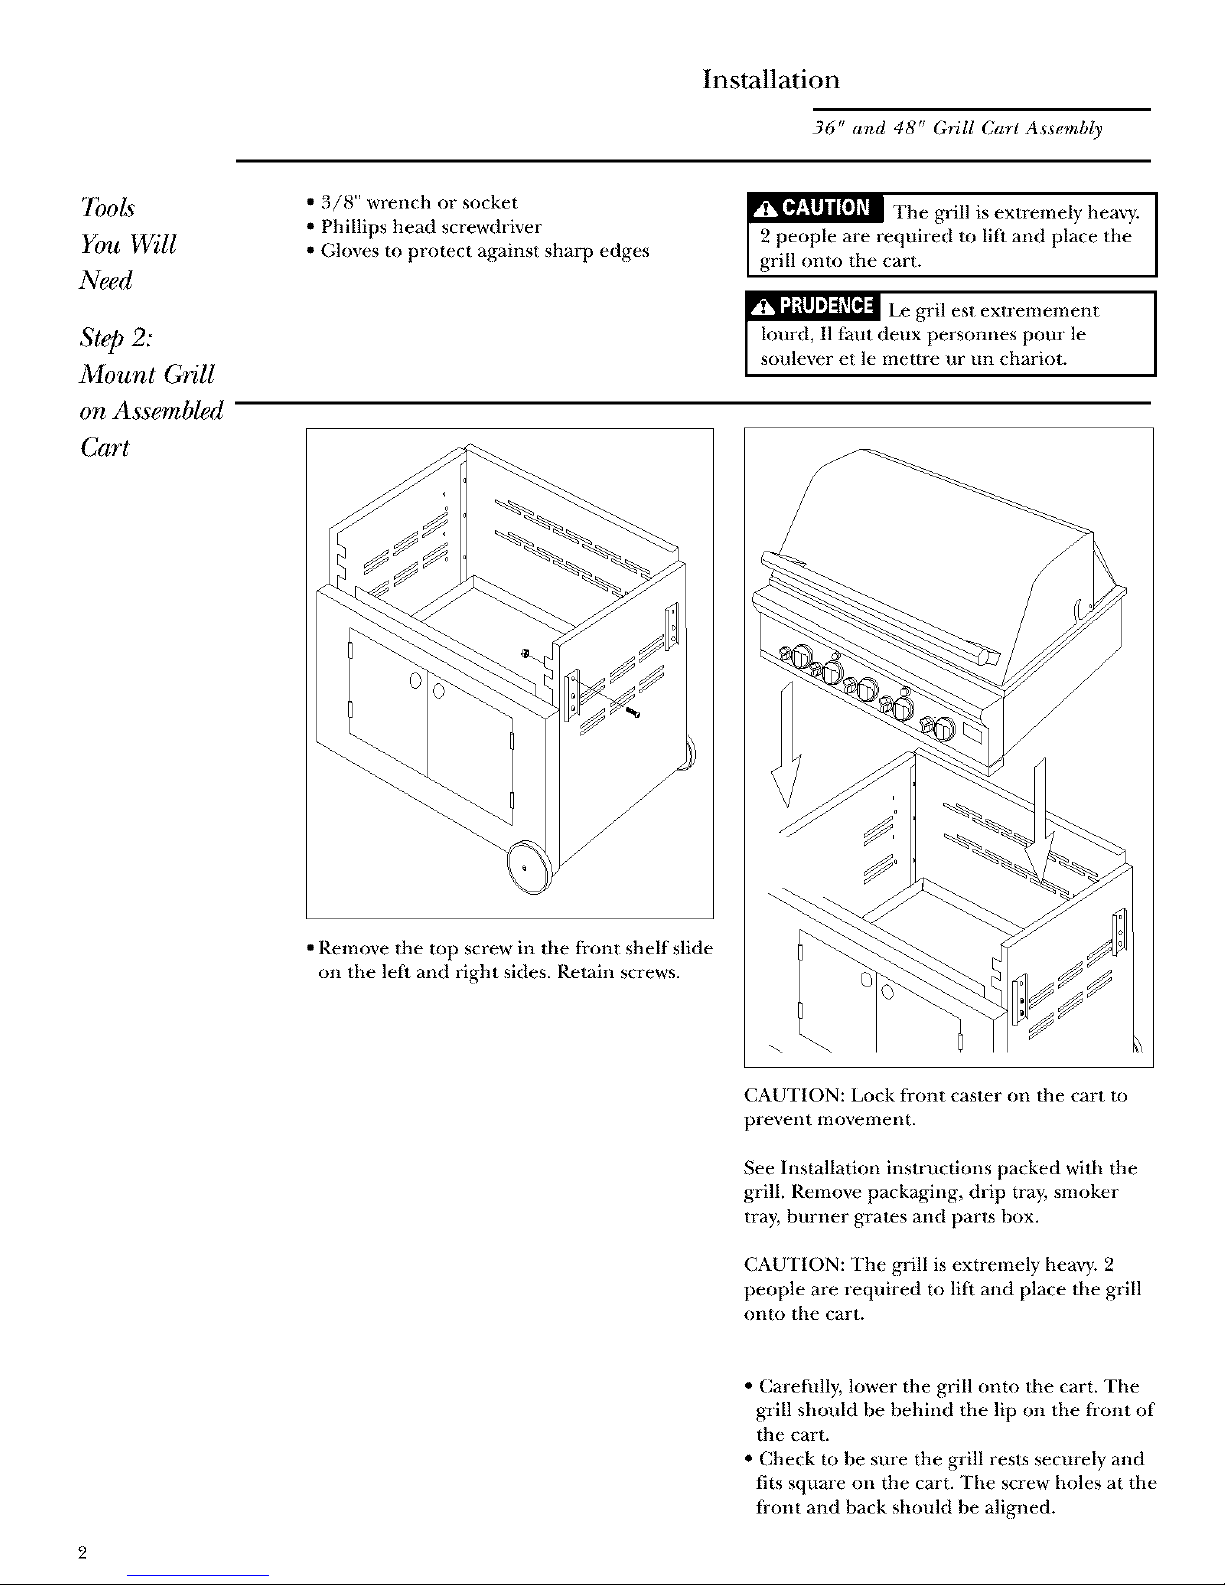
Installation
36" and 48" Grill Cart Assembly
7bols
You Will
Need
Step 2:
Mount GdU
on Assembled
Cart
• 3/8" wrench or socket
• Phillips head screwdriver
• Gloves to protect against shall0 edges
*V_l_[ll_llllfl_m The grill is extremely hea W.
2 people are required m lift and place the
grill onto the cart.
•" Le gril esl exlremement
lourd, n faul deux personnes pour le
soulever et le mettre ur un chariot.
/
• Remove the mp screw in file front shelf slide
on the left and right sides. Retain screws.
CAUTION: Lock firont cas/er on the cart m
prevent moveIllent.
See Installation inslructions packed with the
grill. Remove packaging, drip tray, smoker
tray, burner gra/es and paris box.
CAUTION: The grill is extremely heavy. 2
people are required to lift and place the grill
onto the cart.
• Carefidly, lower the grill onto the cart. The
grill should be behind the lip on the front of
the cart.
• Check to be sure the grill resls securely and
fits square on the cart. The screw holes at the
front and back should be aligned.
 Loading...