

Monogram ZX24CTBSS Assembly Instructions Manual
®
24" and 27" Outdoor Cooking Center
Monogram
Models ZX24CTBSS/ZX27CTACSS
Assembly Instructions
Before you Begin – Read these instructions completely and carefully.
Note To Installer: Be sure to leave these instructions with the Consumer.
Note to Consumer: Keep these instructions with your Owners Manual for future reference.
Grill Carts
If you have questions concerning the installation of this
product, call the GE Answer Center® Consumer
Information Service at 800.626.2000, 24 hours a day, 7
days a week.
If you received a damaged Grill Cart, you should contact
your dealer.
Assembly of this grill cart requires basic mechanical skills.
Proper assembly is the responsibility of the installer.
Step 1:
Open the box and remove the contents.
Remove packaging and protective film.
Remove
Packaging
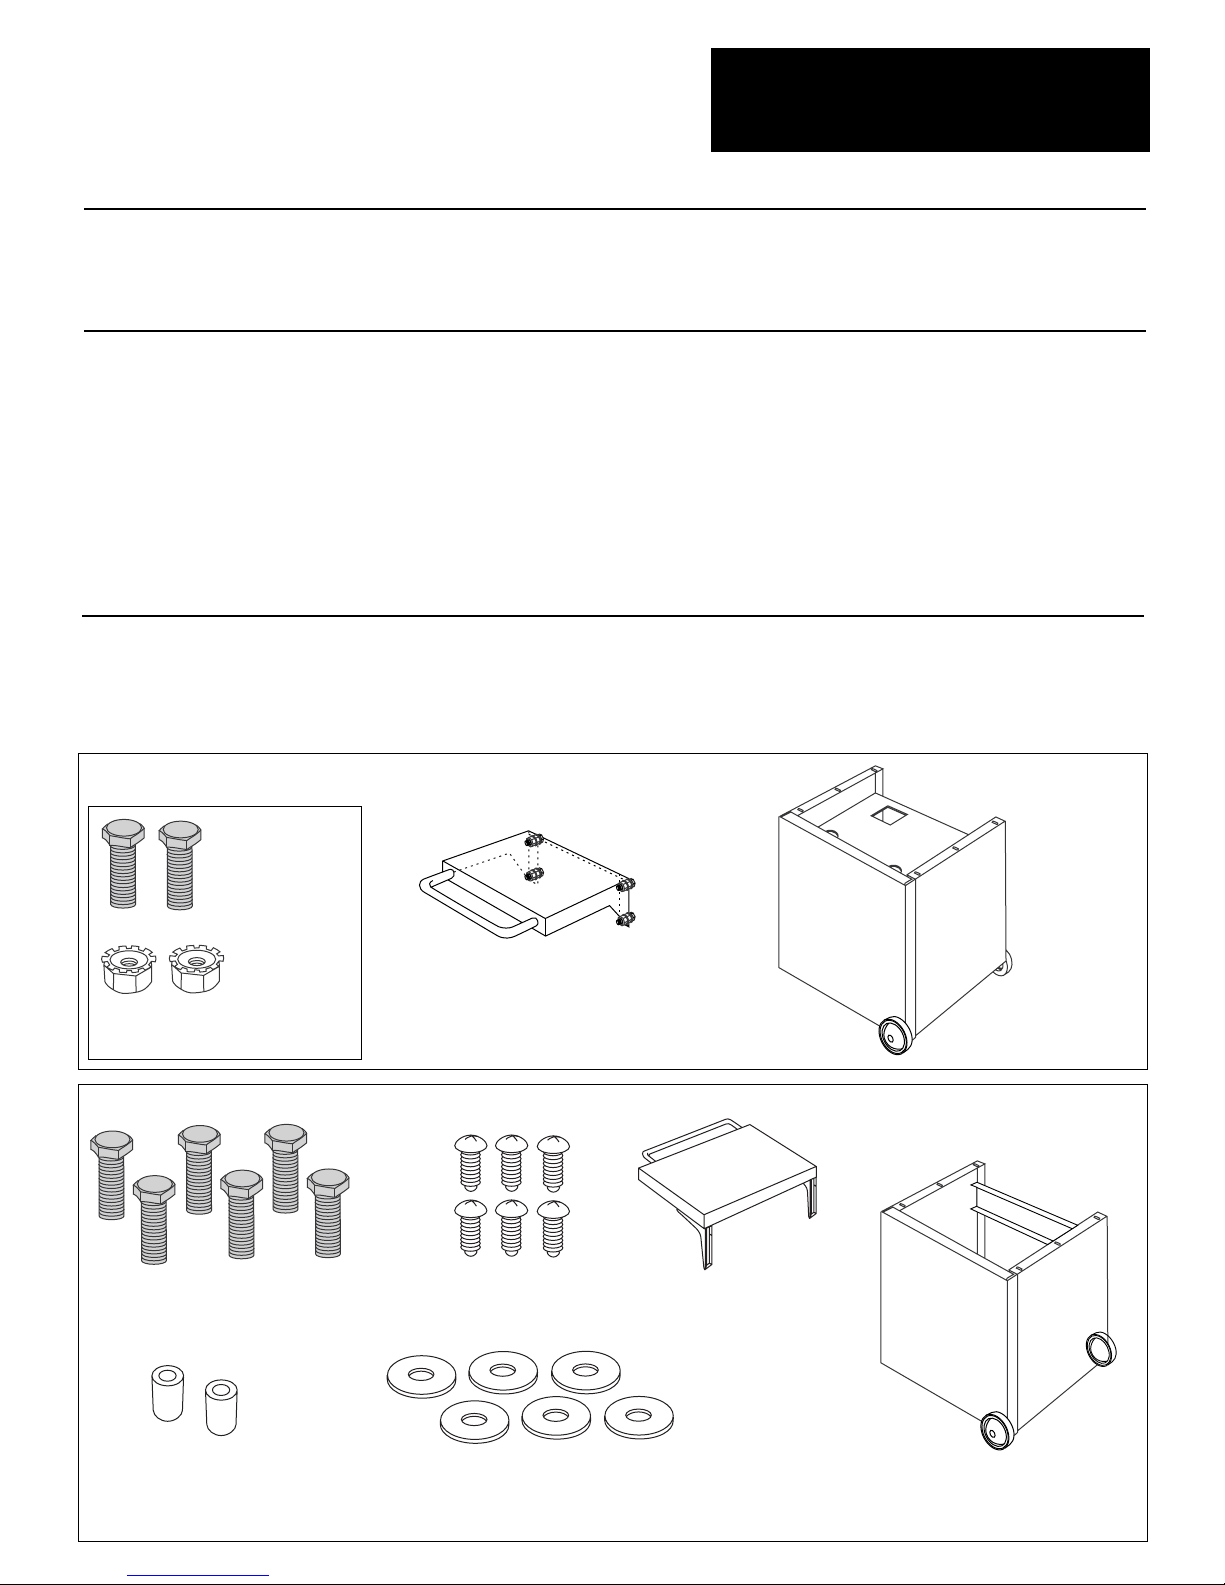
24” Grill Cart
1/4-20 x 1/2 Bolts
Count 2
For Monogram local service in your area, 1-800-444-1845.
For Monogram service in Canada, 1-888-880-3030.
For Monogram Parts and Accessories, call 1-800-626-2002.
NOTE:
Carts must be completely assembled before any gas
connections are made.
Locate the hardware accessory package and
check contents.
Extra Hardware
(not required)
27” Grill Cart
1/4-20 x 1/2" Bolts
Aluminum Spacers
Count 2
Count 6
1/4-20 Nuts
Count 2
Shelf with
4 Bolts
and 8 Nuts
Cart
Fold-Down Shelf
10-24 x 1" Screws
Count 6
Cart
1/4" Flat Washers
Count 6
24” Grill Cart
Assembly Instructions
Tools
You Will
Need
• Two 7/16" wrenches or socket with 6”
extension.
• Phillips head screwdriver
• Gloves to protect against sharp edges
CAUTION
CAUTION
2 people are required to lift and place the
grill onto the cart.
PRUDENCE
CAUTION
lourd, Il faut deux personnes pour le
soulever et le mettre ur un chariot.
The grill is extremely heavy.
Le gril est extremement
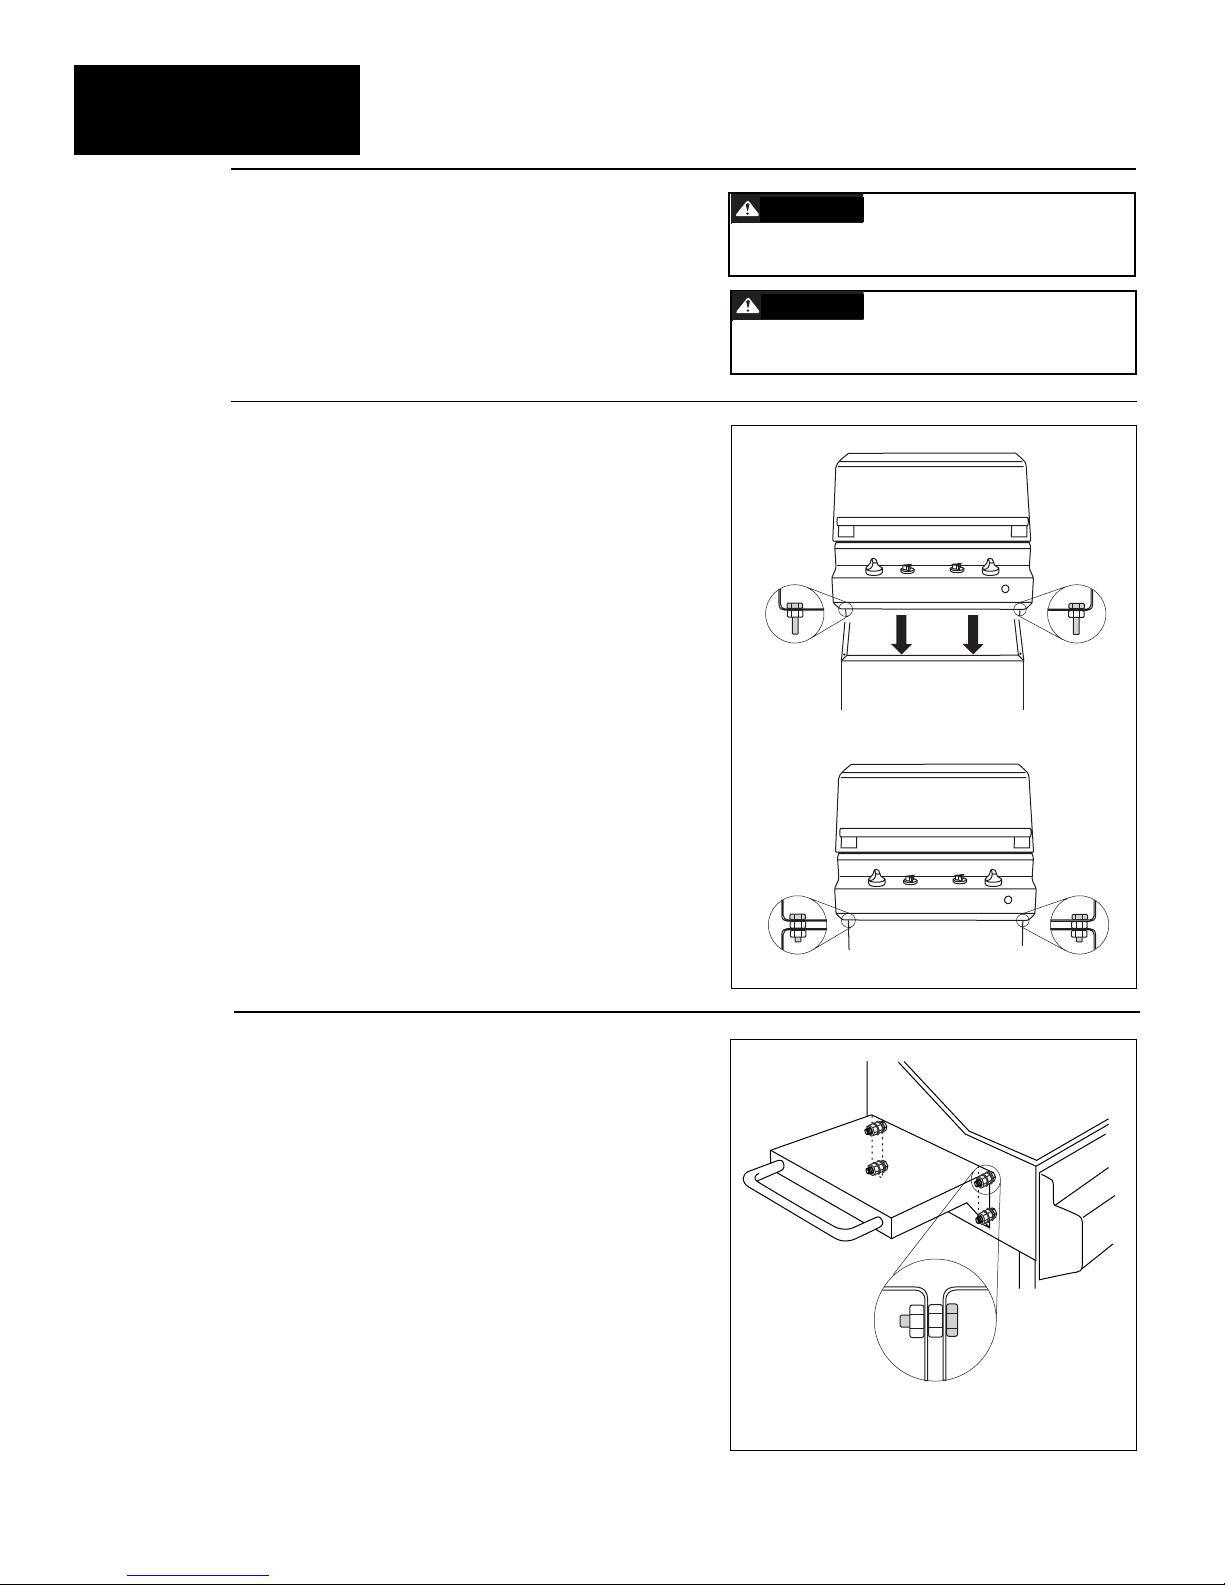
Step 2
Mount Grill
Onto Cart
• The grill base has 1/4 x 20 bolts with two
nuts pre-installed on each corner. Remove
bottom nuts on each corner and set aside.
• Check to be sure the remaining nuts on the
bottom of the grill are tight.
• Lower the grill onto the cart.
• Route the attached hose through the large
square cutout in the top of the cart as you
position the grill onto the cart.
• The bolts on the bottom of the grill should
go through the four corner holes in the top
of the cart.
• Install the four nuts on each corner to the
grill bolts protruding through the cart.
Step 3
Mount Side
Shelf Onto
24” Grill
2
• The shelf should be installed after the grill
has been secured to the cart.
• Open the grill lid.
• Remove the 8 nuts and 4 bolts from the
shelf.
• Install bolts through the grill and secure
with nuts. Tighten.
• Mount shelf onto the four bolts. Secure with
nuts and tighten.
Note: The additional nut installed between the grill
and shelf serves as a spacer that will help keep
the shelf cool during long periods of cooking.
Use the Four Bolts and 8 Nuts Secured to the Shelf
 Loading...